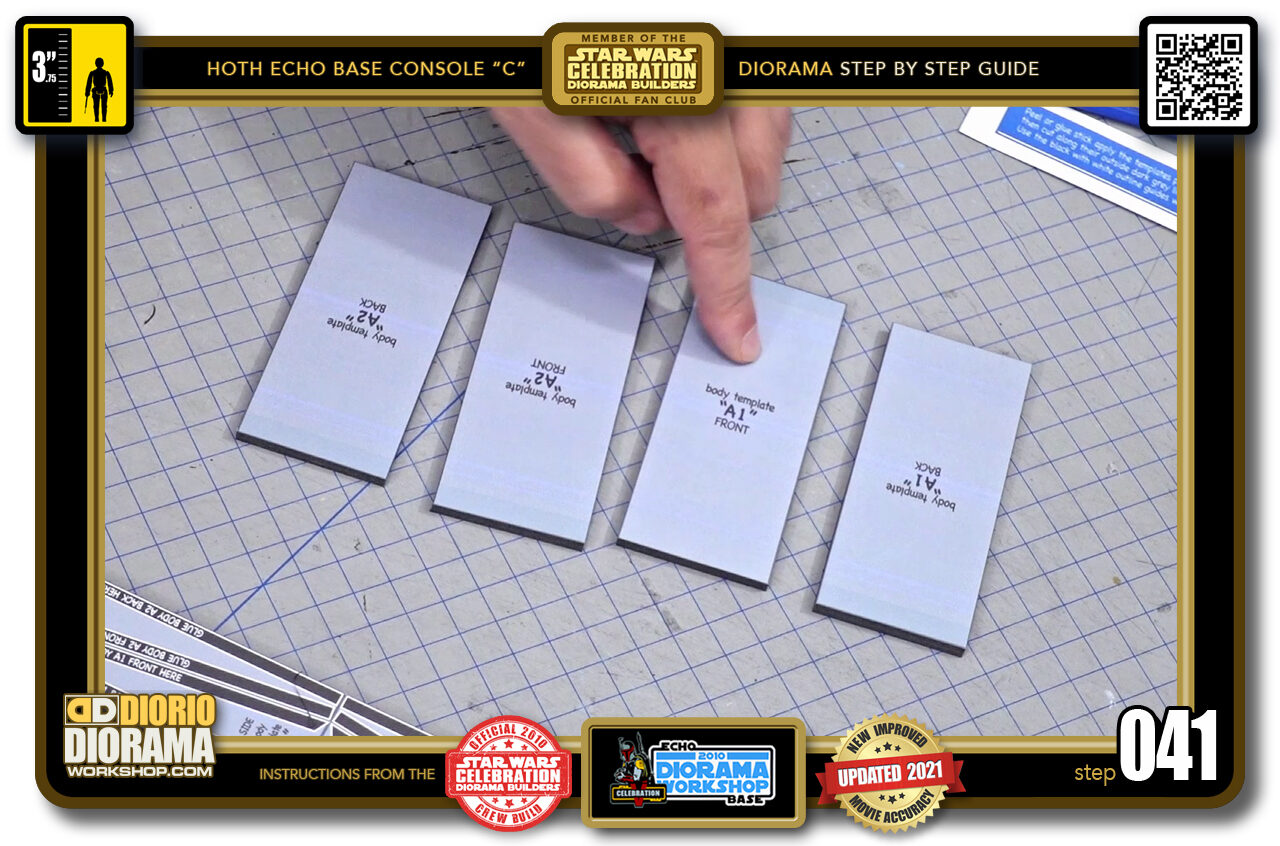
- STEP 041 > You now should have 4 identical main body template pieces. Now we can cut the sides.
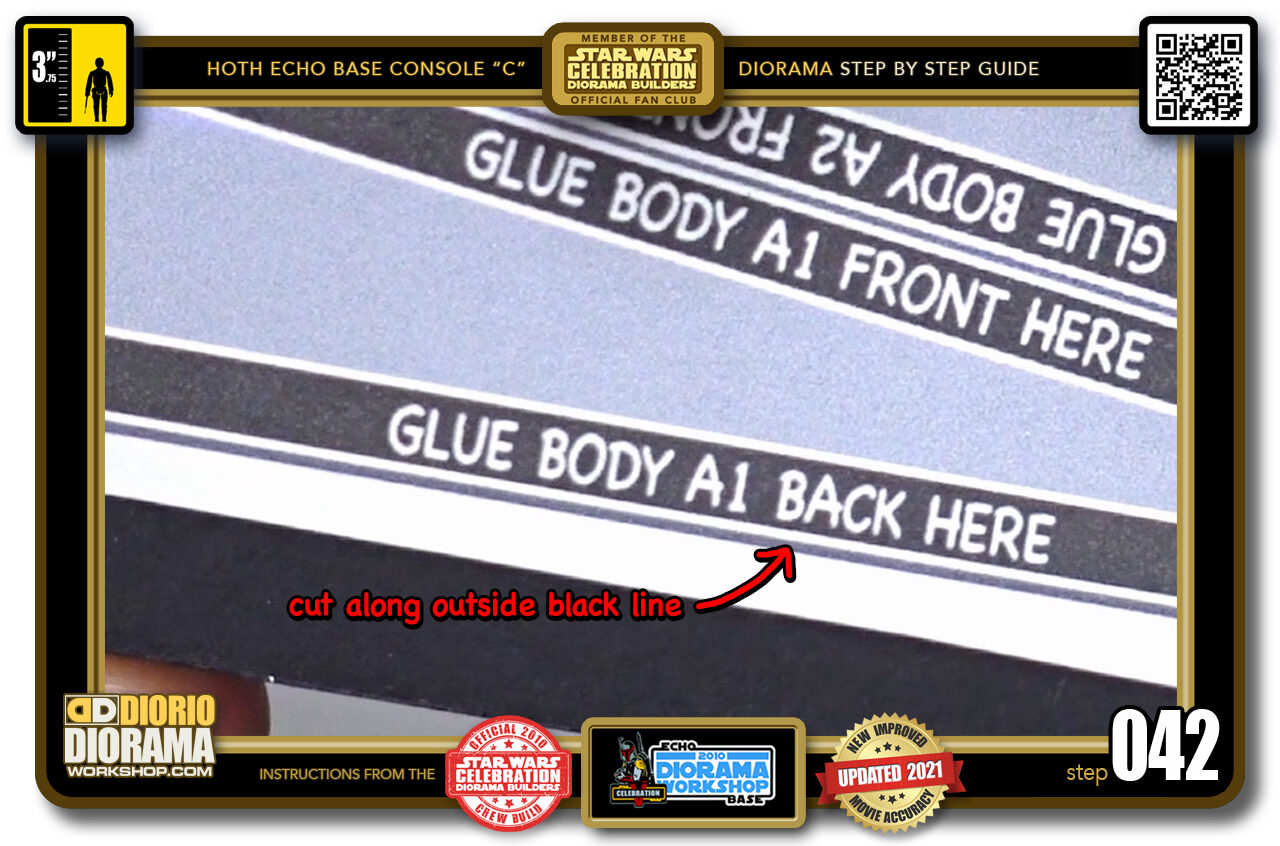
- STEP 042 > Now here it is very important that we cut along the black OUTSIDE LINE (red arrow). We want to KEEP that white gap space seen between the cutting guide line and the black "glue body" box.
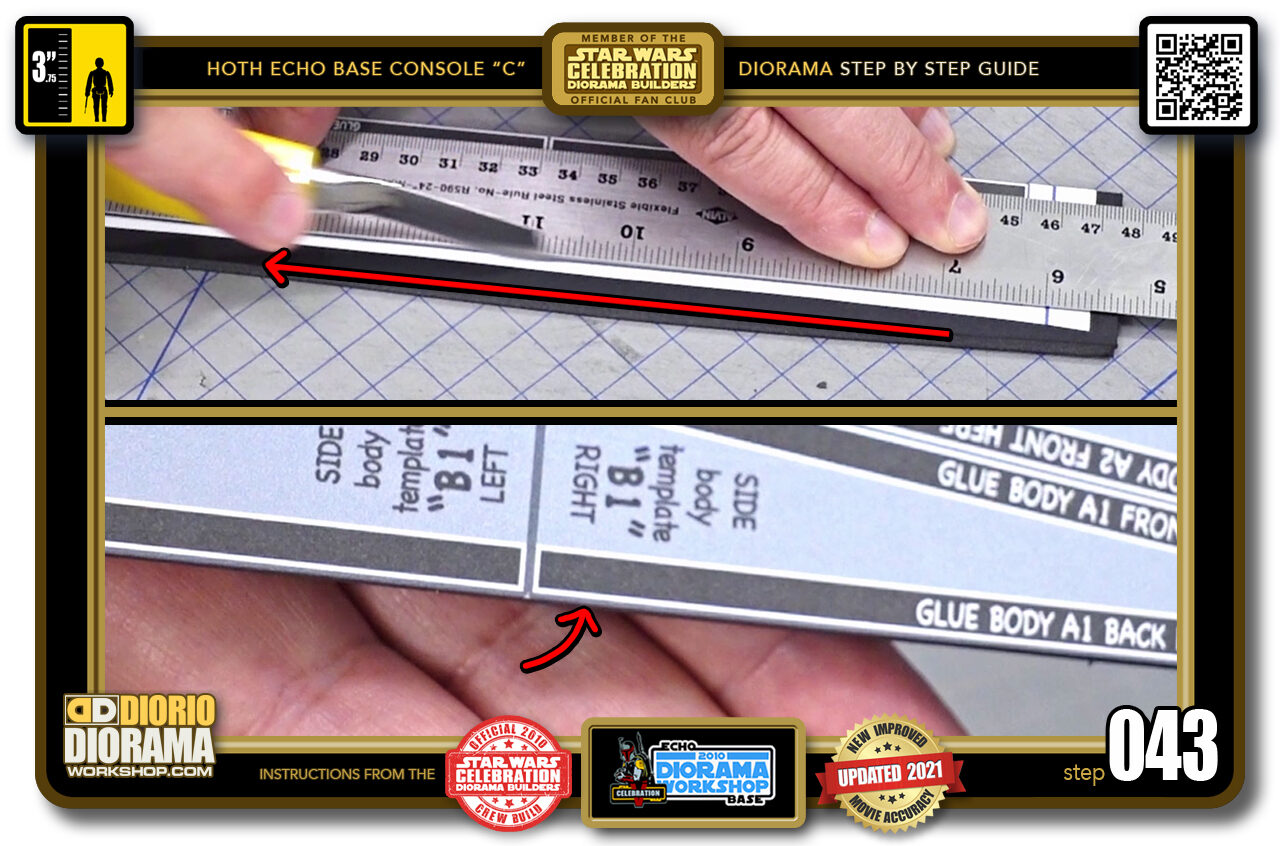
- STEP 043 > So align your ruler, place your X-Acto, lower the blade and slice (top image) See how the white gap remains ? (bottom image).
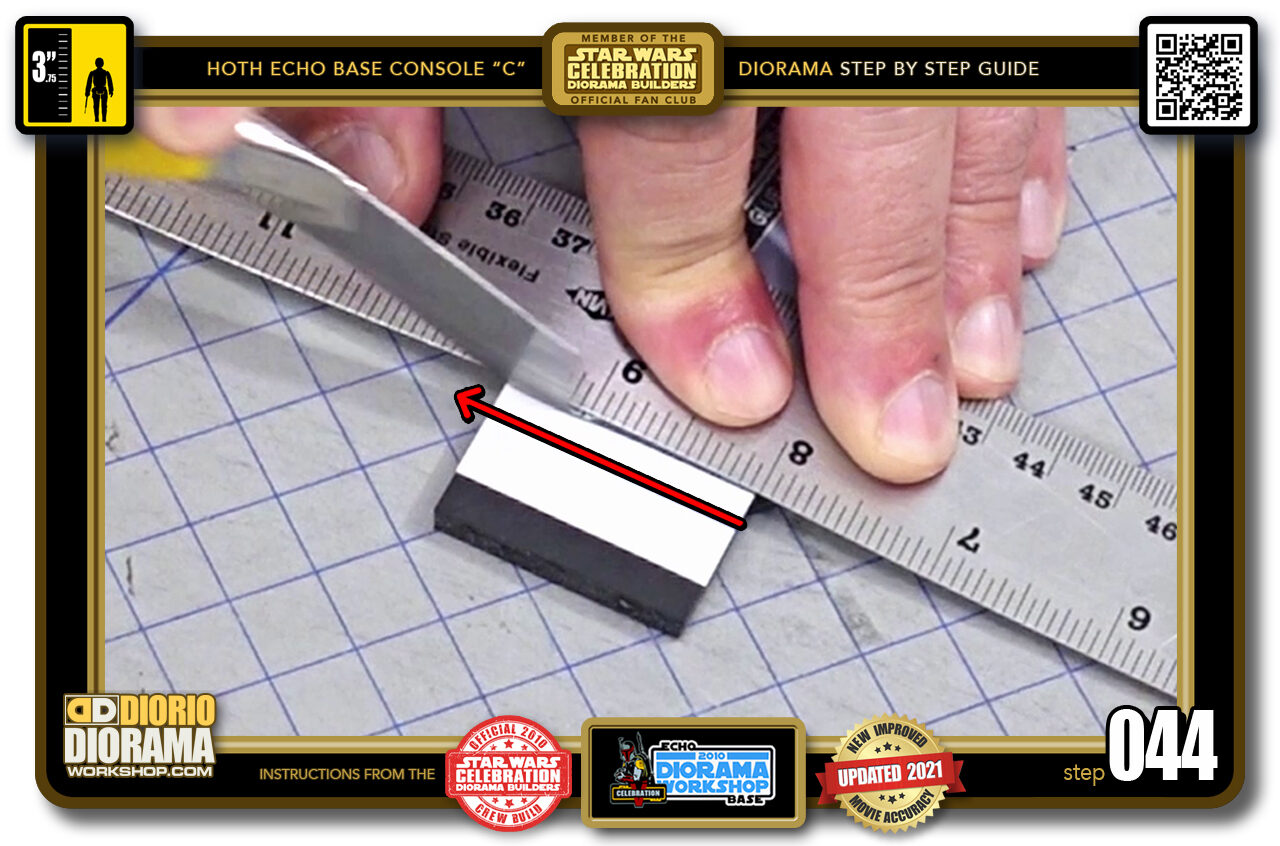
- STEP 044 > Slice off both sides.
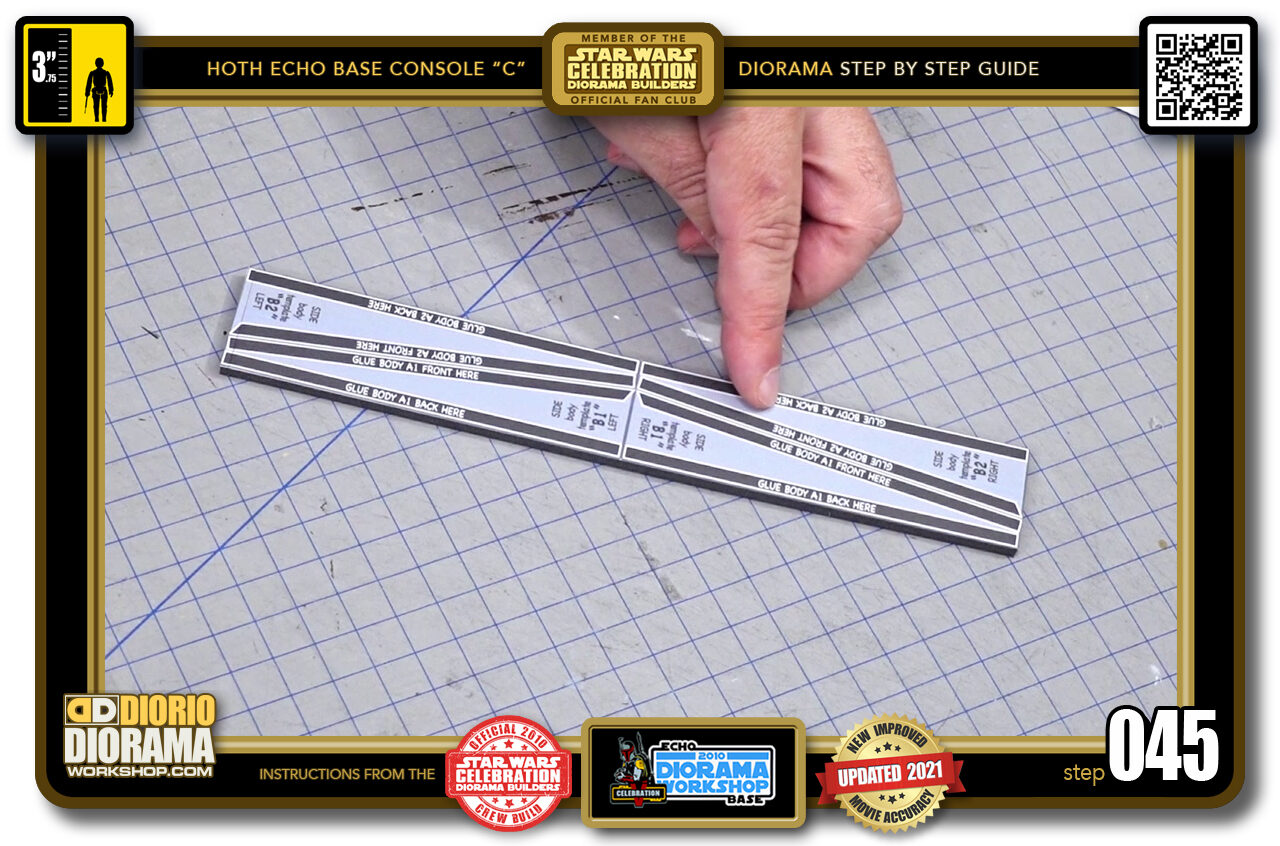
- STEP 045 > Now you have this shape. This is actually 2 sides that are mirrored. You want to cut along the MIDDLE LINE FIRST to seperate in 2 before you then cut the diagonal lines.
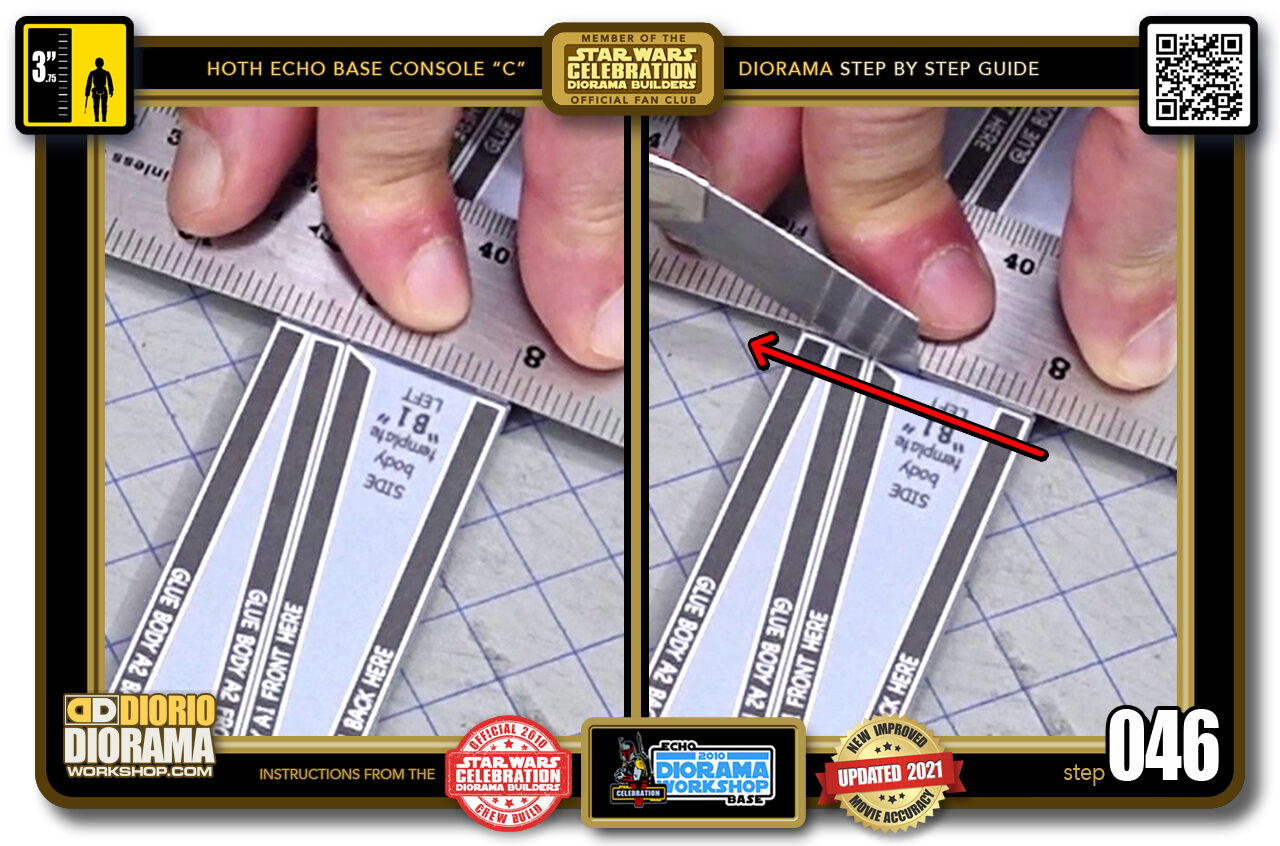
- STEP 046 > So align your ruler along the centre black line (left image) and cut (right image).
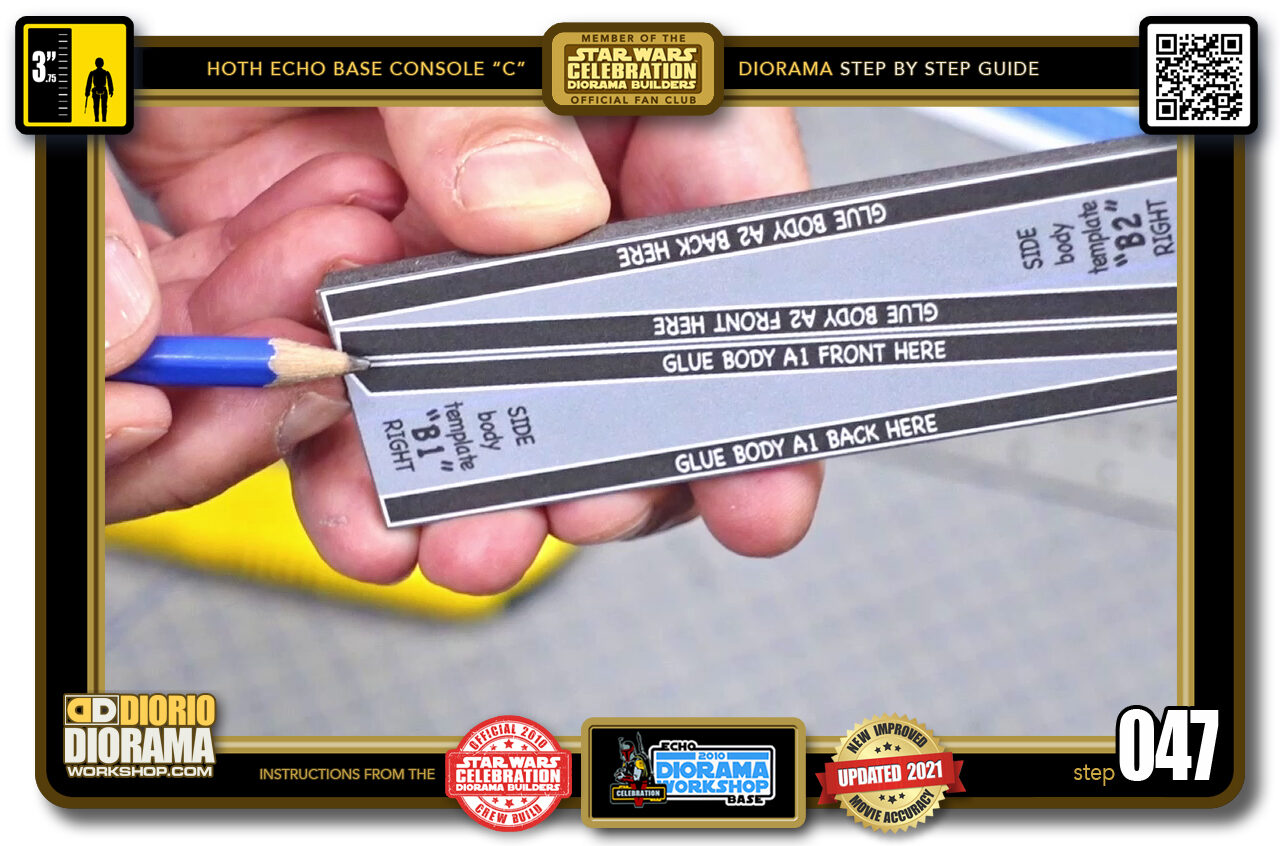
- STEP 047 > Now that we have 2 pieces, each piece now contains 2 sides. We will now be cutting the centre diagonal line. Look closely where the pencil is pointing to. You have the 2 black "GLUE" zones surrounded by a white outline (the same white outline we kept when cutting the outer sides) There is a THIN BLACK LINE between the 2 white outlines. THIS is where we want to slice.
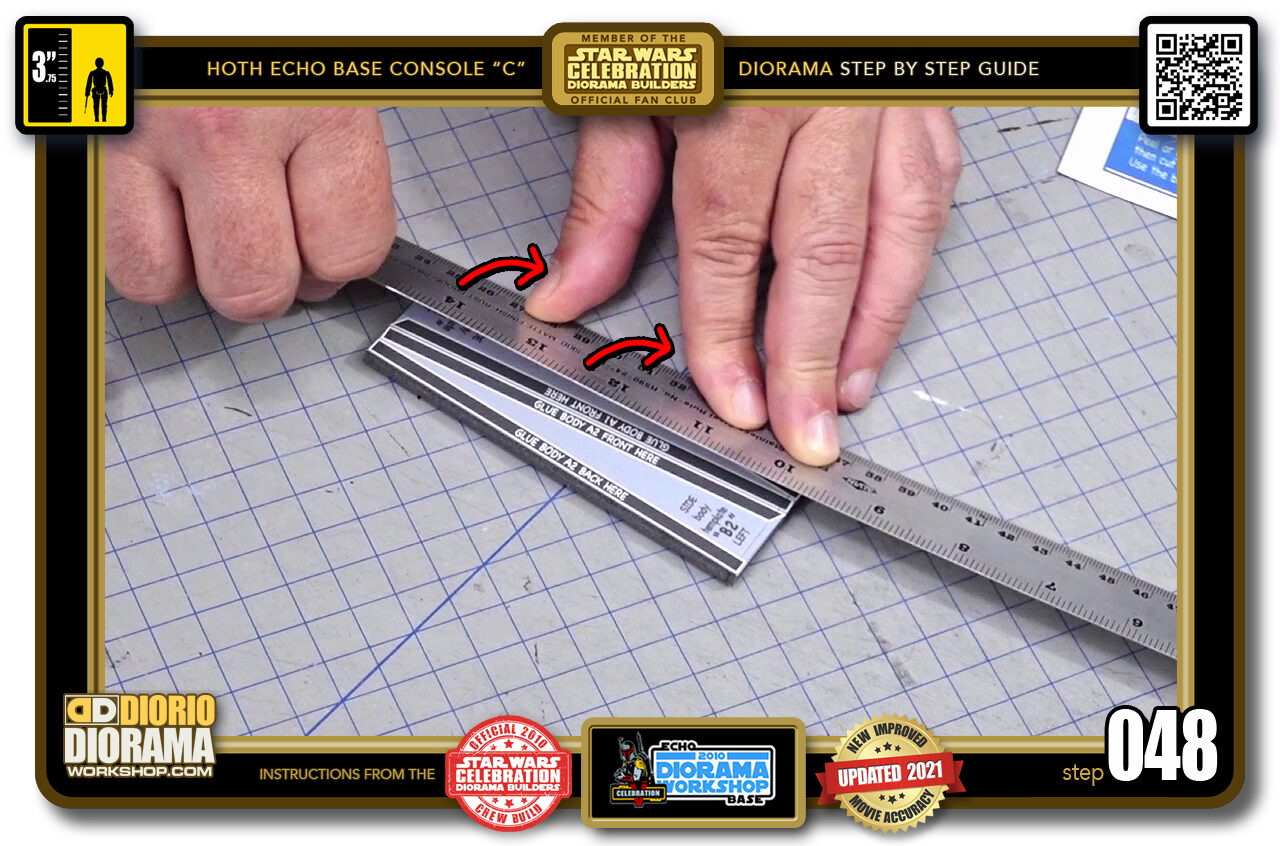
- STEP 048 > When cutting small width foamcores, you can sometimes have your ruler wobble (red arrows) and loose it's footing if you will causing a high risk of a bad cut.
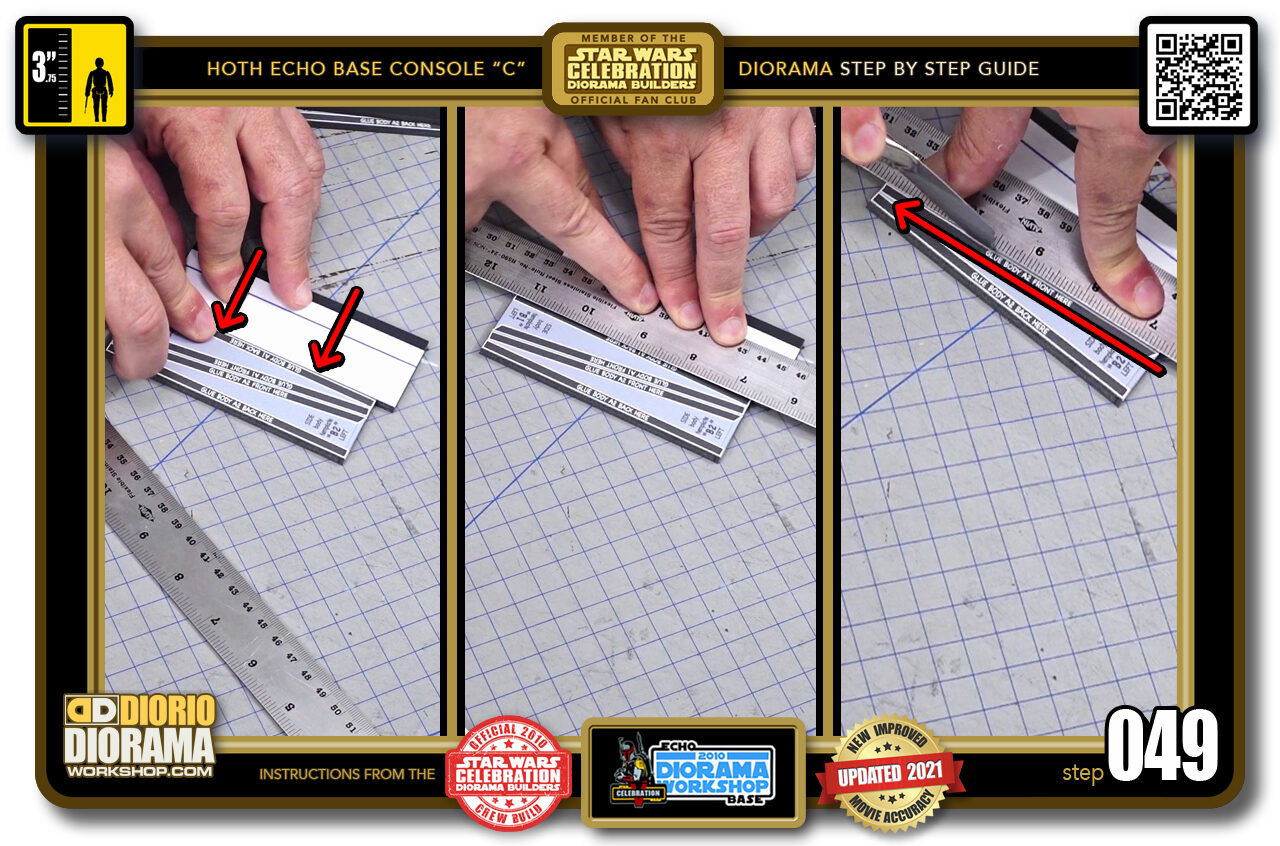
- STEP 049 > You can fix this by grabbing a scrap foamcore of the same height and place it right against your cutting piece (left image) Now when you place your ruler (centre image) it is fully level and balanced and won't wobble anymore as you cut (right image)
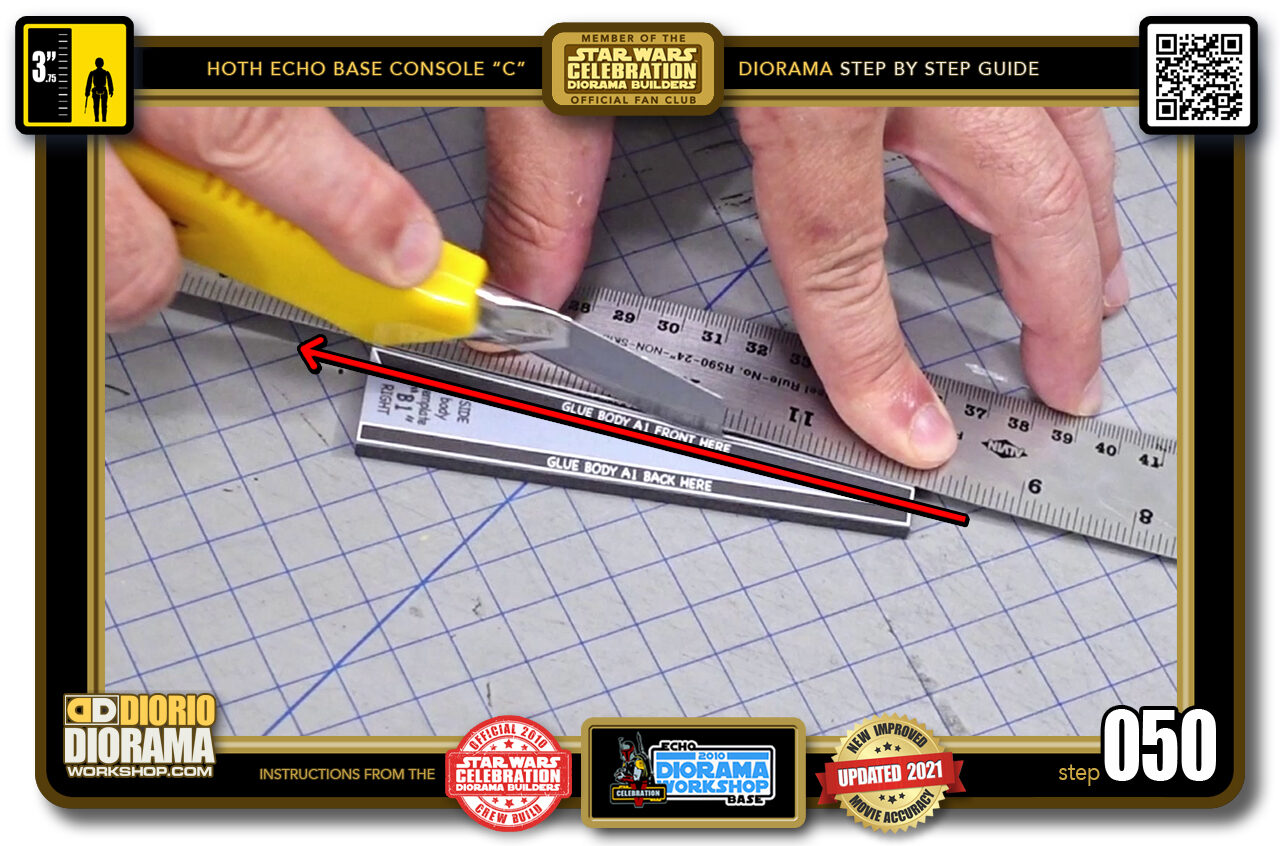
- STEP 050 > So align your ruler with that centre black line. Don't align with the white frames. Place the X-Acto, lower the blade and slice (red arrow).
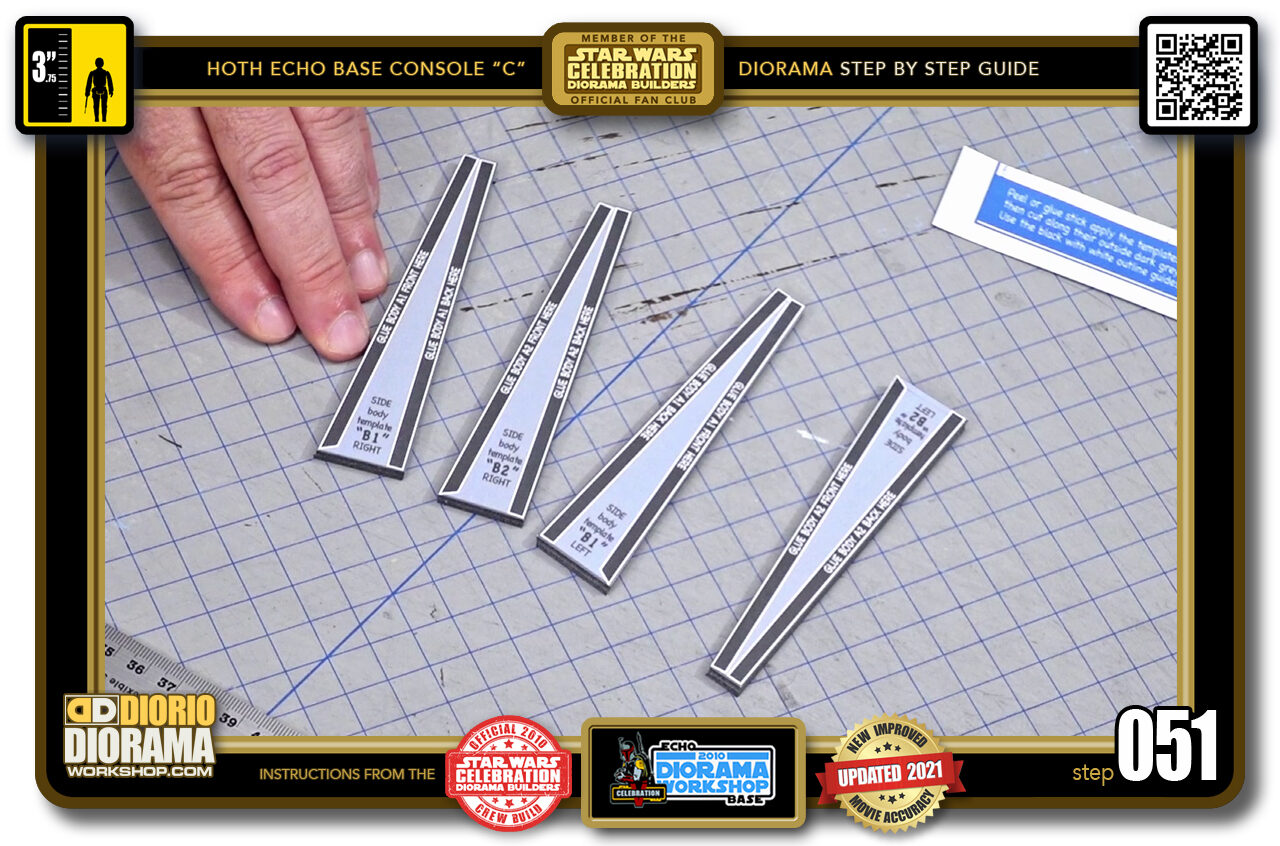
- STEP 051 > You now have all 4 side pieces ready for assembly.
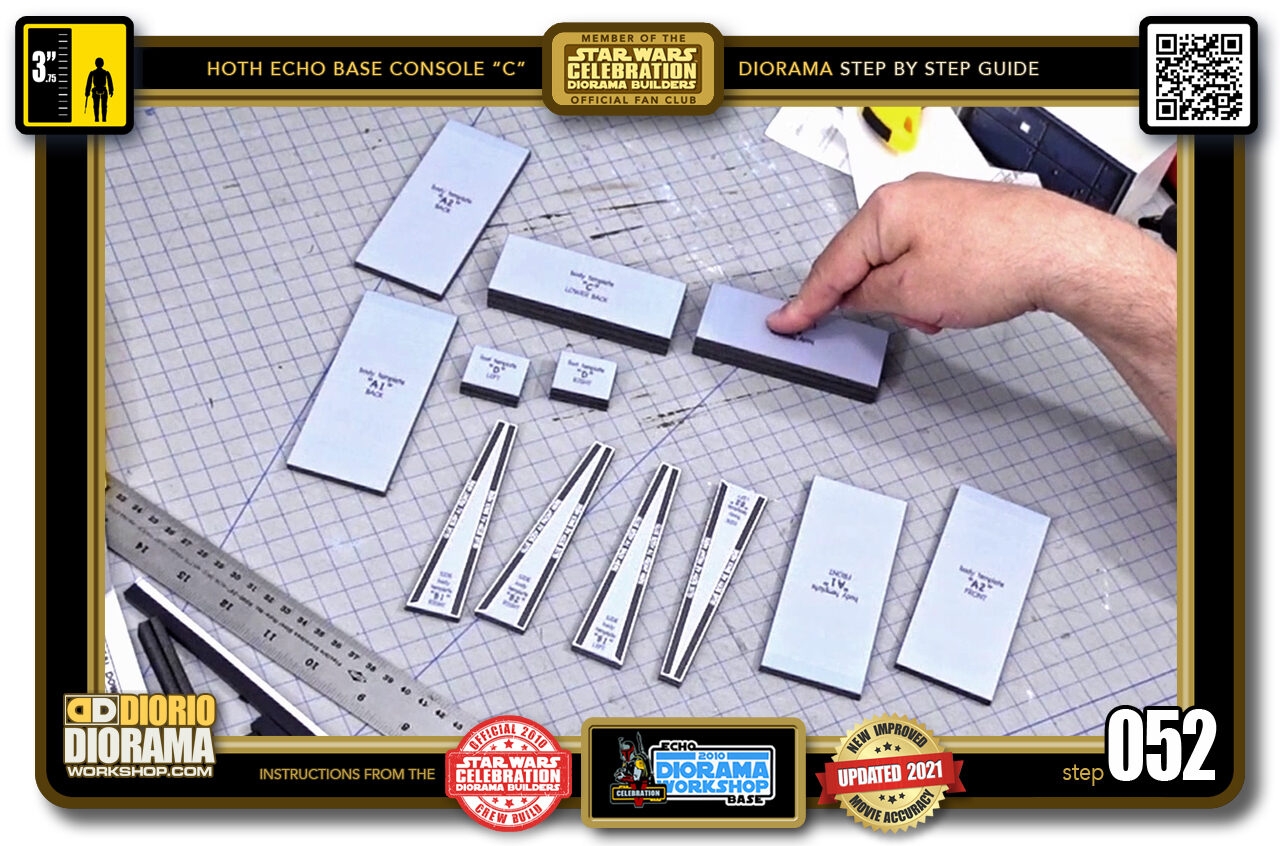
- STEP 052 > Actually ALL pieces are now done and ready to be put together. Main body, 2 rear boxes and 2 front feet.
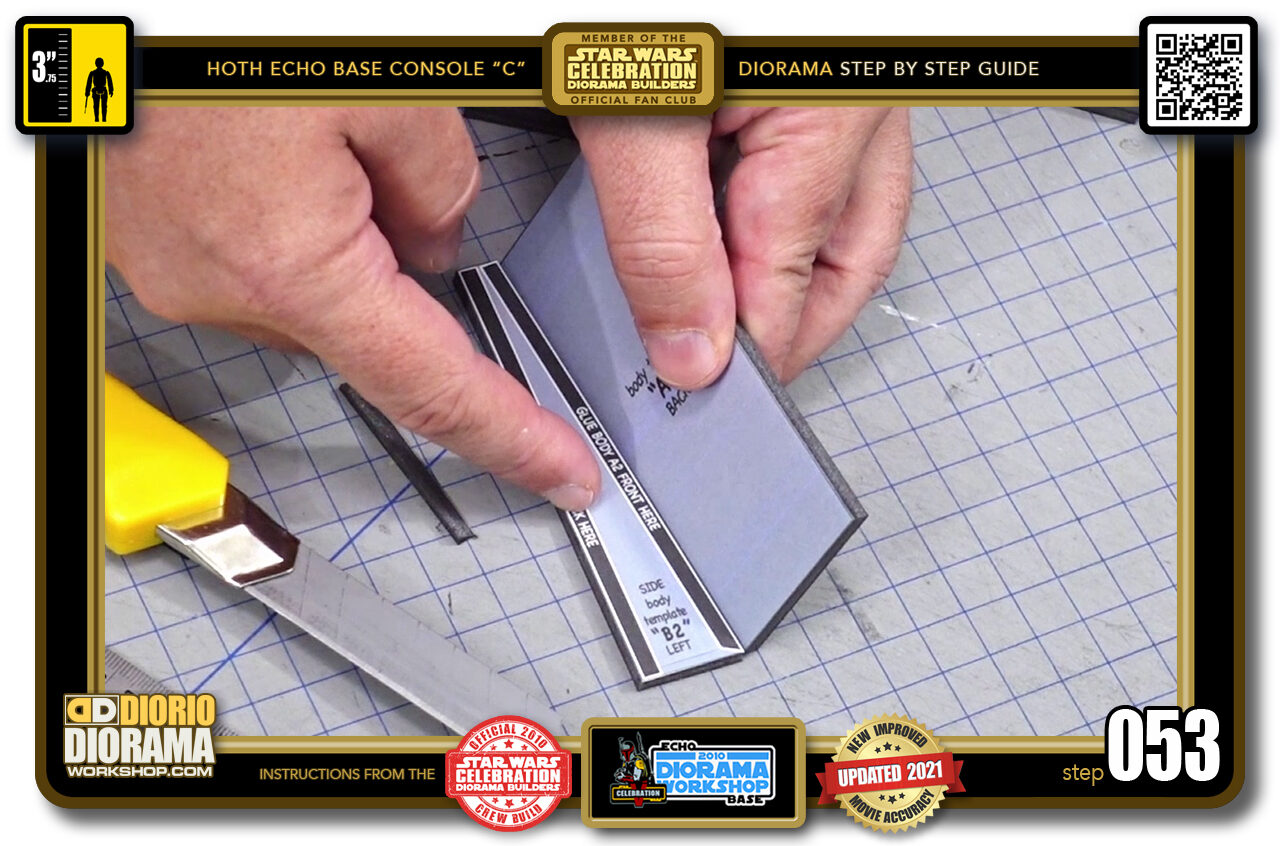
- STEP 053 > When gluing your pieces together we want the decal sides to be facing each other. It's not a deal breaker but it makes your shape cleaner and prevents any of the template text and instructions to peek through the outside decal skins.
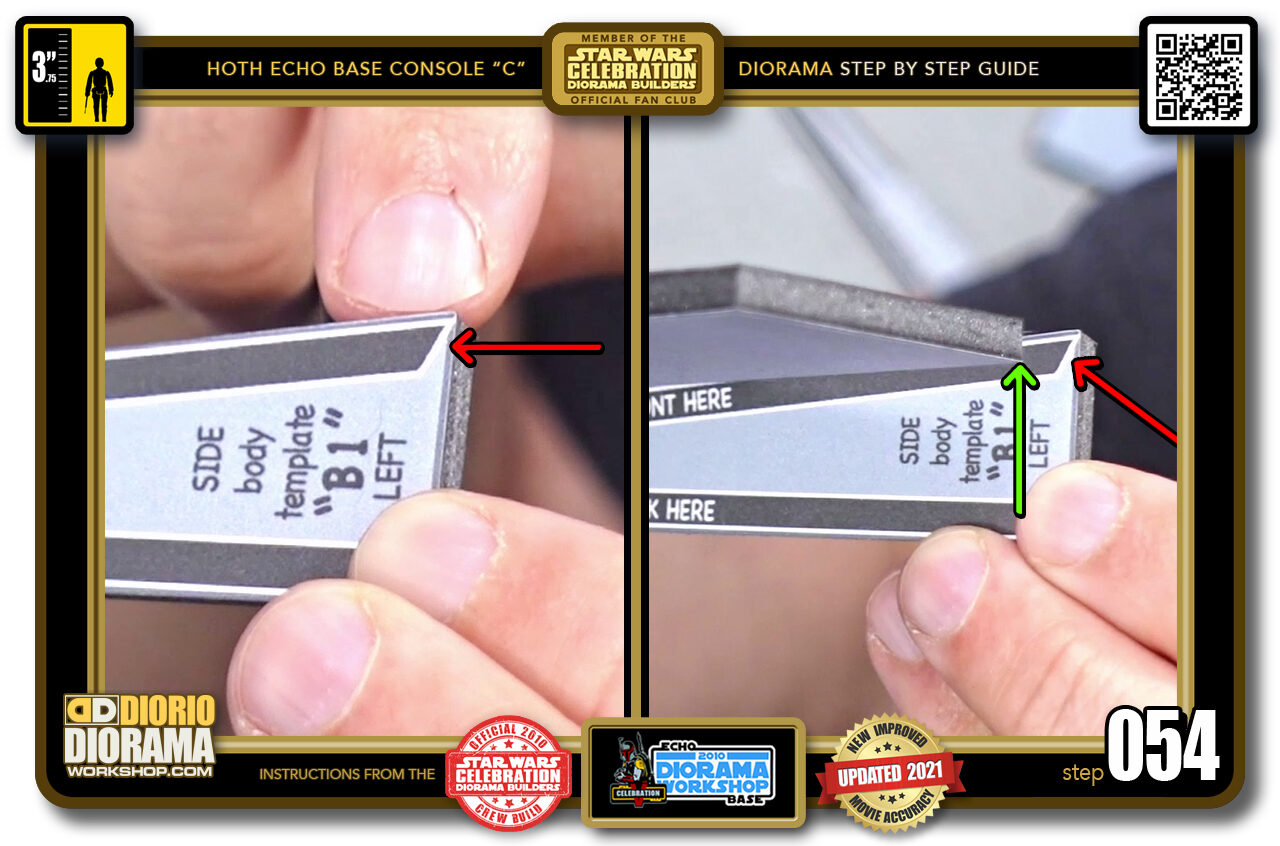
- STEP 054 > You will notice when you go to hot glue your first body piece to it's side foamcore, there is a small angle at the bottom of the front corner (left image red arrow) At the moment all of your main body piece have regular 90 degree corners (right image green arrow) So we need to make 2 slices before grabbing the hot glue gun.
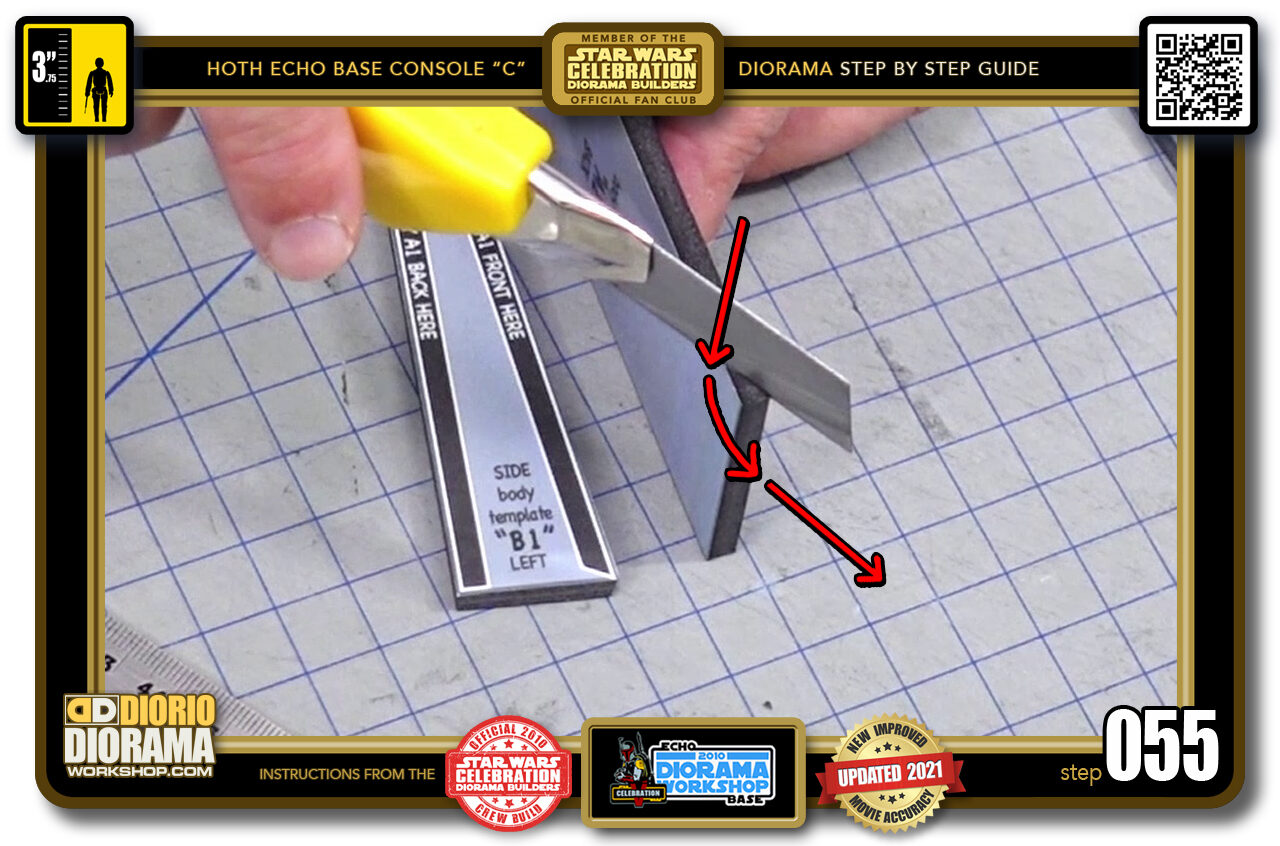
- STEP 055 > We will want to cut at the same angle as in the template and you will want to slide the blade down as you move it forwards at the same time (red arrows) If you were to just press down only, you would risk crushing the foamcore and ut would look like a big mess when you place your decal later on.
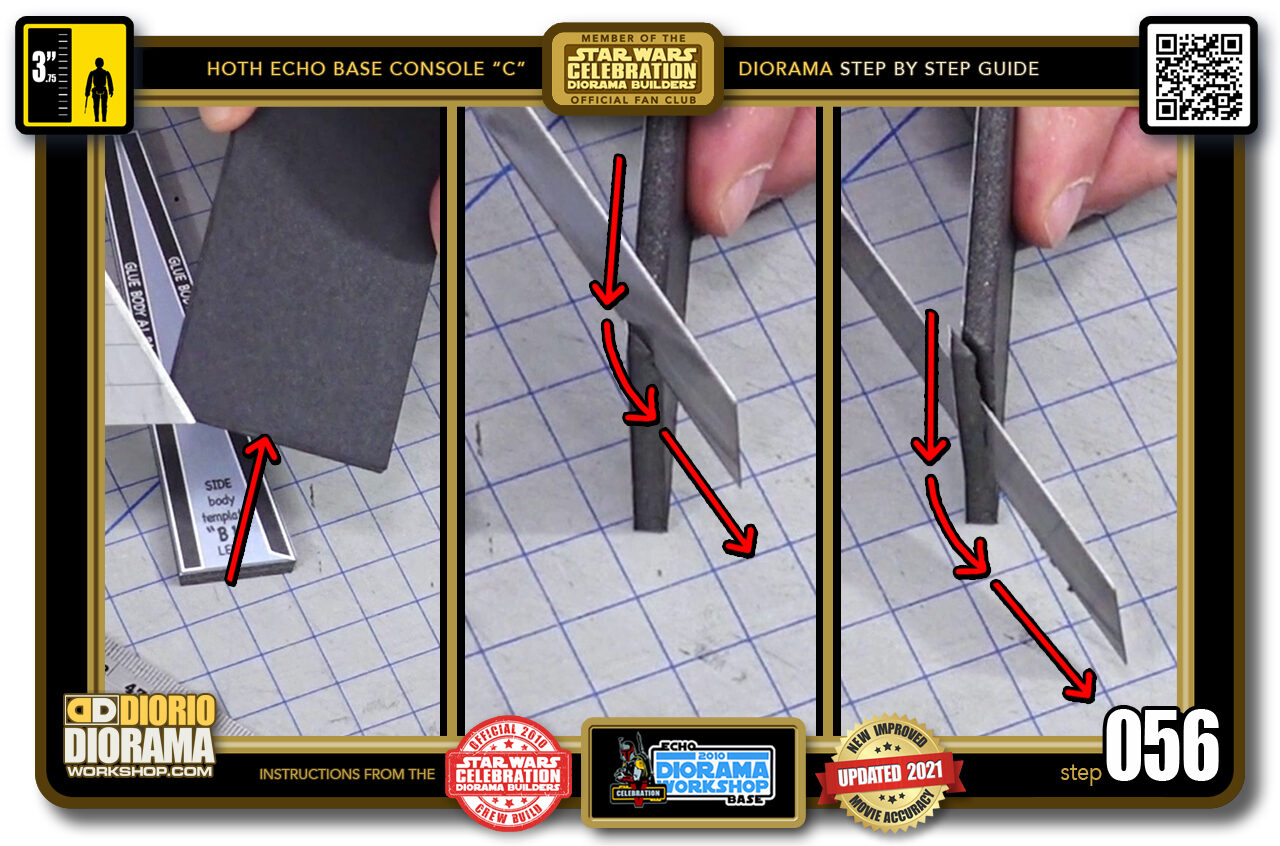
-
STEP 056 > With practice this becomes super easy. Do a few on spare foamcore before the real cut if you are a little nervous. The important thing is we want to try and use the rear paper skin of the foamcore are your blade guide (left image) meaning we don't want the blade to ever cut into, past this layer. We want the blade to cut through the top paper layer as well as the inner styrofoam of the foamcore only by placing your blade close to its tip and start pressing downwards (centre image) all at the same time as moving the blade forwards (right image).
If your blade doesn't reach the bottom, just reposition the blade tip at the starting position (tip) but at the height you just finished cutting, and continue pressing down and forwards till you reach the surface and slice off your corner.
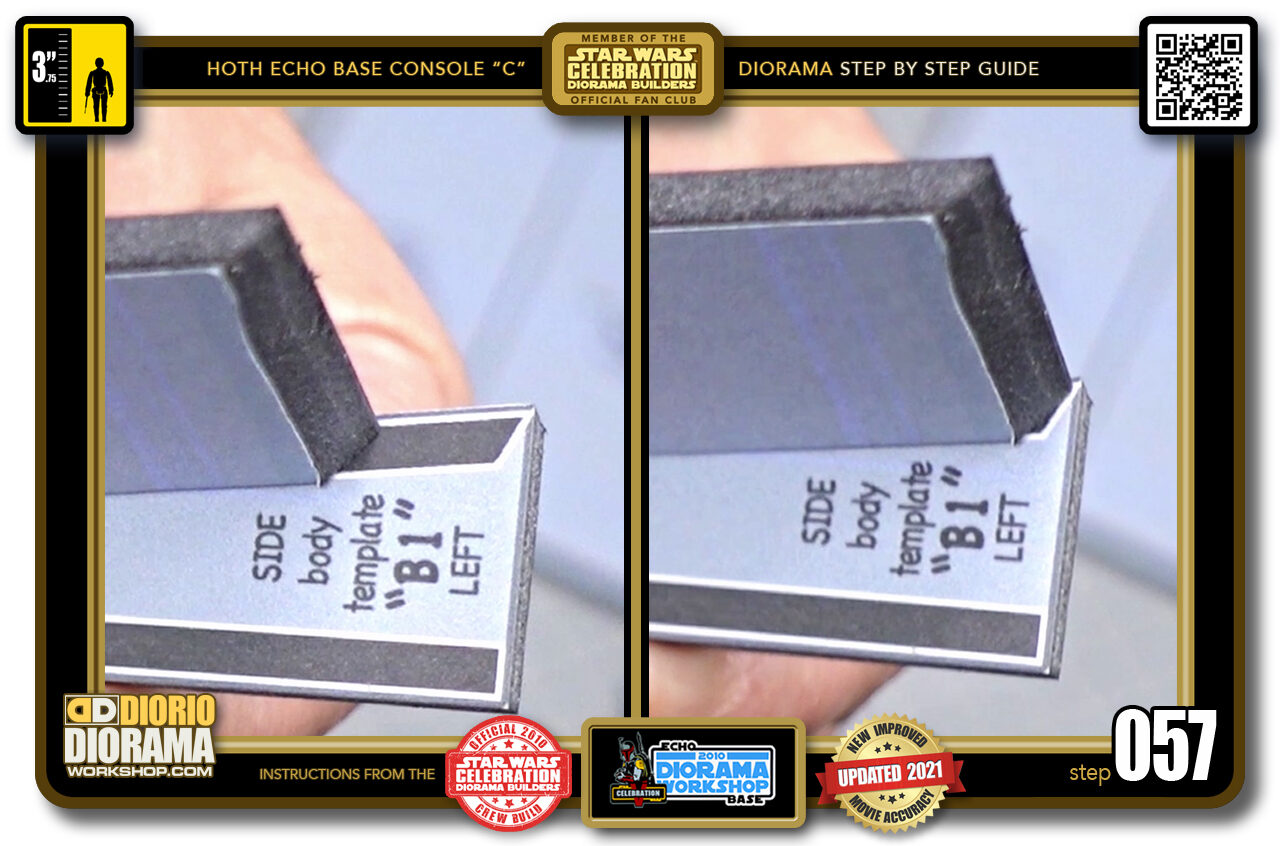
- STEP 057 > You can see how now, your front main body piece bottom corner angle matches the angle of the template (left image) and fits just as intended when placed on top of the black template alignment box (right image).
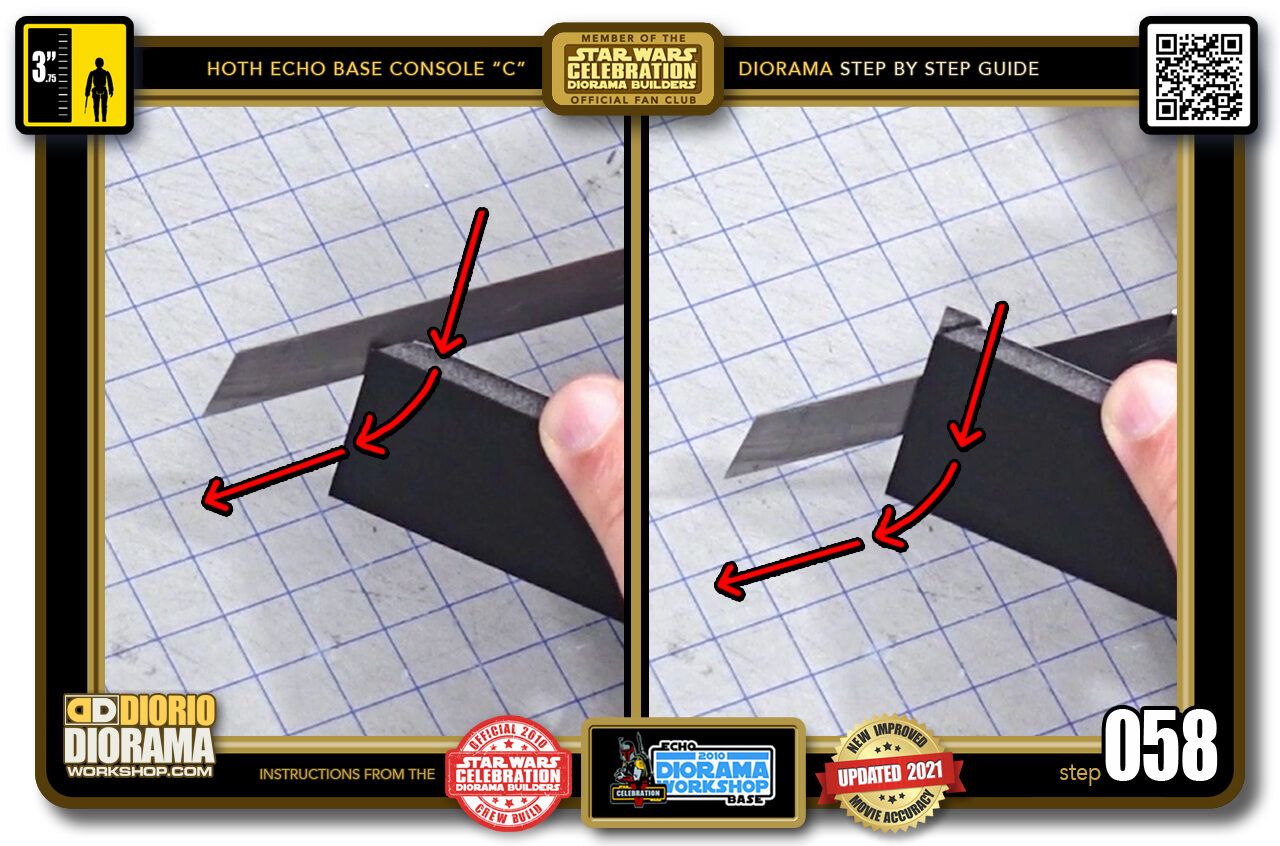
- STEP 058 > We want to do the same thing on your 2nd front piece. This time I am showing you what the cutting looks like from the outside of the rear paper foamcore layer you don't want to cut through. As long as that paper layer remains straight, it doesn't matter if the unseen inside is not perfect.
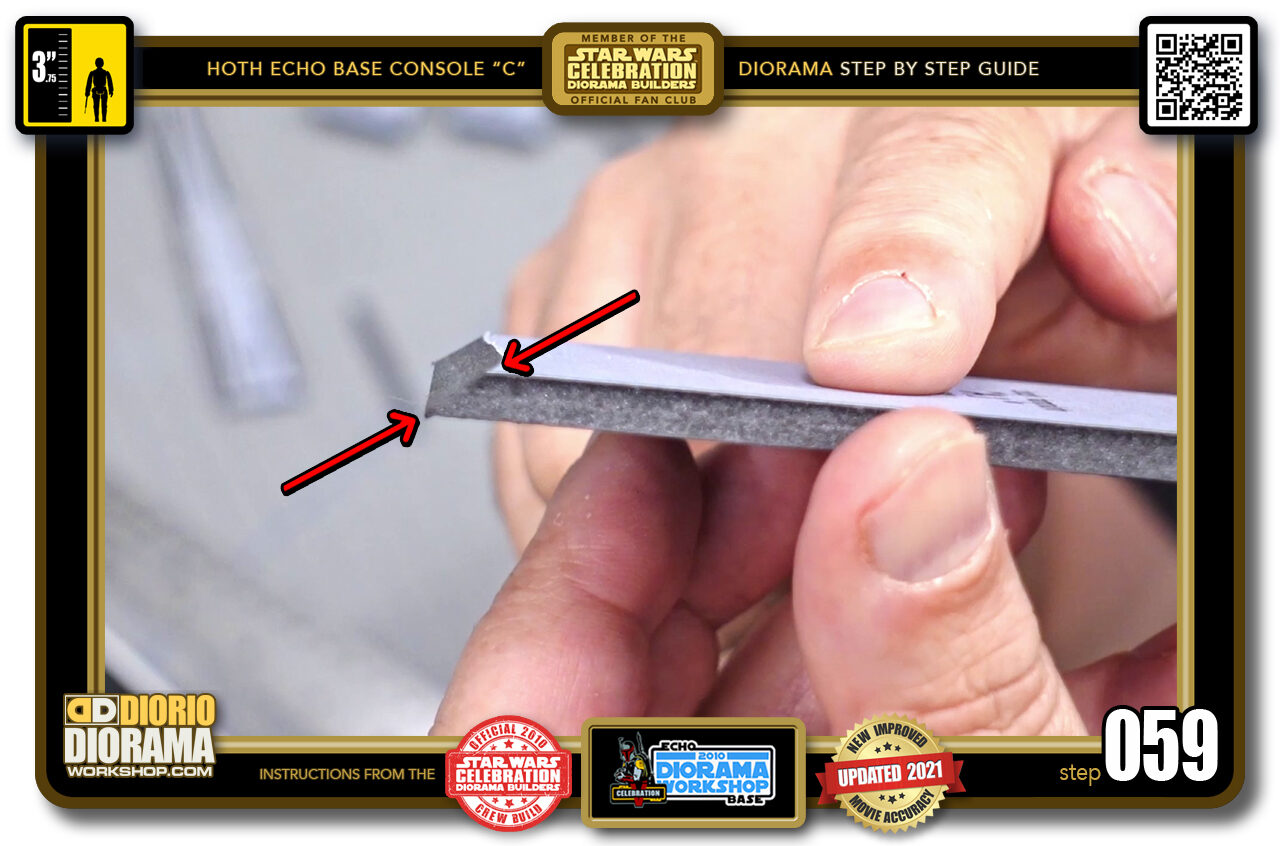
- STEP 059 > What we get in the end is a angle cut that has one side (bottom arrow) in this case the original length and the top shaved on the inside (top arrow).
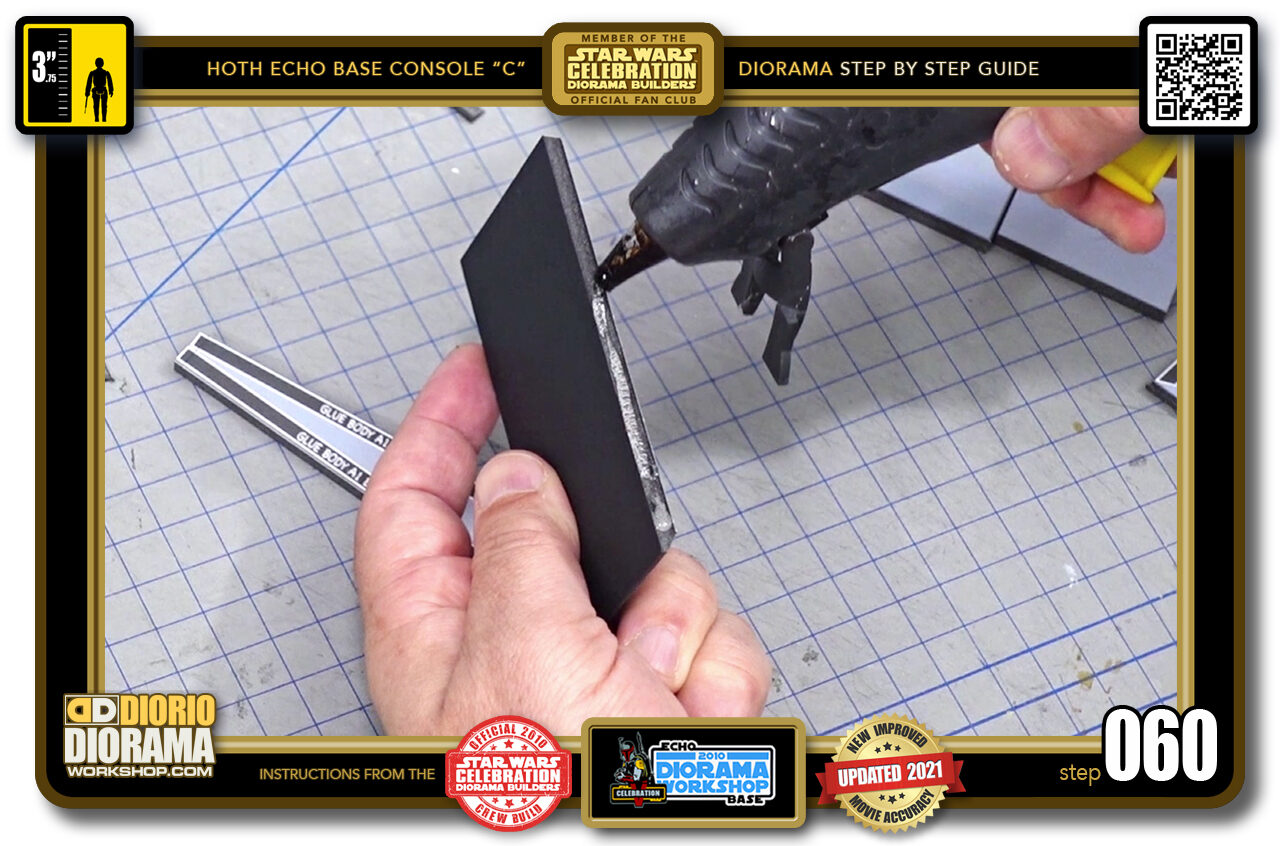
- STEP 060 > Now we can start assembly. Grab one of your angle cuts and apply a line of hot glue.

.
Did you already build this Diorama ? At home or at our Star Wars Celebration Diorama Builders workshop ? Would you like to show it in the site’s GALLERY VISITORS DIORAMAS section, YES ? That is Awesome !!! You can find out all the details on how to email me your photos on the VISITORS SUBMISSIONS INFO page … When I get your photos, I will create your very own page just like this one. You may not realize it but work does inspire others to join in the fun of making Action Figure Dioramas.
.
NOT FOR RESALE ALL Decals, tutorials and artwork are ©FrankDiorio (dioramaworkshop.com) and offered FOR FREE to the fans – that would be you ? so you can build and display my diorama designs in your very own home. I realize I cannot control what one does with my graphics once I place them on the web, I can only ask you as one fan to another, please respect the artist and do not be that jerk who uses my designs and tutorials to build a copy of my work only to sell it on EBAY or trade/sale groups and forums. Thank You. Frank.
.

.
.
If you have a facebook account, why not join the Official Diorama Builders Fan Club today, simply click the logo link below.
 .
.
Catch up with fellow visitors and exchange stories, read cool interviews with the crew, exchange photos, fun surprises and grab some FAN ONLY merchandise next year at actual future conventions ?
.
©2021 Frank Diorio DioramaWorkshop.Com
.
IF YOU LIKE WHAT YOU SEE, PLEASE SHARE WITH YOUR FRIENDS
USING THE SOCIAL MEDIA BUTTONS BELOW


