


-
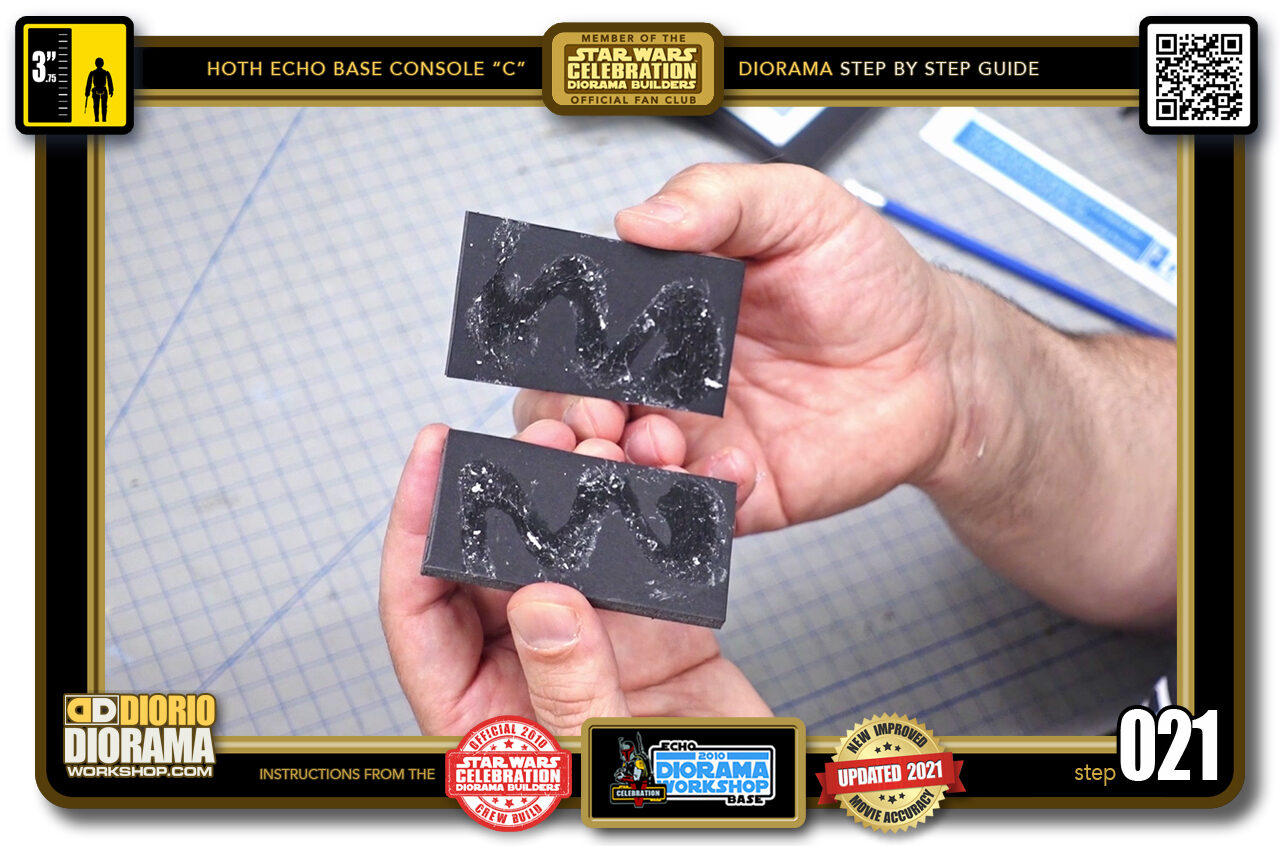
- STEP 021 > If you do too many spins and take too long to return to the aligned position your hot glue will cool down too much and not connect any longer. You will have to put another zig zag and start over. The trick is to act fast and do 2-3 spins and you should be good.
-
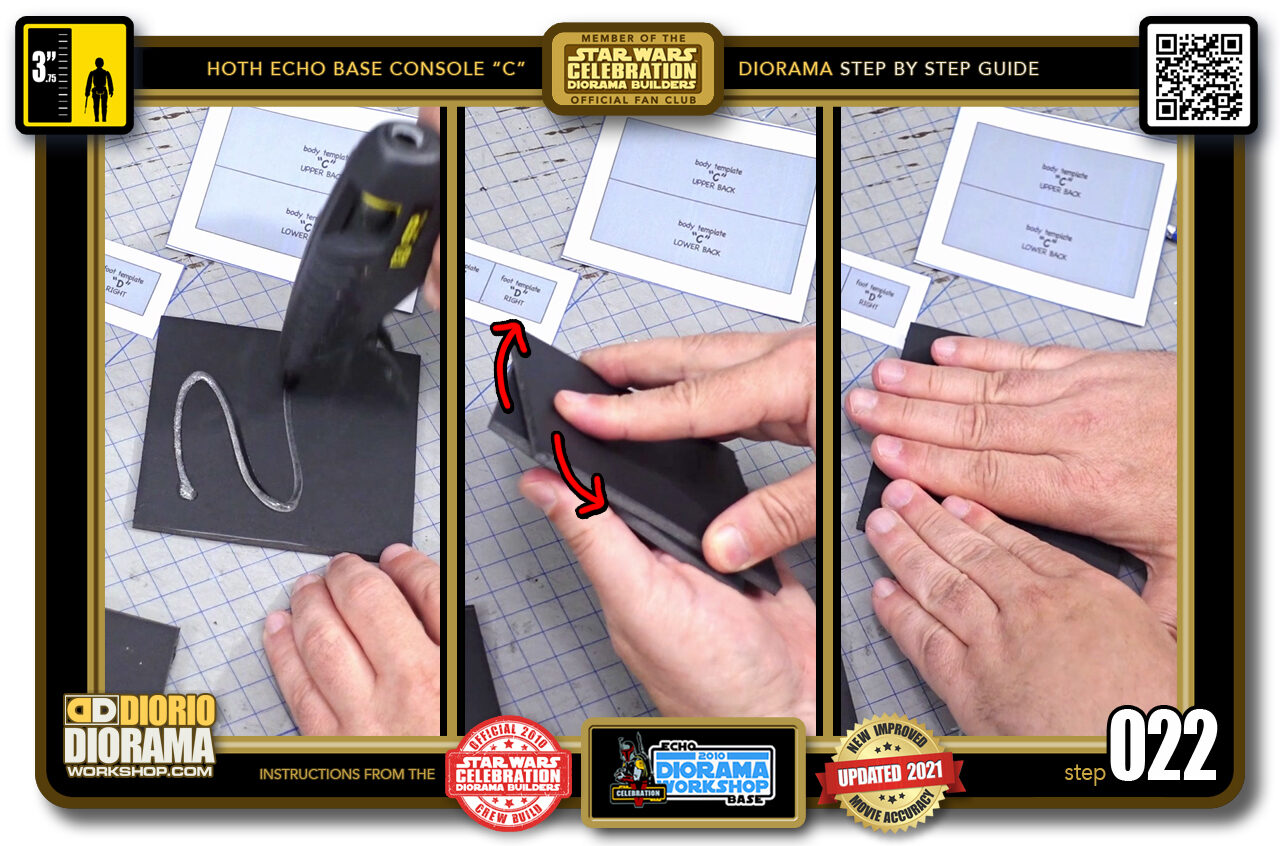
- STEP 022 > Moving onto the larger square we have 3 layers for this one. Start as before with a zig zag of hot glue (left image) and place your 2 foamcore pieces together and quickly start your spinning (centre image) after 2-3 spins, stop when the squares are perfectly aligned and put some pressure with your hand for a few seconds until the hot glue cools down (right image).
-

- STEP 023 > Place your double layer on your table and zig zag some hot glue on the top of the 2 layers (left image) Take your 3rd foamcore piece and place it on top of the glue and start spining again (centre image) When it's aligned perfectly with the bottom double layer, place it on the table surface and put some pressure for a few seconds (right image).
-
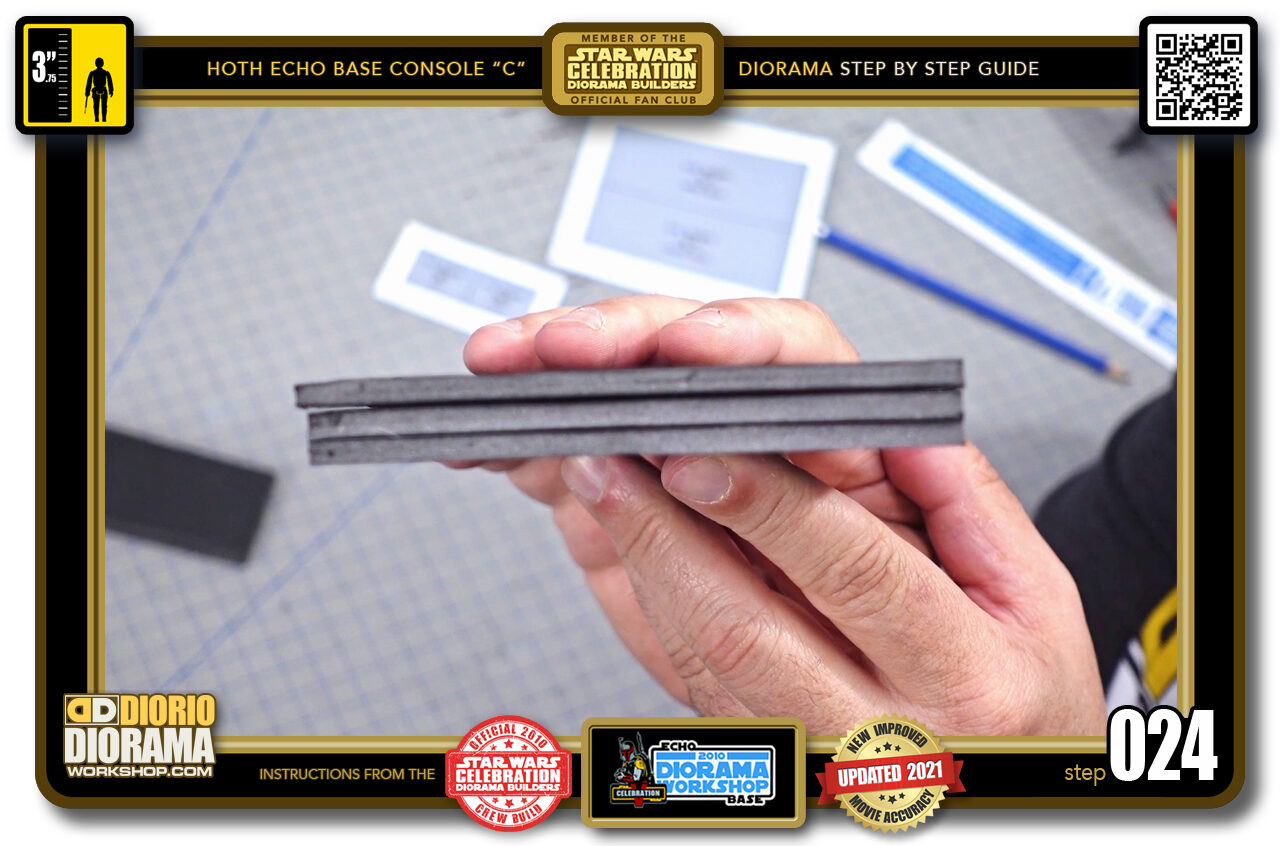
- STEP 024 > Your triple layer foamcore should look like this. You can see the bottom connection (layer 1 and 2) wsa flattened better with the spins than the top one (layer 2 and 3) as there is more a gap between it. A little more spin would have allowed the layers to toch more closely. Don't worry though, your decal skins will be hiding all of this later on.
-
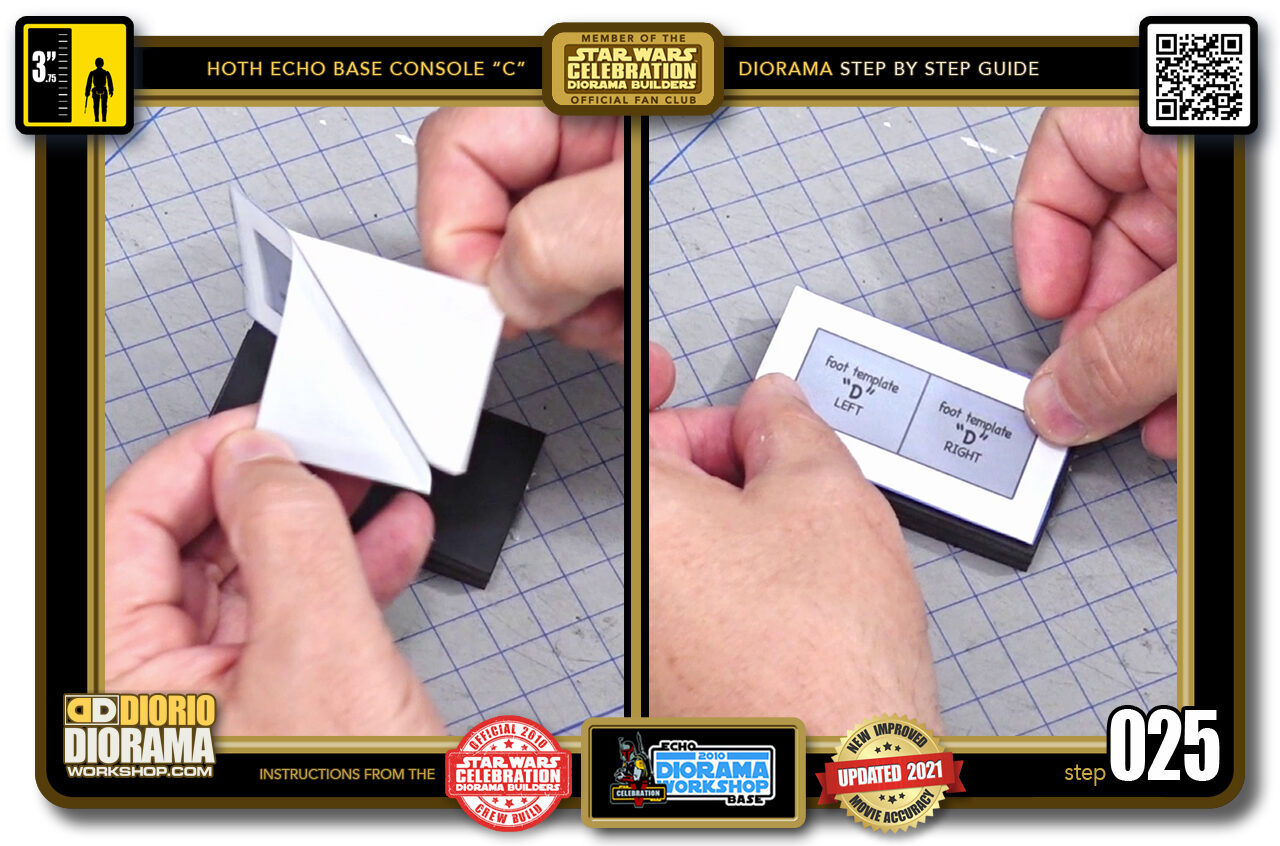
- STEP 025 > Time to apply the template decals. Peel back your "feet" template (left image) and carefully align and place it on your foamcore. If some sticks out it's ok, we will be trimming it to perfection later on. This is why we have plenty excess white safety border on the template decals.
-
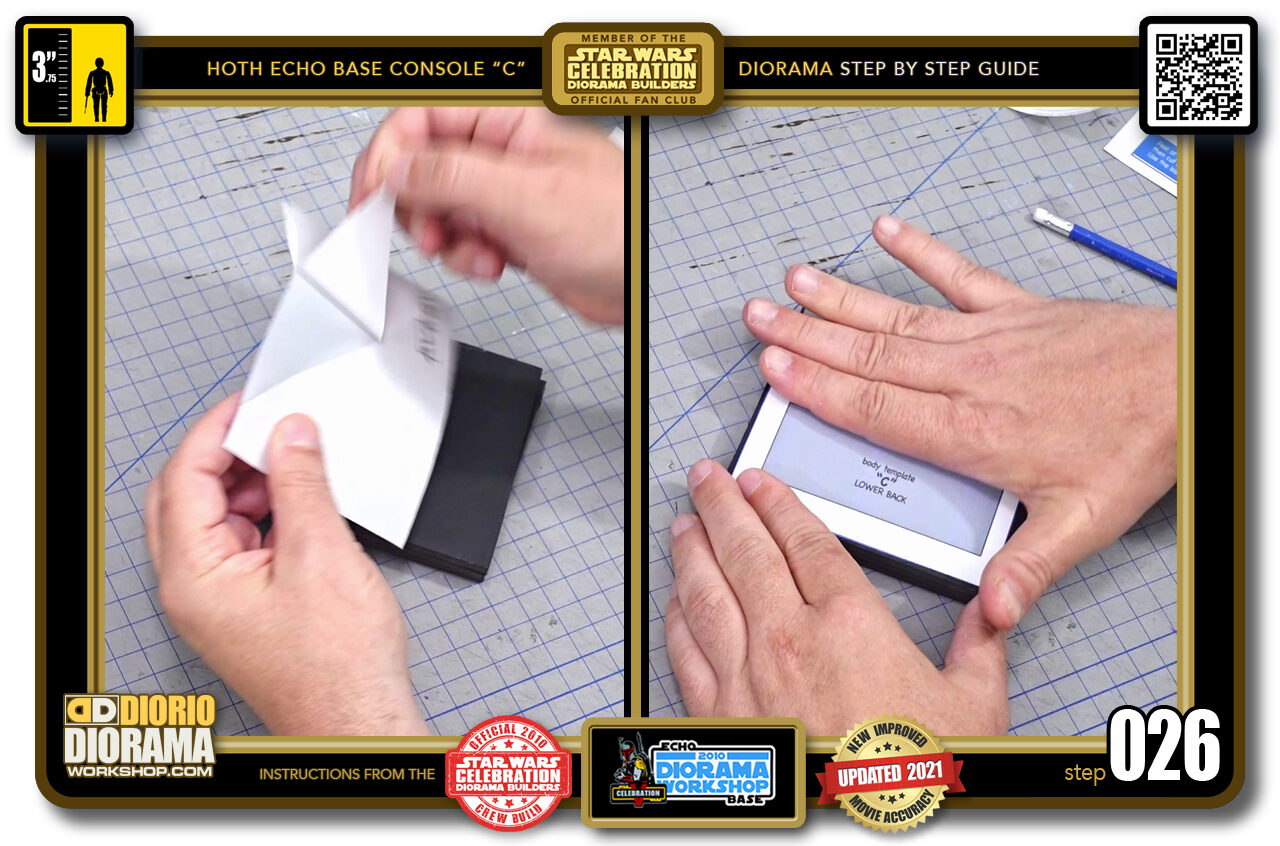
- STEP 026 > Do the same with the rear boxes template decal. Peel your label (left image) and align and press down onto your tripple thick foamcore square (right image).
-
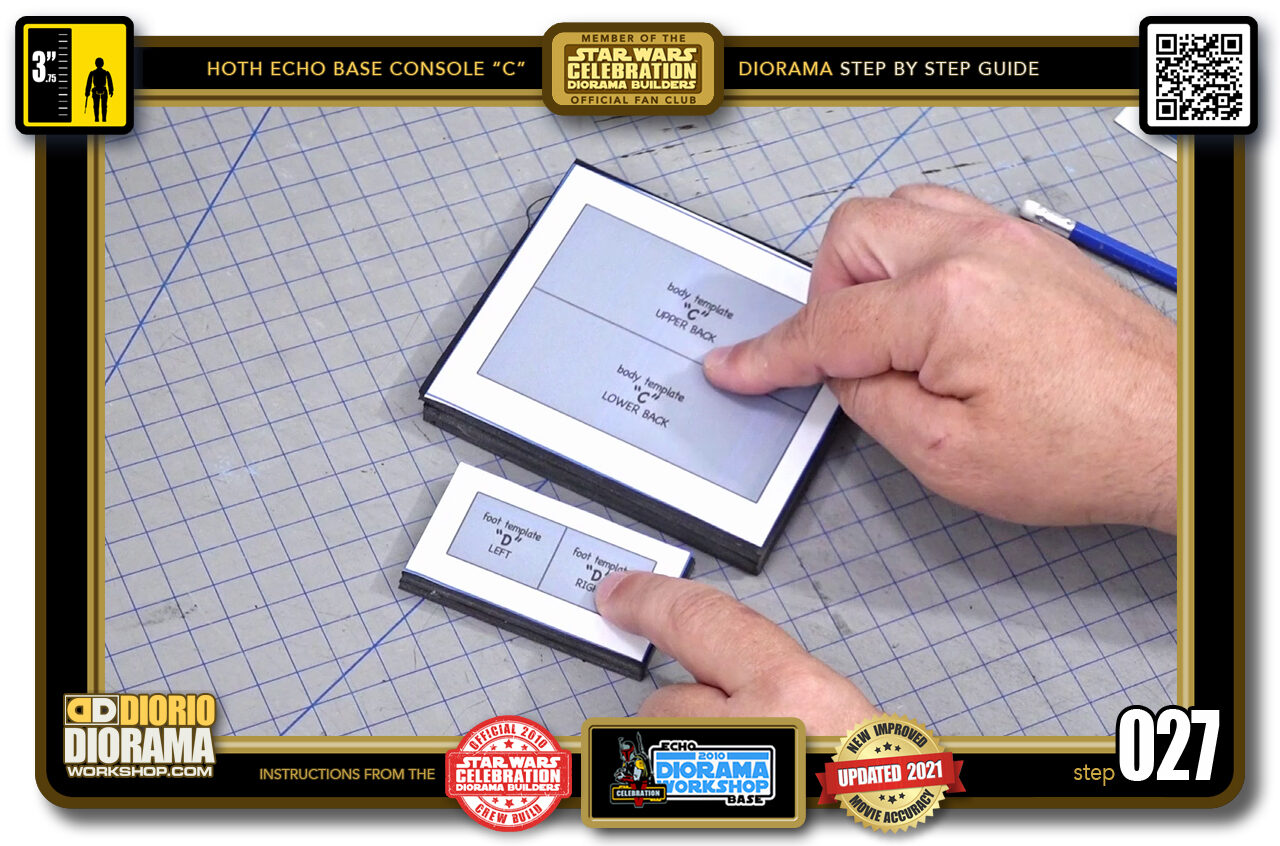
- STEP 027 > we now have the 2 templates attached to our foamcore layers and can now do th eprecision cuts to give us our true template pieces.
-
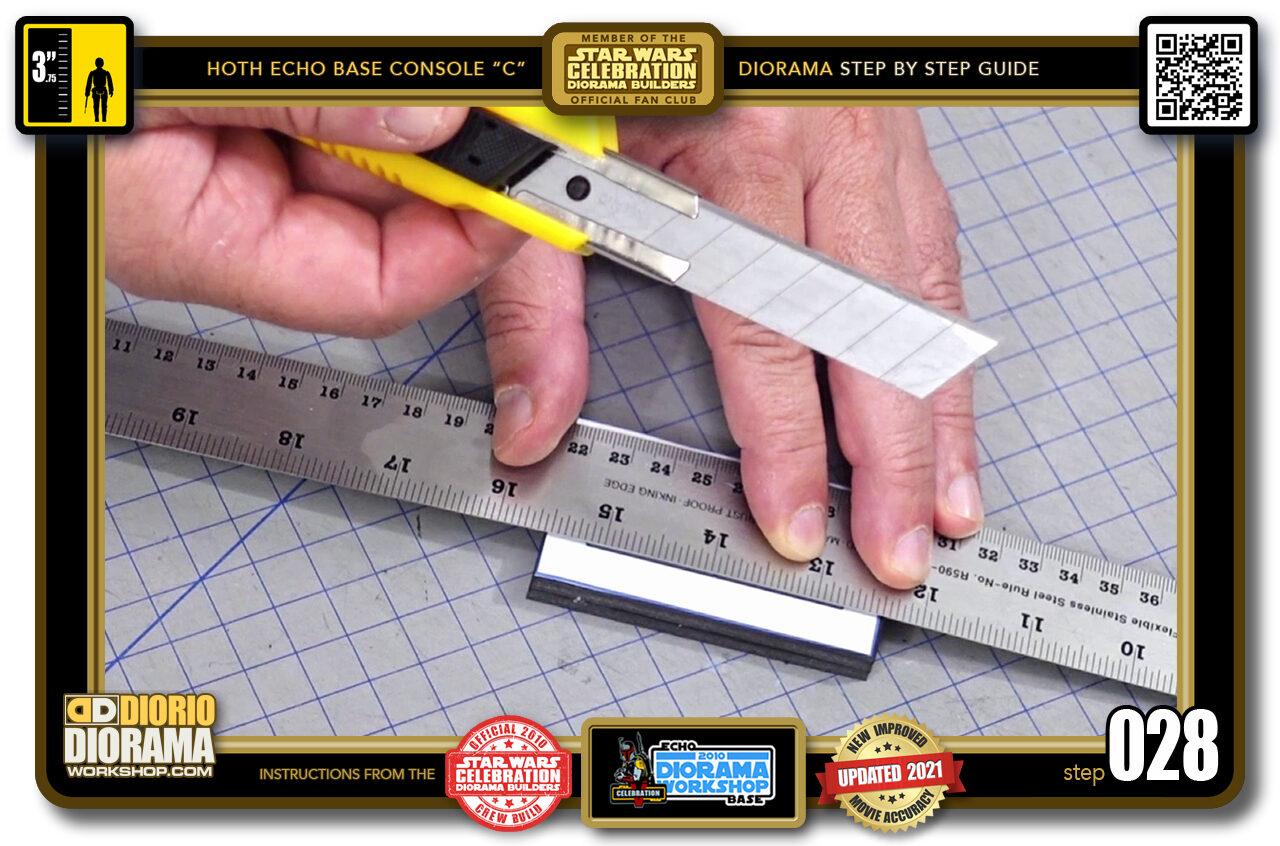
- STEP 028 > Align your ruler with the black outer lines. Also, when starting a project it's always good to start with a NEW blade. For foamcore cuts, we also want to extend the blade of our X-Acto knife as much as we can. This way the entire blade slowly slices the foamcore giving a cleaner cut than if it was just a small tip section.
-
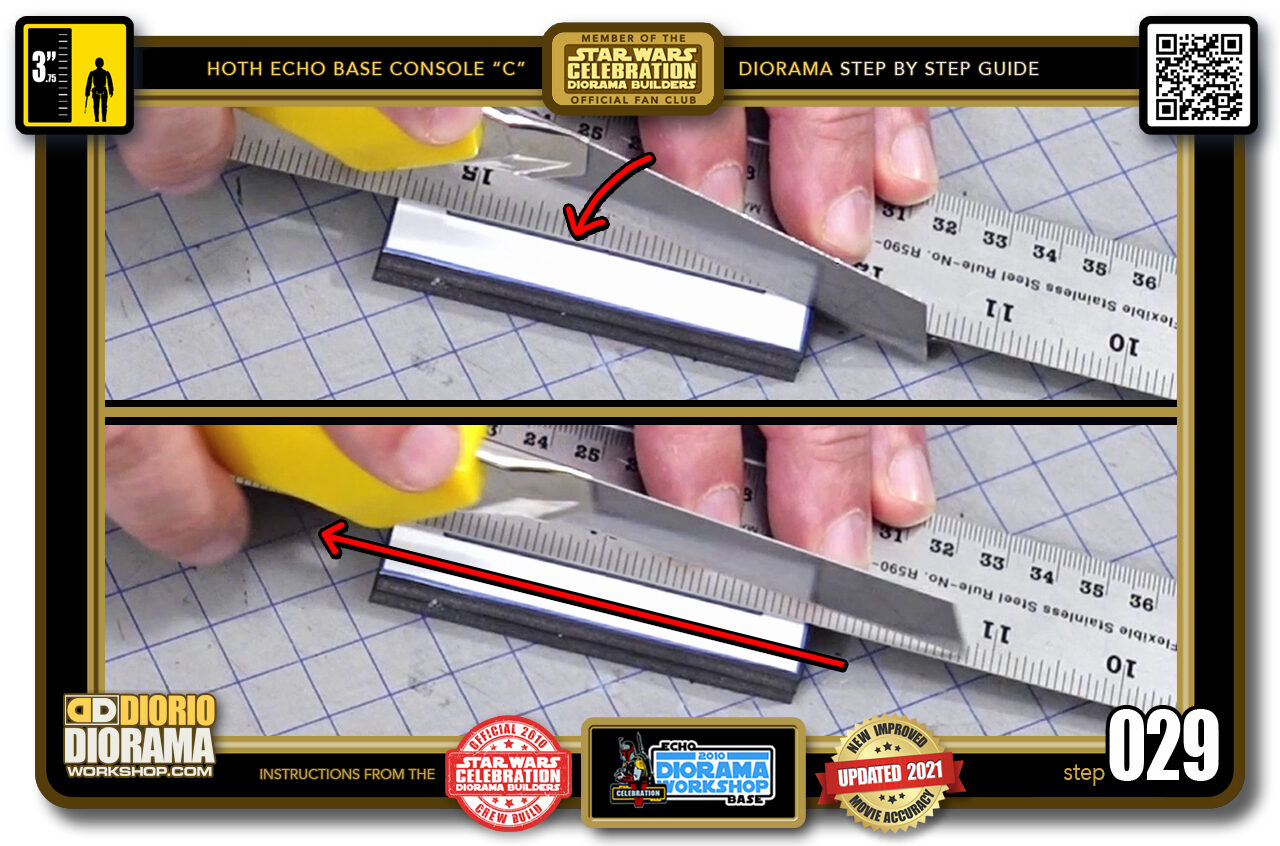
- STEP 029 > Place your X-Acto knife at the start of your cut and lower the blade until it is almost parallel to the table surface (top image) then you pull back and cut off your slice (lower image). Because the foamcore is multi layered you may have to do 2-3 passes to go all the way through.
-
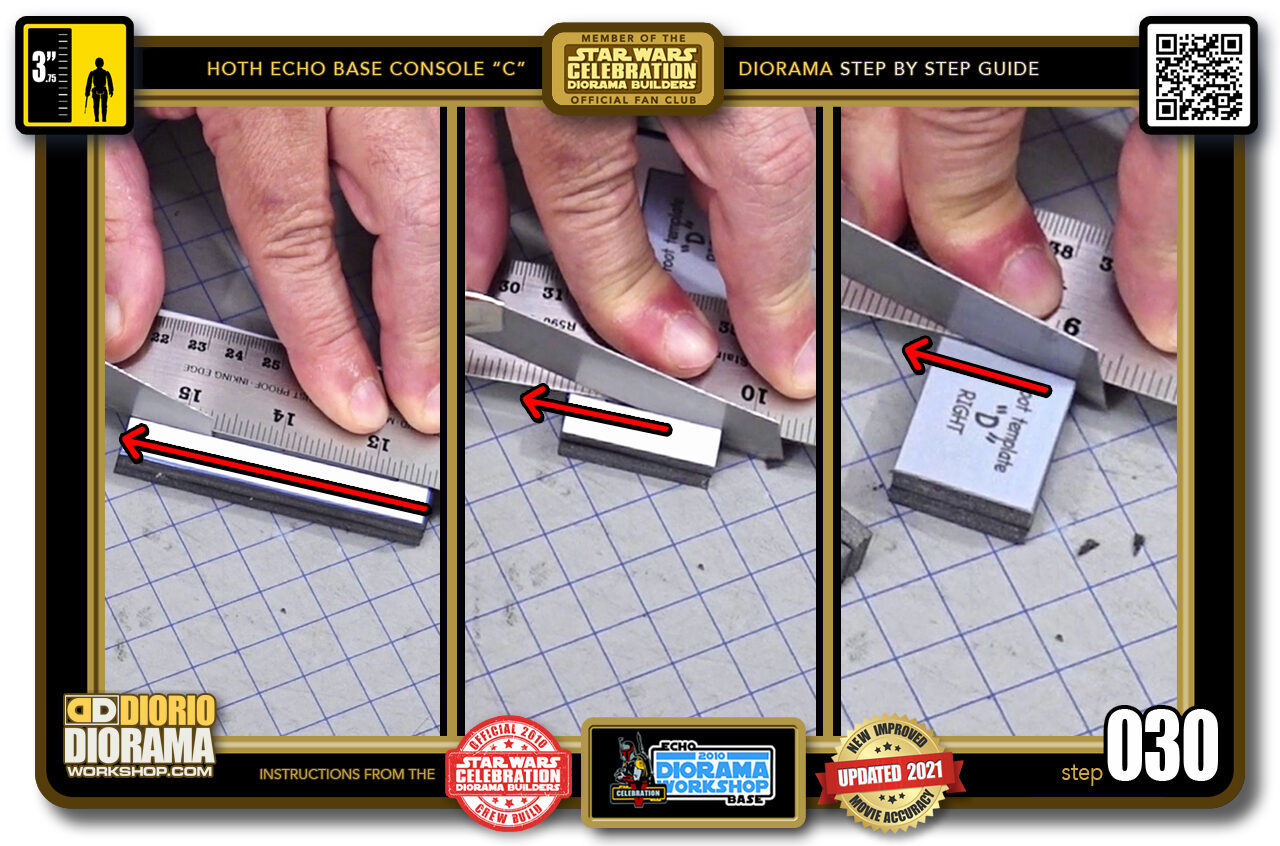
- STEP 030 > Repeat the same steps all the way around. Place your X-Acto knife at the starting position then lower the blade and slice (left and centre images) Once all the outside lines are cut you can align your ruler with the inside dividing line and cut (right image).
-
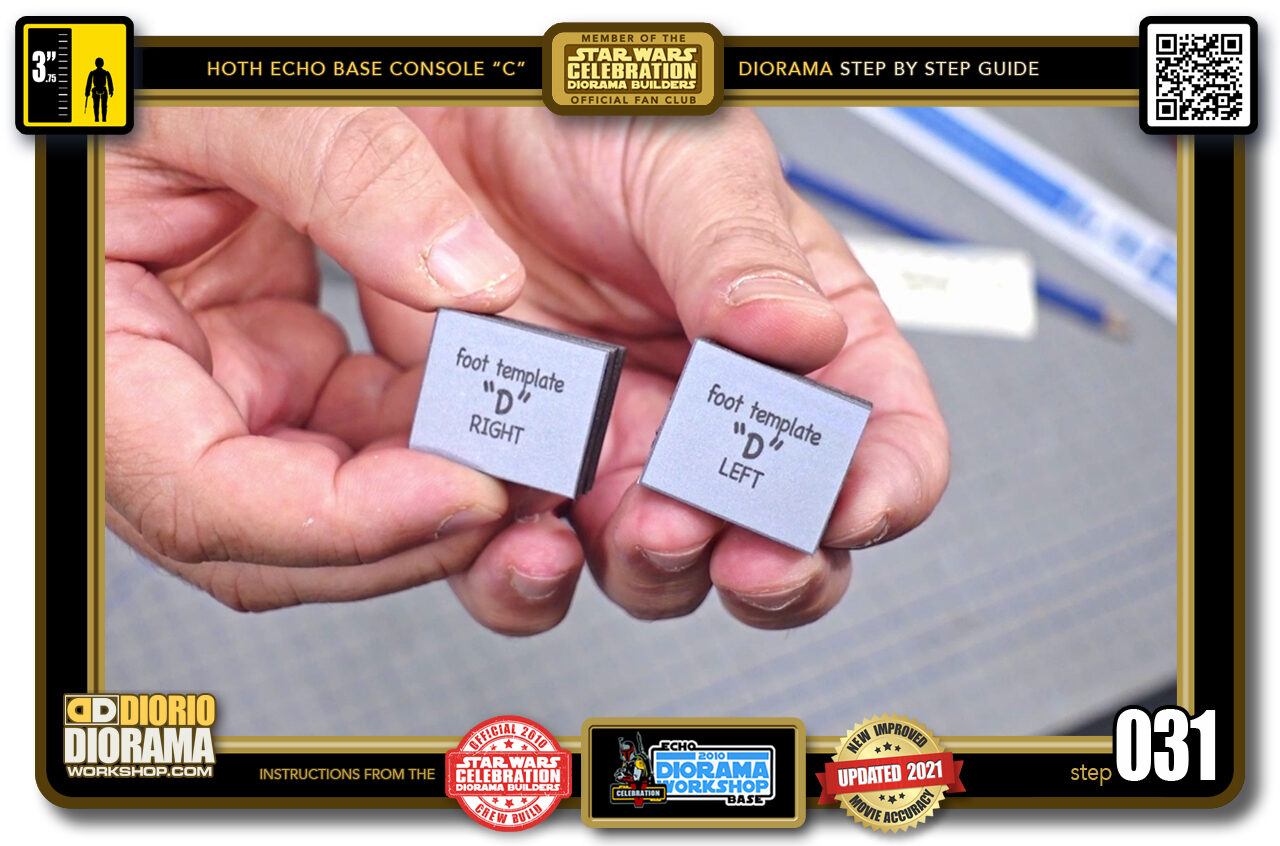
- STEP 031 > You should now have 2 identical perfect little double thickness feet 🙂
-
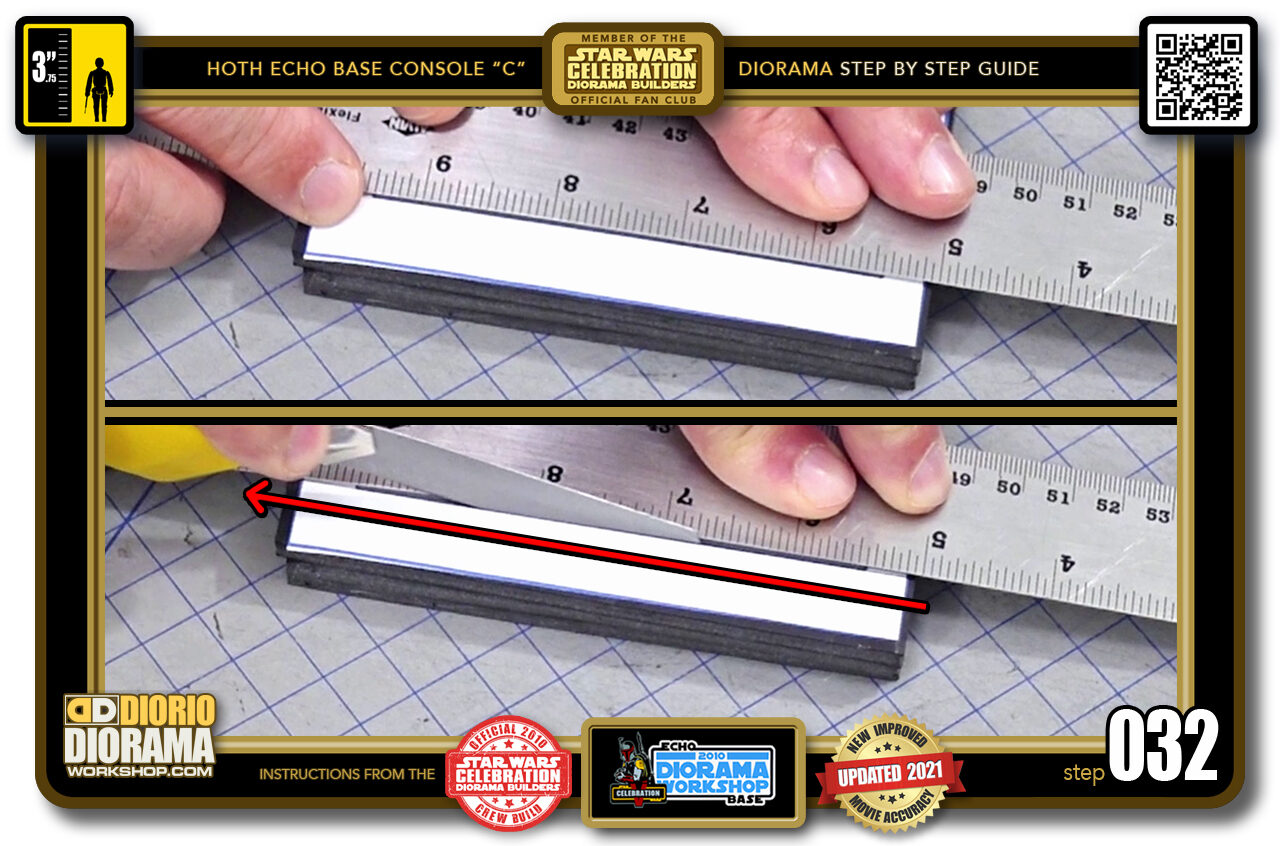
- STEP 032 > Time for the larger triple box. The technique is the same. Align your ruler with the outside line (top image). You just want a little to be visible as we don't want any of the white to be seen in the final template cuts. Place your X-Acto knife at the start, lower the blade and slice (bottom image) It took me 3-4 slices to go all the way through my foamcore.
-
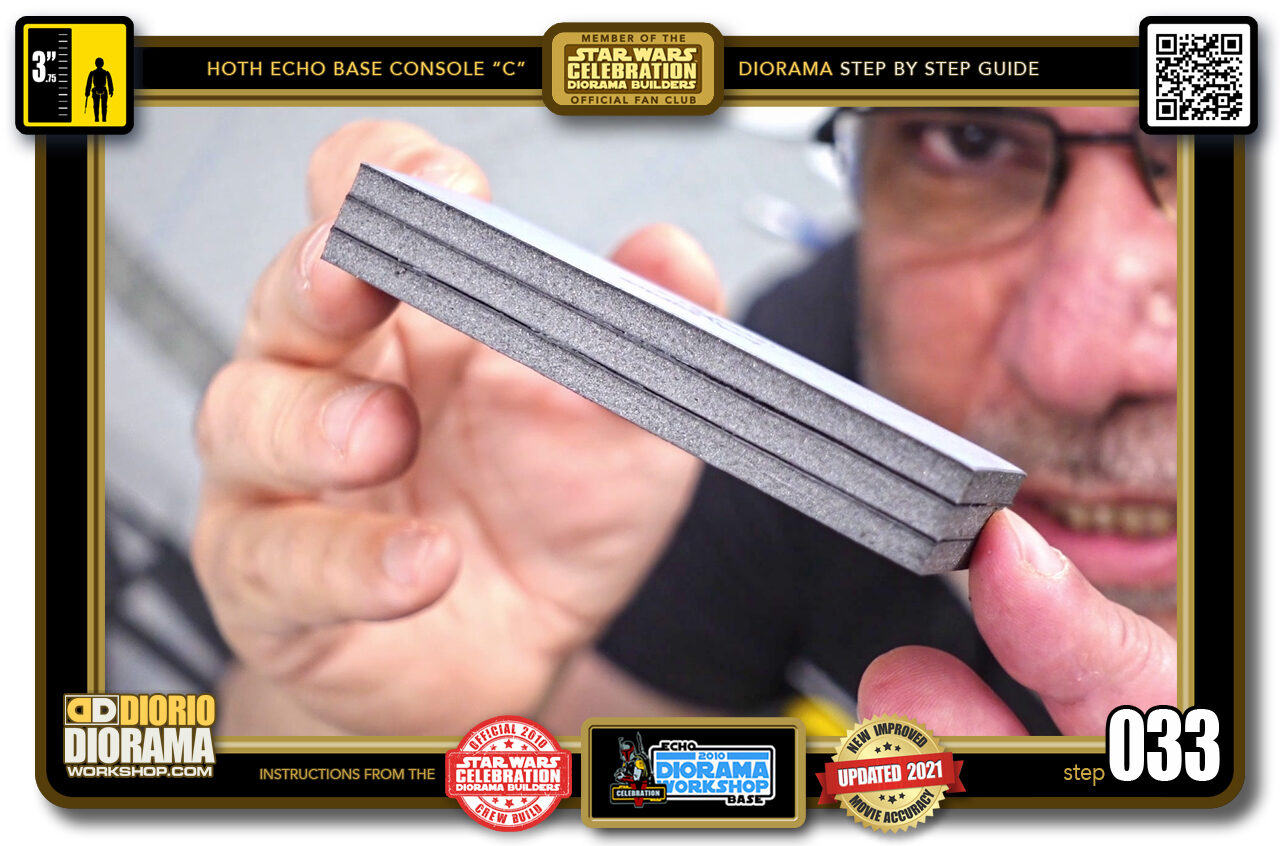
- STEP 033 > This is what your cut should look like. See how smooth and no ripped edges and bubble when using a NEW blade ? Now repeat the same cuts on the remaining 3 outside lines.
-
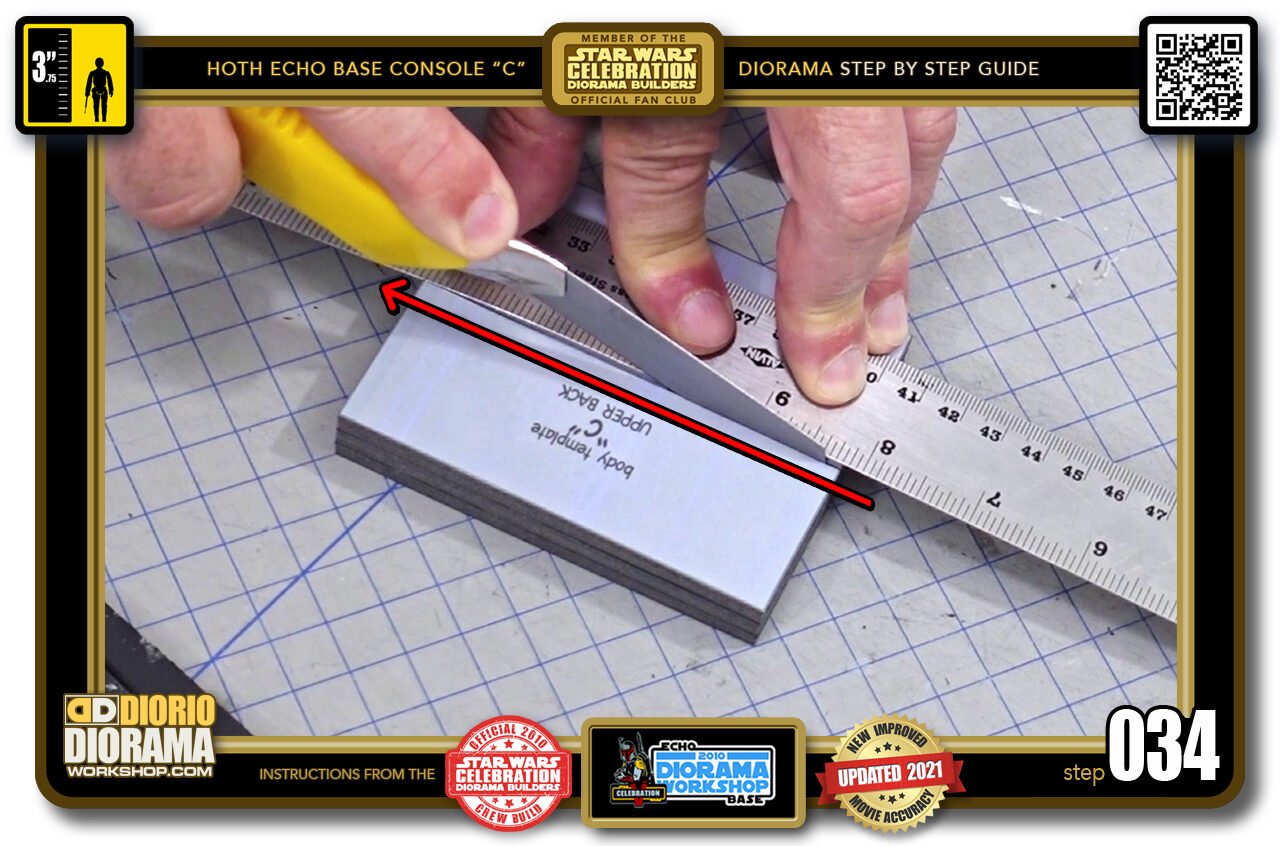
- STEP 034 > When the ouside is done, we can move on to the inner guides to cut our pieces to proper individual sizes. Same technique. Align your ruler with the inner line, place your X-Acto at the start position, lower the blade and pull back to cut (red arrow).
-
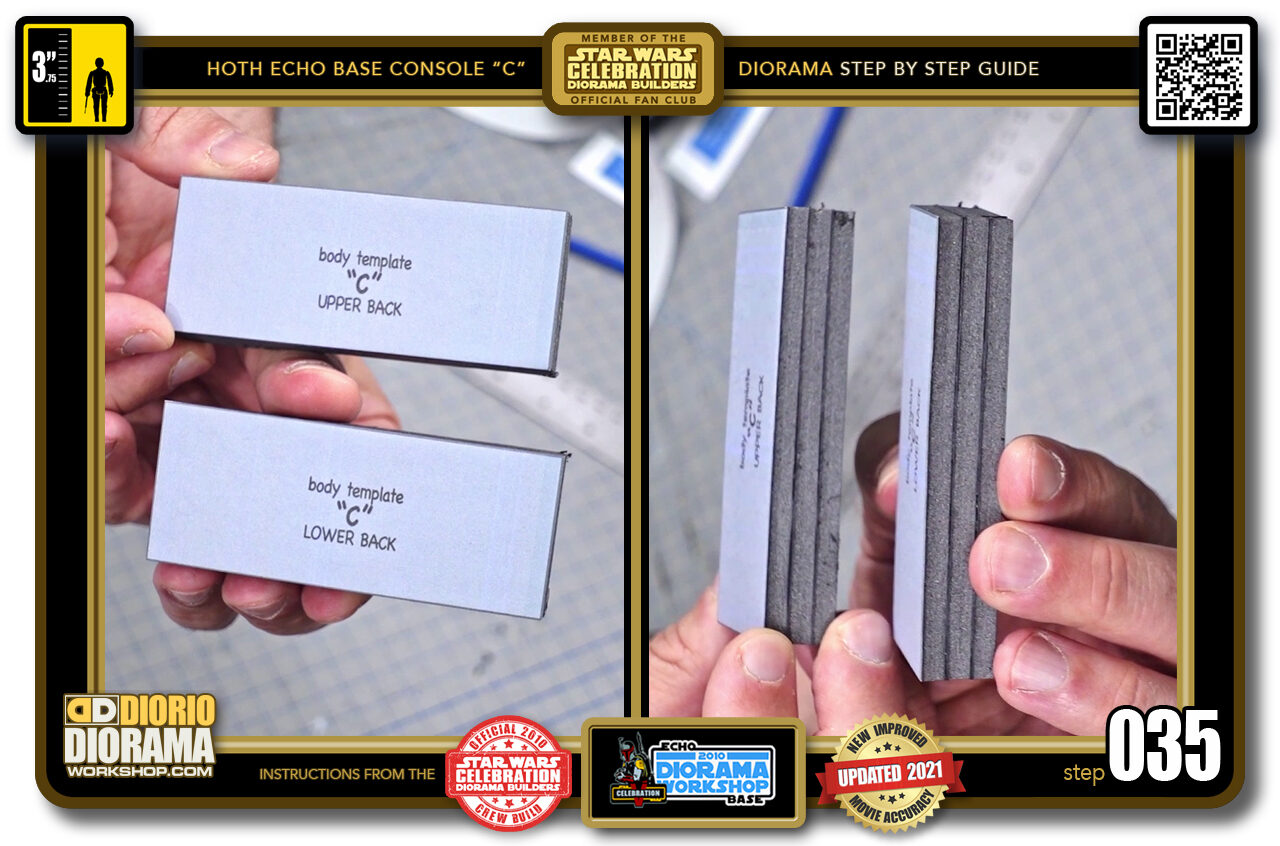
- STEP 035 > We now have 2 identical triple layer foamcore pieces. Put these aside for now.
-
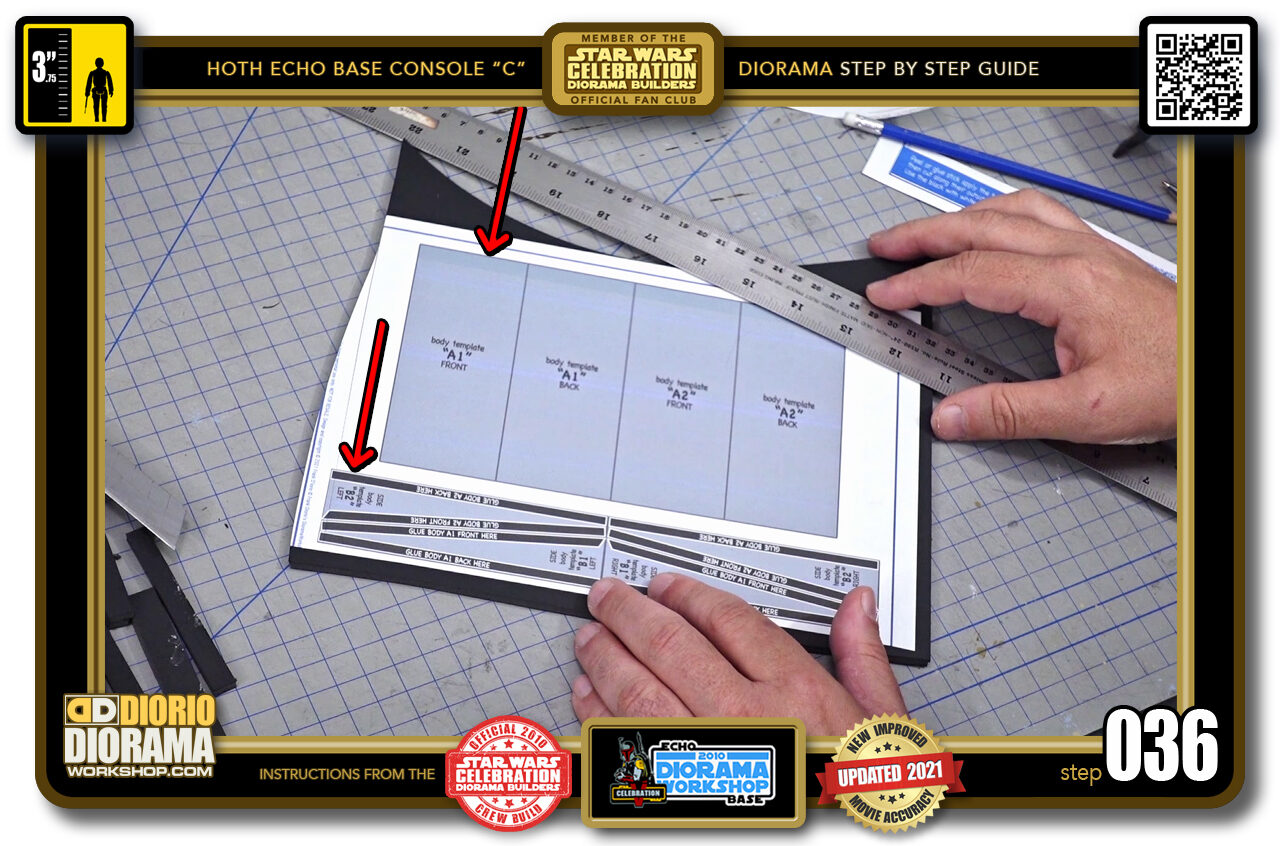
- STEP 036 > Grab the very first decal application piece and we will start again by cutting along all of the OUTSIDE lines first (red arrows).
-

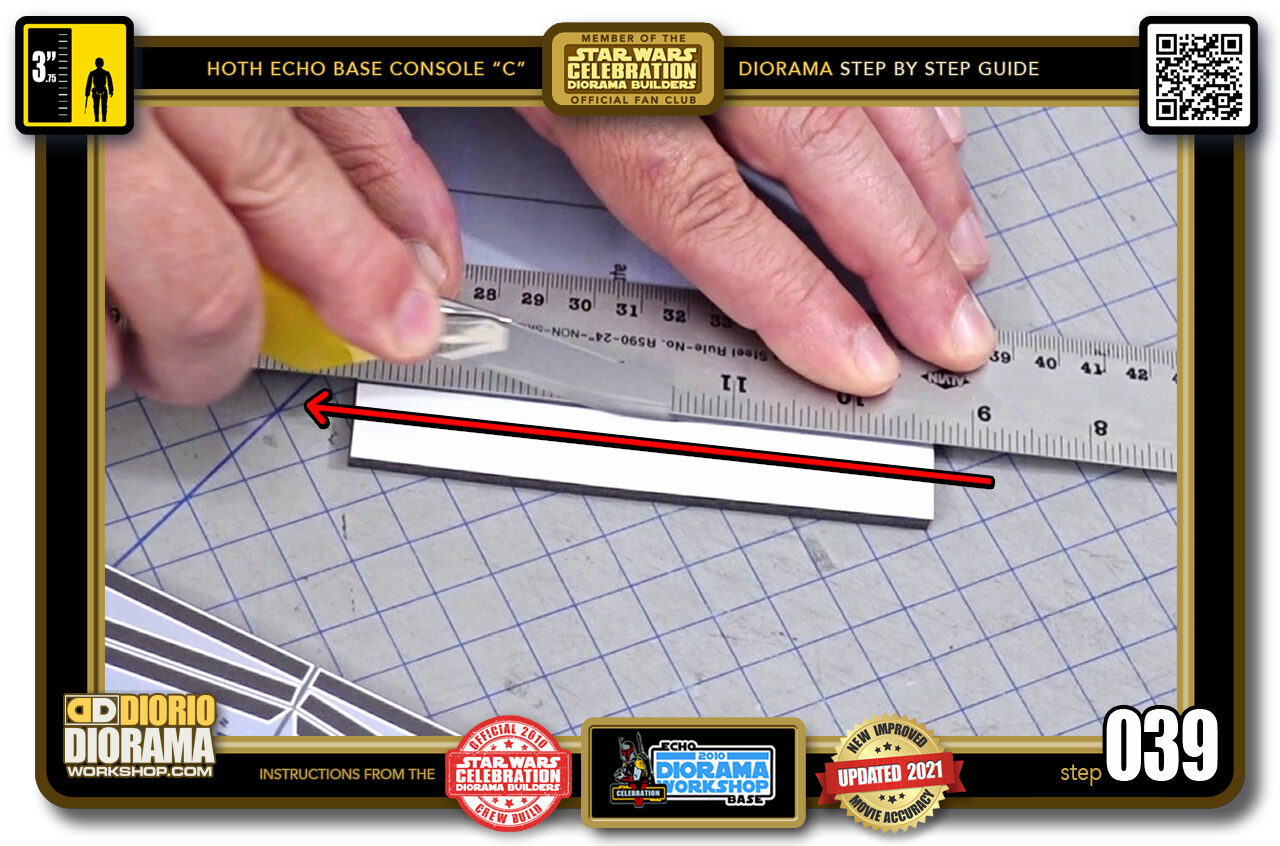
- STEP 037 > Align your ruler to just see a little of the black line, place your X-Acto knife at the starting position, lower the blade, pull back to cut (red arrow) Since this is only 1 foamcore thick, the cuts will go faster and not need as many repeat slices to go all the way through.
-

- STEP 038 > Before cutting the remaing 3 sides of the main body pieces, I wanted to remove the side strip from the foamcore layer first. You don't have to do it this way but for me, it avoids accidental chopping into the sides which would be a disaster.
-
- STEP 039 > With the sides safely put away for now I can freely spin my body foamcore around and cut the remaining 3 sides without worry of accidentally slicing into a side piece.
-
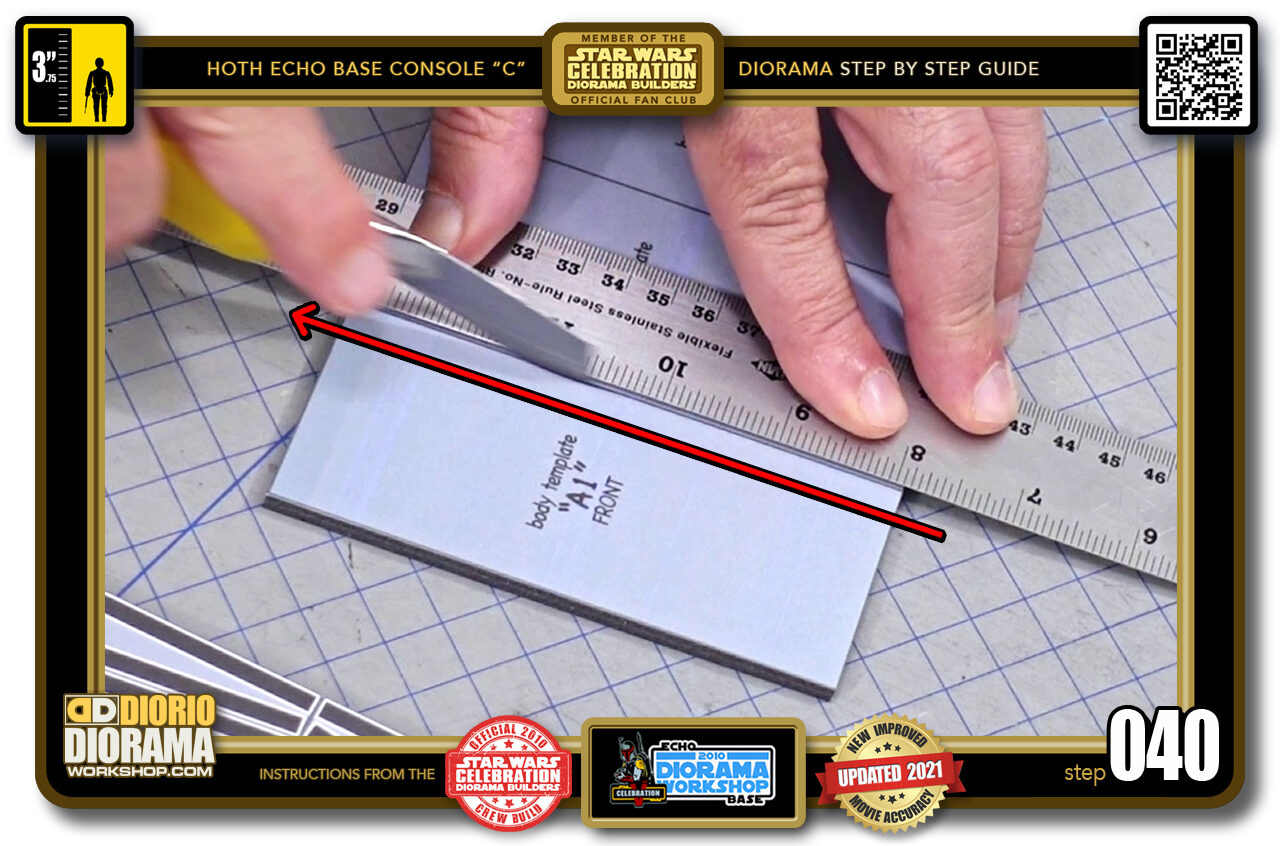
- STEP 040 > When the outside lines are all cut, I move into the inner cutting lines. Same technique, different line :).

.
Did you already build this Diorama ? At home or at our Star Wars Celebration Diorama Builders workshop ? Would you like to show it in the site’s GALLERY VISITORS DIORAMAS section, YES ? That is Awesome !!! You can find out all the details on how to email me your photos on the VISITORS SUBMISSIONS INFO page … When I get your photos, I will create your very own page just like this one. You may not realize it but work does inspire others to join in the fun of making Action Figure Dioramas.
.
NOT FOR RESALE ALL Decals, tutorials and artwork are ©FrankDiorio (dioramaworkshop.com) and offered FOR FREE to the fans – that would be you ? so you can build and display my diorama designs in your very own home. I realize I cannot control what one does with my graphics once I place them on the web, I can only ask you as one fan to another, please respect the artist and do not be that jerk who uses my designs and tutorials to build a copy of my work only to sell it on EBAY or trade/sale groups and forums. Thank You. Frank.
.

.
.
If you have a facebook account, why not join the Official Diorama Builders Fan Club today, simply click the logo link below.
 .
.
Catch up with fellow visitors and exchange stories, read cool interviews with the crew, exchange photos, fun surprises and grab some FAN ONLY merchandise next year at actual future conventions ?
.
©2021 Frank Diorio DioramaWorkshop.Com
.
IF YOU LIKE WHAT YOU SEE, PLEASE SHARE WITH YOUR FRIENDS
USING THE SOCIAL MEDIA BUTTONS BELOW