


-

- STEP 001 > Here are all the materials you need to make your console. You can print a list to bring to the store here... https://dioramaworkshop.com/tutorials-materials-list-hoth-echo-base-console-c-2021/
-
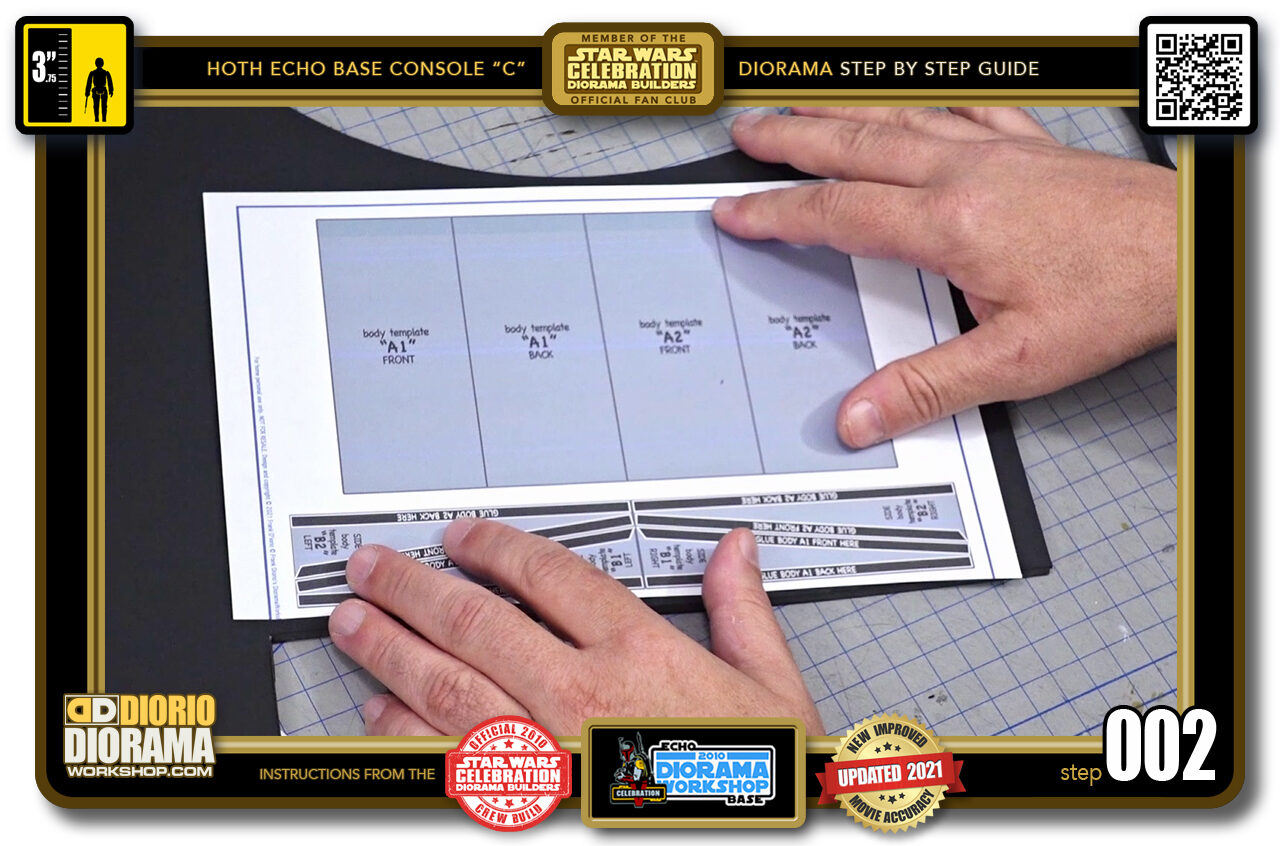
- STEP 002 > Let's start with the main body templates. I printed mine on full size label sheets. Just find a piece of foamcore big enough for the paper to cover. You can download your FREE templates here ... https://dioramaworkshop.com/tutorials-blueprints-hoth-echo-base-rebel-console-c-2021/
-
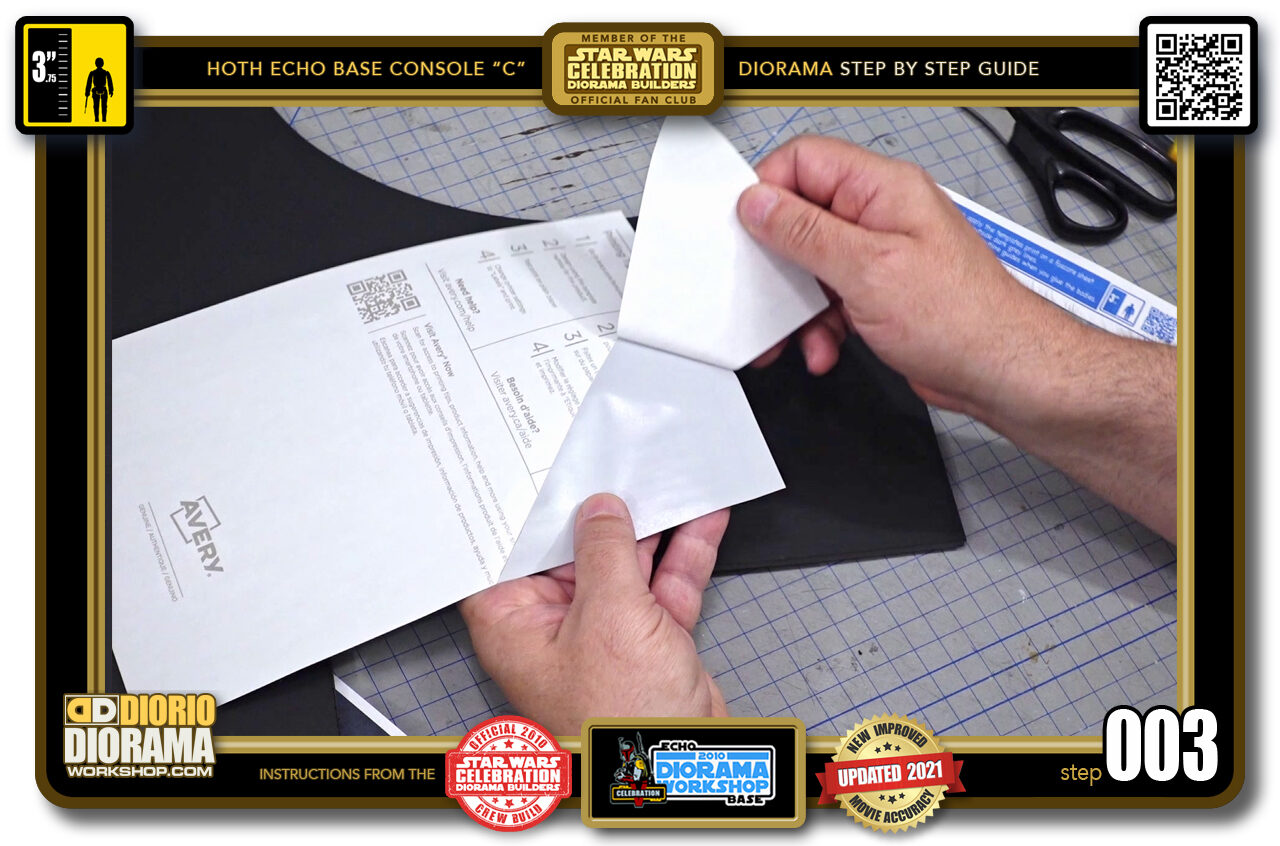
- STEP 003 > Peel back your label sheet. If you printed on regular paper, apply some gluestick on the rear of the sheet. VENER use HOT GLUE to apply decals.
-
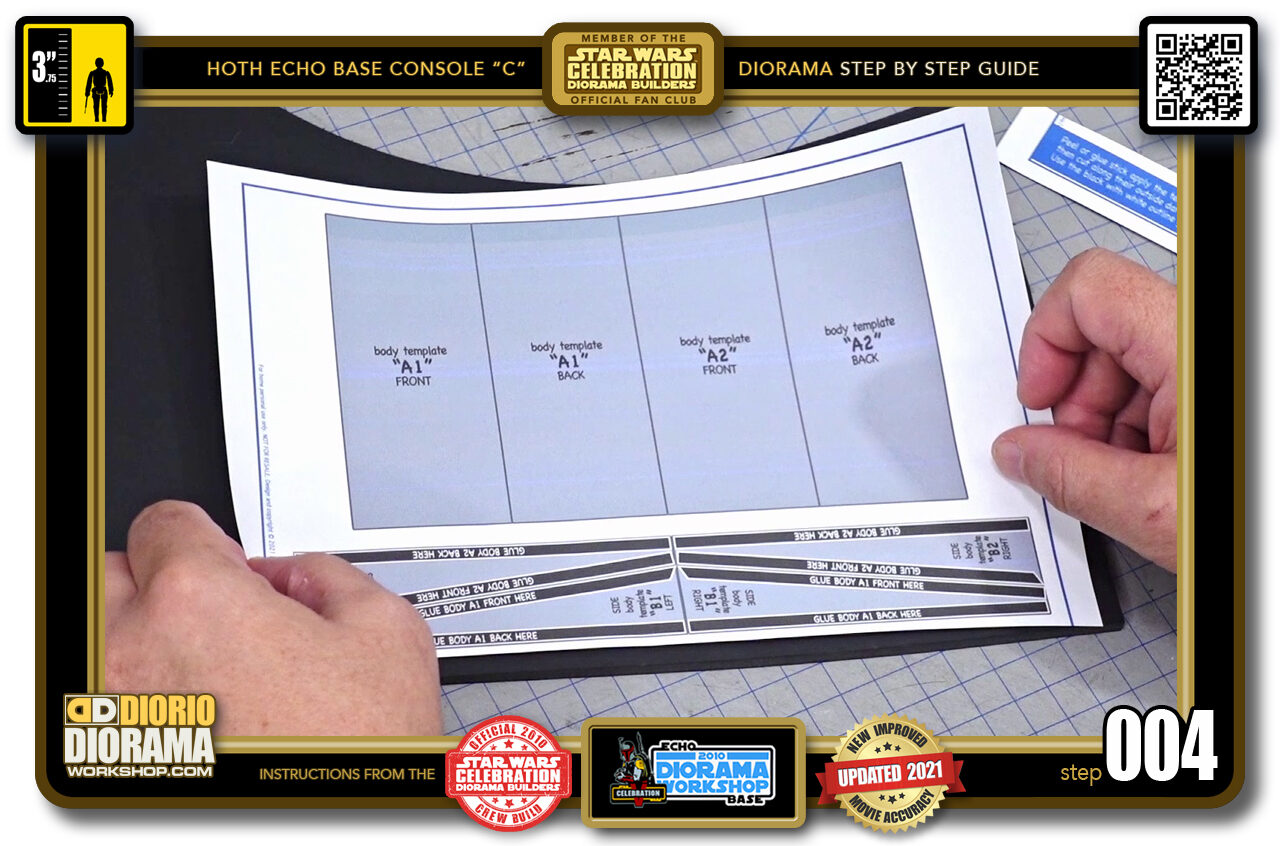
- STEP 004 > Align your sheet on your foamcore at the bottom keeping the top end raised off the surface.
-
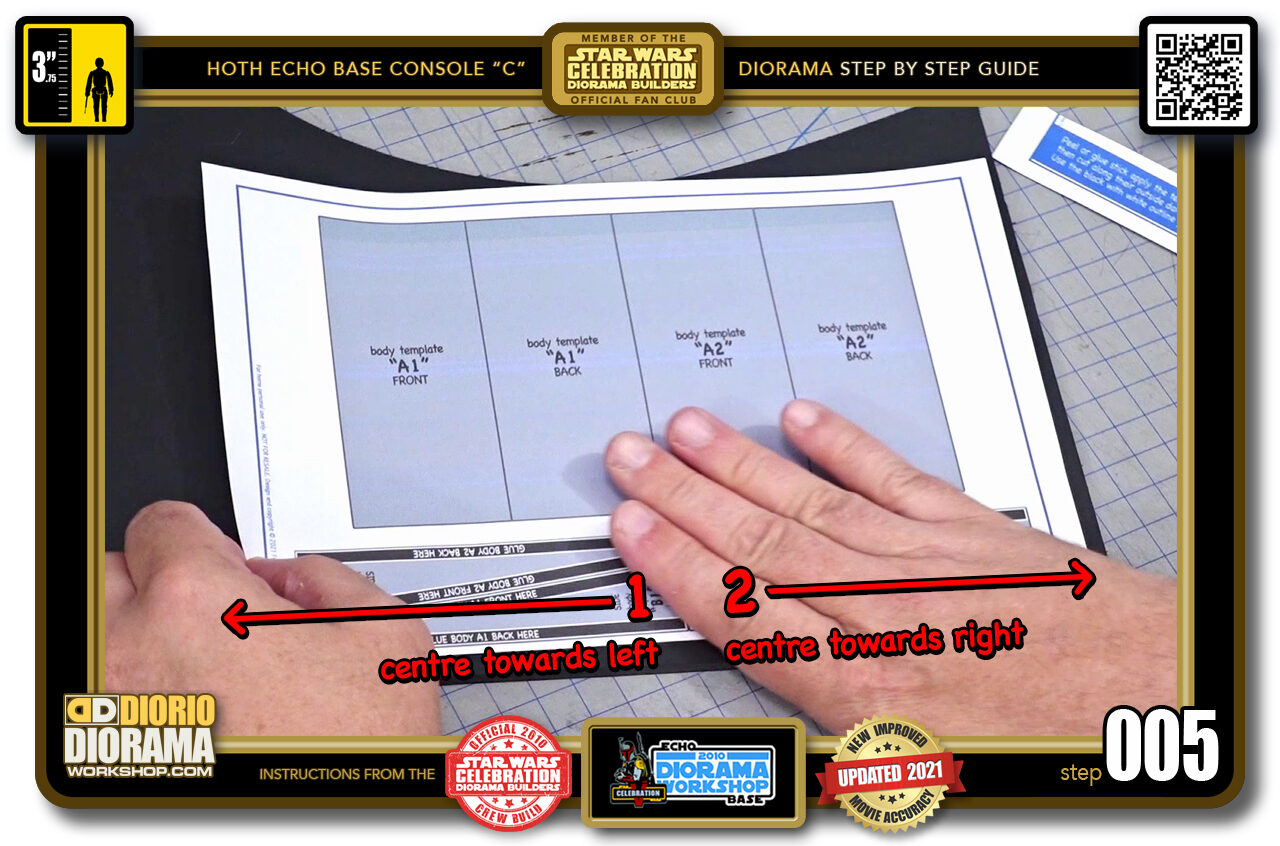
- STEP 005 > Gently and slowly pass your fingers along the BOTTOM ONLY from CENTRE LEFT - back to the CENTRE and then go RIGHT.
-
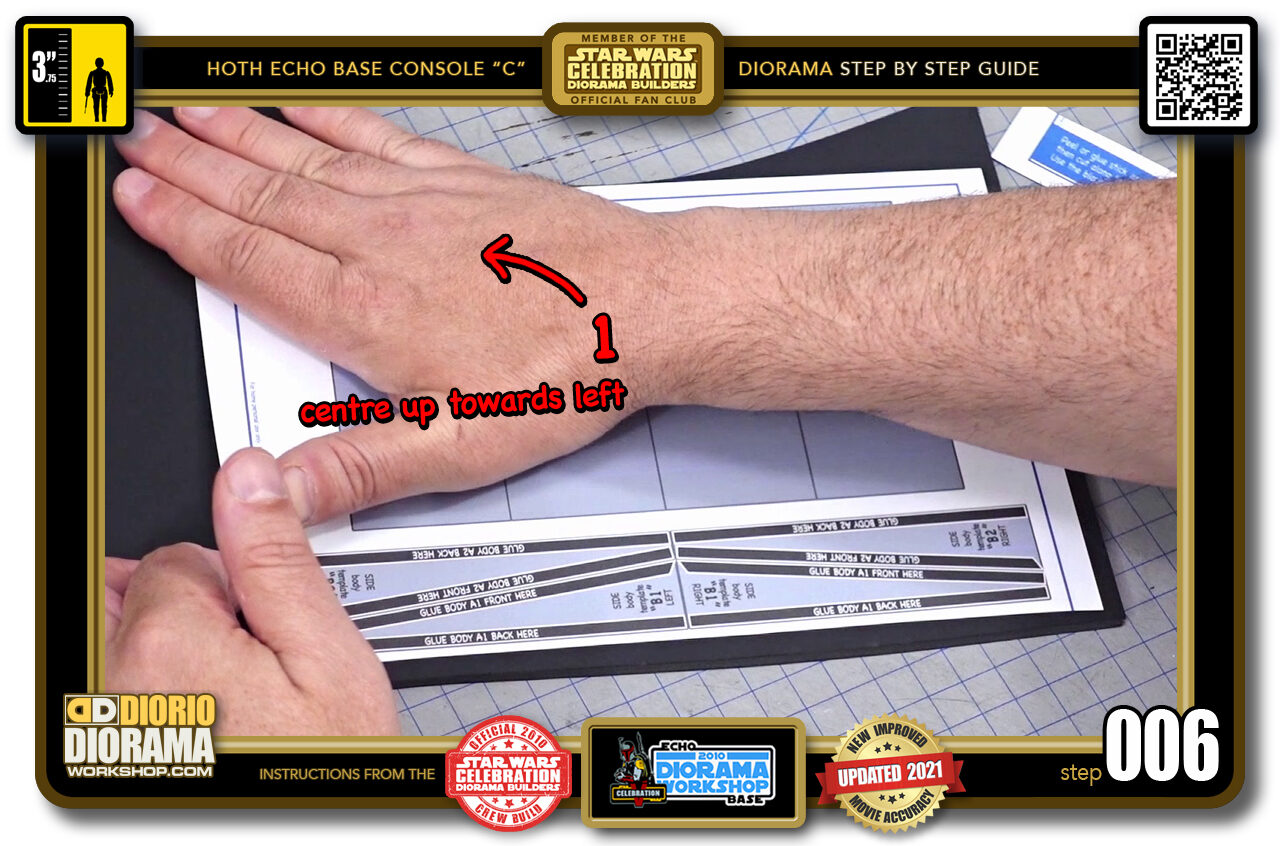
- STEP 006 > Once the bottom is secured, you can make your way towards the top of the page. ALWAYS return to the CENTRE and move your way outwards to the sides.
-
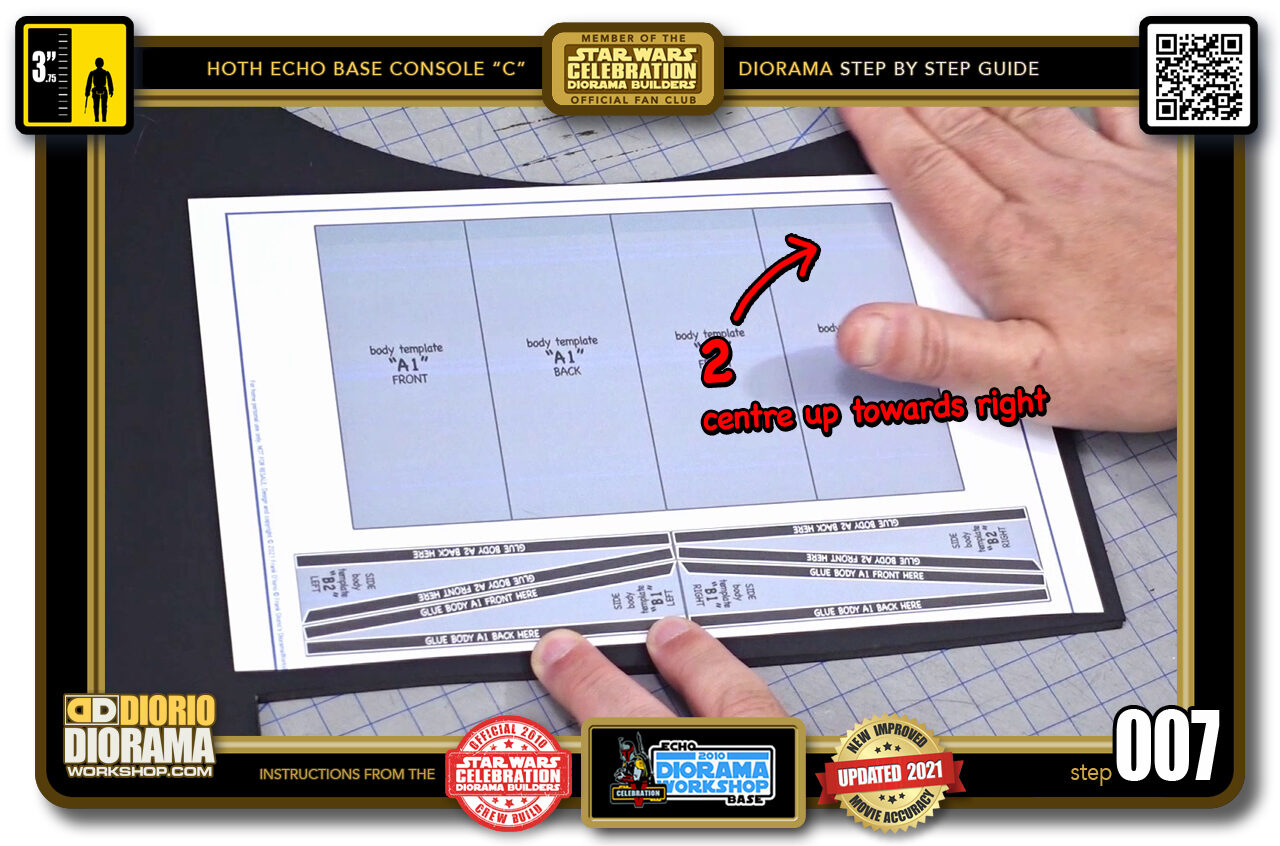
- STEP 007 > CENTRE OUT right then back centre left and centre right again. This will prevent any folds or air bubbles to be trapped in the middle of your decal.
-
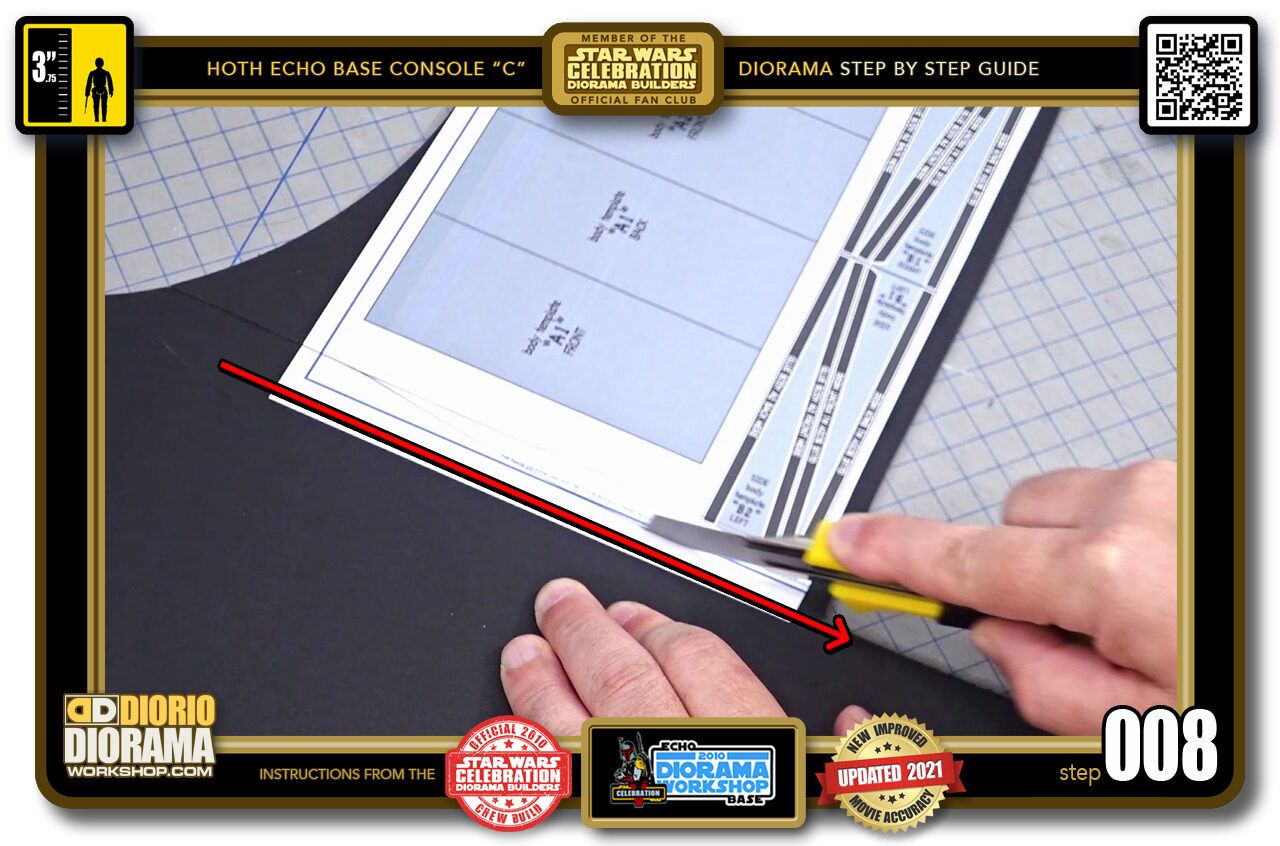
- STEP 008 > I used a foamcore scrap to apply the template decal and it is too large to manipulate easily on the working surface so I will just trim roughly along the paper and put the remaining foamcore aside for a future project.
-
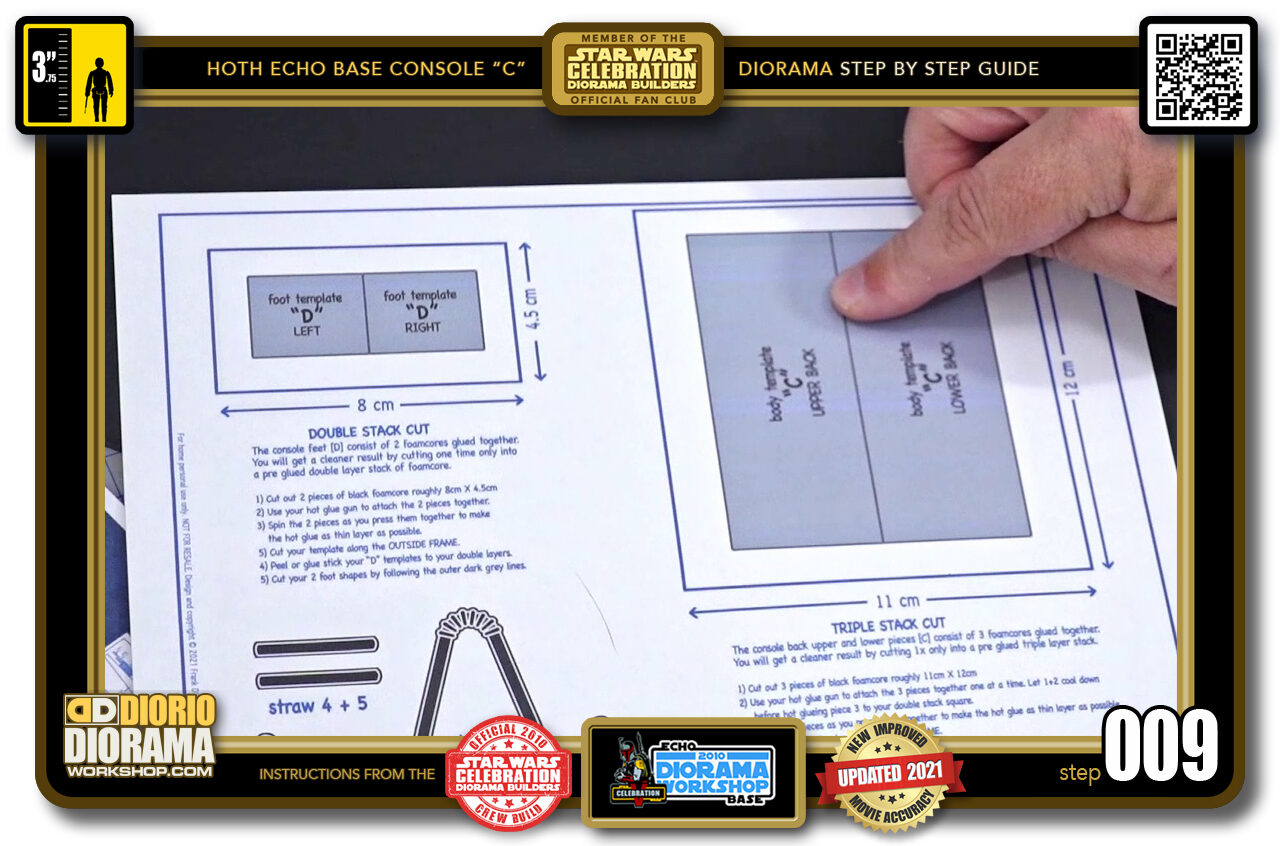
- STEP 009 > Now we can move onto the templates for the feet and rear boxes. The feet are DOUBLE thickness foamcore and the rear boxes are TRIPPLE thick.
-
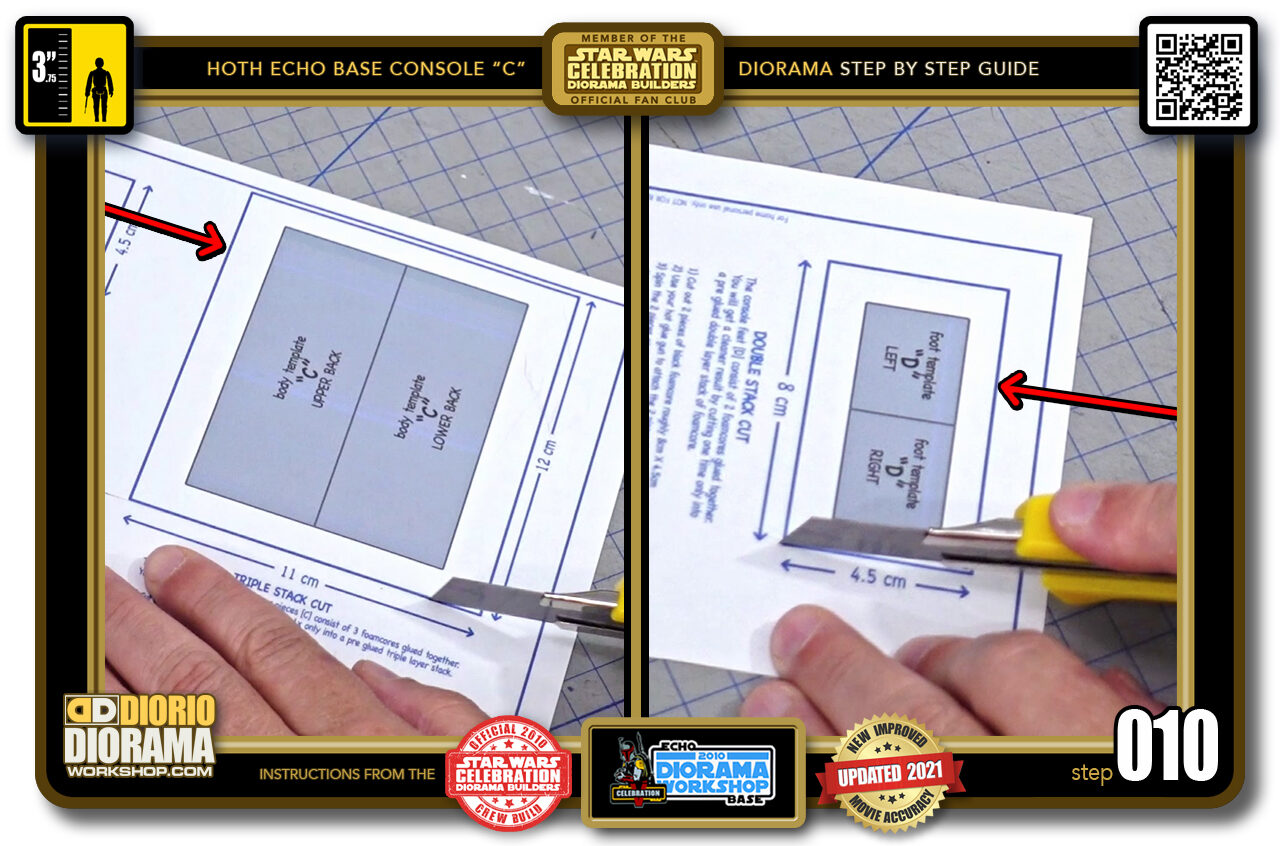
- STEP 010 > So what I want to do first is to trim both templates around the shapes blue cutting lines (red arrow)
-
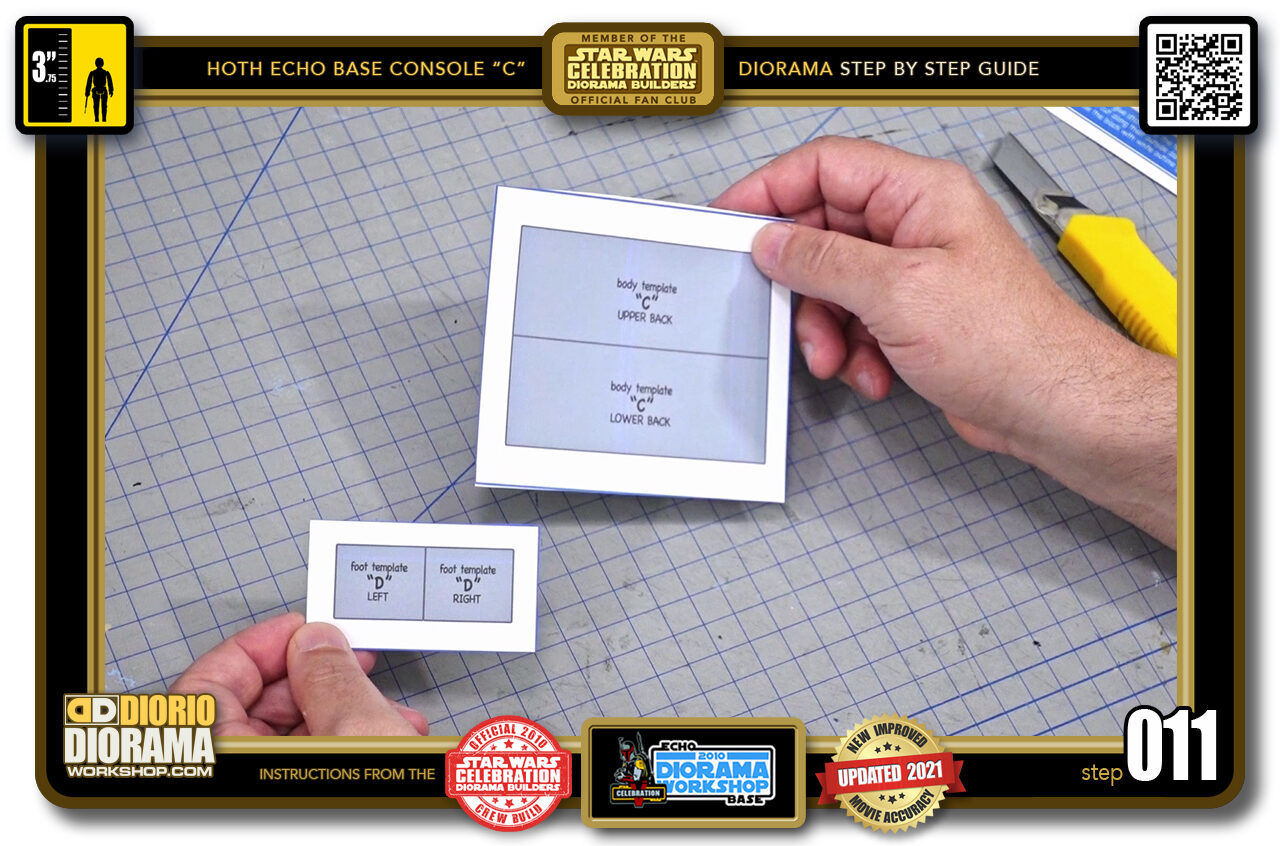
- STEP 011 > You will now have the 2 template decals like this.
-
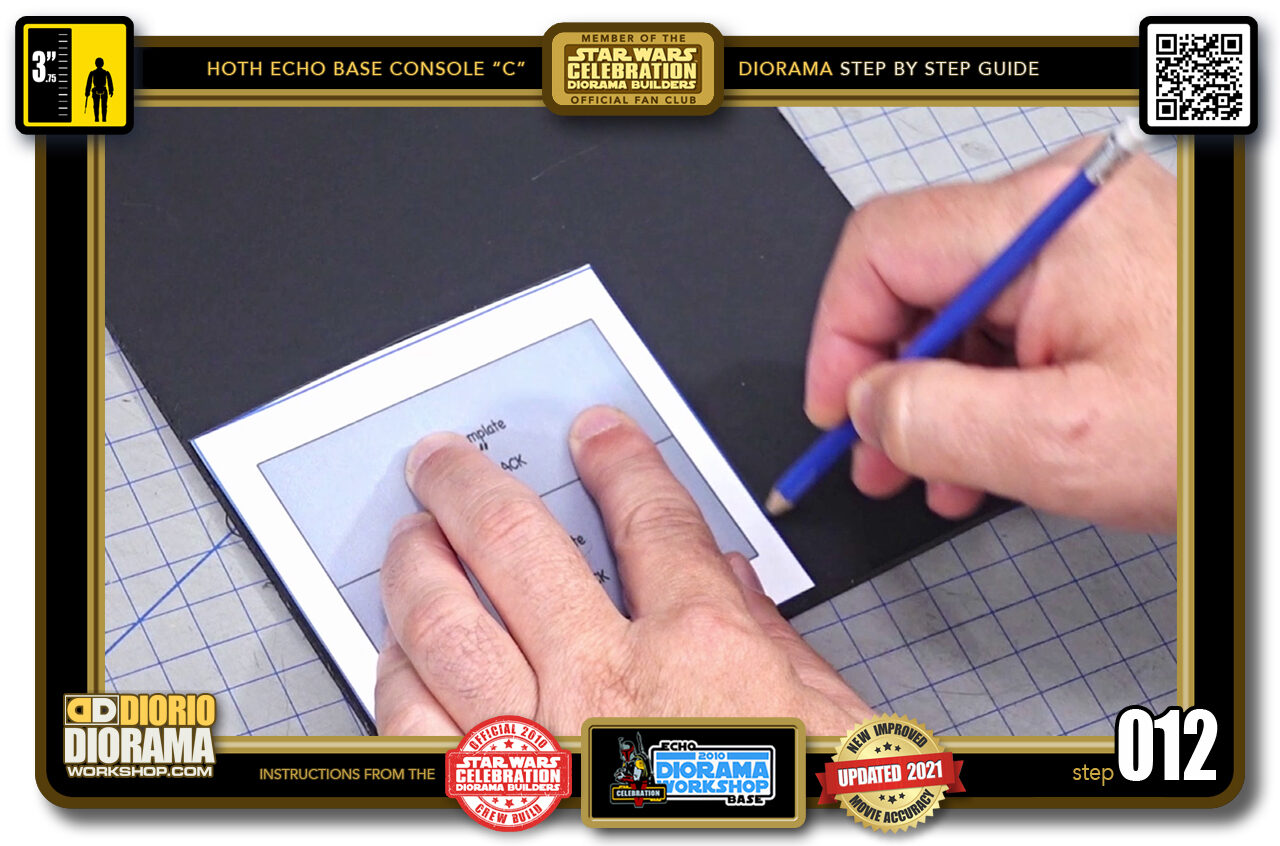
- STEP 012 > For the rear boxes we need 3x this shape so grab a pencil and trace along the outside of your paper onto a foamcore piece. If you don't have black foamcore you can use white as the decal skins will be hiding the foamcore layers in the end.
-
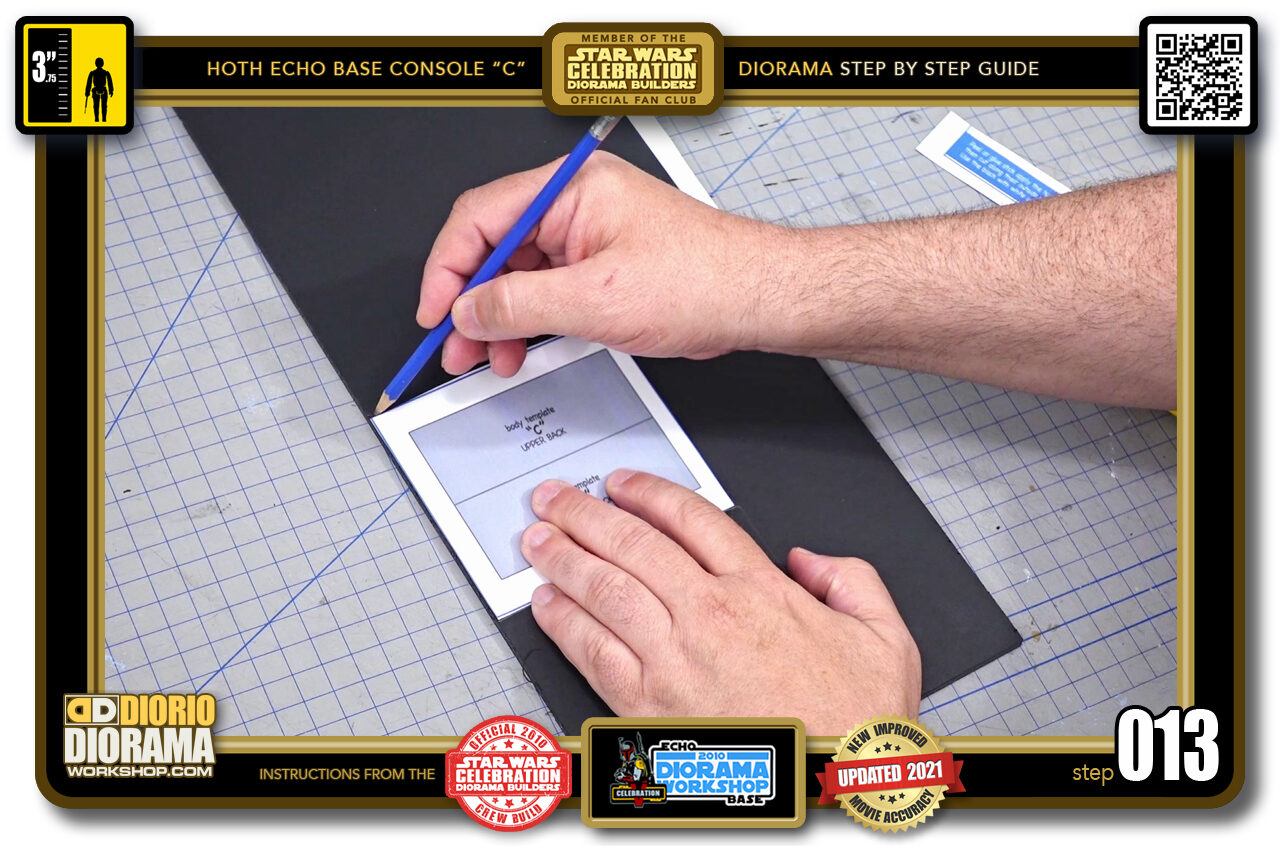
- STEP 013 > Move your paper shape above the first tracing and trace again. Then move it again to trace a 3rd and final time.
-
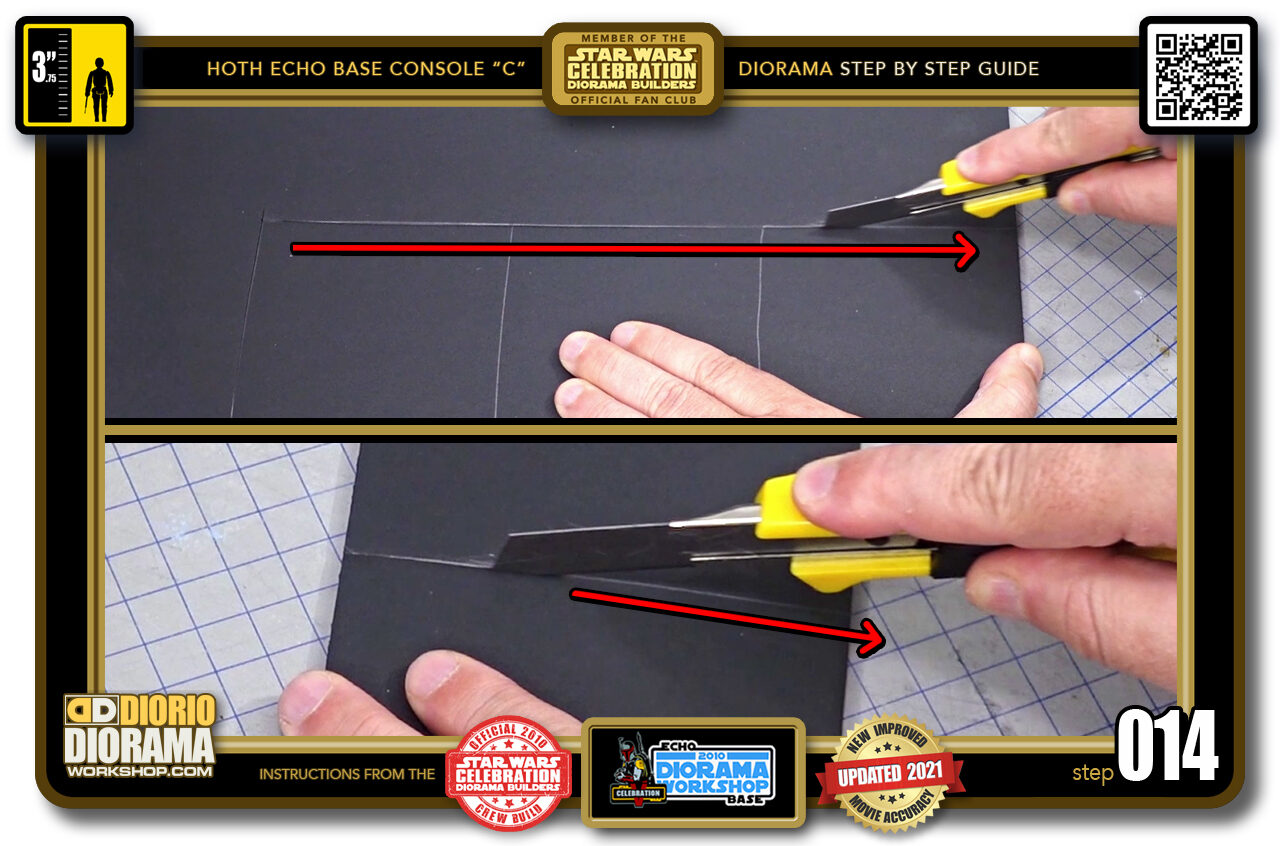
- STEP 014 > Now take your X-Acto knife and cut along the outside pencil lines first (top image) then you can cut along the middle lines to separate them into 3 squares (lower image)
-
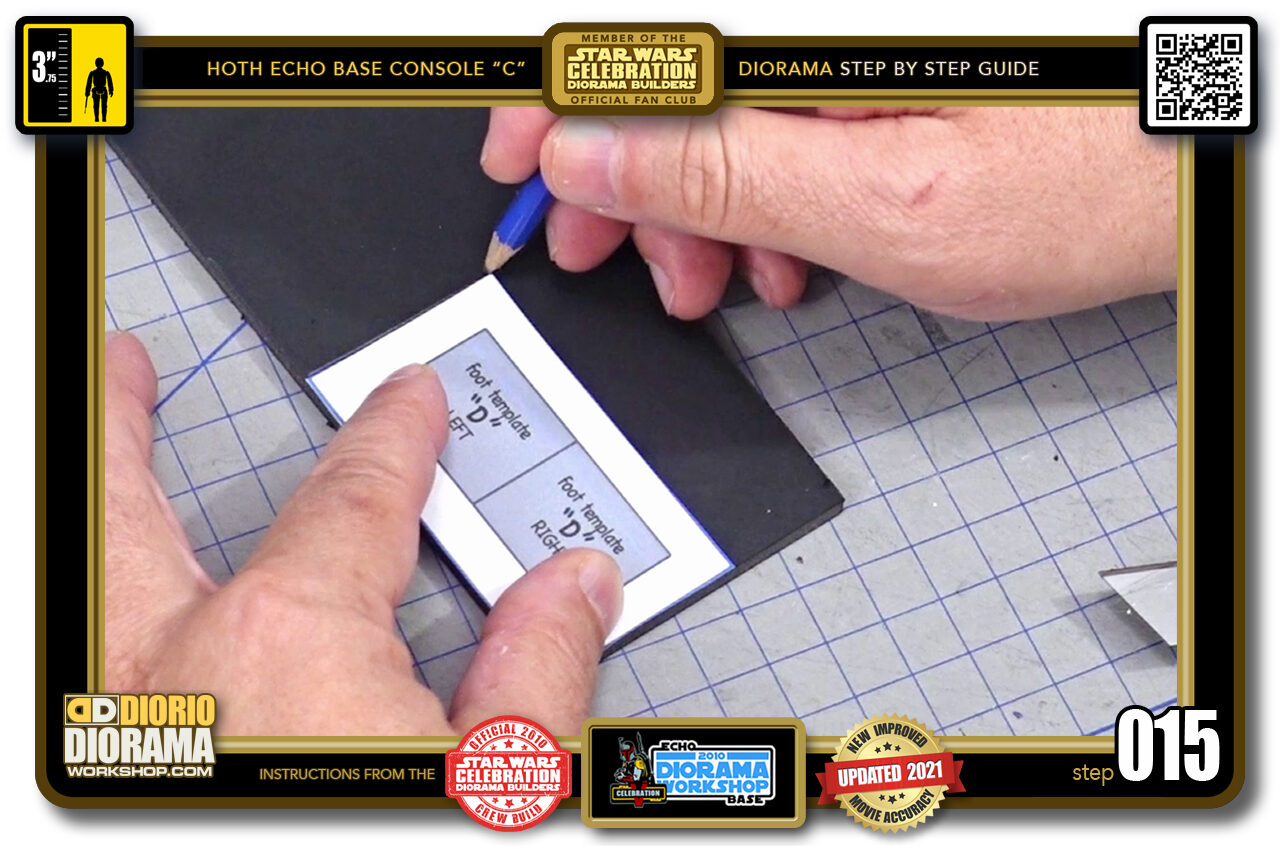
- STEP 015 > We want to do the same with the feet template paper. Place it on a piece of foamcore and trace along the outside.
-
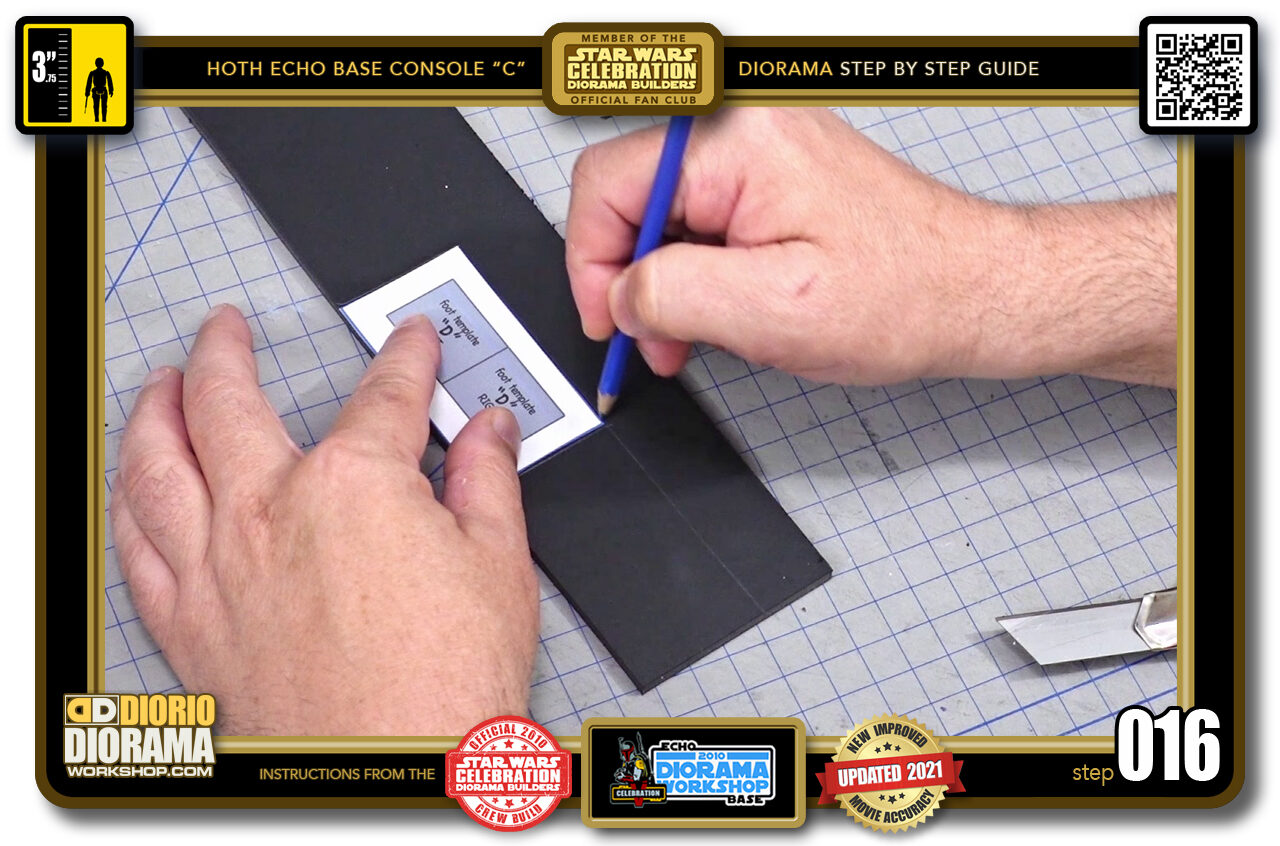
- STEP 016 > Place your paper above the first tracing and trace again.
-
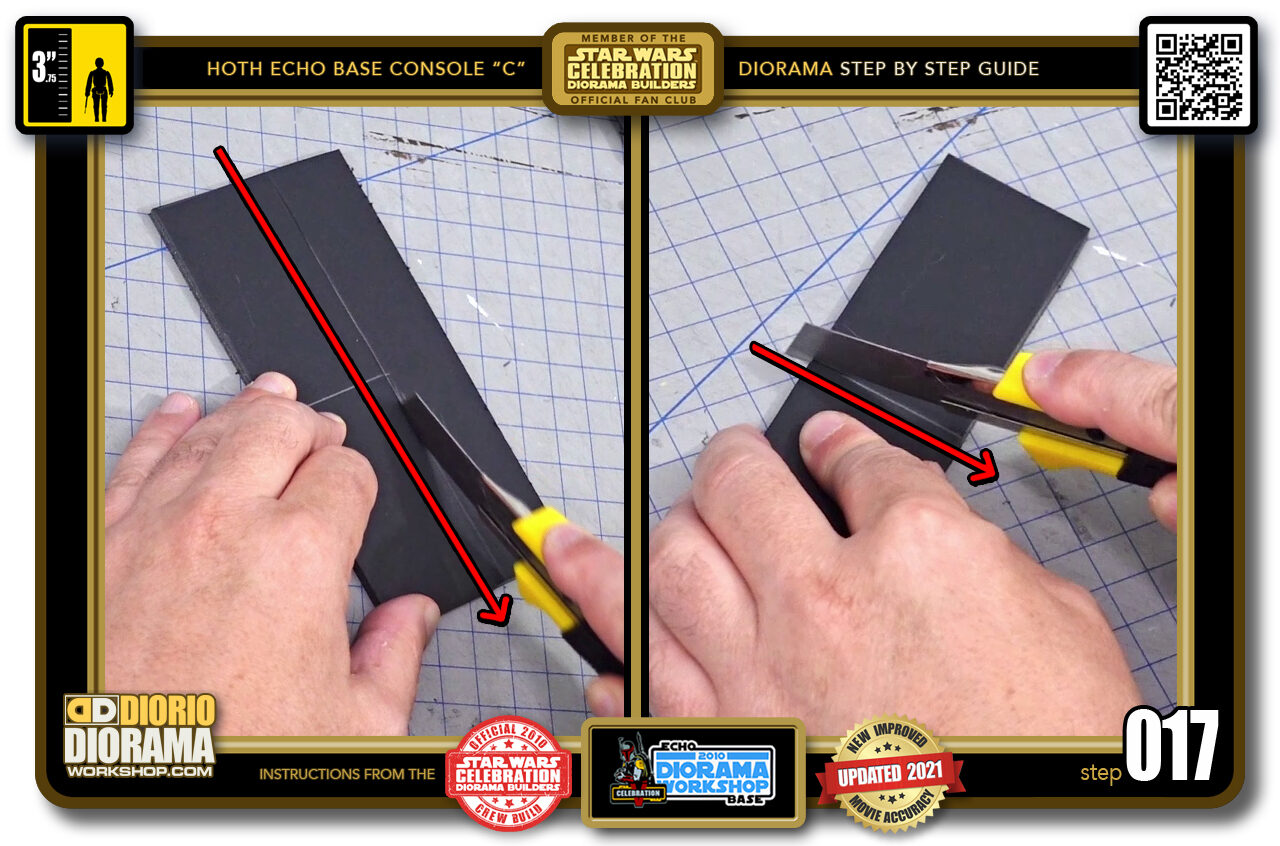
- STEP 017 > Use your X-acto knife to slice off the outside pencil lines first (left image) and then cut the centre line to give you 2 rectangles.
-
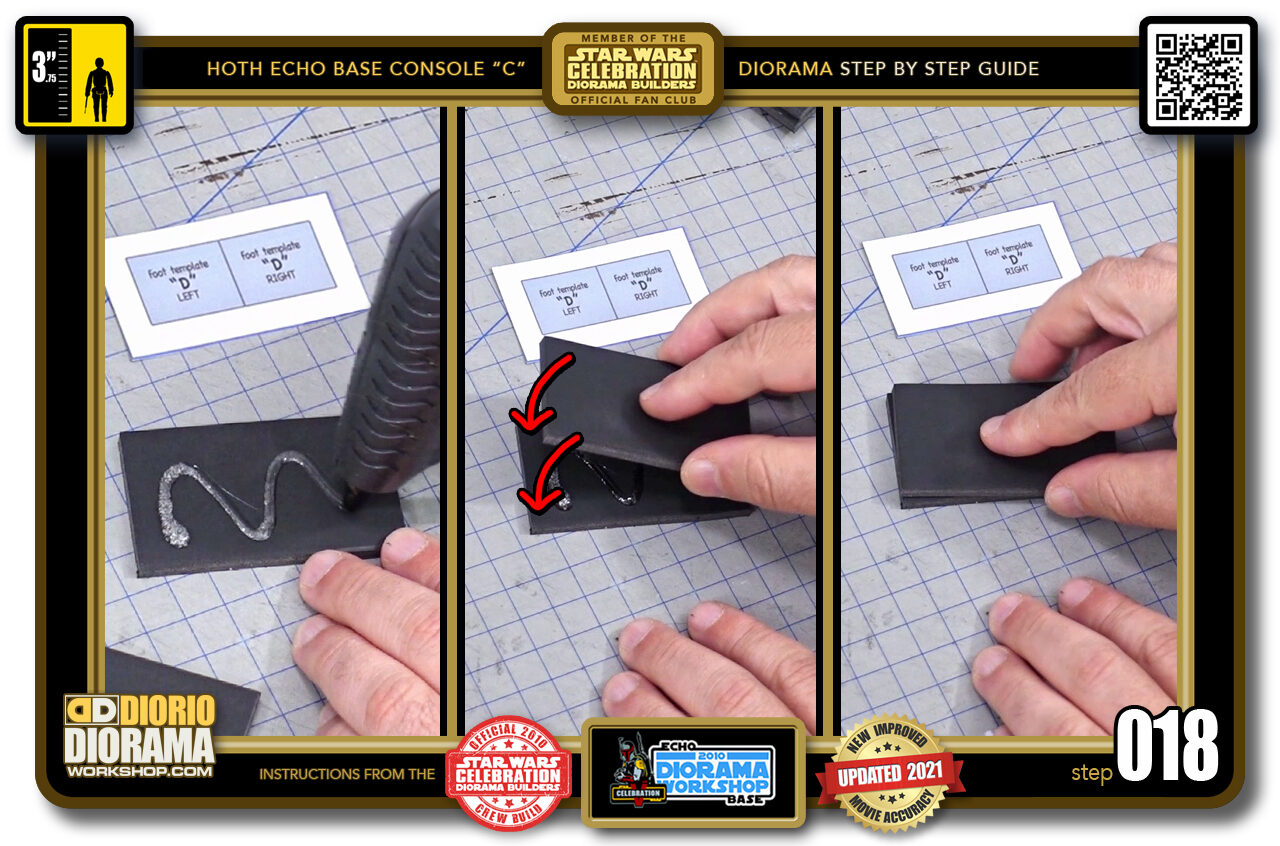
- STEP 018 > We now want to create the multi layer shapes so we can attach the decal templates. Let's start with the smaller "feet" shape. You want to start with a zig zag of hot glue on your first foamcore piece (left image). Then align your 2nd piece with the right corners and lower onto the first (centre image) until they connect (right image).
-
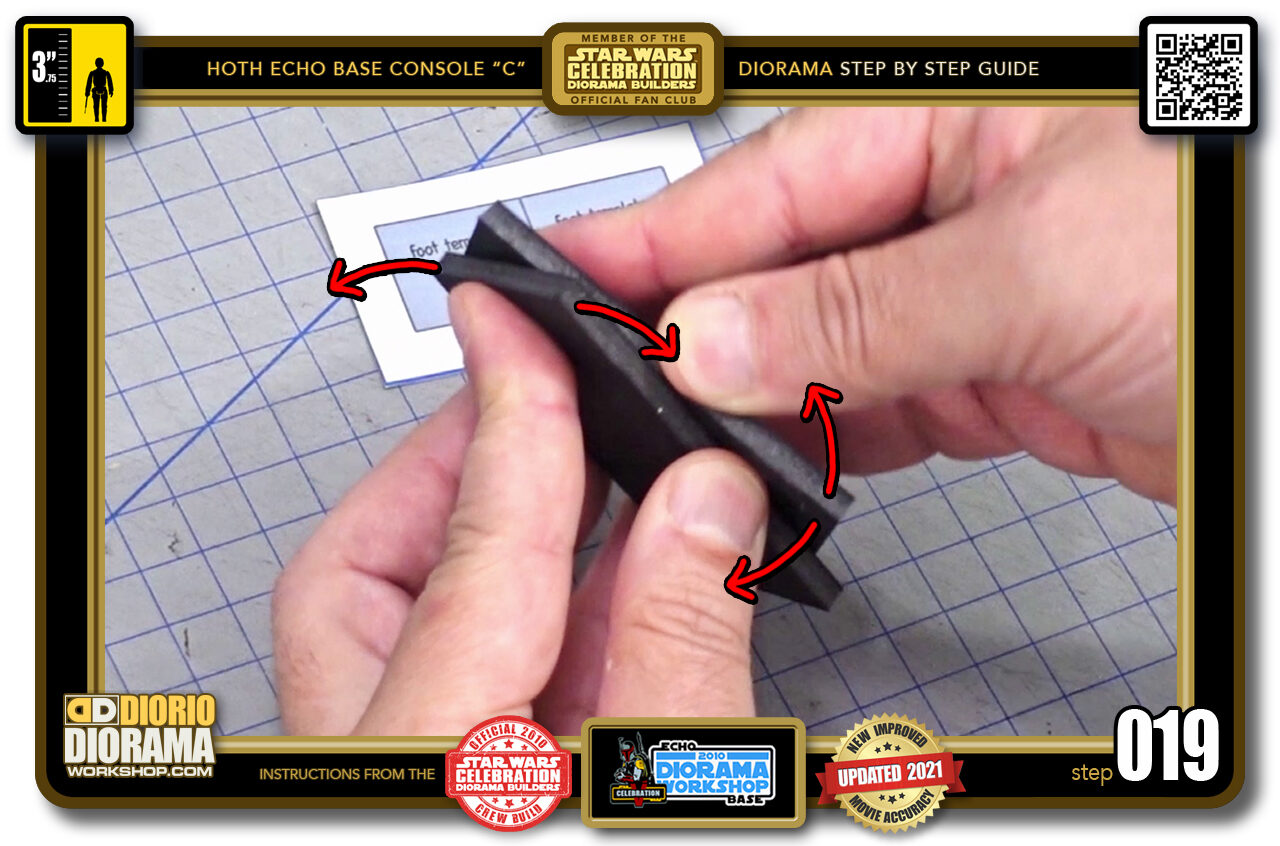
- STEP 019 > Now we want as flat a connection as we can and to do so, we want to smoosh, or spread out the hot glue that is between the layers. To do this just rotate each layer in opposite directions. If you are spinning your bottom piece to the left, you want to spin the top piece to the right. Then reverse the motion. Bottom now to the right and top to the left and reverse again, 2-3 times until you stop when aligned on all sides.
-
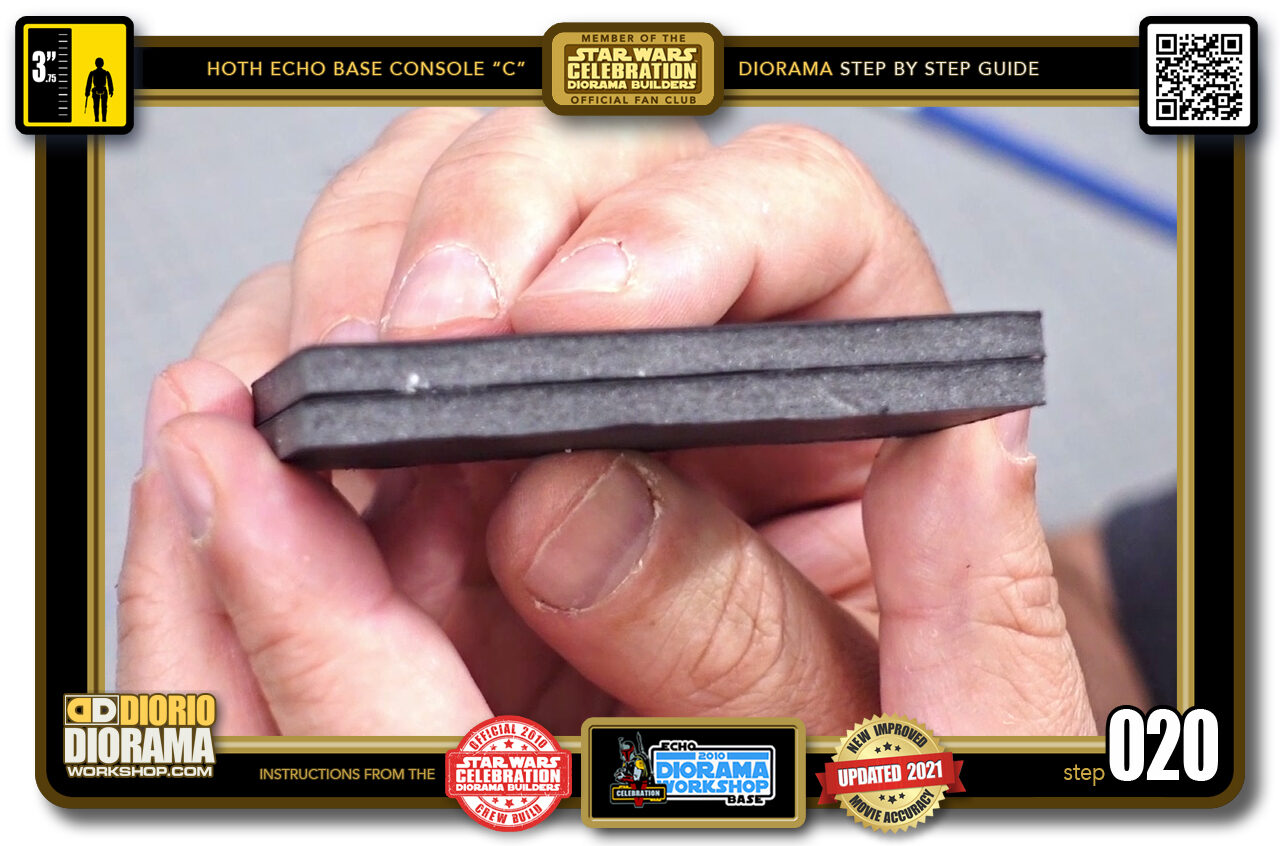
- STEP 020 > Doing these rotations will thin out the hot glue from a "snake" glob to a flat sticky layer which will allow your foamcore layers to be as close to each other as possible. Think of it like if you made a peanut butter sandwhich. If you used a spoon to put the peanut butter you would have a big bump in the middle of your bread, but if you spread it out with a knife evenly, your bread would be nice and even and flat. It's kind of the same thing with the hot glue.

.
Did you already build this Diorama ? At home or at our Star Wars Celebration Diorama Builders workshop ? Would you like to show it in the site’s GALLERY VISITORS DIORAMAS section, YES ? That is Awesome !!! You can find out all the details on how to email me your photos on the VISITORS SUBMISSIONS INFO page … When I get your photos, I will create your very own page just like this one. You may not realize it but work does inspire others to join in the fun of making Action Figure Dioramas.
.
NOT FOR RESALE ALL Decals, tutorials and artwork are ©FrankDiorio (dioramaworkshop.com) and offered FOR FREE to the fans – that would be you ? so you can build and display my diorama designs in your very own home. I realize I cannot control what one does with my graphics once I place them on the web, I can only ask you as one fan to another, please respect the artist and do not be that jerk who uses my designs and tutorials to build a copy of my work only to sell it on EBAY or trade/sale groups and forums. Thank You. Frank.
.

.
.
If you have a facebook account, why not join the Official Diorama Builders Fan Club today, simply click the logo link below.
 .
.
Catch up with fellow visitors and exchange stories, read cool interviews with the crew, exchange photos, fun surprises and grab some FAN ONLY merchandise next year at actual future conventions ?
.
©2021 Frank Diorio DioramaWorkshop.Com
.
IF YOU LIKE WHAT YOU SEE, PLEASE SHARE WITH YOUR FRIENDS
USING THE SOCIAL MEDIA BUTTONS BELOW