


-
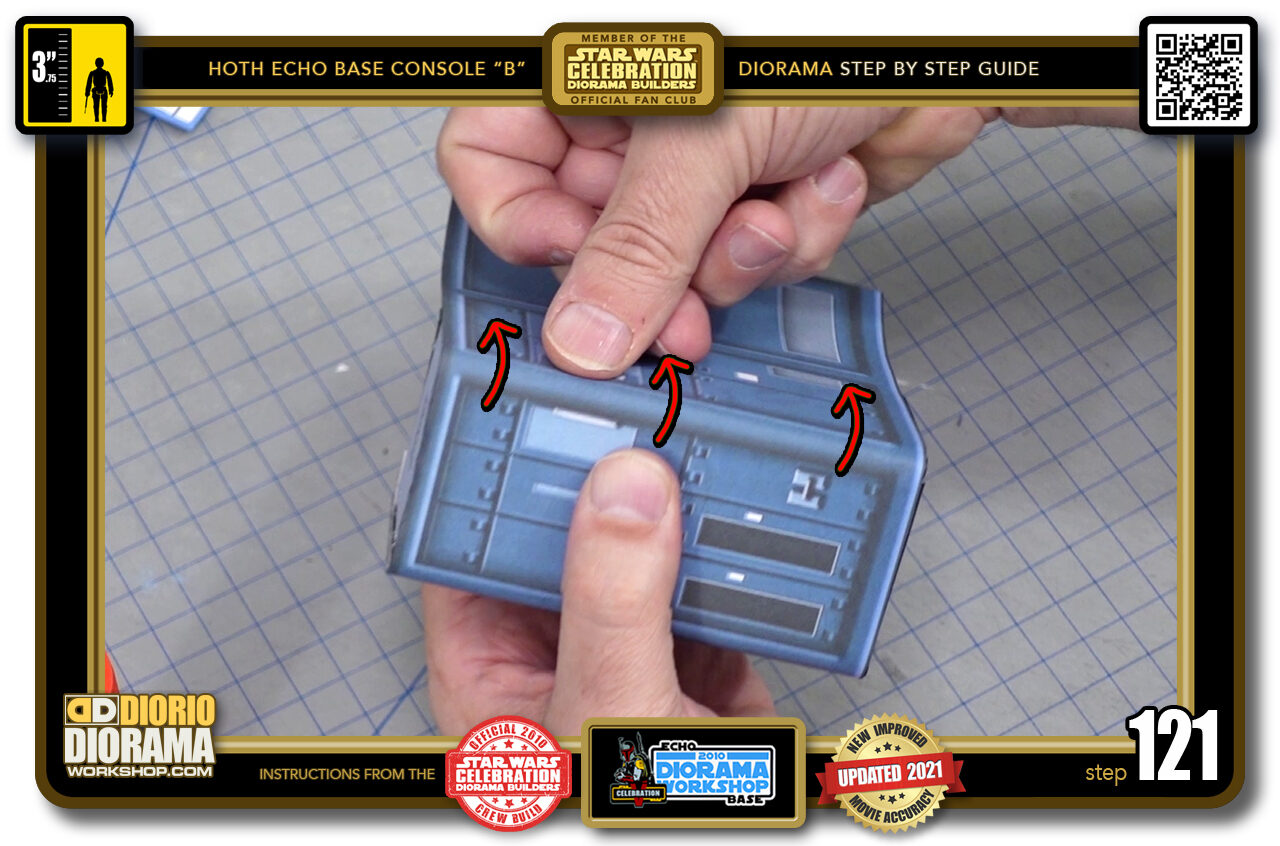
- STEP 121 > Press around the corner all along the side of the decal to start it's curve memory.
-
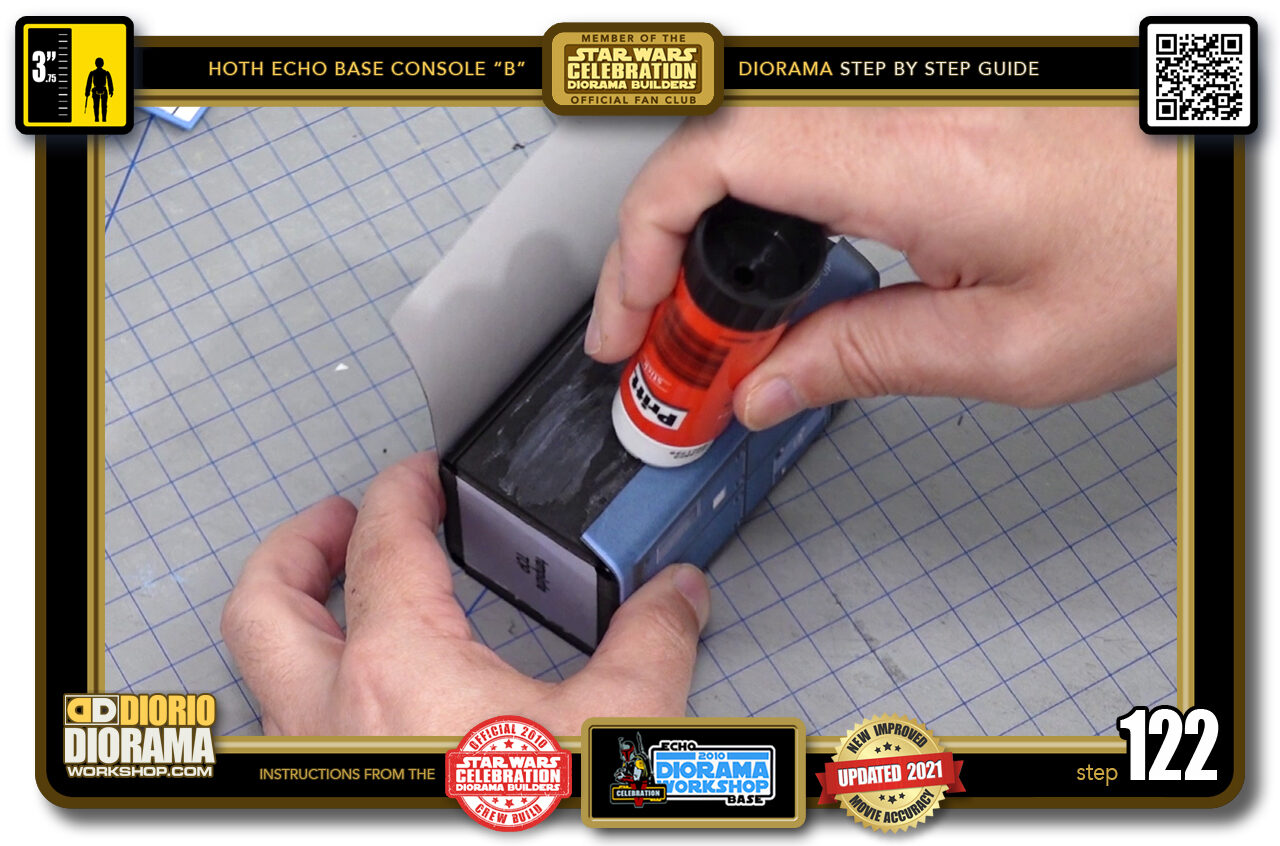
- STEP 122 > Apply some gluestick on the last exposed foamie side. Make sure to put some on top of the THIS SIDE UP lip as well so that when the decal overlaps it will connect and blend seamlessly.
-
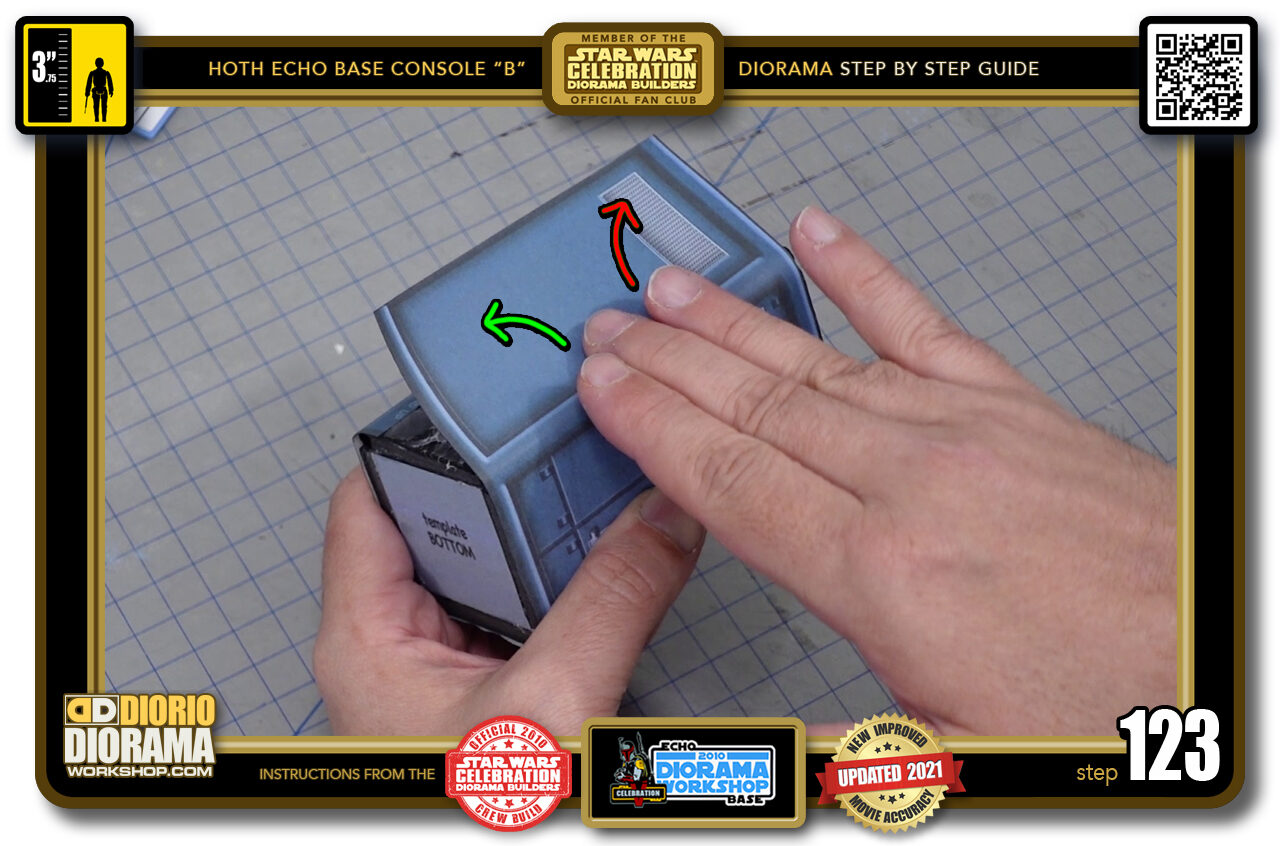
- STEP 123 > You know the technique by now, Start centre bottom work your way up left (green arrow) then back centre bottom and work your way up to top right (red arrow)
-
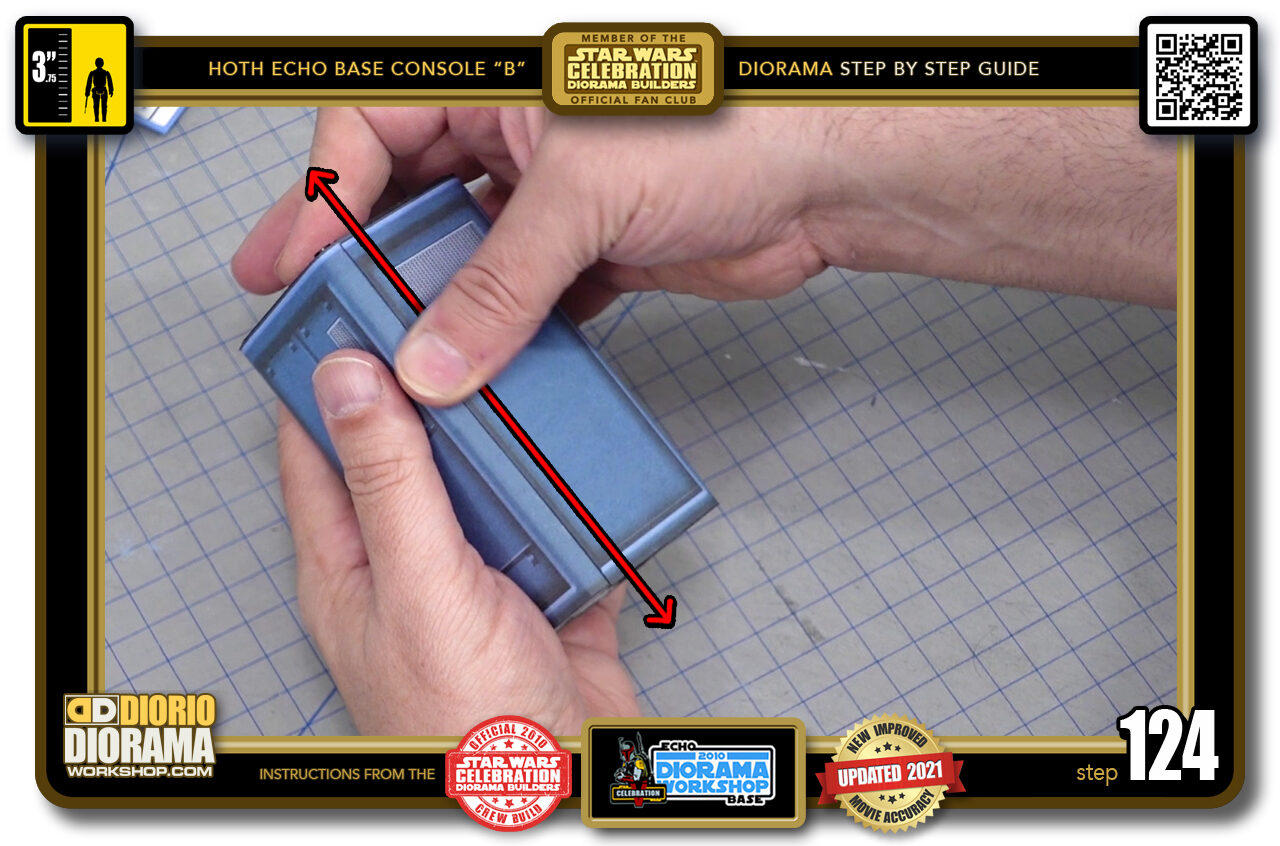
- STEP 124 > When your decal has made contact with the entire surface and smooth (no bubbles or folds) use your thumb to press down over the end seam to make sure the decal edge blends and makes full contact with the decal lip underneath.
-
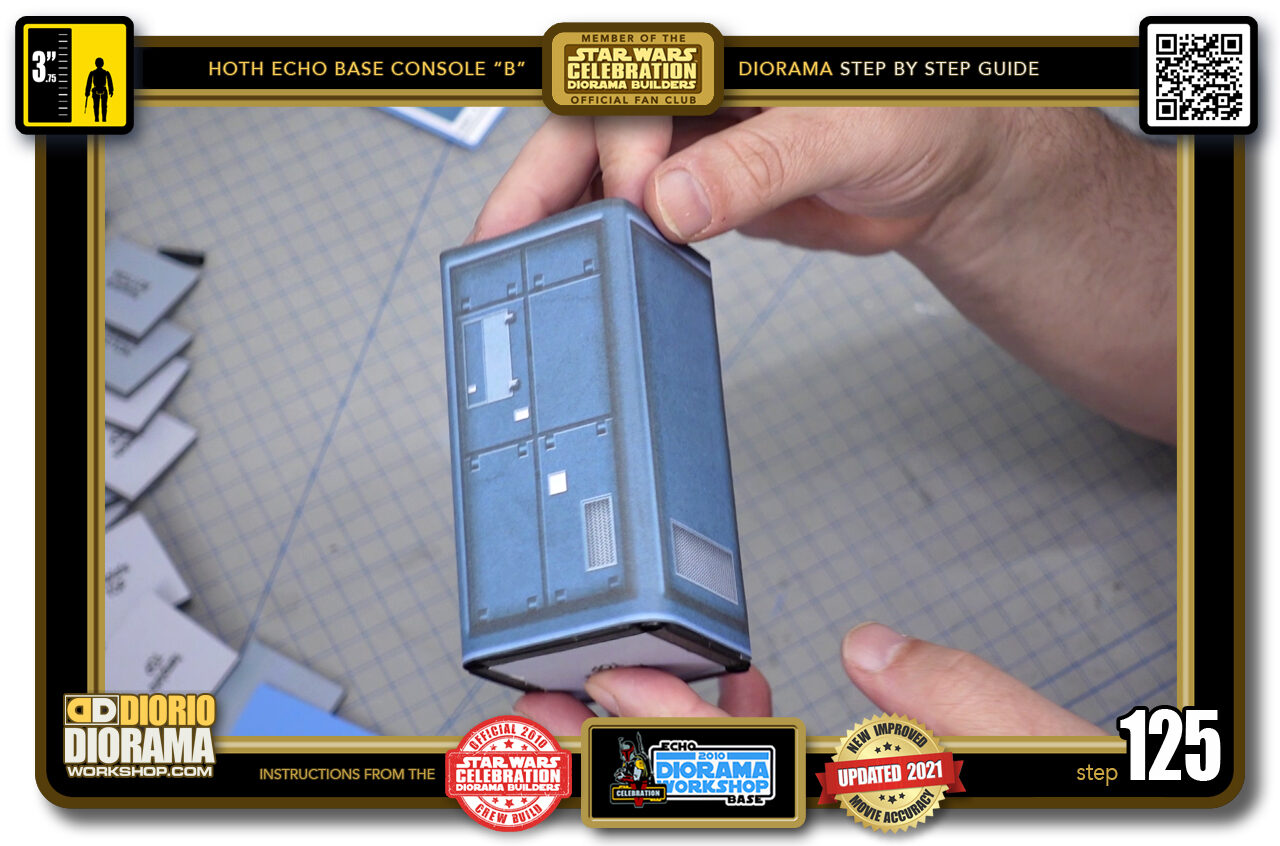
- STEP 125 > Your decal wrap is now done.
-
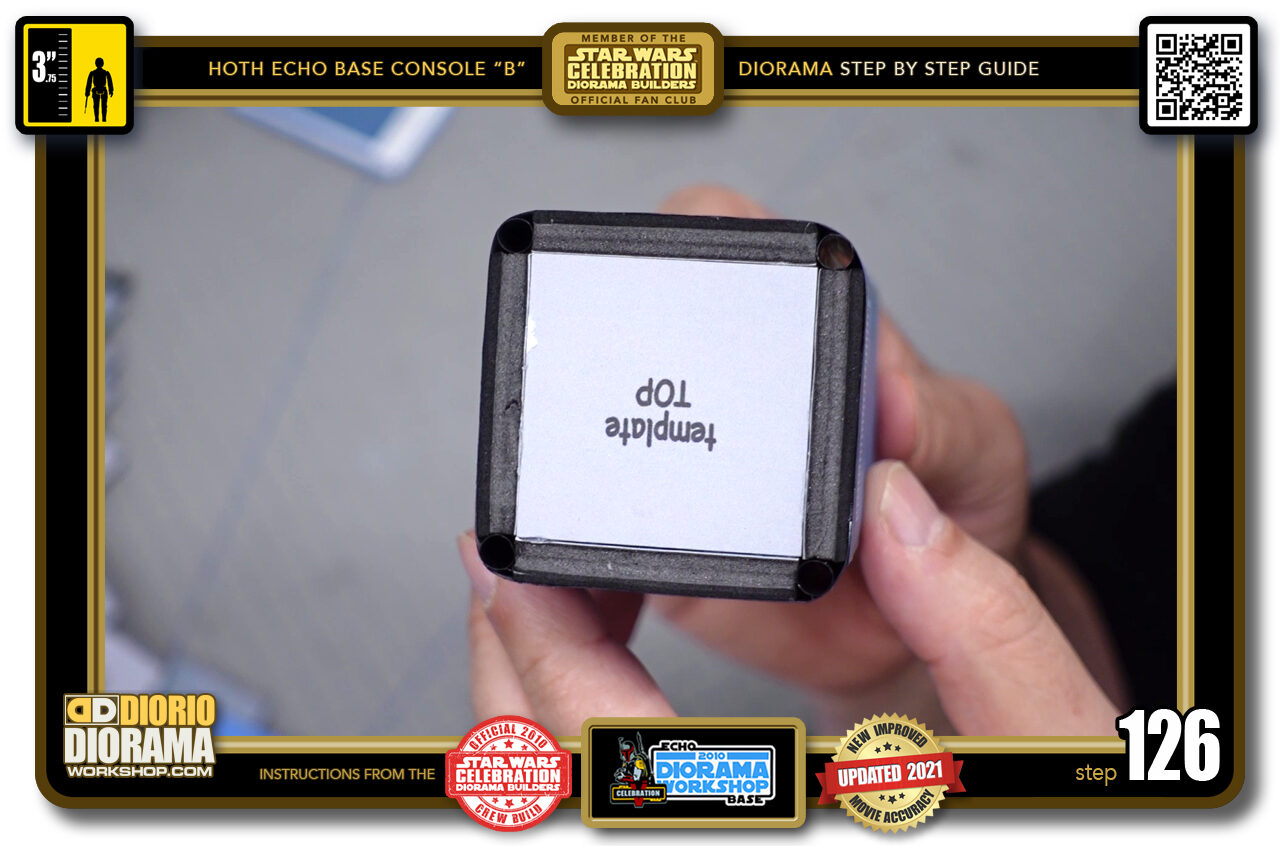
- STEP 126 > See how the rounded corners look just like in the movie ?
-
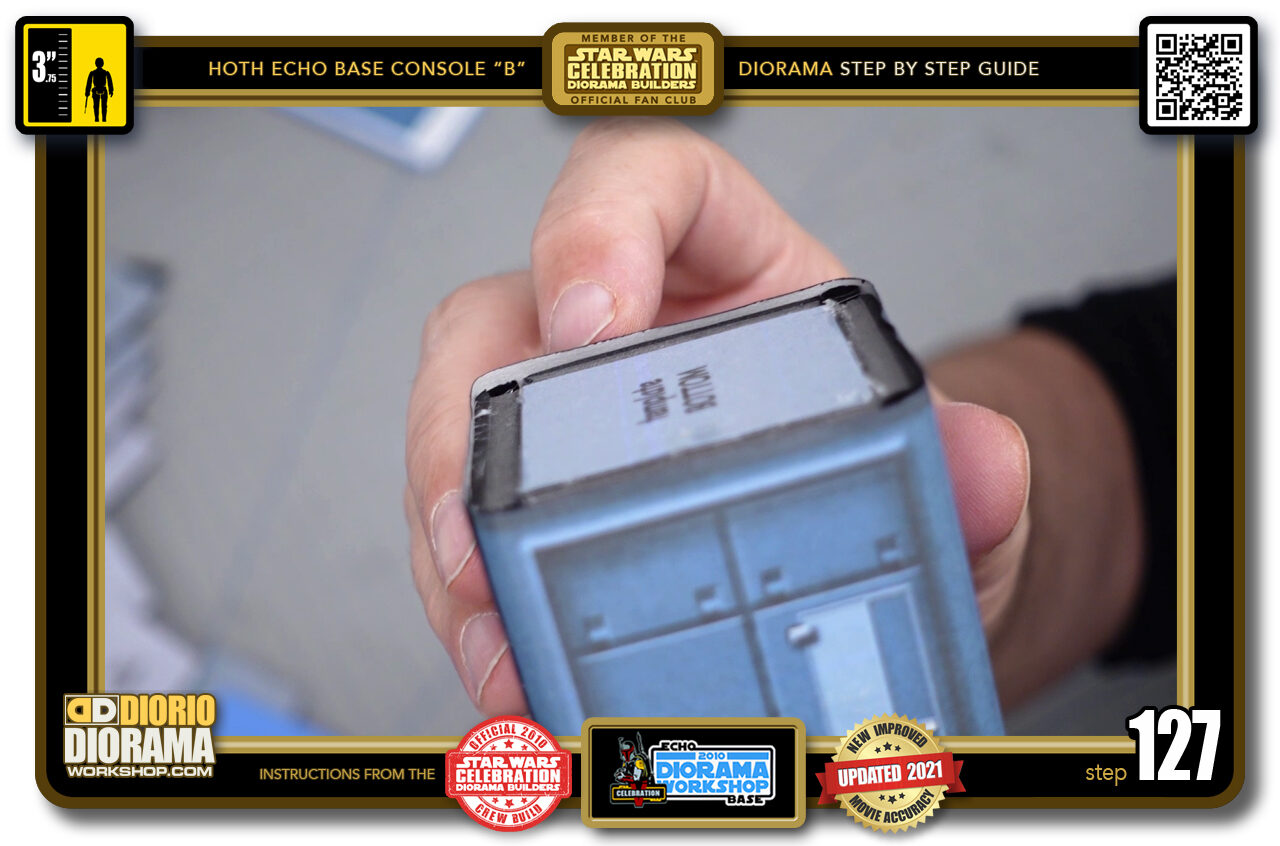
- STEP 127 > Now if you have some little decal sticking past the top and bottom edges like this, it is very easy to fix.
-
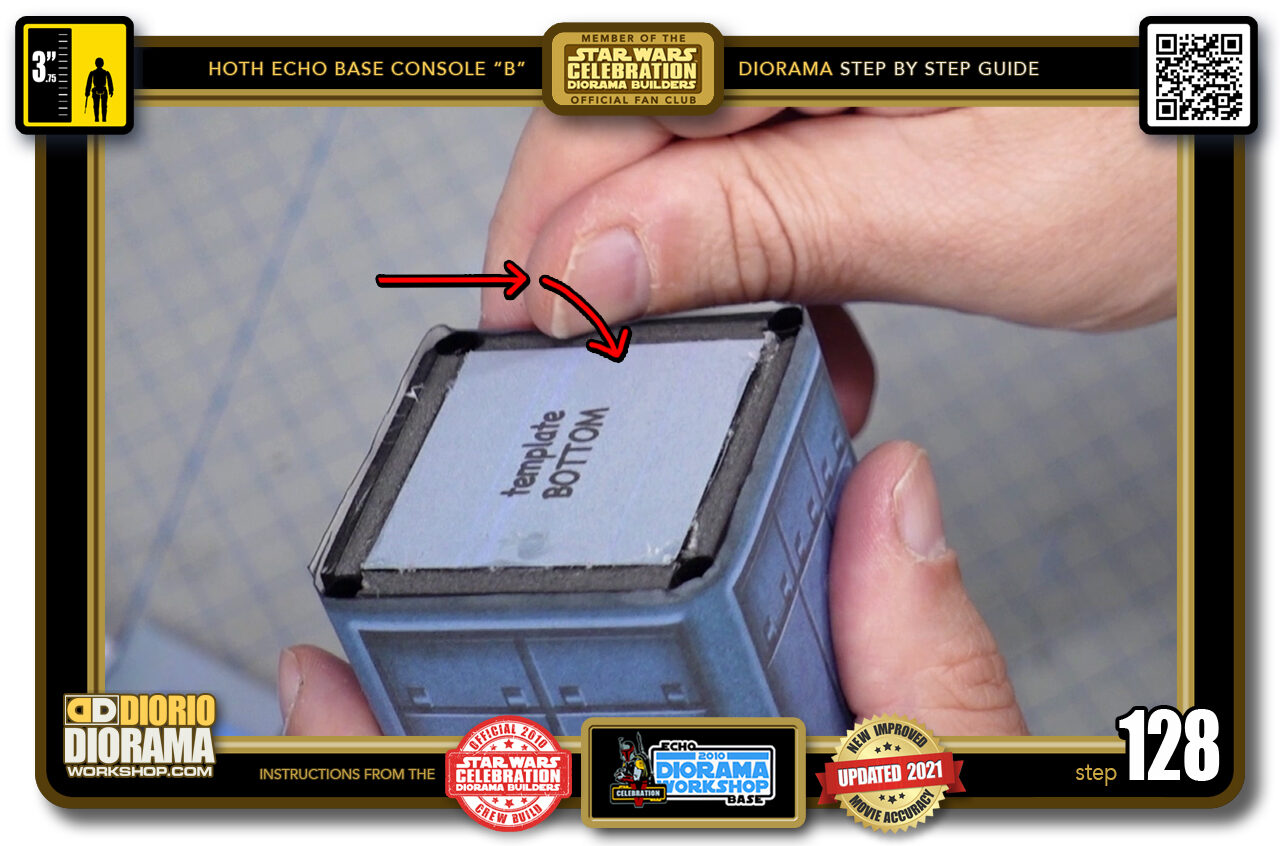
- STEP 128 > Using my trusted fingernail technique, slide your thumb along the edge while curving it towards the centre of the square. This will flatten and prepare your surface area to receive the top and bottom decal skin foamies. ALWAYS FOLD INWARDS. If you moved your thumb in the opposite direction you would be ripping and tearing your decal off from the surface. We certainly don't want that.
-
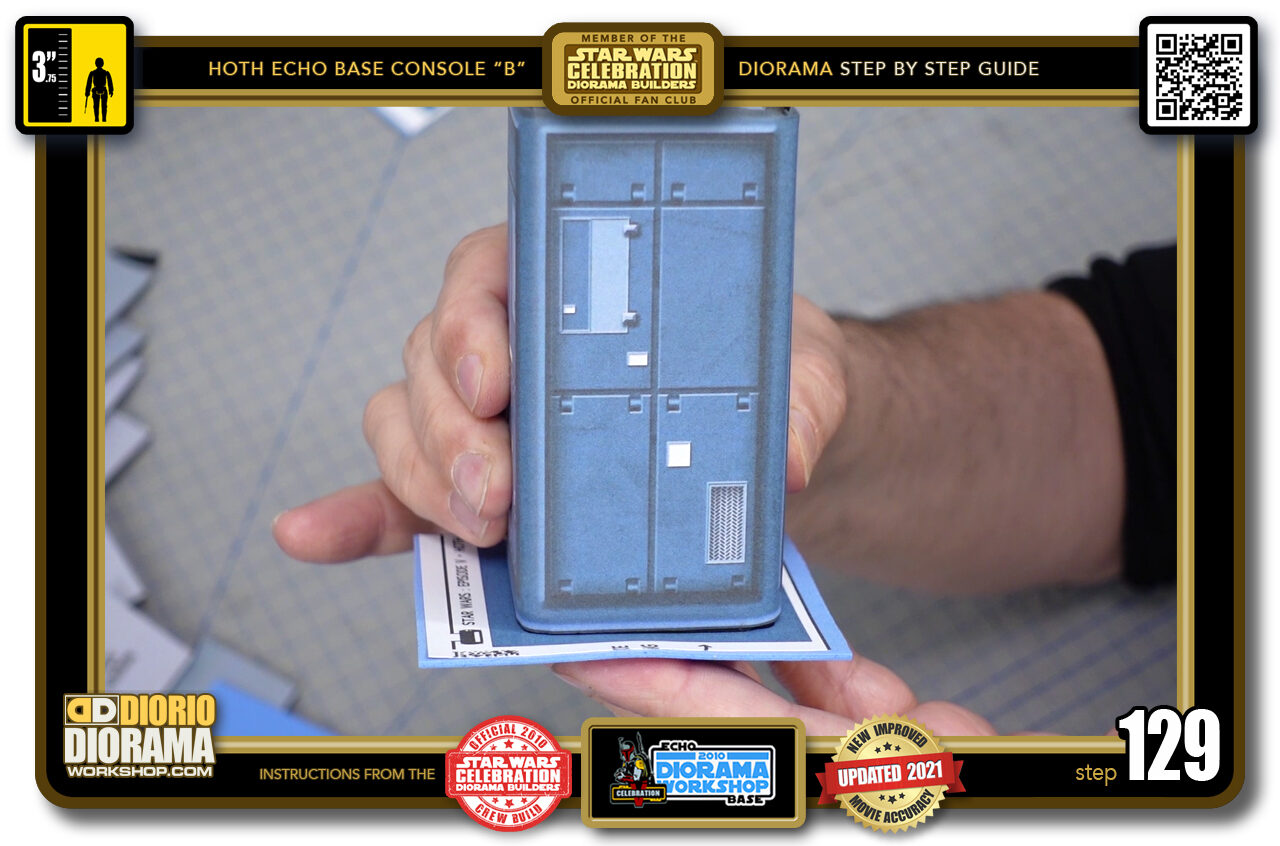
- STEP 129 > Now we need to glue the top and bottom pieces.
-
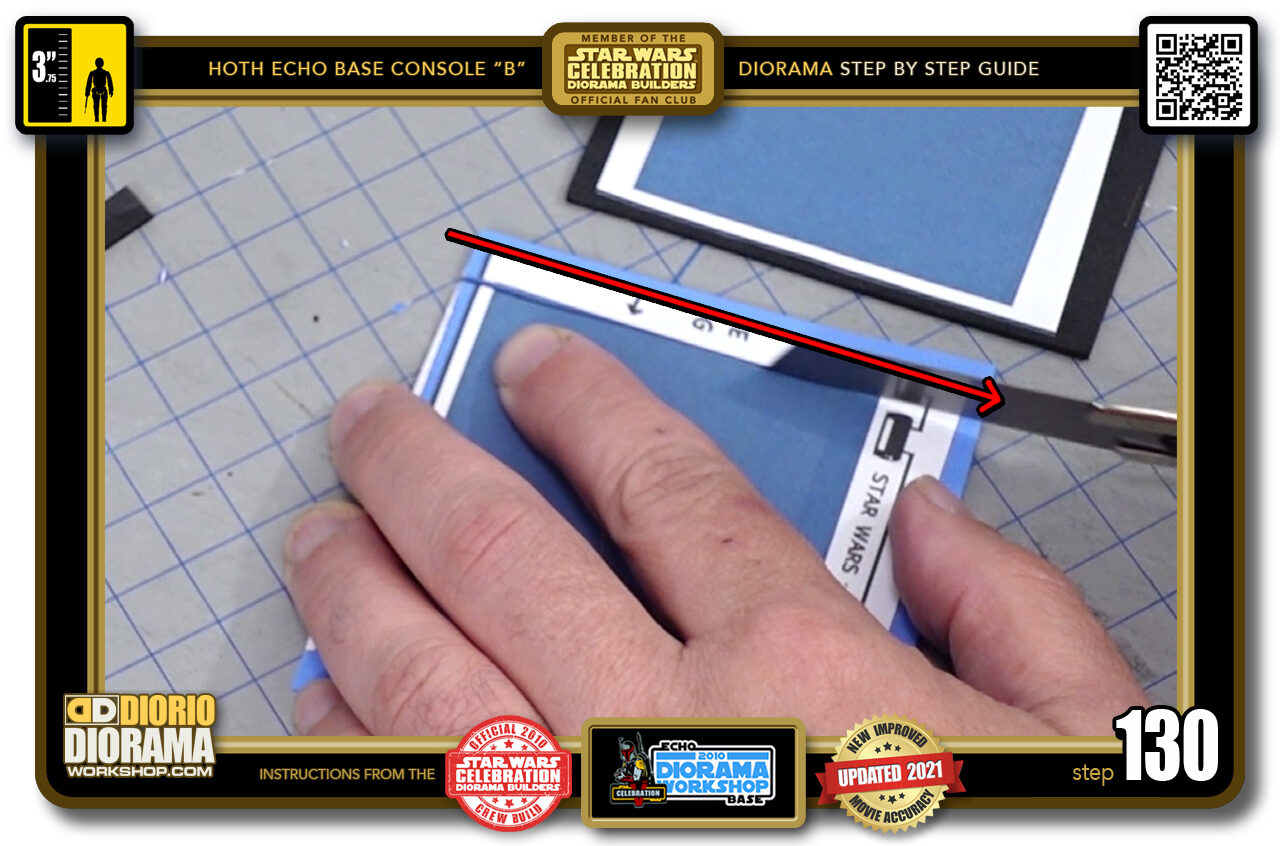
- STEP 130 > First thing to do is properly trim off all outside excess on all 4 sides of your squares.
-
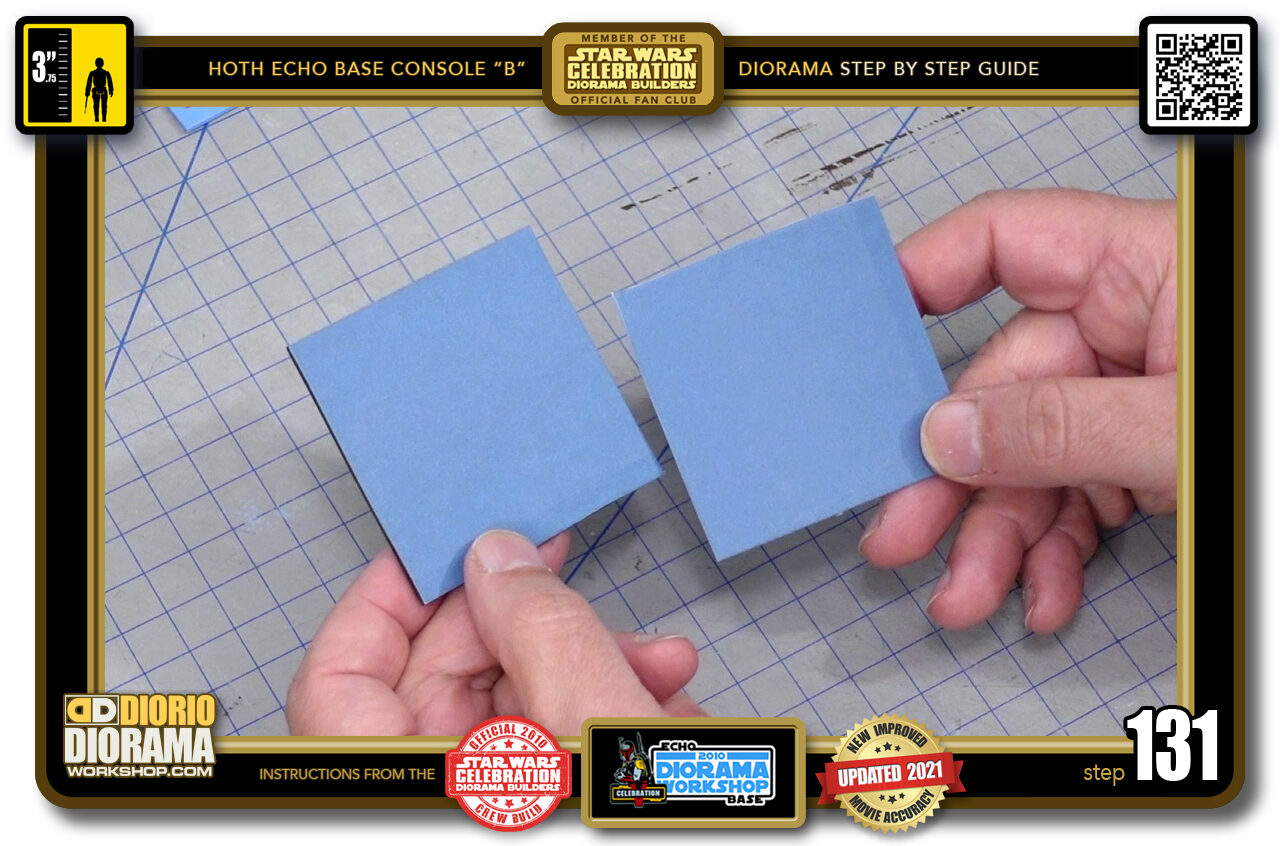
- STEP 131 > You want to end up with 2 perfect decal squares like this. And yes, even trimmed they are LARGER than the top and bottom shapes. This is wanted.
-
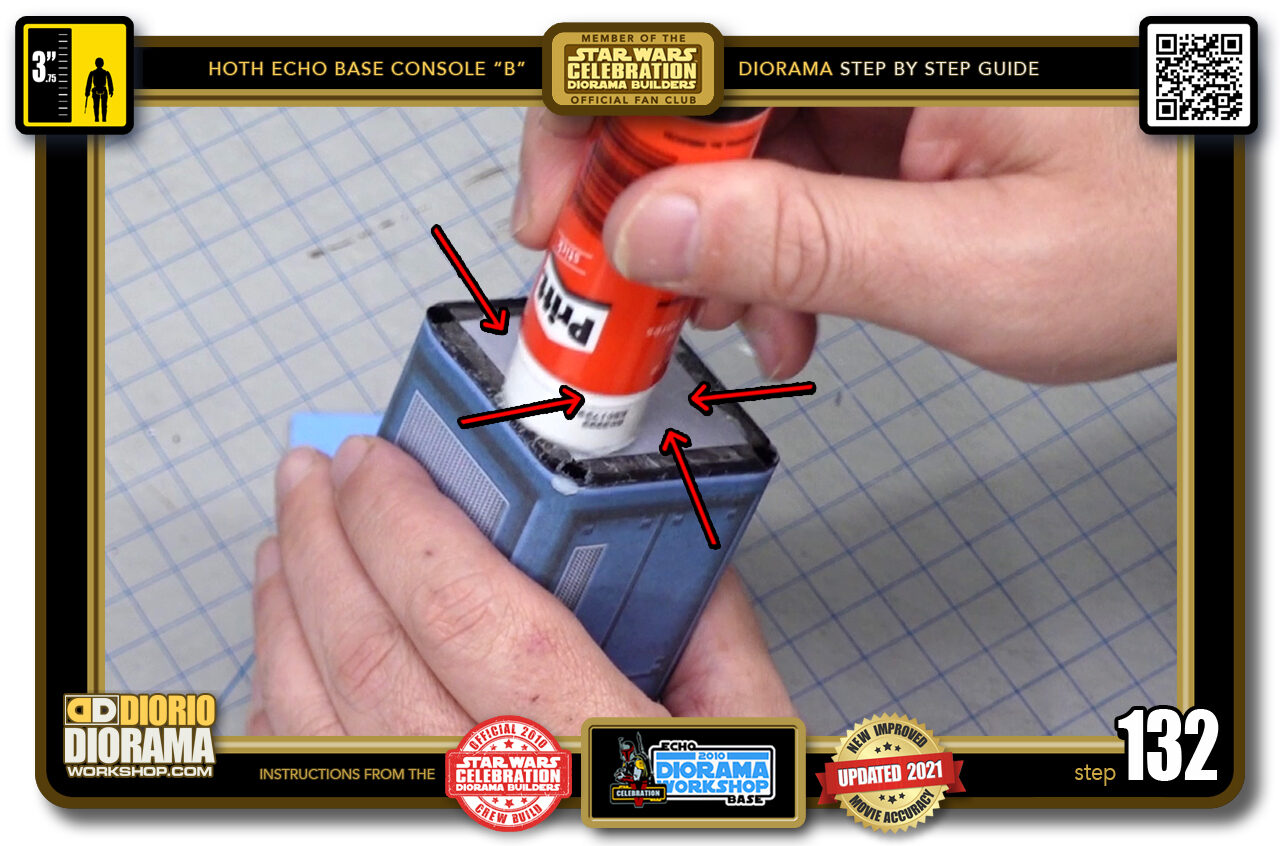
- STEP 132 > Apply some gluestick to the entire surface. ALWAYS bring the stick INWARDS just like you did with your thumb. If you were to apply outwards from the centre you would tear off the decal. You DON'T want that after all the hard work we put in so far.
-
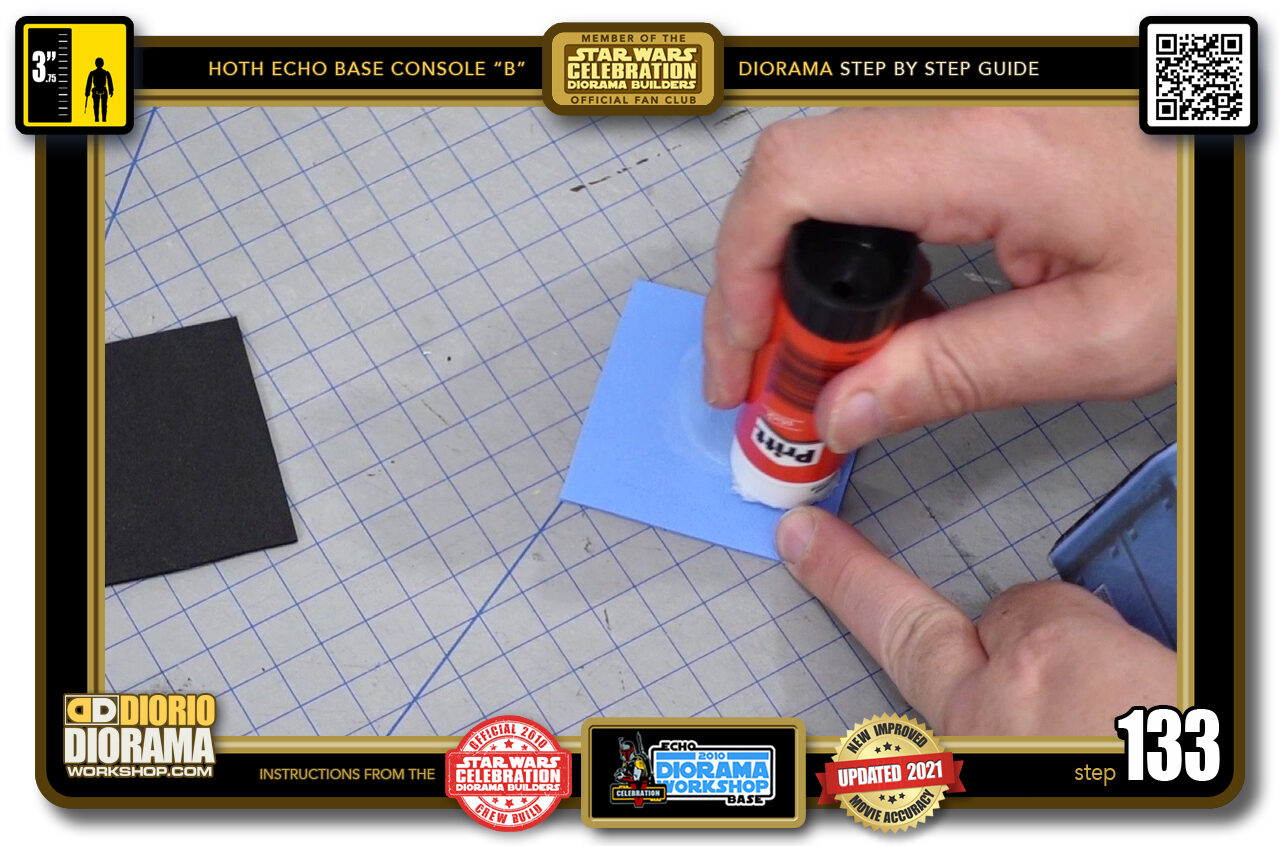
- STEP 133 > We want the decal side to face out, which means you want to place the decal side onto the table surface and apply some gluestick (NEVER HOT GLUE) onto the foamie side.
-
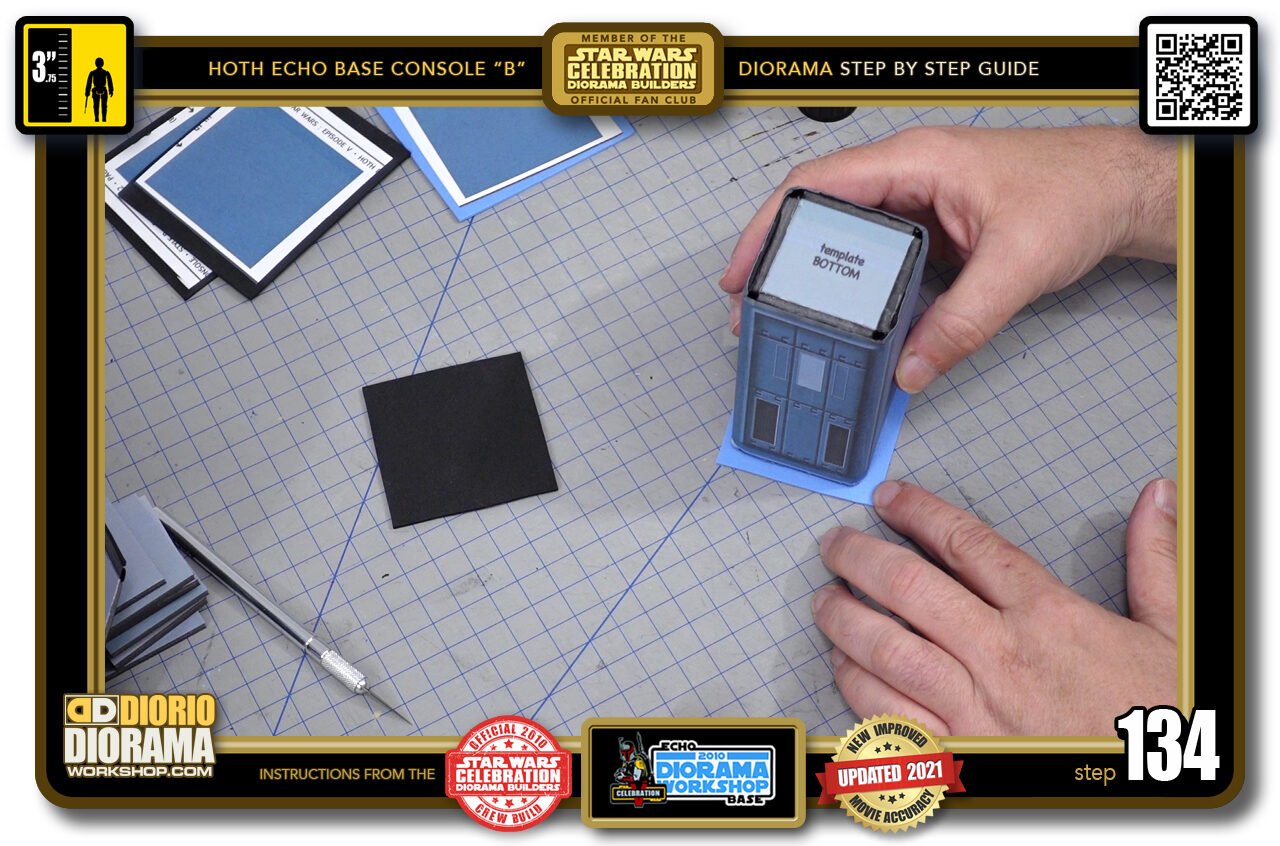
- STEP 134 > You can now place the console body on top of the foamie. If you are using blue for the bottom like I am make sure it is on the end with the decal blue highlight, and the black on the dark shadow emboss end. That is if you are doing 2 colour foamies. If your foamie is the same on both ends, this does not matter.
-
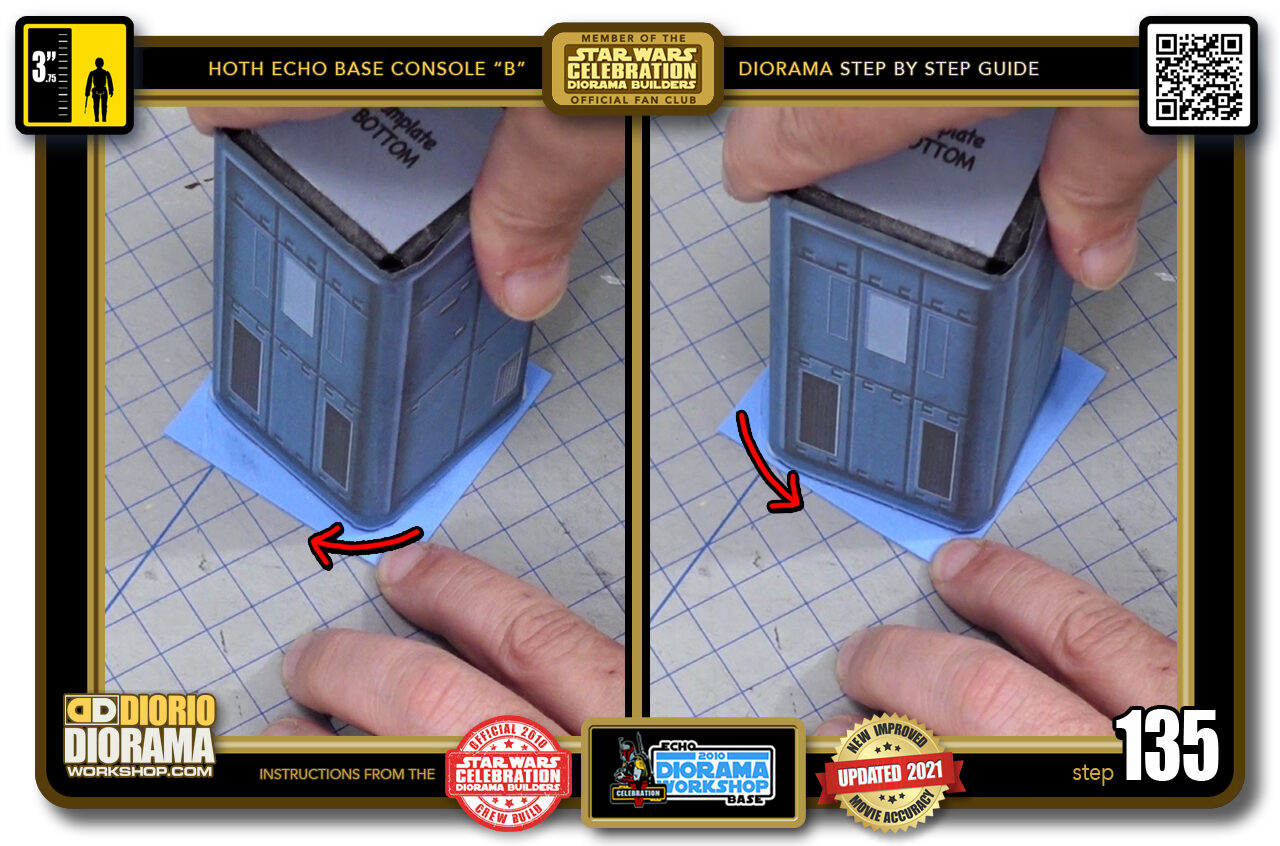
- STEP 135 > Because we put gluestick on both surfaces, when they touch, you can still move them around a little. To obtain maximum strength and a tight contact, rotate your console body a little to the right (left image) and a little to the left (right image) a couple of times and stop when it's centred with equal excess on all sides.
-
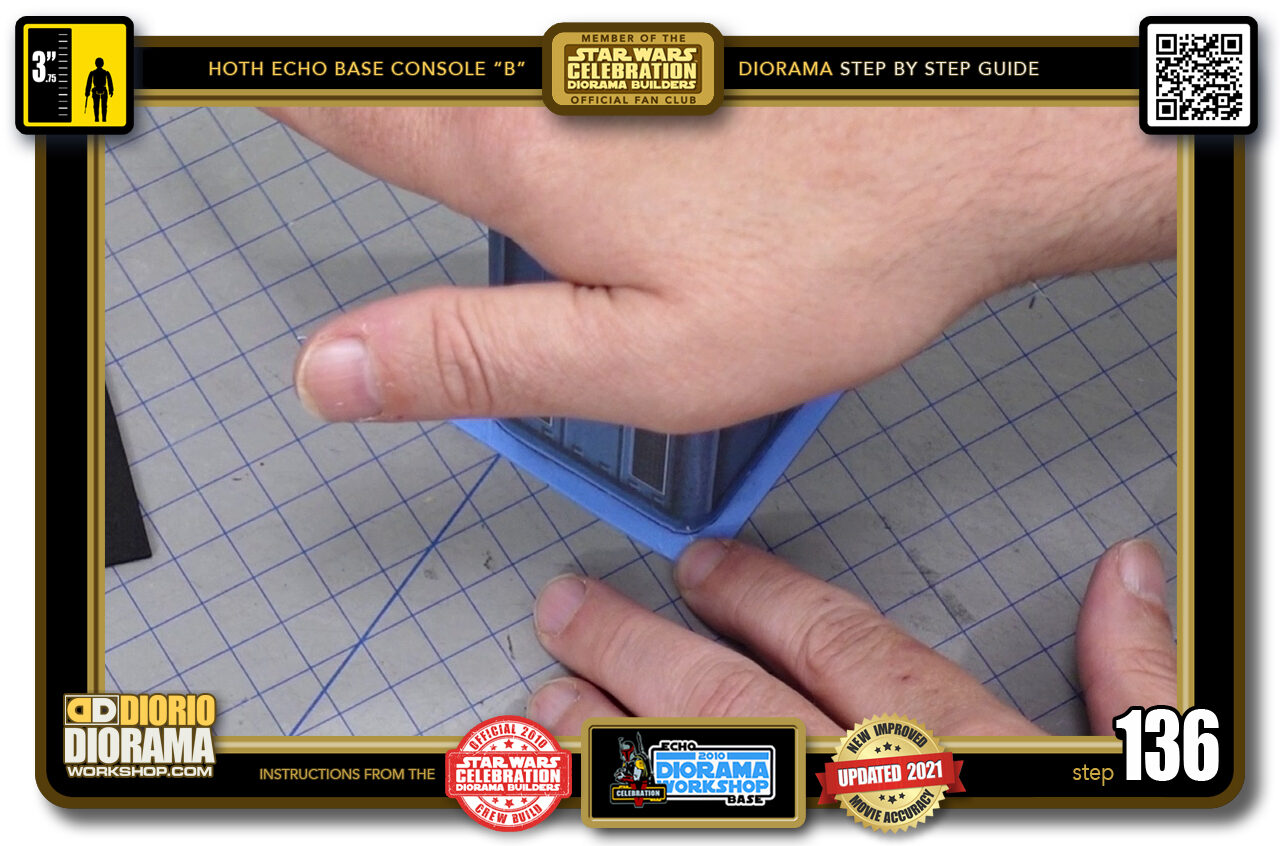
- STEP 136 > Press down one last time and let dry for a few minutes.
-
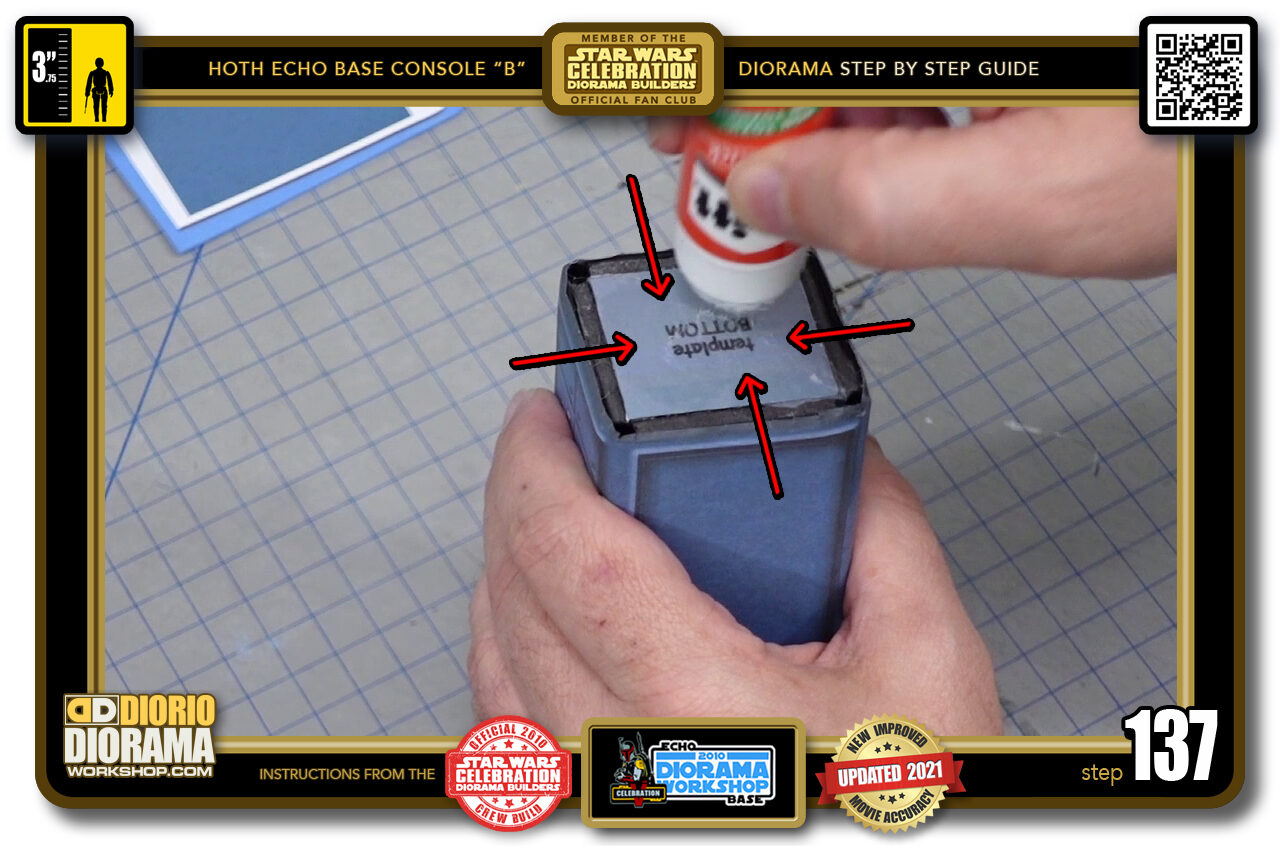
- STEP 137 > Repeat the same steps for the other end of your console. Always gluestick INWARDS (red arrows).
-
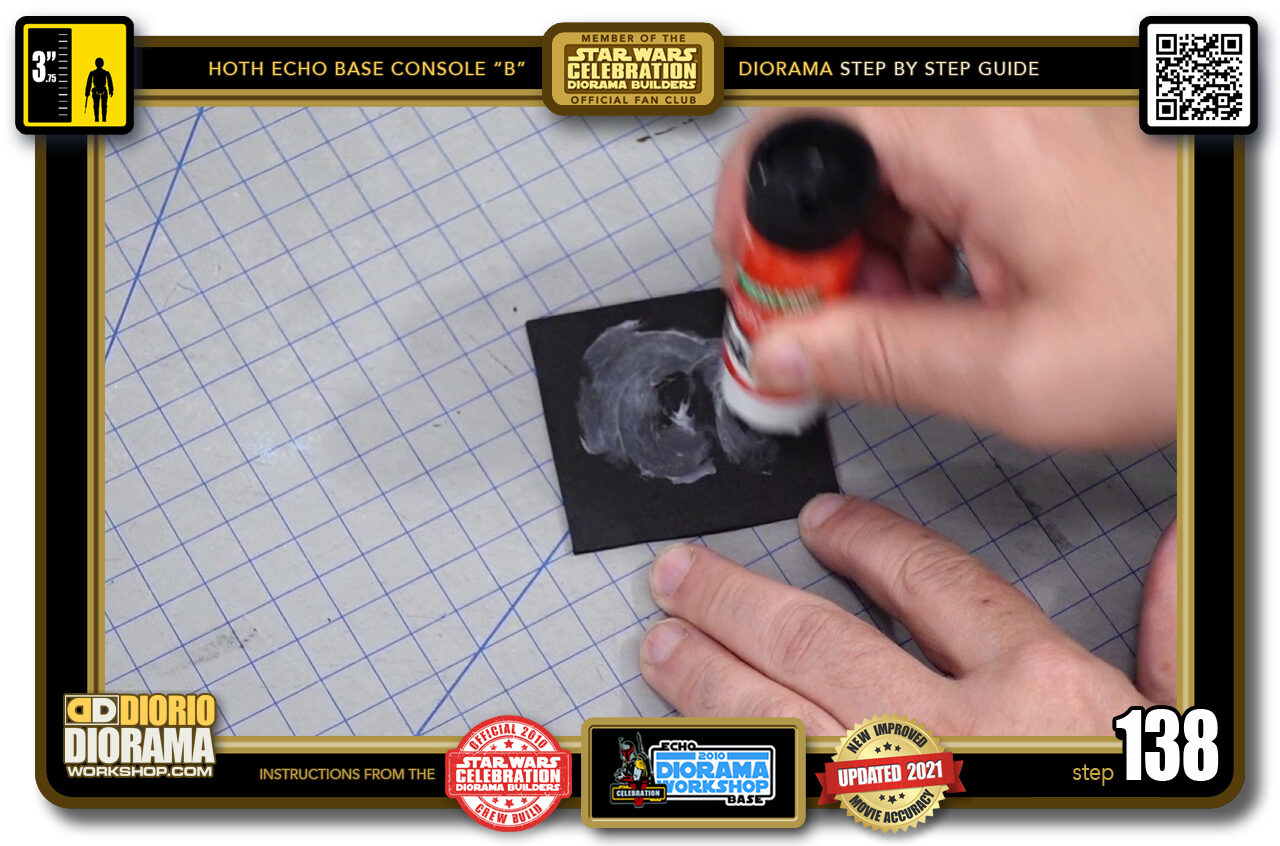
- STEP 138 > Gluestick on the foamie side.
-
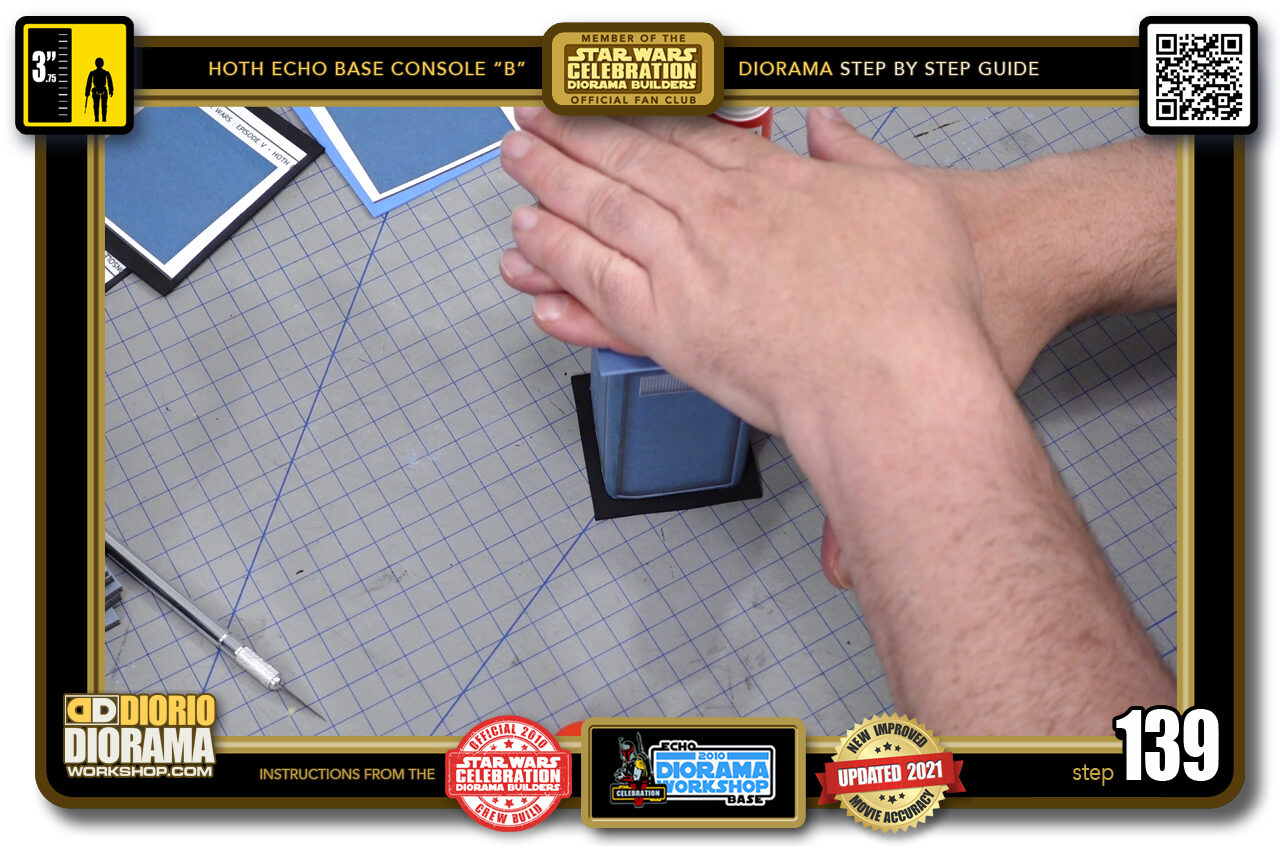
- STEP 139 > rotate and centre and press down.
-
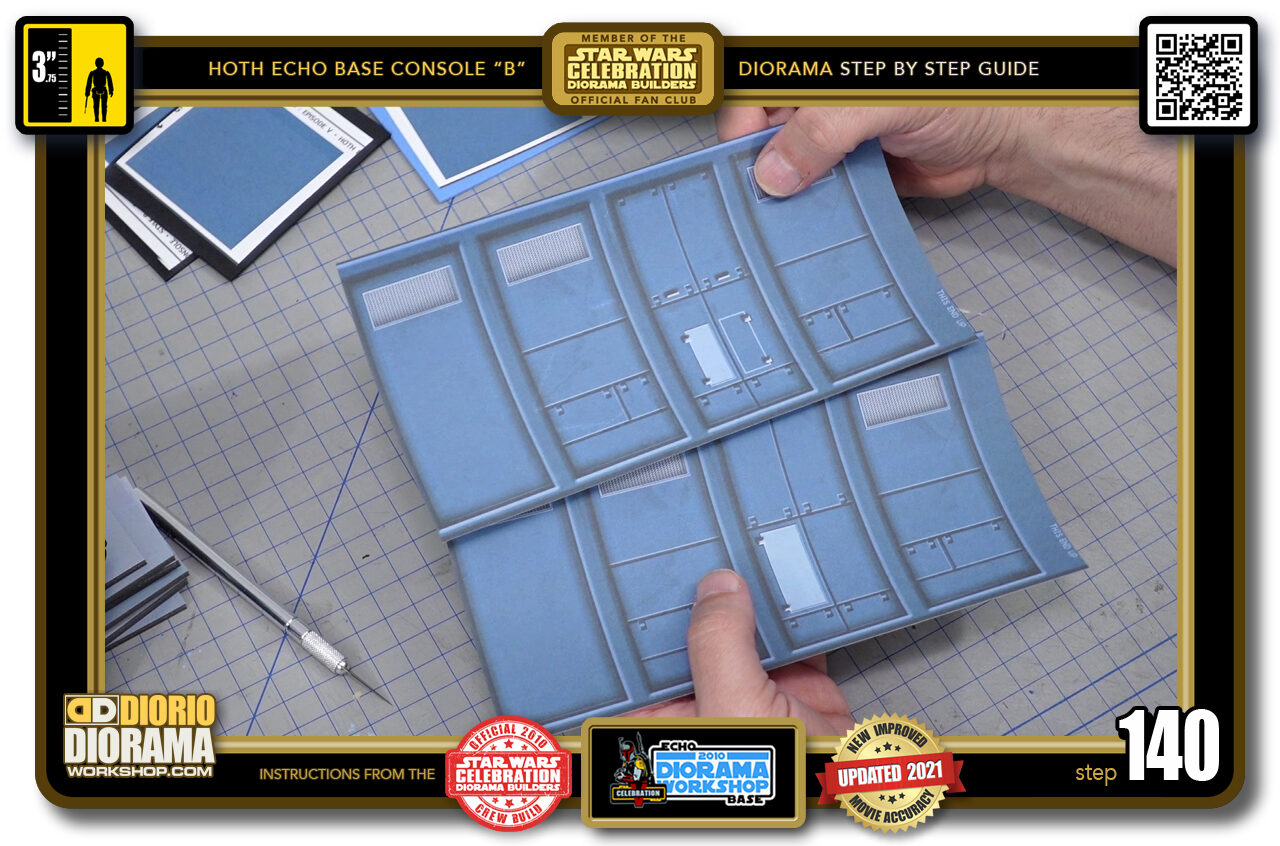
- STEP 140 > If you want to place a variety of consoles in your Hoth Echo base diorama, you can use one of the remaining 3 decal skins from the DECALS PDF.

.
Did you already build this Diorama ? At home or at our Star Wars Celebration Diorama Builders workshop ? Would you like to show it in the site’s GALLERY VISITORS DIORAMAS section, YES ? That is Awesome !!! You can find out all the details on how to email me your photos on the VISITORS SUBMISSIONS INFO page … When I get your photos, I will create your very own page just like this one. You may not realize it but work does inspire others to join in the fun of making Action Figure Dioramas.
.
NOT FOR RESALE ALL Decals, tutorials and artwork are ©FrankDiorio (dioramaworkshop.com) and offered FOR FREE to the fans – that would be you ? so you can build and display my diorama designs in your very own home. I realize I cannot control what one does with my graphics once I place them on the web, I can only ask you as one fan to another, please respect the artist and do not be that jerk who uses my designs and tutorials to build a copy of my work only to sell it on EBAY or trade/sale groups and forums. Thank You. Frank.
.

.
.
If you have a facebook account, why not join the Official Diorama Builders Fan Club today, simply click the logo link below.
 .
.
Catch up with fellow visitors and exchange stories, read cool interviews with the crew, exchange photos, fun surprises and grab some FAN ONLY merchandise next year at actual future conventions ?
.
©2021 Frank Diorio DioramaWorkshop.Com
.
IF YOU LIKE WHAT YOU SEE, PLEASE SHARE WITH YOUR FRIENDS
USING THE SOCIAL MEDIA BUTTONS BELOW