


-
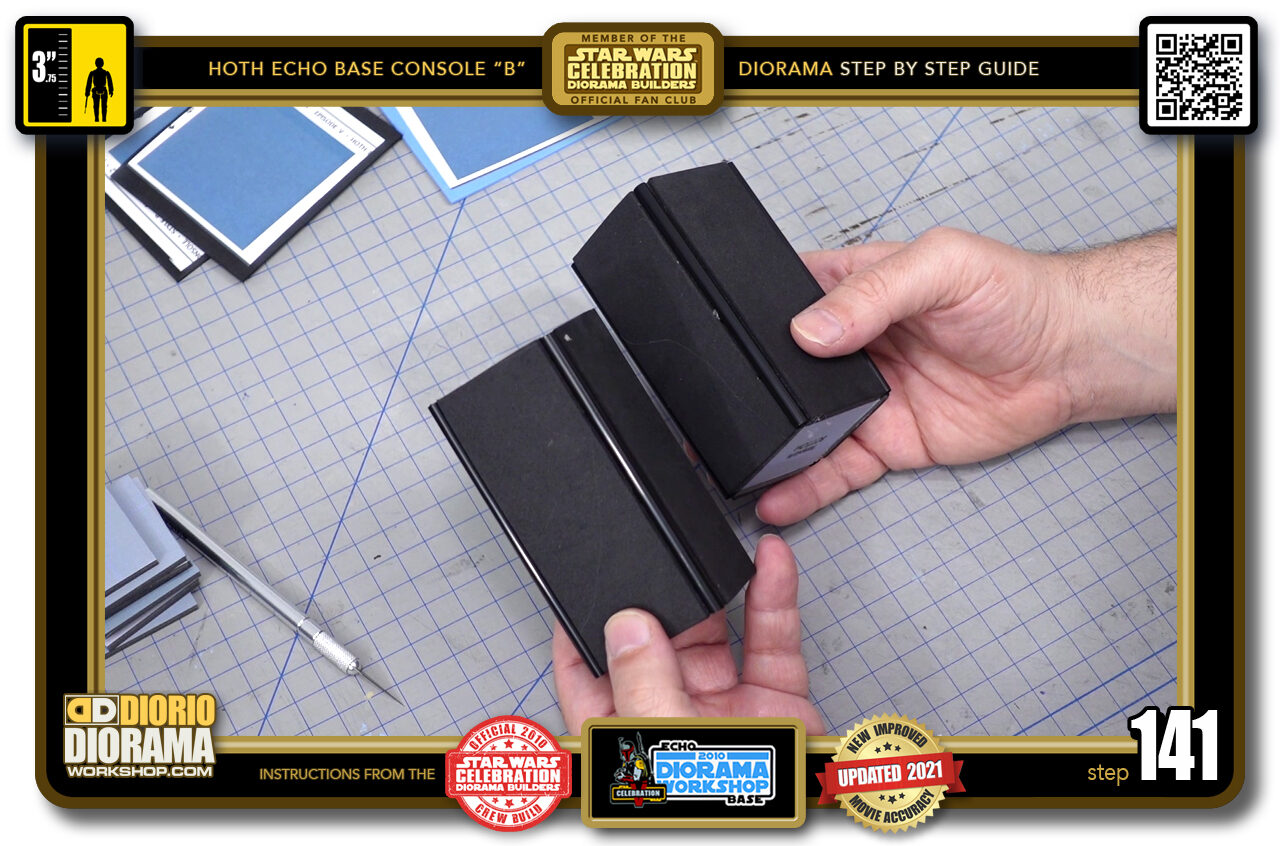
- STEP 141 > All you need to do is make more console bodies and apply the other decals in the same manner as we have for console "B" 1.
-
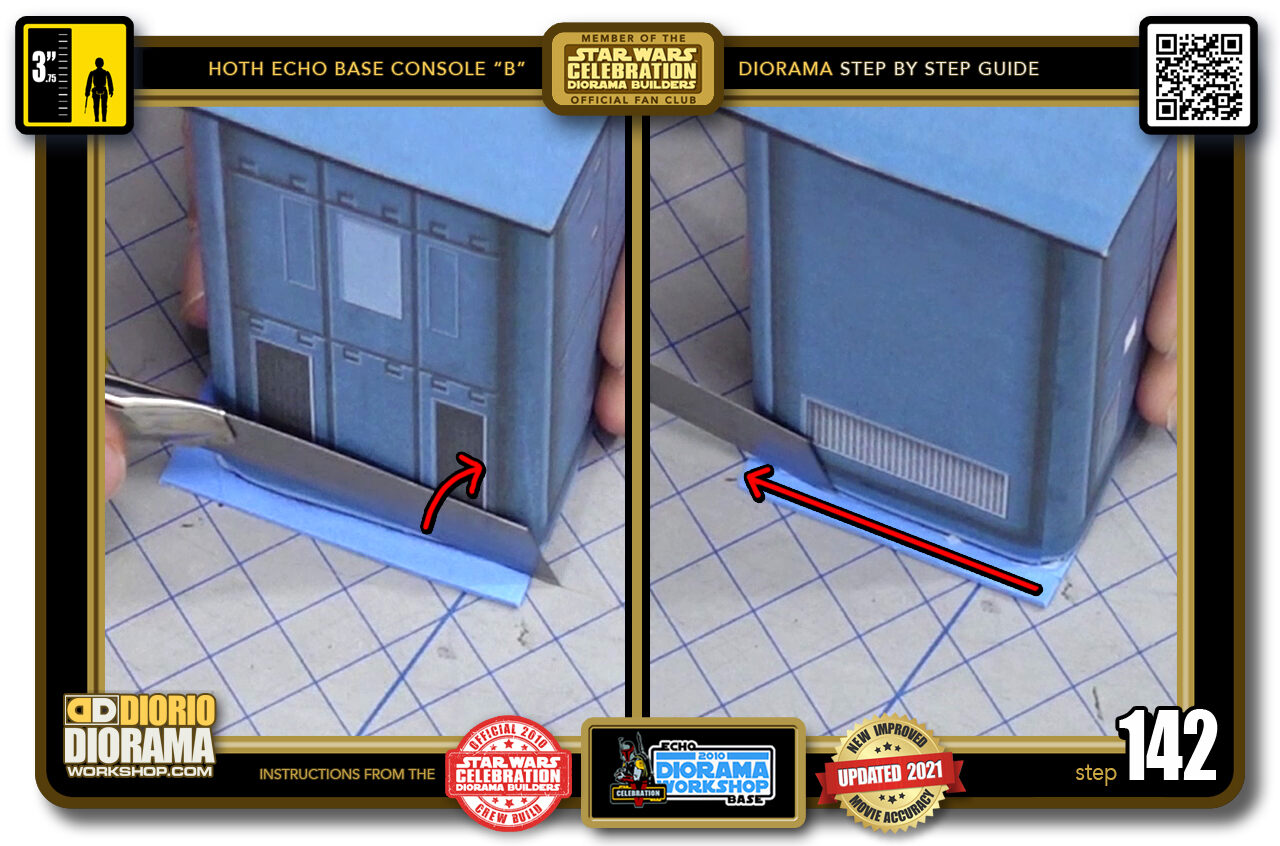
- STEP 142 > Now going back to our first console, we need to trim FLUSH the top and bottom foamies. This is easily done because the foamie is so thin, it's like cutting through butter. You just need to make sure your X-Acto knife blade is extended all the way and rotate the angle of your wrist (the blade) until it presses up against the side of the console body (left image). Then just pull the knife back, keeping the blade pressed against the wall all the way from one corner to the next. (right image).
-
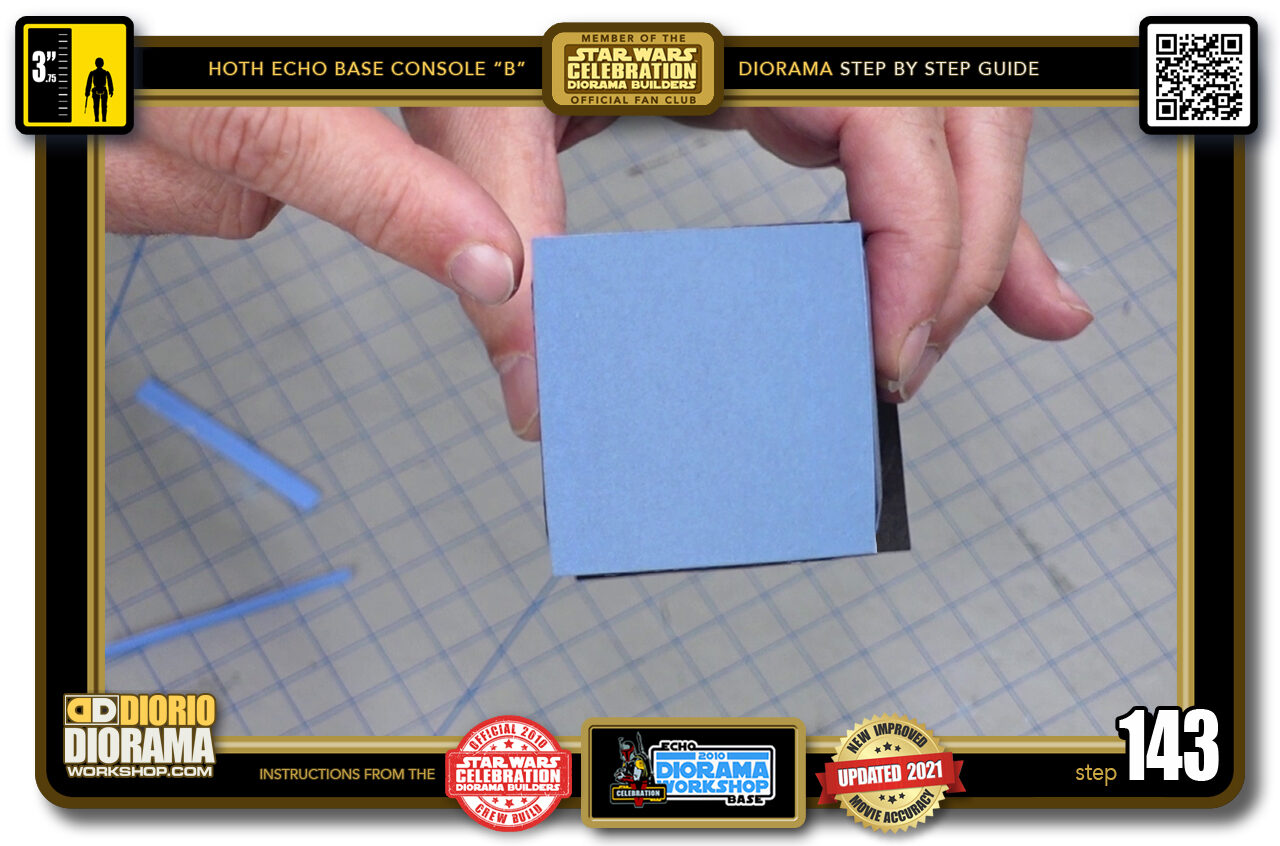
- STEP 143 > Your foamie should now look like this, a perfect square. Time to round off the corners.
-
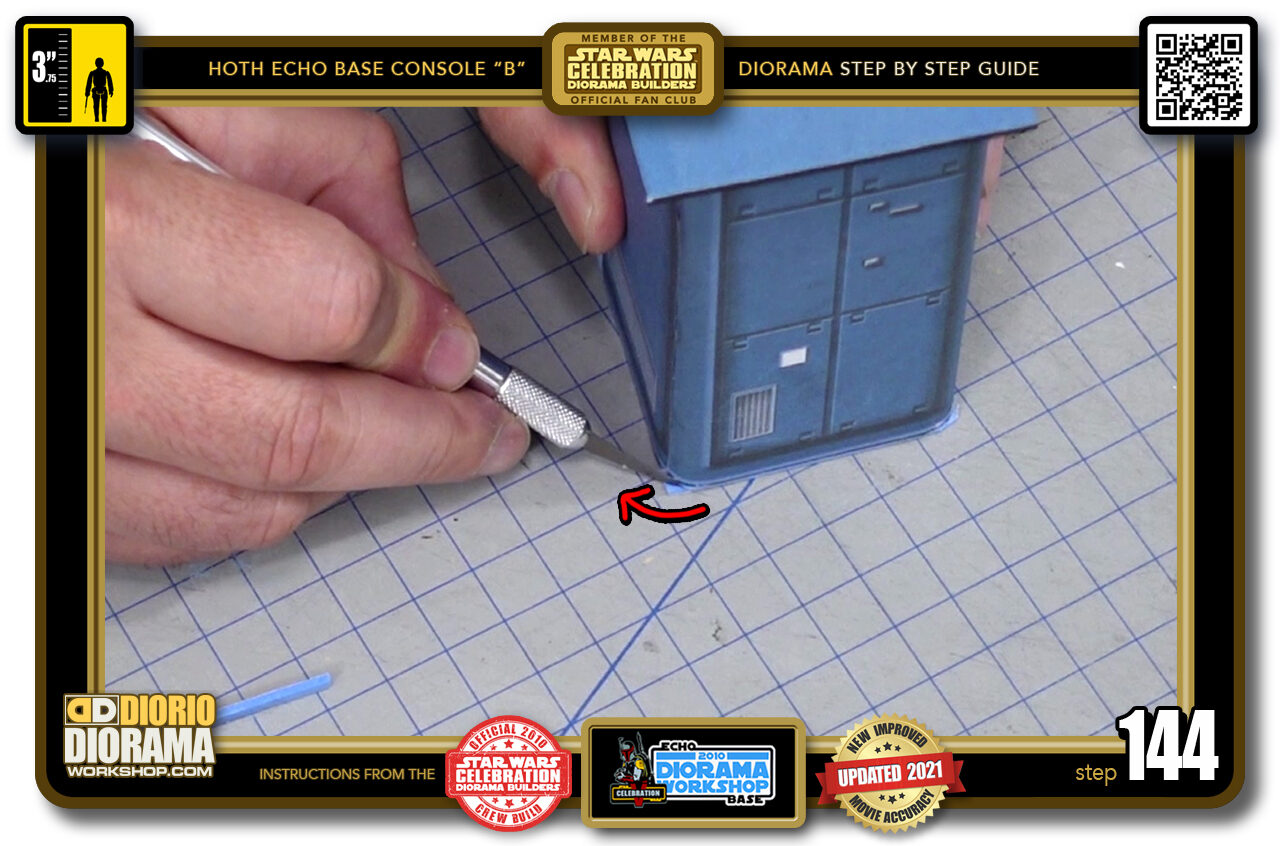
- STEP 144 > Switch to your X-Acto PEN - it's easier to turn corners than the larger blade of a X-Acto knife. Press the blade against the walls edge and go around each corner. If you need to do multiple passes and take away little bits at a time instead of one moon shape, that is fine too.
-
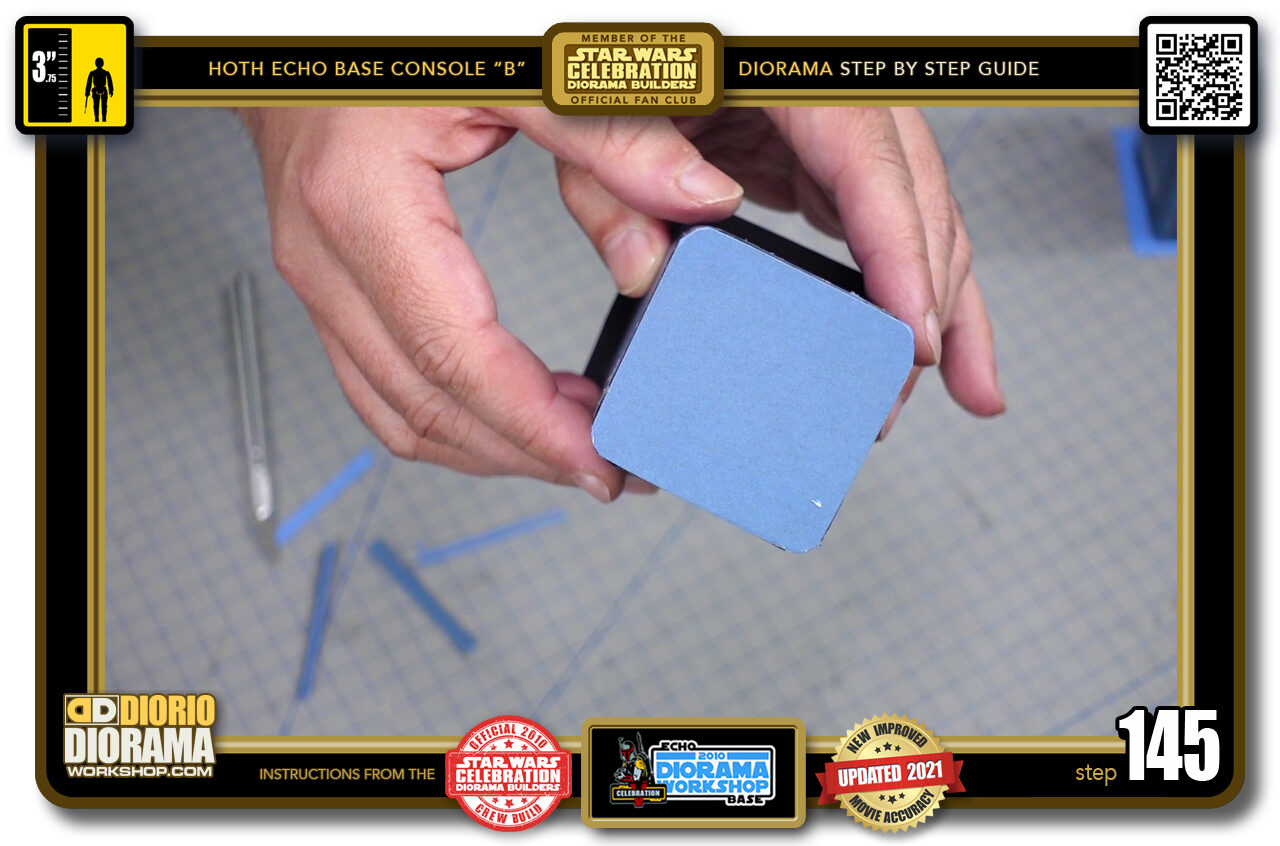
- STEP 145 > What we want in the end is for the corners to all follow along the rounded edges like this.
-
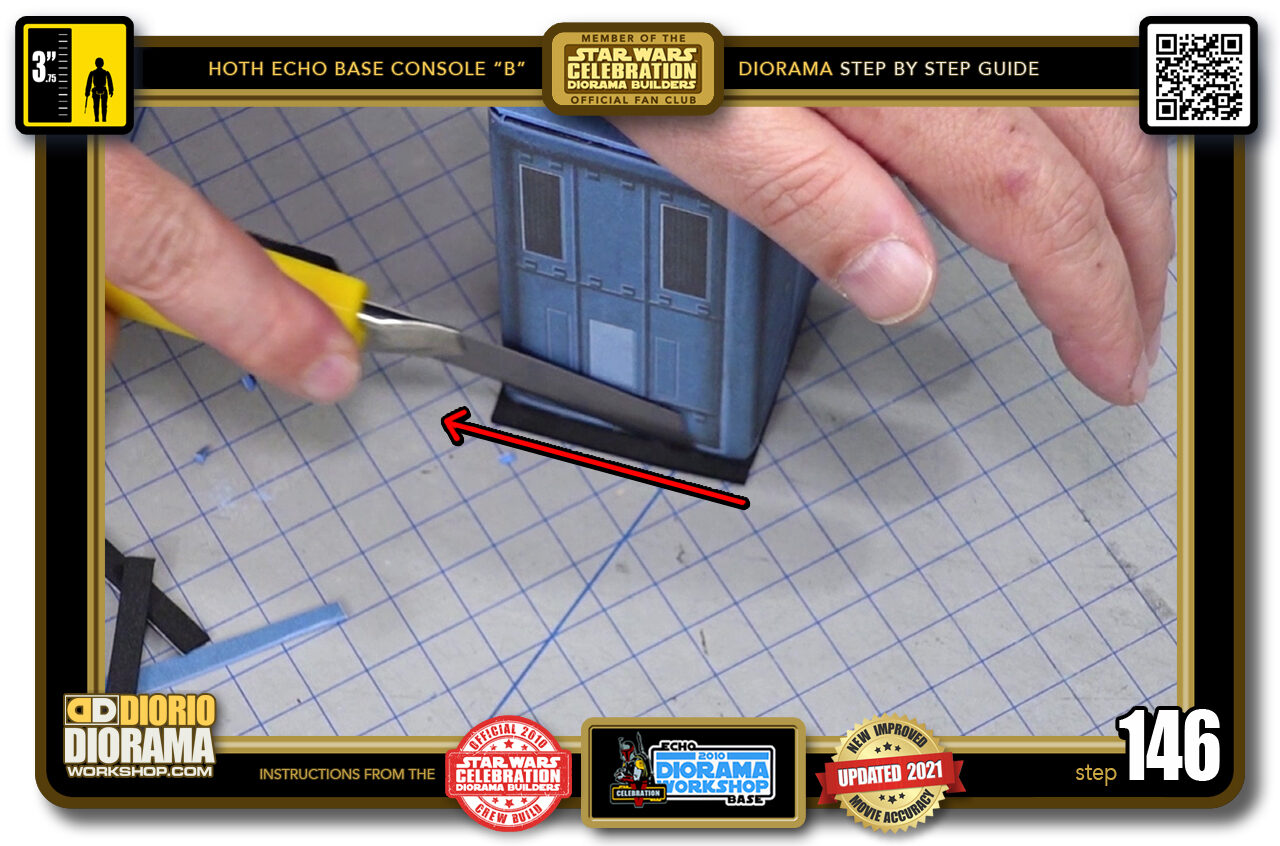
- STEP 146 > Repeat the same thing on the opposite end.
-
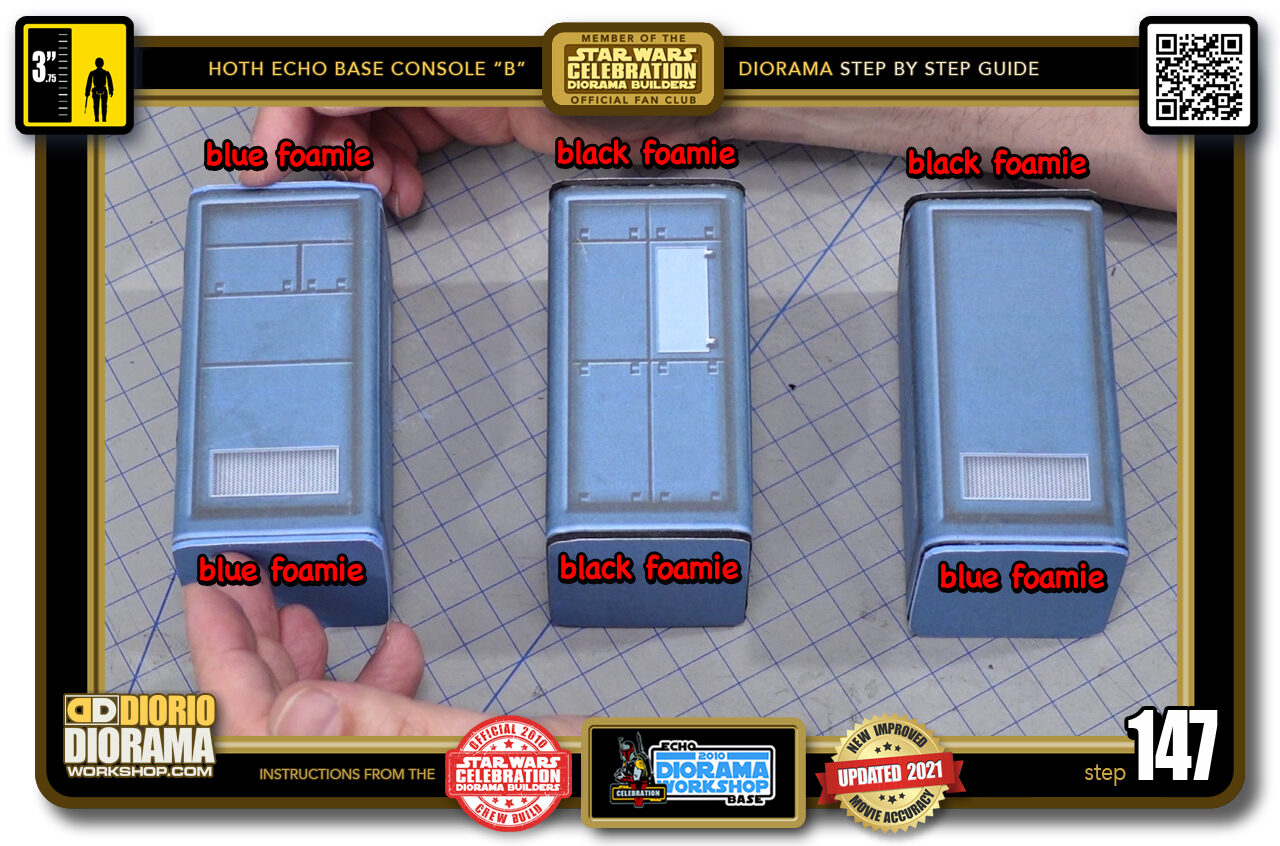
- STEP 147 > Here is a photo of the console we just made and the other 2 variations to show you what different foamie colours look like in the final build. On the left is a double blue foamie. Centre has double black foamie and on the right blue foamie at the bottom and black foamie at the top.
-
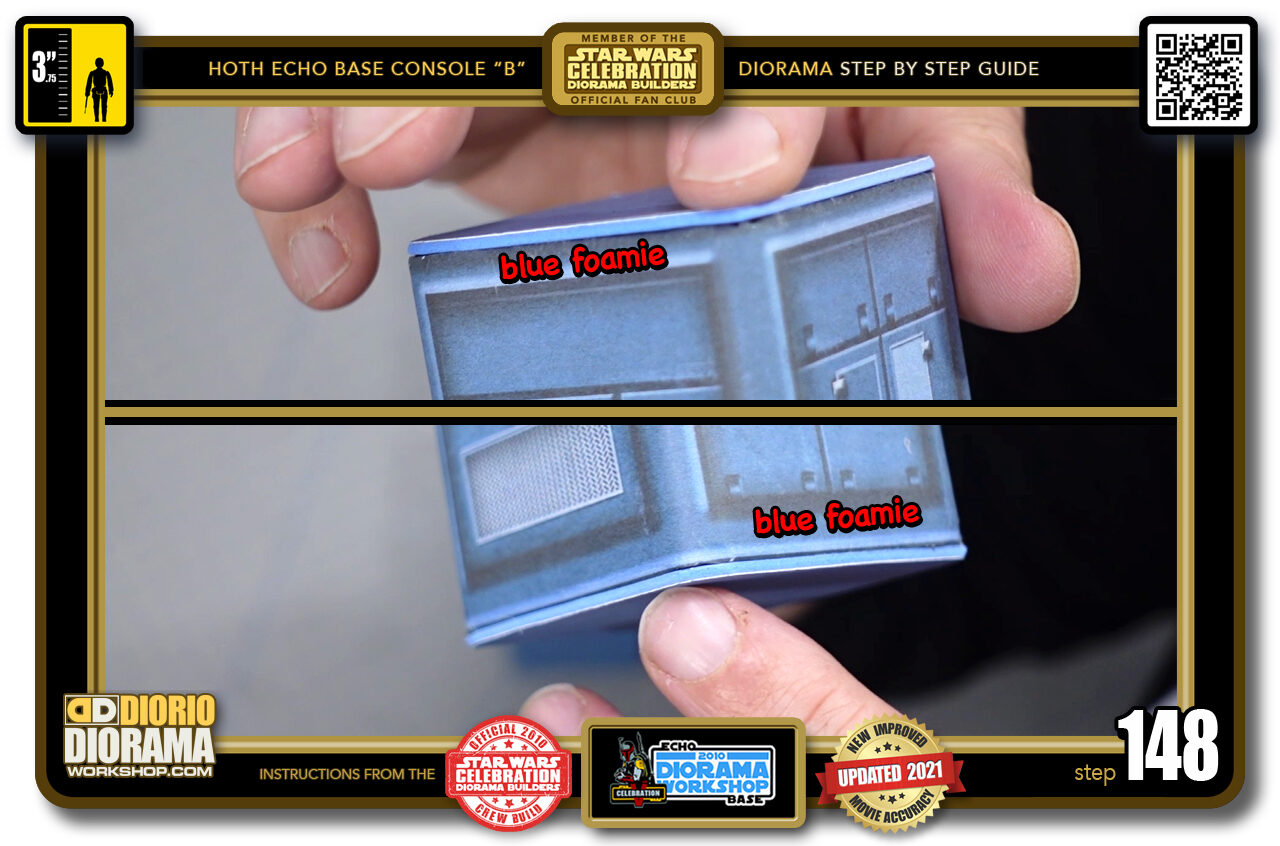
- STEP 148 > When both ends use the blue foamie, you can see that the white paper thickness blends in pretty well here. You don't really need to do anything to them.
-
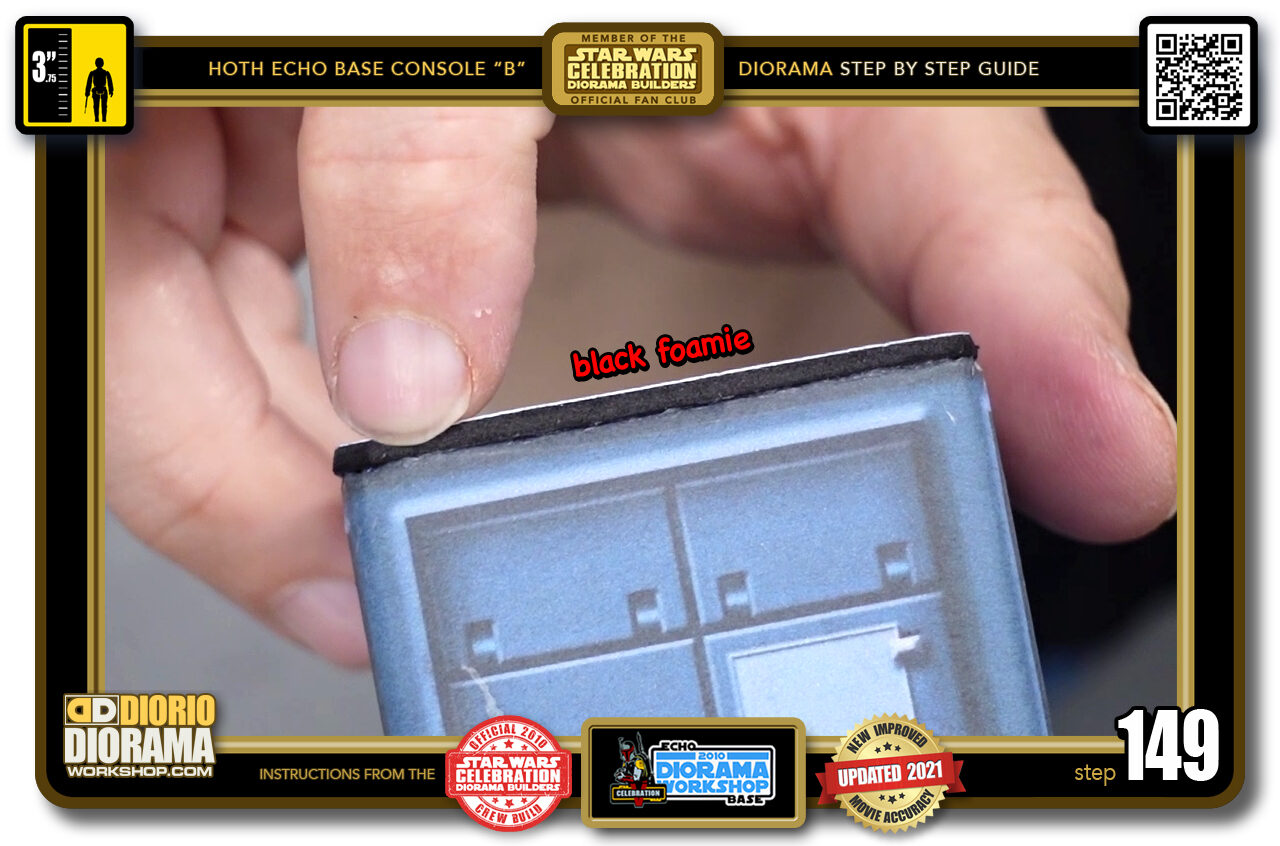
- STEP 149 > The black foamie however clearly makes the white thickness pop out and distracts us.
-
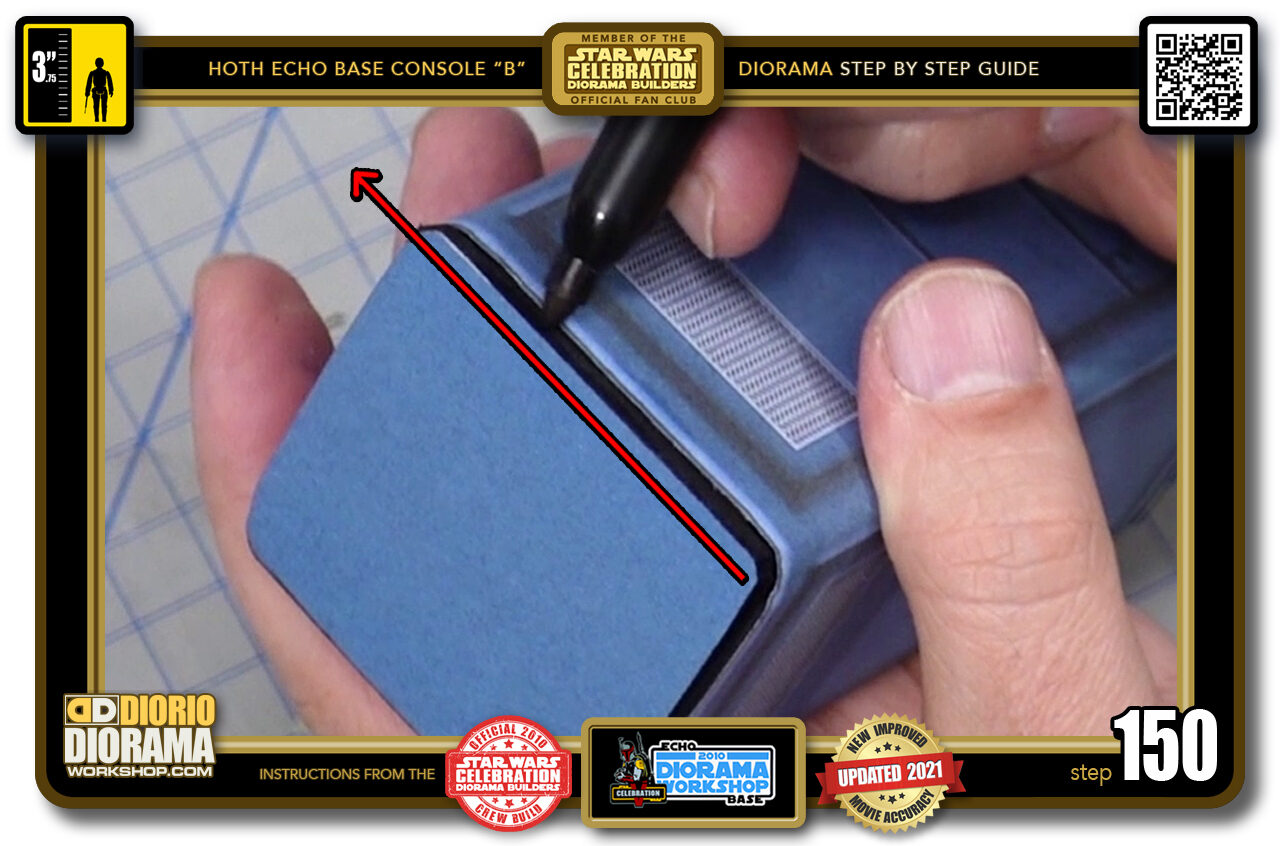
- STEP 150 > We want to use a black sharpie (the side of the pen tip not the pointy end) and go all the way around the decal edge. You will magically see the white line disappear and the decal blend in perfectly with the black foamie piece.
-
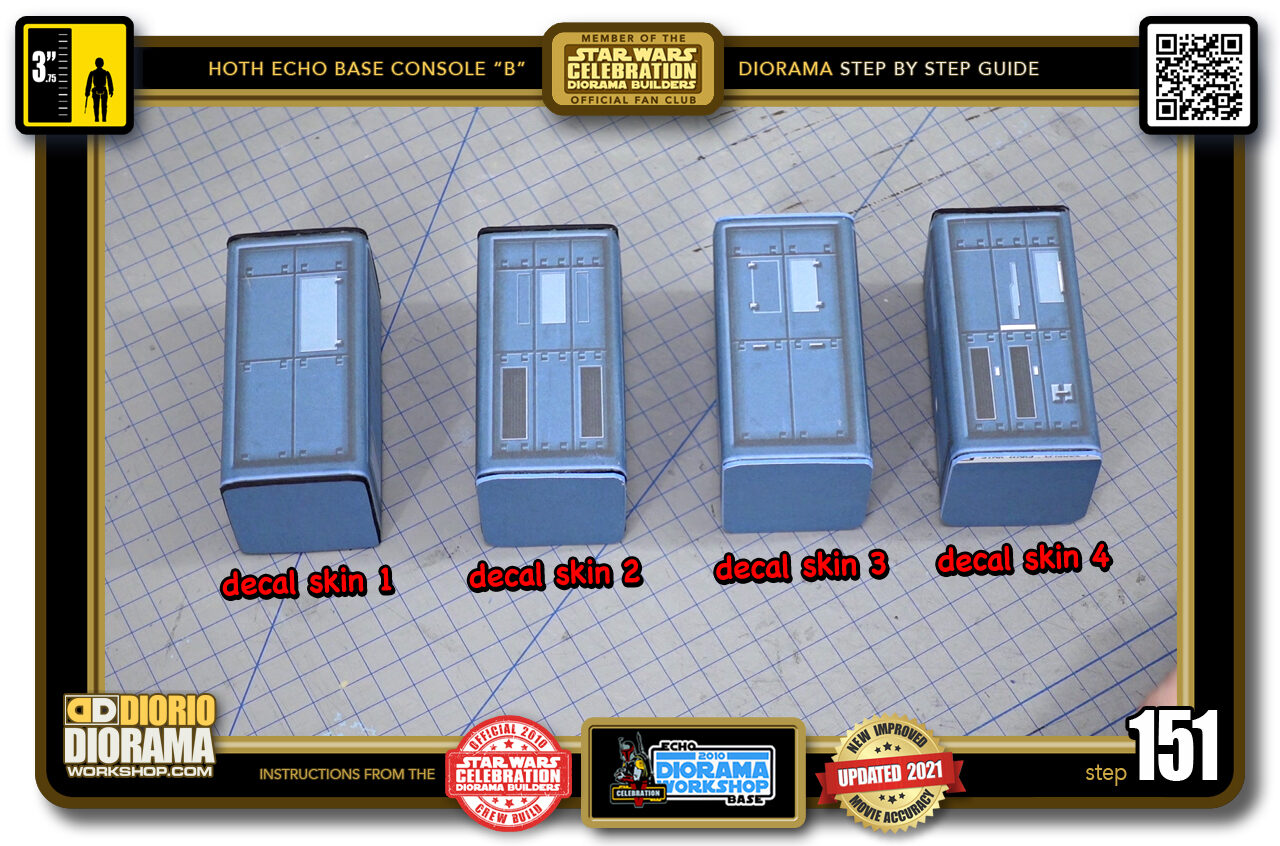
- STEP 151 > And there you have it, the 4 different console "B" skin options on different foamie colour options. The one you select is up to you. There is no must choose colour here really. It is up to personal taste and what you can find in your local hobby store.
-
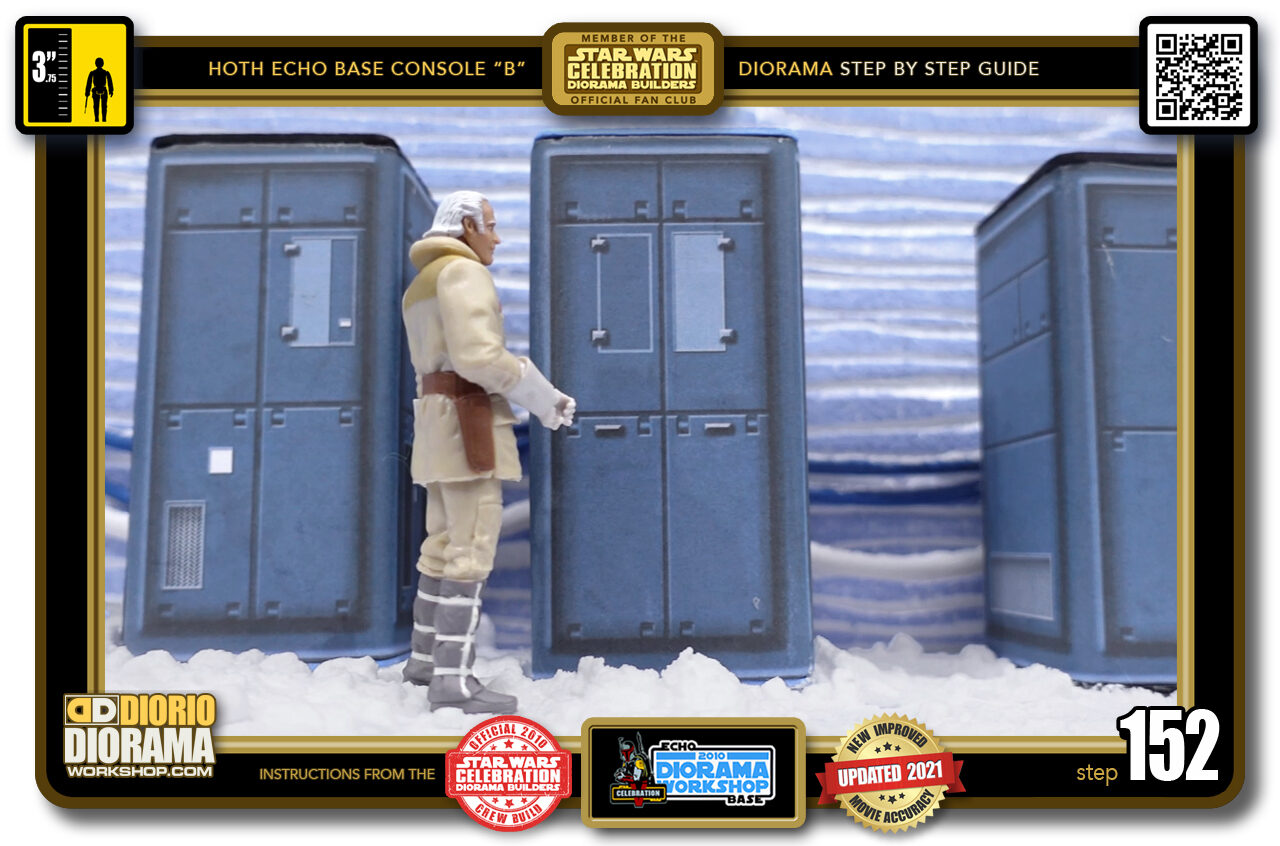
- STEP 152 > You can now place your console "B" builds in any of your hoth builds, be it hallway or Rebel War Room.
-
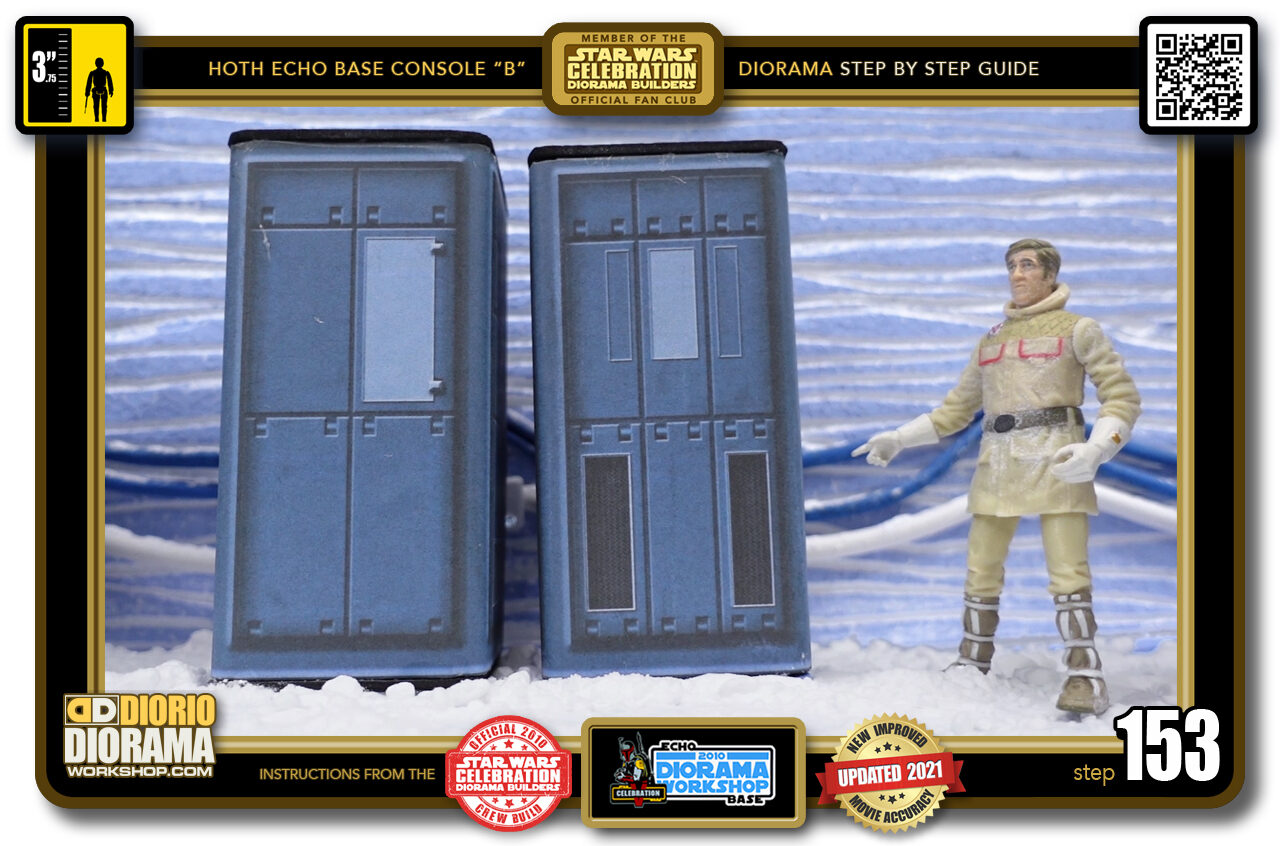
- STEP 153 > WSTEP 240 > Heyhen you place them side by side and in a proper environment they really come to life just like in the movie. Let me know in the comments if you built these and if you had fun 🙂 Frank.

.
Did you already build this Diorama ? At home or at our Star Wars Celebration Diorama Builders workshop ? Would you like to show it in the site’s GALLERY VISITORS DIORAMAS section, YES ? That is Awesome !!! You can find out all the details on how to email me your photos on the VISITORS SUBMISSIONS INFO page … When I get your photos, I will create your very own page just like this one. You may not realize it but work does inspire others to join in the fun of making Action Figure Dioramas.
.
NOT FOR RESALE ALL Decals, tutorials and artwork are ©FrankDiorio (dioramaworkshop.com) and offered FOR FREE to the fans – that would be you ? so you can build and display my diorama designs in your very own home. I realize I cannot control what one does with my graphics once I place them on the web, I can only ask you as one fan to another, please respect the artist and do not be that jerk who uses my designs and tutorials to build a copy of my work only to sell it on EBAY or trade/sale groups and forums. Thank You. Frank.
.

.
.
If you have a facebook account, why not join the Official Diorama Builders Fan Club today, simply click the logo link below.
 .
.
Catch up with fellow visitors and exchange stories, read cool interviews with the crew, exchange photos, fun surprises and grab some FAN ONLY merchandise next year at actual future conventions ?
.
©2021 Frank Diorio DioramaWorkshop.Com
.
IF YOU LIKE WHAT YOU SEE, PLEASE SHARE WITH YOUR FRIENDS
USING THE SOCIAL MEDIA BUTTONS BELOW