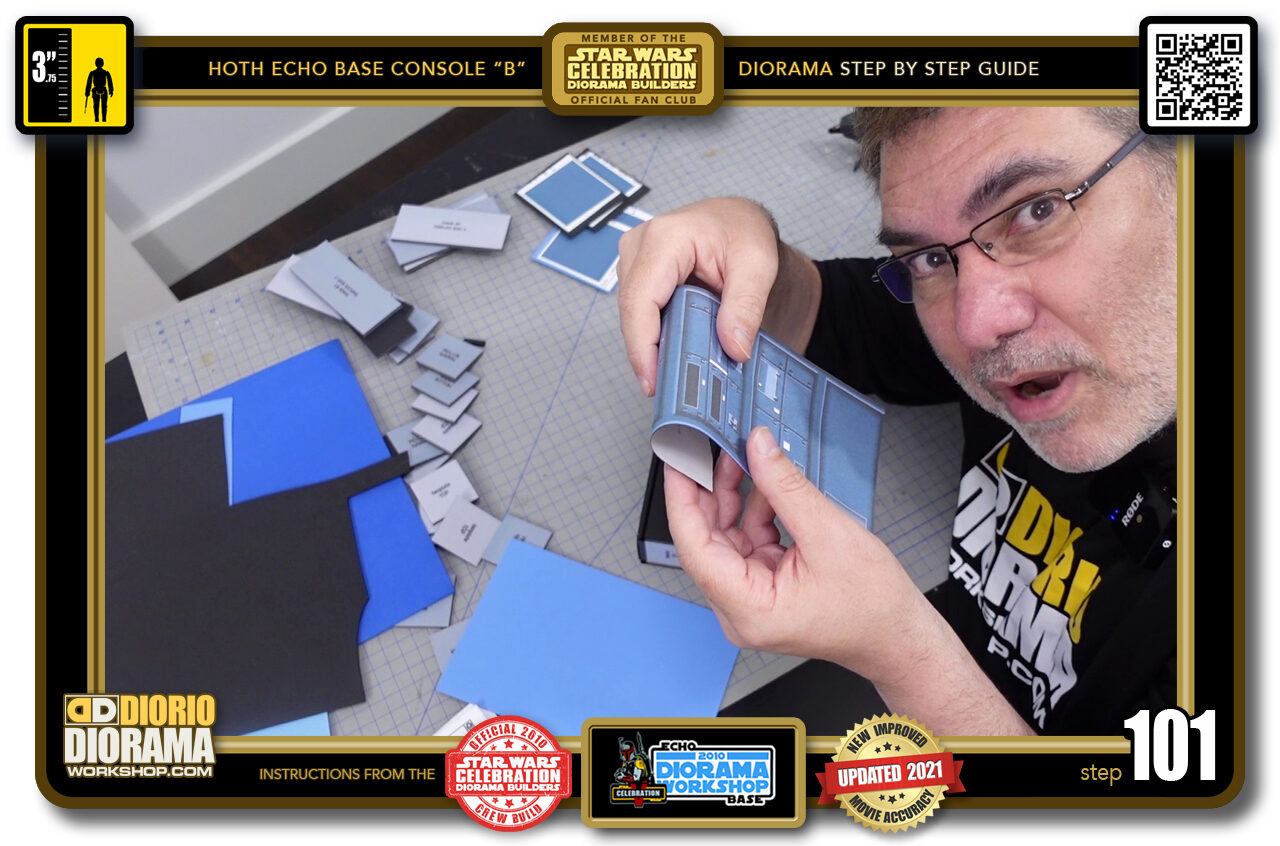
- STEP 101 > With gaps between each panel, this allows the decal to wrap perfectly around each of the straws.
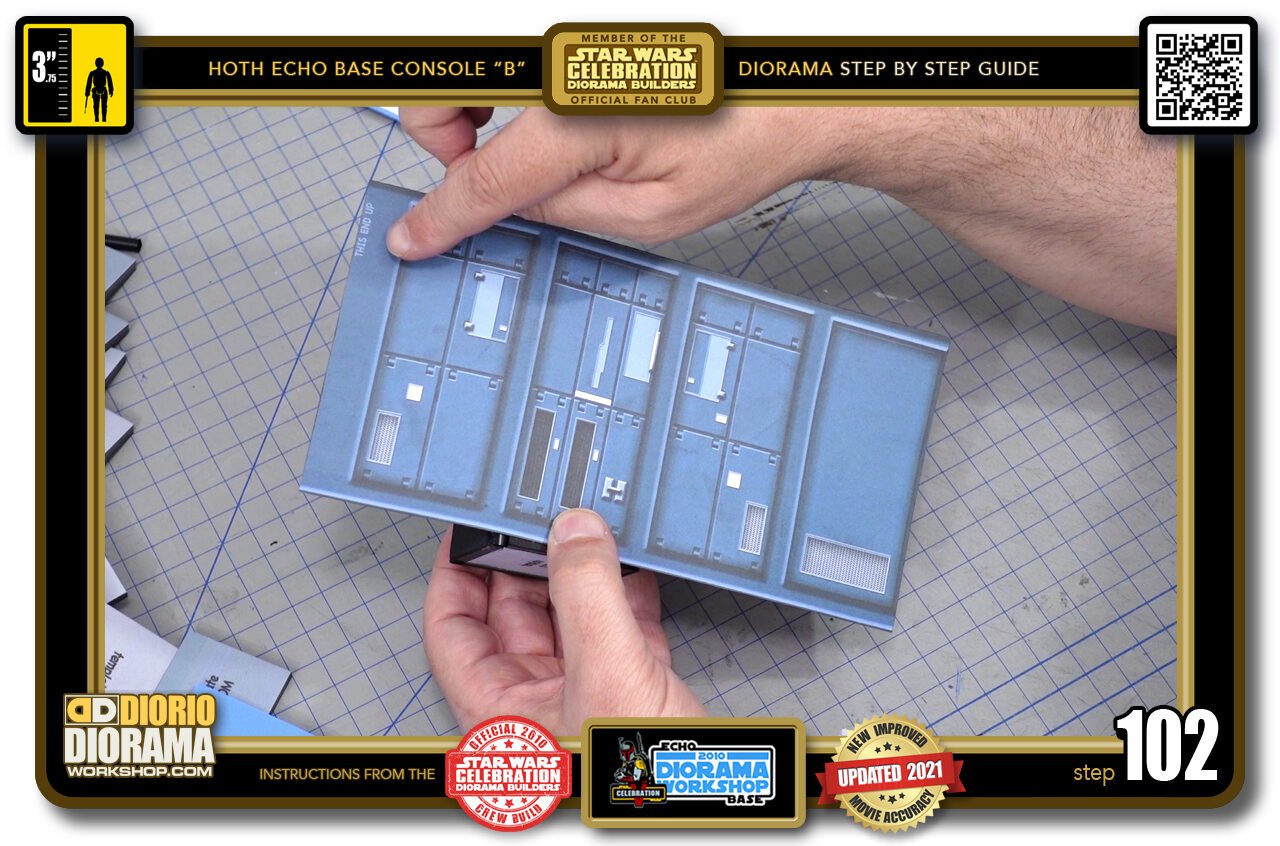
- STEP 102 > There are a couple of important things to know before you glue your decal to your console body. First there is a little THIS SIDE UP in the upper left corner. This will be covered and hidden when side 4 folds over it.
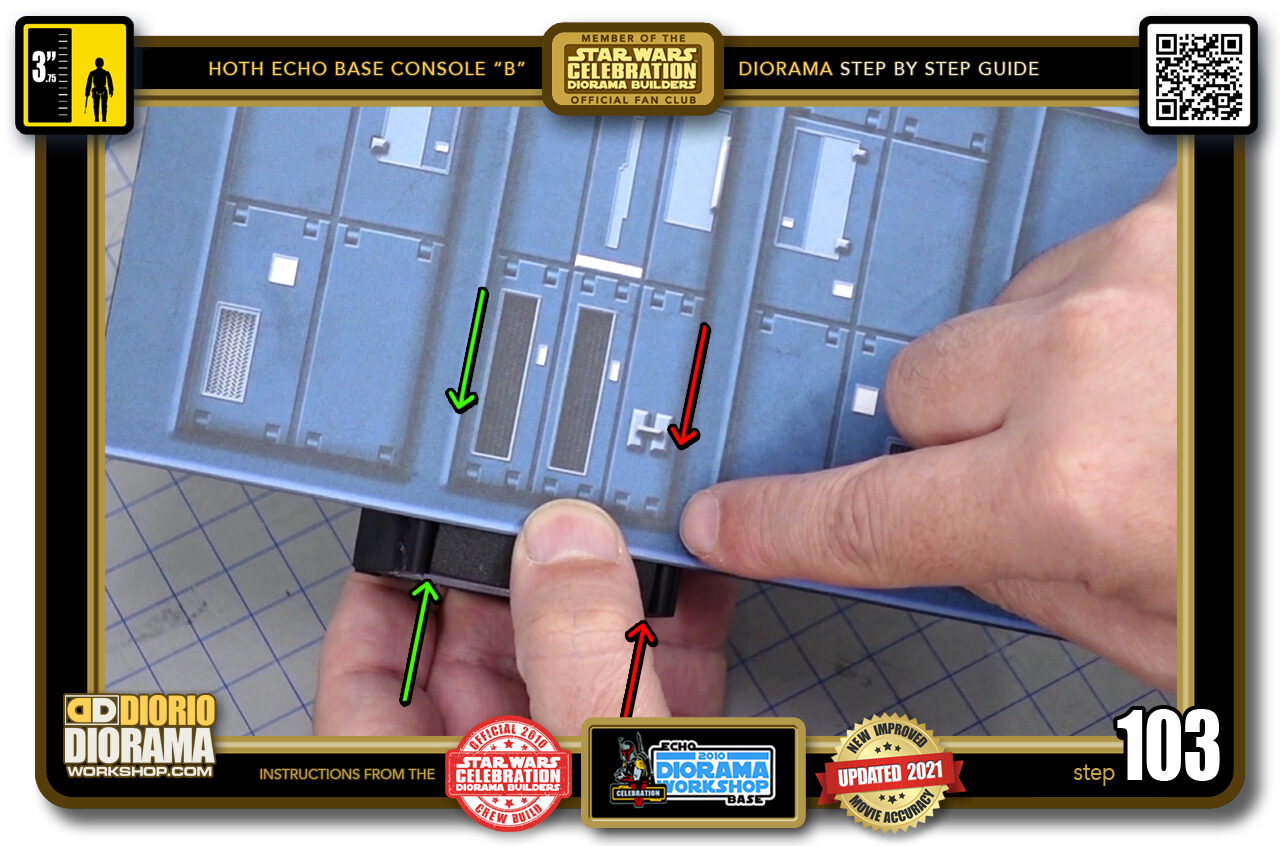
- STEP 103 > Next is the most important information for your first positioning. The blue highlight emboss in the decal should align where the straw and left side piece connect (green arrow) and the darker emboss will align with the right side edge and straw connection (red arrows)
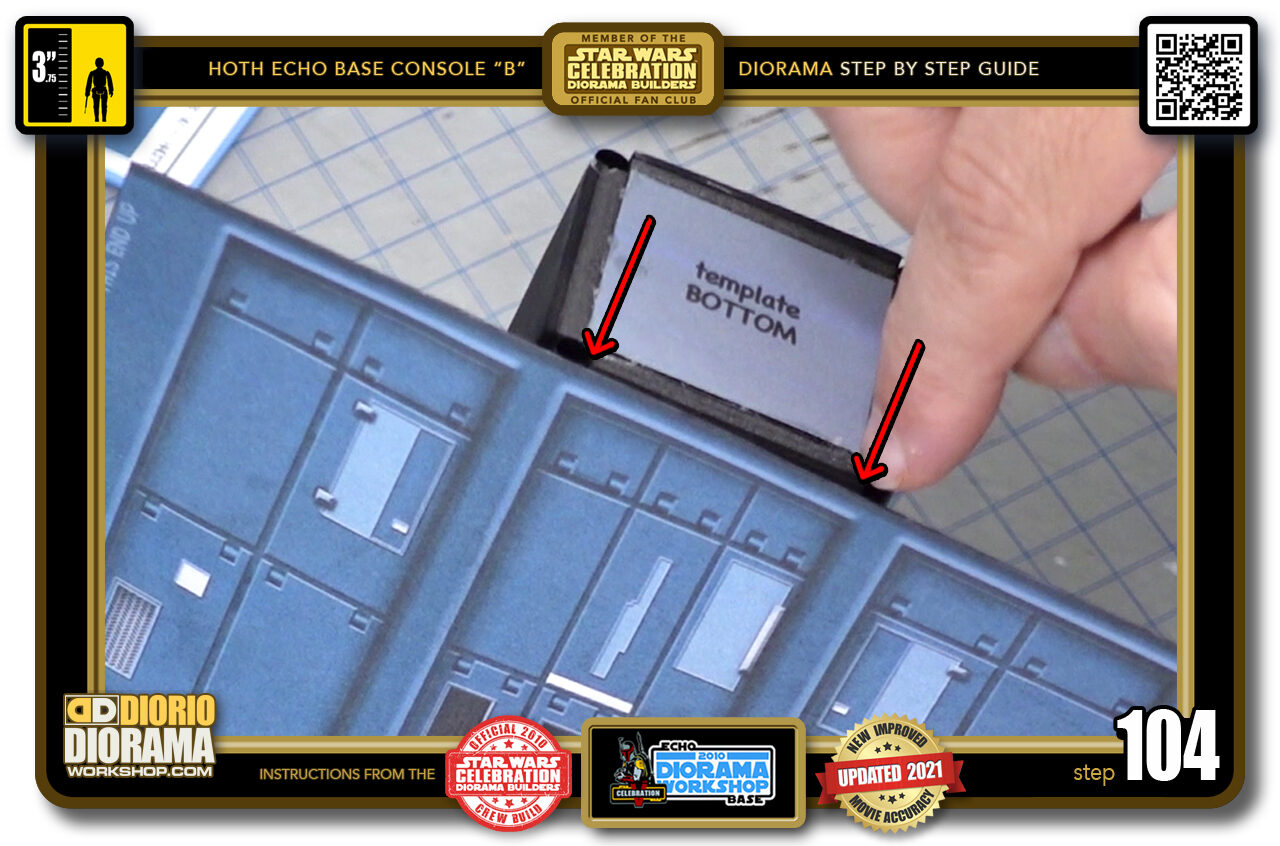
- STEP 104 > When you move, angle your decal the top will align perfectly just as at the bottom.
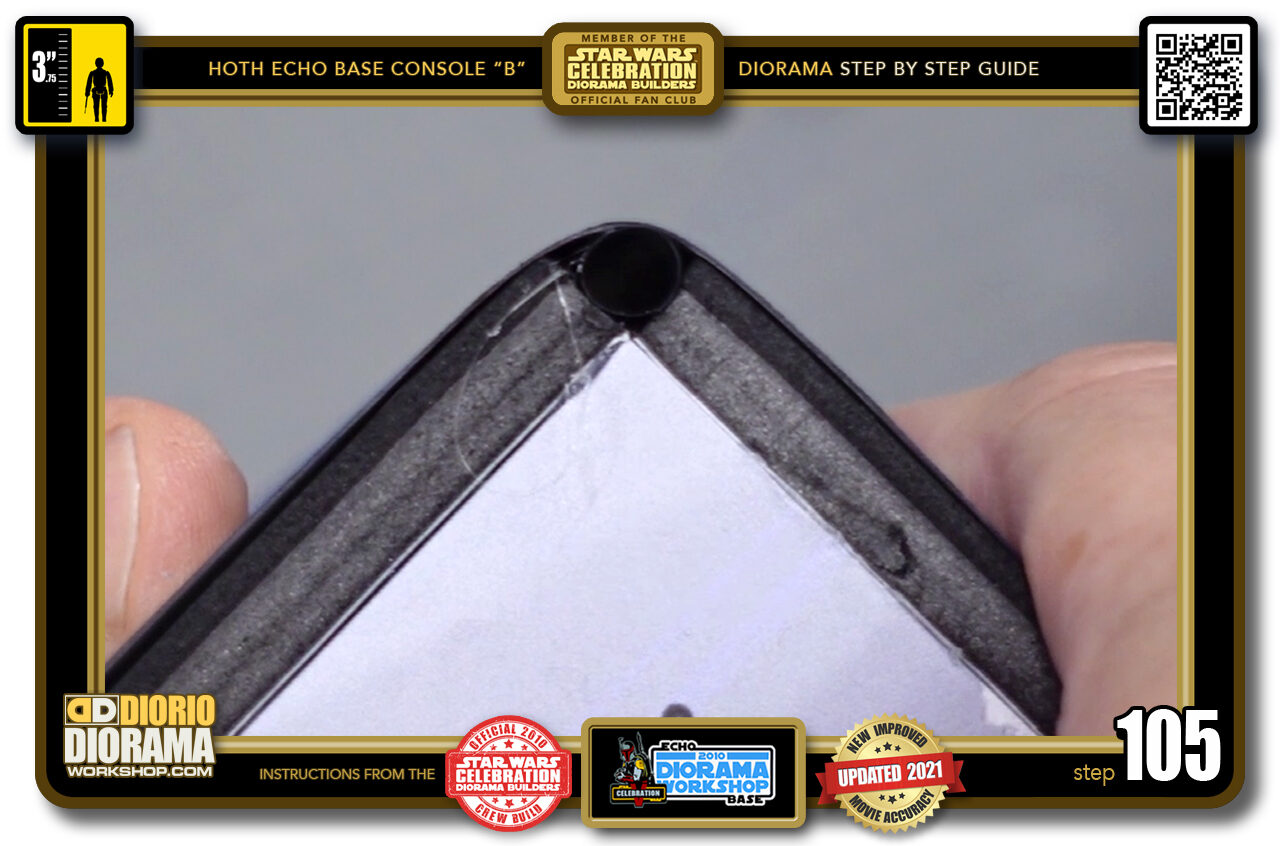
- STEP 105 > Then your decal will wrap perfectly around your straw giving you a nice rounded angle corner just like in the movie.
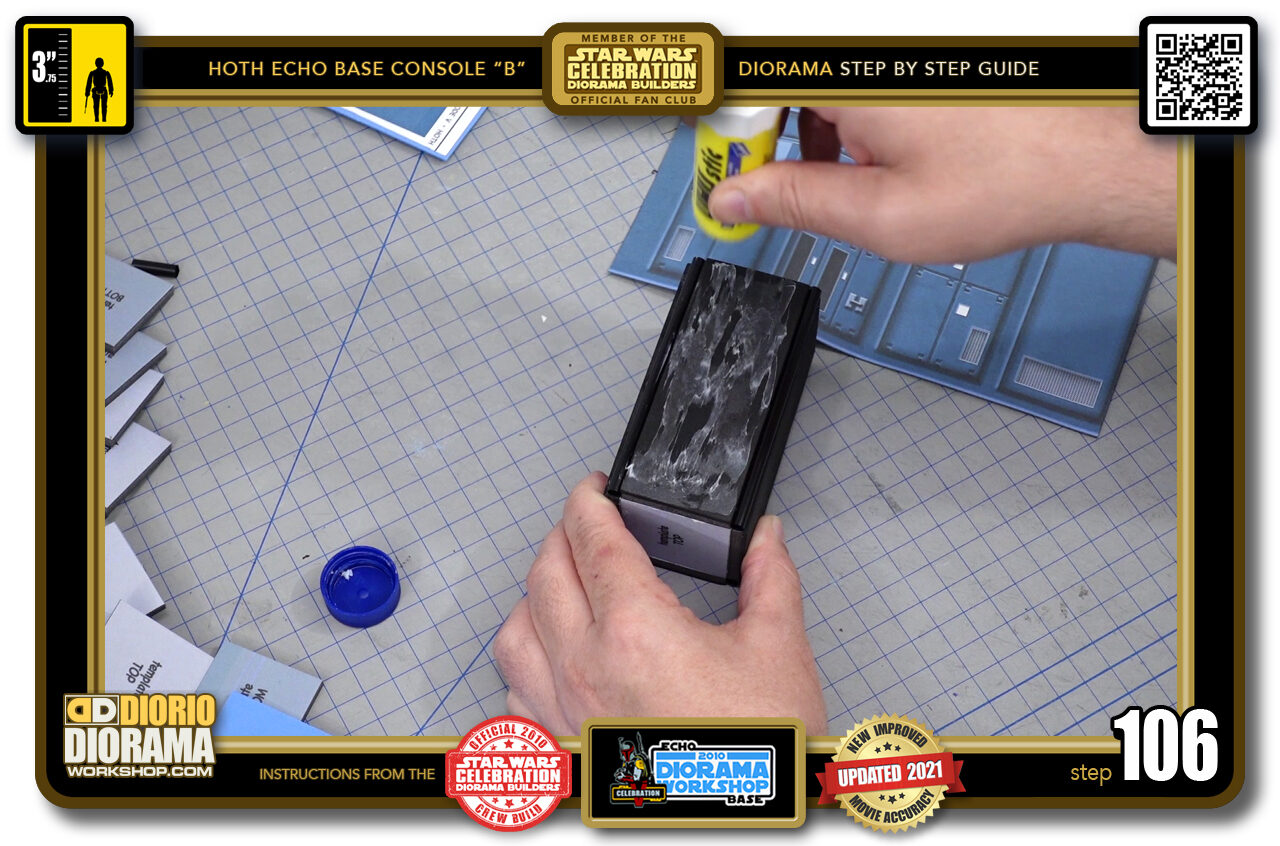
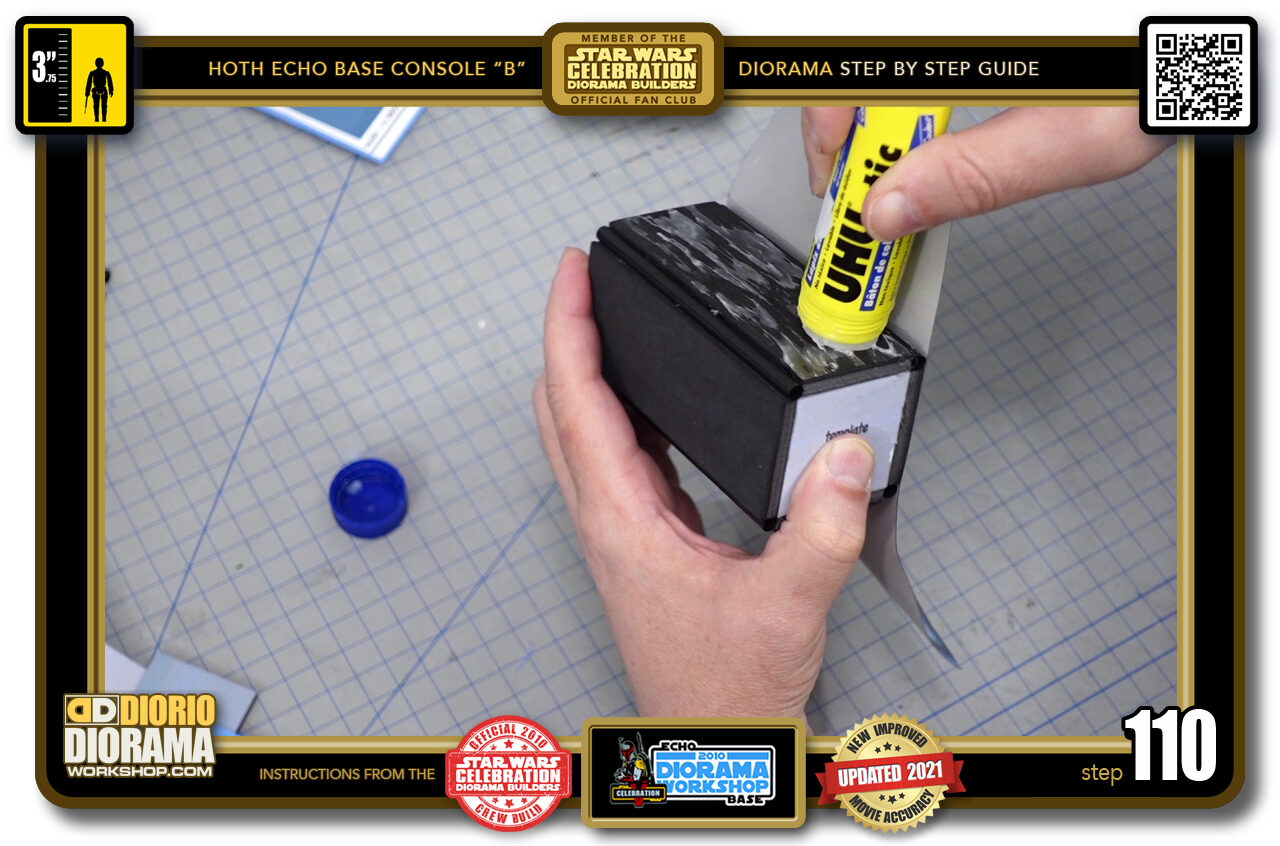
- STEP 106 > Start with some glue stick on any of the 4 foamie body sides. NEVER USE HOT GLUE for attaching decals.
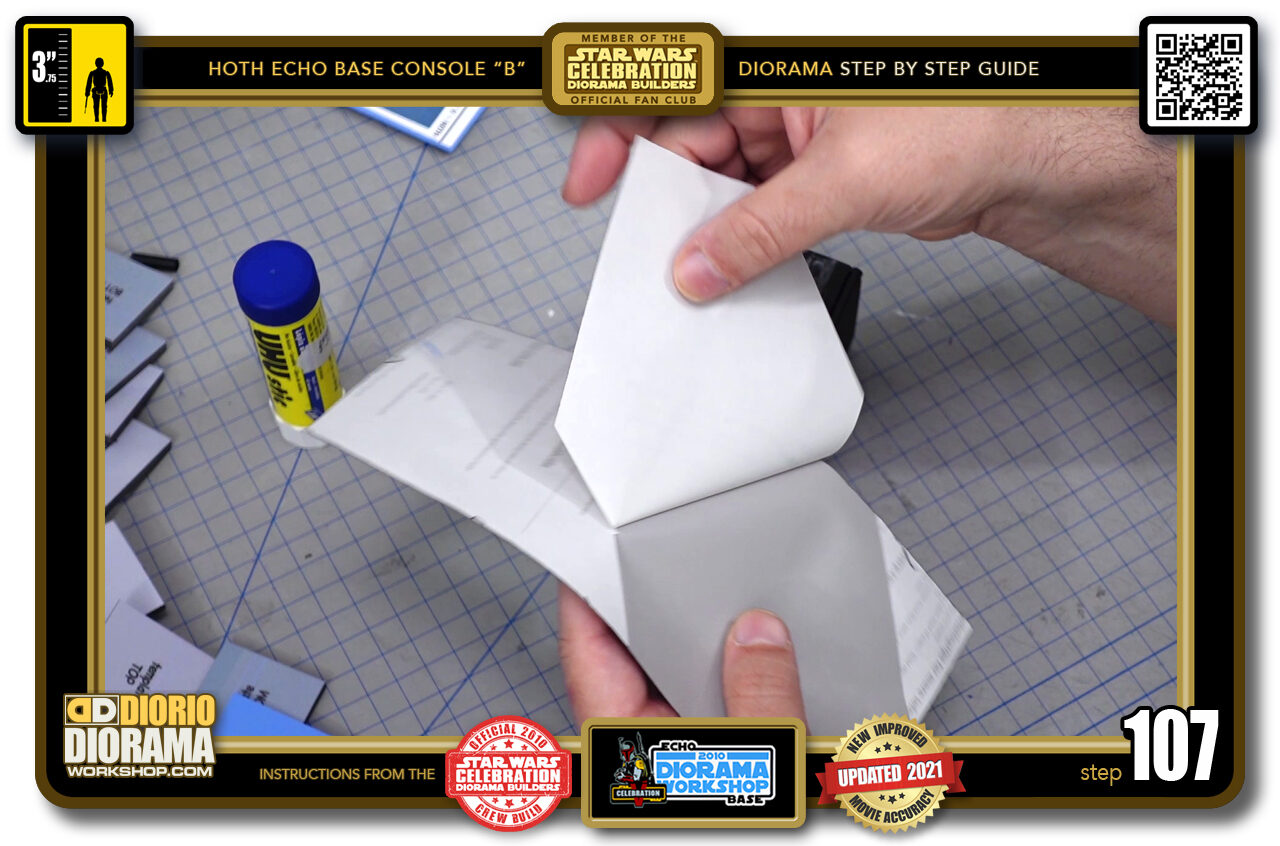
- STEP 107 > Peel back your sticker sheet. If you used regular paper, just apply some gluestick to the back like you did on the foamie.
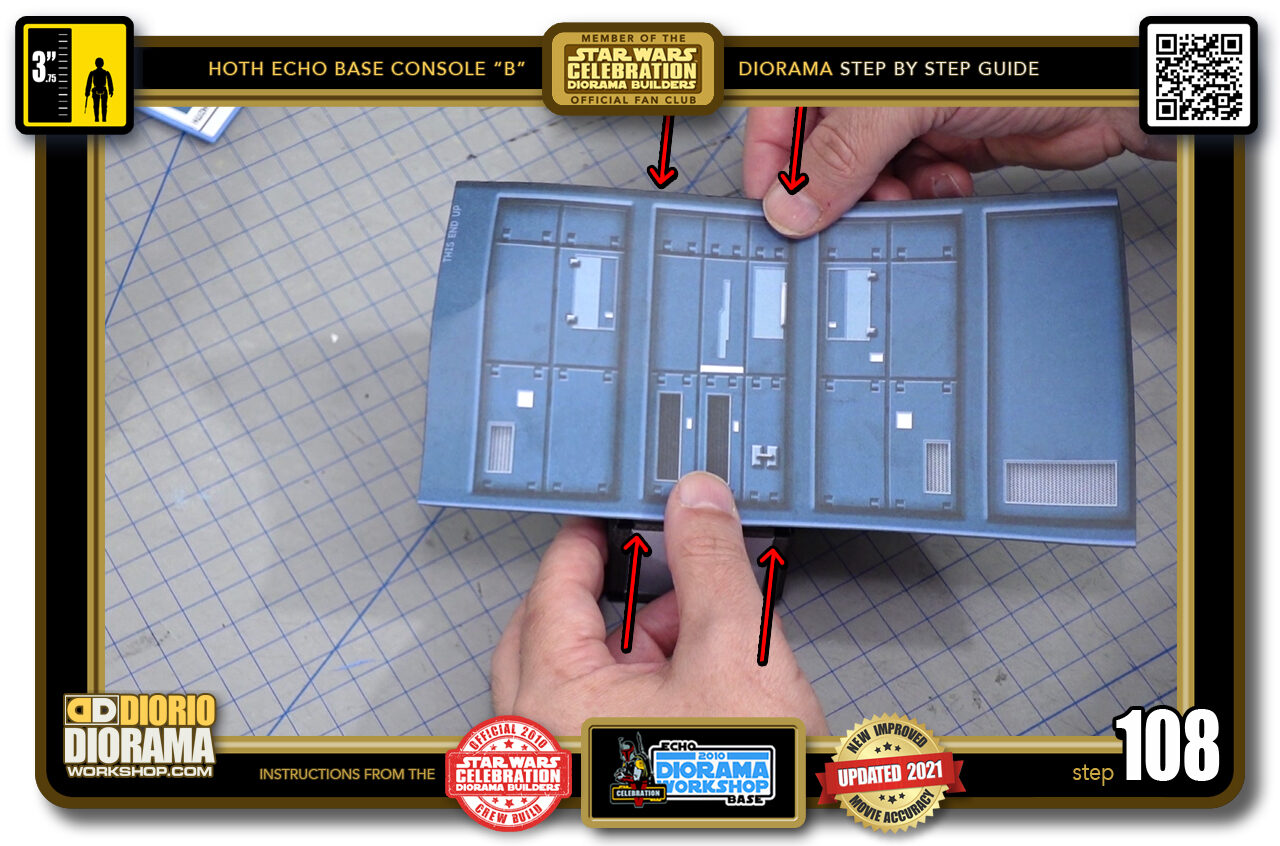
- STEP 108 > Carefully align your top and bottom guides and then lower the decal onto the console body.
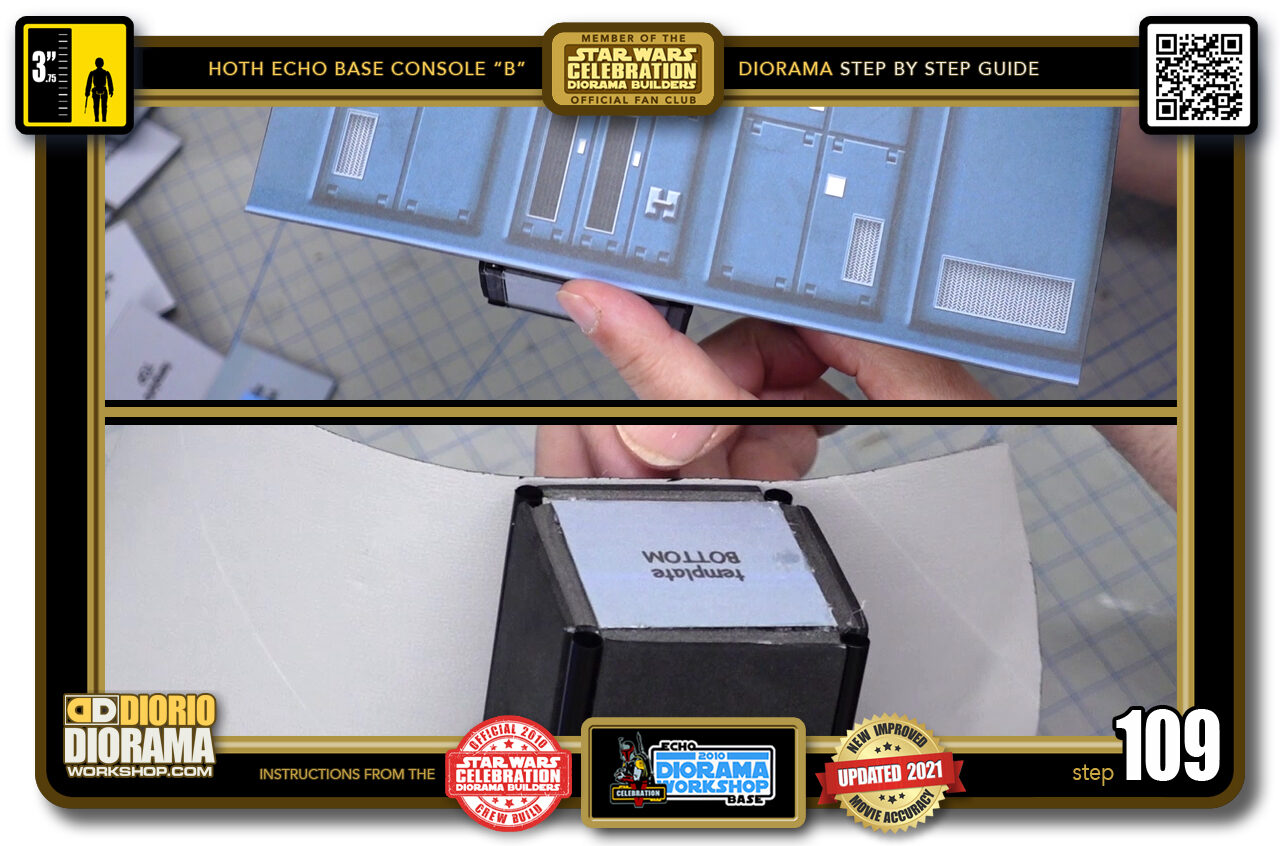
- STEP 109 > Make sure the bottom (top image) is flush with the body edges. If you see a little decal stick out on the opposite end (bottom image) that's ok, we will fix that with our fingernail technique later on.
- STEP 110 > We now want to apply the area to the left of your second decal panel. Put some gluestick all over the foamie body piece.
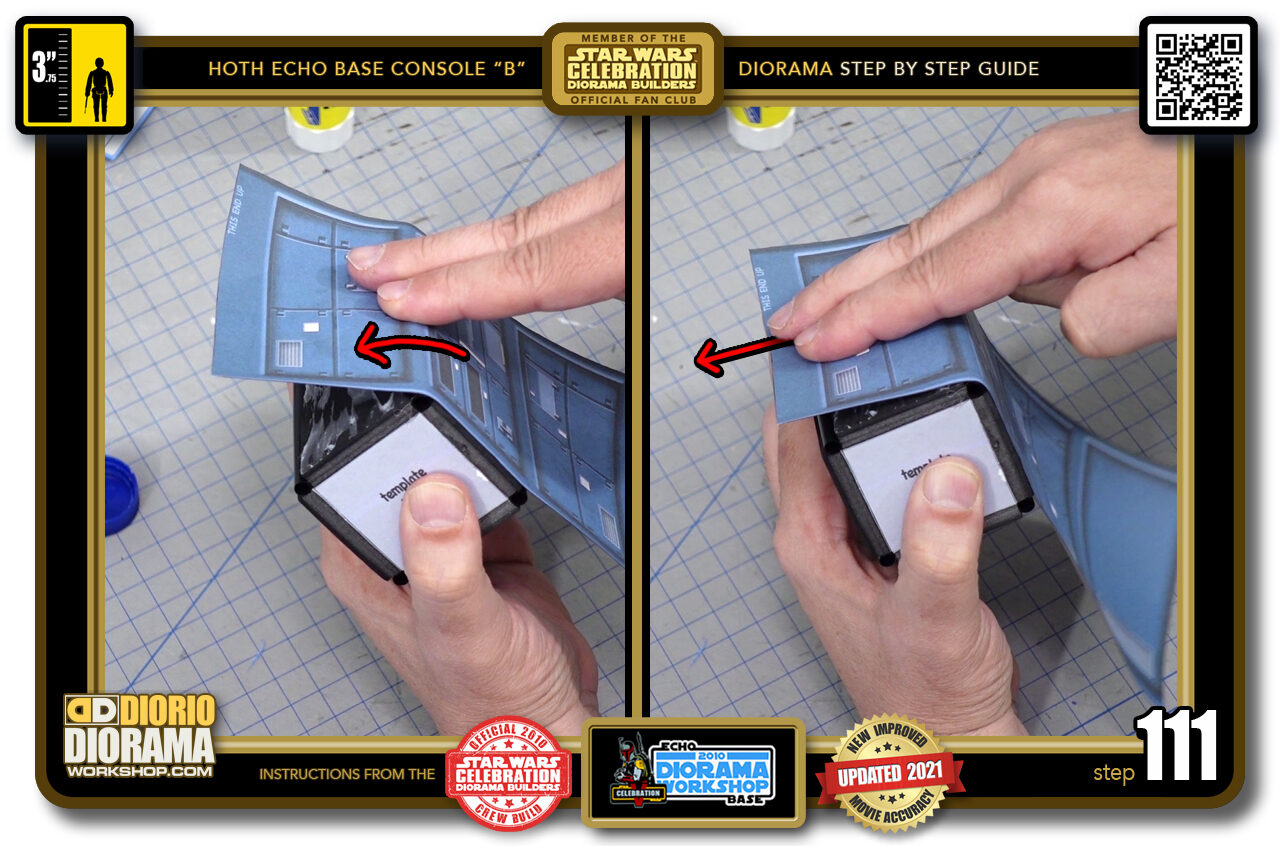
- STEP 111 > Now gently use 2 fingers to press down the centre of the decal and move the skin against the straw to get that movie curved corner (left image). Move your fingers straight down the centre (right image) until you reach the end. If you see that your decal is NOT lining up properly at the bottom and top ends DO NOT PANIC YET 🙂
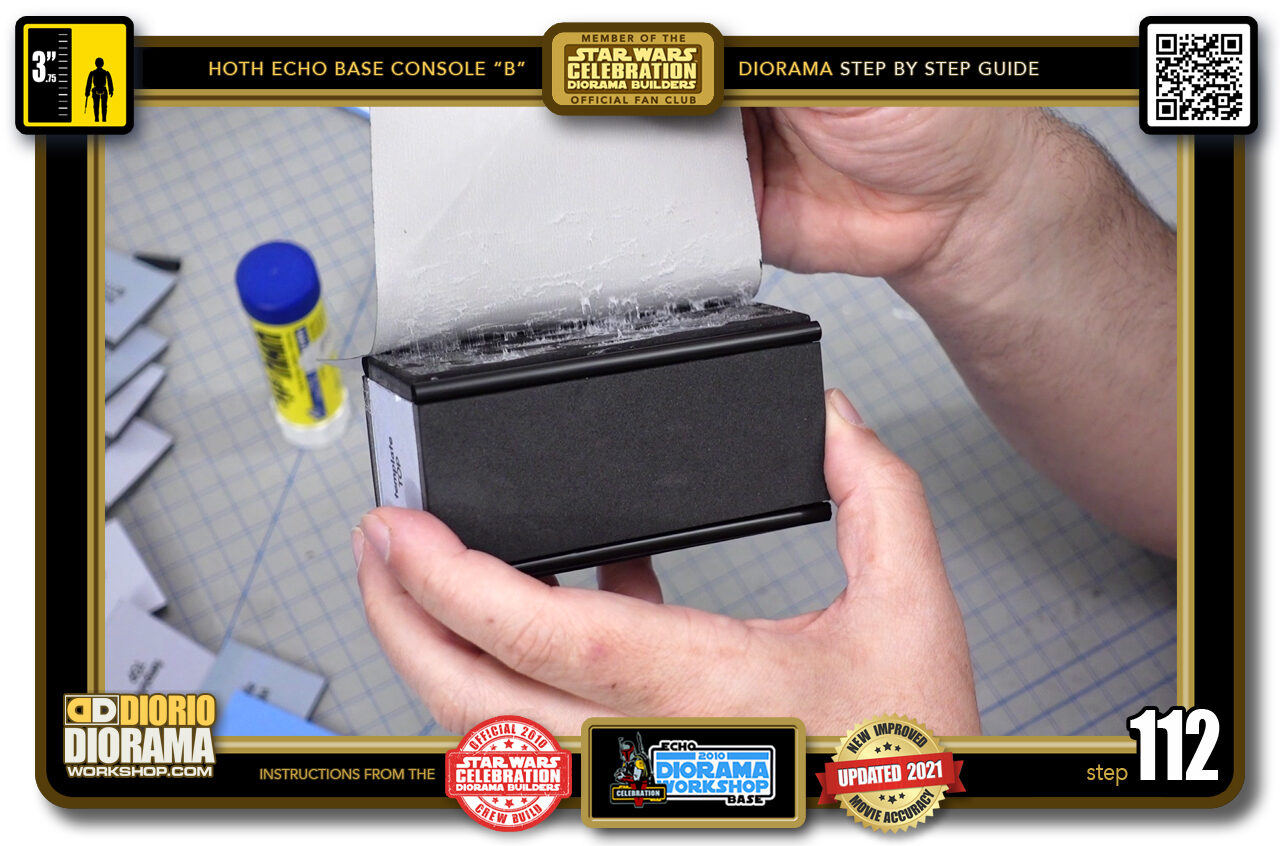
- STEP 112 > This is the beauty of using gluestick on the body even if using a decal sheet. This allows the 2 to not cement instantly and thus, pull apart for repositioning if need be without tearing the decal to shreds.
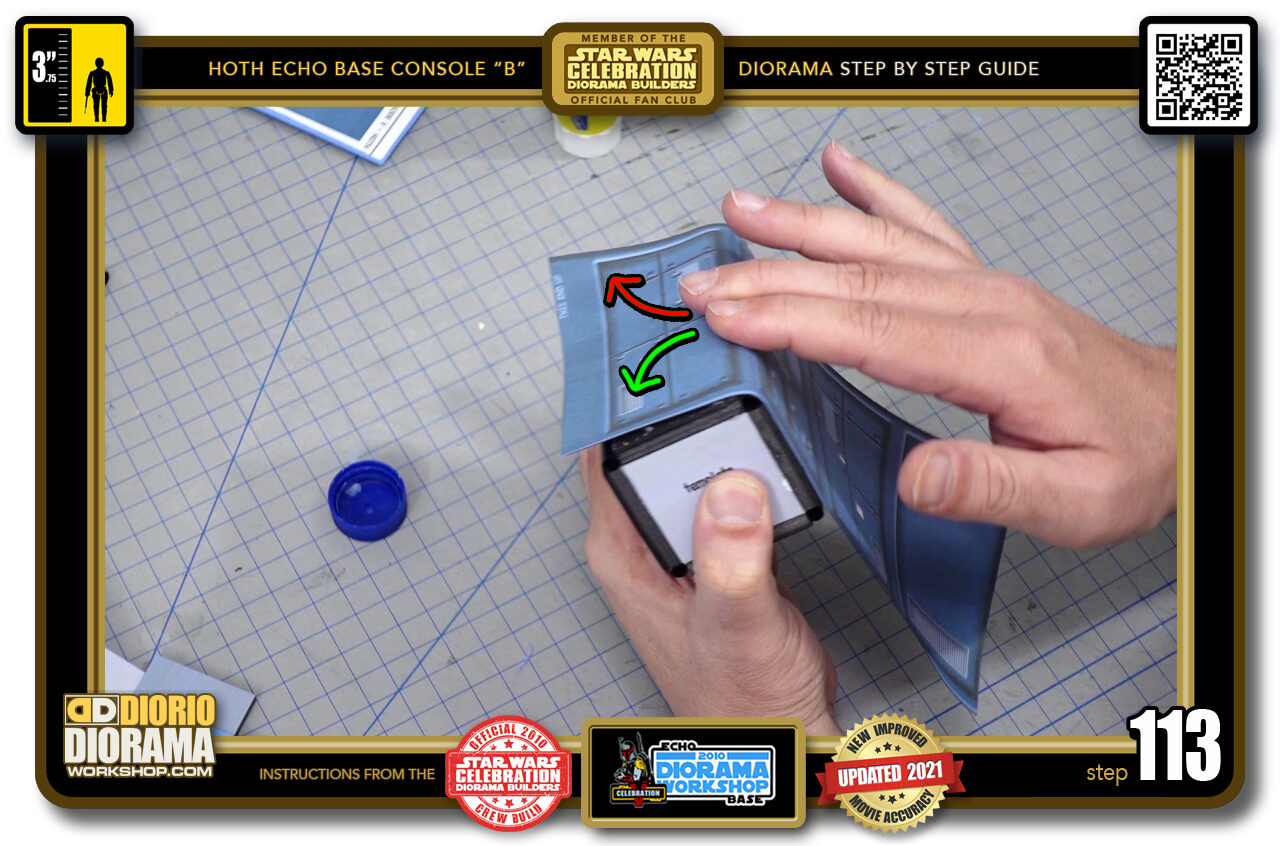
- STEP 113 > Once it is placed to your satisfaction, you can now go from the centre bottom and up to the left (green arrow) then return to the centre bottom and move up towards the right (red arrow).
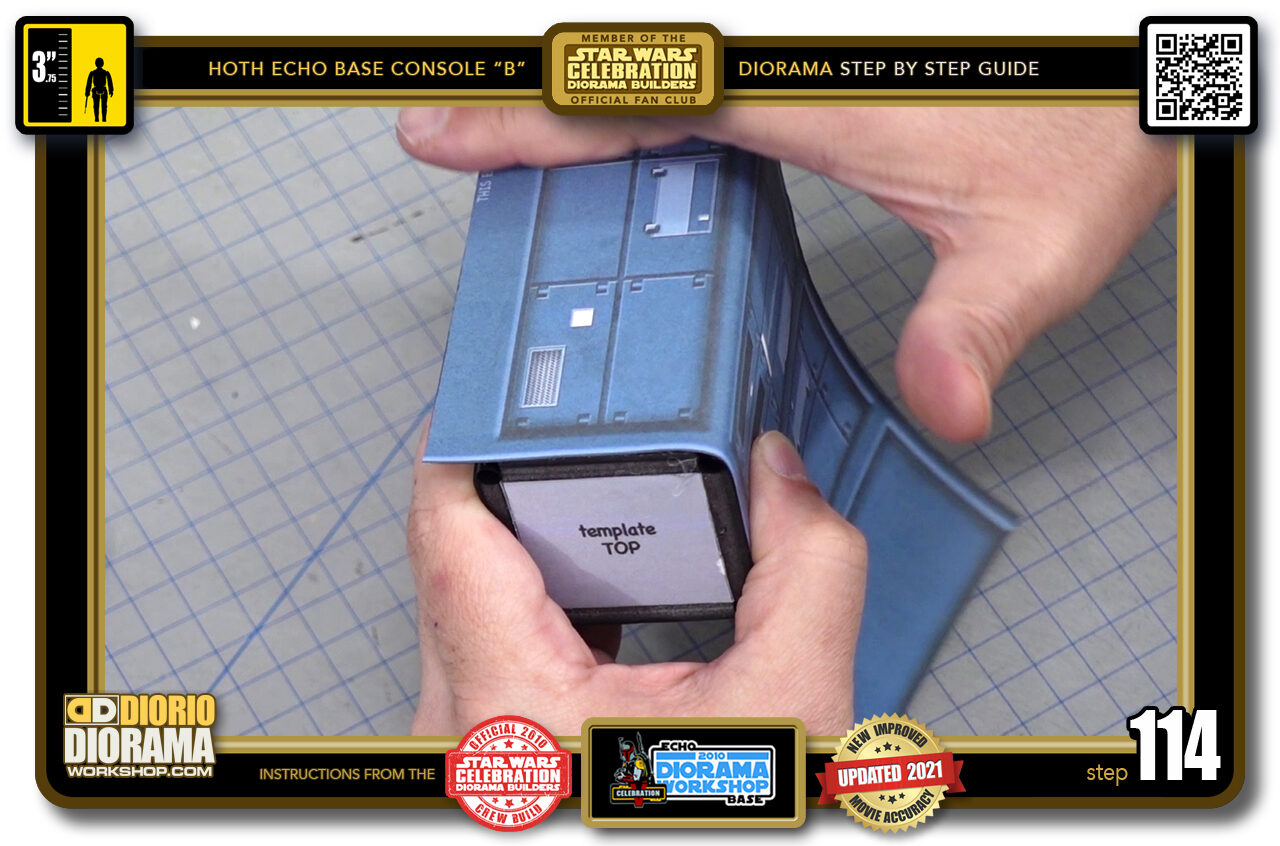
- STEP 114 > Then when you know there are no bubble or folds you can use your entire hand to move across the decal surface and make sure the contact is nice and tight.
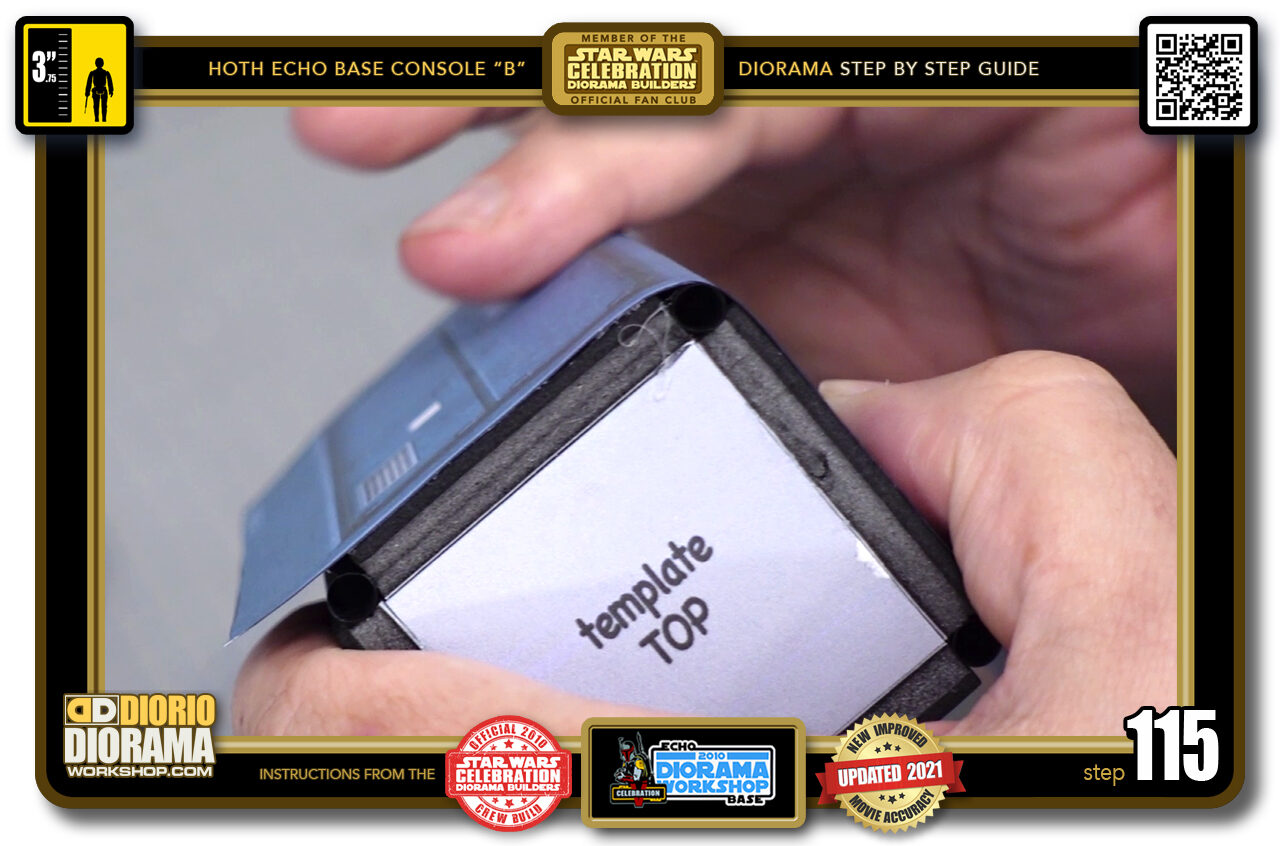
- STEP 115 > You can see here how the decal just curves around perfectly as I designed.
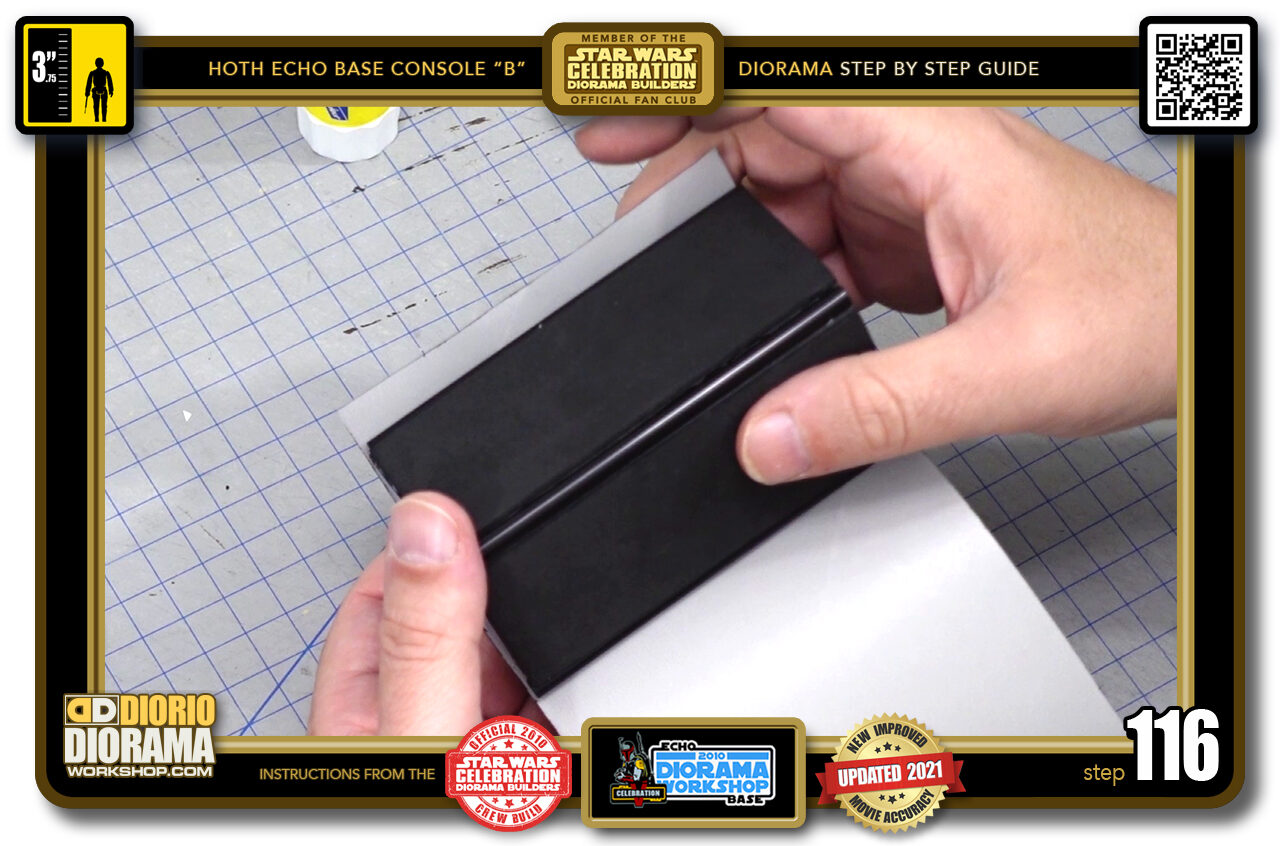
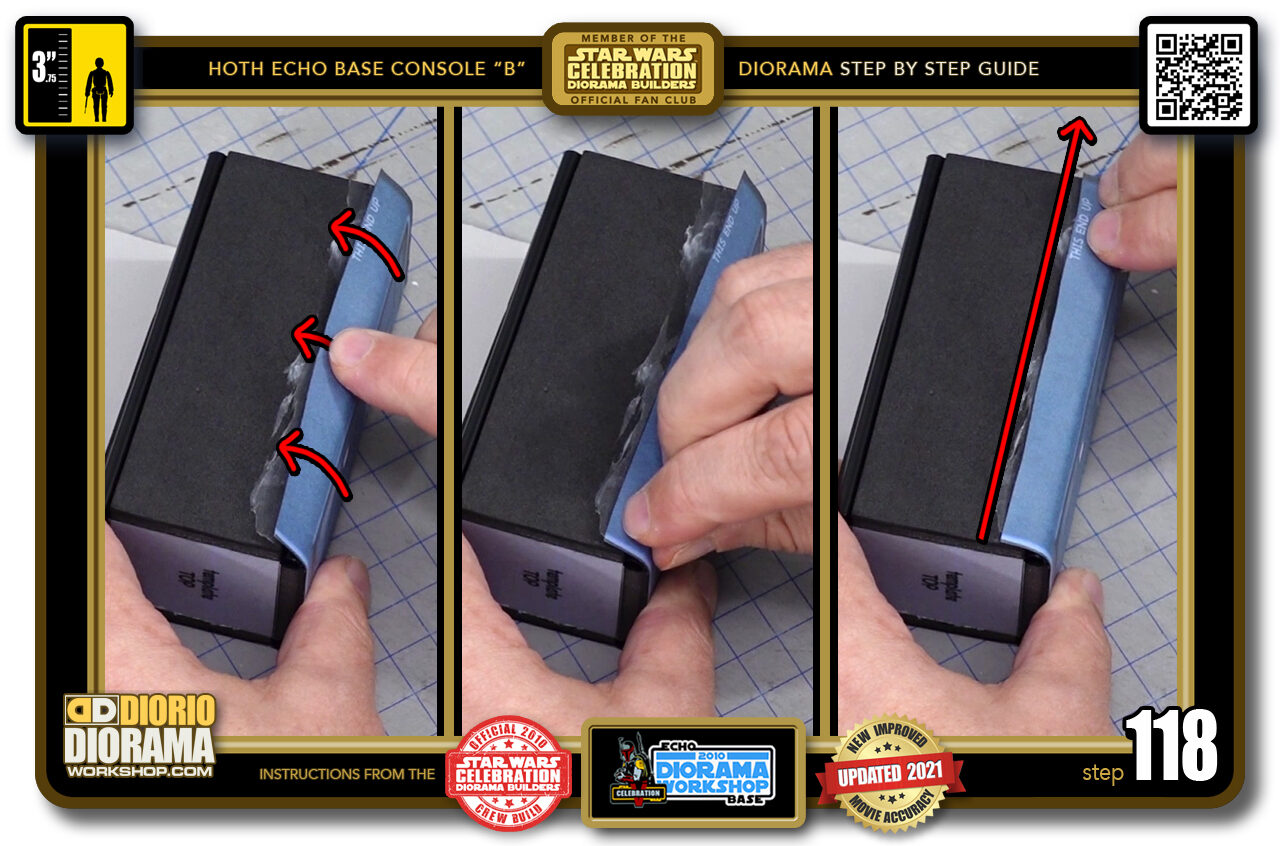
- STEP 116 > Next up is to fold over the small decal lip that has the THIS SIDE UP written on it.
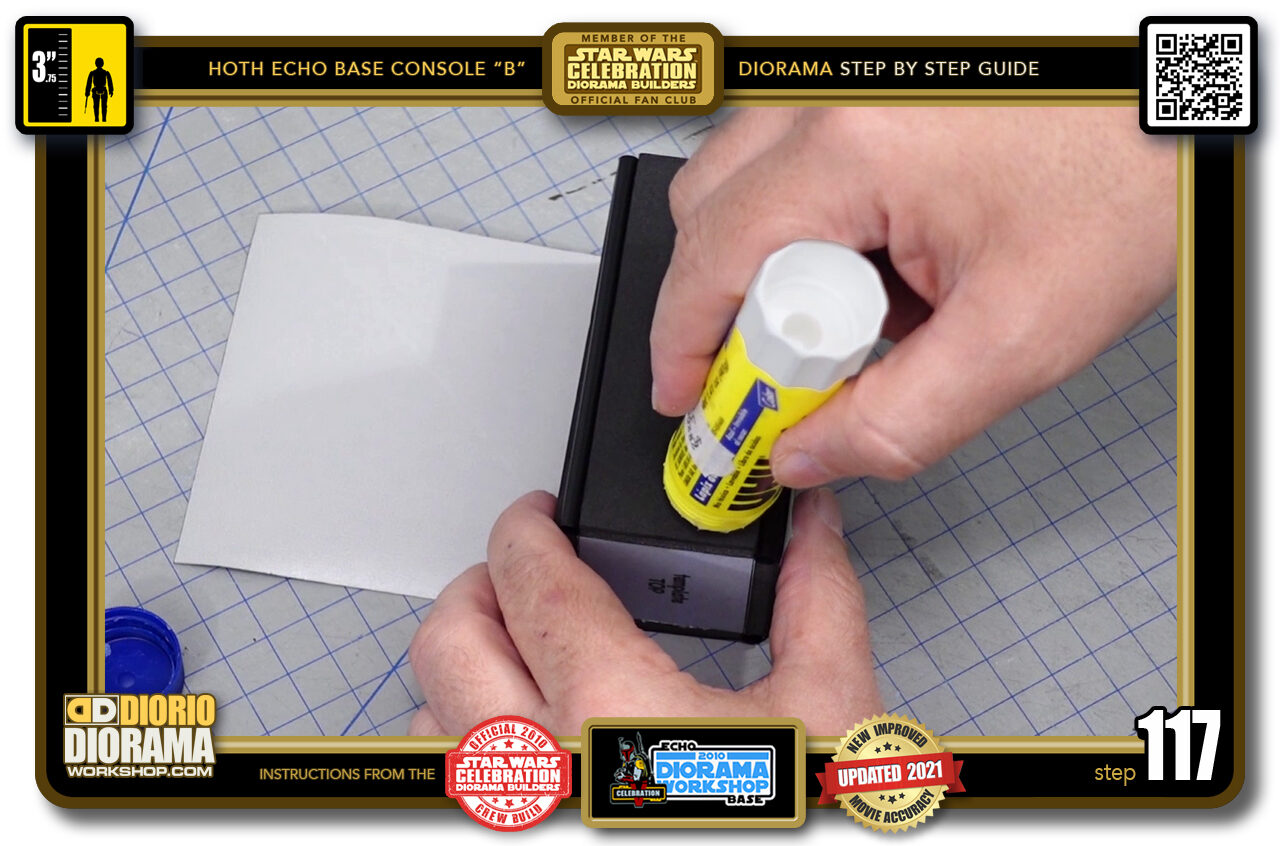
- STEP 117 > We want to place some gluestick along the 1/4 of the side. where the decal will touch. Try NOT to cover the entire surface as your fingers will likely touch the glue and things will get messy fast and you risk putting glue all over the decal surface.
- STEP 118 > Start by gently folding over the decal with your index finger (left image). Once it started to bend you can start pinching along the straw to make the curve memory more intense (centre image) Last but not least, move your fingers along the top of the decal all the way across.
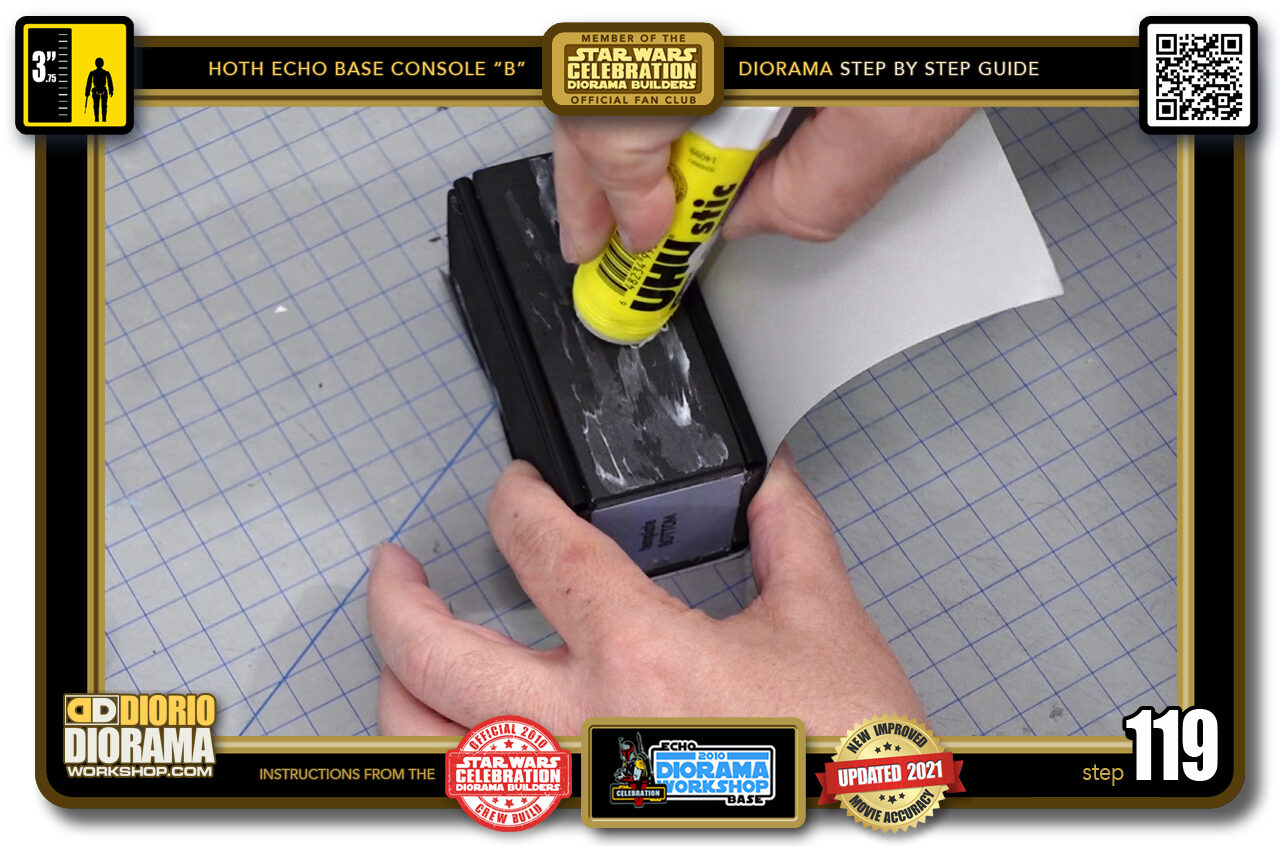
- STEP 119 > Now for the 3rd side - or the panel to the right of the first glued side - I hope that doesn't sound too confising LOL. Gluestick all across the foamie surface.
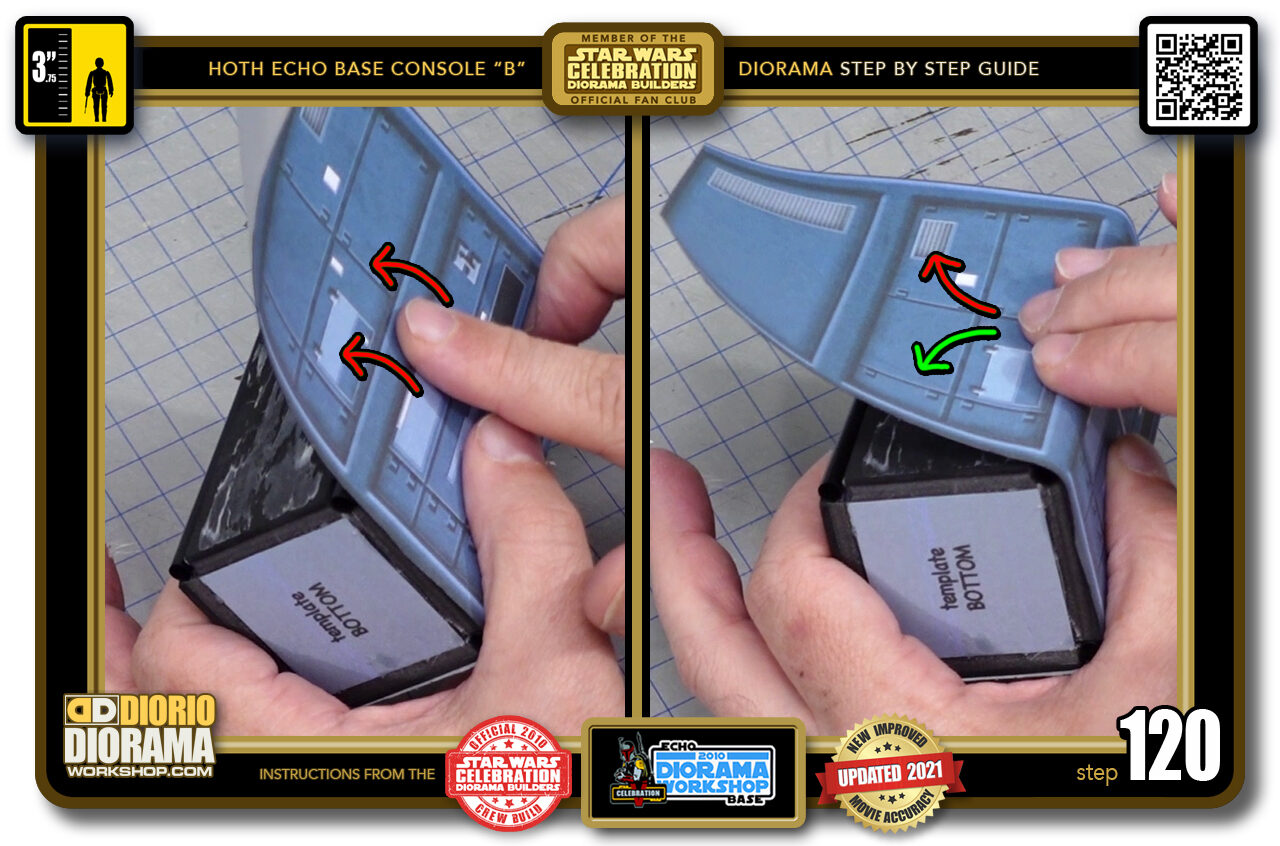
- STEP 120 > Like we did before. Carefully and gently start by folding the decal over the straw at the centre (left image) then go back to the centre bottom and move up and left (right image green arrow) then back to centre bottom and move up to the right (right image red arrow).

.
Did you already build this Diorama ? At home or at our Star Wars Celebration Diorama Builders workshop ? Would you like to show it in the site’s GALLERY VISITORS DIORAMAS section, YES ? That is Awesome !!! You can find out all the details on how to email me your photos on the VISITORS SUBMISSIONS INFO page … When I get your photos, I will create your very own page just like this one. You may not realize it but work does inspire others to join in the fun of making Action Figure Dioramas.
.
NOT FOR RESALE ALL Decals, tutorials and artwork are ©FrankDiorio (dioramaworkshop.com) and offered FOR FREE to the fans – that would be you ? so you can build and display my diorama designs in your very own home. I realize I cannot control what one does with my graphics once I place them on the web, I can only ask you as one fan to another, please respect the artist and do not be that jerk who uses my designs and tutorials to build a copy of my work only to sell it on EBAY or trade/sale groups and forums. Thank You. Frank.
.
.
.
If you have a facebook account, why not join the Official Diorama Builders Fan Club today, simply click the logo link below.
 .
.
Catch up with fellow visitors and exchange stories, read cool interviews with the crew, exchange photos, fun surprises and grab some FAN ONLY merchandise next year at actual future conventions ?
.
©2021 Frank Diorio DioramaWorkshop.Com
.
IF YOU LIKE WHAT YOU SEE, PLEASE SHARE WITH YOUR FRIENDS
USING THE SOCIAL MEDIA BUTTONS BELOW


