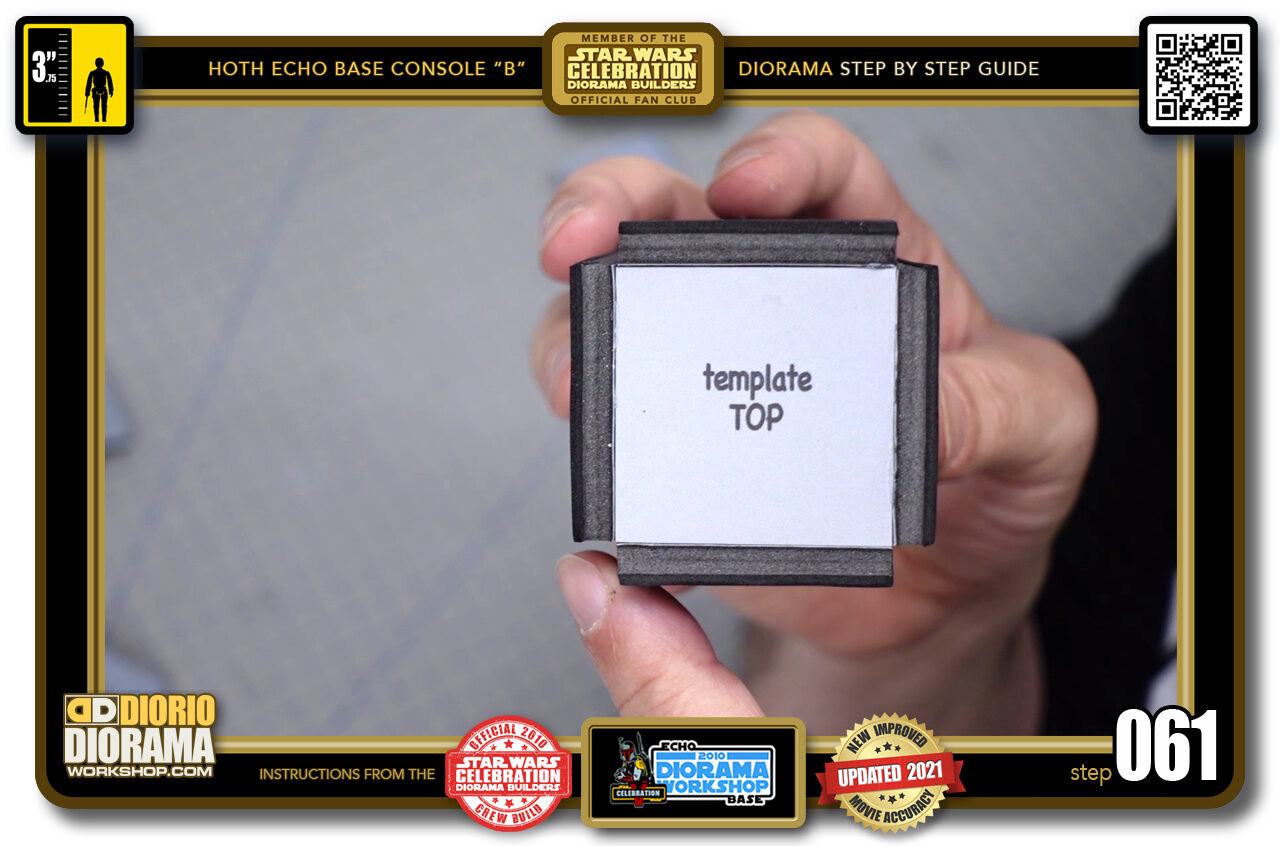
- STEP 061 > We now have full connection to either your top or bottom (I started with top as shown here) foamcore square template.
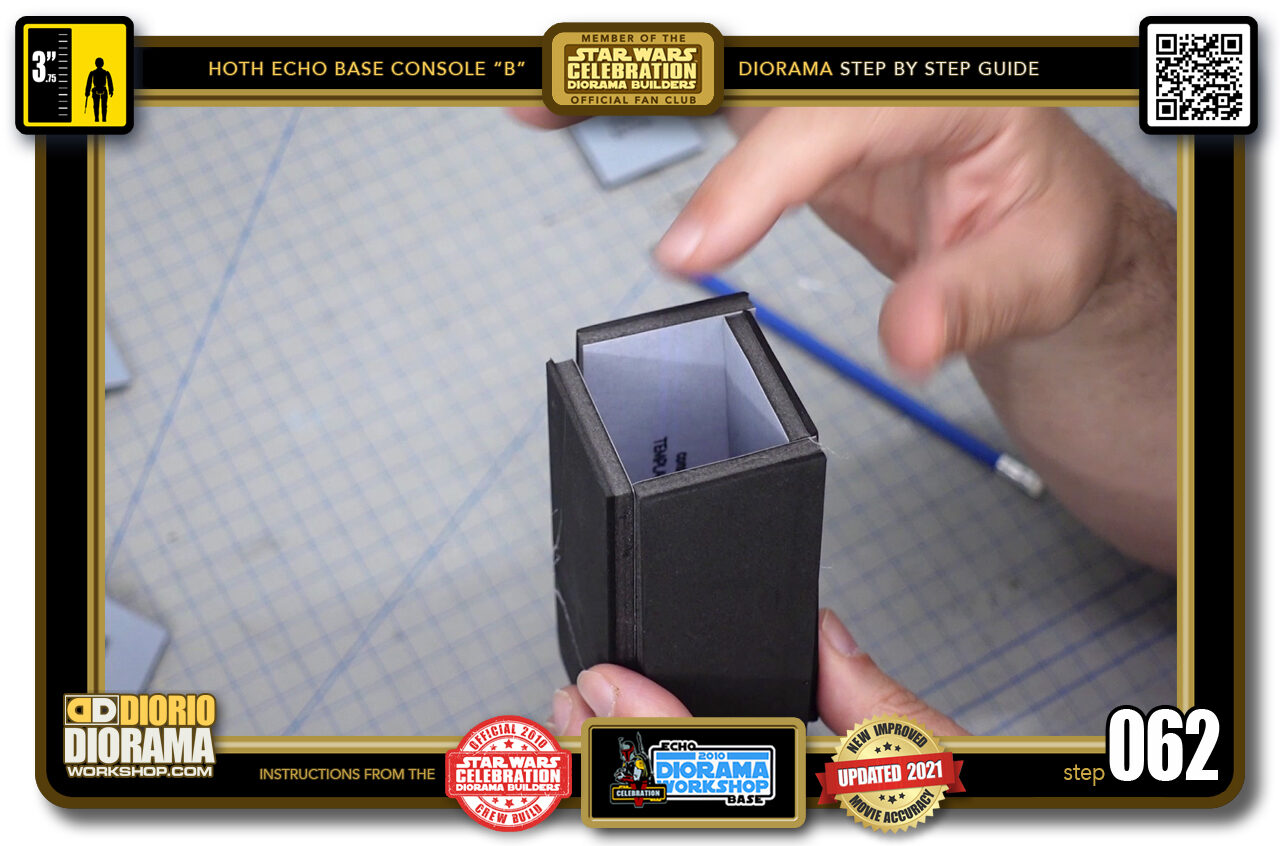
- STEP 062 > It's time to repeat the same technique for the other end.
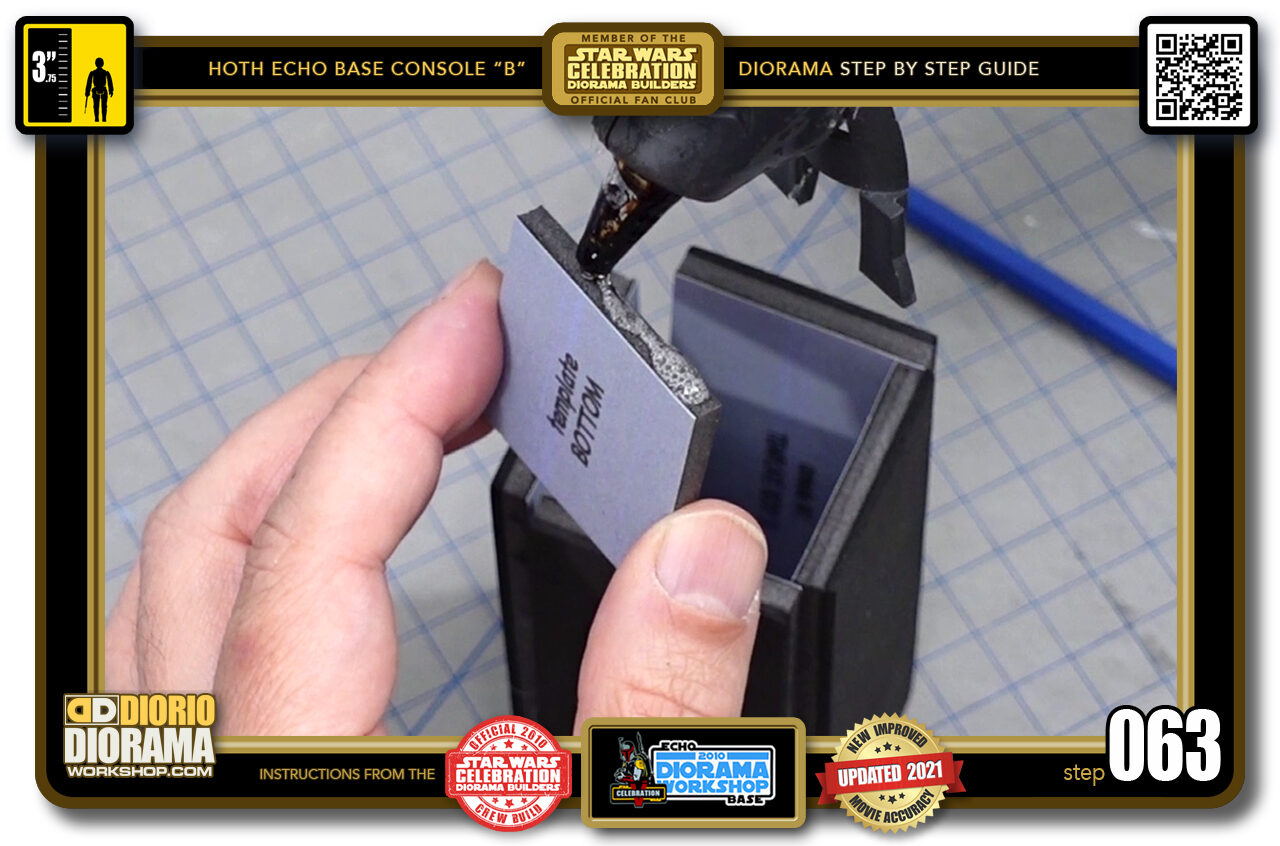
- STEP 063 > Pick a side and apply a small line of hot glue onto it.
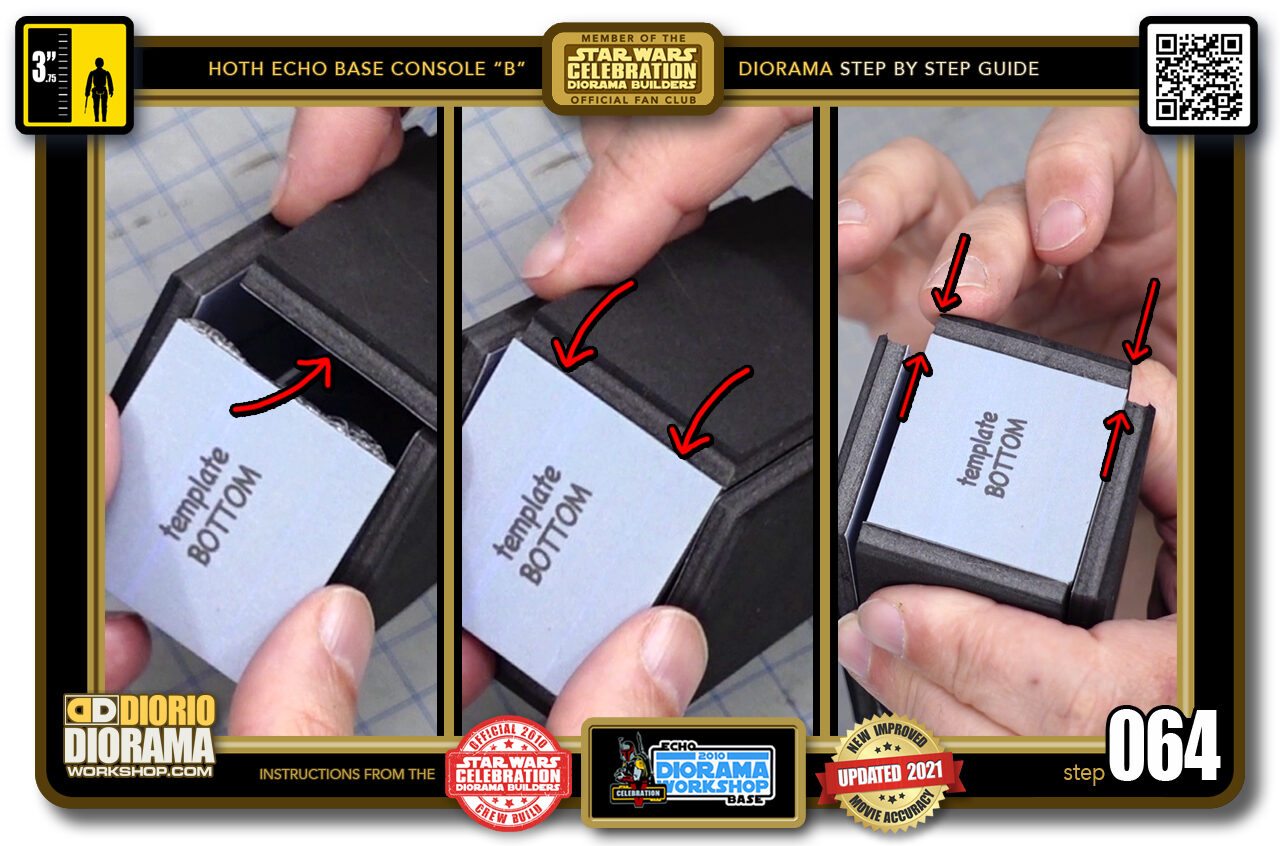
- STEP 064 > Now we want to slowly and carefully slide the square piece under your first side (left image) then slowly lower the side piece to make contact with the square piece (centre image) and make sure it is centred with each corner of your side piece. Also make sure it is FLUSH with the square's surface. You don't want to feel a bump when passing your finger across the 2 pieces.
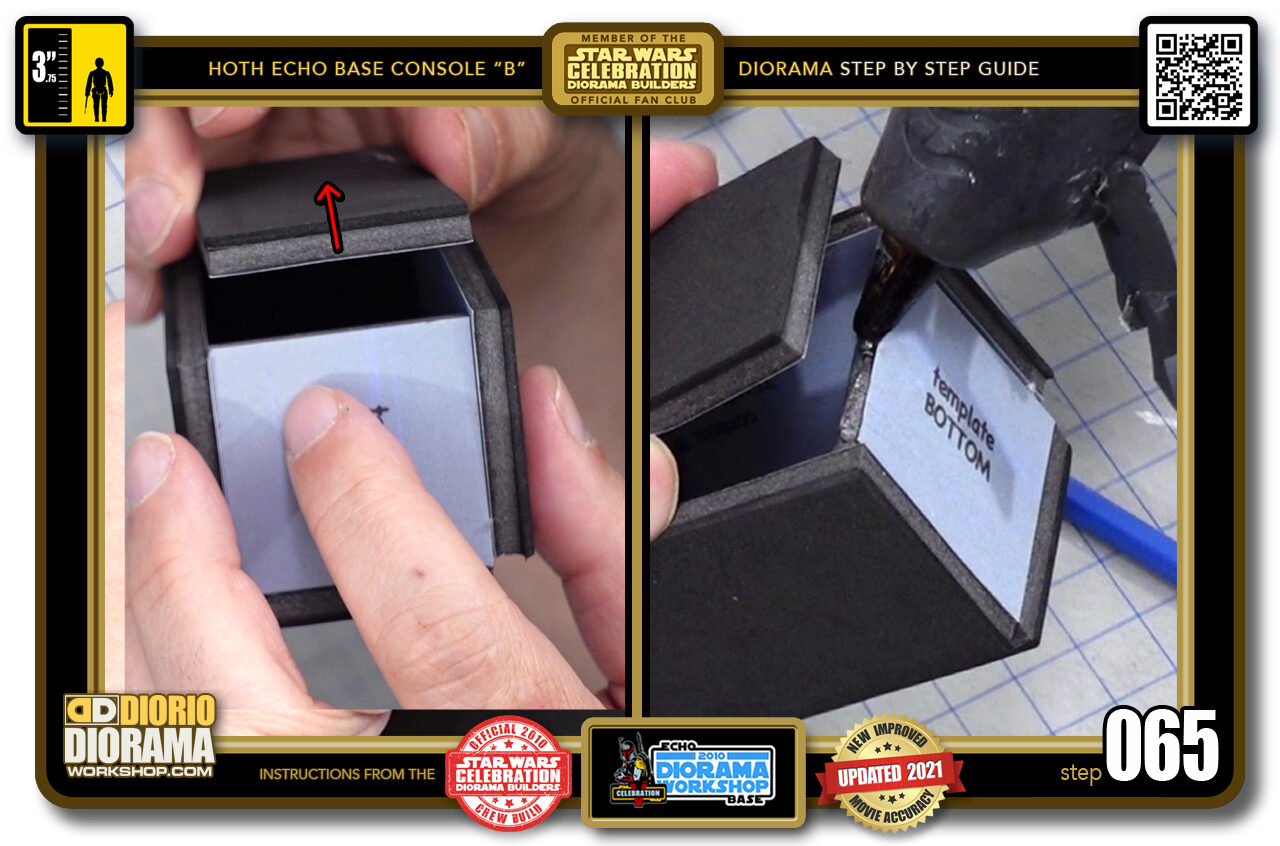
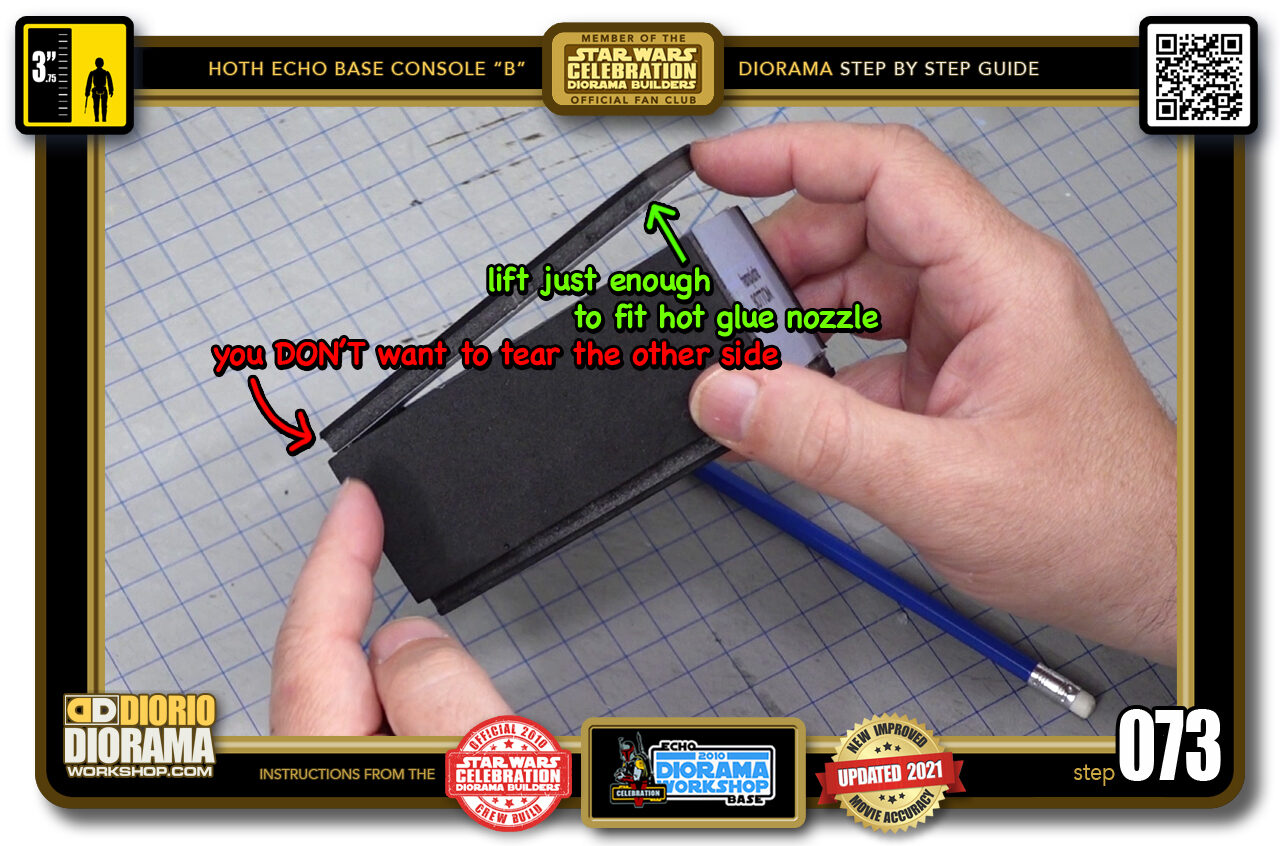
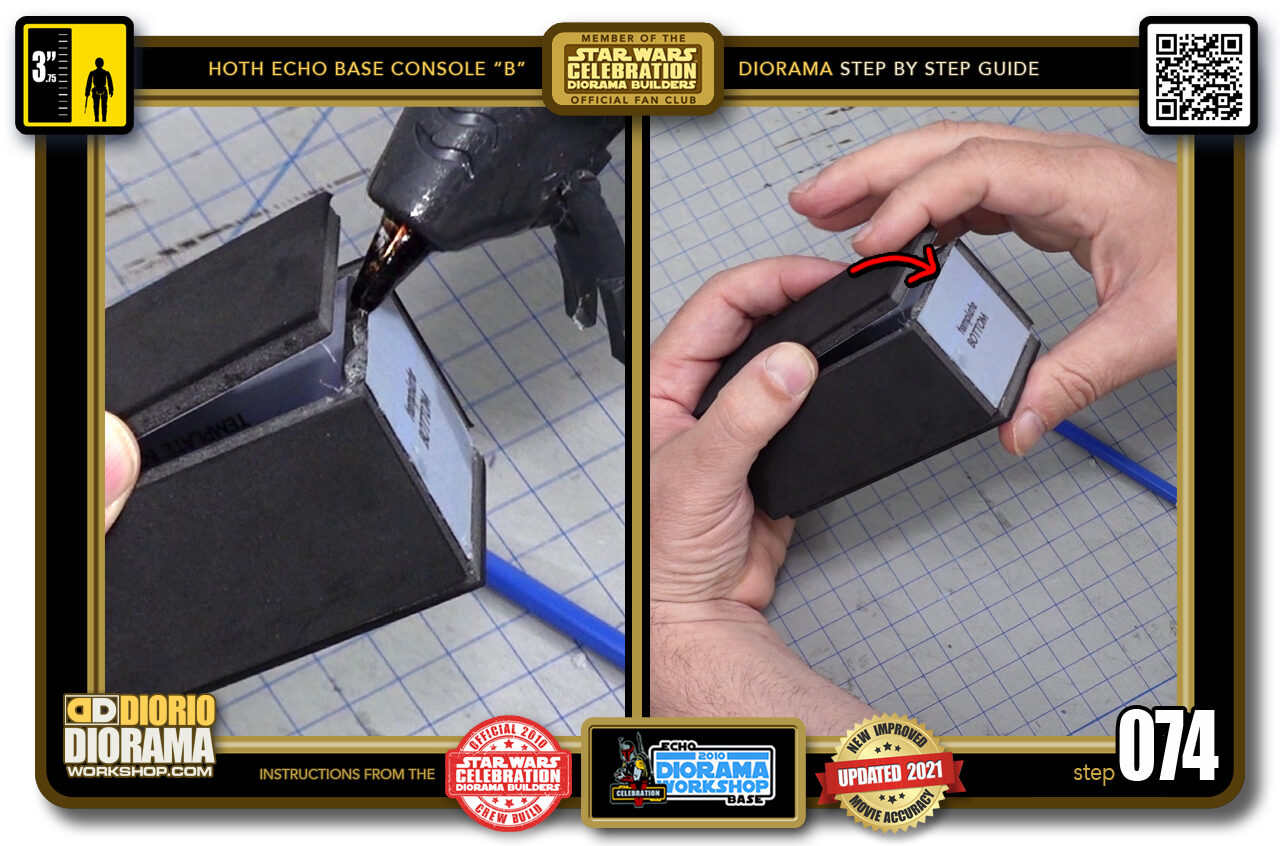
- STEP 065 > Next we must glue the OPPOSITE side of your square's first connection - PLUS - From this point on, for the other 3 sides, you need to first gently LIFT UP the end (left image) to allow your hot glue gun nozzle to squeeze in between the gap and allow you to then apply your line of hot glue to the edge surface (right image).
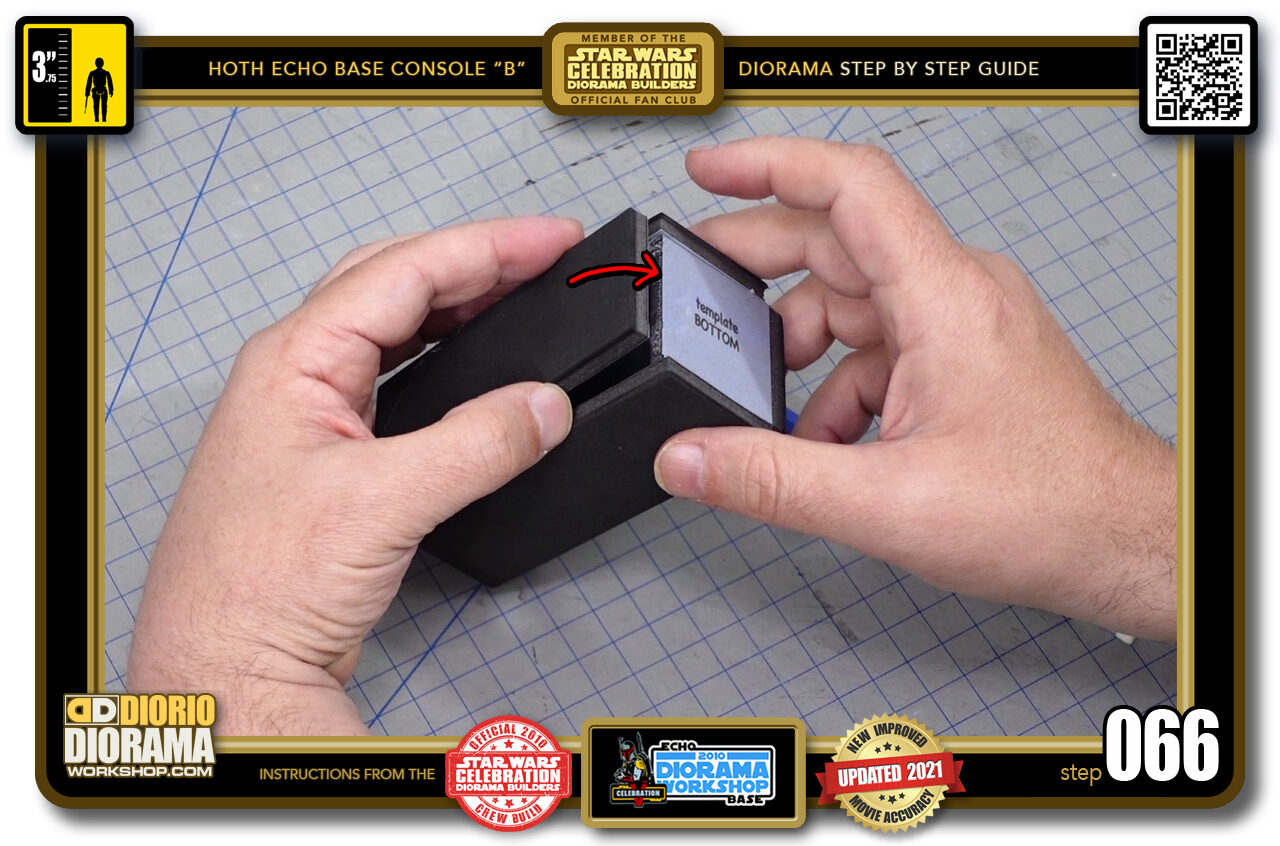
- STEP 066 > Then slowly lower the end until you make contact with your square piece.
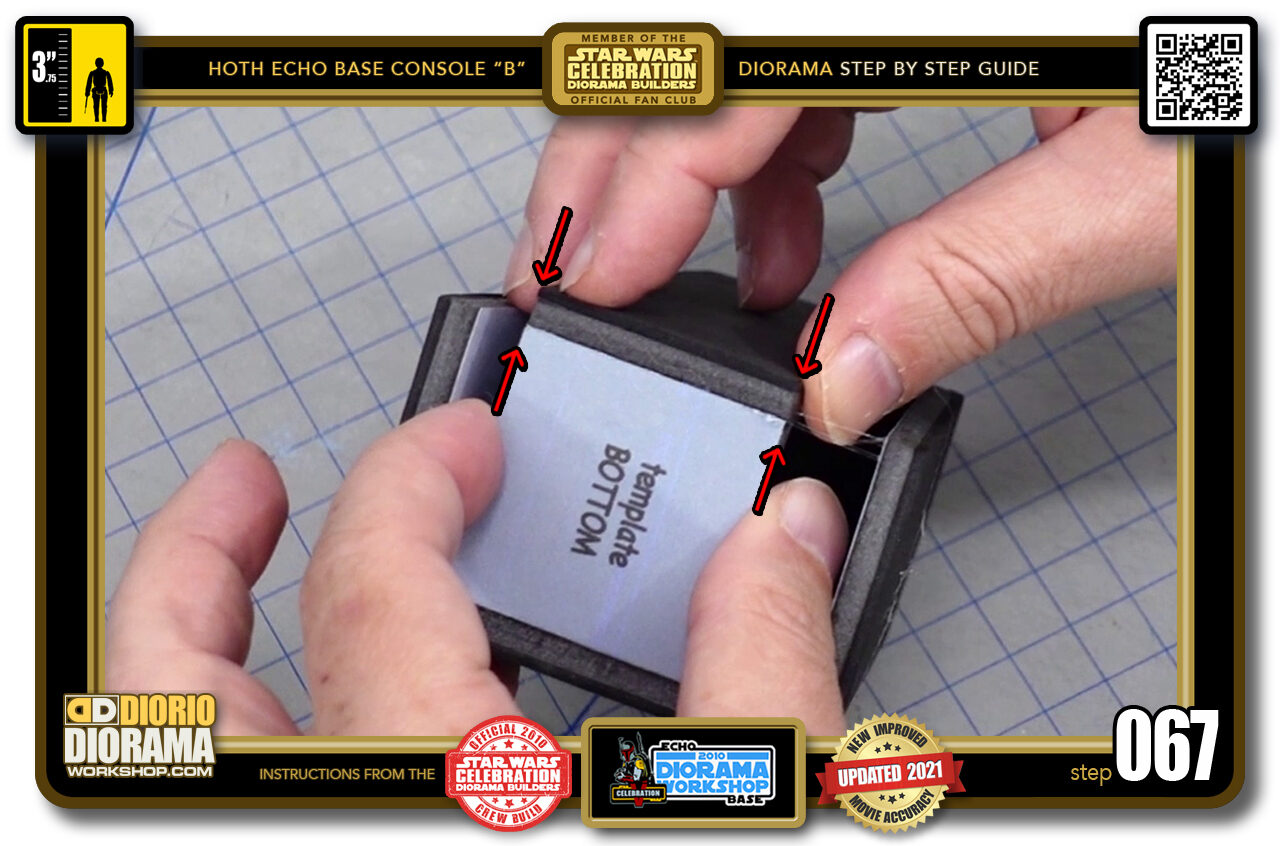
- STEP 067 > Remember to make sure your corners all line up and you are flush with the top surface of your square piece.
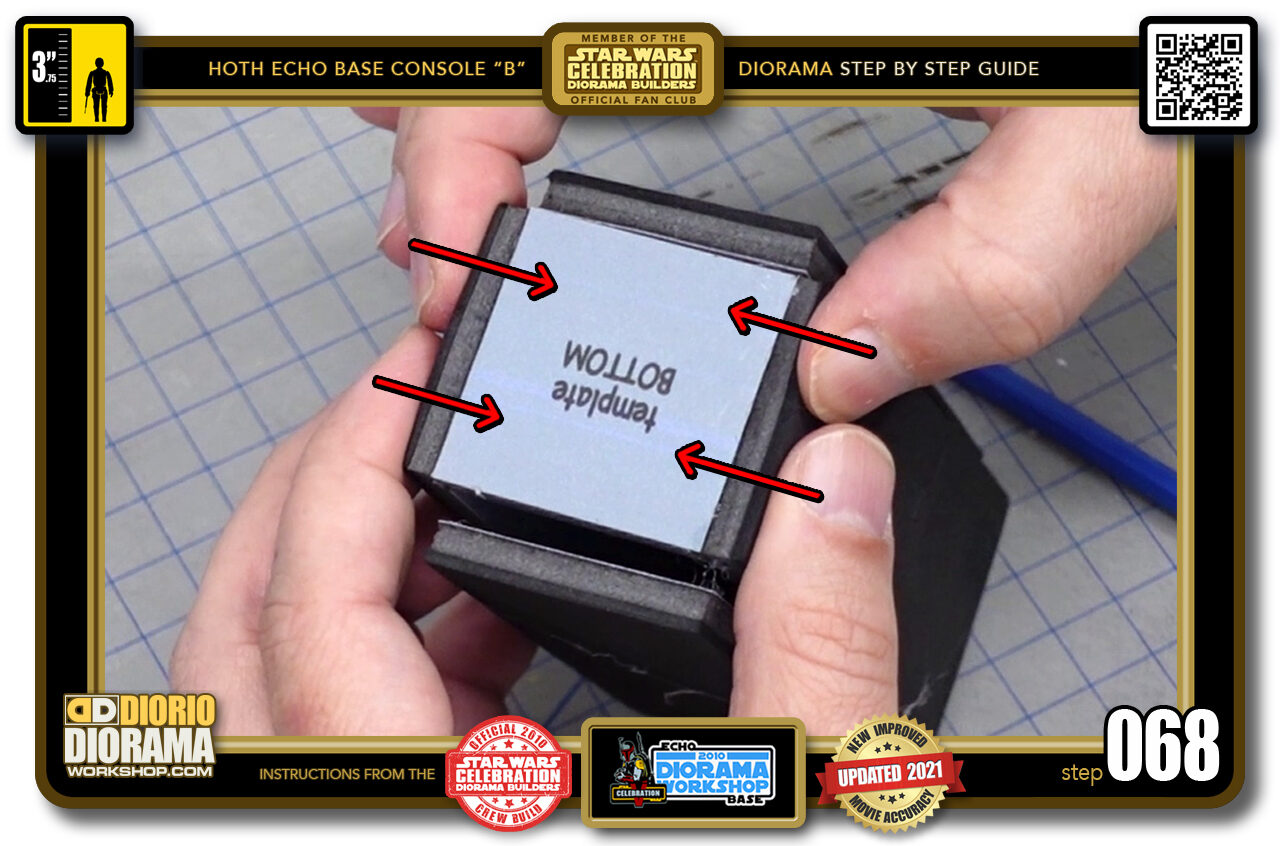
- STEP 068 > Now with your thumbs and index fingers, press your console body bottom (First and 2nd glued side) together and hold for 20-30 seconds until the glue from side 2 has cooled down a little and safe to move on to side 3.
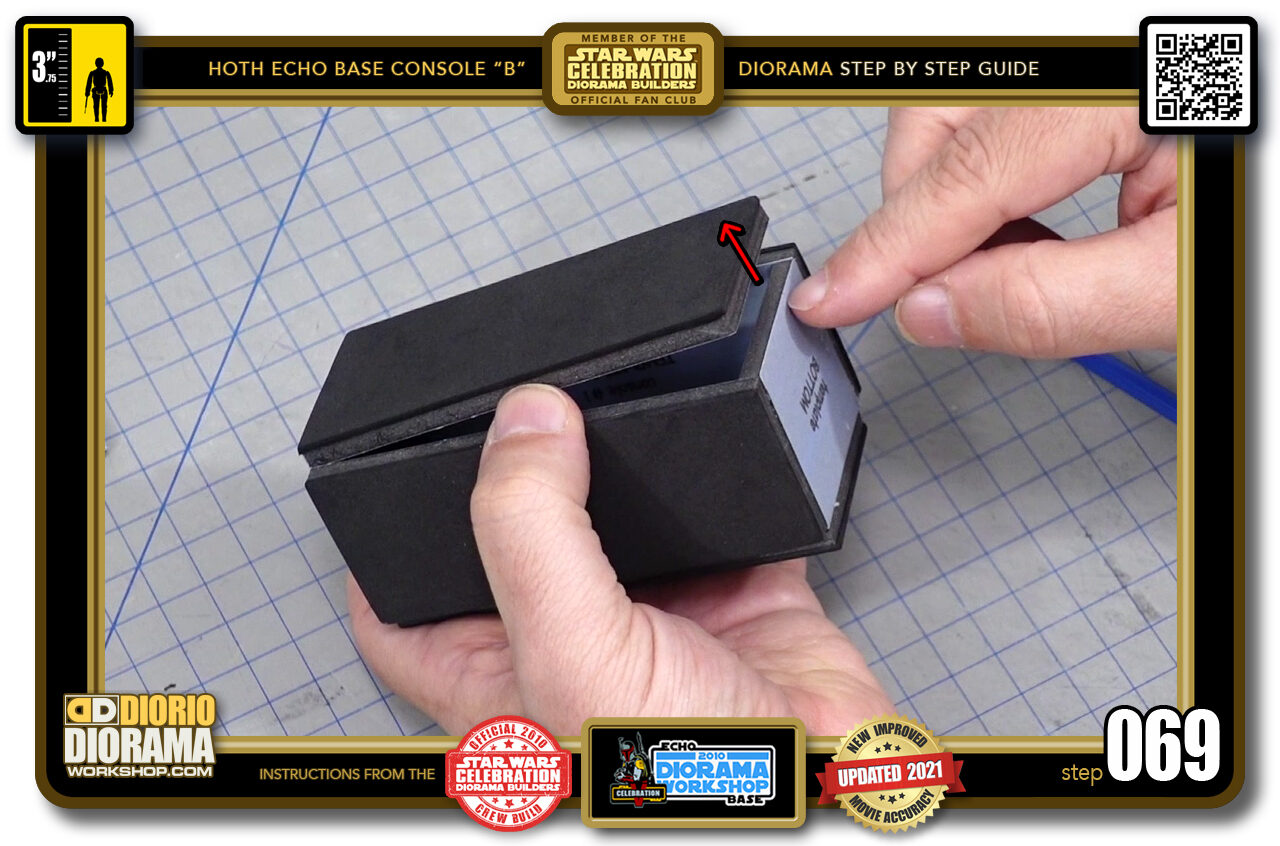
- STEP 069 > Time for side 3. Start by gently lifting the end again.
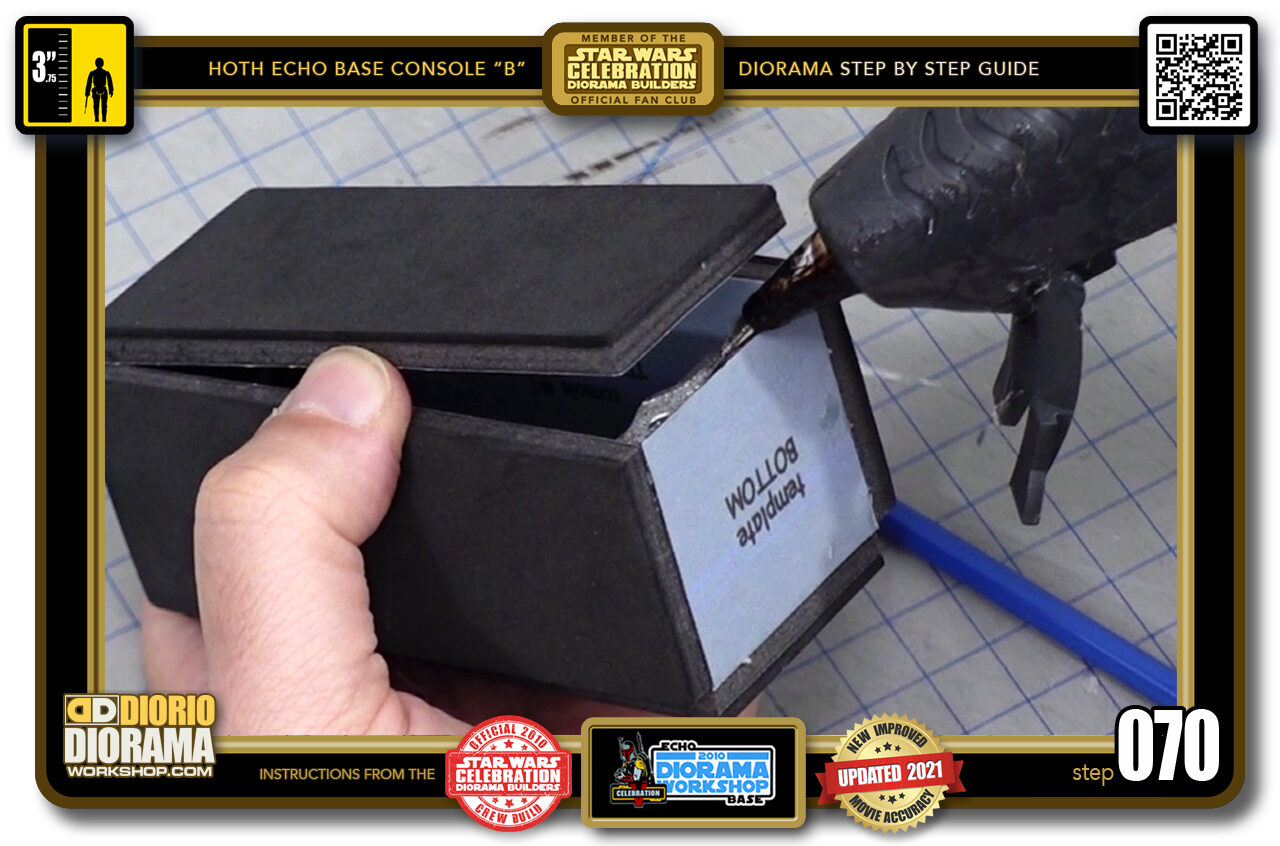
- STEP 070 > Place a small line of hot glue against the edge.
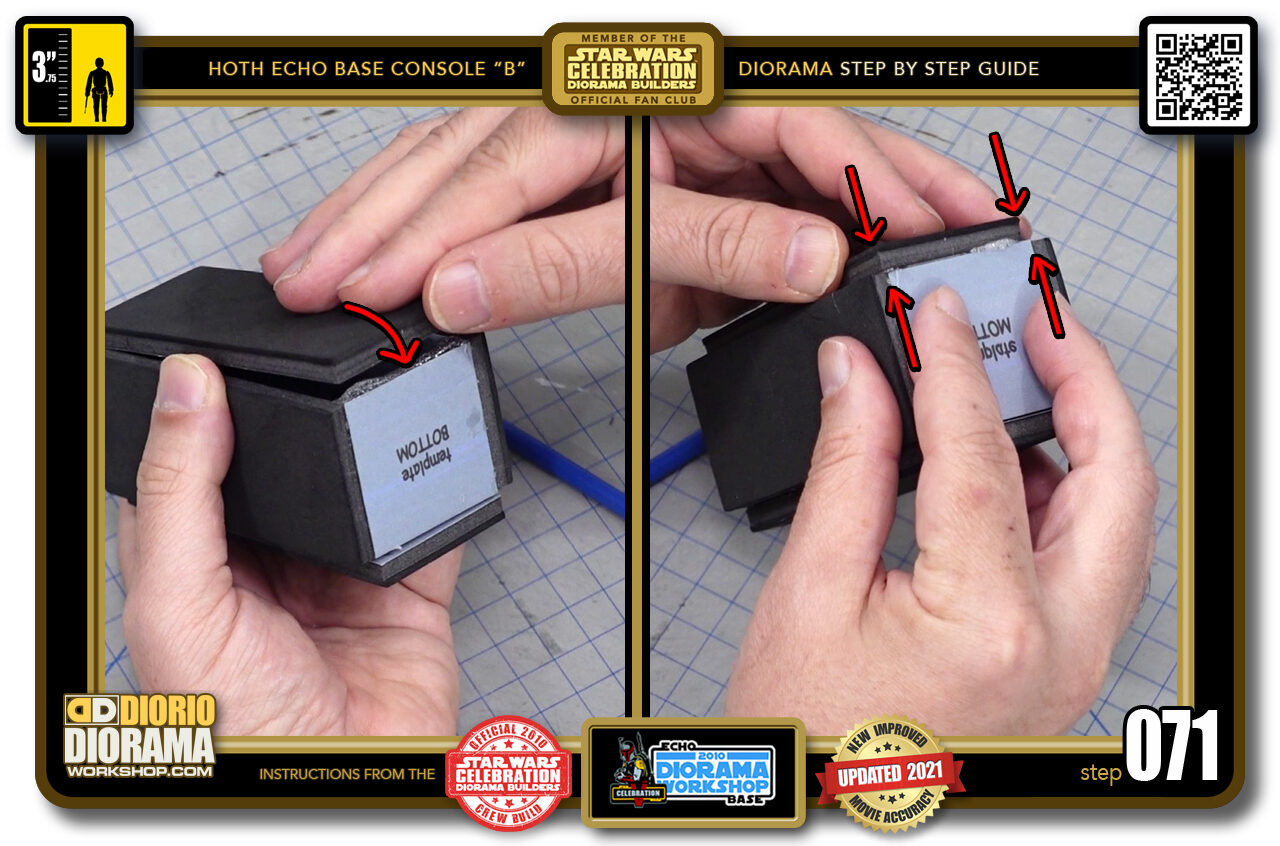
- STEP 071 > Lower your side end (left image) until you make contact. and make sure your corners line up perfect with your square piece sides (right image).
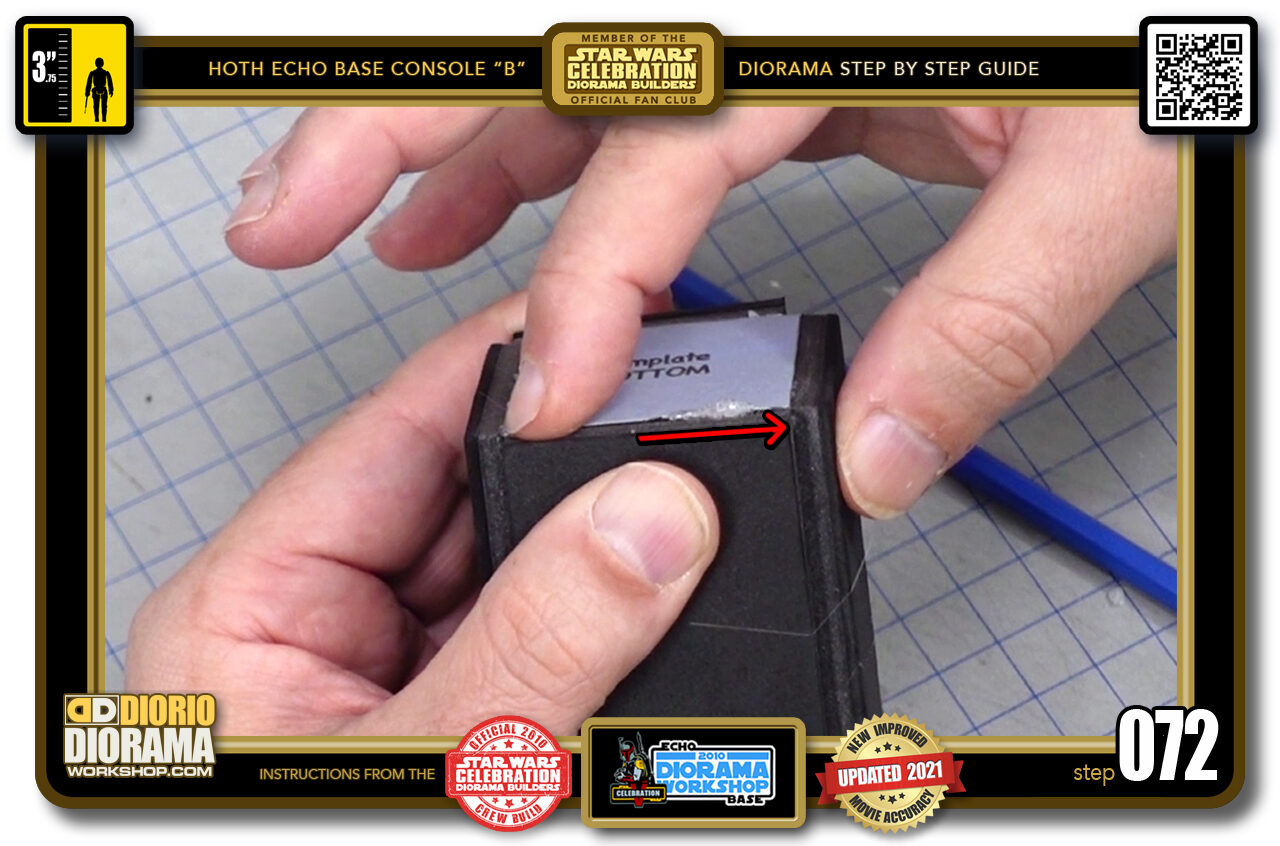
- STEP 072 > If some hot glue smooshes out from the connection, wait 5-10 seconds and you can swipe the excess off with your finger in a fast motion in case the glue is still hot. If too hot you can risk burning your finger, if too cool, it may have solidified beyond the point of being able to smoosh/wipe it off. After time, you will get the feel of what temperature you feel comfortable touching.
- STEP 073 > Also, I maybe should have said this when doing the first piece, but when you lift the end, do NOT lift too high so that you will tear and rip the glue from the other end. You want to gently lift just enough to fit the hot glue nozzle.
- STEP 074 > So last piece, repeat all the steps and press the sides together until you feel the body pieces are secure.
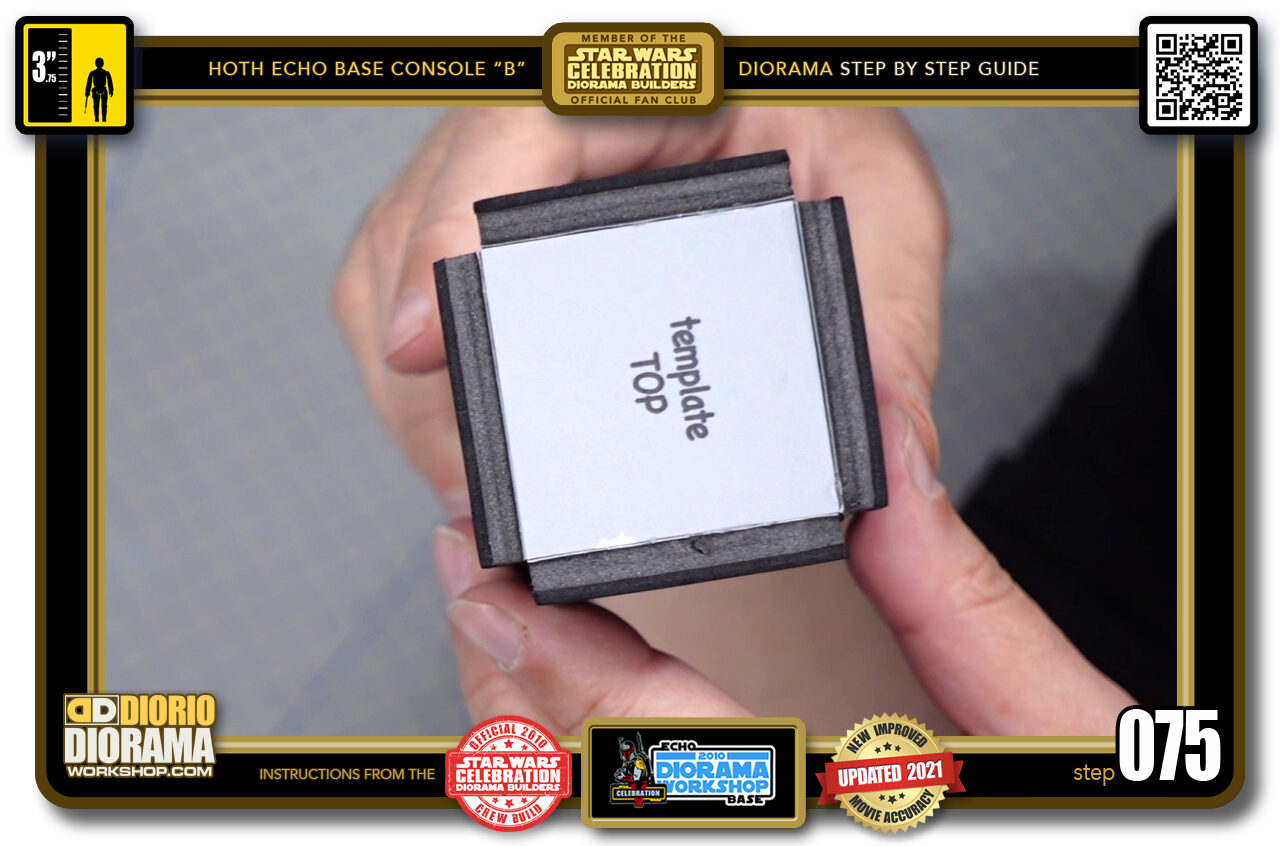
- STEP 075 > The opposite side of our body is now attached as well. Place it aside and let's move on to the decal skins...
-
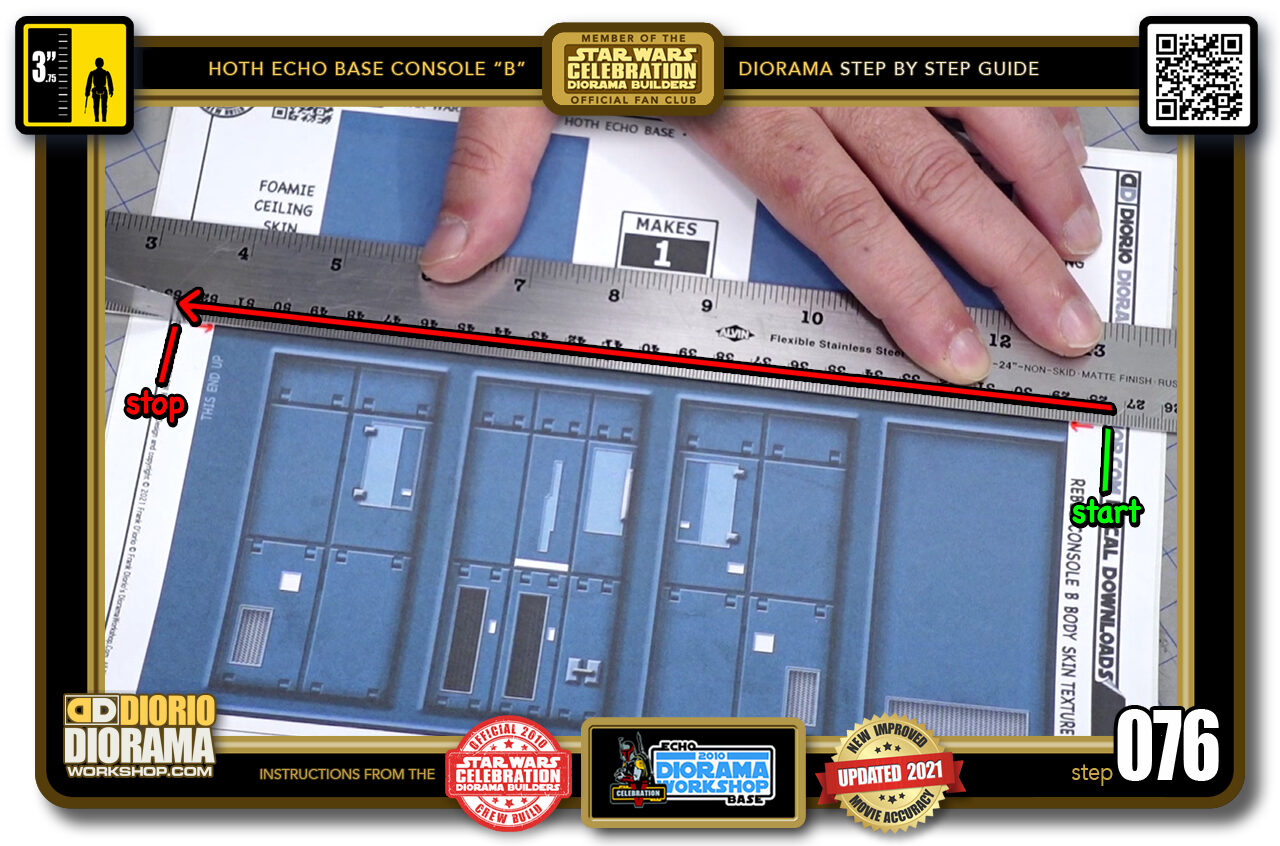
STEP 076 > Grab any of the 4 skins - the choice is up to you which one to use. What we want to do here is to separate the top and bottom square skins from the main body wrap. In order to do so we are going to use the RED ARROW CUTTING GUIDES
There is an important thing to know about the guides if you have never used them before in a previous build. When you cut along the first 2 sides, you don't want to slice all the way through the paper print because you risk loosing the guide positions for the opposite sides. So you want to start with the top horizontal cut. Align your ruler with the 2 arrows and Start between the paper's edge and the decal skin colour (green start) and then STOP your cut just after your decal colour but BEFORE the END of your paper. (red stop).
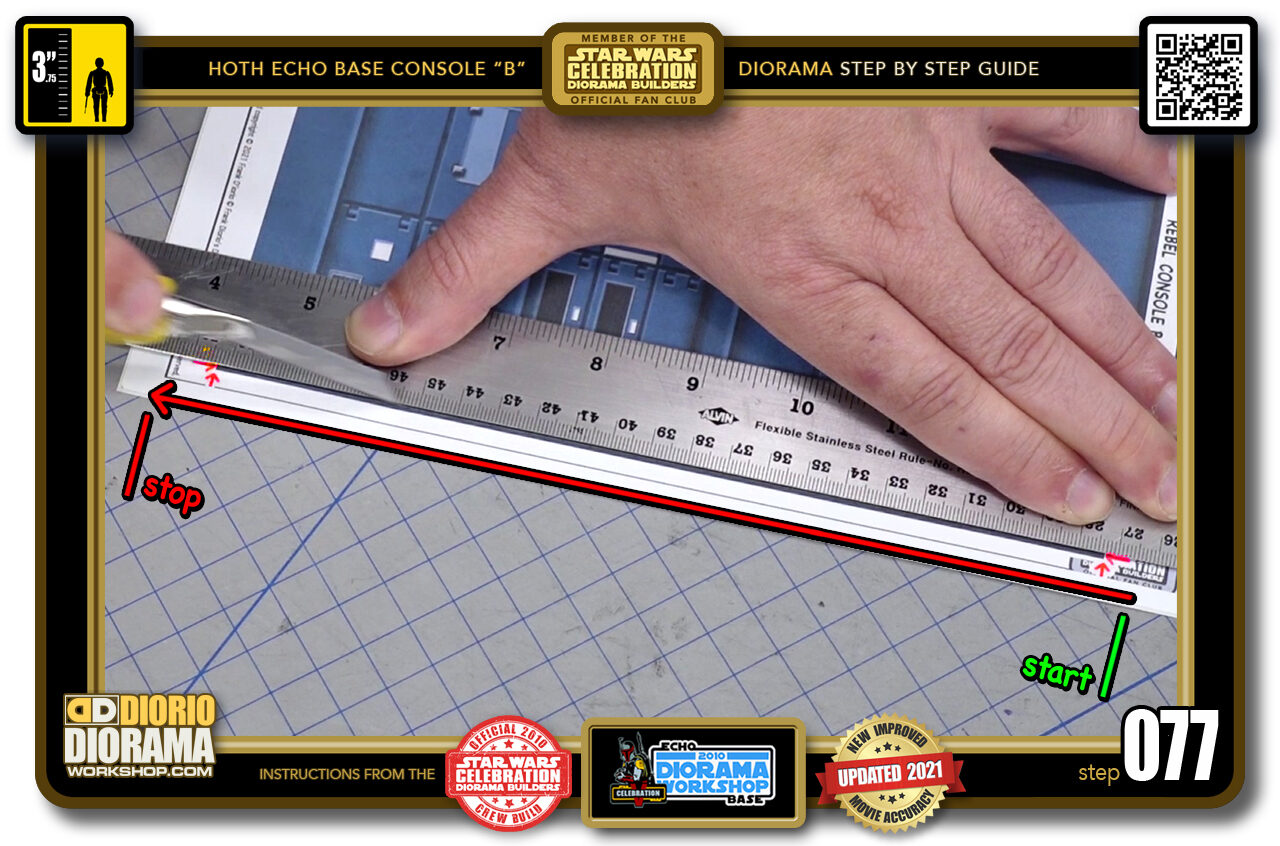
- STEP 077 > Repeat the same thing for the opposite horizontal cut. Align your ruler and slice approximately from where you see the green start to the red stop text seen in the image.
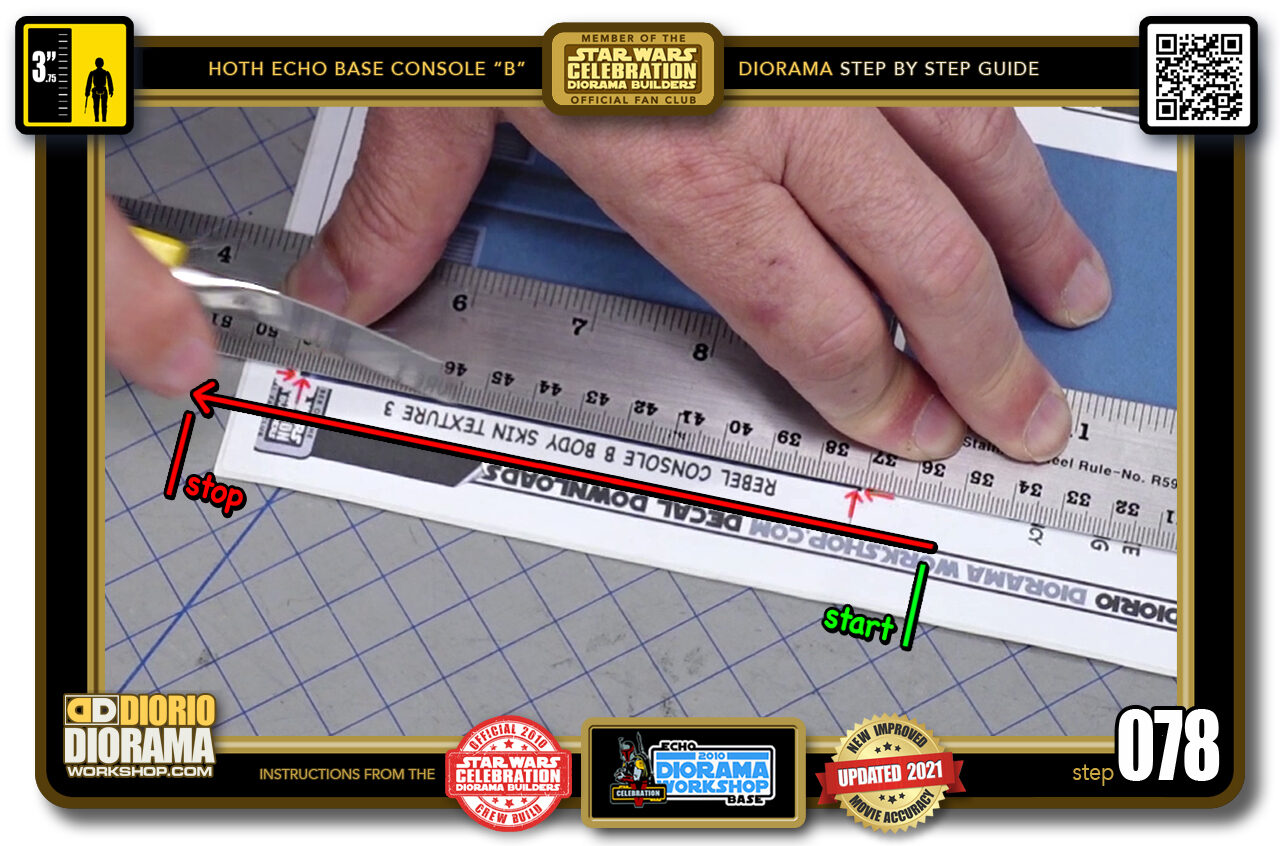
- STEP 078 > Once you have 2 parallel cuts (either both top and bottom as we did here or both left and right sides) you can now cut through past the arrows if you wish as you see in the green start and red stop text seen in the image.
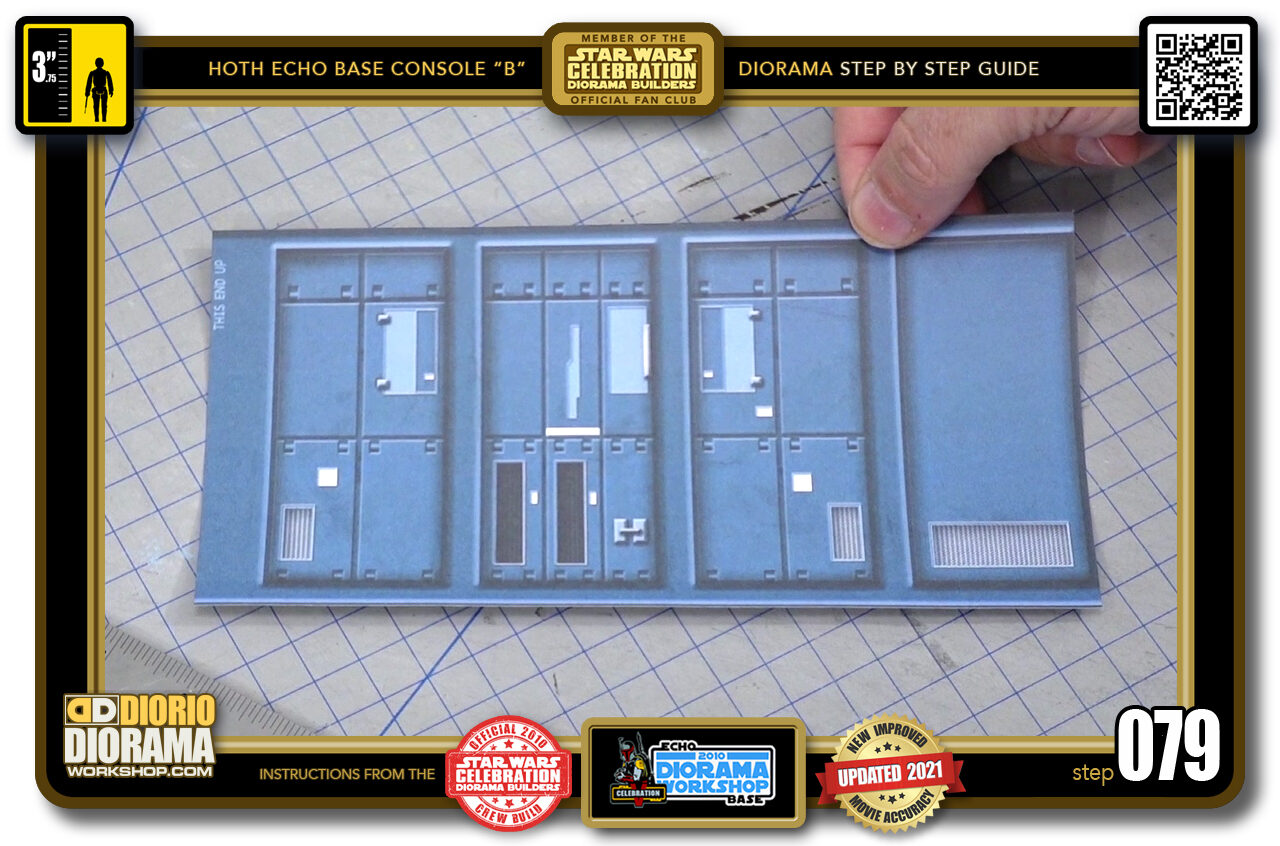
- STEP 079 > You should now have a perfectly trimmed/cut wrap around console body decal skin.
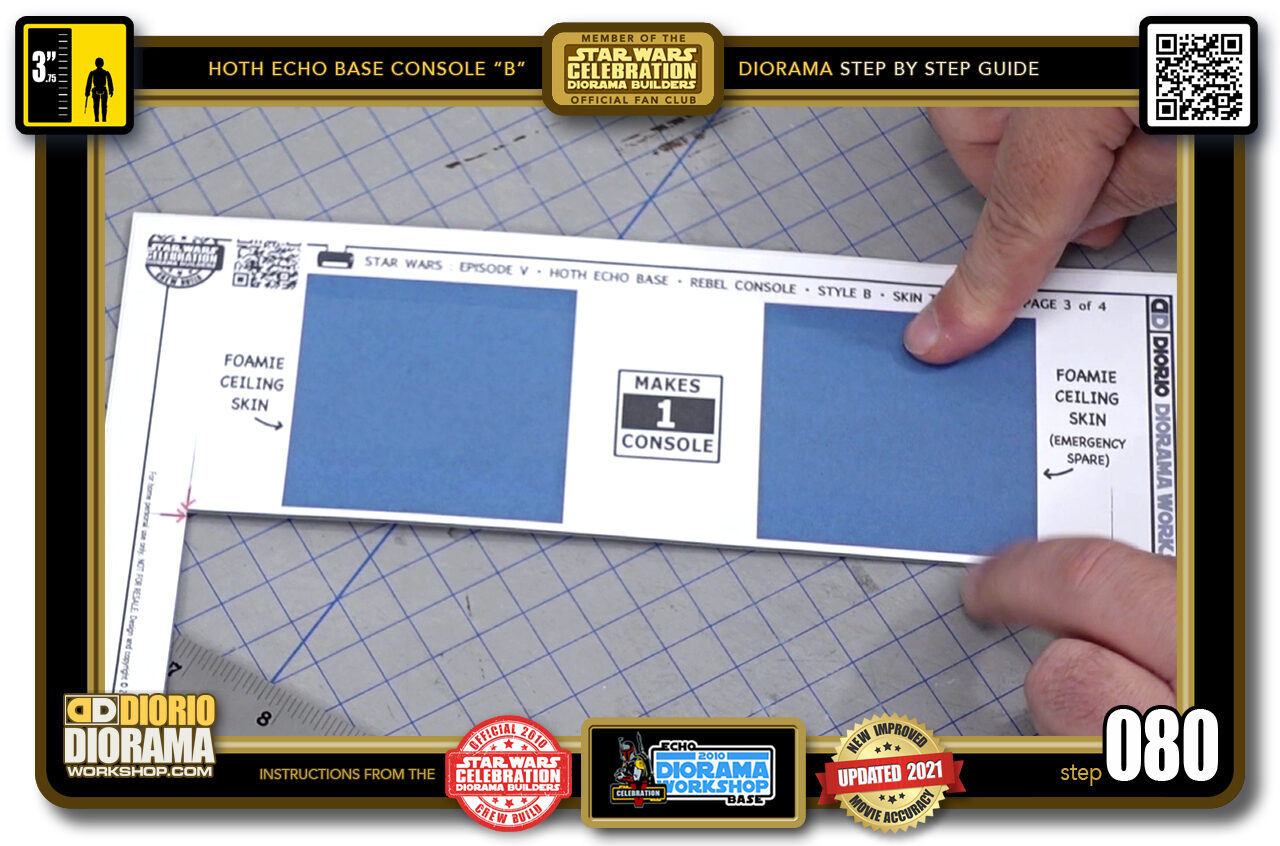
- STEP 080 > This leaves us with the 2 top and bottom squares.

.
Did you already build this Diorama ? At home or at our Star Wars Celebration Diorama Builders workshop ? Would you like to show it in the site’s GALLERY VISITORS DIORAMAS section, YES ? That is Awesome !!! You can find out all the details on how to email me your photos on the VISITORS SUBMISSIONS INFO page … When I get your photos, I will create your very own page just like this one. You may not realize it but work does inspire others to join in the fun of making Action Figure Dioramas.
.
NOT FOR RESALE ALL Decals, tutorials and artwork are ©FrankDiorio (dioramaworkshop.com) and offered FOR FREE to the fans – that would be you ? so you can build and display my diorama designs in your very own home. I realize I cannot control what one does with my graphics once I place them on the web, I can only ask you as one fan to another, please respect the artist and do not be that jerk who uses my designs and tutorials to build a copy of my work only to sell it on EBAY or trade/sale groups and forums. Thank You. Frank.
.
.
.
If you have a facebook account, why not join the Official Diorama Builders Fan Club today, simply click the logo link below.
 .
.
Catch up with fellow visitors and exchange stories, read cool interviews with the crew, exchange photos, fun surprises and grab some FAN ONLY merchandise next year at actual future conventions ?
.
©2021 Frank Diorio DioramaWorkshop.Com
.
IF YOU LIKE WHAT YOU SEE, PLEASE SHARE WITH YOUR FRIENDS
USING THE SOCIAL MEDIA BUTTONS BELOW


