


-

- STEP 021 > Align your ruler against as close as you can to the sides of your shapes, remember you don't want to have any of the white in the cuts.
-
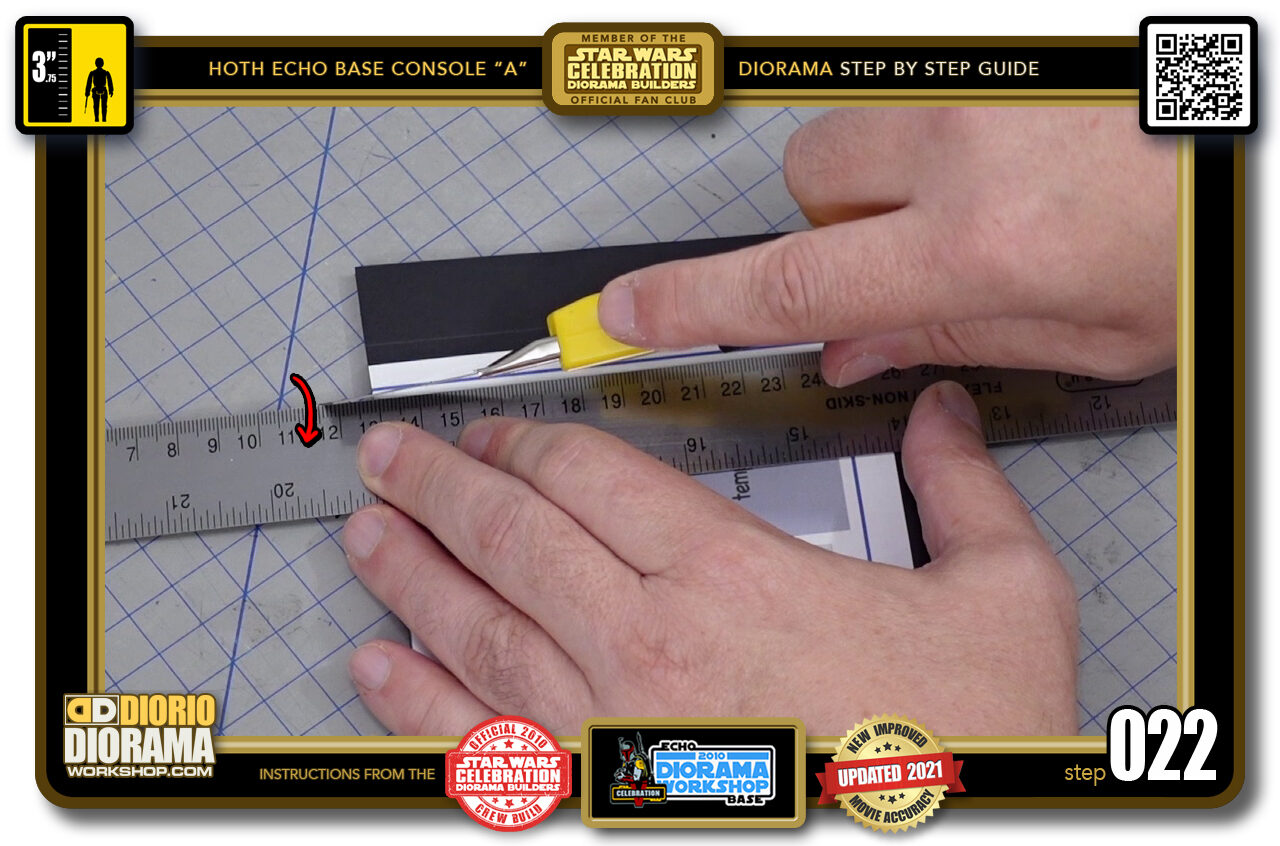
- STEP 022 > When you do your cuts with the X-Acto knife, try to NOT angle your blade side to side, you want to try and keep a straight 90 degree angle.
-
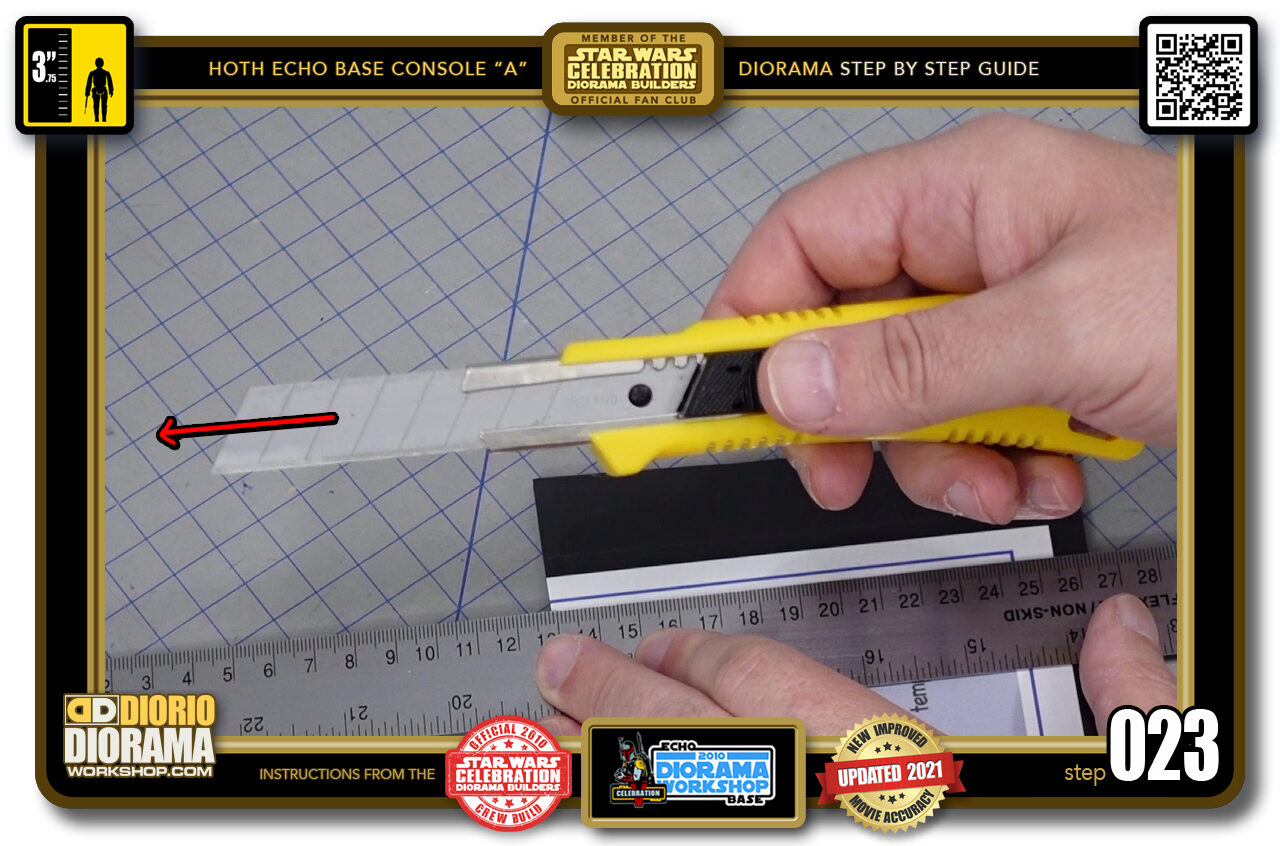
- STEP 023 > Also you want to extend your blade so that it touches as much of the foamcore surface as possible giving you straighter smoother cuts. It helps also if you change to a NEW BLADE before every project. Foamcore is the killer of the blades.
-
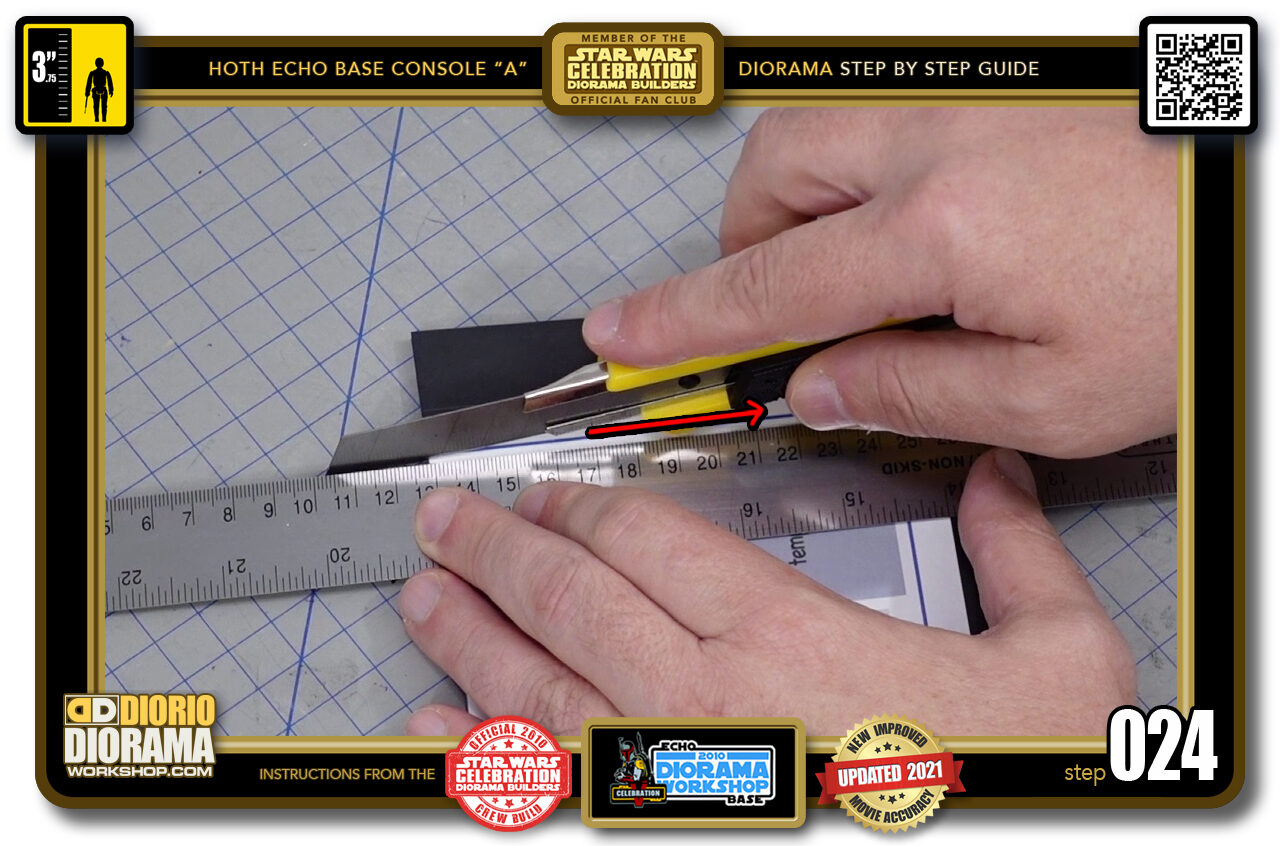
- STEP 024 > Place your blade at the start of your foamcore and slide it all the way down.
-
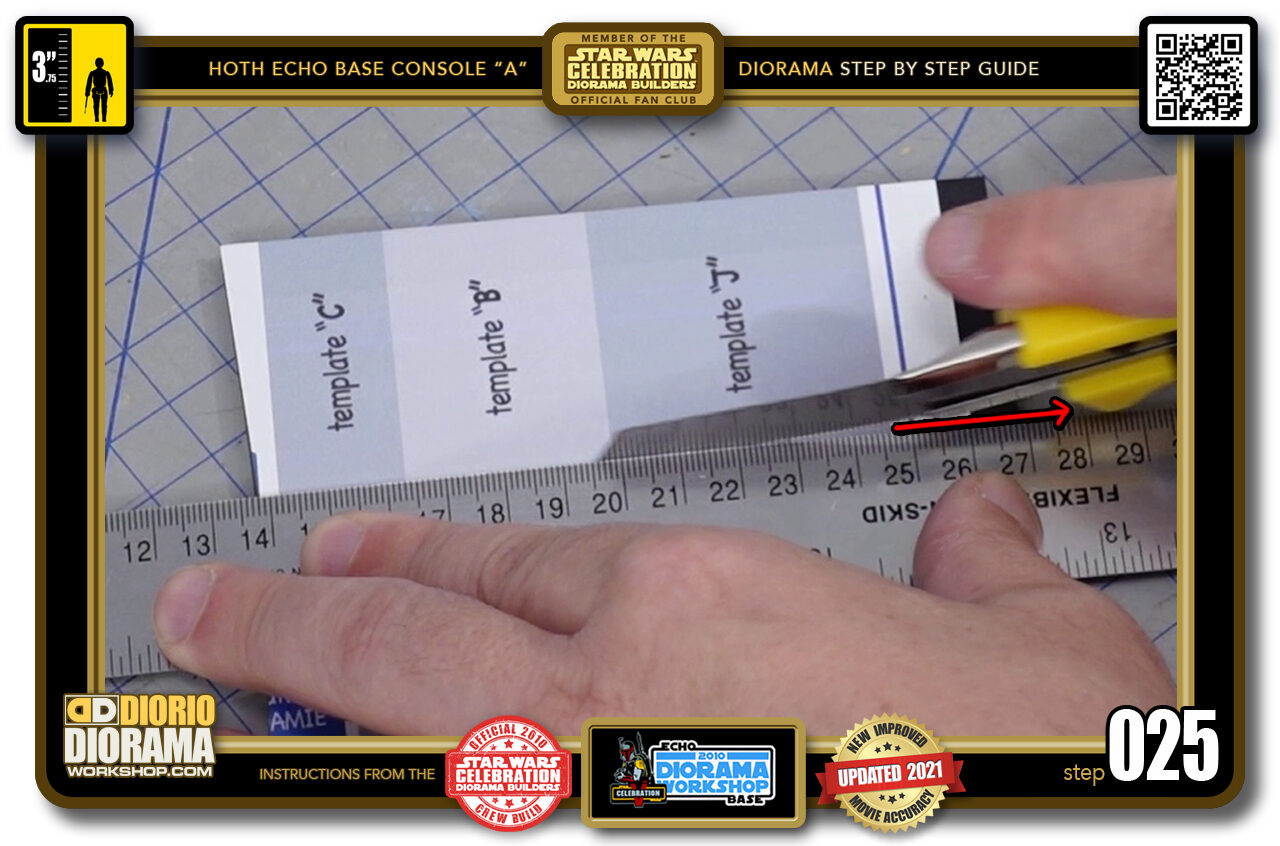
- STEP 025 > Continue this on each of the sides of your decal template shapes. I aligned them perfectly in the design to allow you to do one clean straight cut as much as where it fit on the paper.
-
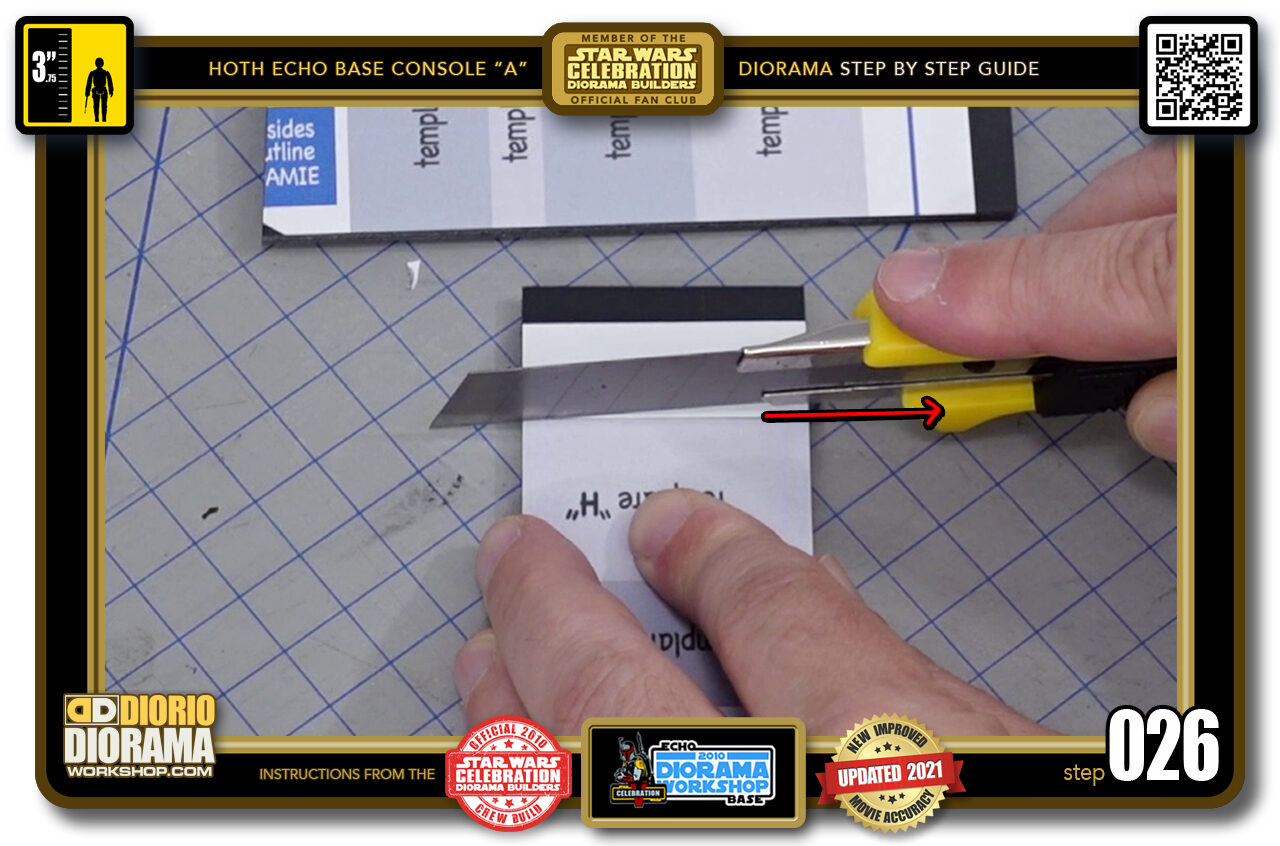
- STEP 026 > Once your sides are done, you just need to separate each of your templates into their individual pieces. Again just place your blade asa close to the colour lines as possible and cut. If you feel at easae like I do, you can hand cut without a ruler to save time and get a better view of where you actually need to cut.
-
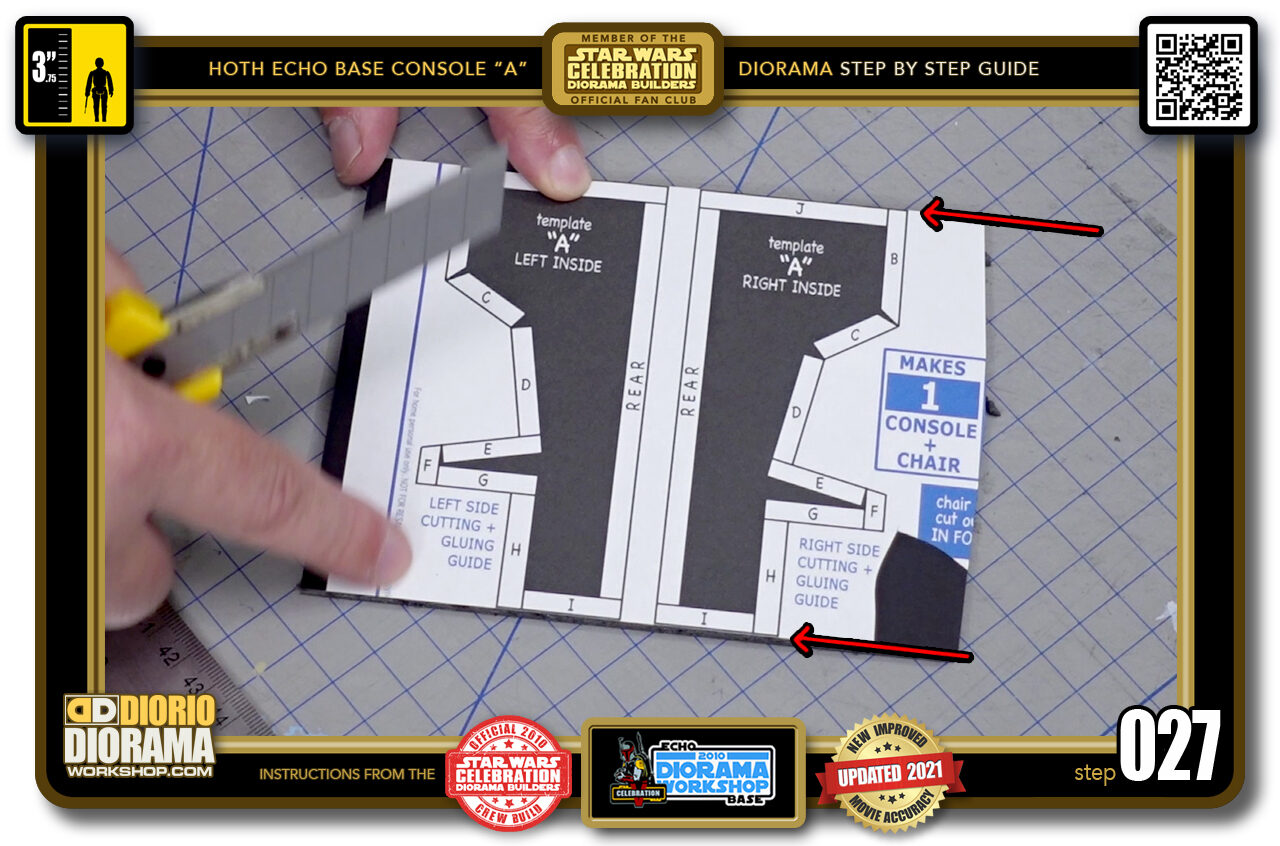
- STEP 027 > Now for the 2 console "A" sides, you can slice and cut all the way along the TOP and BOTTOMS of both at the same time as they are aligned perfectly for you to be able to do so (red arrows). Same goes for the FRONT EDGES. You can align your ruler with the "B" and "F" pieces and cut a straight line.
-
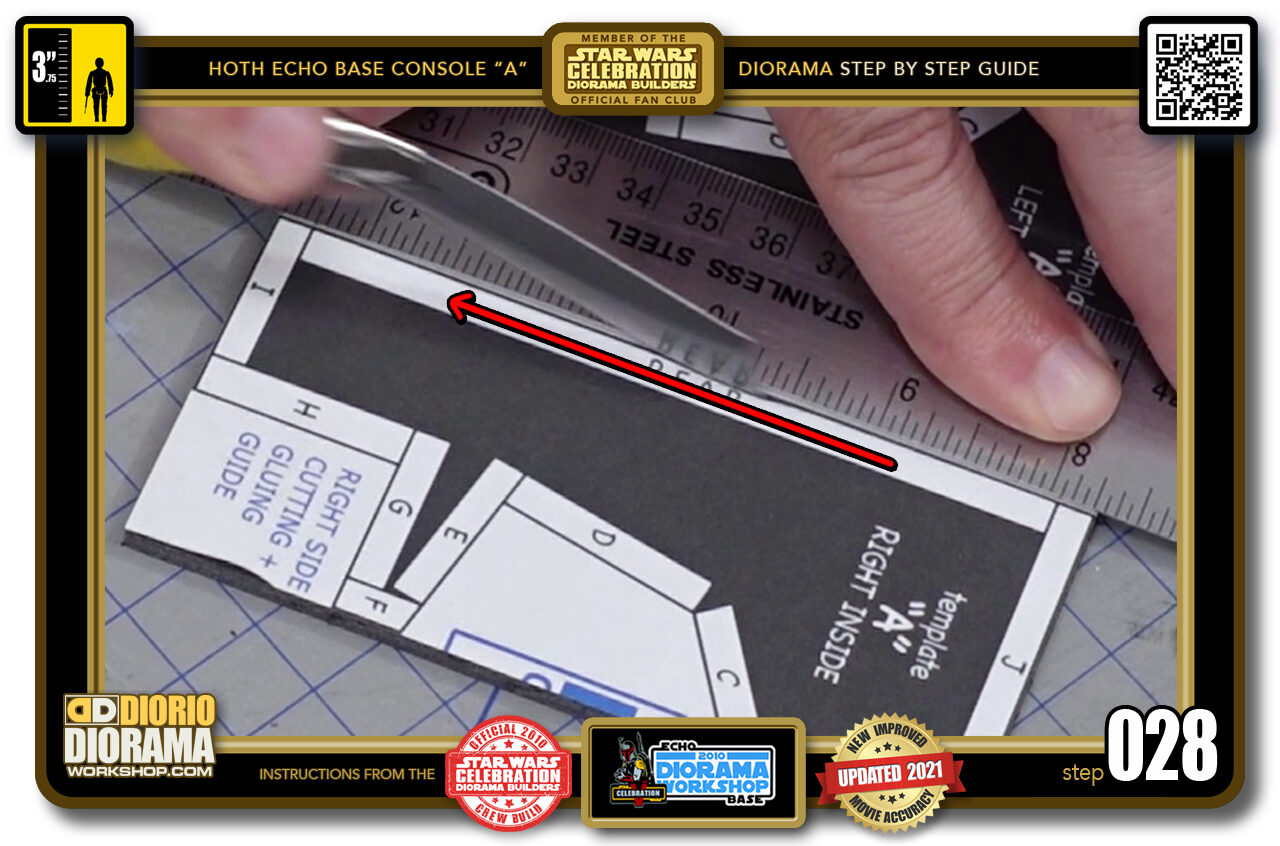
- STEP 028 > For the rear, just align the ruler with the black outside line outer edge and slice right across.
-
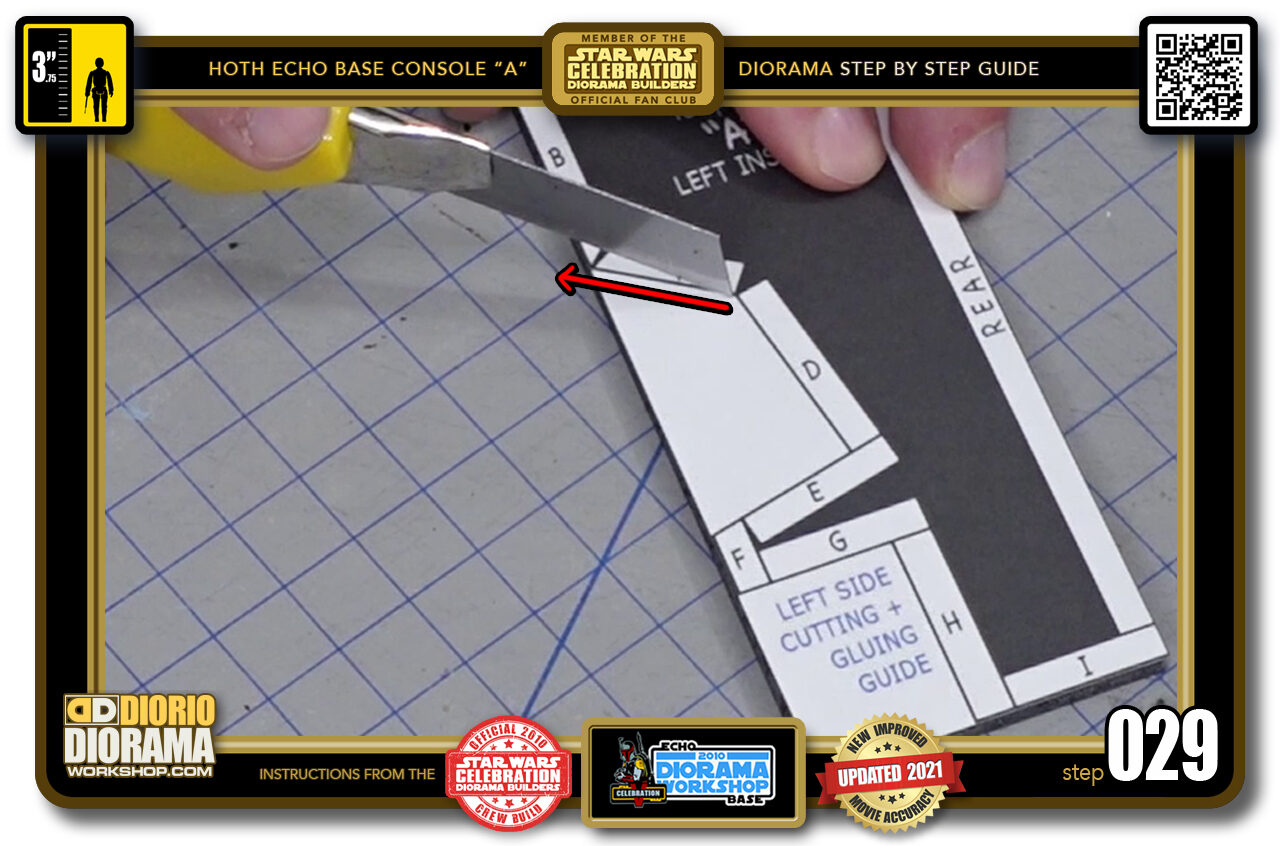
- STEP 029 > When cutting the inside shapes, to get the smoothest clean cuts... you will ALWAYS Start from a connecting corner and cut OUTWARDS.
-
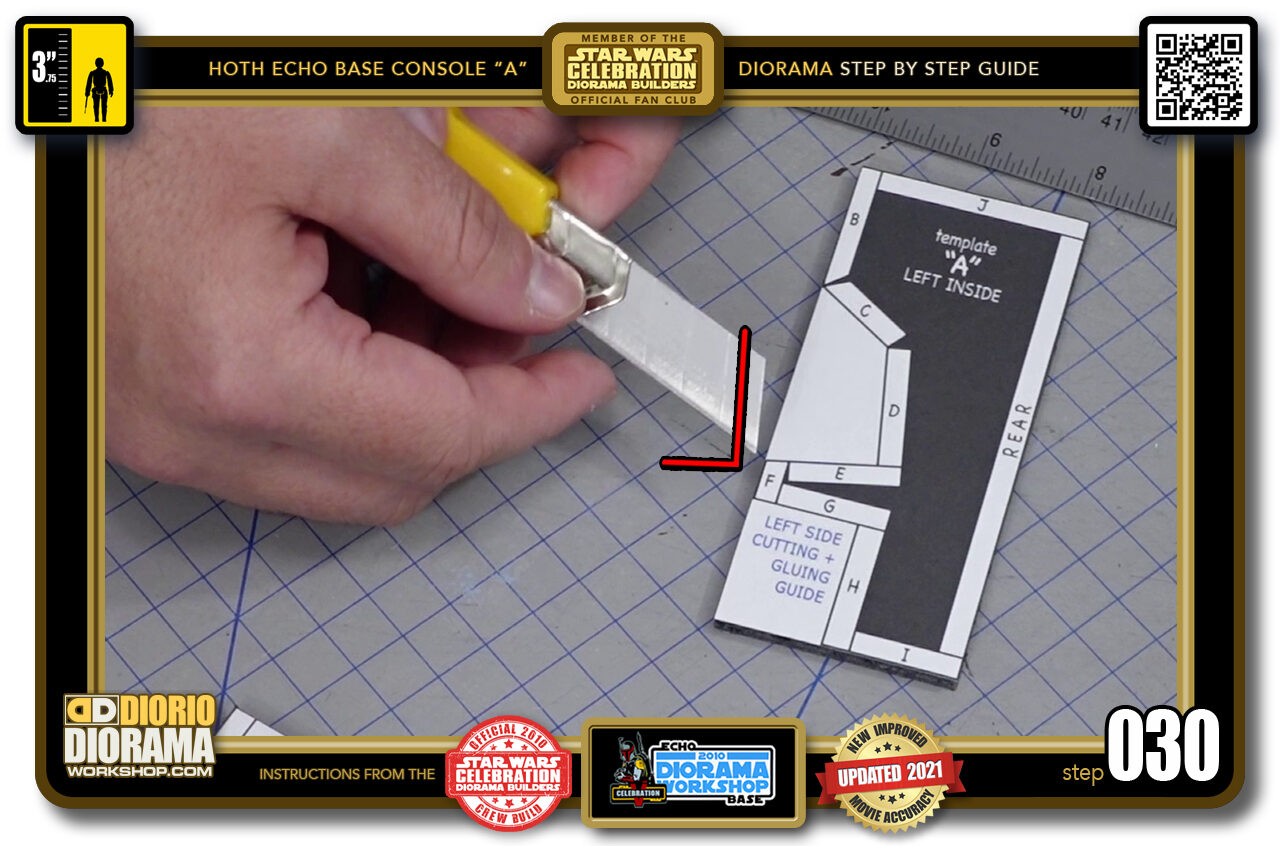
- STEP 030 > Also, you want to try and keep a 90 degree angle from the front edge of your blade and the foamcore (table surface) This will make sure your pointy tip enters flush with your corner and now slide down at an angle.
-
- STEP 031 > Place your tip right at the corner with your knife handle lifted slightly so that your front of the blade gets that 90 degree alignment.
-

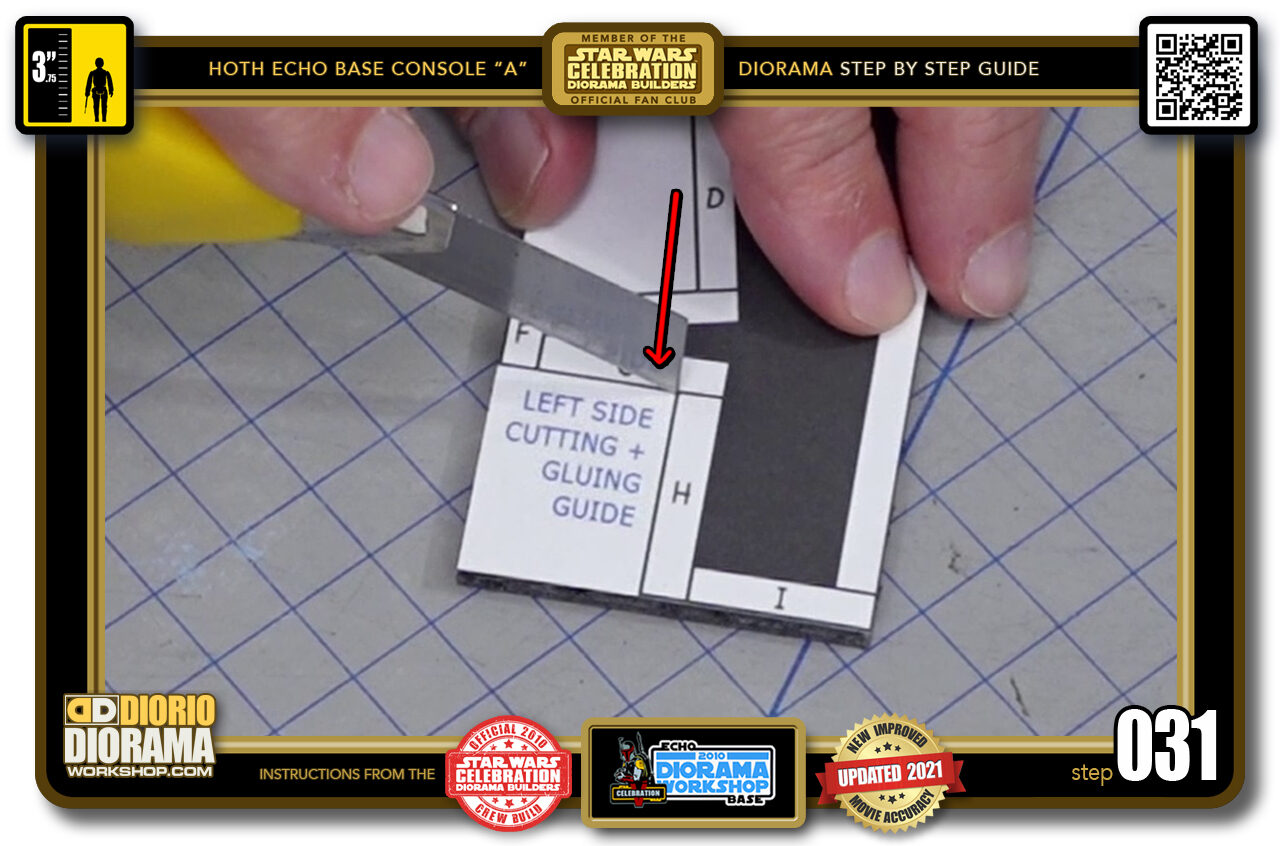
- STEP 032 > Now press down until you reach the bottom of the foamcore (poke through the other side's paper skin)
-
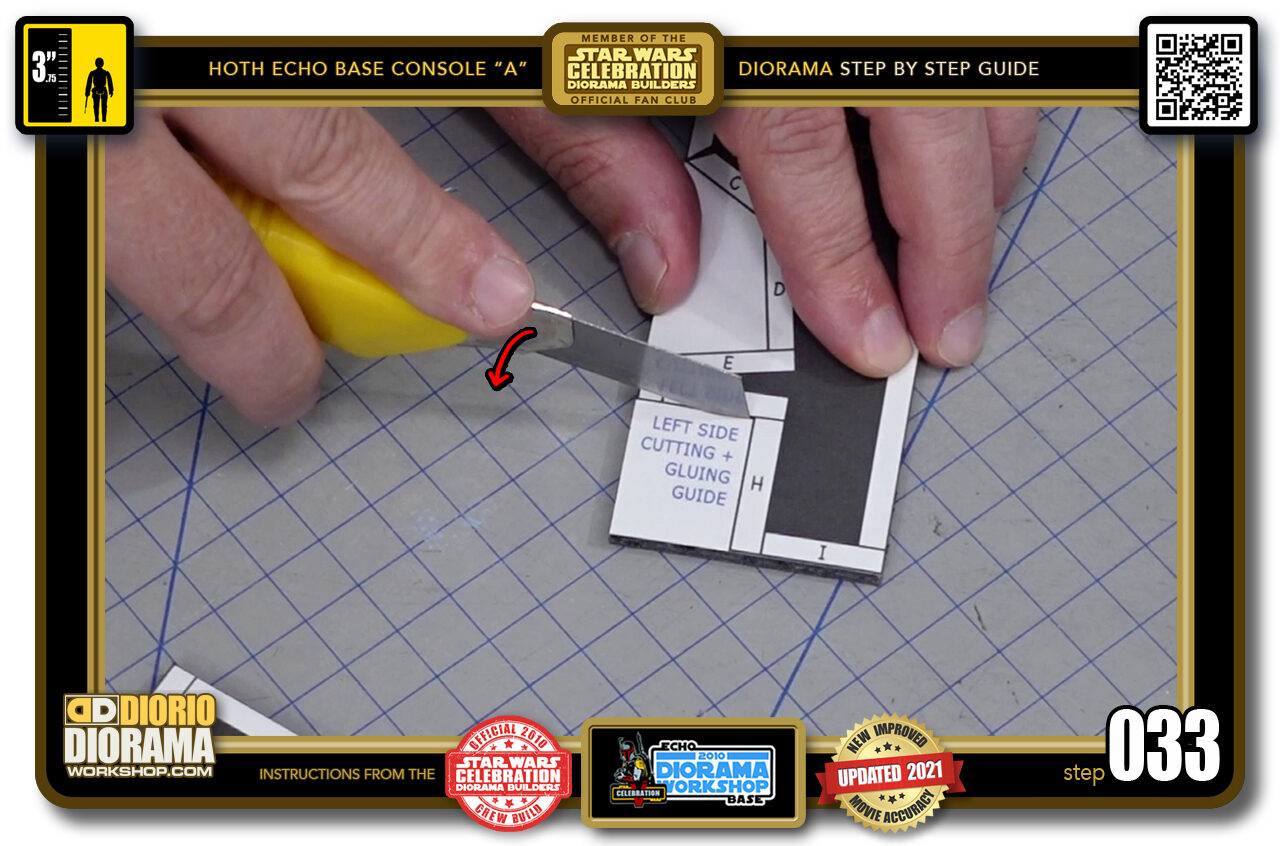
- STEP 033 > Slowly LOWER your handle angle until it is almost parallel to the cutting surface.
-
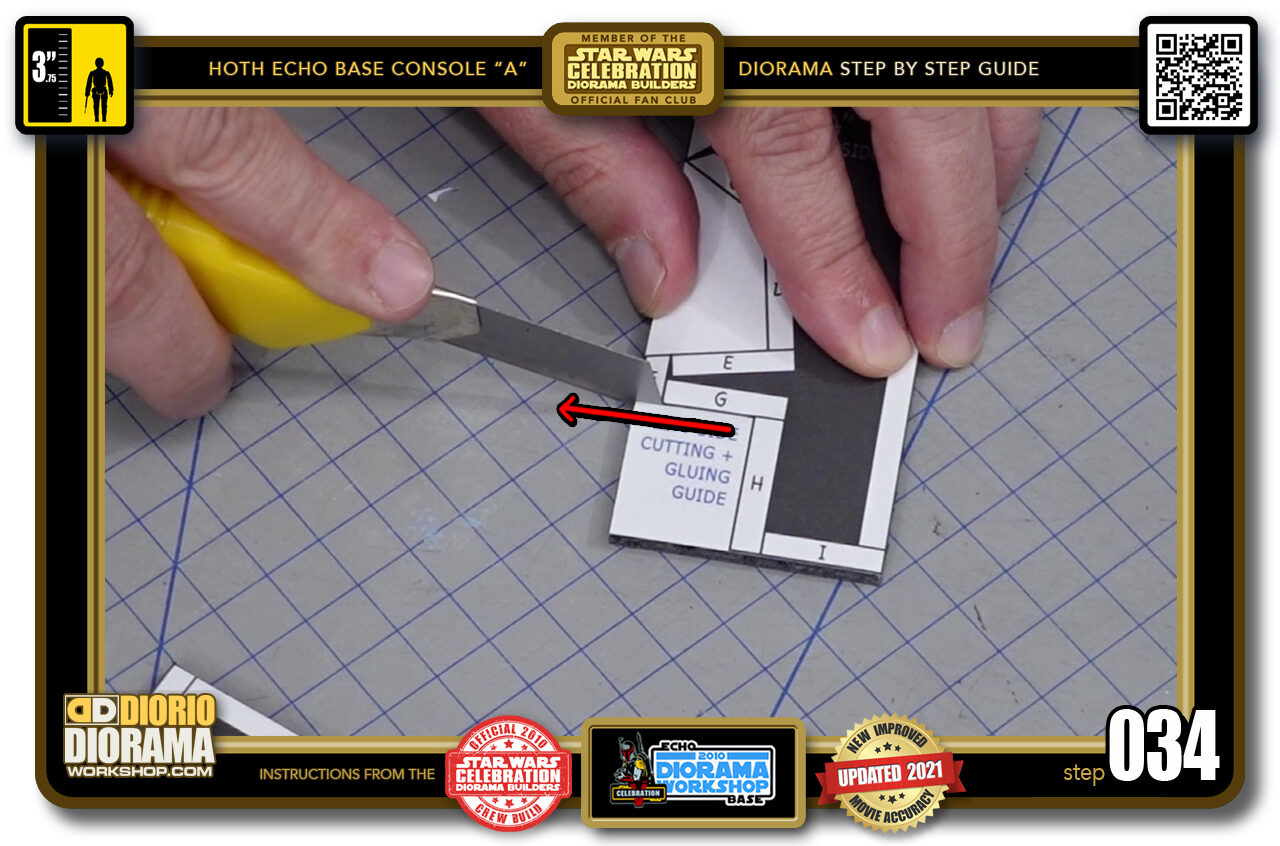
- STEP 034 > Then start to pull the blade back towards the outside.
-
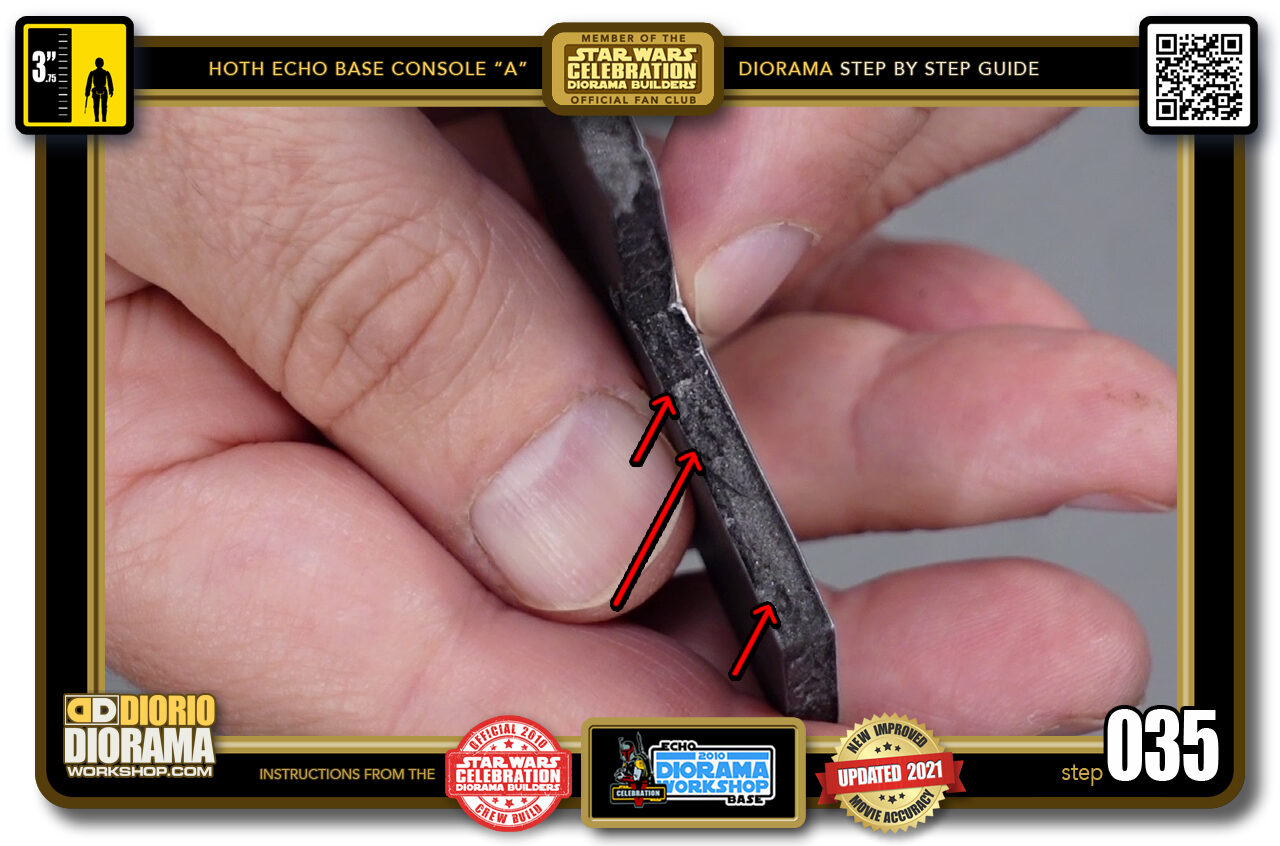
- STEP 035 > If at any time during your build you start to see bubbles show up in your cuts it means your blade is getting dull and it's time to REPLACE with a NEW BLADE.
-
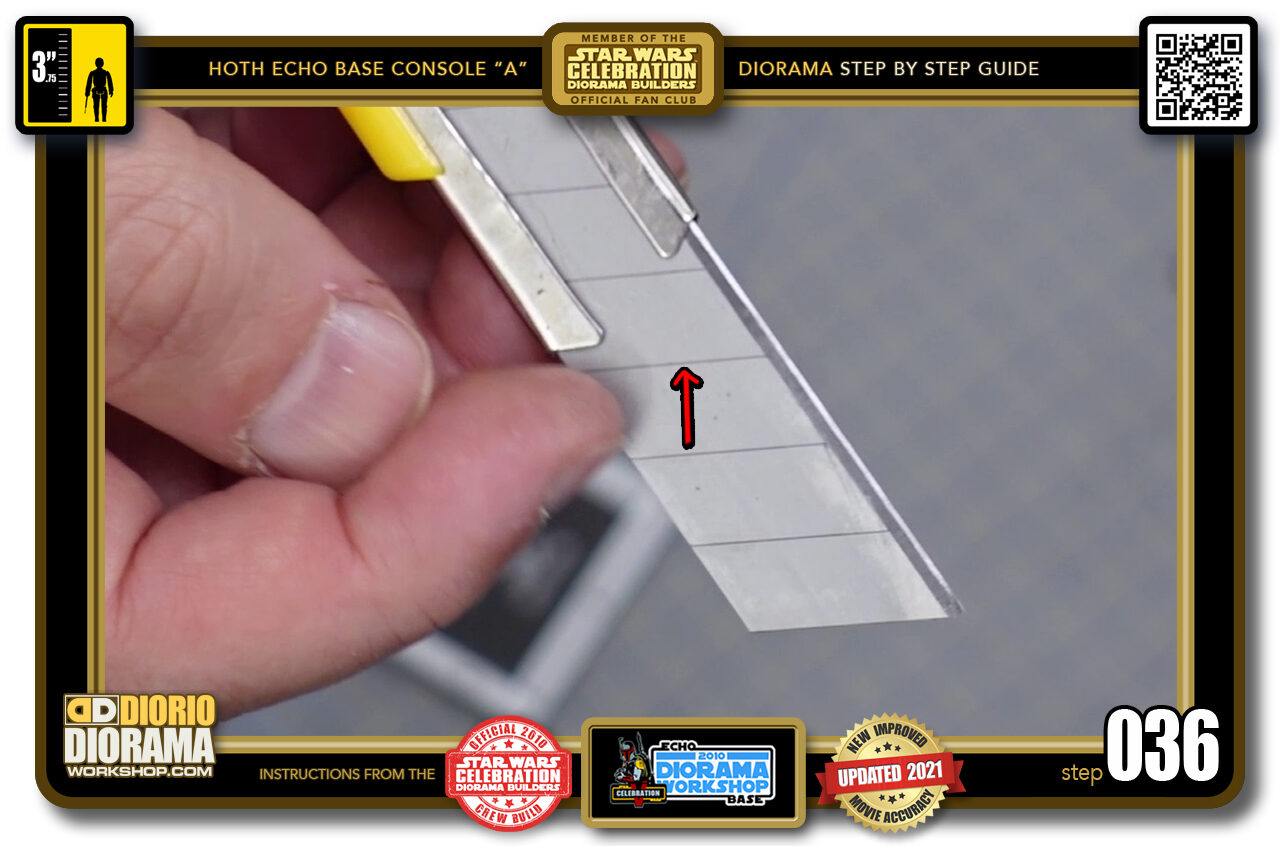
- STEP 036 > To save some money, you can also just SNAP OFF a couple of sections to give your blade a little longer life. Just align one of the snap off guides with the edge of your knife.
-
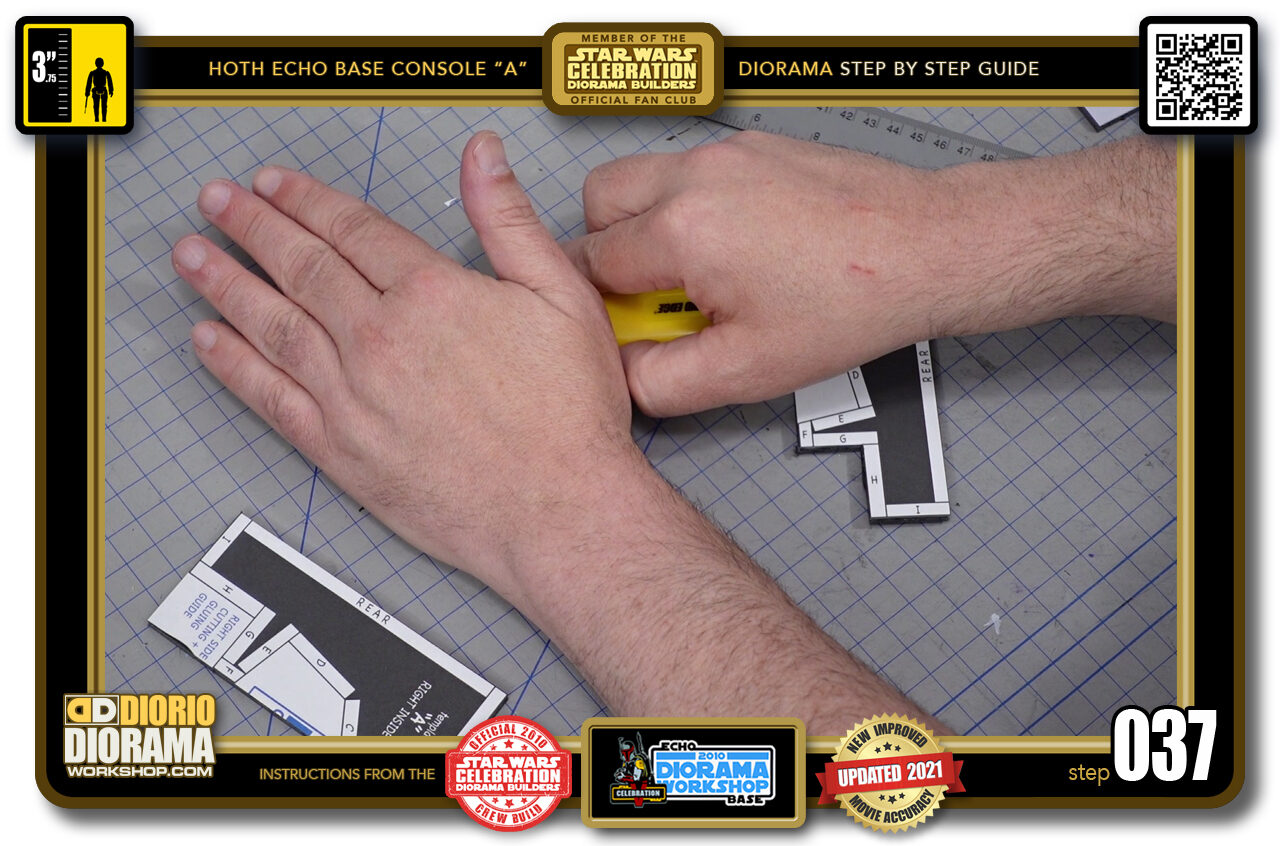
- STEP 037 > Cover the blade with your hand so the blade doesn't fly into your face, that would be very bad. And the angle your X-Acto blade handle until you hear a POP sound.
-
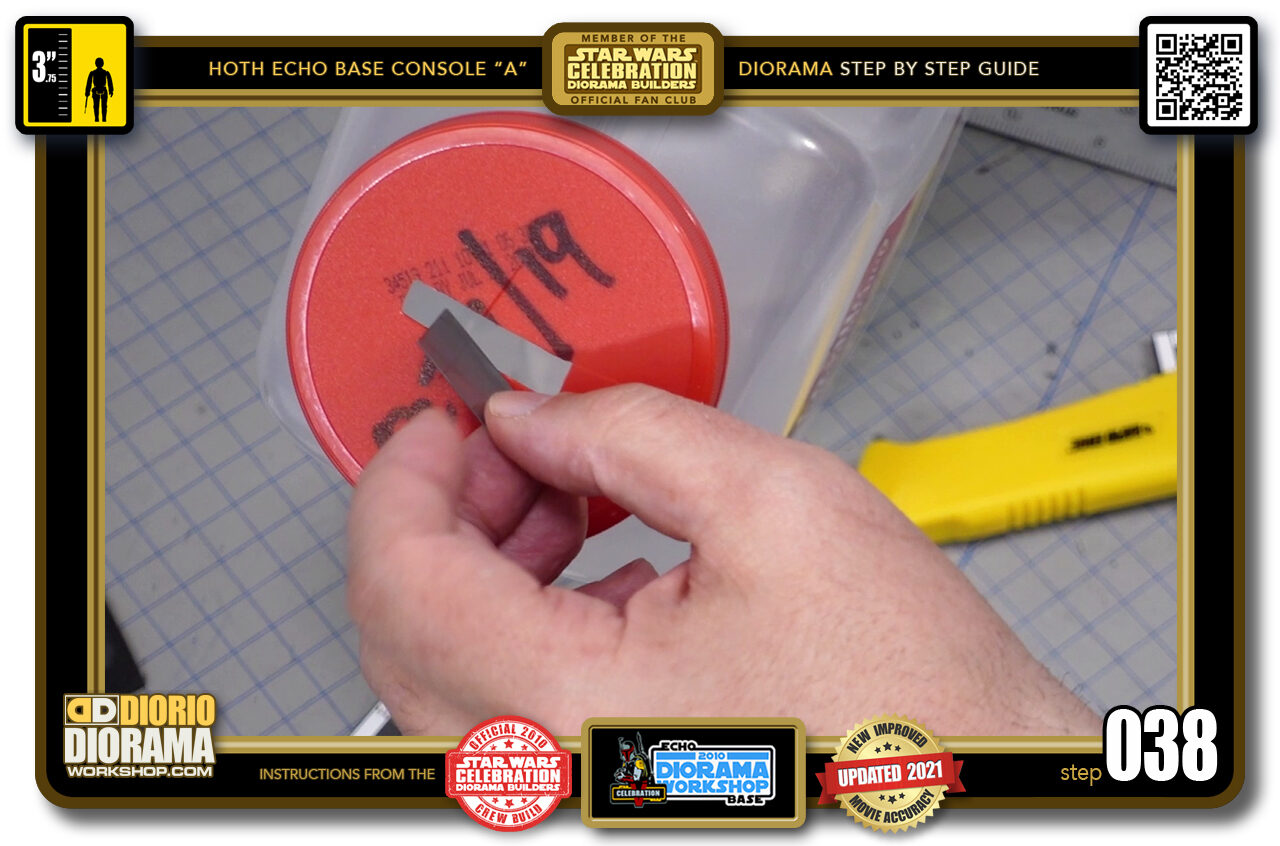
- STEP 038 > Toss the dull snapped off portion of the blade into a safety container so that no one cuts themselves. The blades maybe not sharp for foamfore anymore but they can still easily cut your fingers.
-
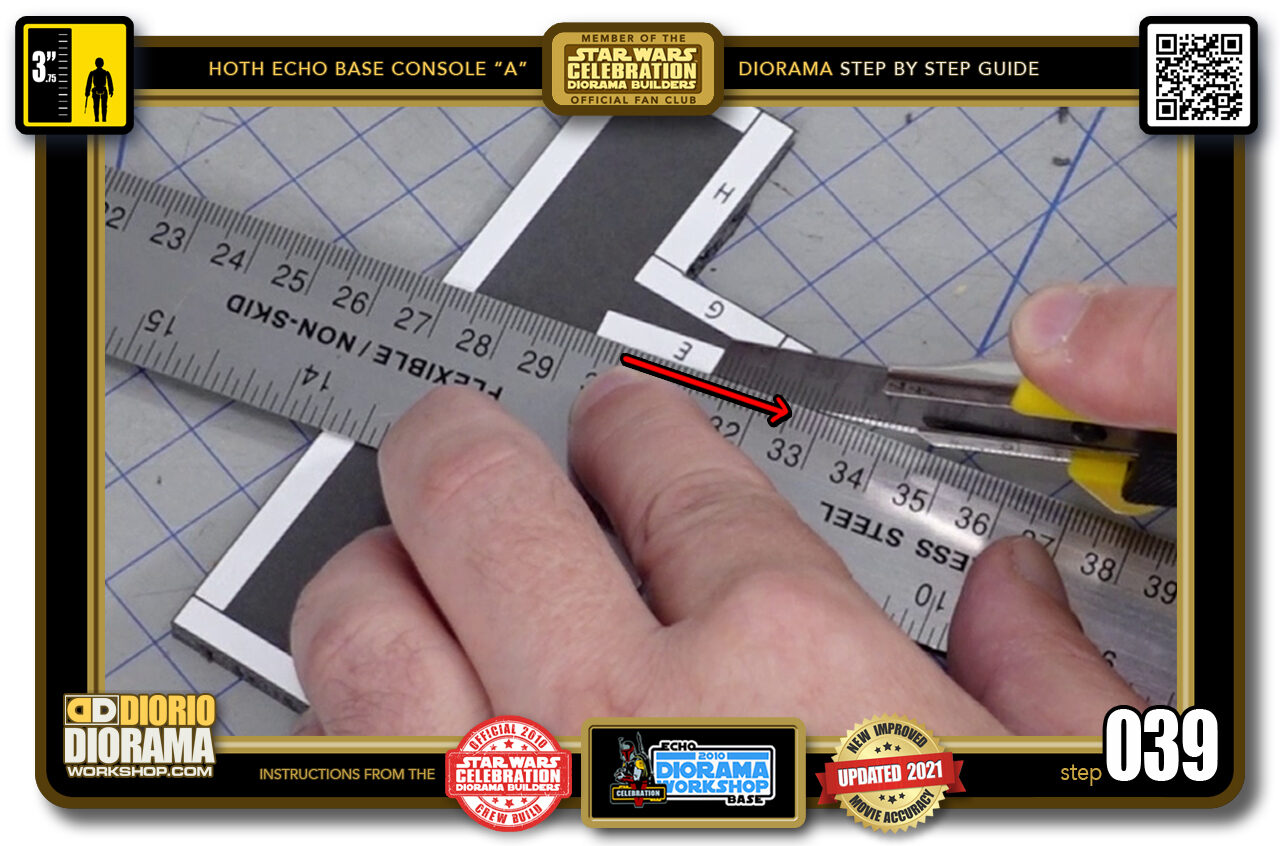
- STEP 039 > If you don't feel at ease doing hand cuts, you can align a ruler and do the same techniques. Remember to ALWAYS START at a connecting corner and CUT OUTWARDS.
-
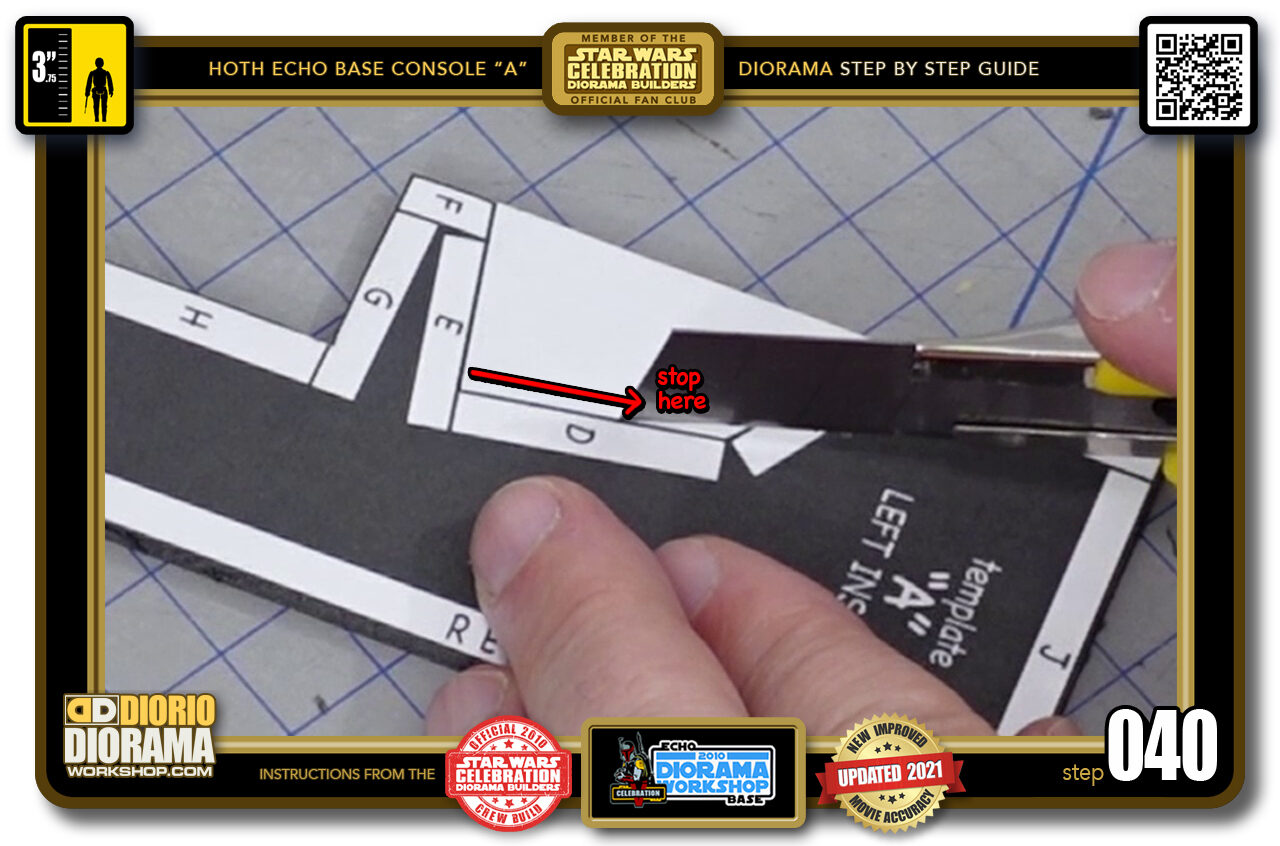
- STEP 040 > For the "D" piece since there is no OUTSIDE edge for your blade to exit, we need to do this cut in 2 parts. Start in ONE corner of your choice and then STOP just BEFORE you reach the END.

.
Did you already build this Diorama ? At home or at our Star Wars Celebration Diorama Builders workshop ? Would you like to show it in the site’s GALLERY VISITORS DIORAMAS section, YES ? That is Awesome !!! You can find out all the details on how to email me your photos on the VISITORS SUBMISSIONS INFO page … When I get your photos, I will create your very own page just like this one. You may not realize it but work does inspire others to join in the fun of making Action Figure Dioramas.
.
NOT FOR RESALE ALL Decals, tutorials and artwork are ©FrankDiorio (dioramaworkshop.com) and offered FOR FREE to the fans – that would be you ? so you can build and display my diorama designs in your very own home. I realize I cannot control what one does with my graphics once I place them on the web, I can only ask you as one fan to another, please respect the artist and do not be that jerk who uses my designs and tutorials to build a copy of my work only to sell it on EBAY or trade/sale groups and forums. Thank You. Frank.
.

.
.
If you have a facebook account, why not join the Official Diorama Builders Fan Club today, simply click the logo link below.
 .
.
Catch up with fellow visitors and exchange stories, read cool interviews with the crew, exchange photos, fun surprises and grab some FAN ONLY merchandise next year at actual future conventions ?
.
©2021 Frank Diorio DioramaWorkshop.Com
.
IF YOU LIKE WHAT YOU SEE, PLEASE SHARE WITH YOUR FRIENDS
USING THE SOCIAL MEDIA BUTTONS BELOW