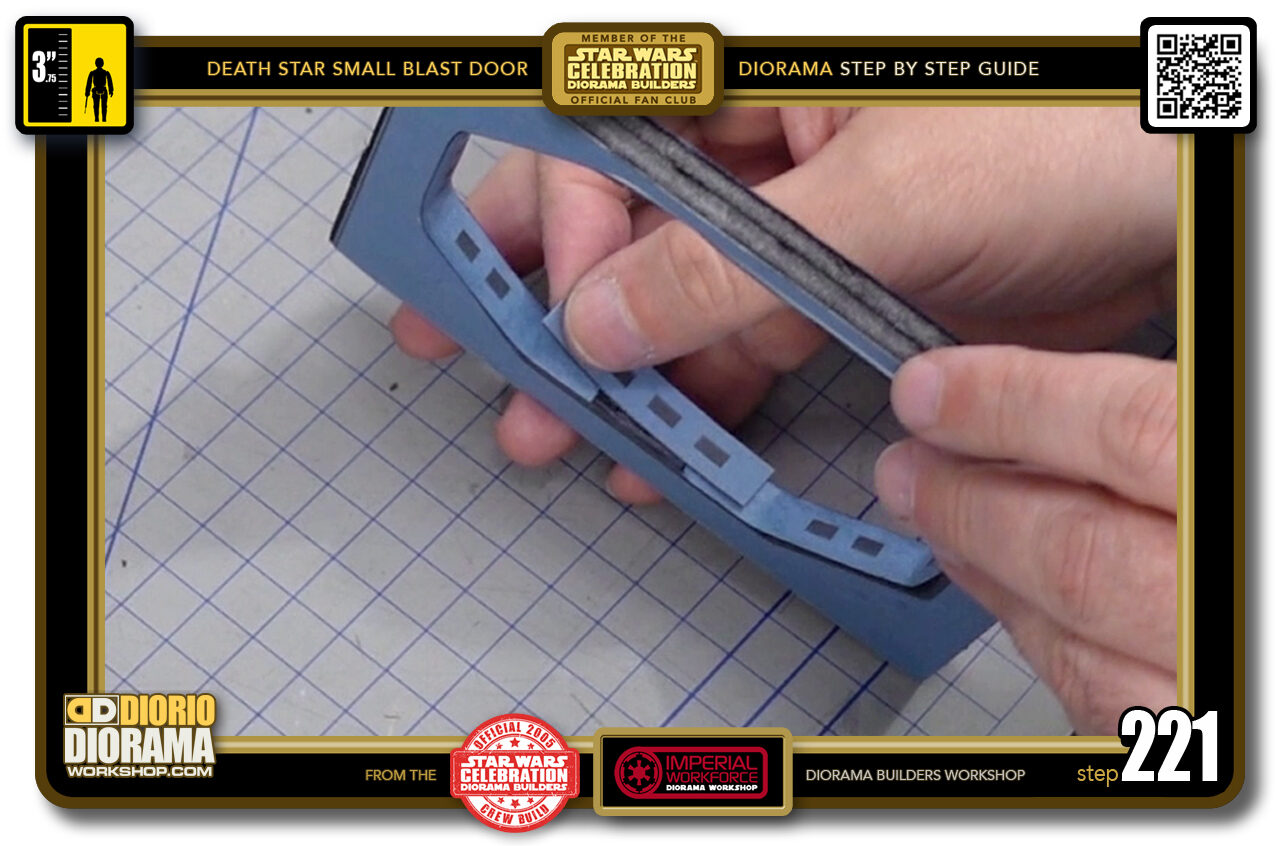
- STEP 221 > Repeat the same steps to apply the opposite end.
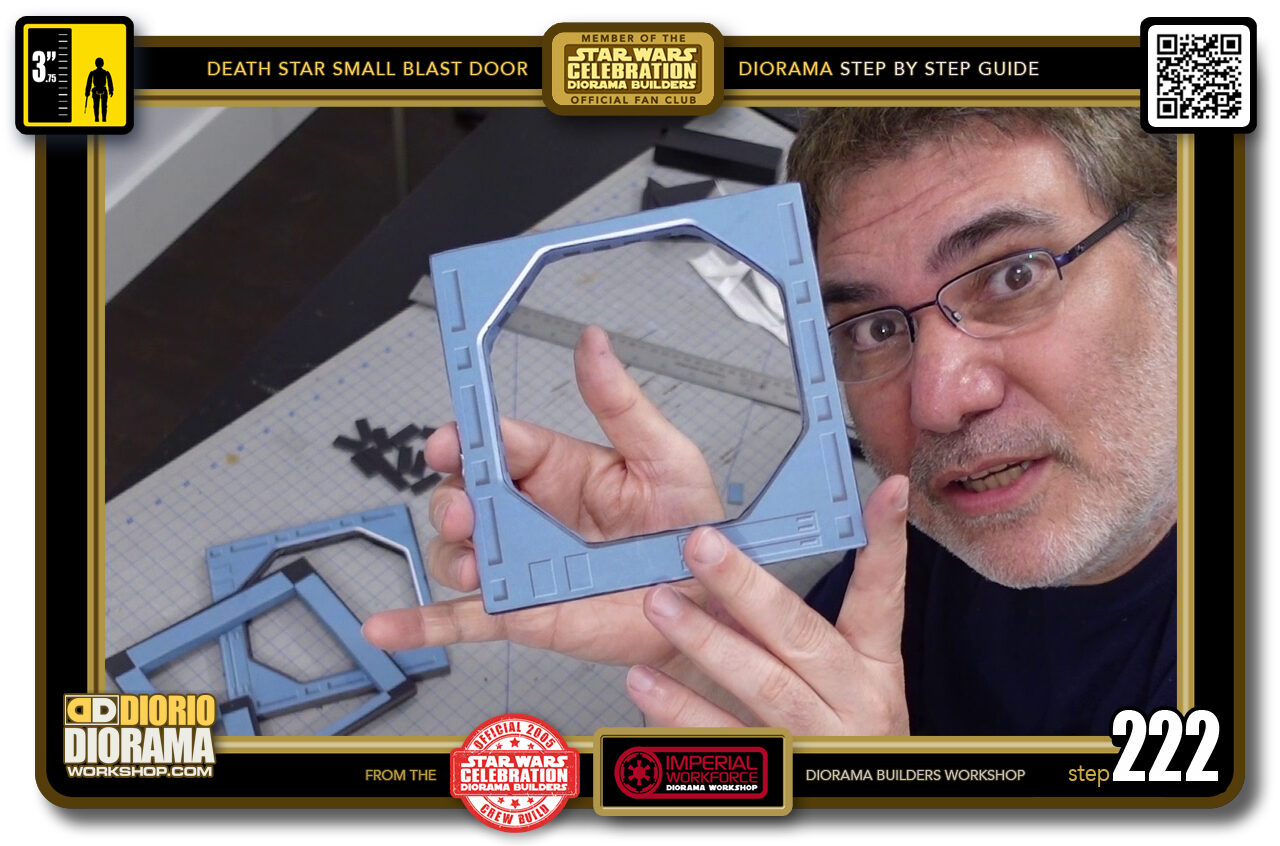
- STEP 222 > Your double thick octagonal frame is complete. Now repeat all the steps on your other piece.
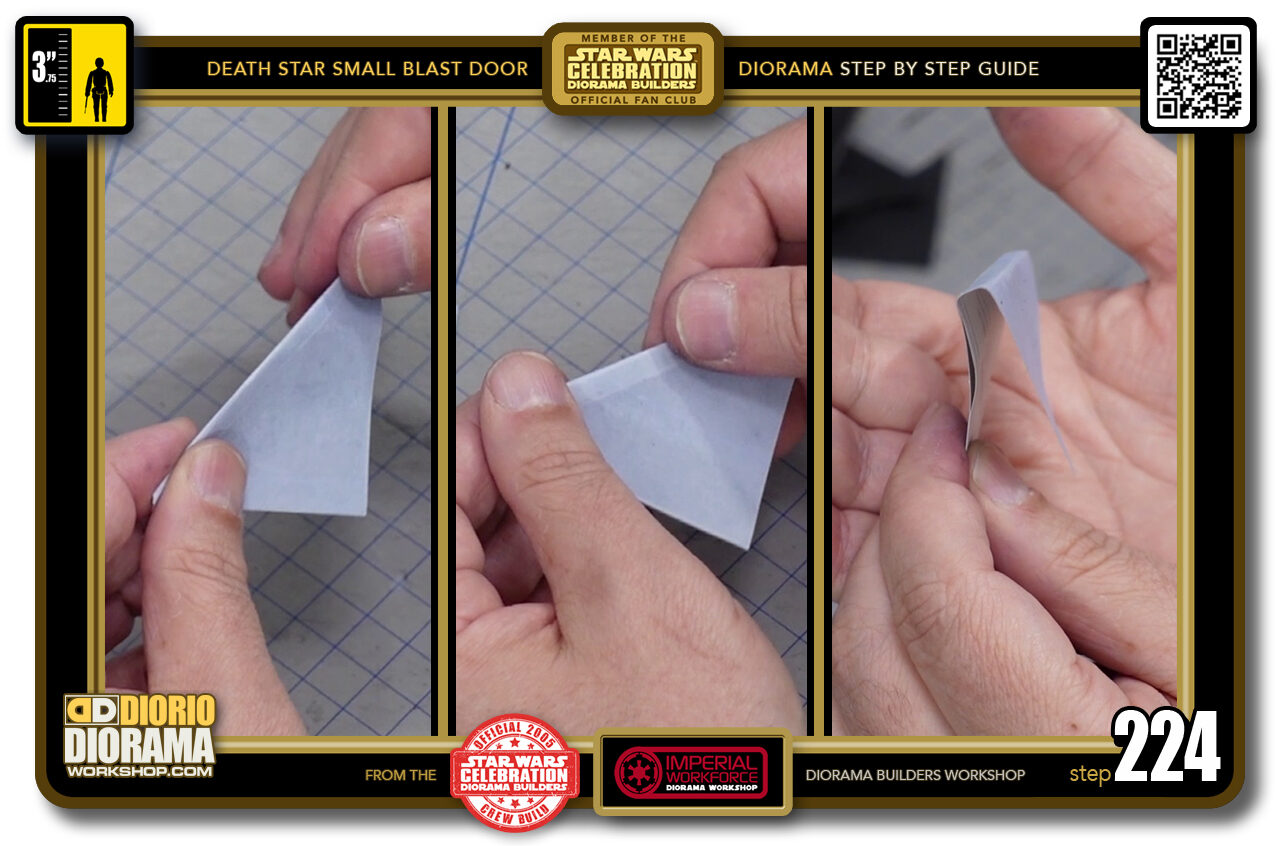
- STEP 223 > With all the frame decals in place we can move on to the dorito door corners. We need to first fold them like we did the inner square frame skins. Start by bending them around your fingers and press more and more until you can pinch them flat all the way across.
- STEP 224 > When the first side is folded, spin it around and fold the other side until you get a shape that looks like the image on the right.
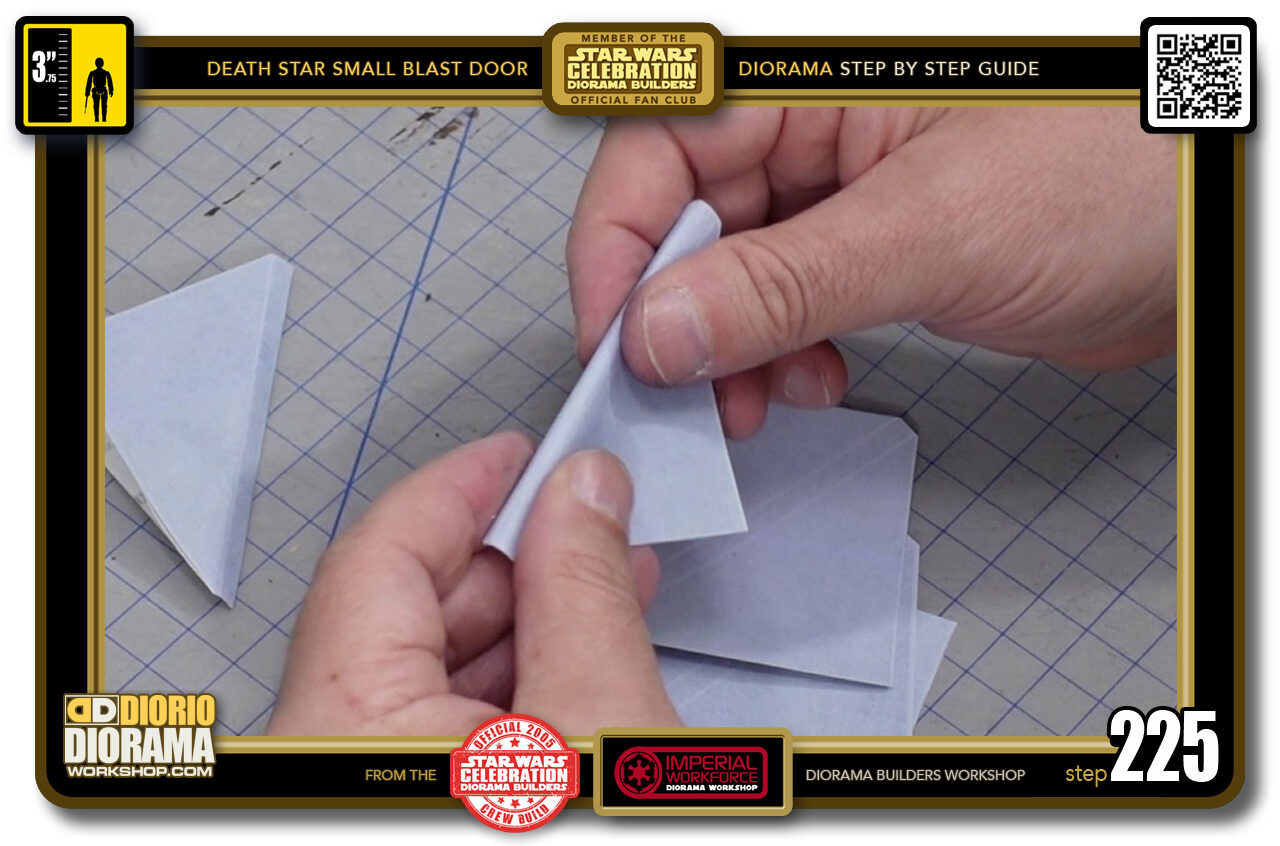
- STEP 225 > Now repeat the folds on the other 5 decals.
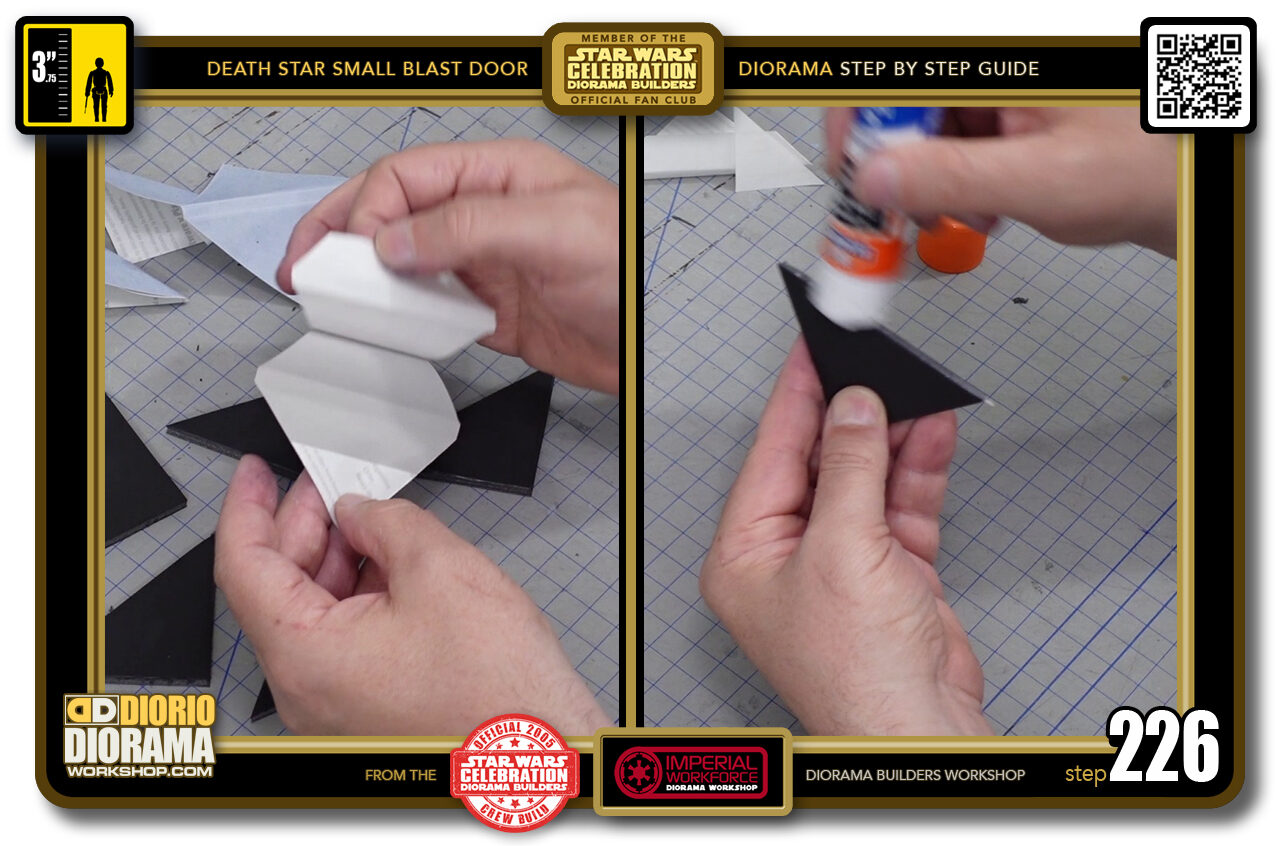
- STEP 226 > Folds are done you can peel the first decal and set it aside as you put some gluestick on the long side of the dorito triangle. No need to put glue on the dorito sides, just the spine. NEVER USE HOT GLUE !!!
- STEP 227 > Wrap your decal folds against the foamcore thickness. You can slide it forward and back untill you get equal distance on both ends. It's ok if a teeny end of the foamcore peeks through, we won't see it when assembled.
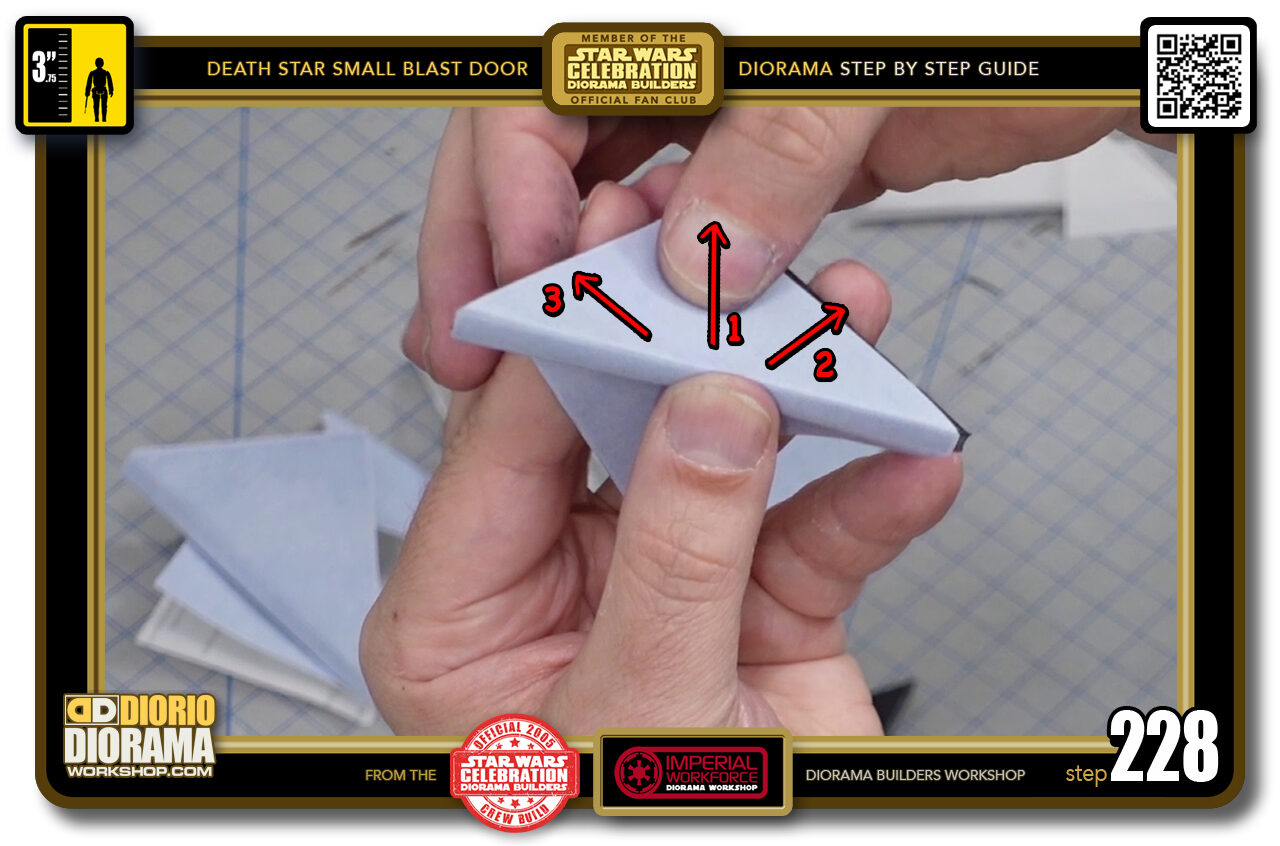
- STEP 228 > Just like the frame spines, start in the centre, press your finger to prevent the decal from sliding out of place and then use your other thumb to stretch the decal outwards and onto the foamcore side surface. Go back to the centre and now go towards one of the outer corners (2) back to the centre and move towards the opposite end (3)
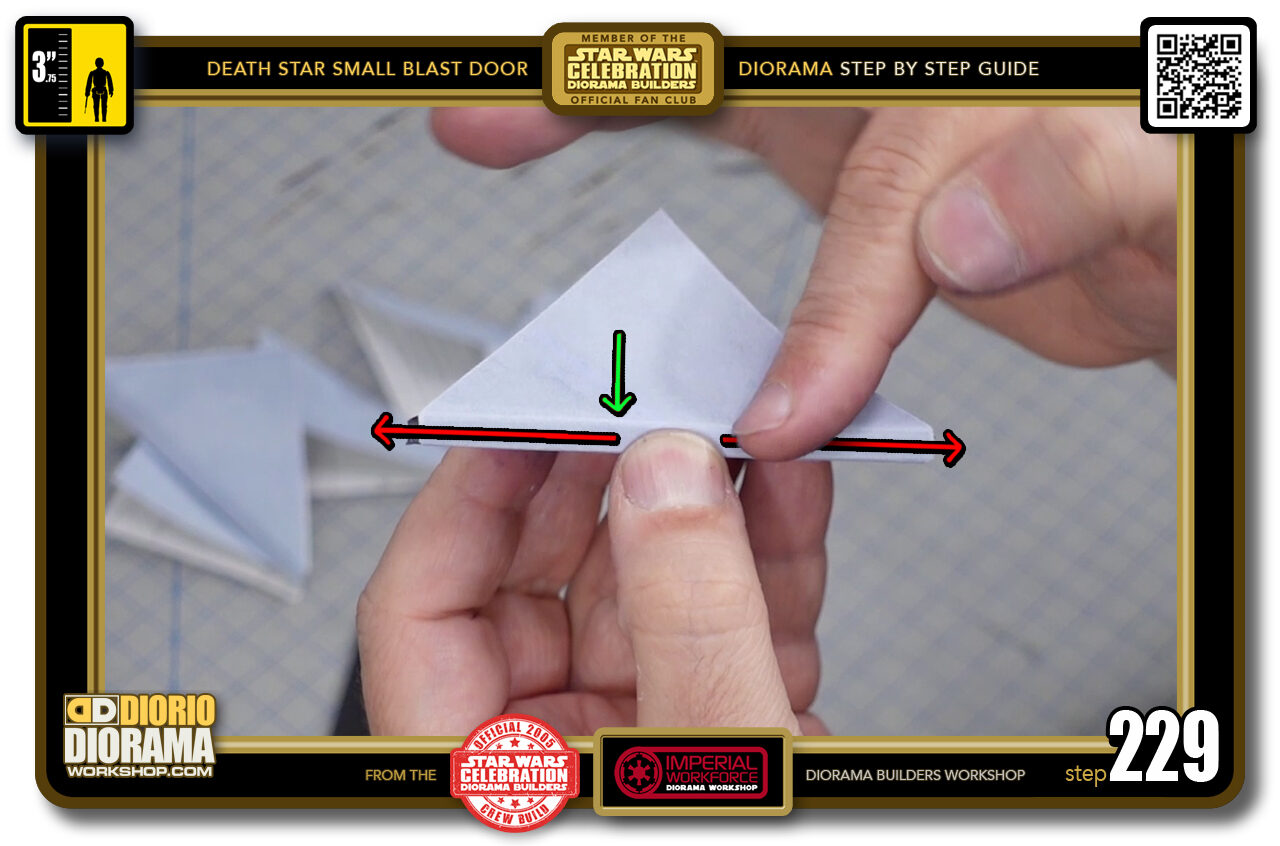
- STEP 229 > Now we want to make sure there is no air under the spine area. So first re-press along the top edge to make the decal fold fit perfectly along the foamcore edge.
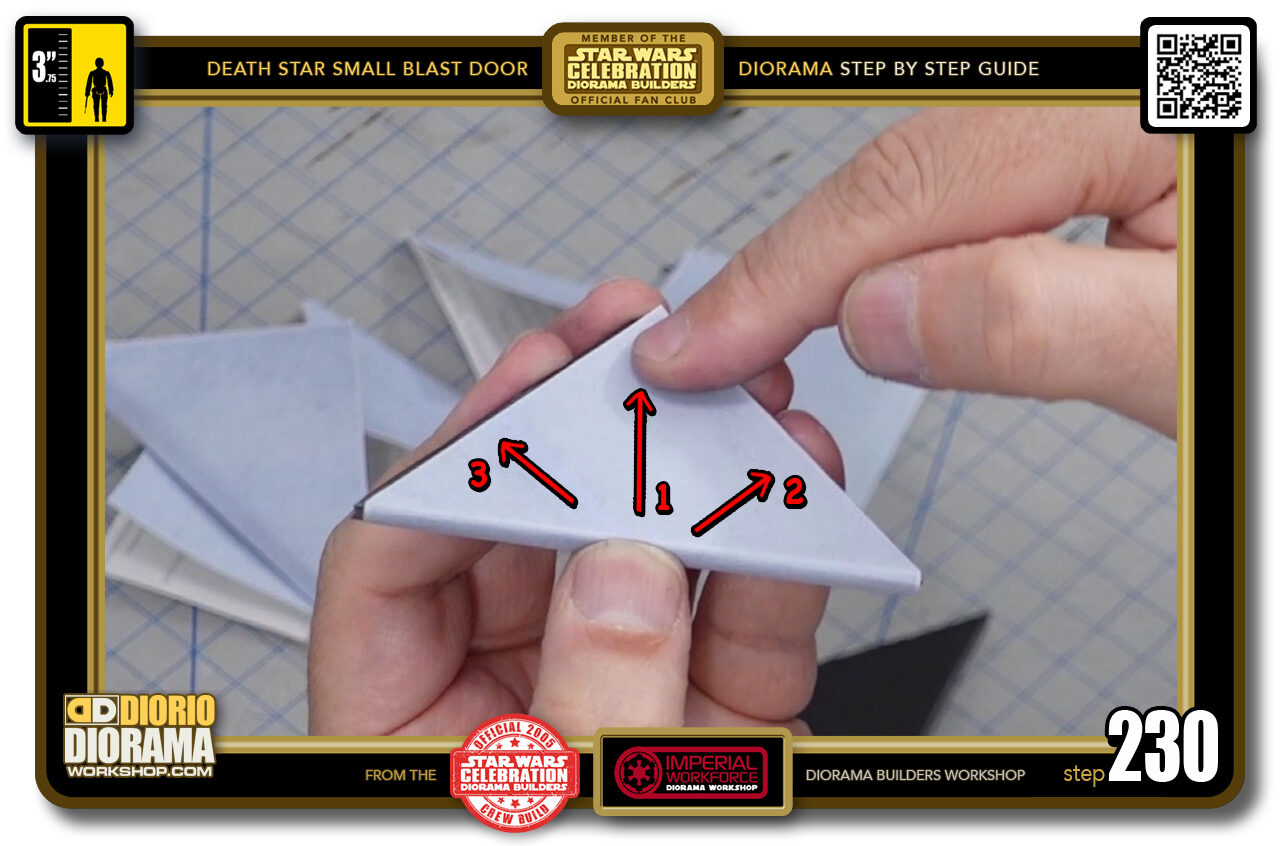
- STEP 230 > Now you can do like the other side, and use your finger to strecth and press the decal outwards from the centre's starting position.
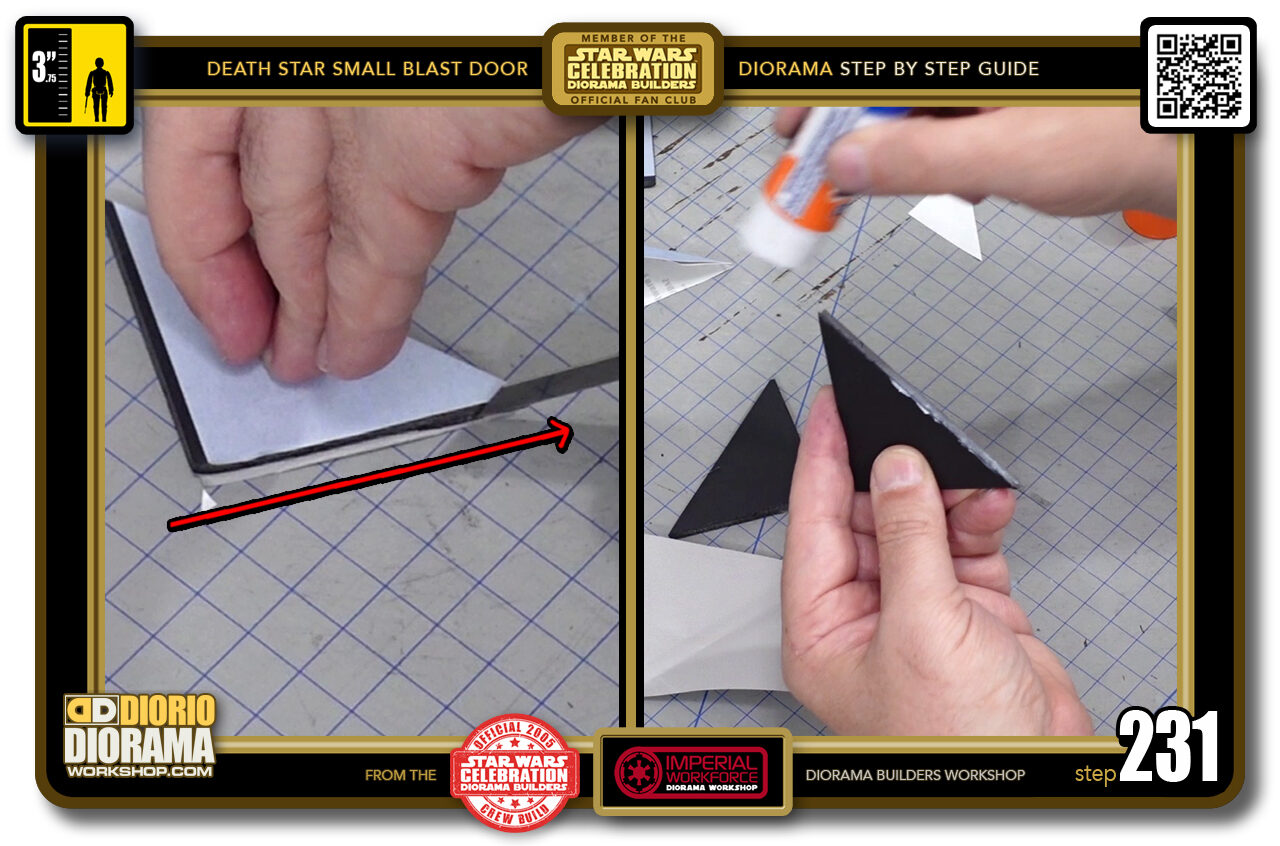
- STEP 231 > If you see any little excess of your decals poking past your dorito shape, you can trim those off with your X-Acto knife. Make sure your blade is SHARP to avoid tearing the decal. Trust me on that one. Now peel and put aside as you gluestick the spine of your other pieces. Repeat until all skins have been applied.
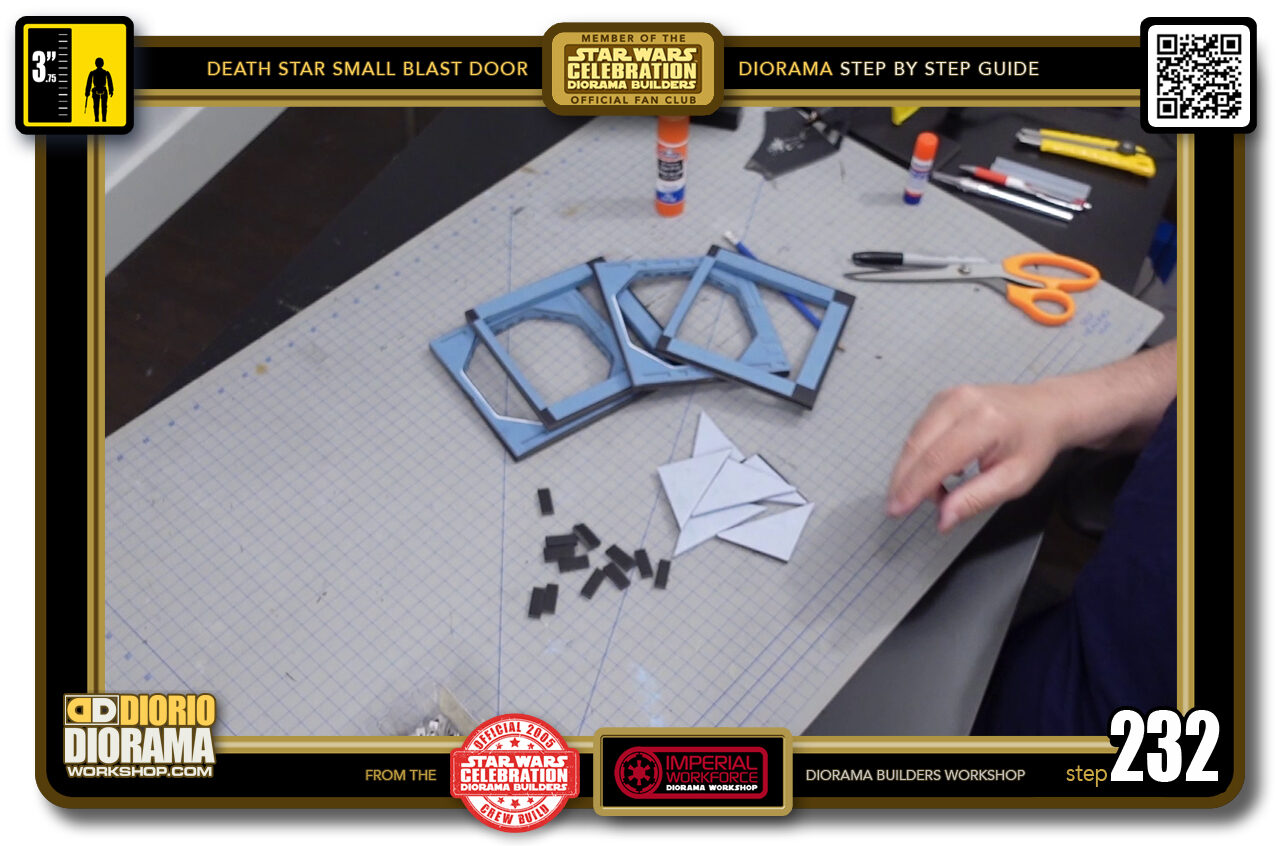
- STEP 232 > the hardest and longest part is done, ALL your pieces are complete. We can now make it all come to life 🙂
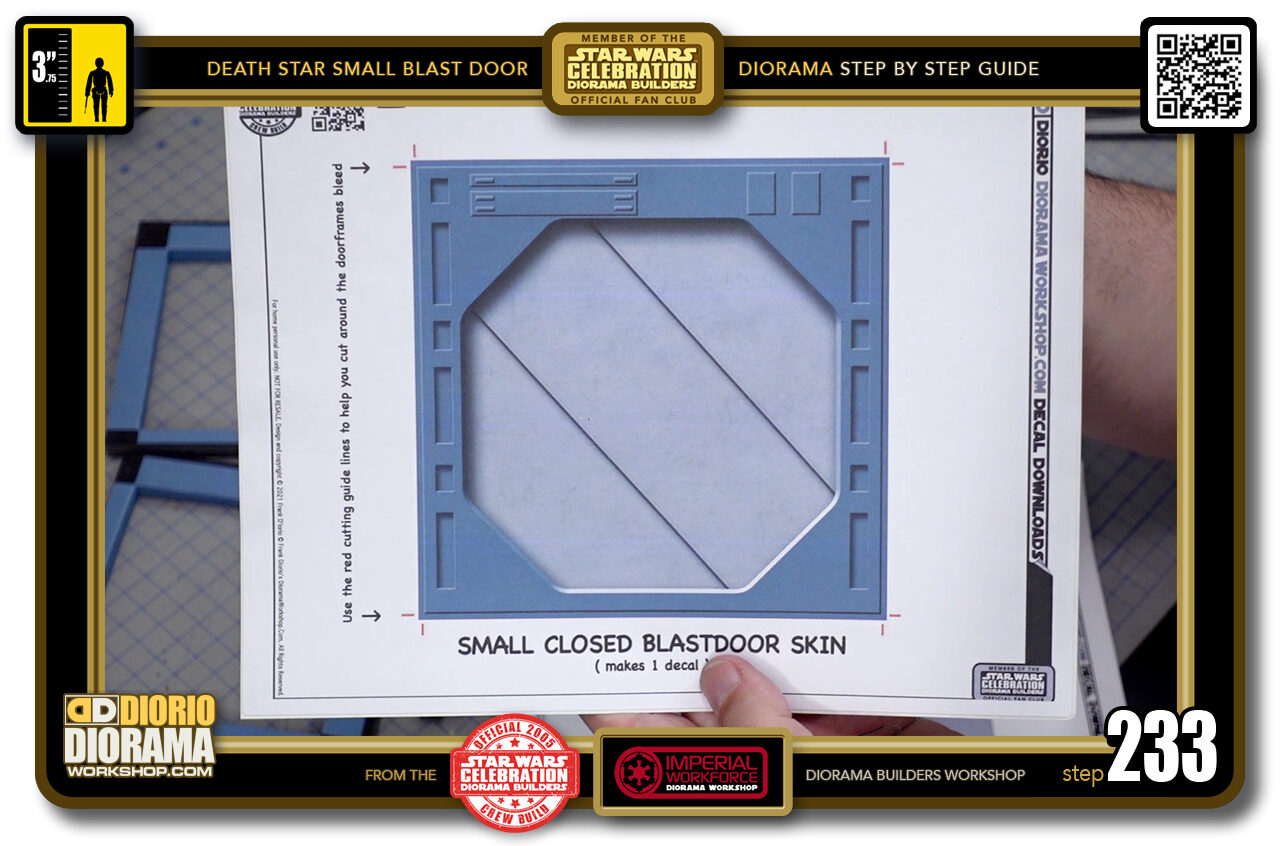
- STEP 233 > Again as I mentioned before, if ever you don't want to make a second door, yu can trick the eye in your diorama using the closed door decal that simulates a 3D effect right in the decal. Just peel and stick and you are done.
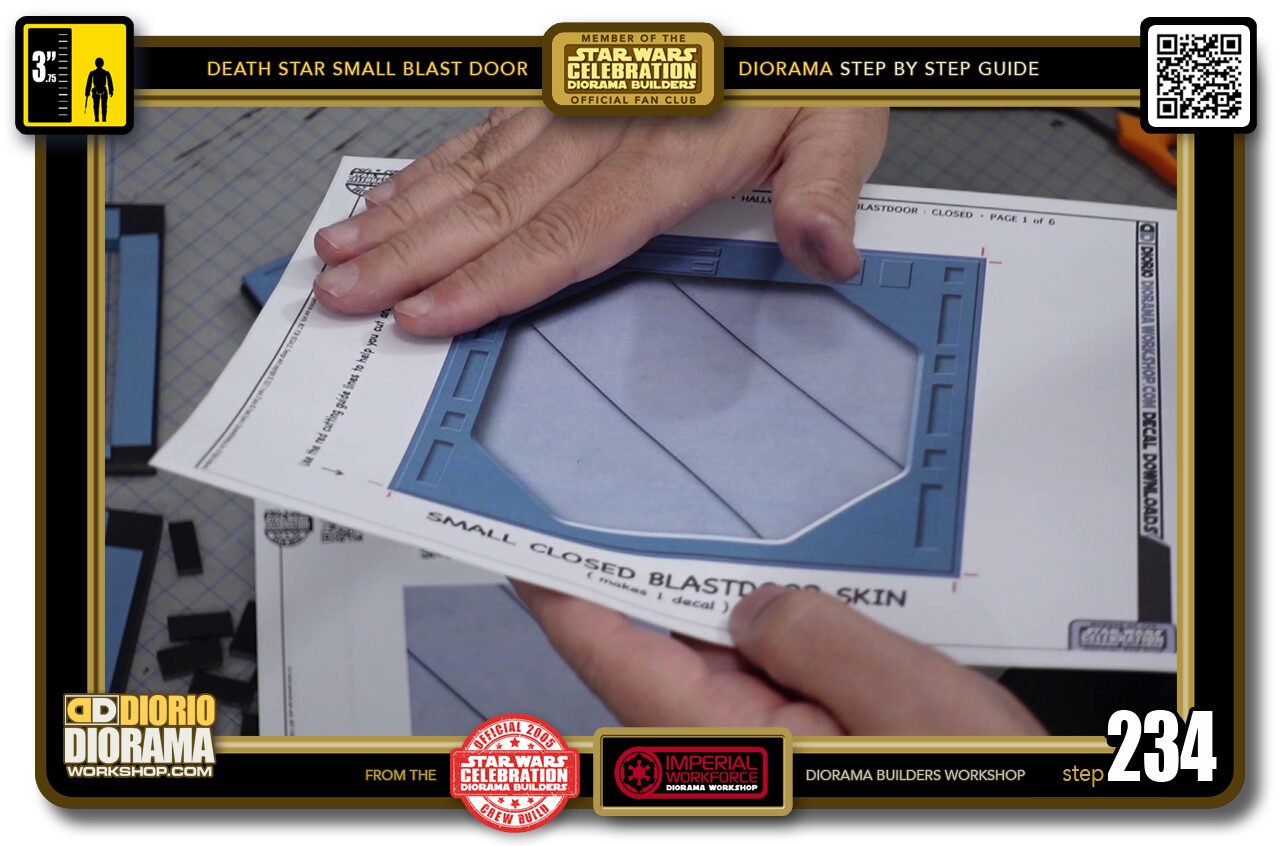
- STEP 234 > Of course being just a decal, if you look at it from the side, you will see that it is completely flat.
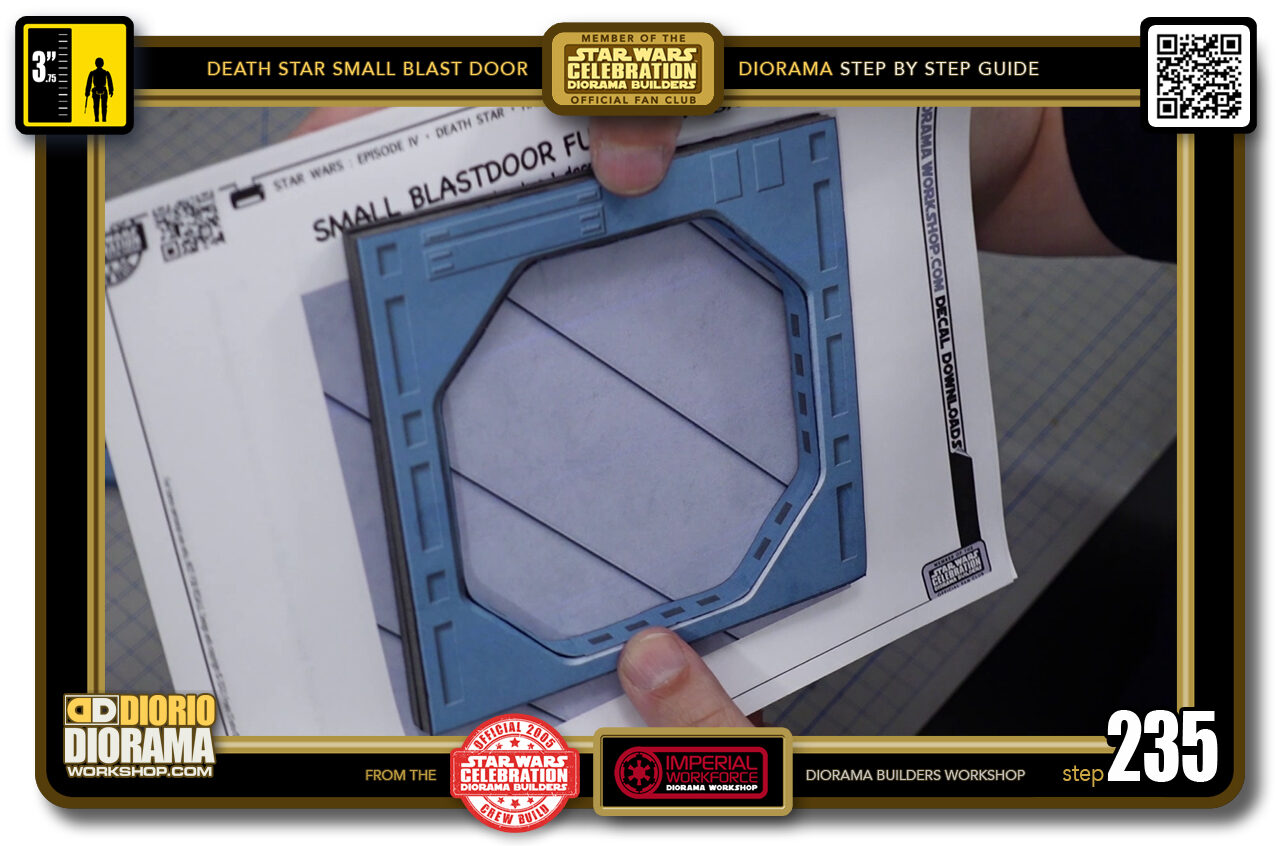
- STEP 235 > Here is where the fun of the full door decal comes in. If you want a closed door but still have the 3D look like the film set, you simply need to build the FRONT Octagonal Frame and when you place the full door decal behind it, you get the same effect as the closed door decal but because of the actual frame thickness, when you move your head looking at your diorama from different angles, it will show that it looks like a full door build.
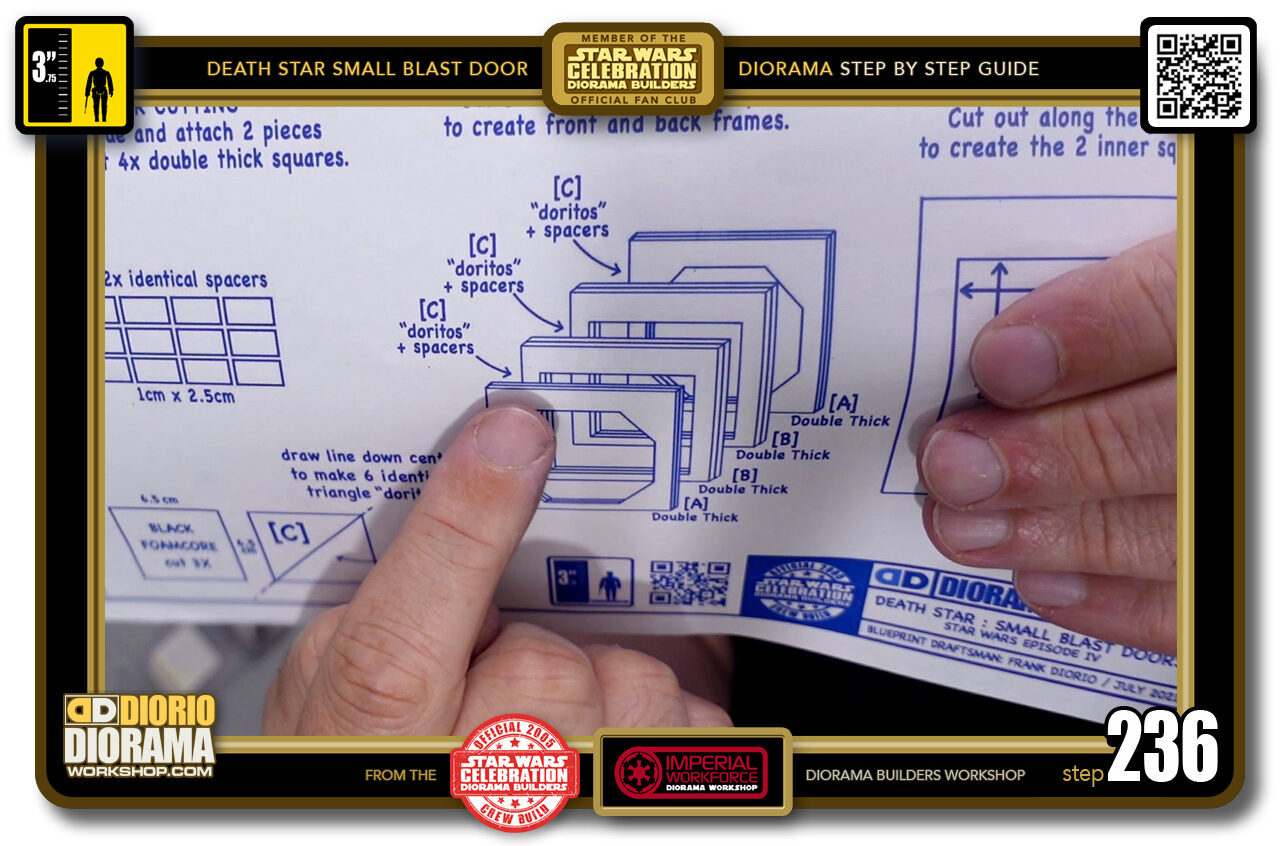
- STEP 236 > Let's look at the blueprints, we can see here how the 4 different frames fit on top of one another and the dorito shapes and spacers go in between each of these layers.
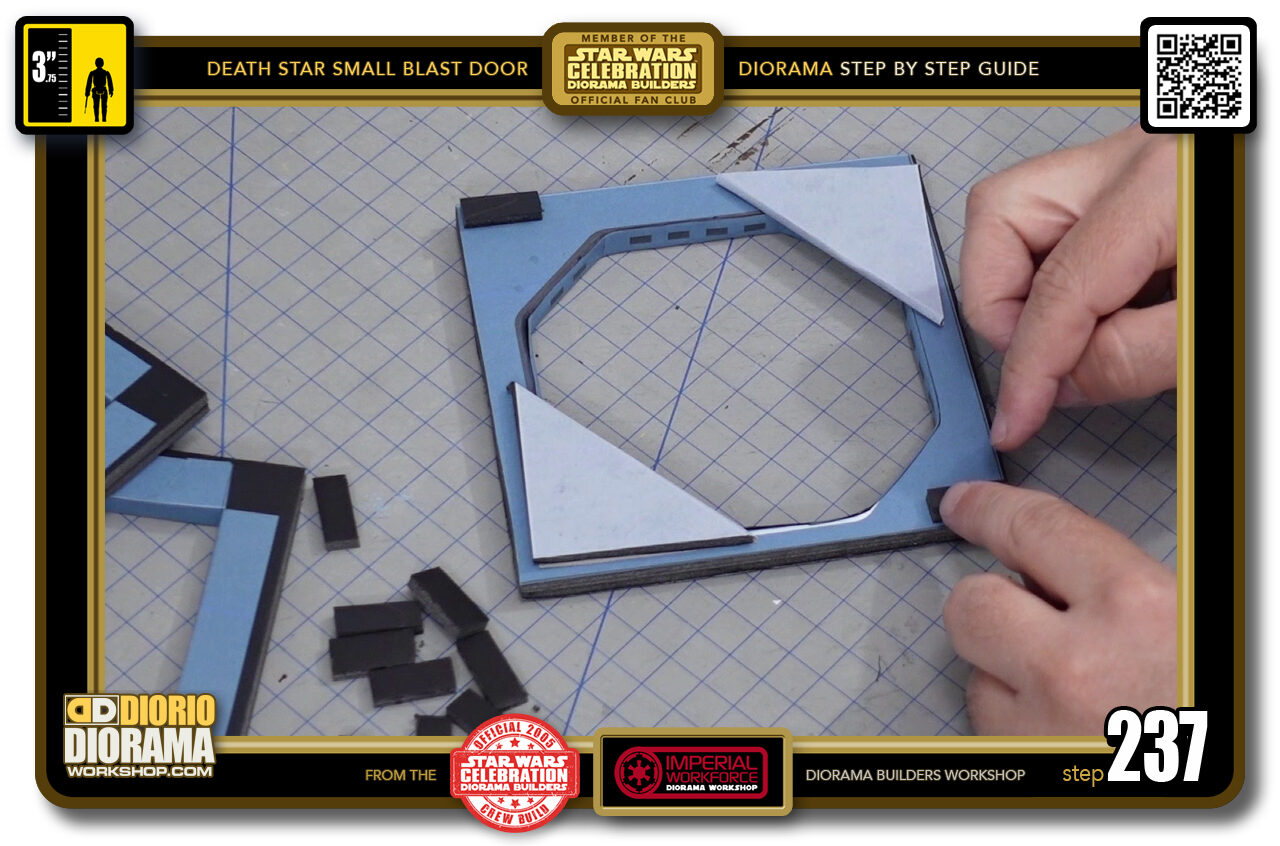
- STEP 237 > To avoid confusion, place your front octagonal frame upside down on your table. Place 2 of your doritos and 2 spacers like you see here in the photo. THE ORIENTATION OF THE PIECES MUST BE LIKE IN THE IMAGE.
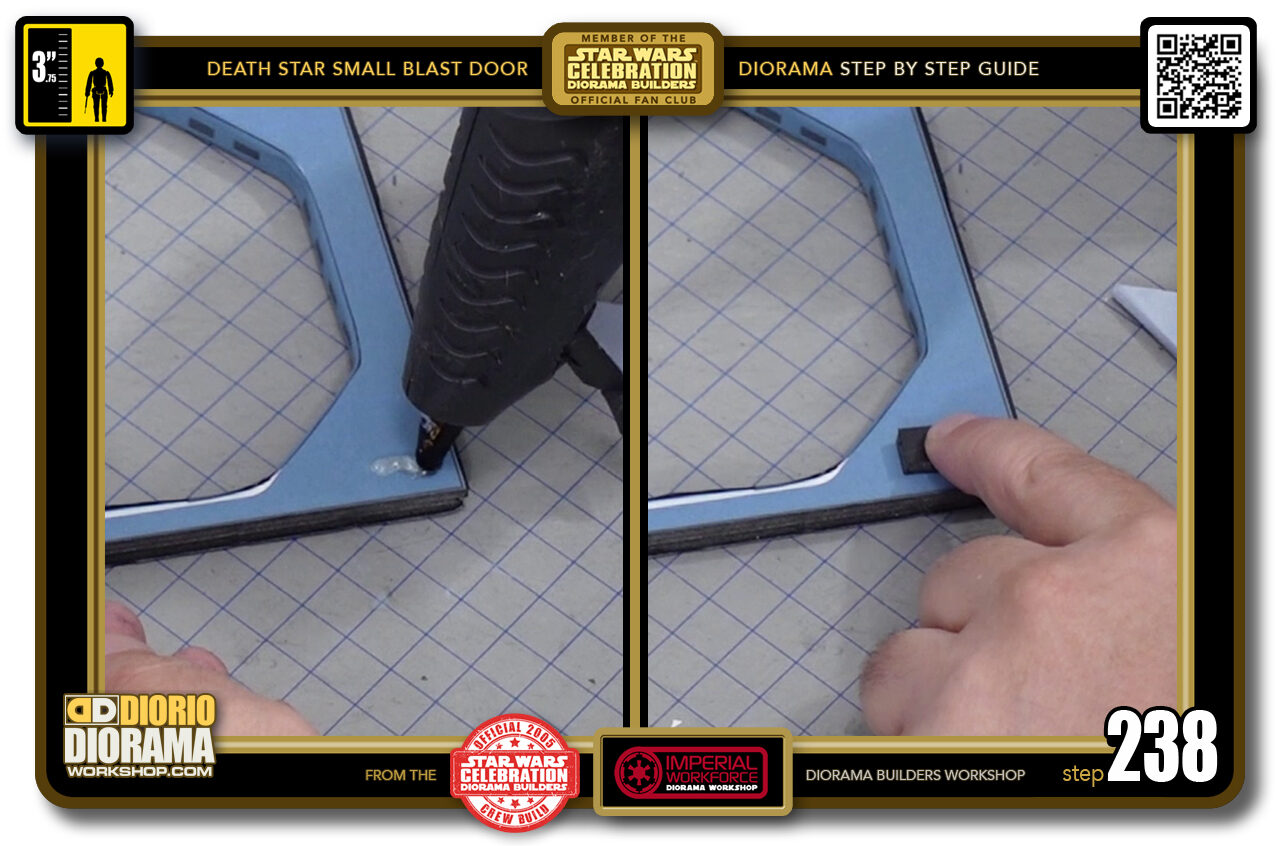
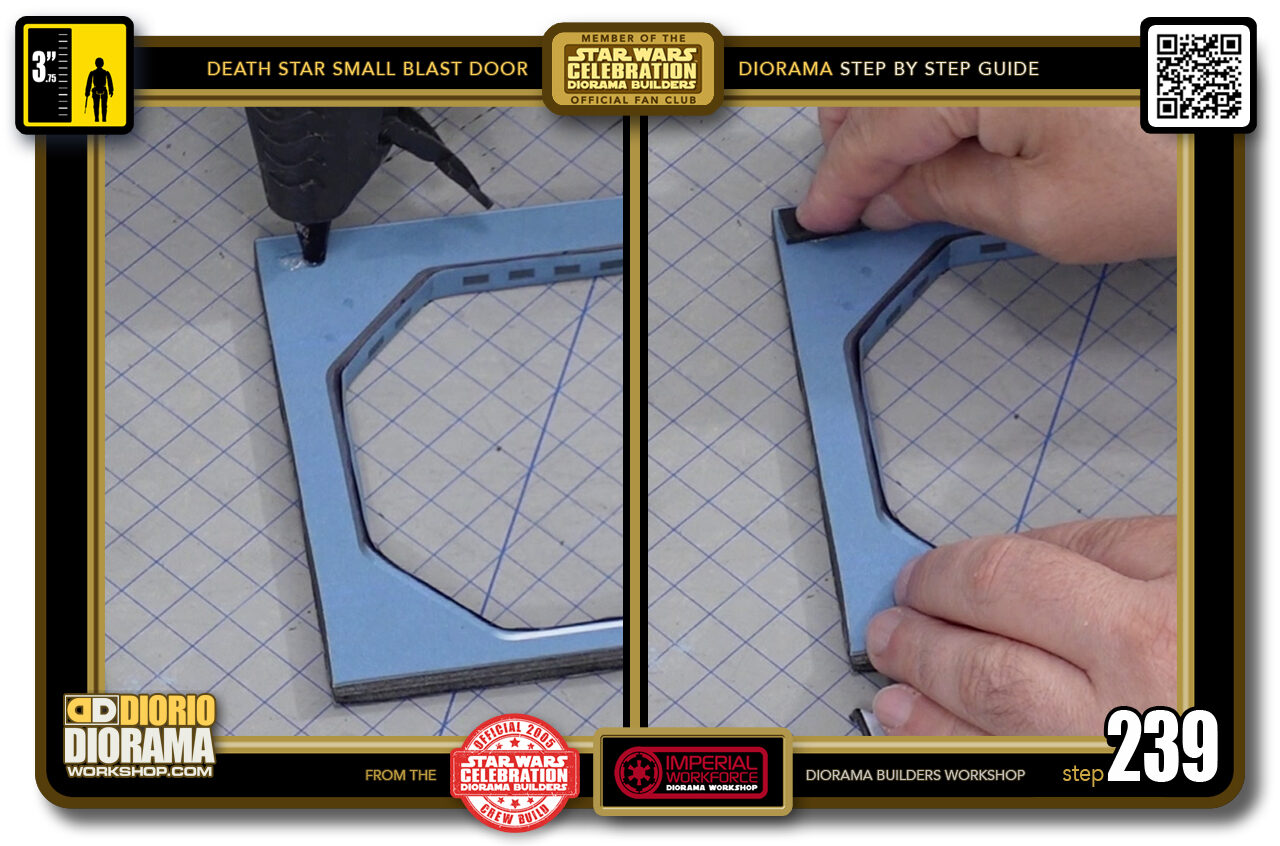
- STEP 238 > Now remove only the tiny corner spacers and place a drop of hot glue on the bottom right corner and press your corner spacer onto it. You can rotate the foamcore clockwise, counter clockwise, clockwise a couple of times to smooshen - is that a word ? LOL the hot glue flatter, as to make the foamcore connection as flat agaisnt each other as possible.
- STEP 239 > Repeat the same thing for the top left. Remove the spacer, put a small drop of hot glue then re-put the corner spacer into place.
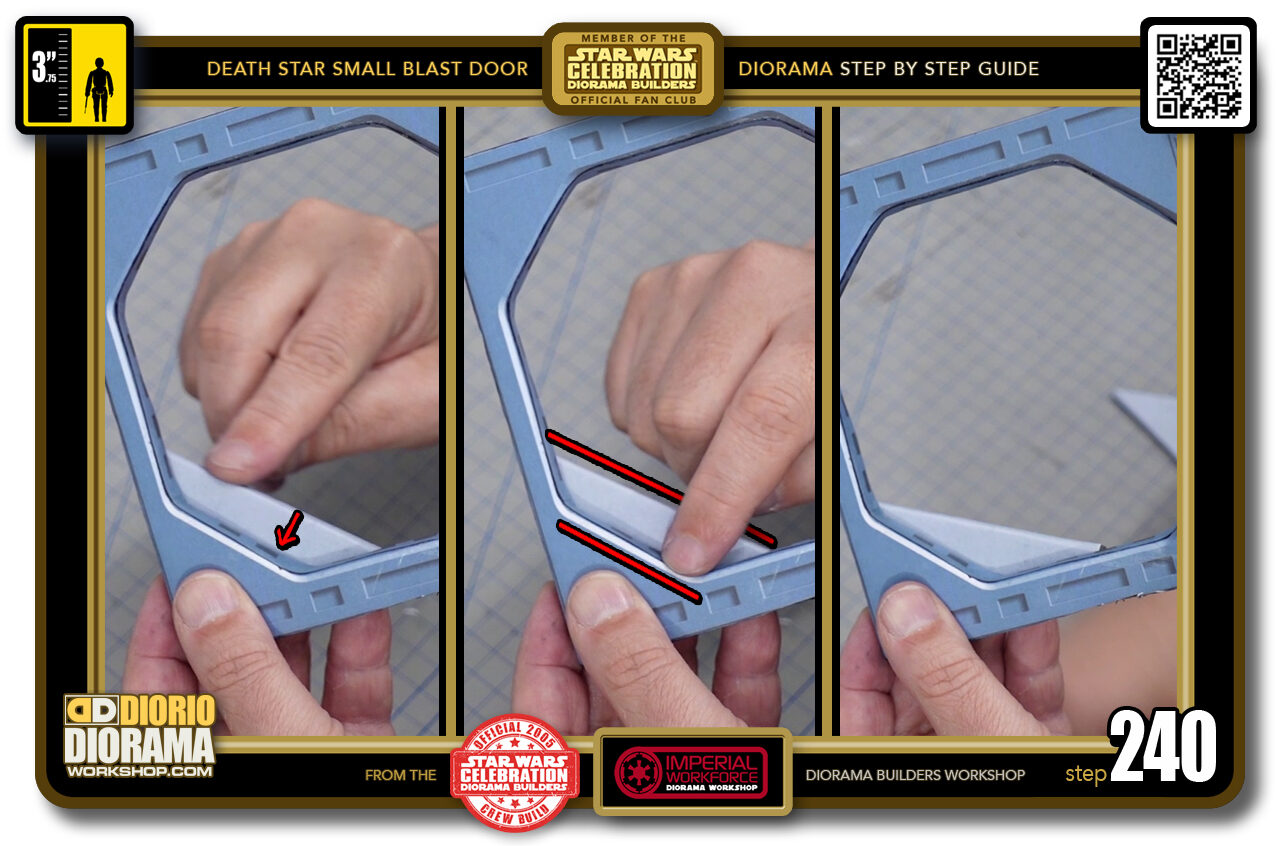
- STEP 240 > Now we can attach the dorito door corners. These will give you the illusion that a full door slid to the left and right to create the open door effect without using a full door. the important thing you will be doing is making sure the space between to top edge of your dorito is equal on both sides of your corner curve and that it is lined up parallel to the outside frame. you DON'T want it all angled crooked like you see in the right image ;P

.
Did you already build this Diorama ? At home or at our Star Wars Celebration Diorama Builders workshop ? Would you like to show it in the site’s GALLERY VISITORS DIORAMAS section, YES ? That is Awesome !!! You can find out all the details on how to email me your photos on the VISITORS SUBMISSIONS INFO page … When I get your photos, I will create your very own page just like this one. You may not realize it but work does inspire others to join in the fun of making Action Figure Dioramas.
.
NOT FOR RESALE ALL Decals, tutorials and artwork are ©FrankDiorio (dioramaworkshop.com) and offered FOR FREE to the fans – that would be you ? so you can build and display my diorama designs in your very own home. I realize I cannot control what one does with my graphics once I place them on the web, I can only ask you as one fan to another, please respect the artist and do not be that jerk who uses my designs and tutorials to build a copy of my work only to sell it on EBAY or trade/sale groups and forums. Thank You. Frank.
.

.
.
If you have a facebook account, why not join the Official Diorama Builders Fan Club today, simply click the logo link below.
 .
.
Catch up with fellow visitors and exchange stories, read cool interviews with the crew, exchange photos, fun surprises and grab some FAN ONLY merchandise next year at actual future conventions ?
.
©2021 Frank Diorio DioramaWorkshop.Com
.
IF YOU LIKE WHAT YOU SEE, PLEASE SHARE WITH YOUR FRIENDS
USING THE SOCIAL MEDIA BUTTONS BELOW


