


-
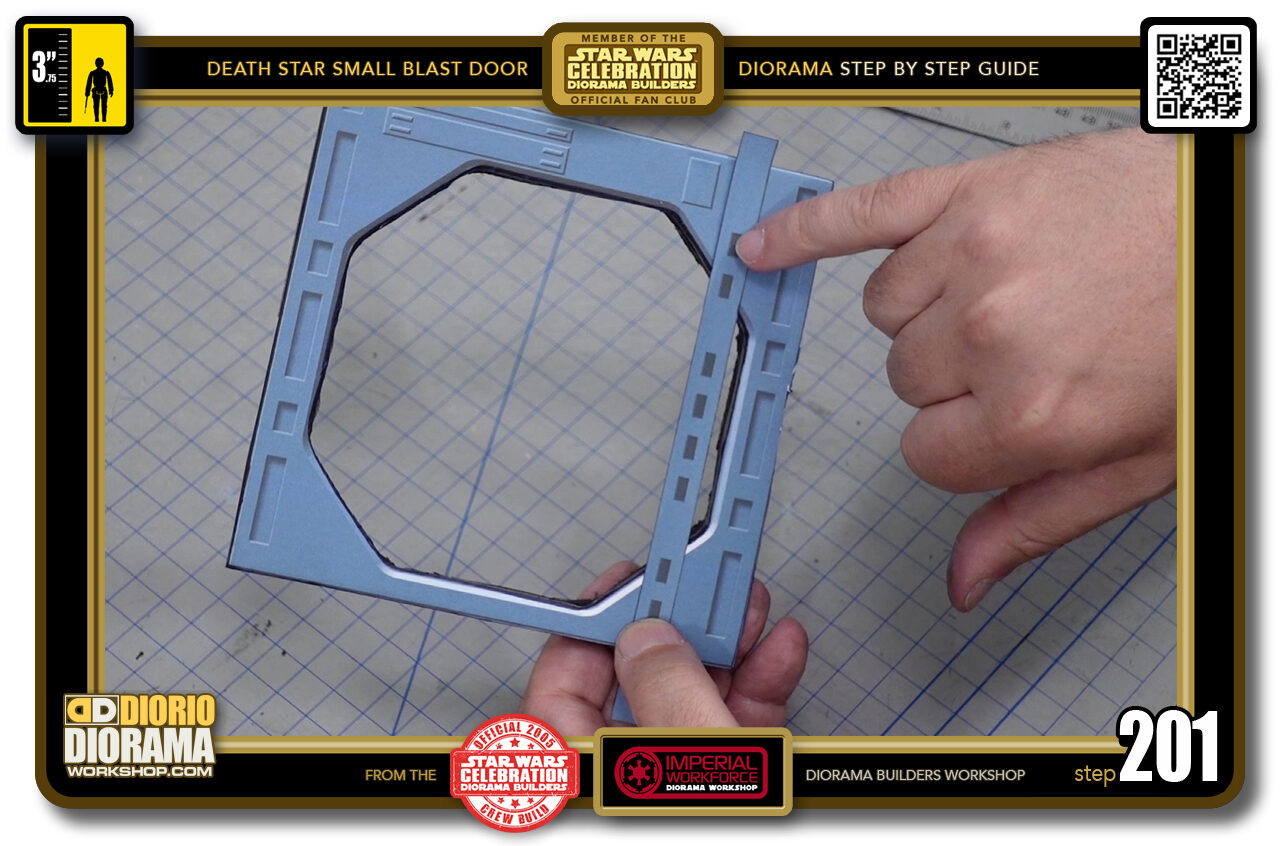
- STEP 201 > The 2 long pieces fit on the left and right spines. You will notice 4 dark rectangles in the centre and 2 dark rectangles on either sides at the end.
-
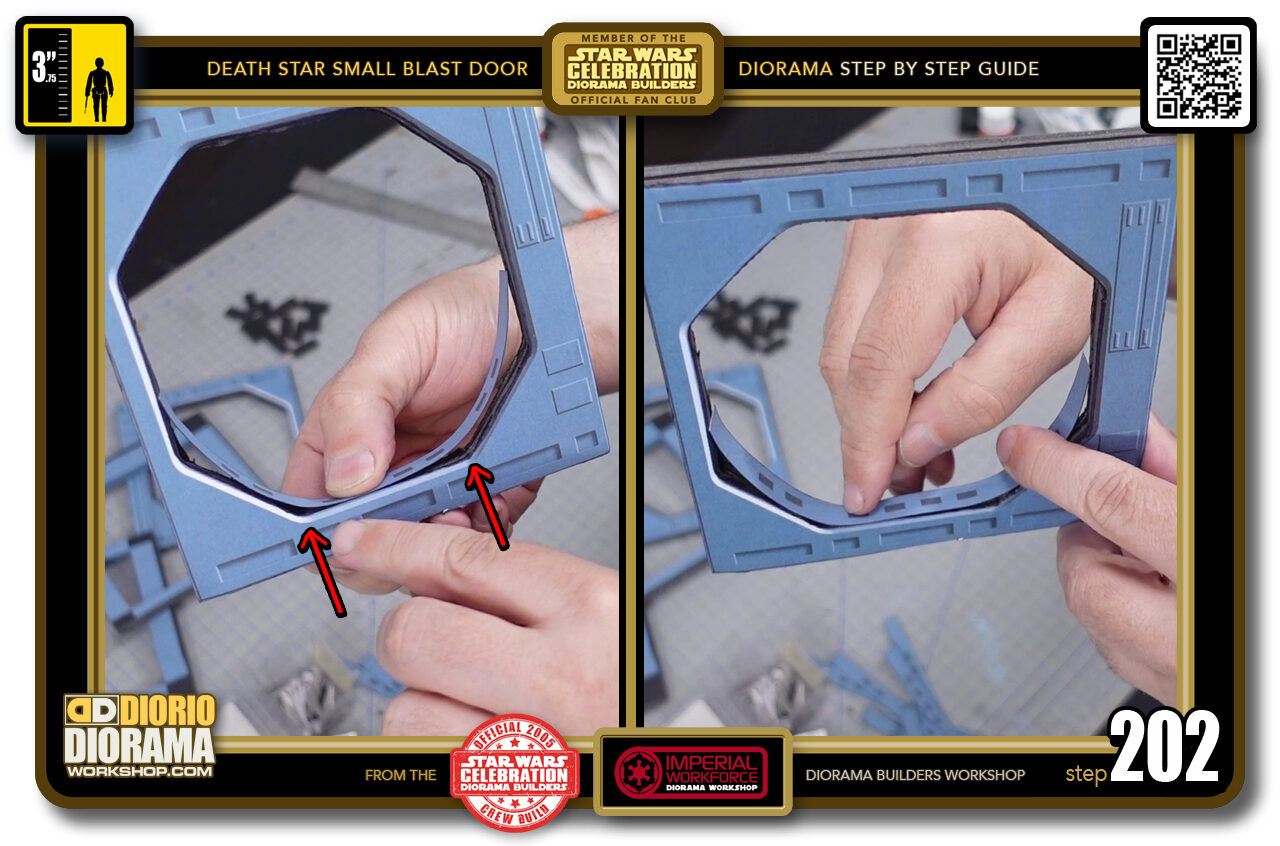
- STEP 202 > What you want to do is align the centre 4 dark squares in the middle of your sides - between the 2 red arrows. Once centred, if you look now at the 2 dark rectangles they will appear centred against the angle between the 2 curved corners.
-
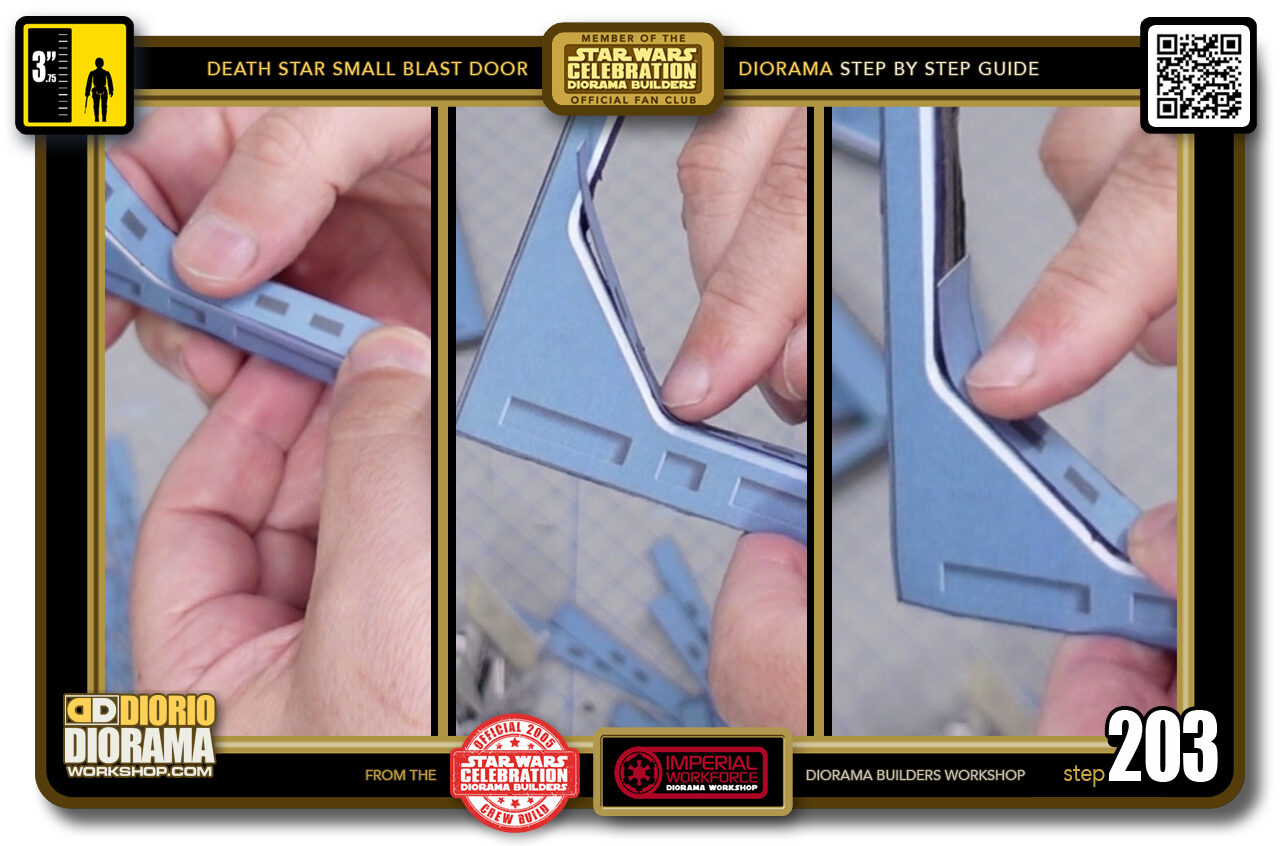
- STEP 203 > So to begin you want to give your decal a bend memory where the rounded corners are. to do this, first make sure your 4 dark rectangles are in the centre of your side spine, then keeping your thumb pressed so the decal doesn't slide, move your finger along the decal until you reach a corner then press with your nail to make a dent. Now fold that bend inwards, now press down on the angle part and slide your finger to the next rounded corner. Press your nail and bend the decal inwards.
-

- STEP 204 > Your decal should look like this when you are done. Now peel it and put it aside on it's side as to not stick to your table.
-
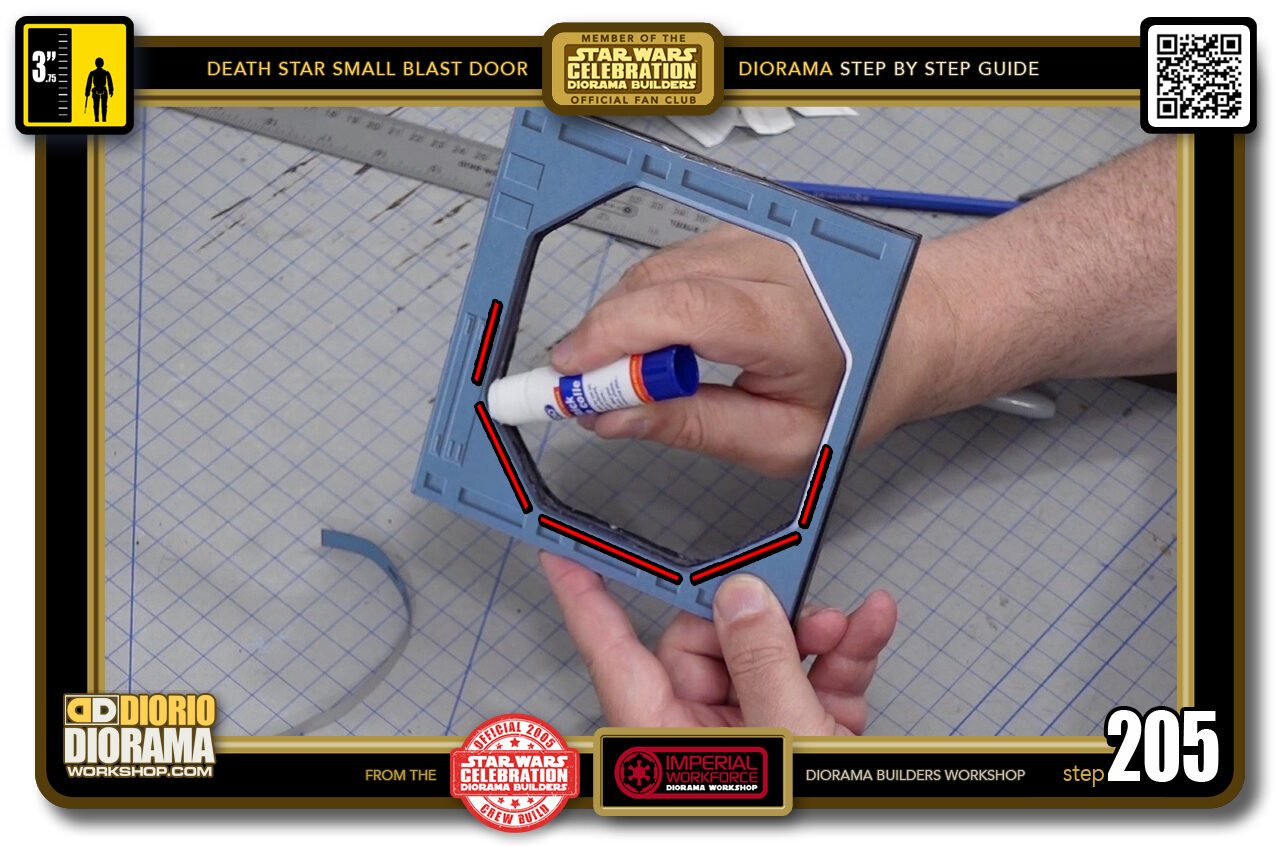
- STEP 205 > Because of the octagonal angles, the normal gluestick doesn't fit properly, so I switched to my "lipstick" size. Apply a good amount of gluestick all over the one side of your frame along the areas you see marked in red.
-
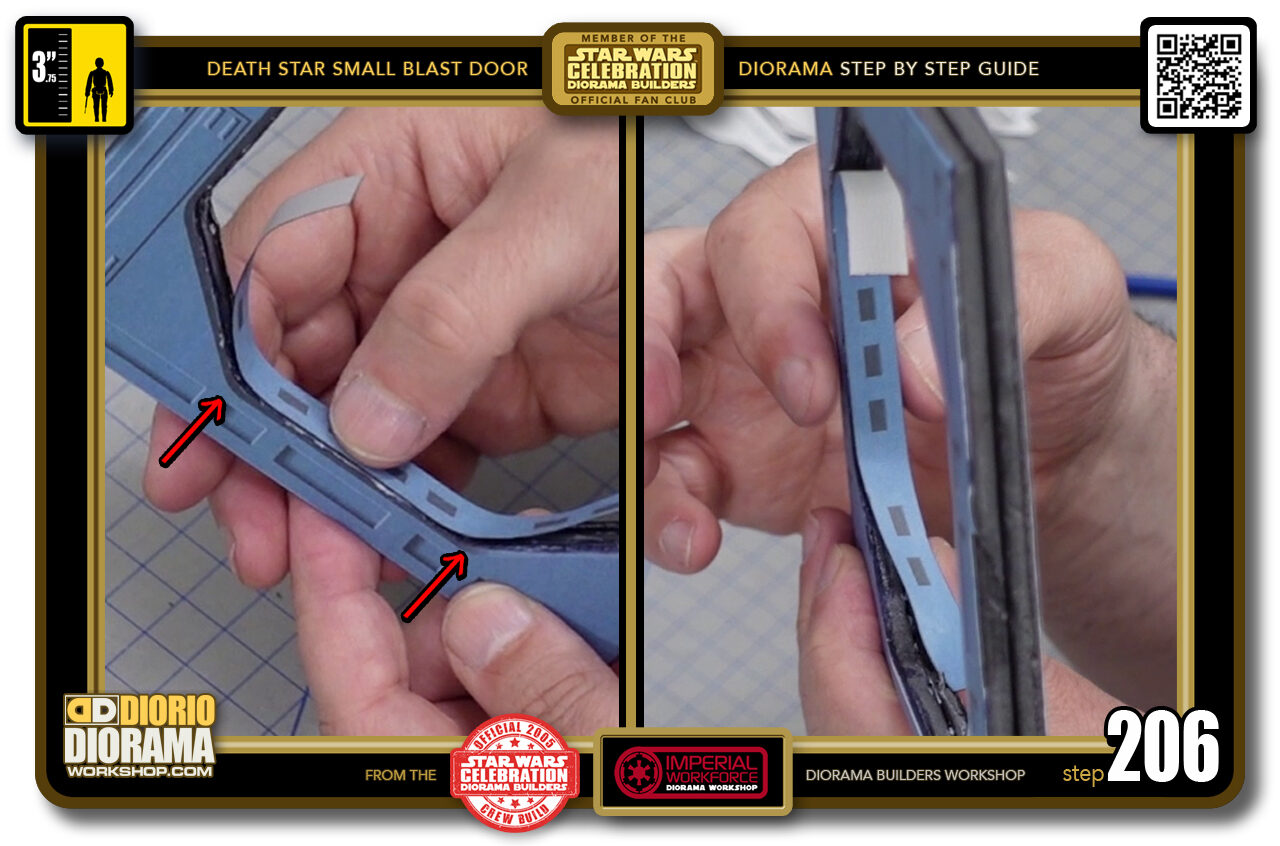
- STEP 206 > Grab your peeled decal and place the centre first. Use your folded marks to guide it in place as seen in the left image. Make sure to keep your decal aligned perfectly with your foamcore thickness as you see in the right image.
-
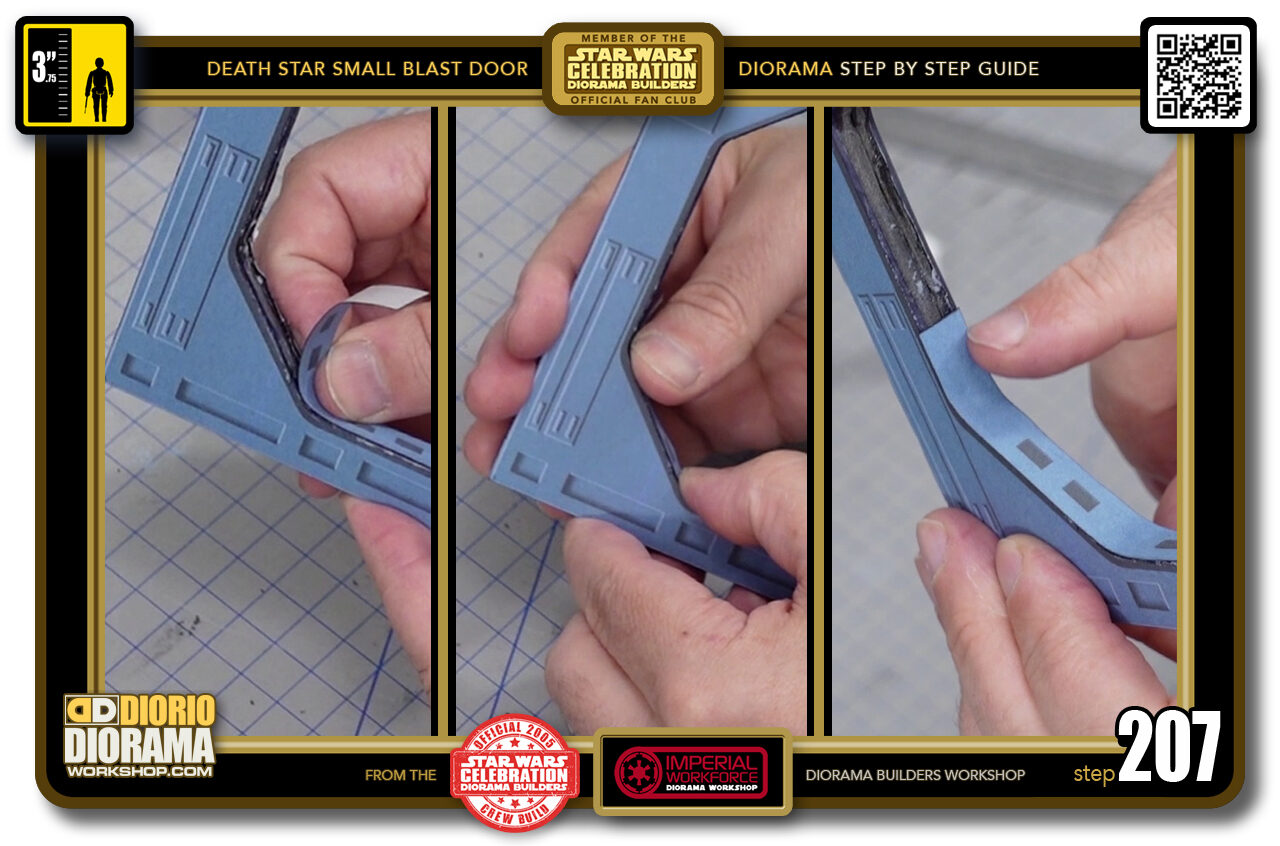
- STEP 207 > Once your center is placed to your liking, move your finger from the centre towards the corner and keep one finger there to prevent any sliding. Now press along the angled part (centre image) and make sure the entire decal lays flat without bubbles or wrinkles. Place your finger on the second rounded corner and then finally move up so that the end of your decal lays flat against the top or bottom of your frame.
-
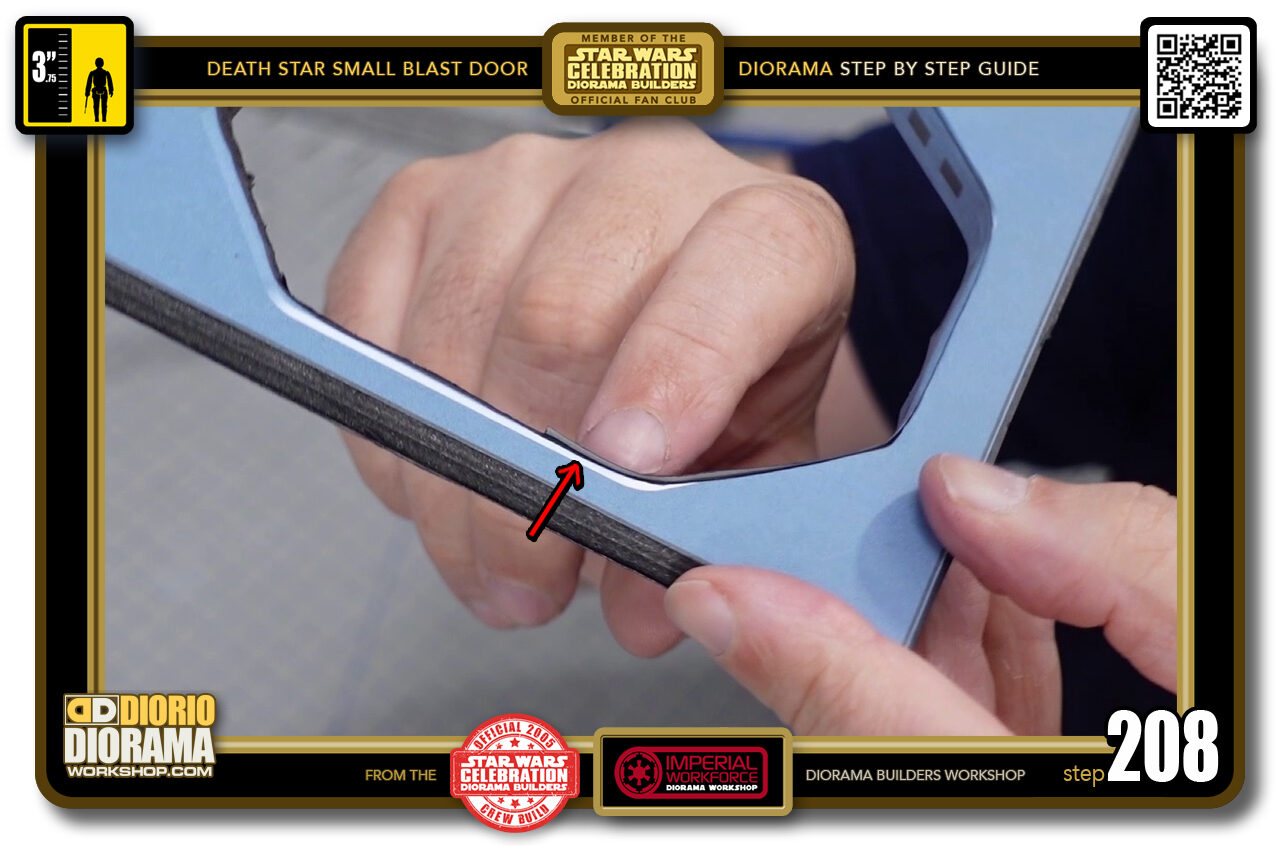
- STEP 208 > You will notice that some of the decal can stick out slightly on the sides of your frame.
-
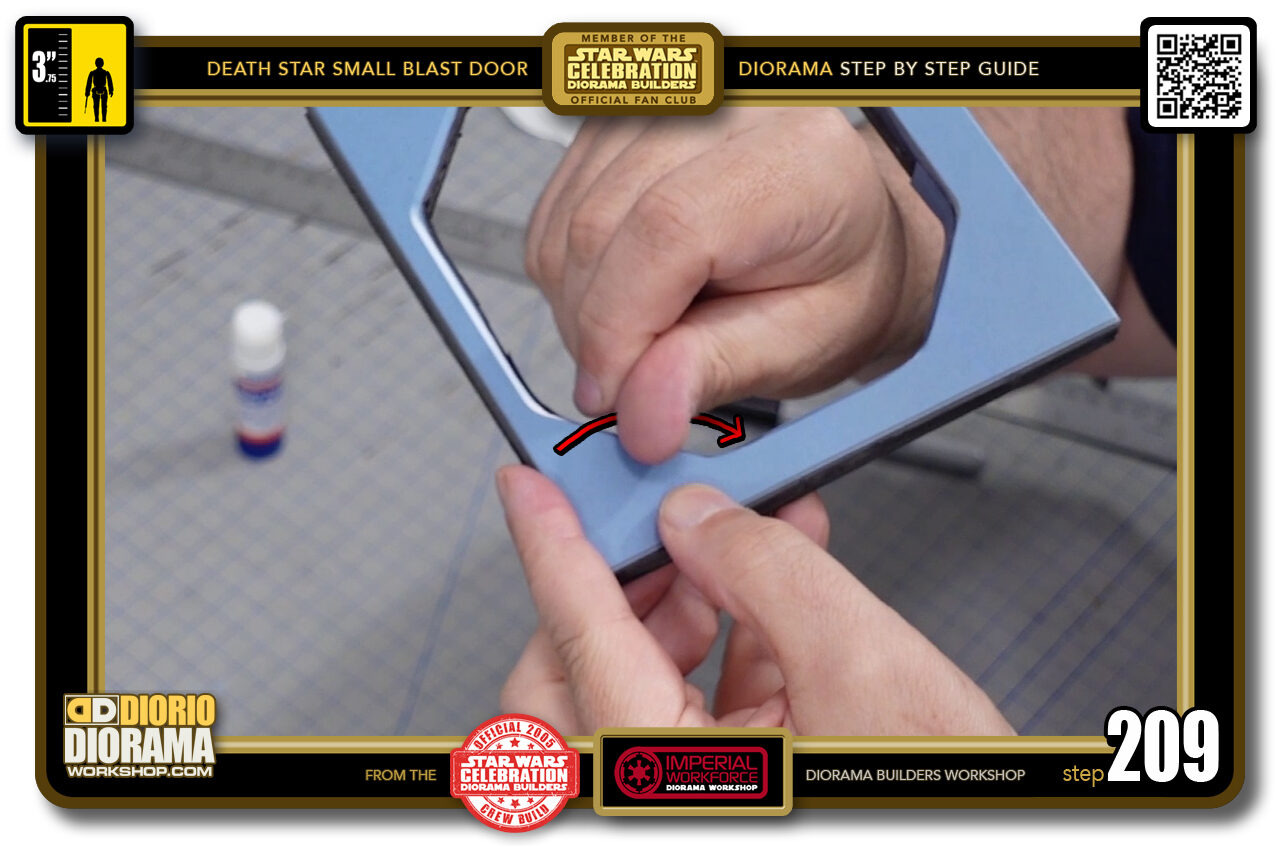
- STEP 209 > Use the thumb nail technique to round the edges and blend them with the curved front and rear frame decals.
-
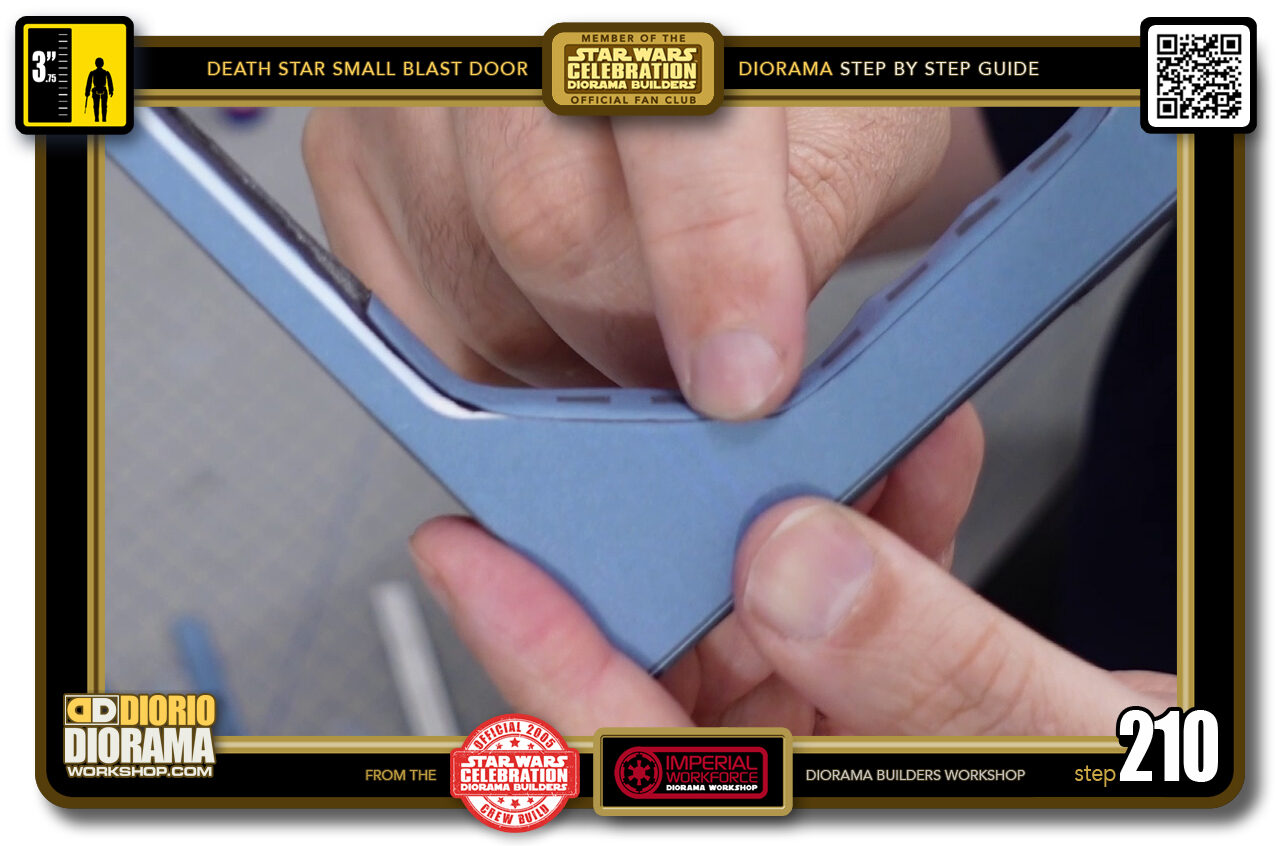
- STEP 210 > You can see how the decals morph one into the other after pressing with your nail. Here you can also see how taking the time to blacken the decal edges with your Sharpie pen makes the blending seamless.
-
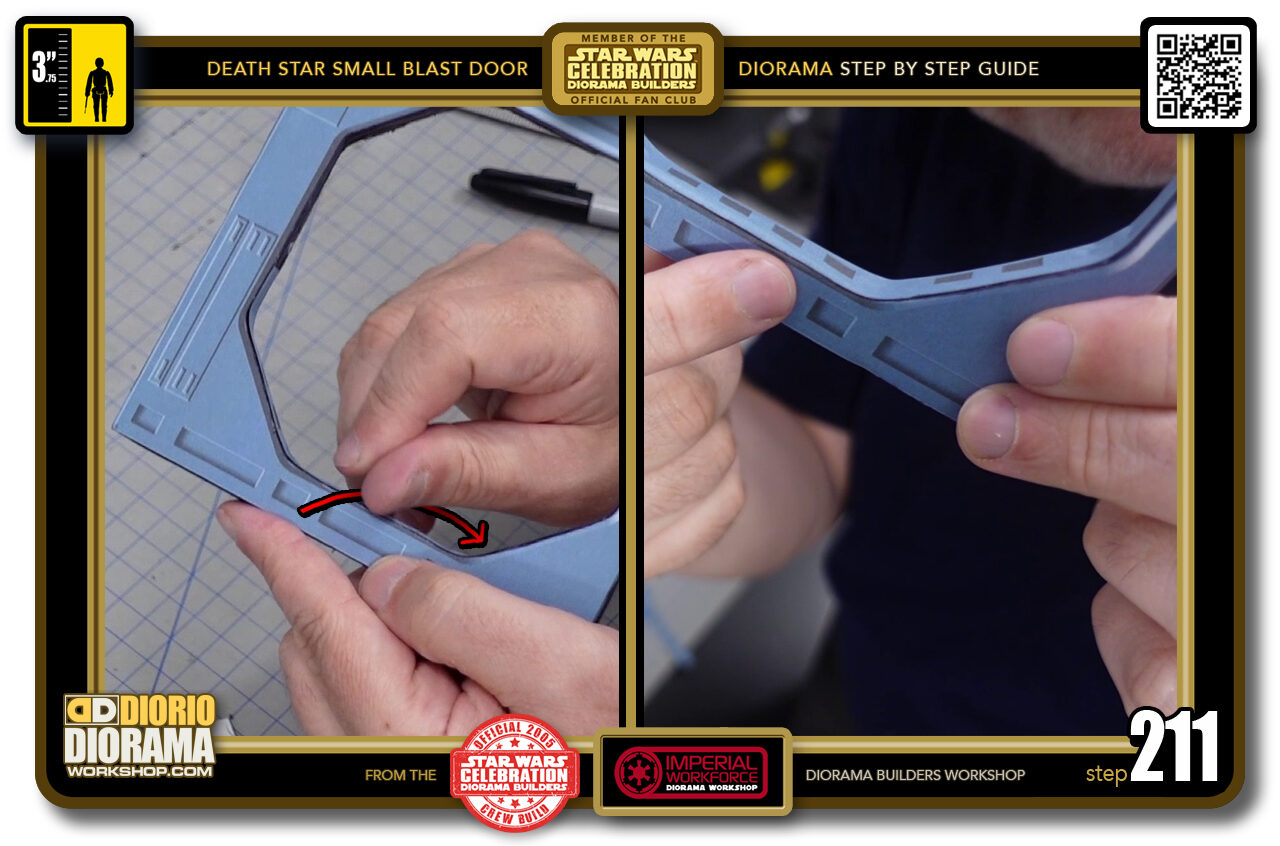
- STEP 211 > So continue the thumb nail technique on both sides of the spine.
-
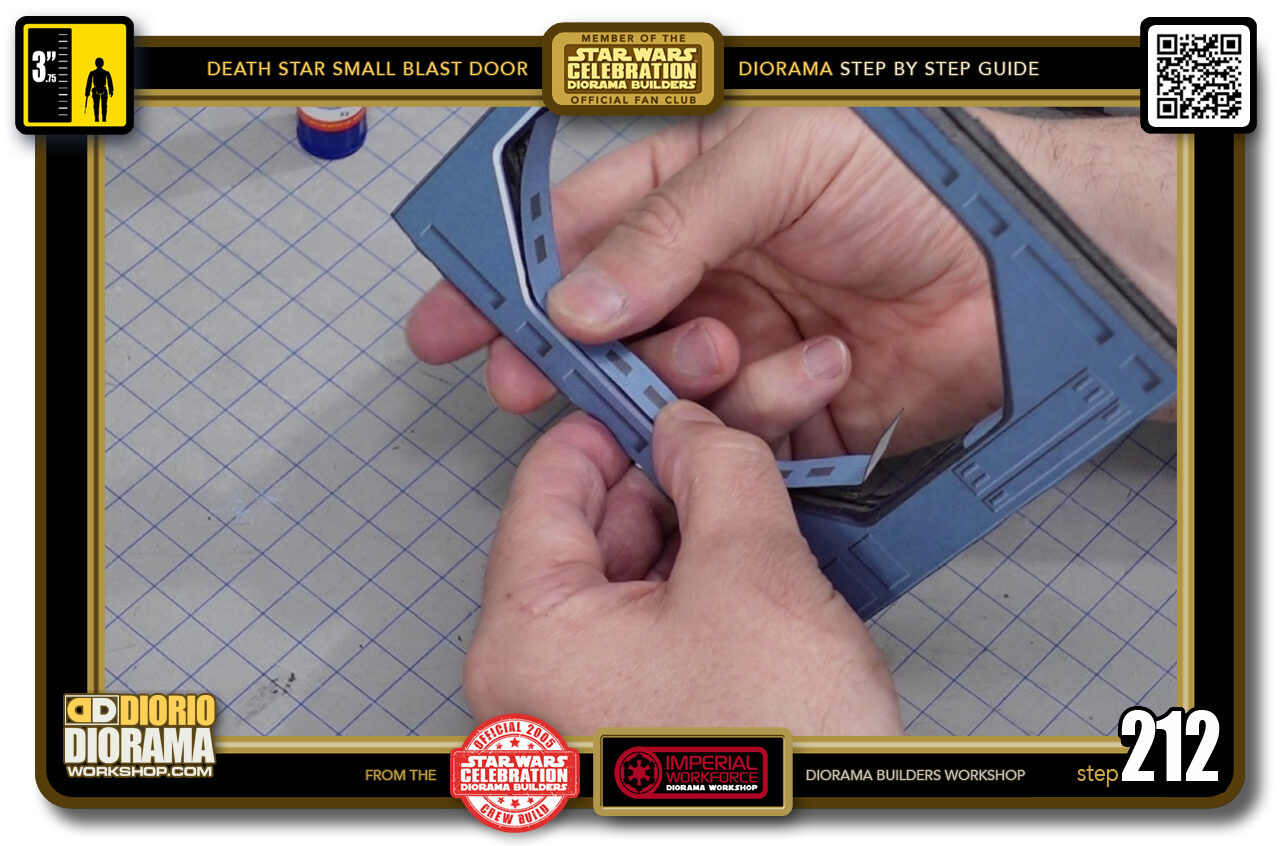
- STEP 212 > Repeat the same steps with the other side of your frame.
-
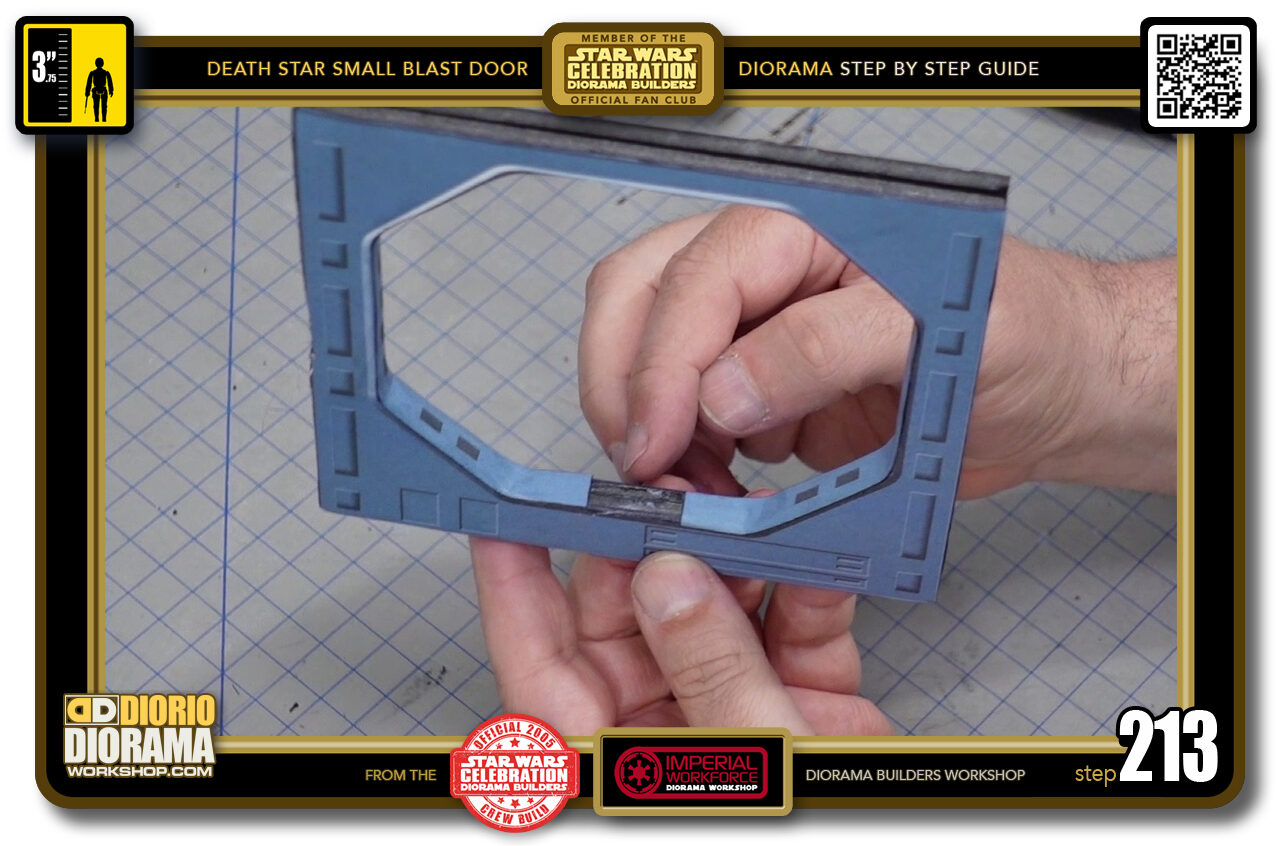
- STEP 213 > Once both sides are secure, it's time to attach the smaller top and bottom pieces.
-
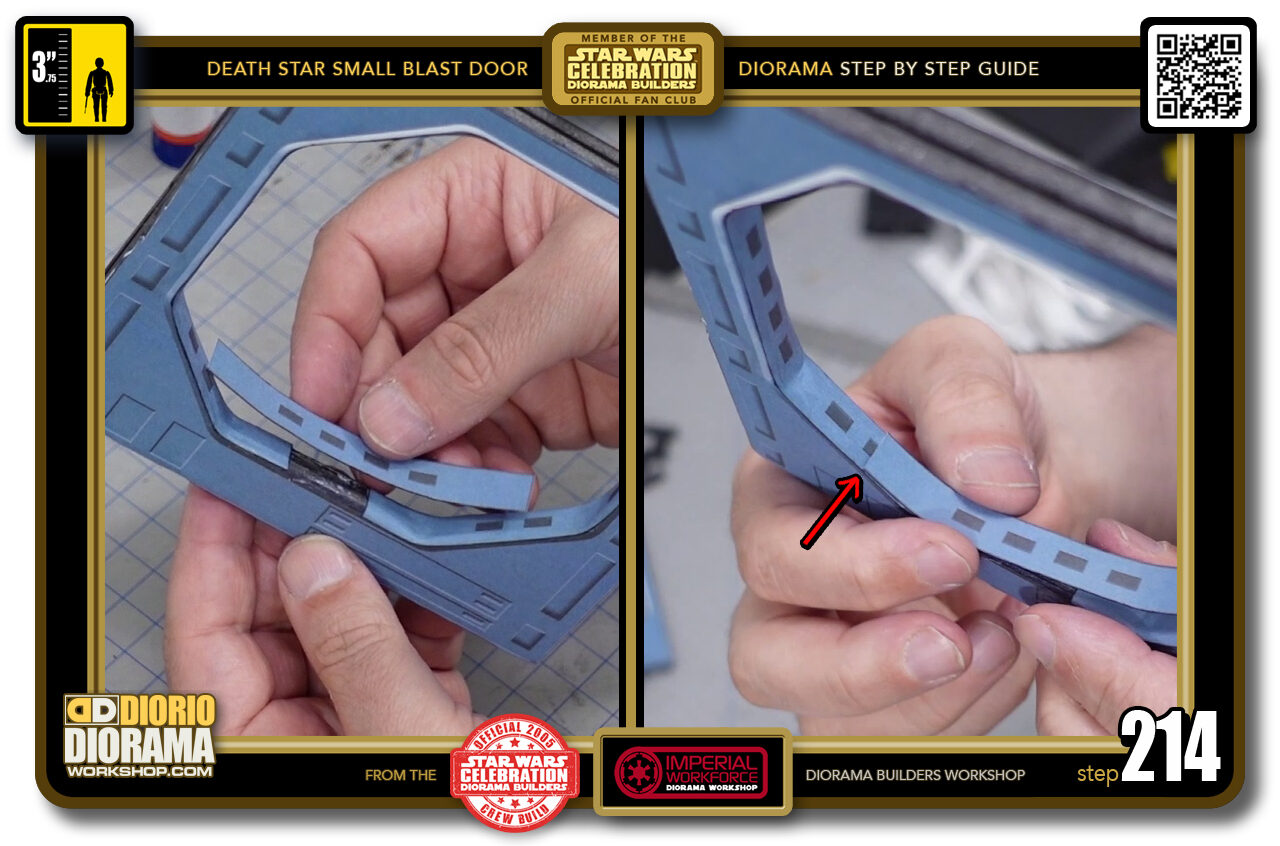
- STEP 214 > The same rules apply to these 2 pieces, you want the 4 dark rectangles to fit in the centre of your curved corners. You will notice in the dry run that if you leave the decal as is, the ends will overlap onto the ends of your side decals and cover up a portion of their dark rectangles.
-
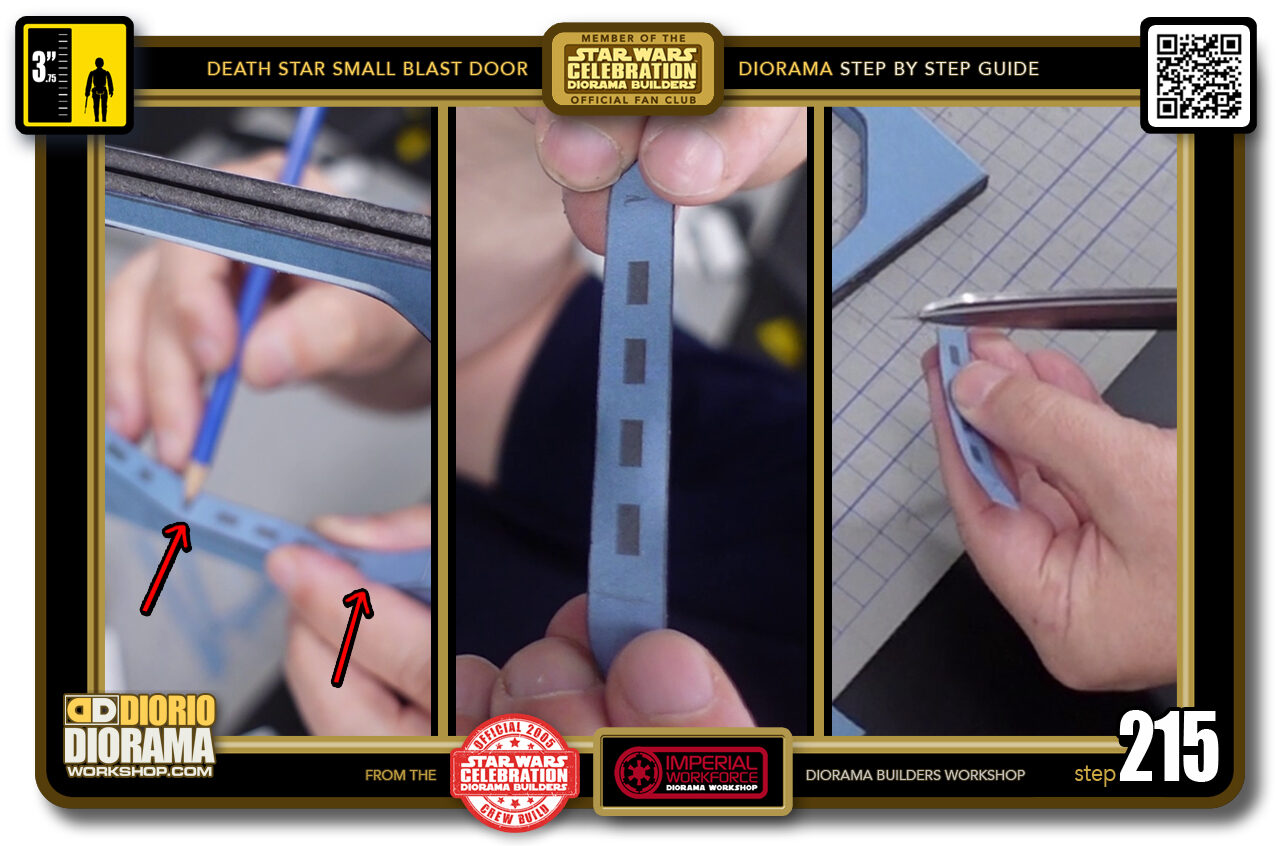
- STEP 215 > Sorry for the blur in the left image. What I was trying to show is that you need to center your 4 dark rectangles on the spine, then take a pencil and place a mark just before each of the corner bends. You can see the marks in the centre image. This is where you will cut off the ends and get a perfect fit. So grab your scisors and chop off the ends.
-

- STEP 216 > You now have the proper width at the top and the original size at the bottom.
-
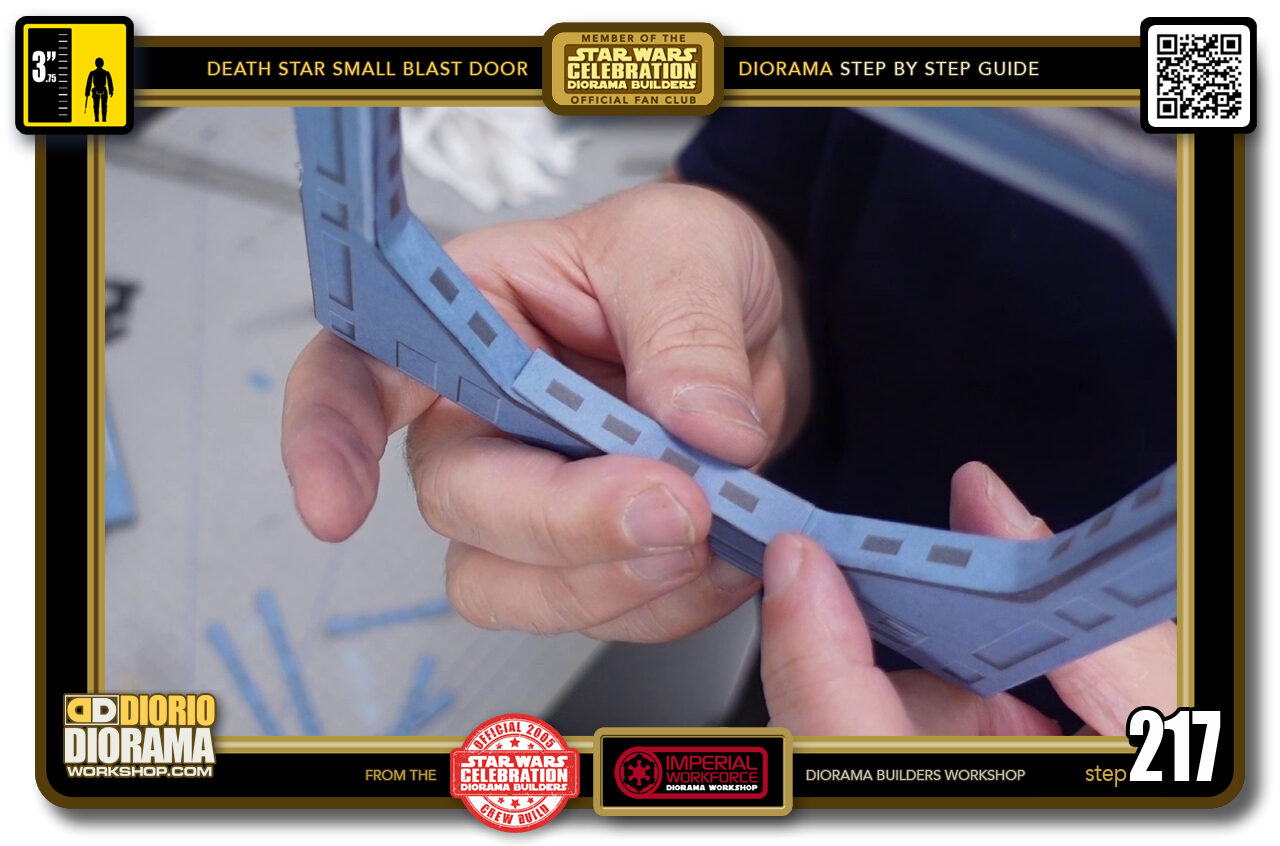
- STEP 217 > Do one last dry run to make sure it fits just right.
-
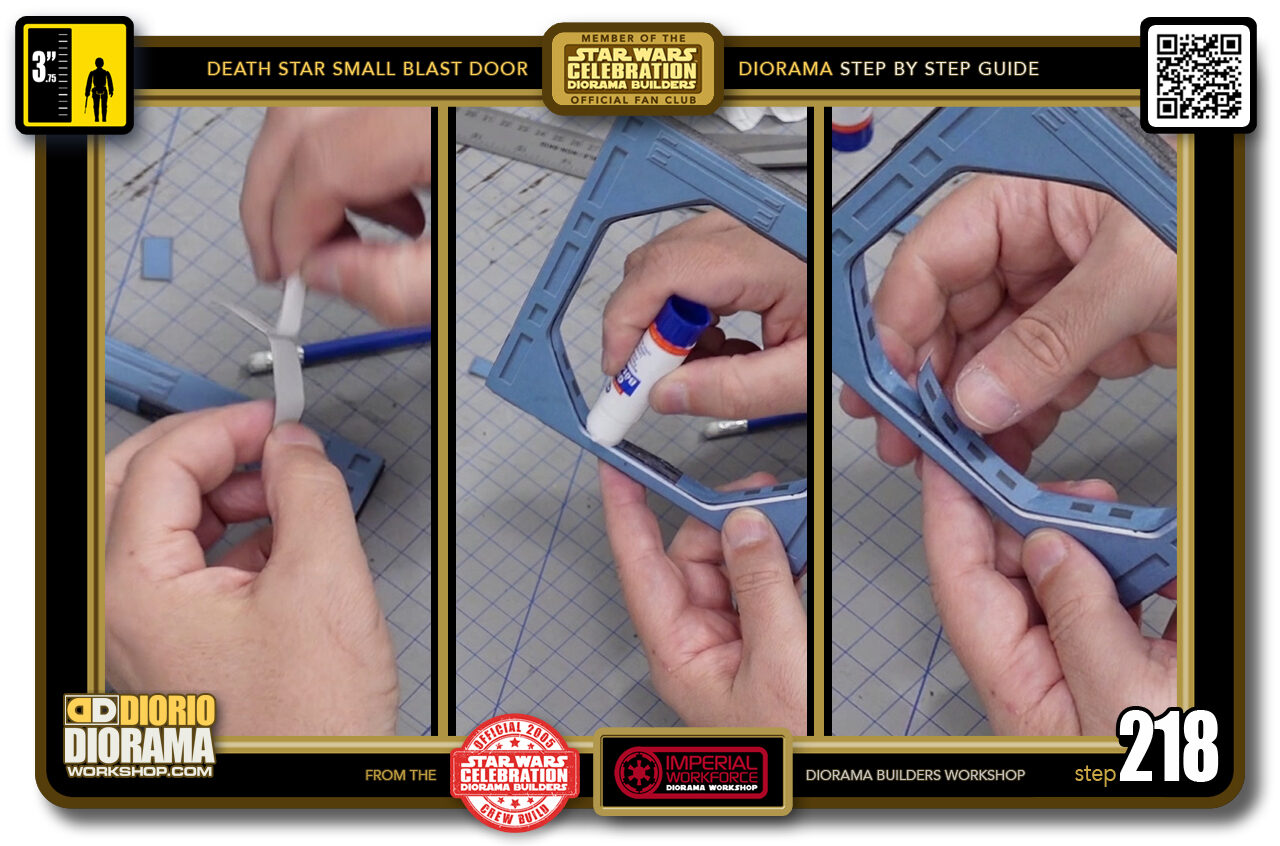
- STEP 218 > Peel your decal, place it to the side, and use a good amount of glue stick on your frame spine. Apply the decal over the top or bottom area.
-
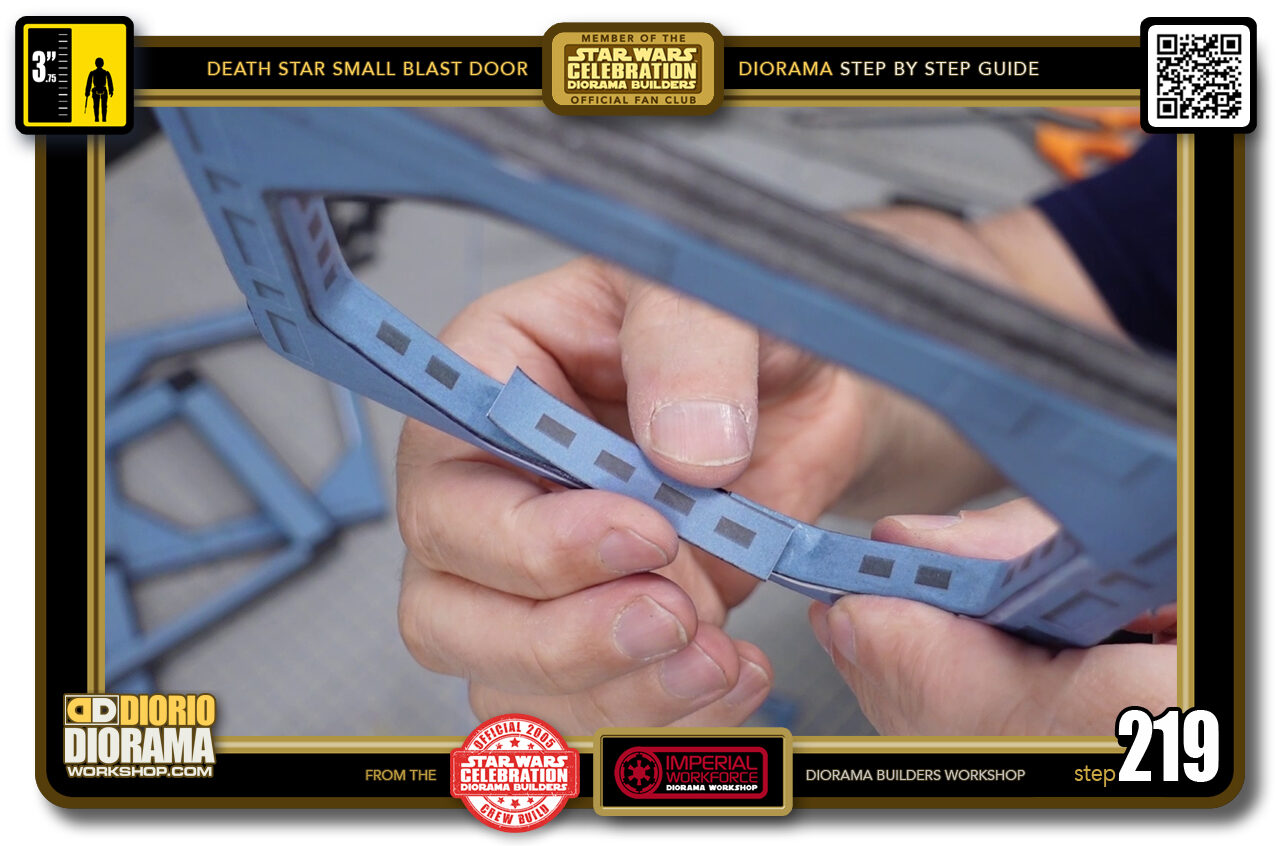
- STEP 219 > You can wiggle it until it is perfectly centred between the rounded corners and equally spaced front and rear of the spine.
-
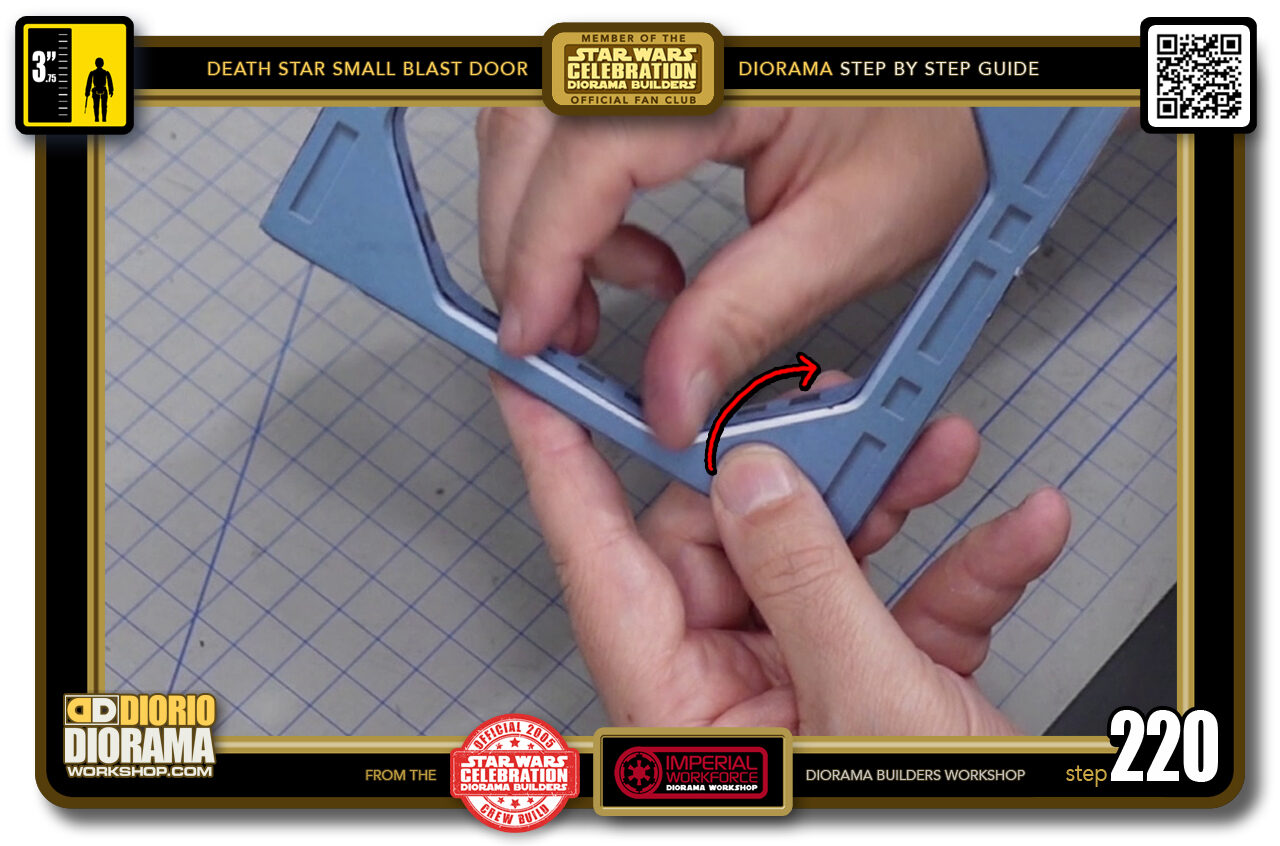
- STEP 220 > Now just use the thumb nail technique to blend it all together.

.
Did you already build this Diorama ? At home or at our Star Wars Celebration Diorama Builders workshop ? Would you like to show it in the site’s GALLERY VISITORS DIORAMAS section, YES ? That is Awesome !!! You can find out all the details on how to email me your photos on the VISITORS SUBMISSIONS INFO page … When I get your photos, I will create your very own page just like this one. You may not realize it but work does inspire others to join in the fun of making Action Figure Dioramas.
.
NOT FOR RESALE ALL Decals, tutorials and artwork are ©FrankDiorio (dioramaworkshop.com) and offered FOR FREE to the fans – that would be you ? so you can build and display my diorama designs in your very own home. I realize I cannot control what one does with my graphics once I place them on the web, I can only ask you as one fan to another, please respect the artist and do not be that jerk who uses my designs and tutorials to build a copy of my work only to sell it on EBAY or trade/sale groups and forums. Thank You. Frank.
.

.
.
If you have a facebook account, why not join the Official Diorama Builders Fan Club today, simply click the logo link below.
 .
.
Catch up with fellow visitors and exchange stories, read cool interviews with the crew, exchange photos, fun surprises and grab some FAN ONLY merchandise next year at actual future conventions ?
.
©2021 Frank Diorio DioramaWorkshop.Com
.
IF YOU LIKE WHAT YOU SEE, PLEASE SHARE WITH YOUR FRIENDS
USING THE SOCIAL MEDIA BUTTONS BELOW