


-
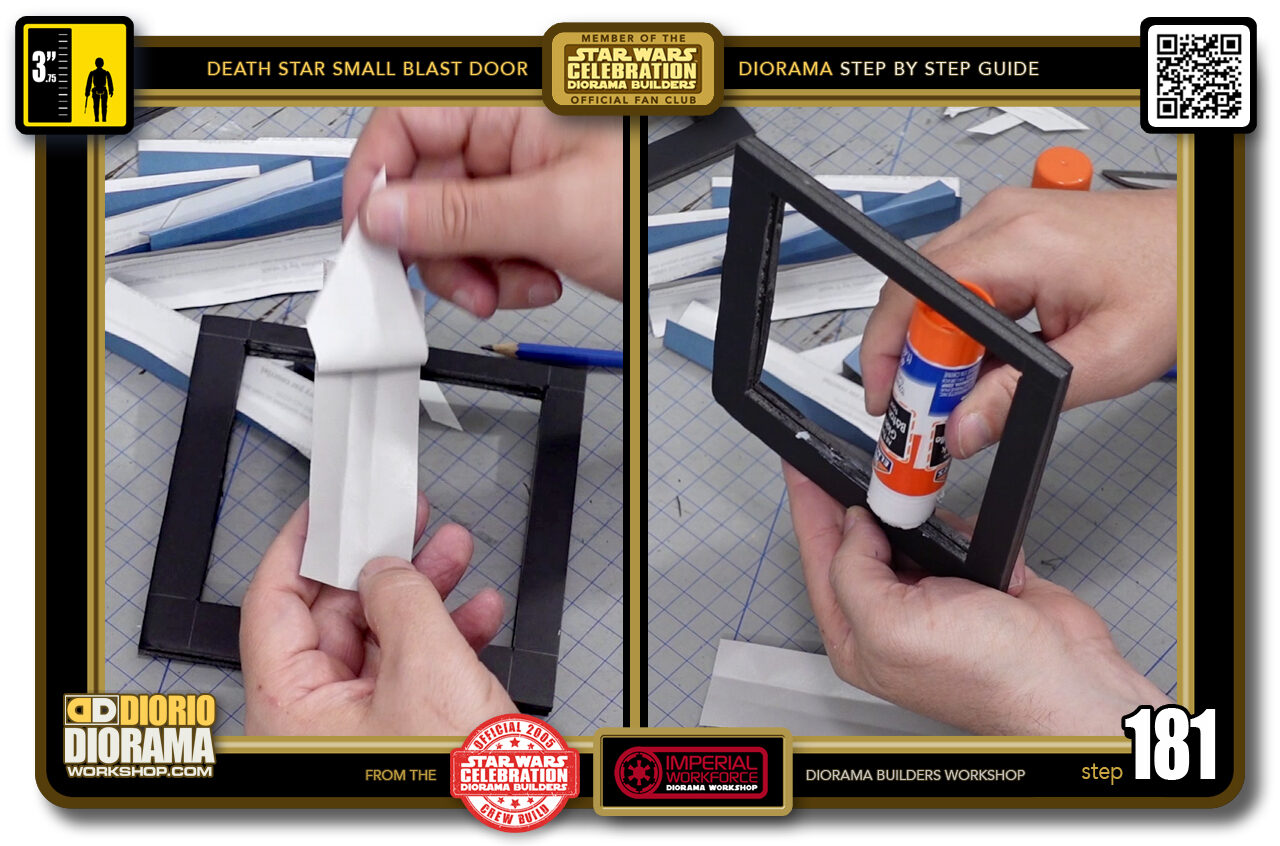
- STEP 181 > Now you want to peel off the decal first (if you didn't use full label sheets you need to apply gluestick on the back of your decal) then put it down with the sticky side up and apply some glue stick (NEVER EVER HOT GLUE FOR DECALS) along the entire spine.
-
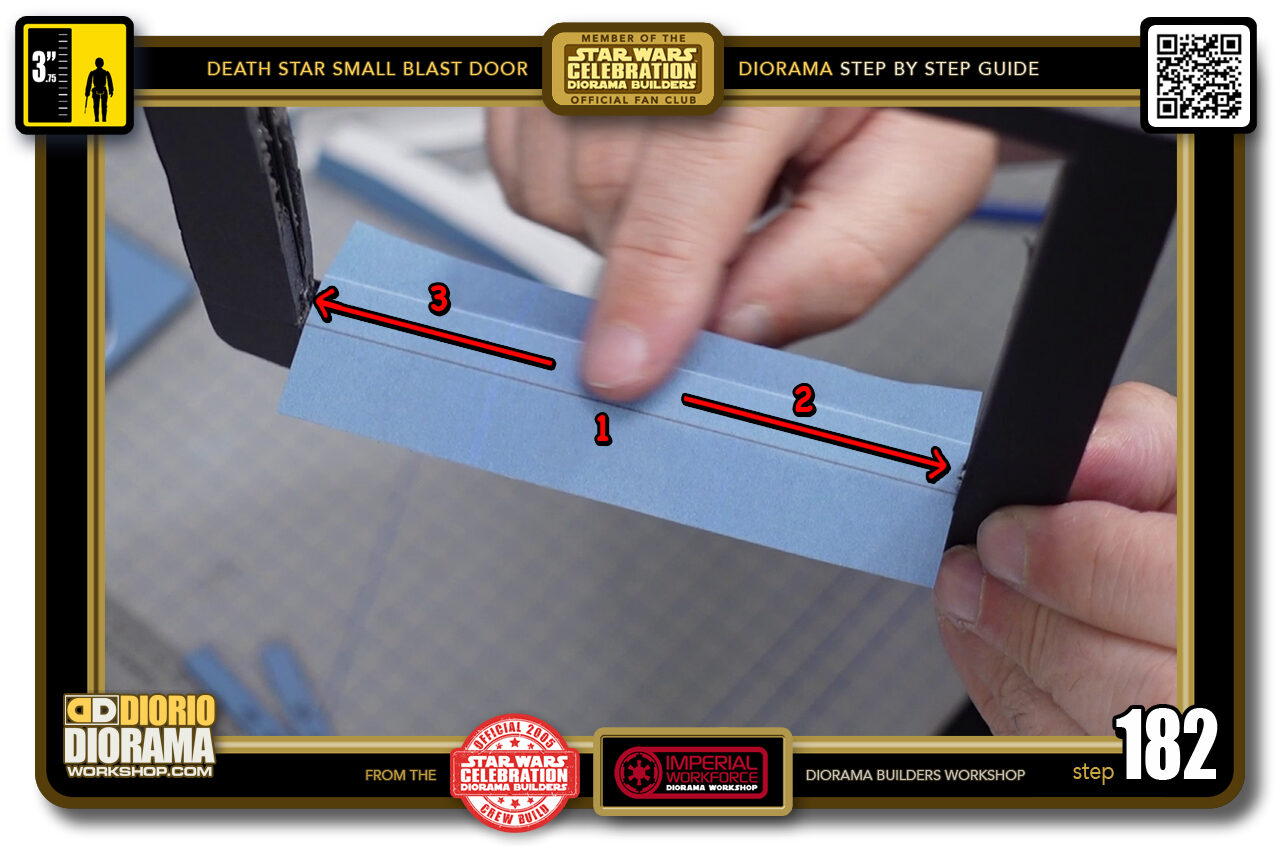
- STEP 182 > Place your decal in the center (use your folding guides to align with the foamcore thickness) and start from the centre out. Go to the right then left your finger, press back down in the centre and then move it along to the left. Since you used gluestick, it takes longer to dry and remains slippery long enough for you to wiggle the decal to a perfect alignment.
-
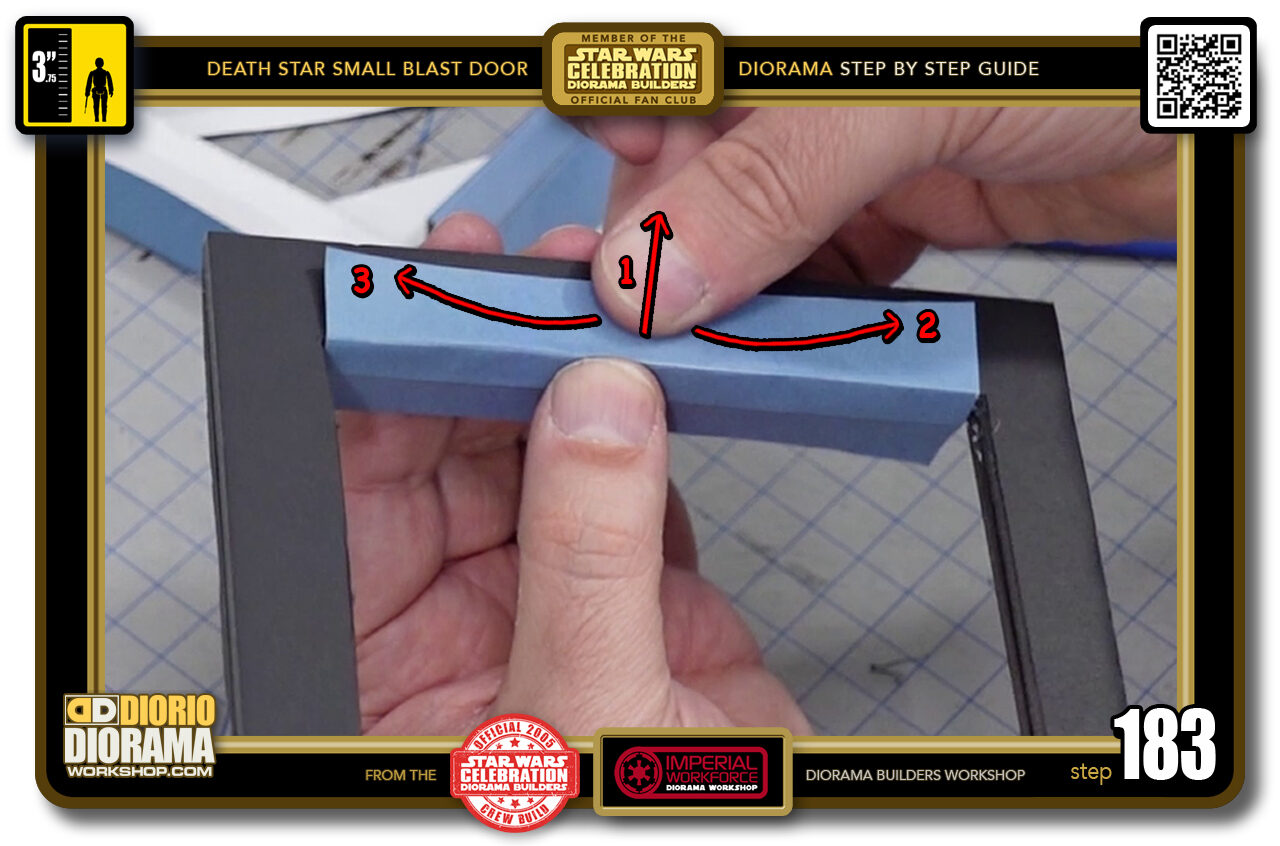
- STEP 183 > Once the centre fold lines are in the right place, put pressure on the inside top centre with your thumb and use your other thumb to stretch the decal outwards, creating an even tighter curve fold around the foamcore. Do this at first in the centre (1) then repeat from centre to right (2) and centre to the left (3).
-
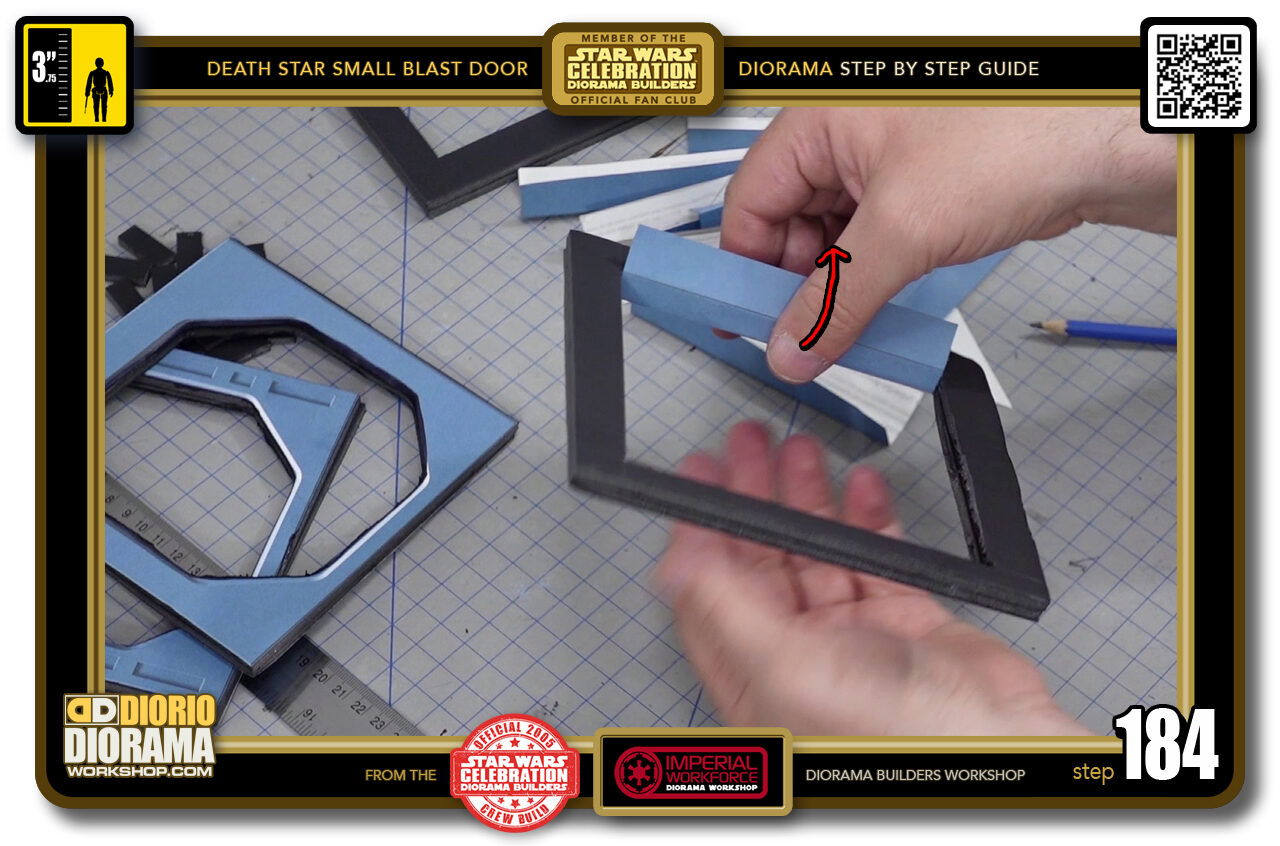
- STEP 184 > move to the other side and repeat. Starting ALWAYS at the centre outwards to avoid air pocket bubbles and unsightly creases.
-

- STEP 185 > From the centre move outwards until your decal is completely touching the foamcore frame surface.
-
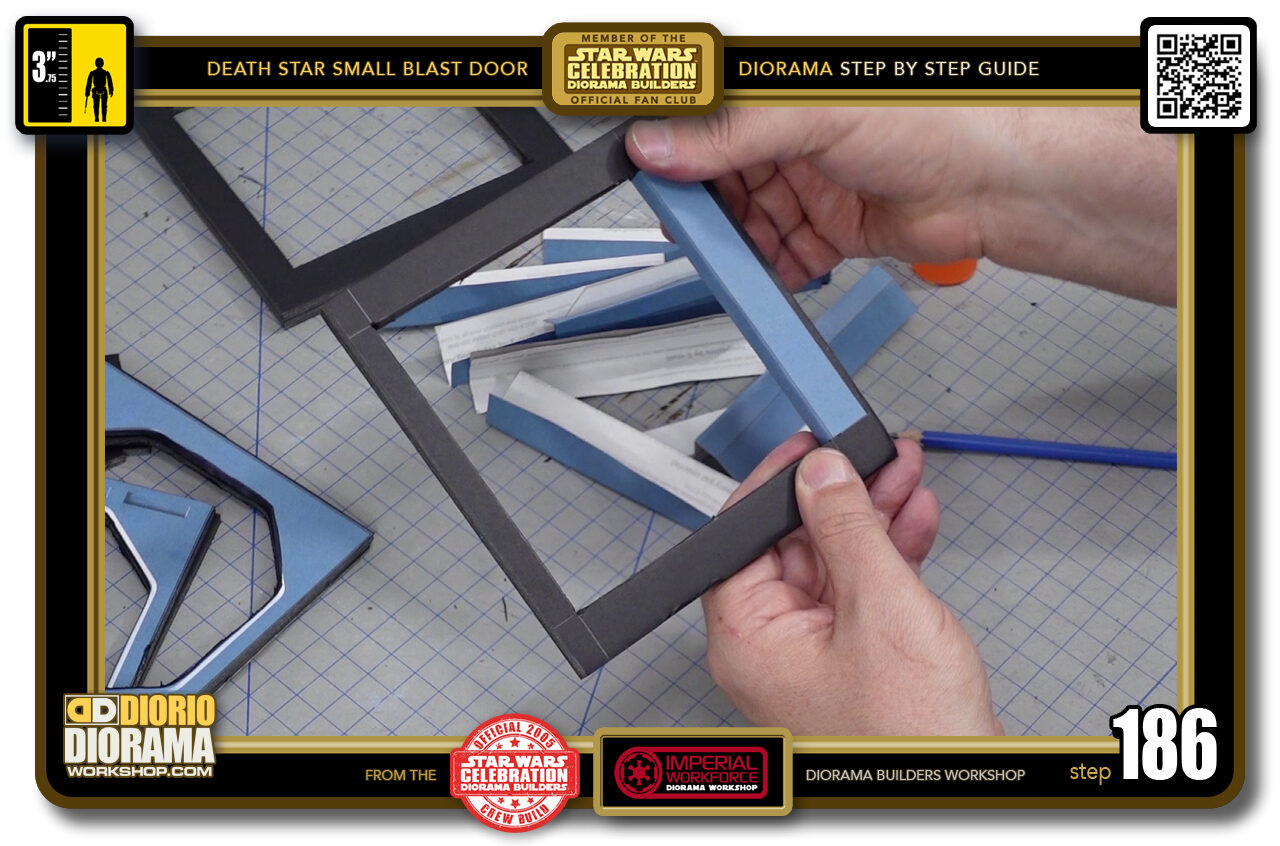
- STEP 186 > your first decal skin is done. Now here is why this FIRST DECAL becomes VERY important in the next applications.
-
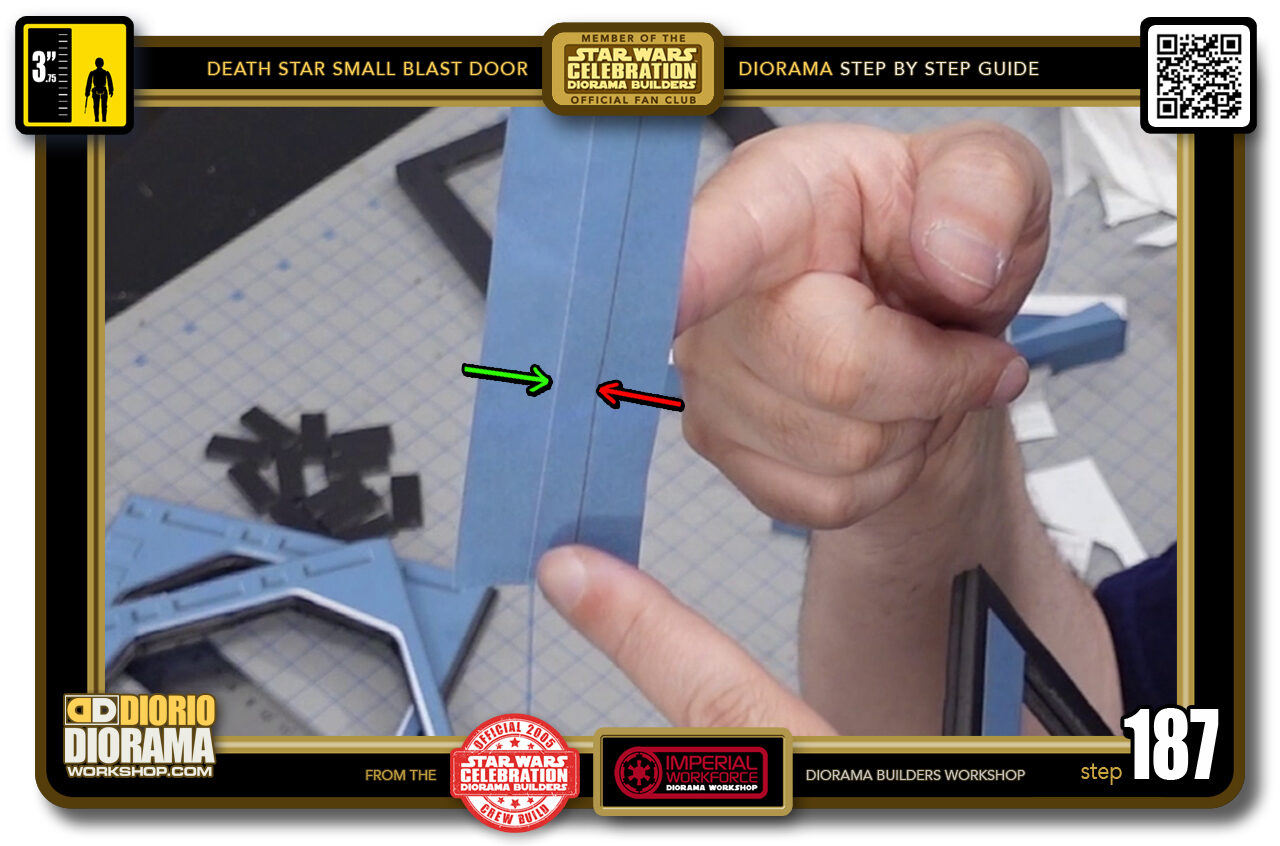
- STEP 187 > If you look closely the folding skins have a "dark" line and a "pale" line. You MUST place the next skins in the orientation to MATCH these colours.
-
-
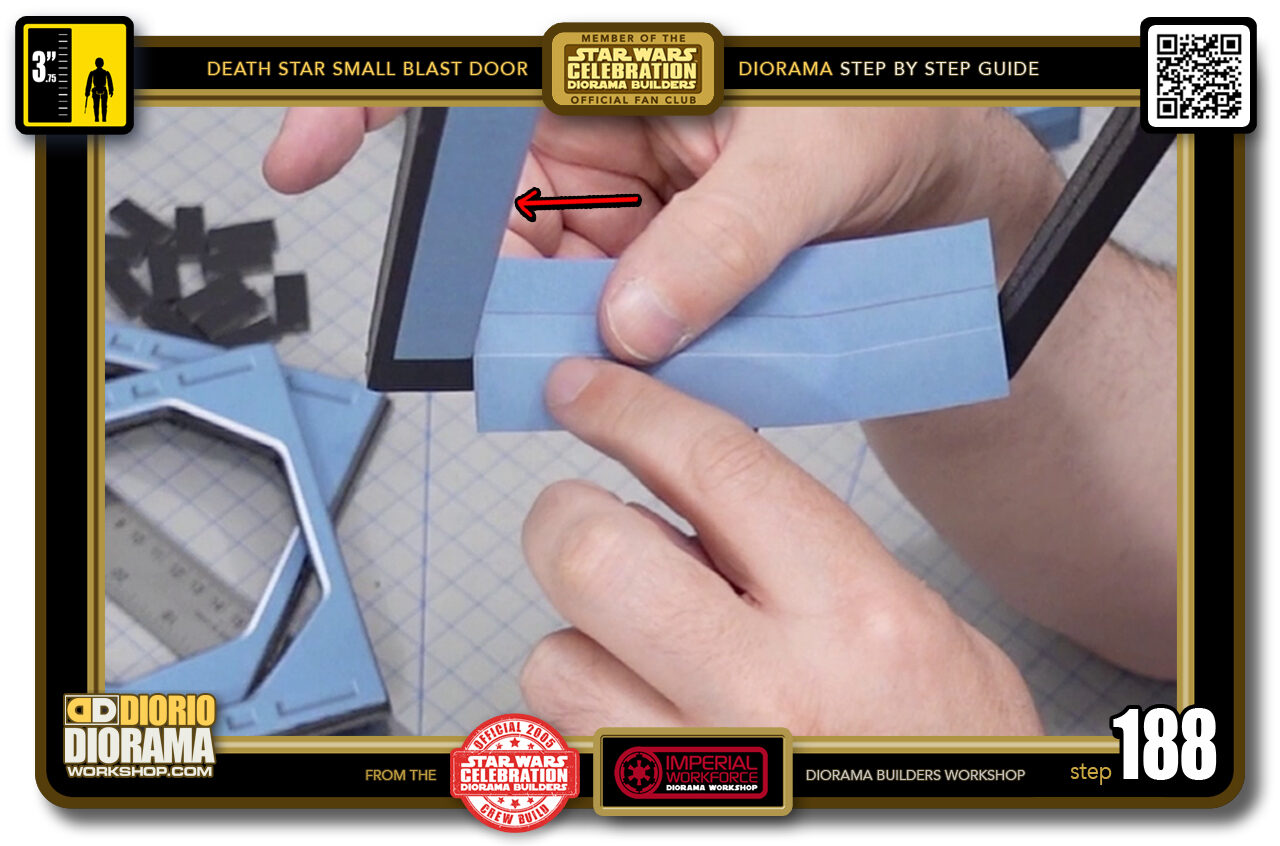
STEP 188 > Everyone of your skins must now MATCH the first skin's clour. On the left the arrow points to the "pale" line which means that the skin on decal 2 "pale" line must be placed FACING on this SAME SIDE.
Repeat the same steps to trim and glue your skin to one of the other 2 equal sides (NOT THE 1cm BOTTOM THIN STRIP) yet.
-
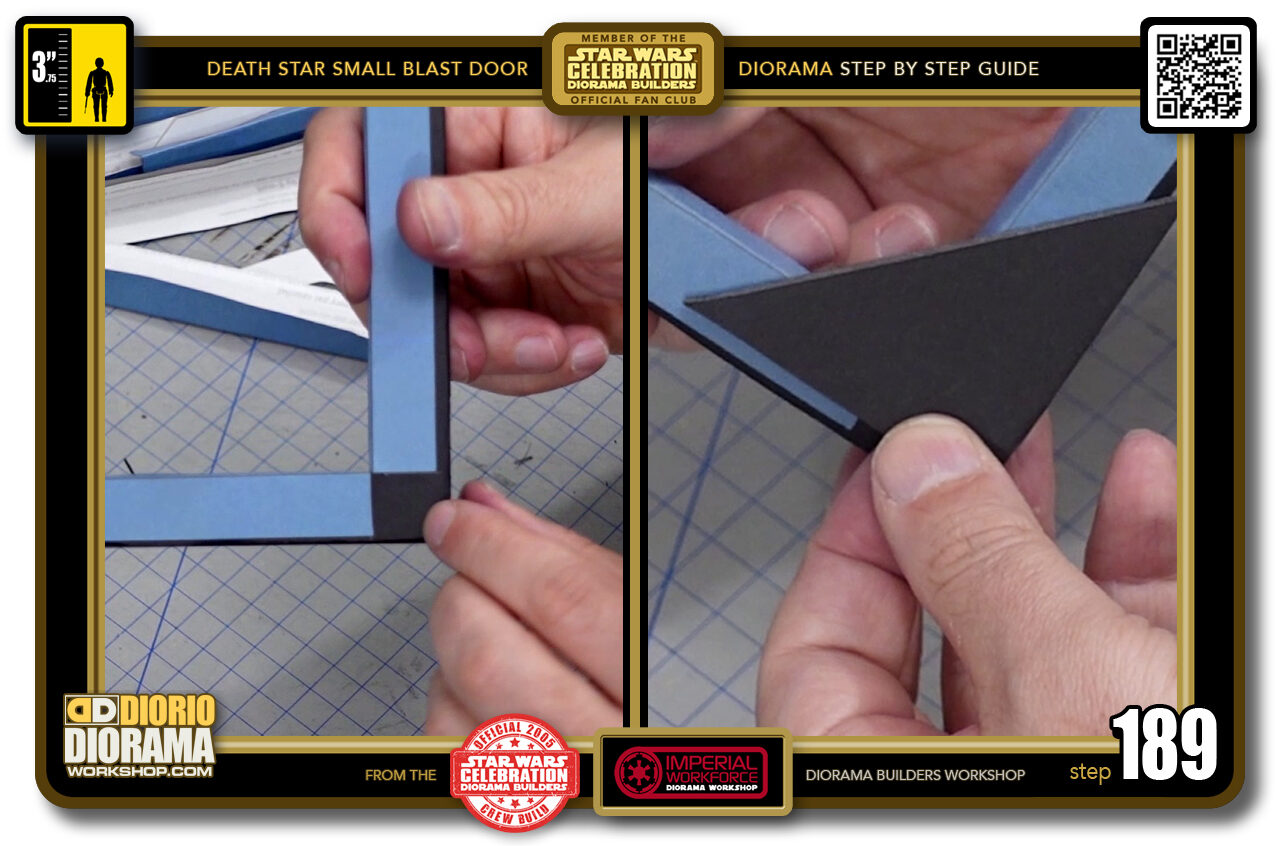
- STEP 189 > You will notice after you have glued 2 pieces that there is a black exposed foamcore gap in the corner. There is no worry here as this will be hidden when covered later with one of your dorito corners.
-
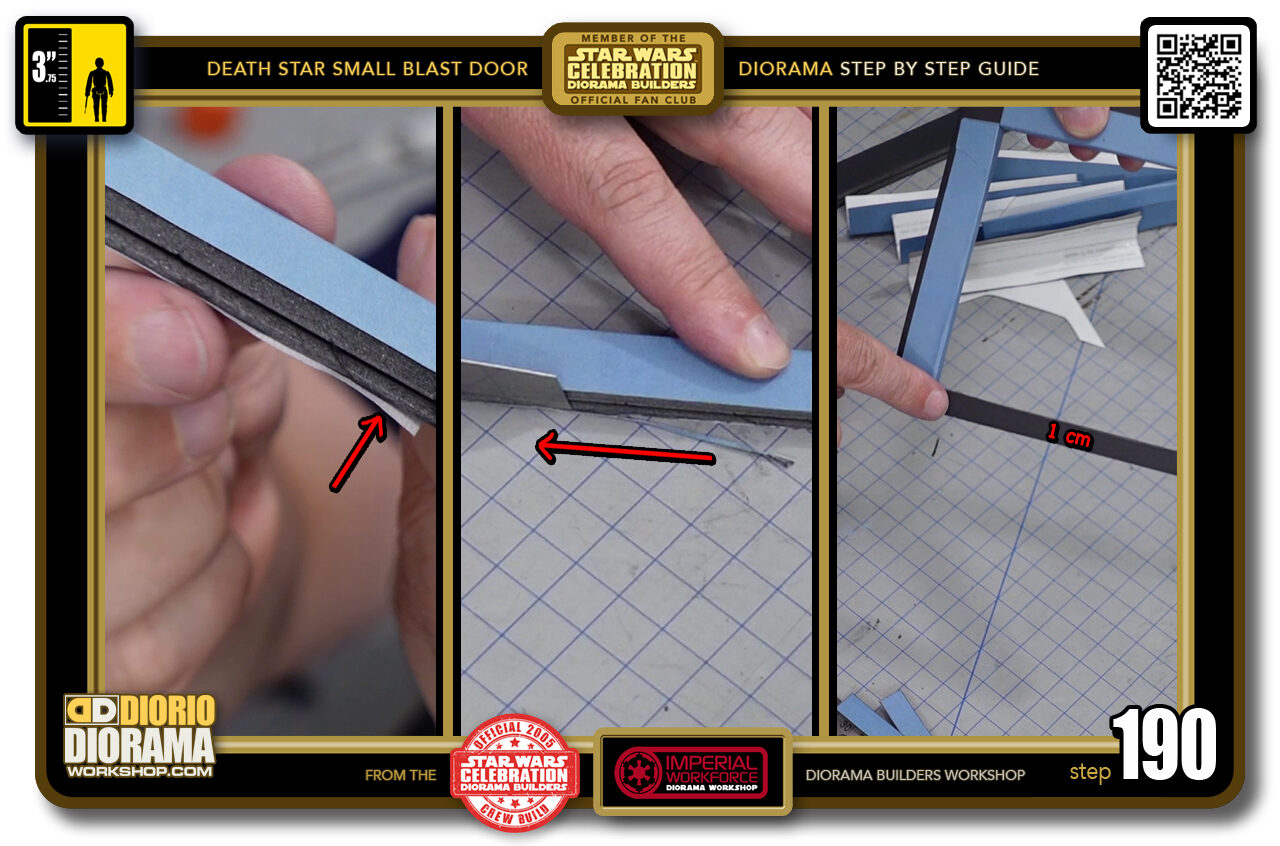
- STEP 190 > After you apply your side skin piece, if you notice a little excess peeking out just trim that off with your X-Acto knife using the side of the thickness as your cutting support. After your 3 equal sides are applied it's time for the last bottom 1cm strip (image right)
-
-
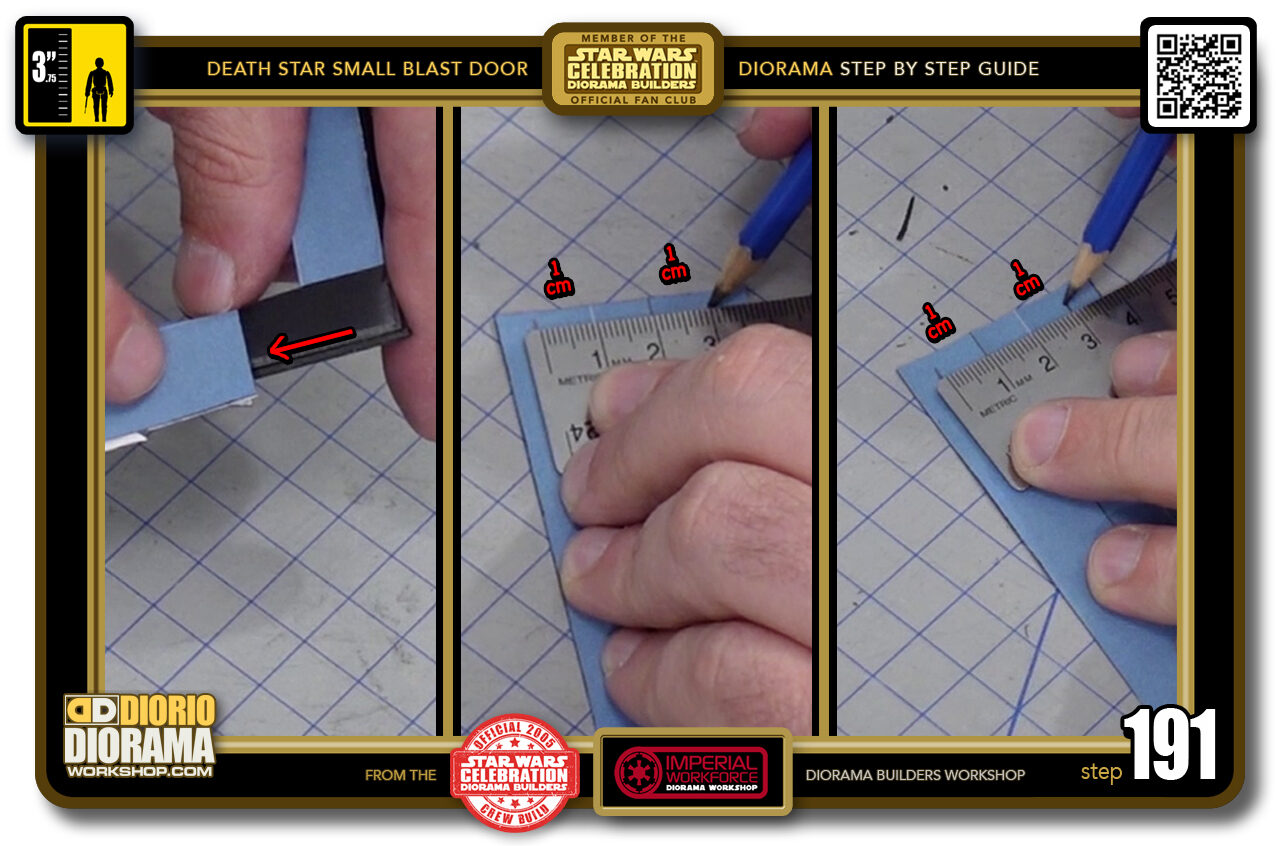
STEP 191 > When you wrap the skin around at the fold, you will notice that it sticks out beyond the edge (red arrow left image) because the strip is only 1cm wide. We want to trim that before gluing.
Take your pencil and make a mark on both ends at 1cm from each side of the centre folding guides.
-
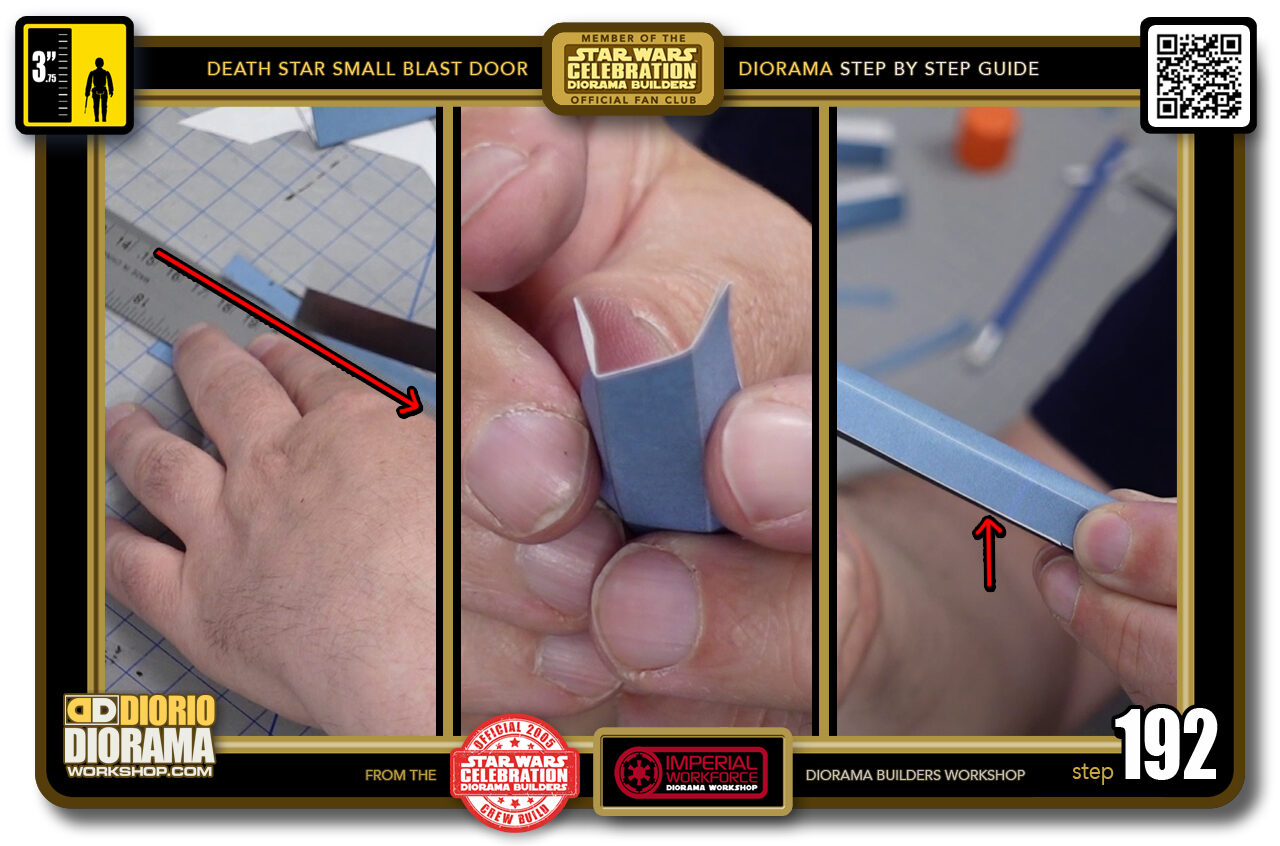
- STEP 192 > You can now take your ruler and align these pencil marks and slice off the outside excess on both sides. (left image) You will now have 3 equal 1cm bends (centre image) and when placed on top of your bottom frame's strip, should line up just nicely against the edge. (right image).
-
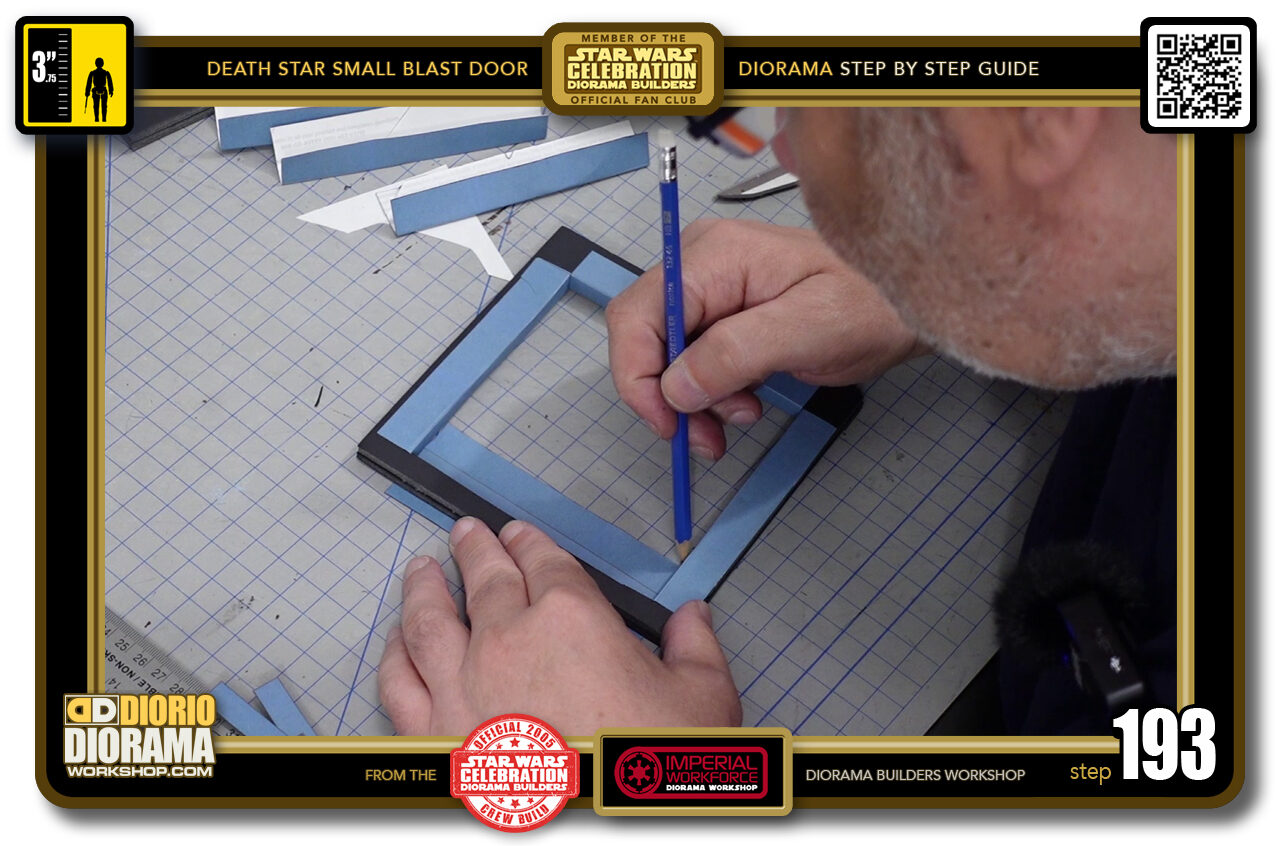
- STEP 193 > As we did for the first 3 decals, we want to get that perfect snug fit, so align your skin to one corner like before and make your pencil guide along the opposite corner.
-
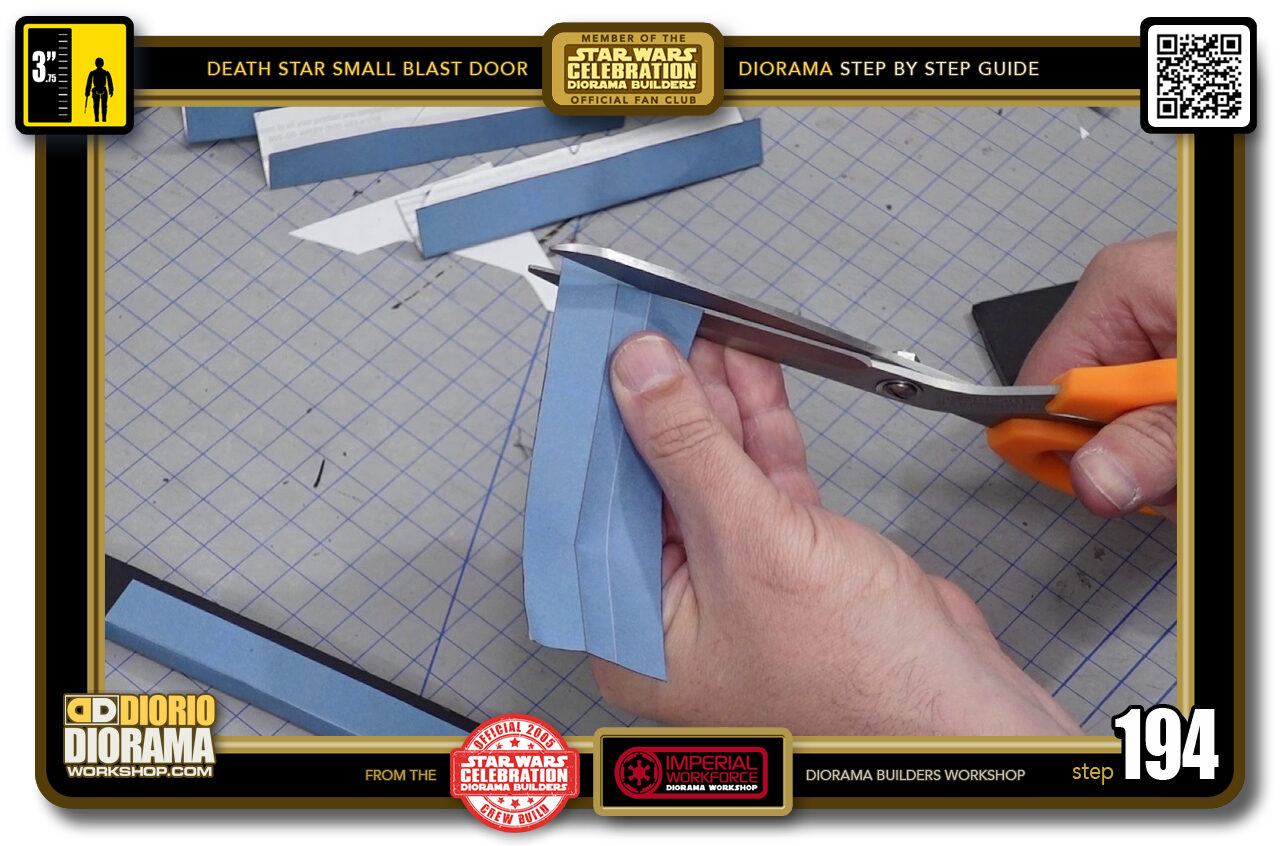
- STEP 194 > Trim off the excess. Remember, trim outside your line, you can always trim again if still too tight a fit.
-
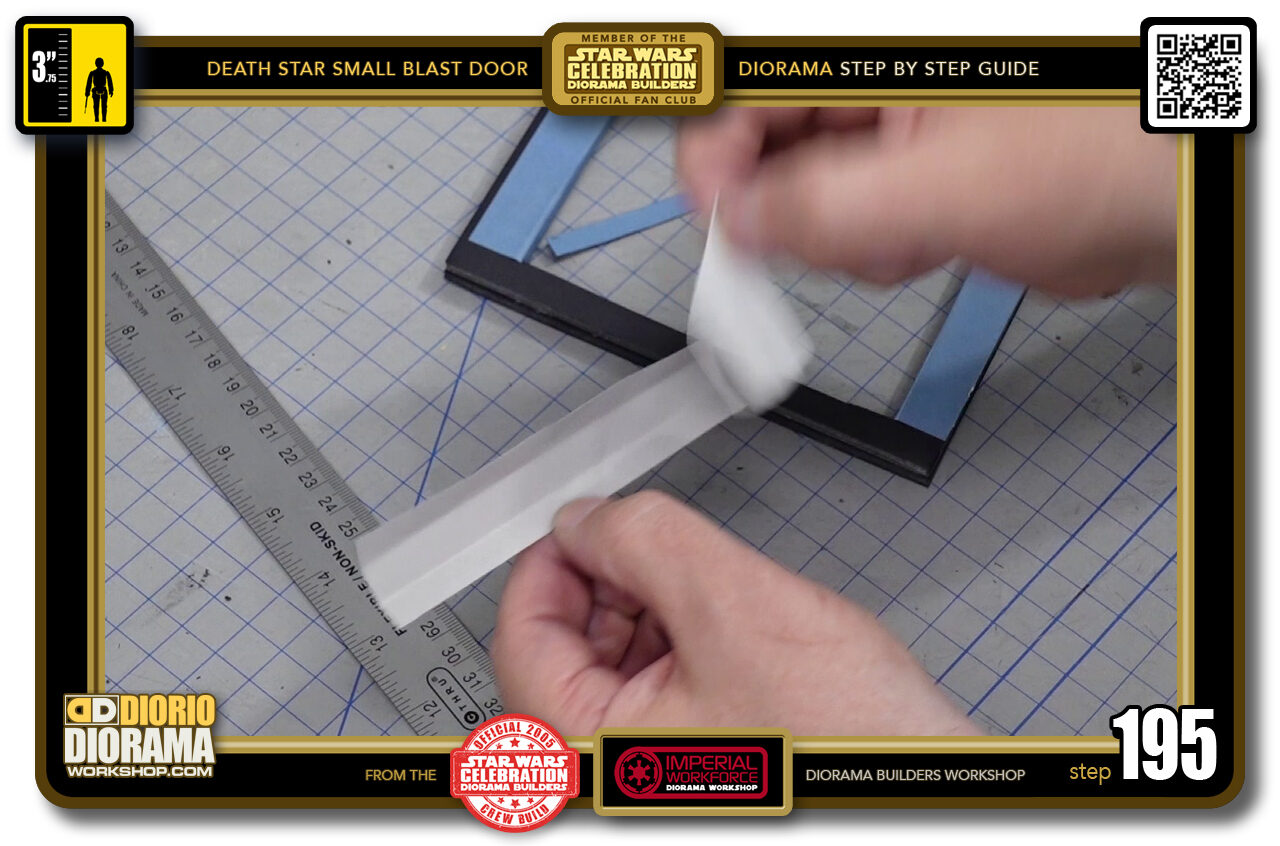
- STEP 195 > When satisfied, peel your decal.
-
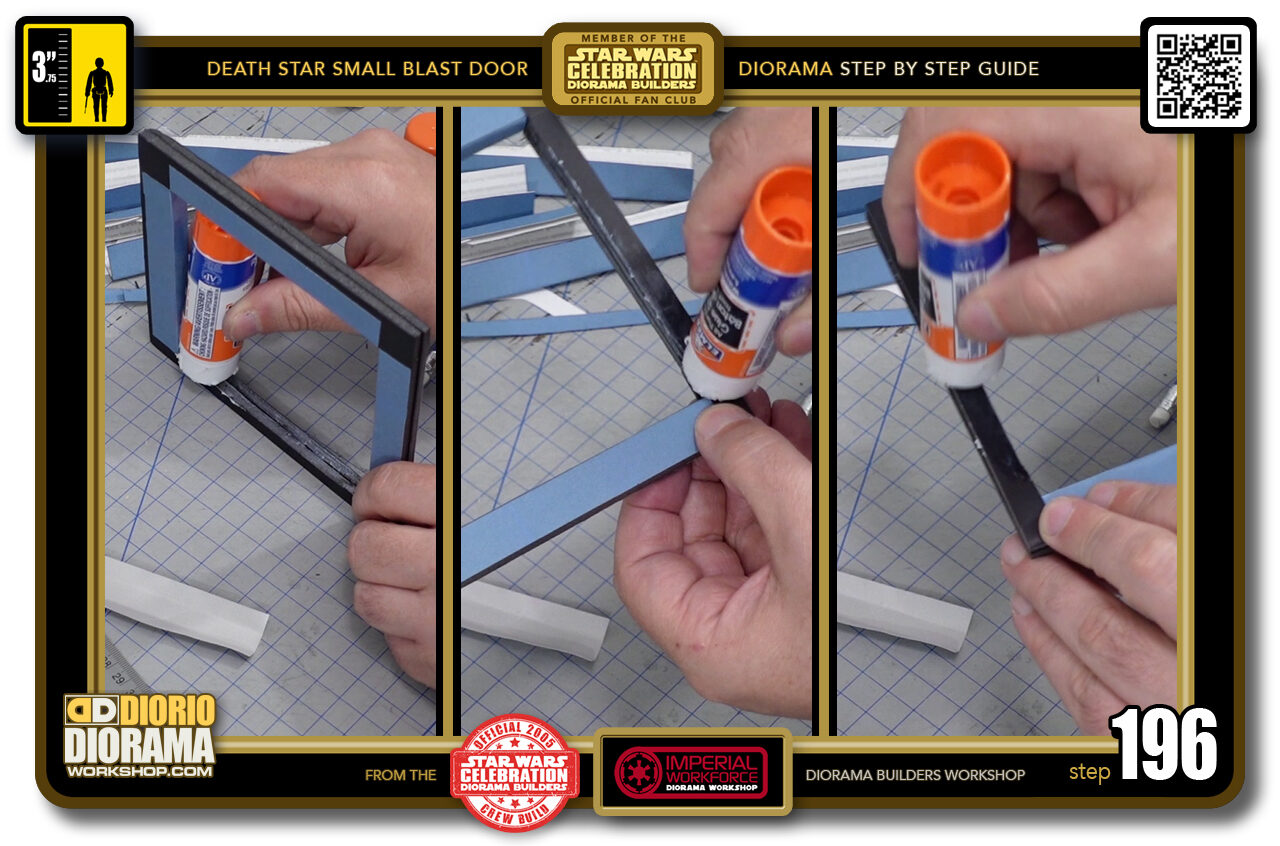
- STEP 196 > Apply the gluestick to the inside edge as before but for THIS bottom frame, apply some on both outside surfaces as well.
-
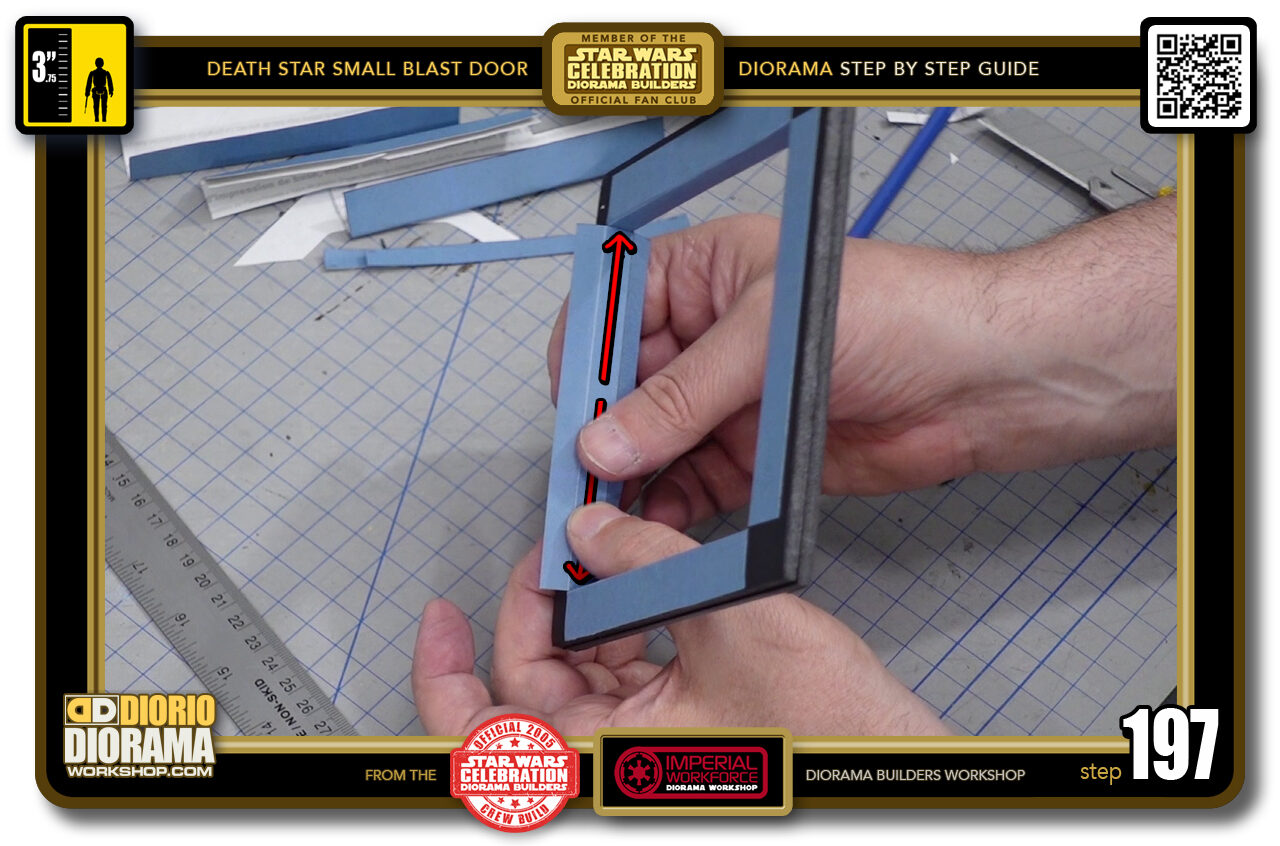
- STEP 197 > Just as before, align your folds along the top of the inner frame and press outwards.
-

- STEP 198 > Then fold over and make contact on both sides. NOTE: Because you put glue on the side surfaces , your fingers may get sticky from glue contact so be careful not to do jerky fast moves that could tear off your decals from the frame if it sticks to your skin.
-
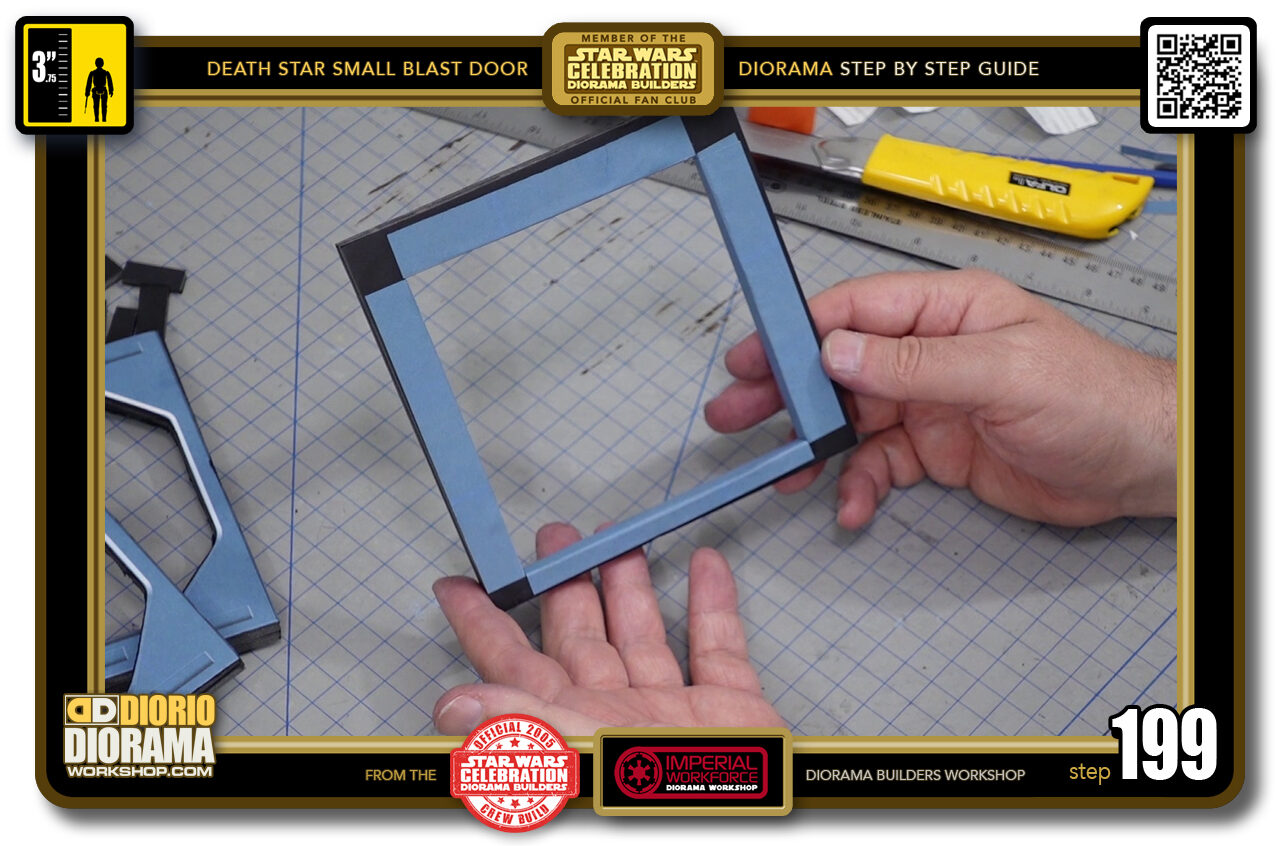
- STEP 199 > Your inner frame is now complete. Repeat all the same steps on your 2nd inner square frame.
-
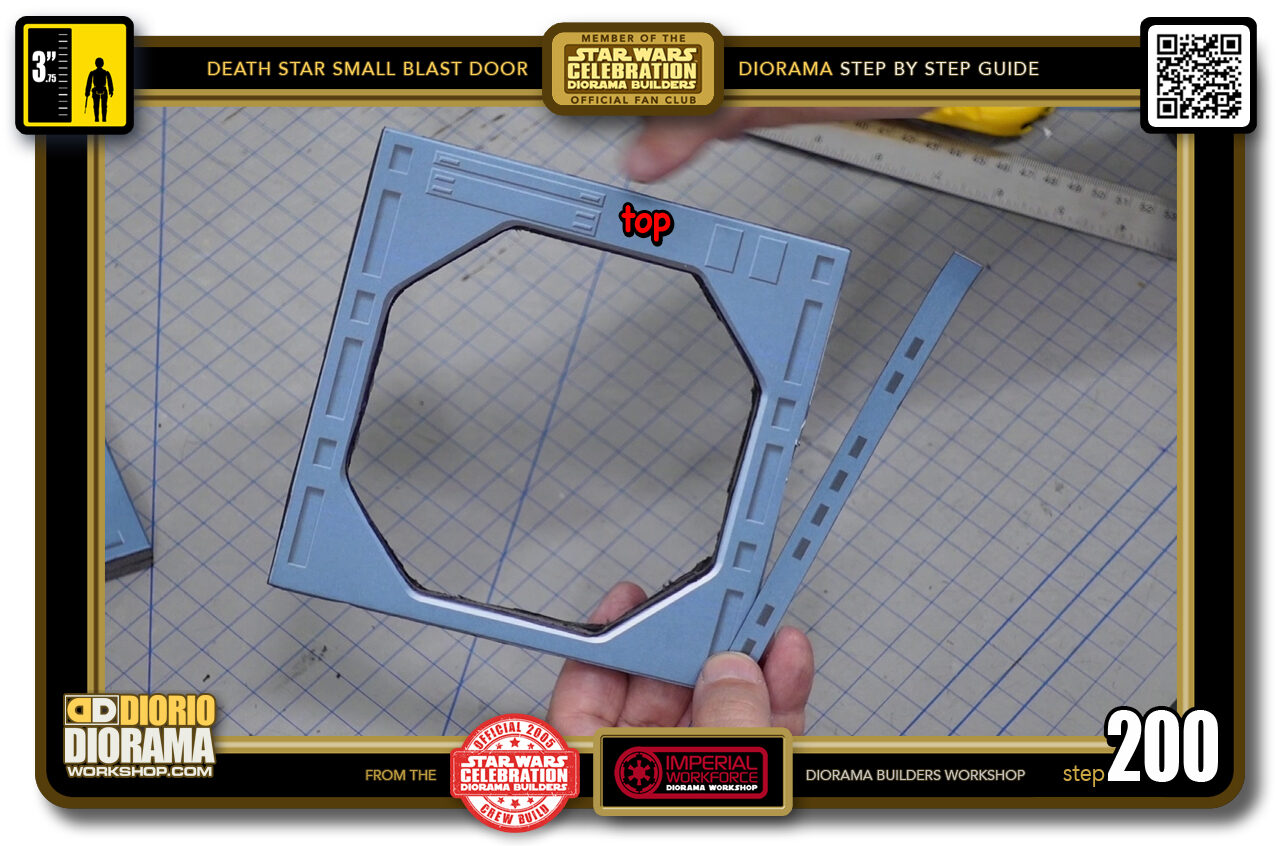
- STEP 200 > Now that your 2 inner frames are completed we can move on to the front and back octagonal frames. For these you will be using the skins with the small dark rectangles located in the centre of the spines.

.
Did you already build this Diorama ? At home or at our Star Wars Celebration Diorama Builders workshop ? Would you like to show it in the site’s GALLERY VISITORS DIORAMAS section, YES ? That is Awesome !!! You can find out all the details on how to email me your photos on the VISITORS SUBMISSIONS INFO page … When I get your photos, I will create your very own page just like this one. You may not realize it but work does inspire others to join in the fun of making Action Figure Dioramas.
.
NOT FOR RESALE ALL Decals, tutorials and artwork are ©FrankDiorio (dioramaworkshop.com) and offered FOR FREE to the fans – that would be you ? so you can build and display my diorama designs in your very own home. I realize I cannot control what one does with my graphics once I place them on the web, I can only ask you as one fan to another, please respect the artist and do not be that jerk who uses my designs and tutorials to build a copy of my work only to sell it on EBAY or trade/sale groups and forums. Thank You. Frank.
.

.
.
If you have a facebook account, why not join the Official Diorama Builders Fan Club today, simply click the logo link below.
 .
.
Catch up with fellow visitors and exchange stories, read cool interviews with the crew, exchange photos, fun surprises and grab some FAN ONLY merchandise next year at actual future conventions ?
.
©2021 Frank Diorio DioramaWorkshop.Com
.
IF YOU LIKE WHAT YOU SEE, PLEASE SHARE WITH YOUR FRIENDS
USING THE SOCIAL MEDIA BUTTONS BELOW