


-
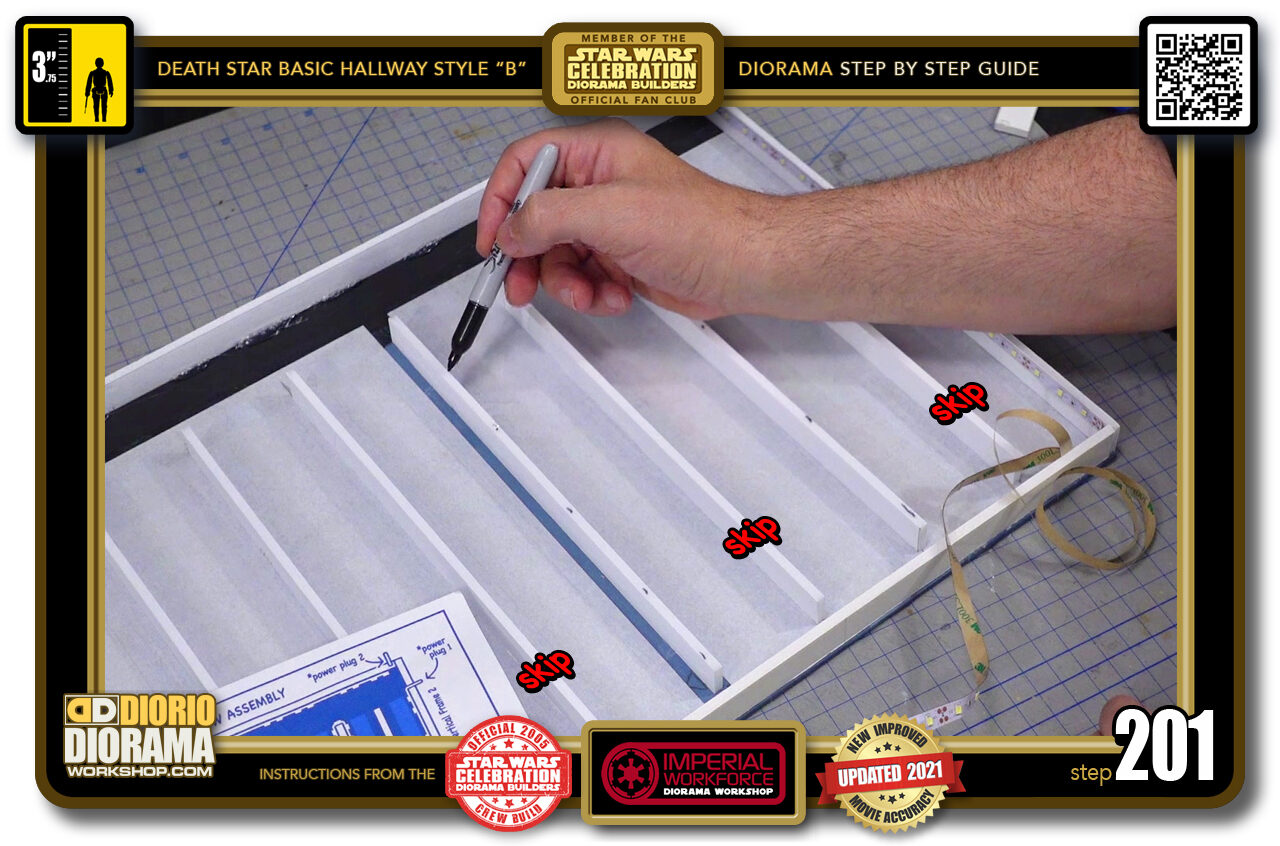
- STEP 201 > To help avoid confusion, I used a black sharpie to put dots along the spine of the beams I WILL be attaching LED lights to.
-
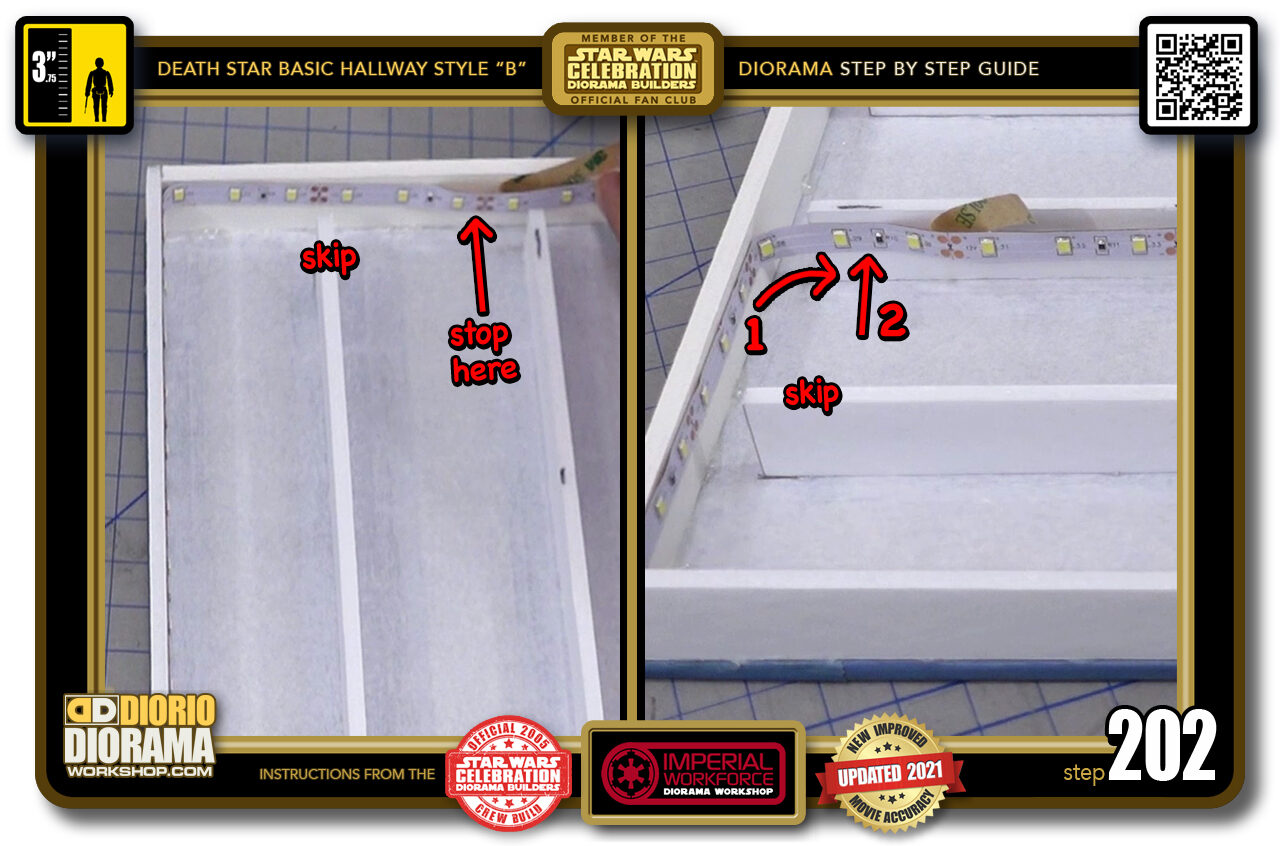
- STEP 202 > When you attach the LED lights after the first corner bend, make sure to SKIP the FIRST centre support and STOP just shy of reaching the second (left image red arrow). You will then do another loose 90 degree bend (right image number 1 red arrow) and start attaching along the second centre support strip's right side (right image second red arrow).
-
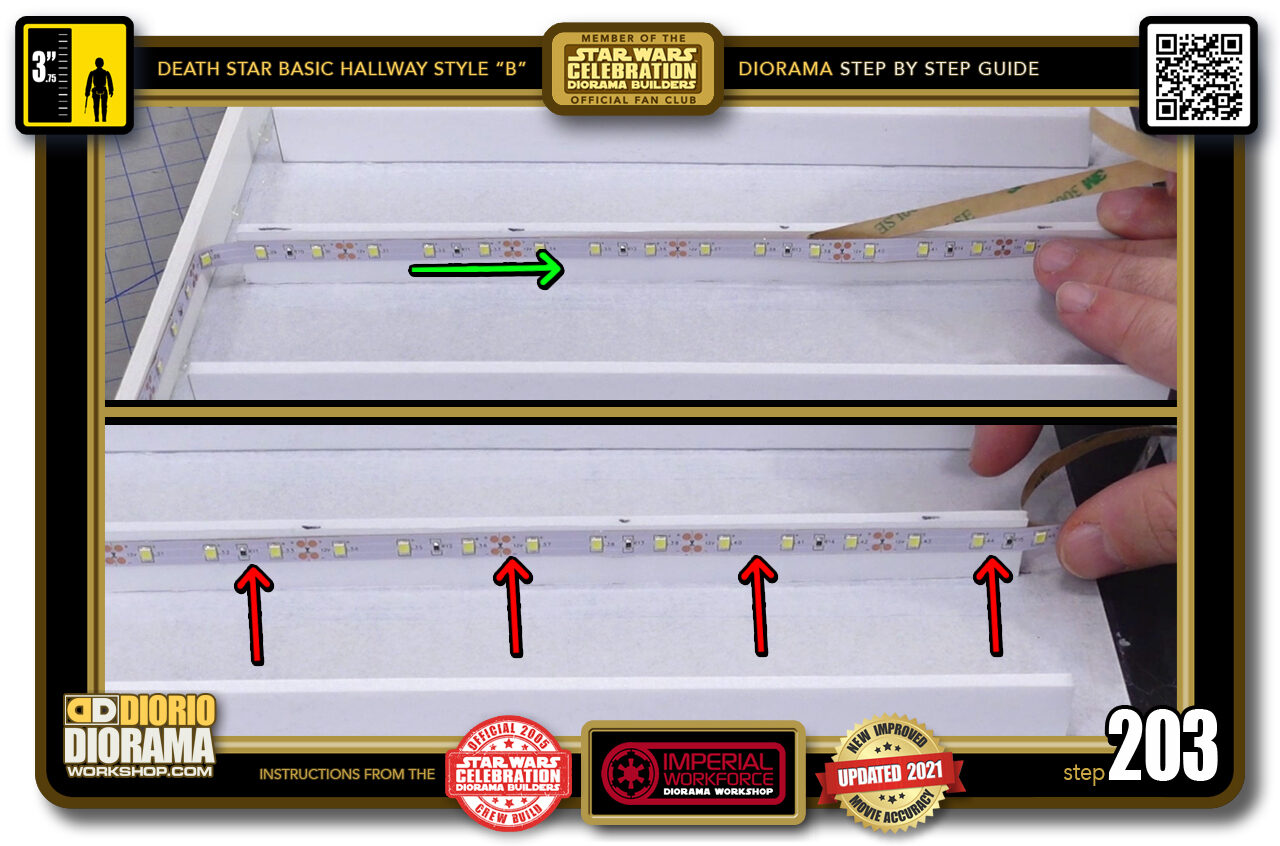
- STEP 203 > With one hand pull the LED lights away from the centre strip surface as you peel the backing paper with your other hand (top image green arrow). Then keep tension on the LED light strip to keep it raised close to the top and start pressing the LED Lights against the foamcore surface from left to right until you reach the end of your centre support.
-
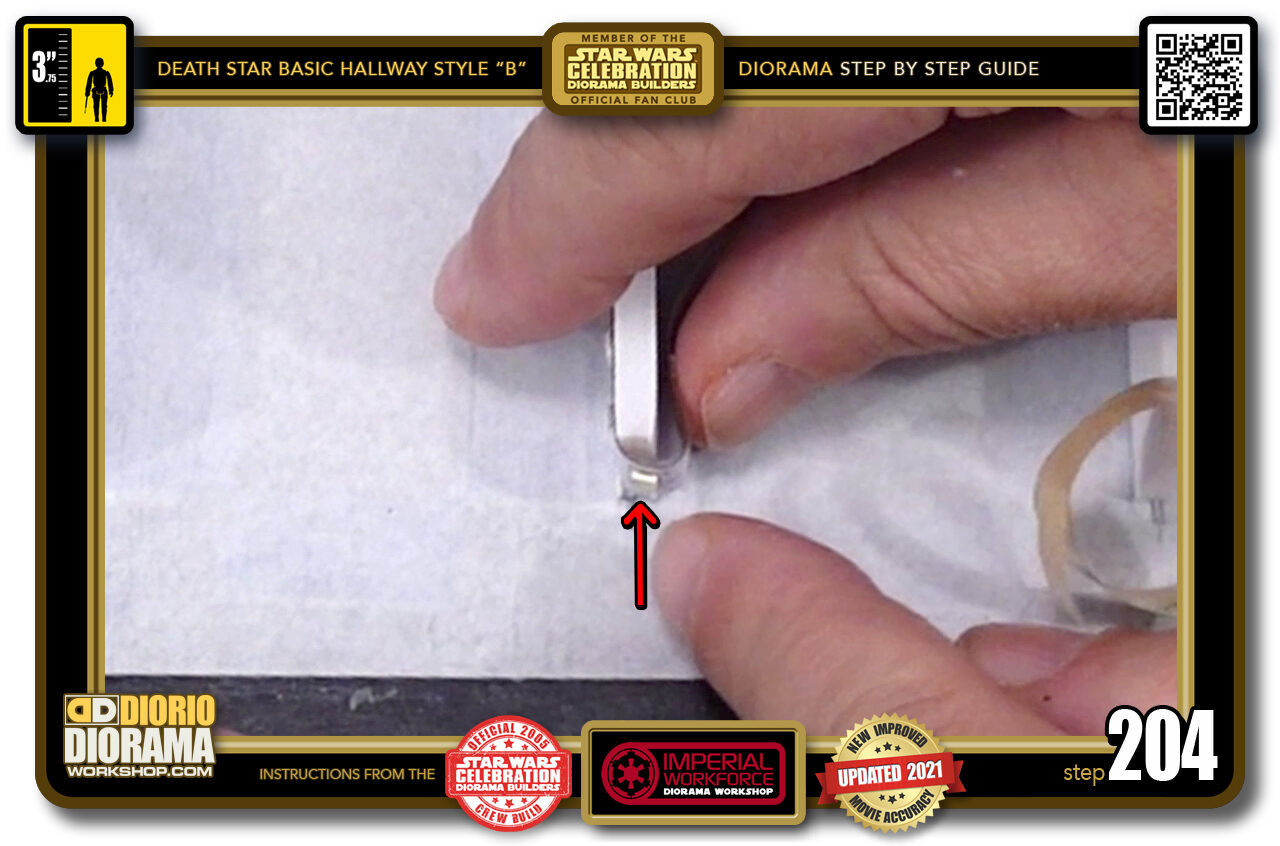
- STEP 204 > Now we have to do a 180 curve around the foamcore thickness. Mine just happened to have one of the LED's right at the tip (red arrow) so I used that to my advantage. If you can't bend it this tight, do the same 180 but looser, the important thing is to NOT snap or break your LED Light strip into 2 parts.
-
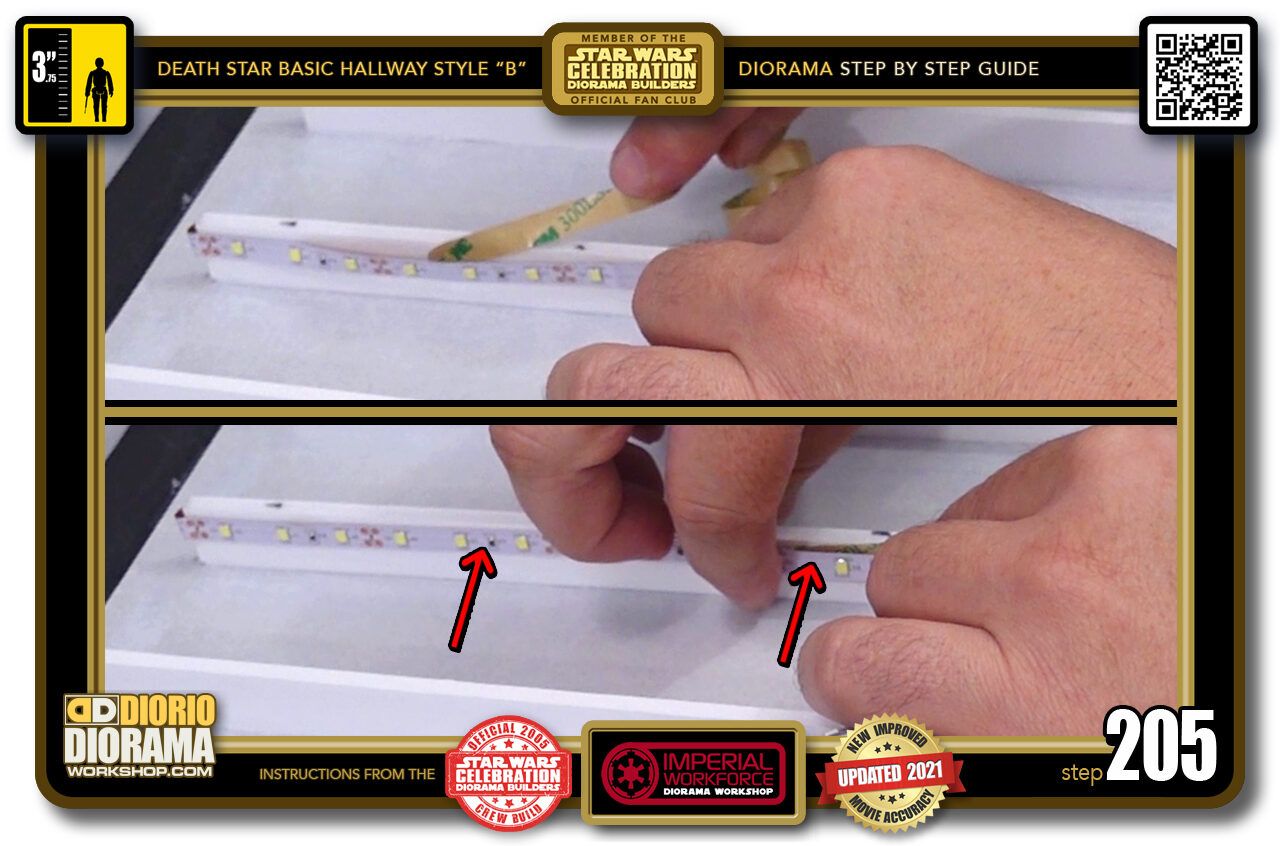
- STEP 205 > Now we are going to run our LED Light strip all the way down on the other side of the same support used in Step 203. Just peel small sections at a time to make sure the lights don't wind their way to touch the ceiling (top image) Press the LED Lights slowly but surely till you reach the end (bottom image red arrows).
-
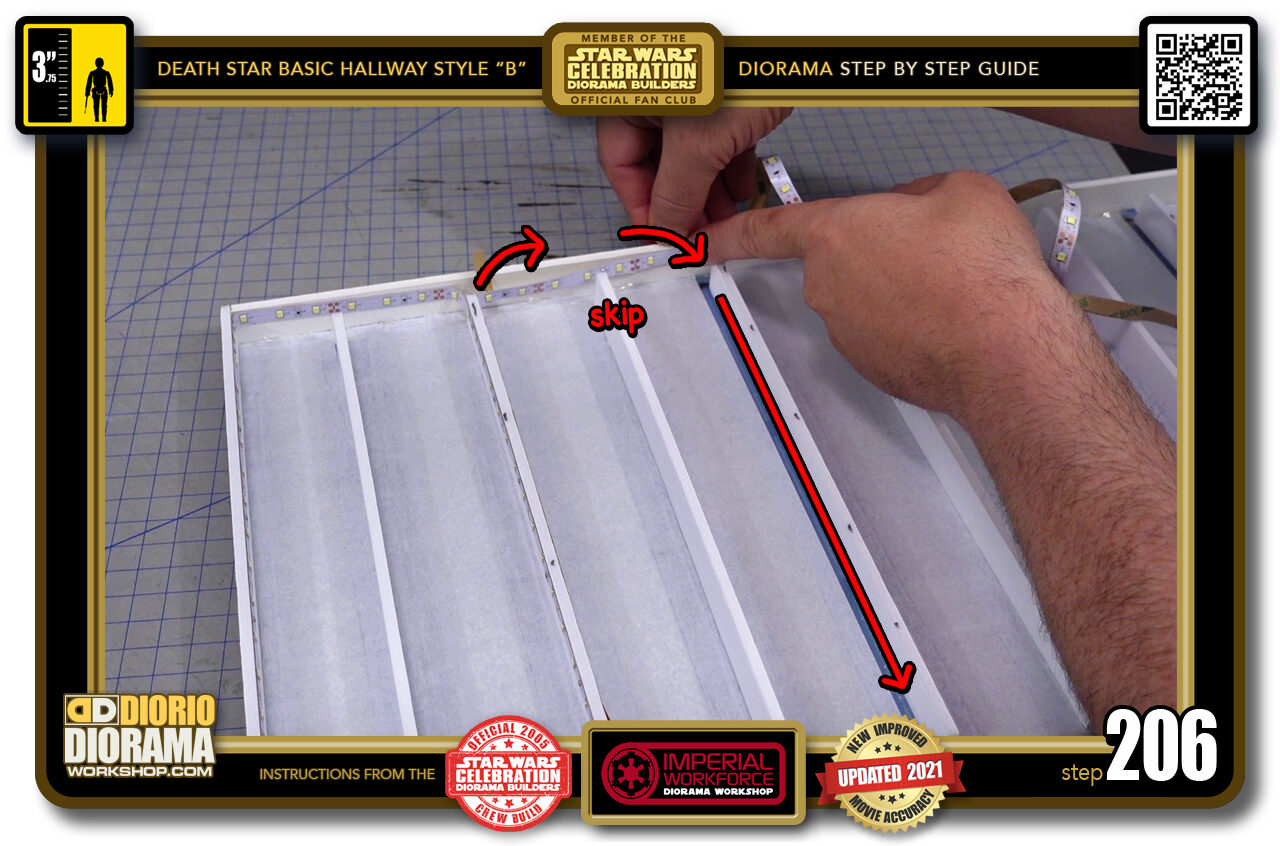
- STEP 206 > Time for another 90 degree loose corner spin onto the side of your ceiling frame and remember to SKIP one row of center support and make your way back up the sides of the next one. (red arrows).
-
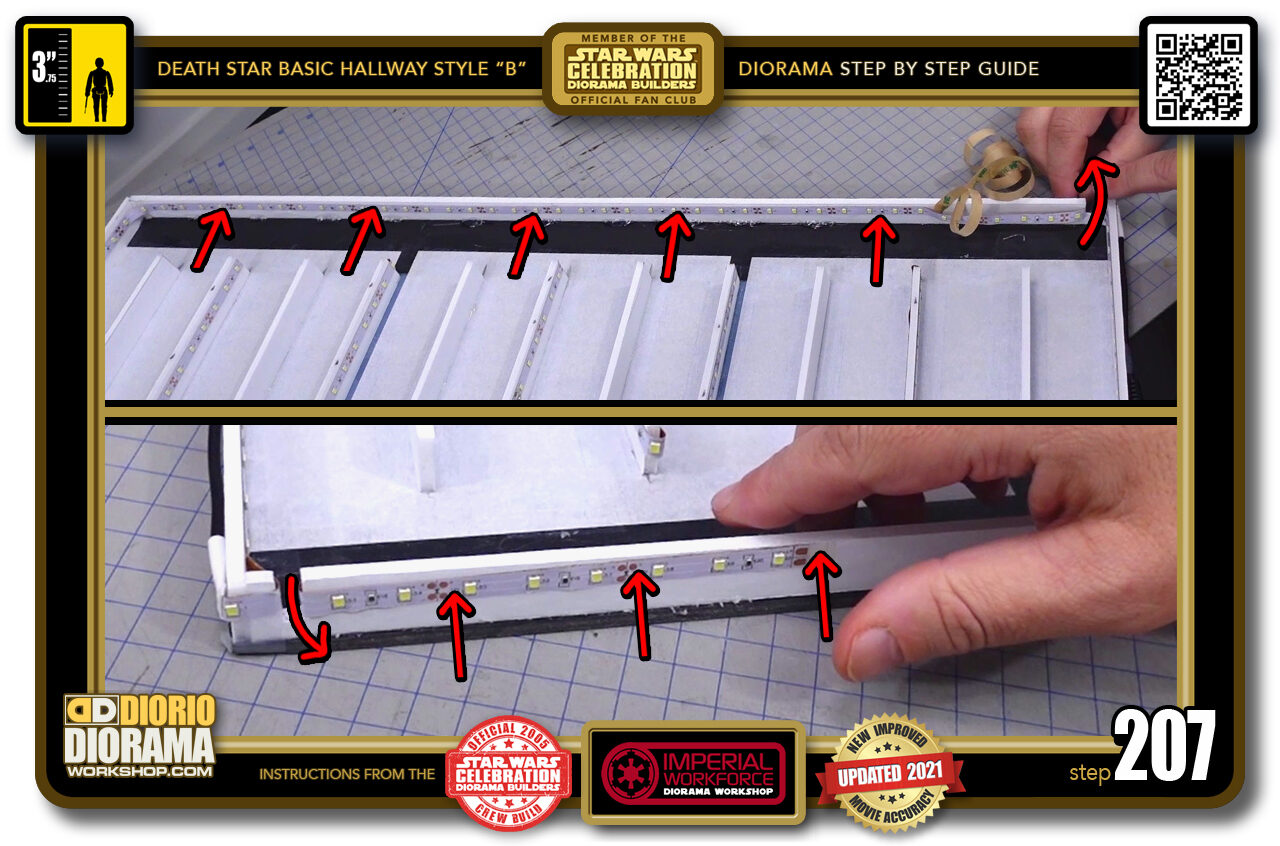
- STEP 207 > After several bends you will eventually make your way to the rear frame and back to the starting point. After you secure and press your LED lights to the frame (top image red arrows) you will need to make your wire exit the hole you cut (step 195) and poked the wires out of at the start. You can then either wrap the excess strip around and attach it to the outside of the rear frame or you can trim the wire at the "scissor icon" markings printed on your LED Light strip.
-
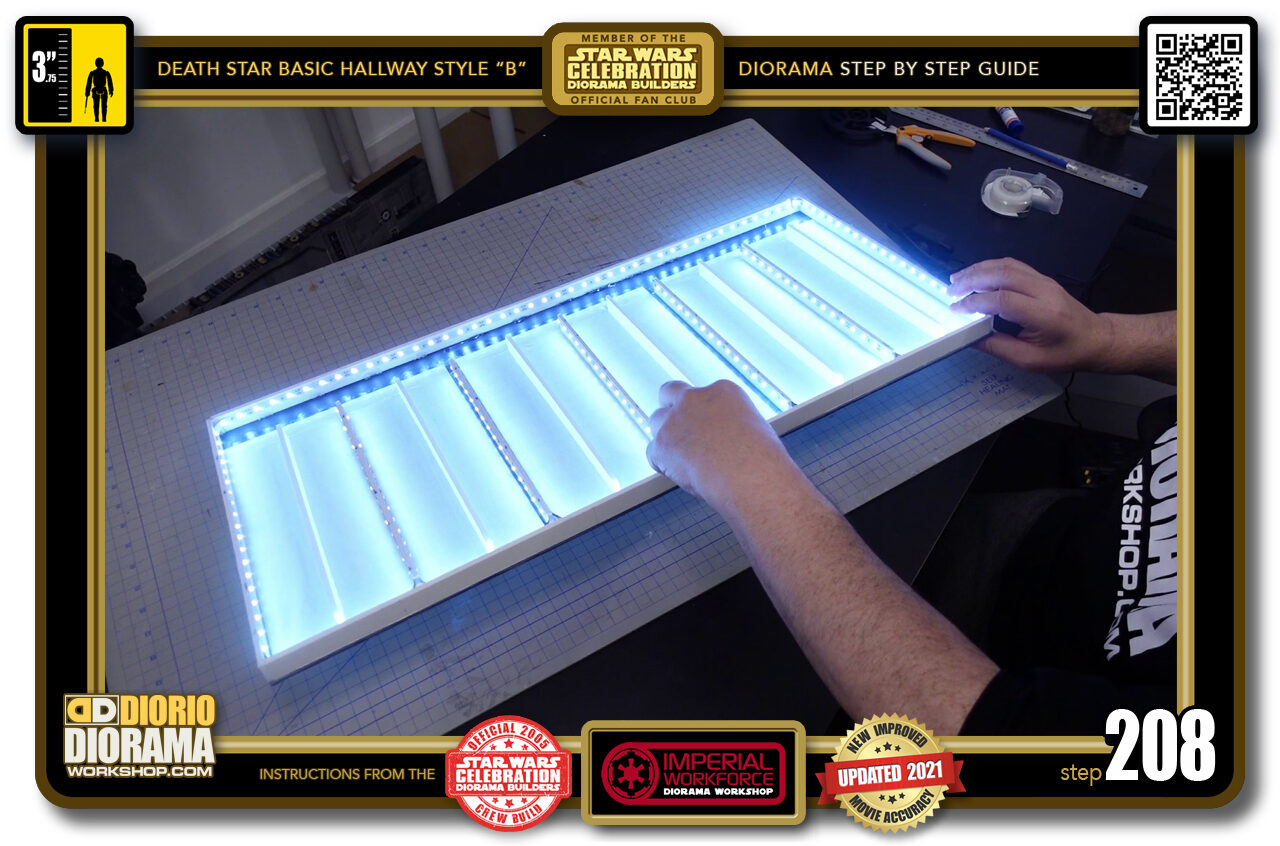
- STEP 208 > Let's plug the power supply and see if they light up - YES !!! we have the power 🙂
-
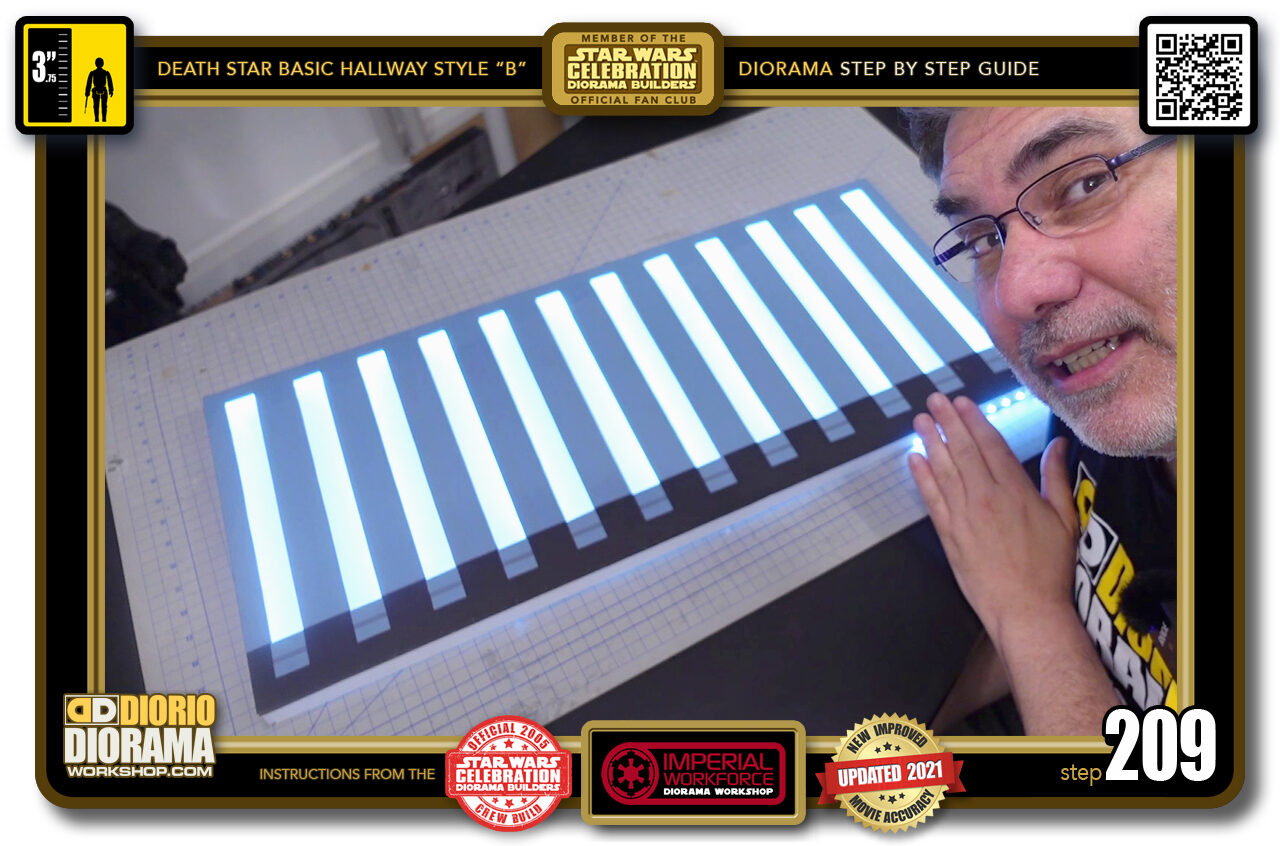
- STEP 209 > Carefully flip your ceiling to it's backside and we can see how the Tracing paper diffuses the light and creates the neon effect just like in the movie. I LOVE IT !!!
-
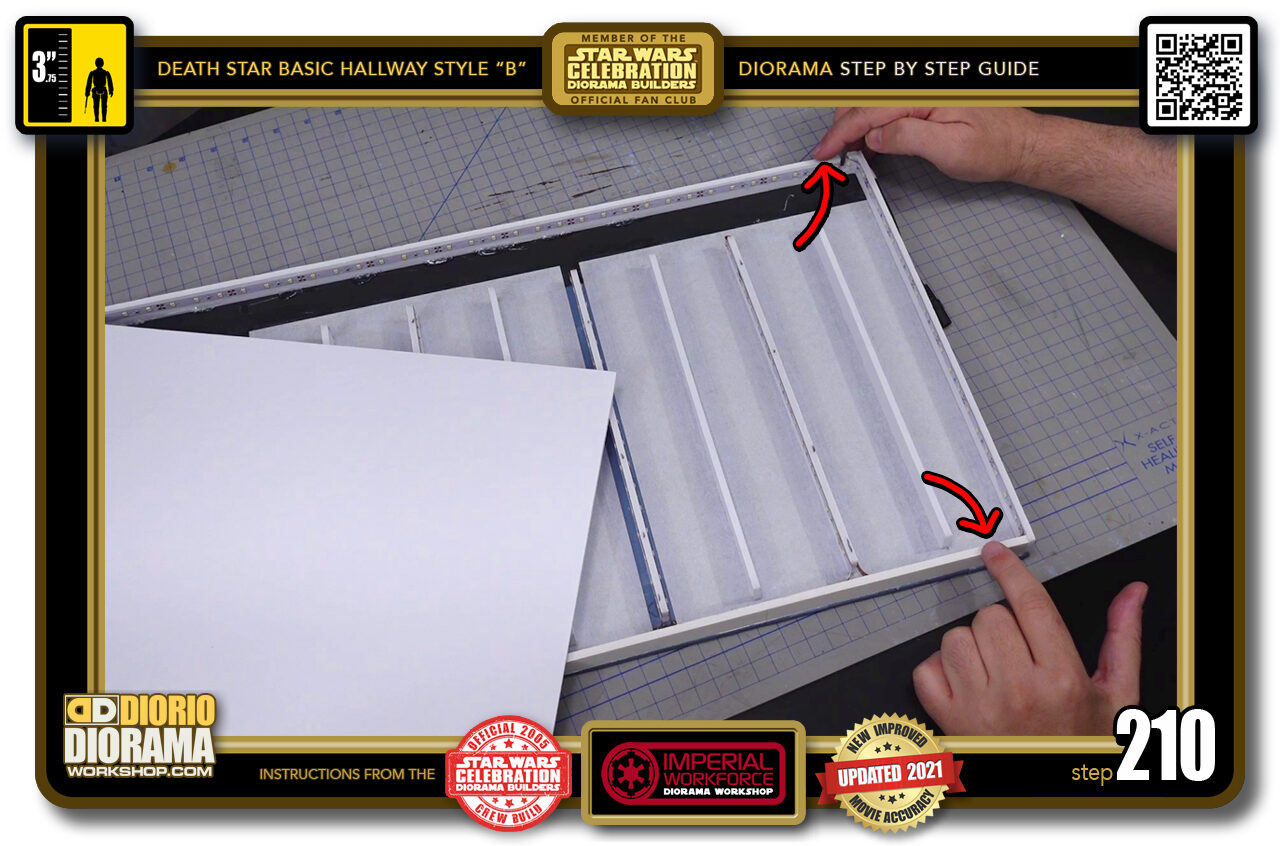
- STEP 210 > Now we can place the reflection ceiling cover. In case something someday goes wrong with the lights, I want to have access to this so I can open it up easy, so I am just going to place 2 drops of glue where the red arrows are pointing to.
-
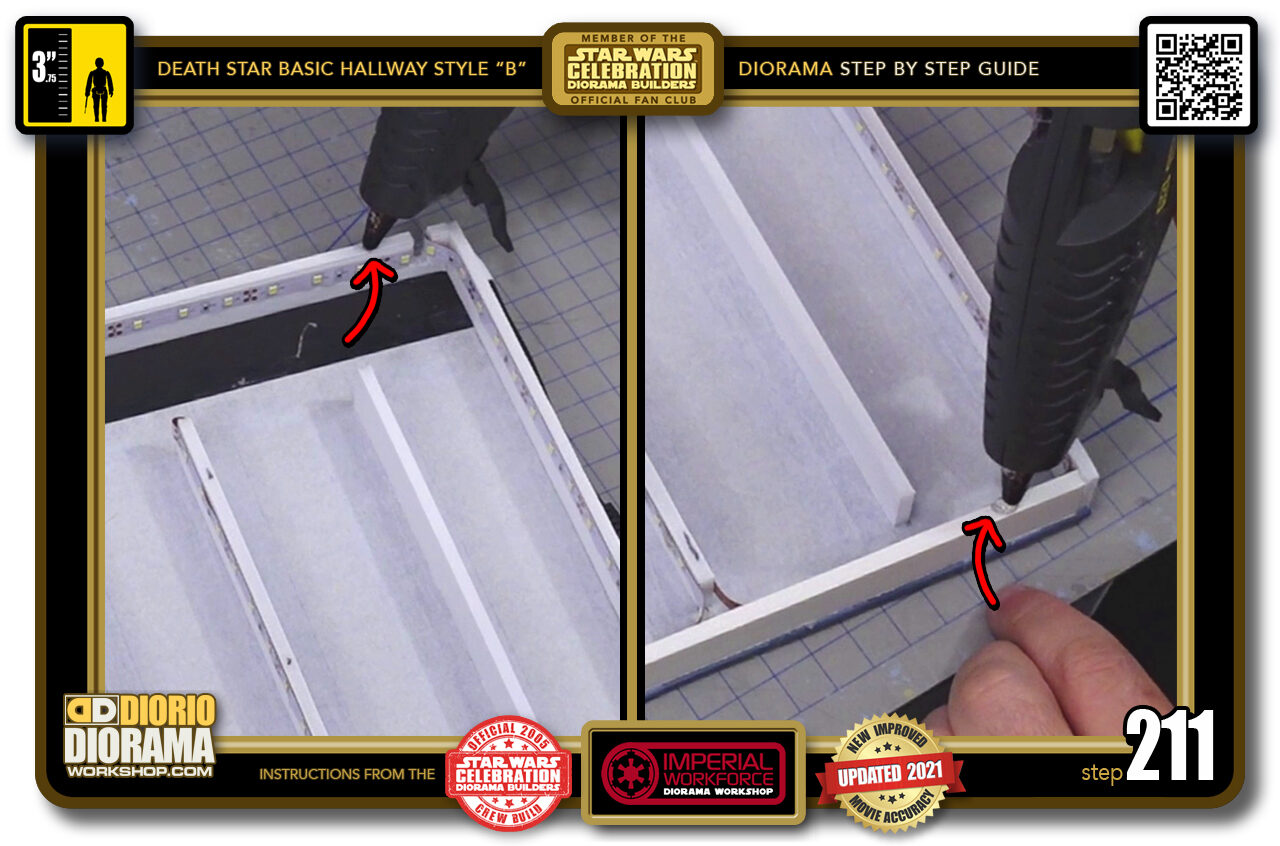
- STEP 211 > Just a small drop on each corner (red arrows).
-
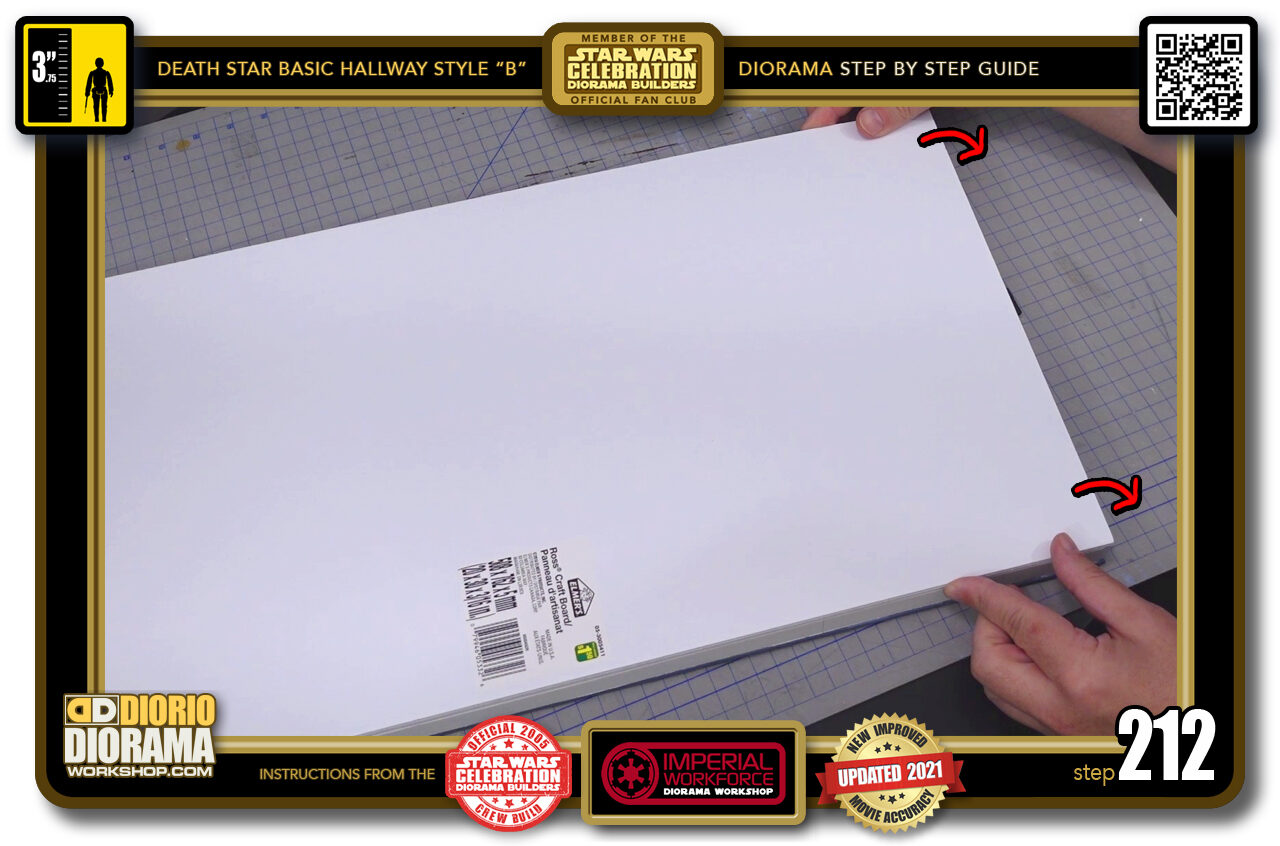
- STEP 212 > Slowly lower the ceiling reflection cover onto the frame supports.
-
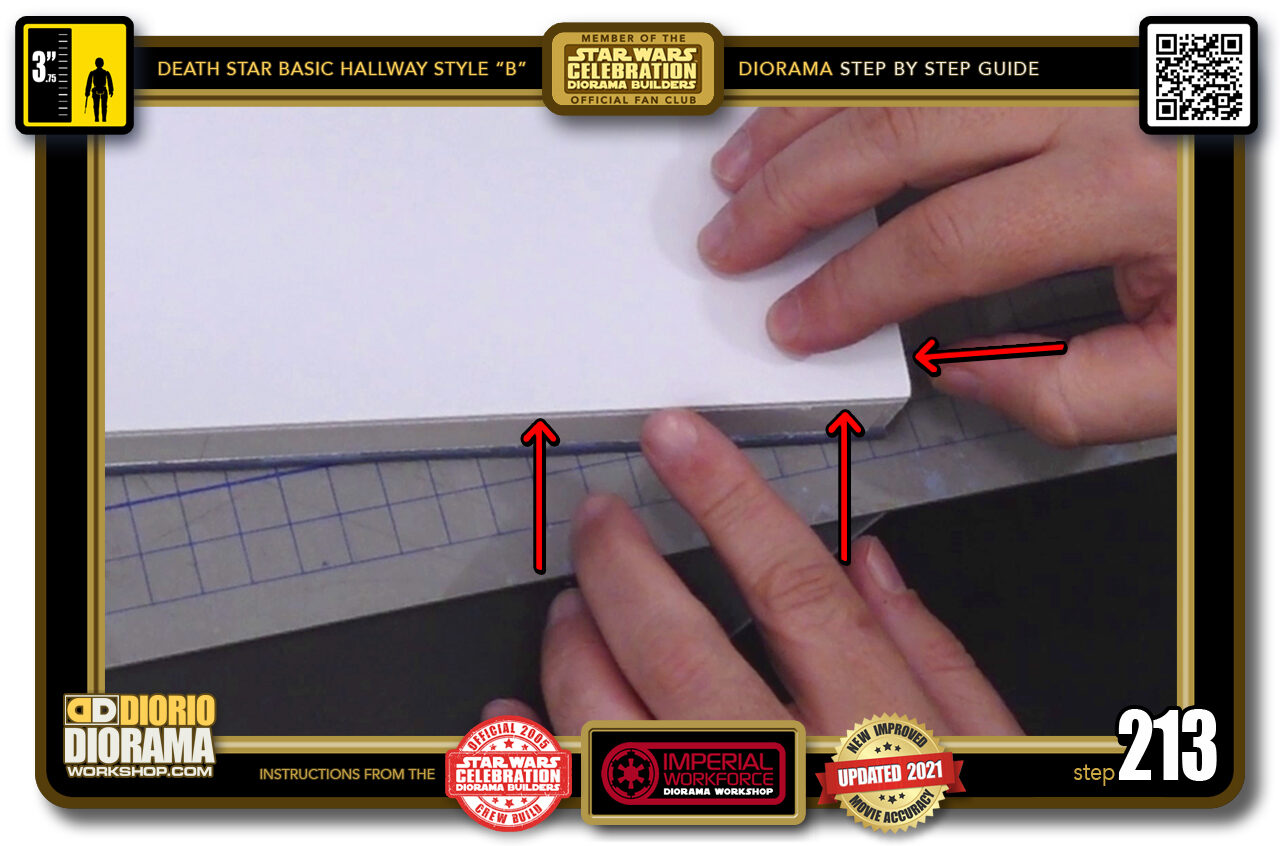
- STEP 213 > Make sure that all sides are flush and the corners align properly.
-
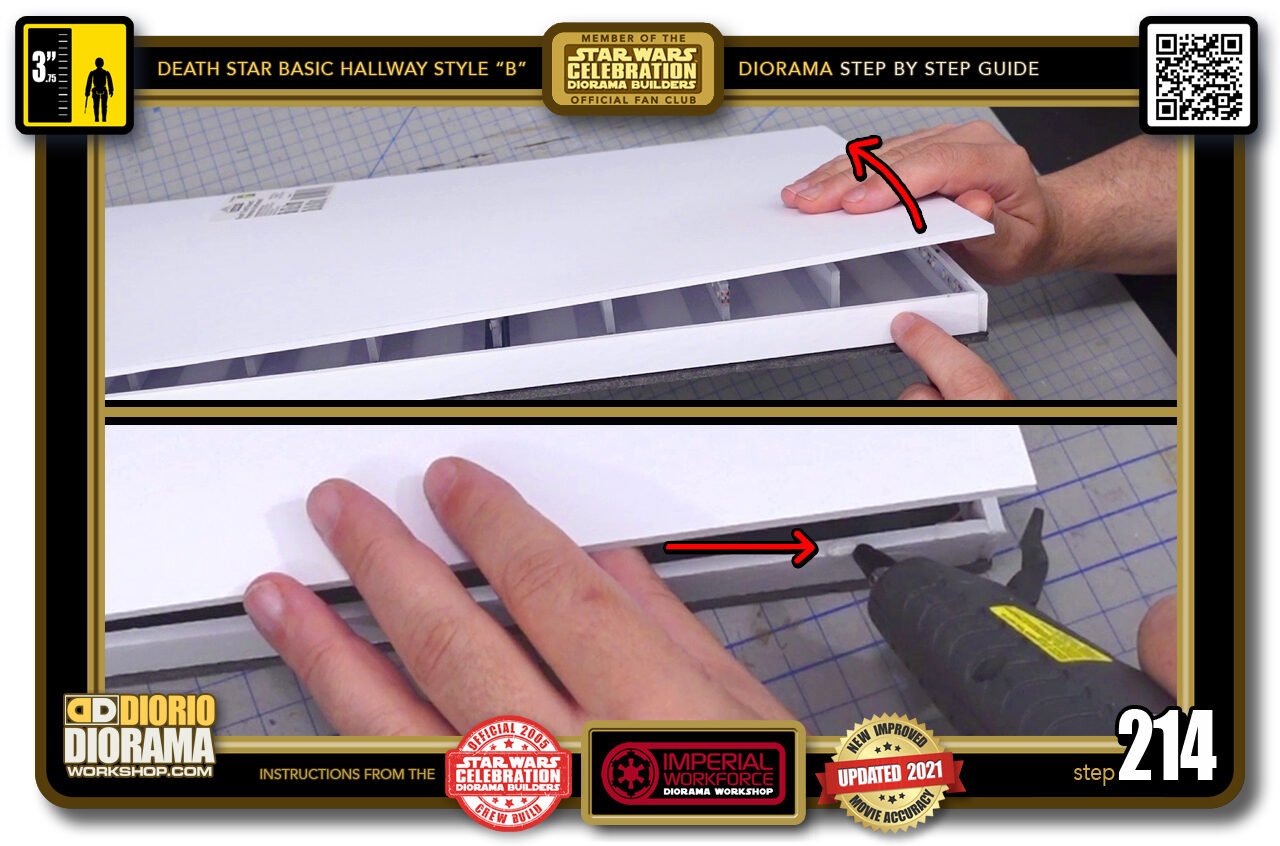
- STEP 214 > Once the hot glue has cooled off a minute or so, we can go to the other side and lift the lid if you will (top image red arrow) and insert the nozzle of the hot glue gun onto the edge surface of the outer frame and apply 2-3 dots of hot glue (bottom image red arrow).
-
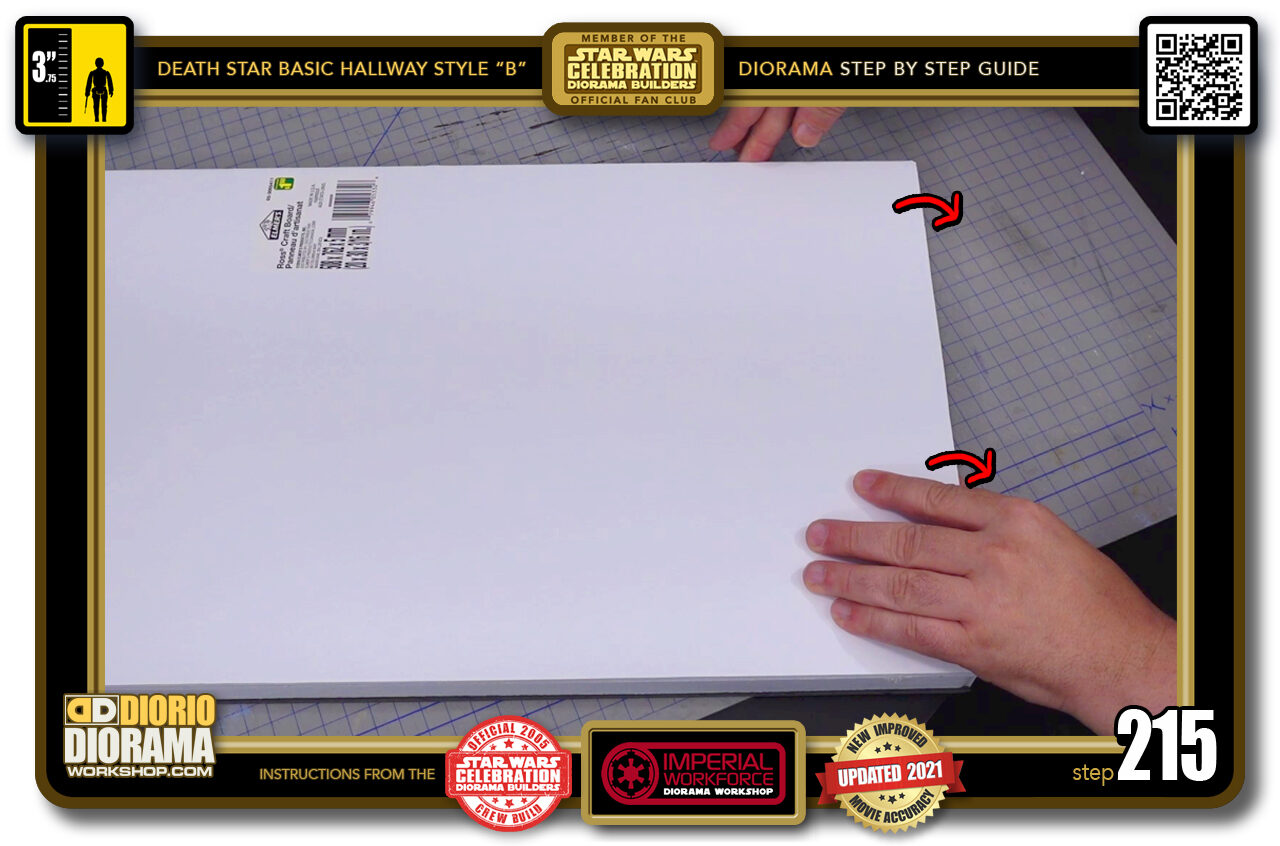
- STEP 215 > Lower the foamcore sheet, make sure corners are lined up and flush and press down 30-40 seconds.
-
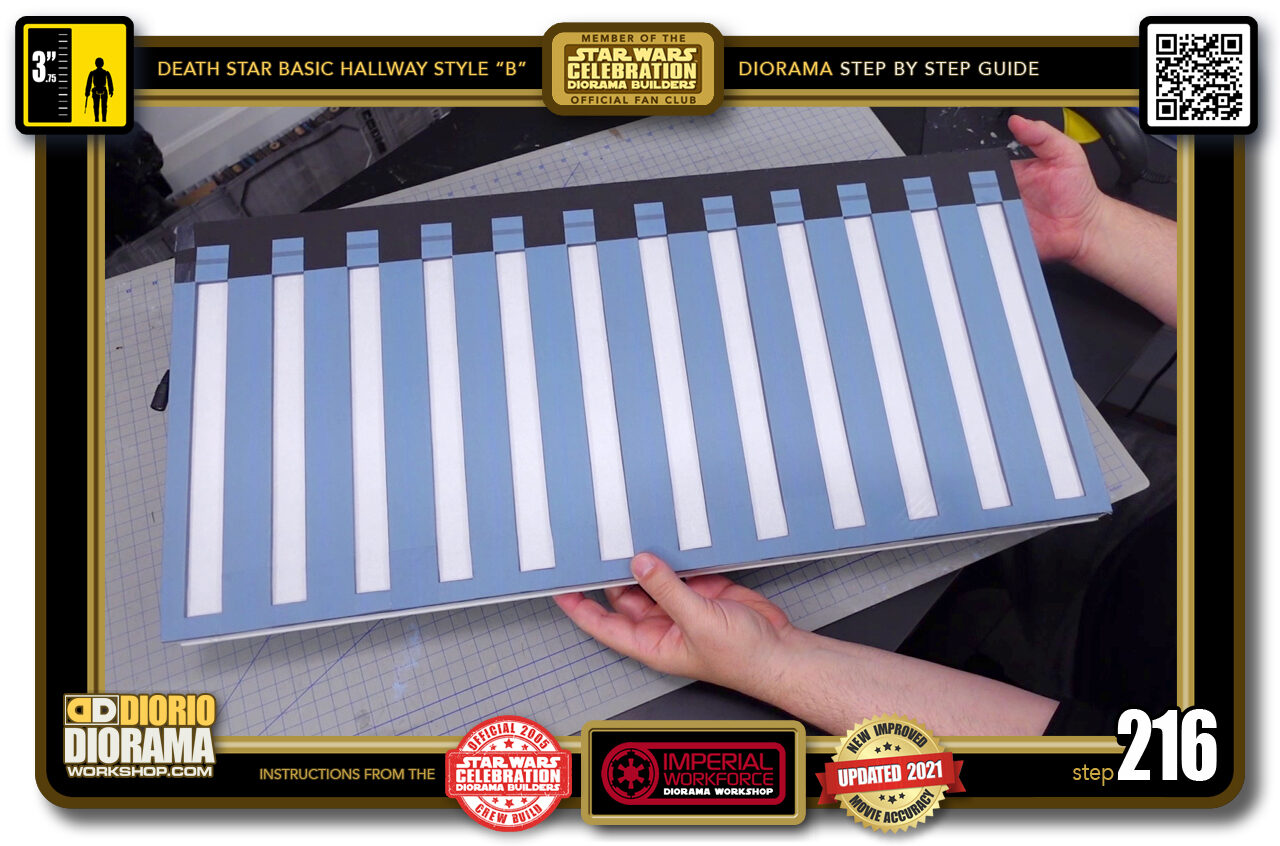
- STEP 216 > And after all that hard work, you have a super cool LED light up ceiling for your hallway. Put this aside in a VERY SAFE place - lol. I would hate for something to happen to it at this point.
-
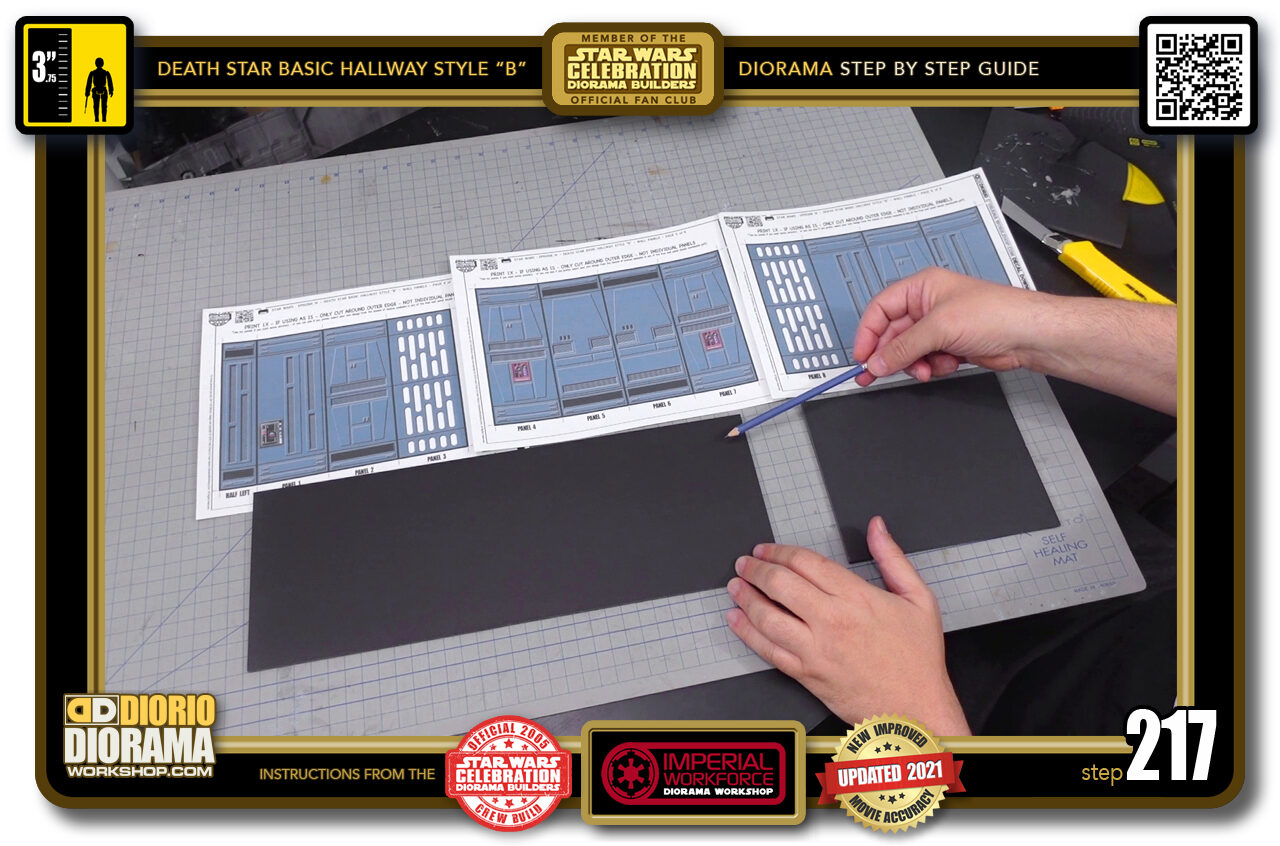
- STEP 217 > Time to place some skins on your rear wall. Grab your free decal downloads. https://dioramaworkshop.com/tutorials-decals-death-star-basic-hallway-style-b/
-
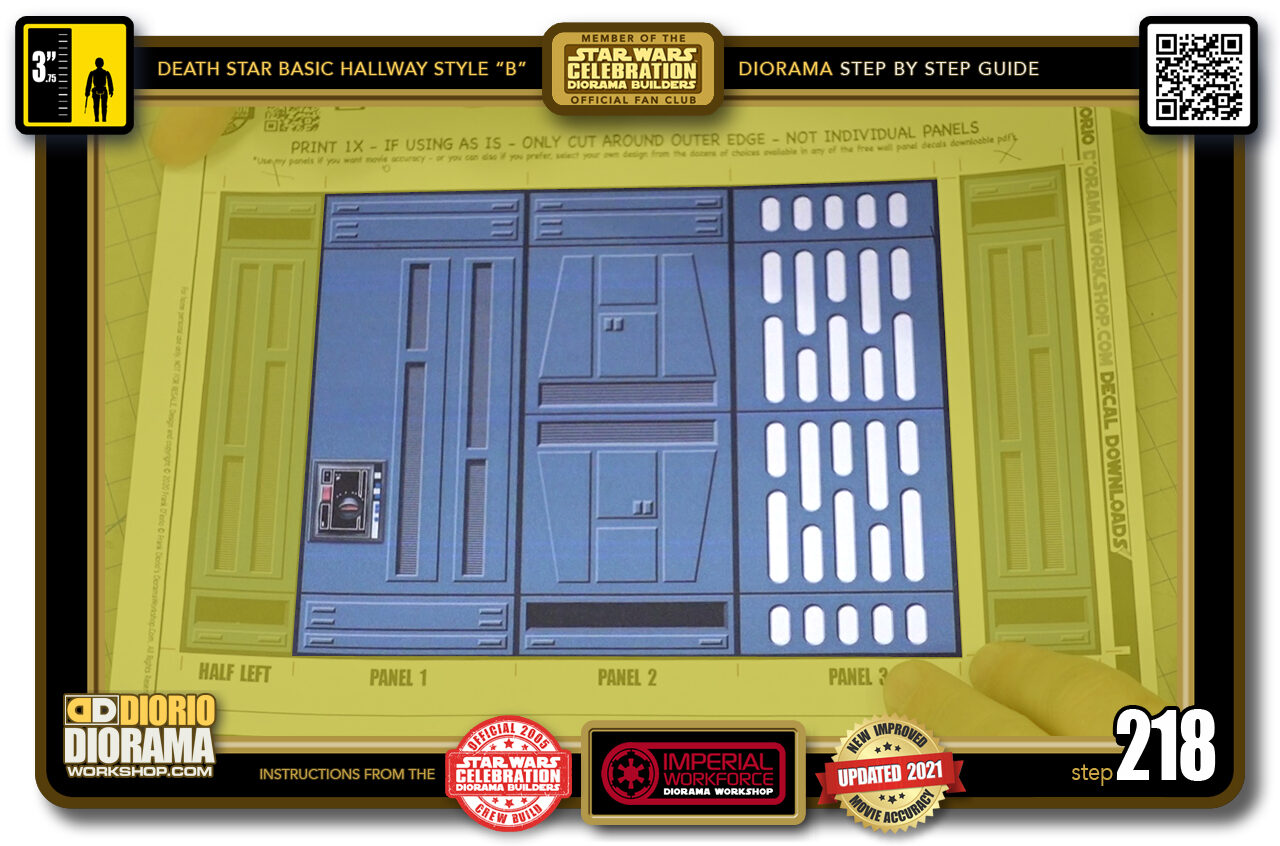
- STEP 218 > On this sheet I only need these 3 panels. I can keep the 2 half panels (seen in the yellow hilite zone) for another diorama.
-
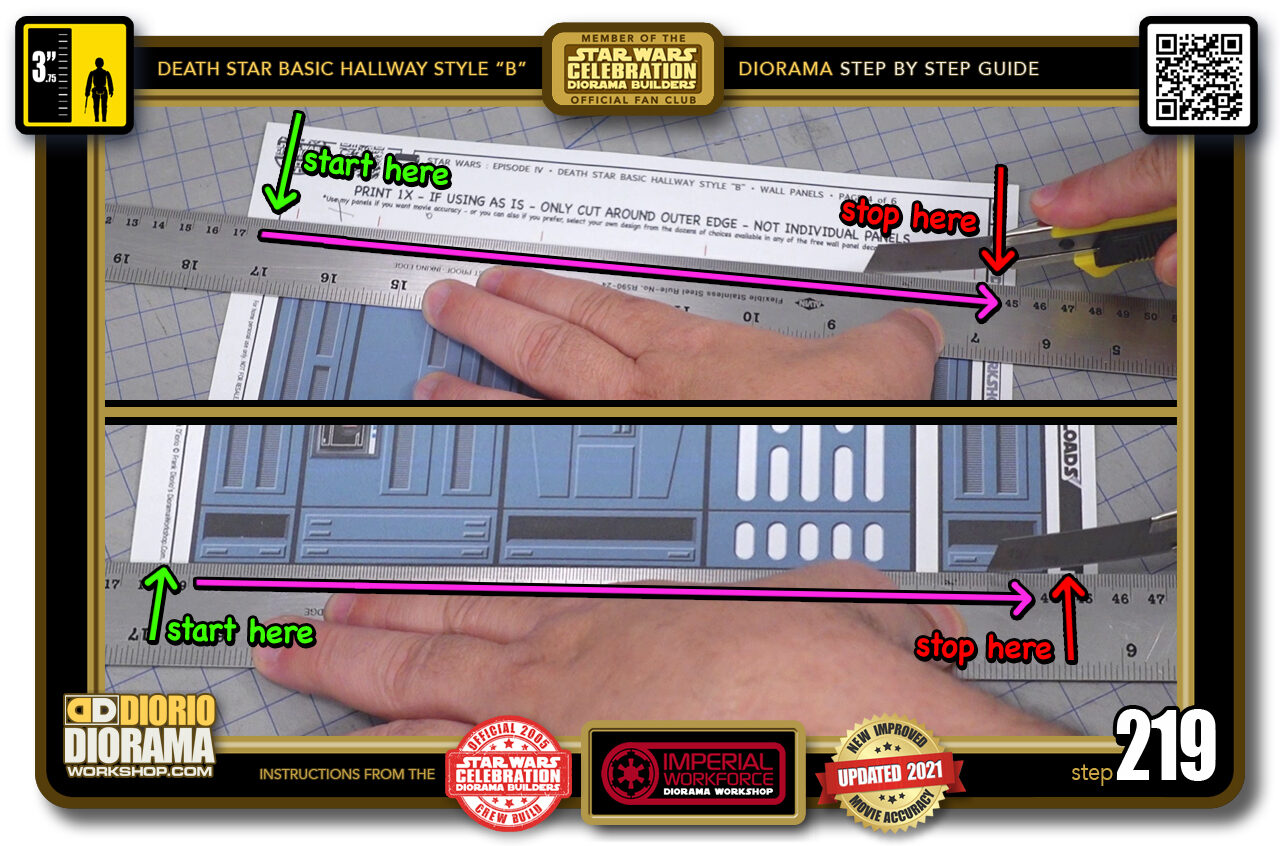
- STEP 219 > When slicing decals and using the red cutting guides, you want to do the horizontal cuts inside the sheet. Meaning you want to start just before the guide (top image green arrow) and you want to stop just before you exit the decal sheet (top image red arrow) Same goes for when cutting the horizontal bottoms of the decals (bottom image).
-
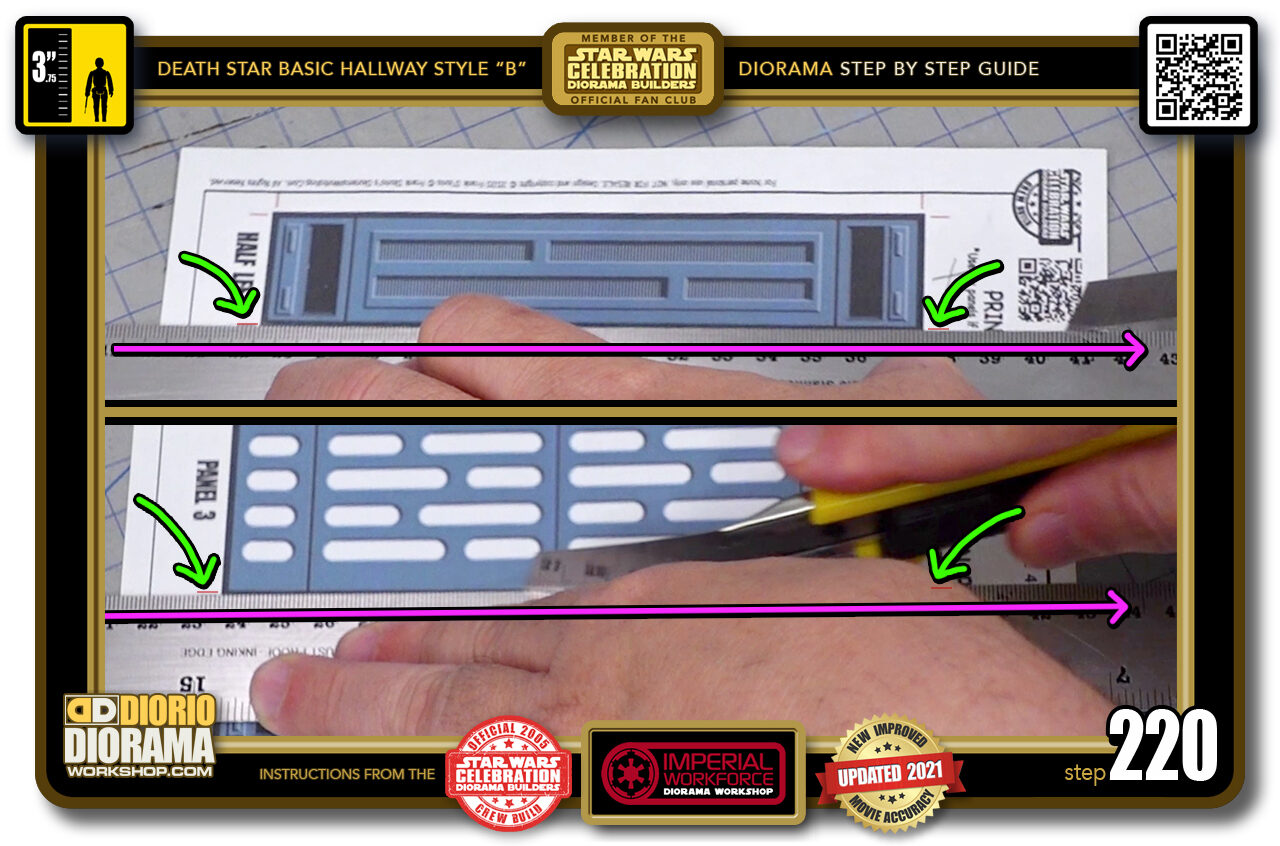
- STEP 220 > When doing the vertical cuts it doesn't matter if you cut all the way through.
.
Did you already build this Diorama ? At home or at our Star Wars Celebration Diorama Builders workshop ? Would you like to show it in the site’s GALLERY VISITORS DIORAMAS section, YES ? That is Awesome !!! You can find out all the details on how to email me your photos on the VISITORS SUBMISSIONS INFO page … When I get your photos, I will create your very own page just like this one. You may not realize it but work does inspire others to join in the fun of making Action Figure Dioramas.
.
NOT FOR RESALE ALL Decals, tutorials and artwork are ©FrankDiorio (dioramaworkshop.com) and offered FOR FREE to the fans – that would be you ? so you can build and display my diorama designs in your very own home. I realize I cannot control what one does with my graphics once I place them on the web, I can only ask you as one fan to another, please respect the artist and do not be that jerk who uses my designs and tutorials to build a copy of my work only to sell it on EBAY or trade/sale groups and forums. Thank You. Frank.
.

.
.
If you have a facebook account, why not join the Official Diorama Builders Fan Club today, simply click the logo link below.
 .
.
Catch up with fellow visitors and exchange stories, read cool interviews with the crew, exchange photos, fun surprises and grab some FAN ONLY merchandise next year at actual future conventions ?
.
©2021 Frank Diorio DioramaWorkshop.Com
.
IF YOU LIKE WHAT YOU SEE, PLEASE SHARE WITH YOUR FRIENDS
USING THE SOCIAL MEDIA BUTTONS BELOW