


-
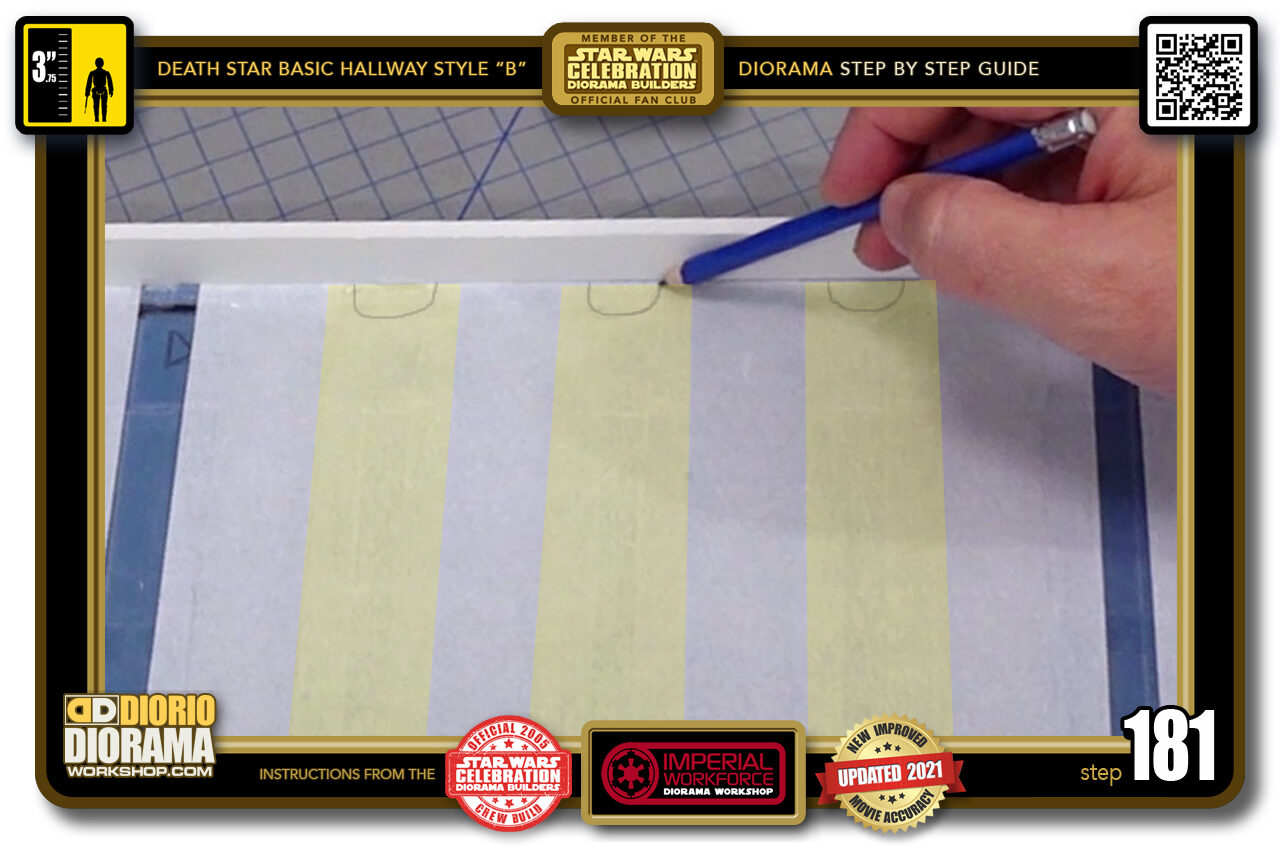
- STEP 181 > Now it's time to attach the rear strip. Now here is little tricky because you don't want any hot glue to melt your tracing paper. The trick I found is that you take a pencil and draw small half circles along the edge of each beam (yellow hilites) This will help you know where to put your hot glue and avoid any accidents.
-
-
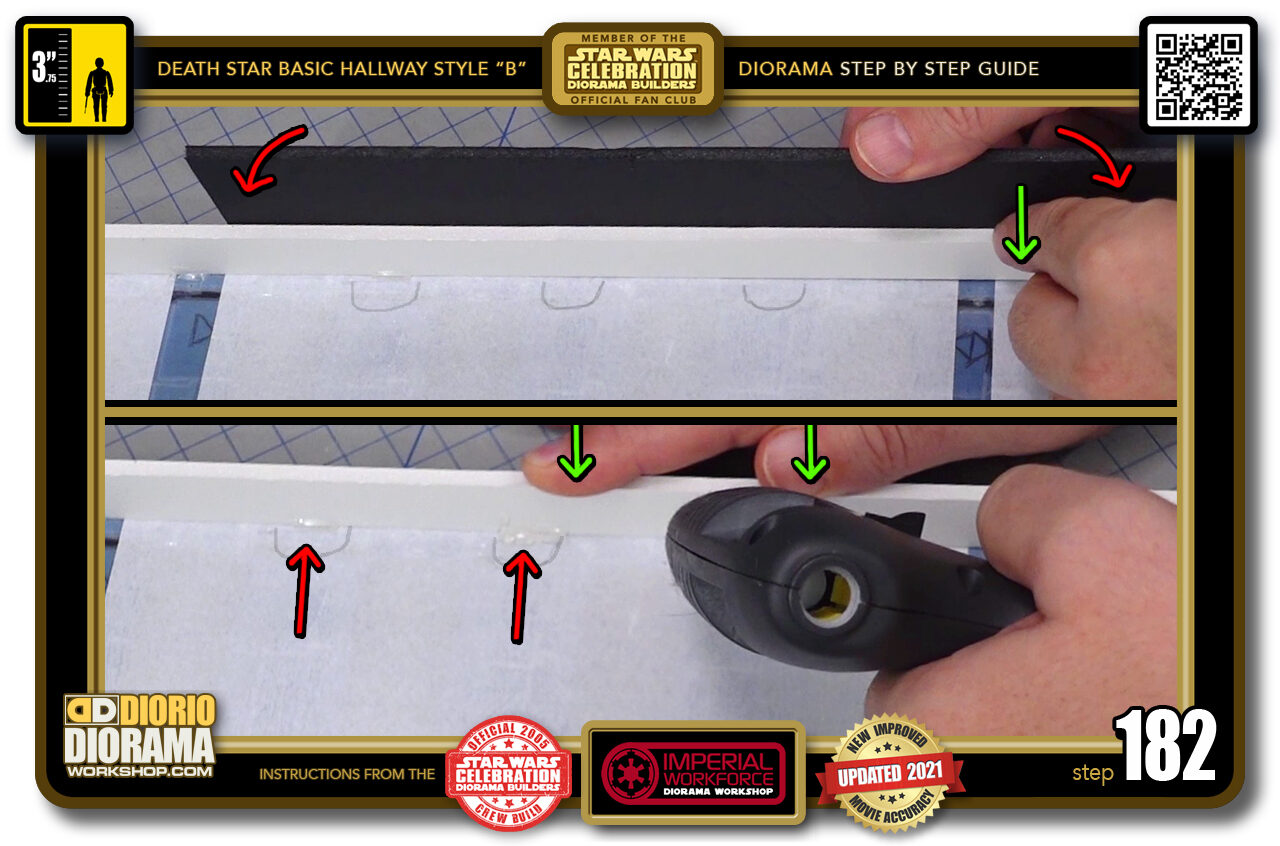
STEP 182 > As in Step 173 do a DRY RUN first, make sure your strip fits exactly between the 2 sides. Lean your scrap "wall" support against the outside ceiling thickness (top image red arrows) and when flush, press down to keep it in place (top image green arrows).
With pressure still on the top of your strip to keep it from moving around (bottom image green arrows) put some tiny hot glue drops inside each of your half circle pencil marks (bottom image red arrows).
-
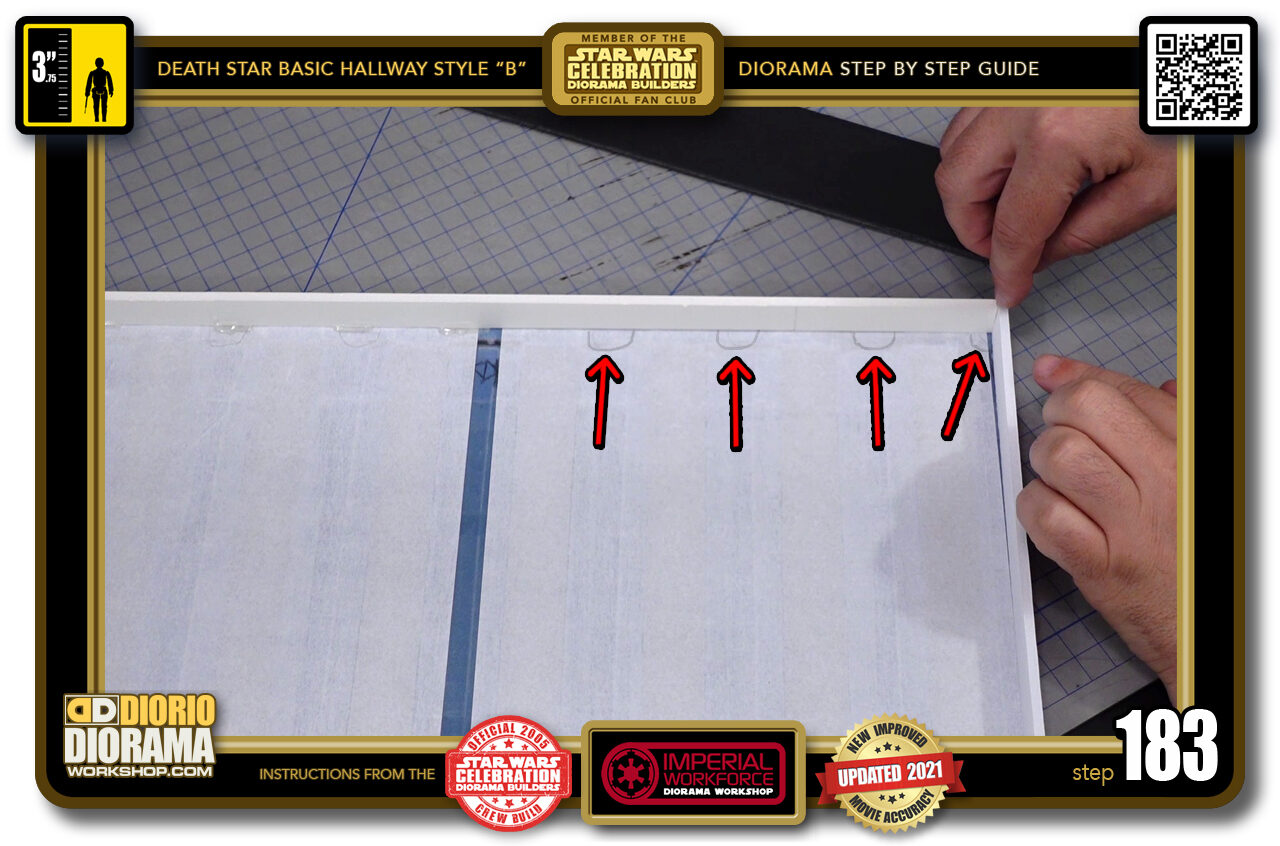
- STEP 183 > Continue this 2-3 times until you reach the opposite corner. Make sure you only put the hot glue INSIDE your half circles (red arrows) and pinch the strips together in the corner to get a tight fit.
-
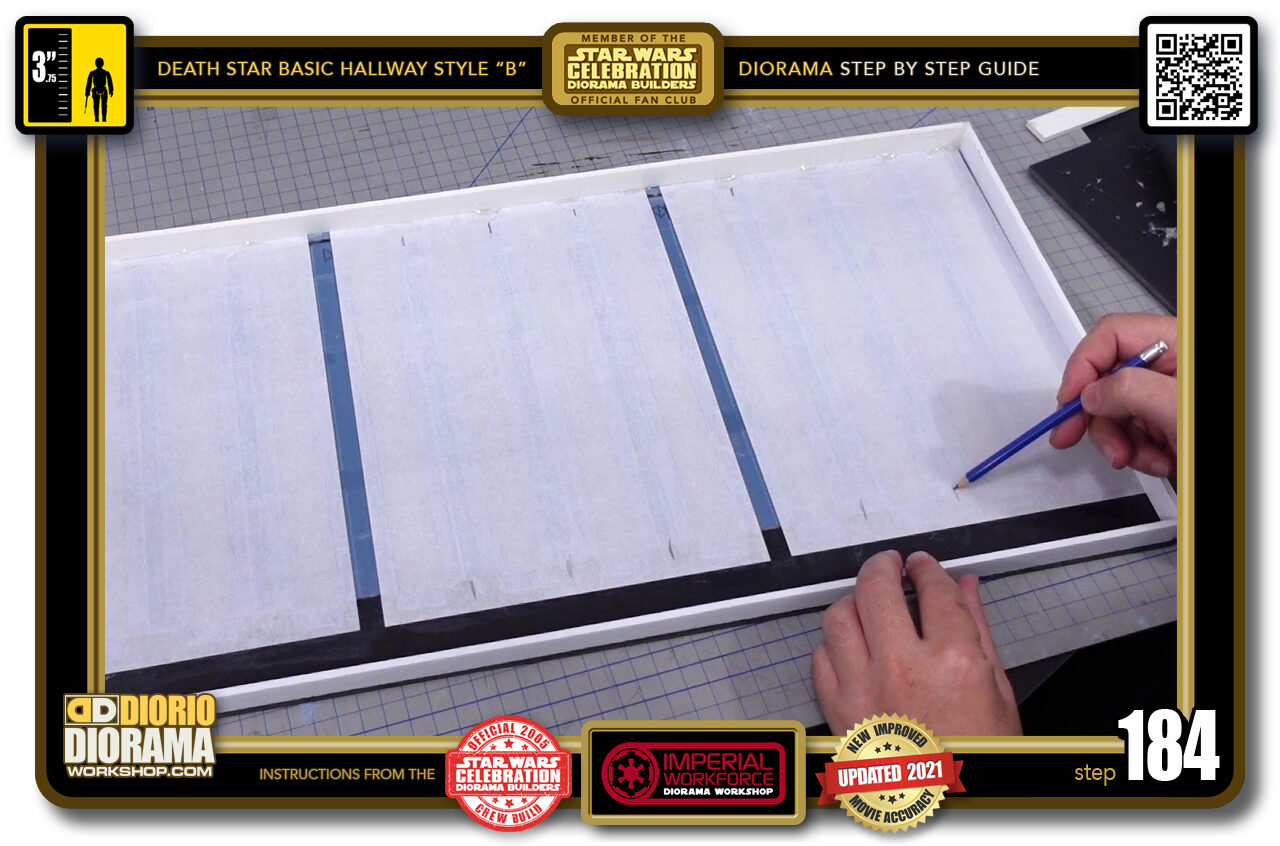
- STEP 184 > You now need to attach the strips that will act as your LED light supports. To make things easier we want to make pencil guides in the centre of every beam.
-

- STEP 185 > Grab 2 pieces of scrap foamcore.
-
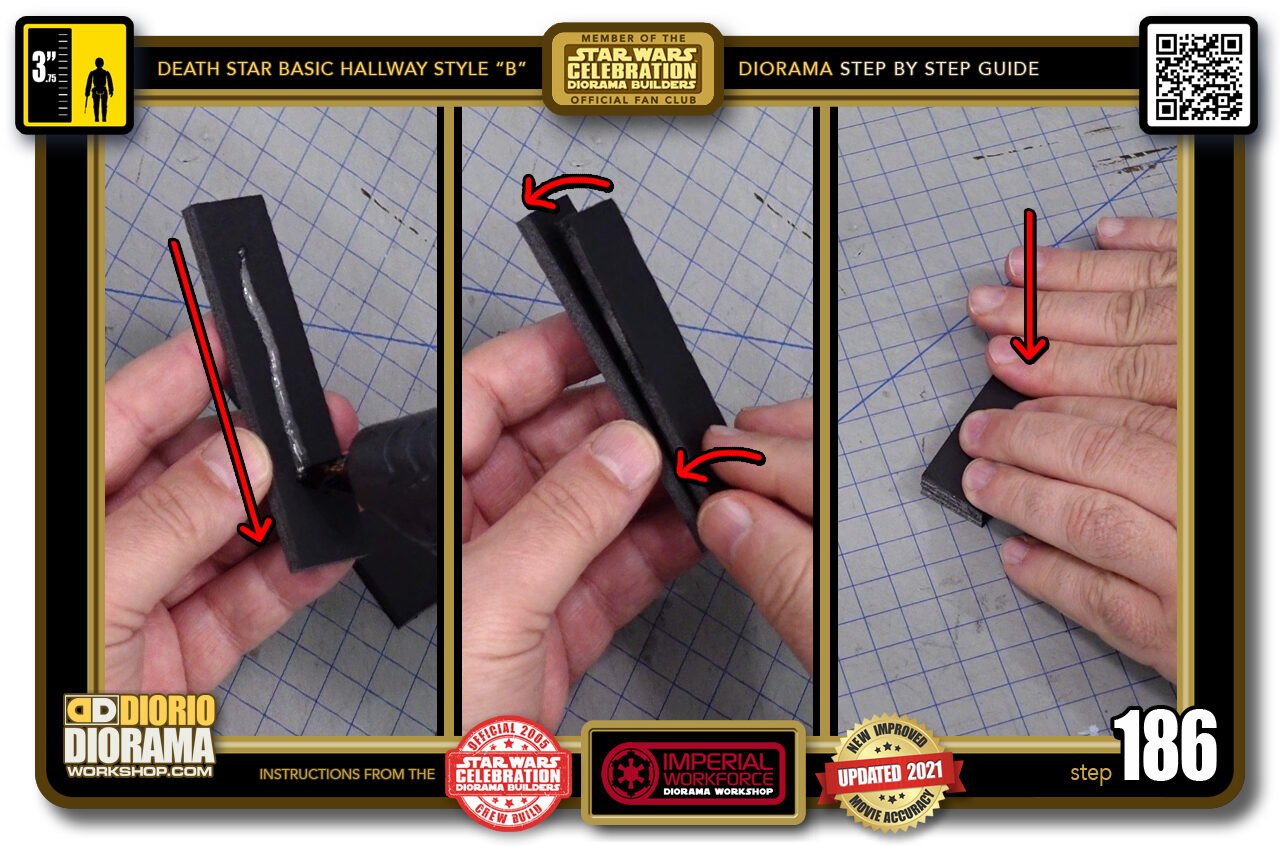
- STEP 186 > Put some hot glue on one side (left image) Press the 2 pieces together and rotate them to flatten the glue as much as possible (centre image) Place on table and apply pressure for 30-40 seconds (right image).
-
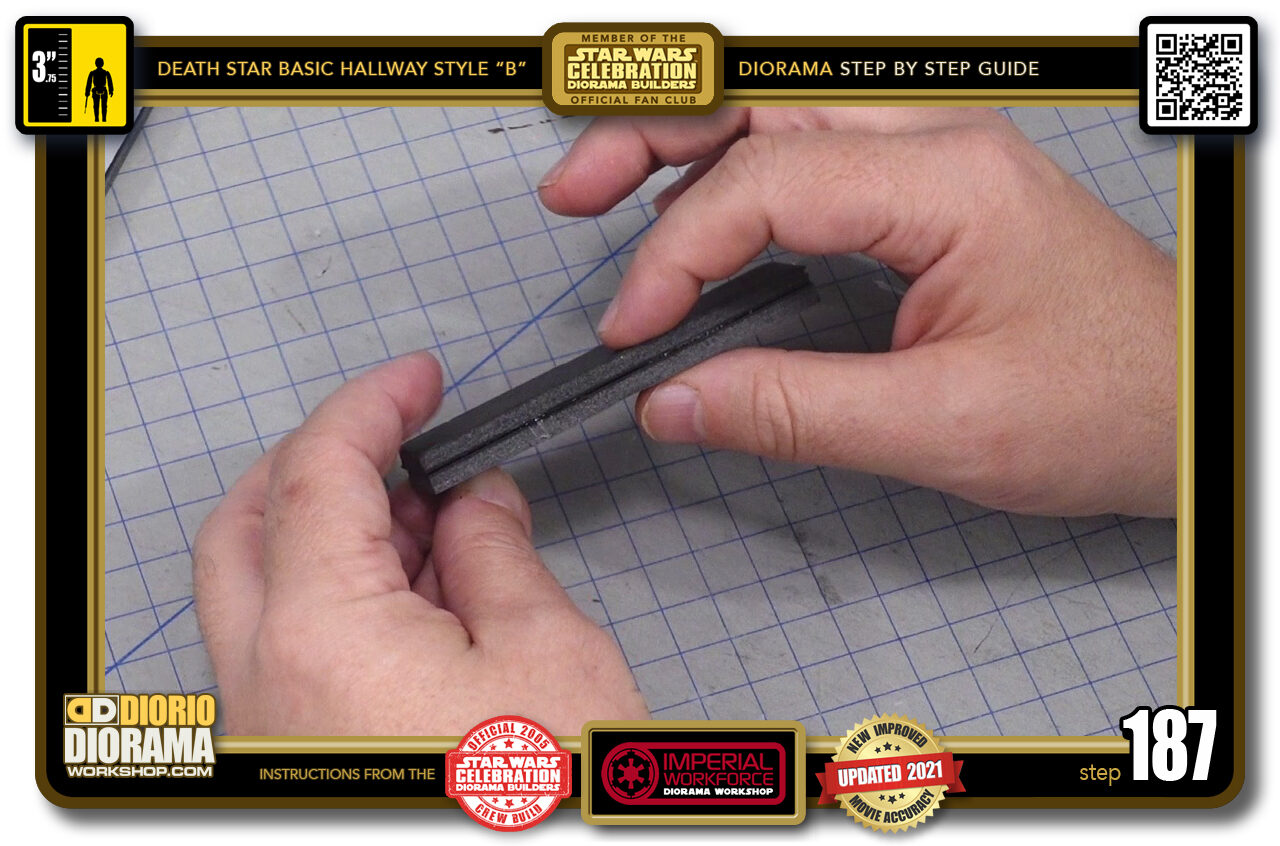
- STEP 187 > You now have your rear spacer.
-
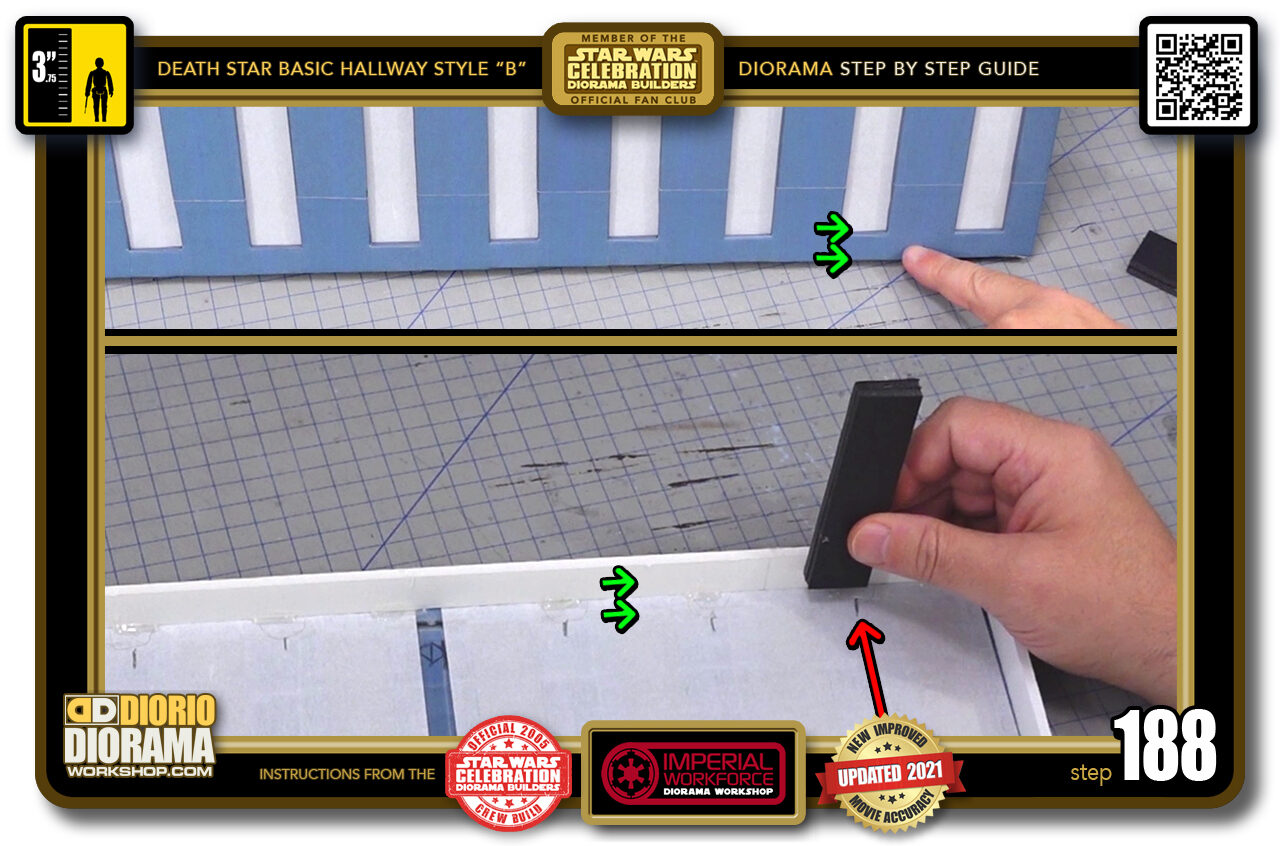
- STEP 188 > You want your support strip to have the same width as the front of your ceiling (top image green arrows) To do so you will lower your scrap double thickness support flush against the white strip which will give you the exact same gap seen on ceiling front (bottom image green arrows) and allow you to slide in your LED support at the right spot (bottom image red arrow).
-
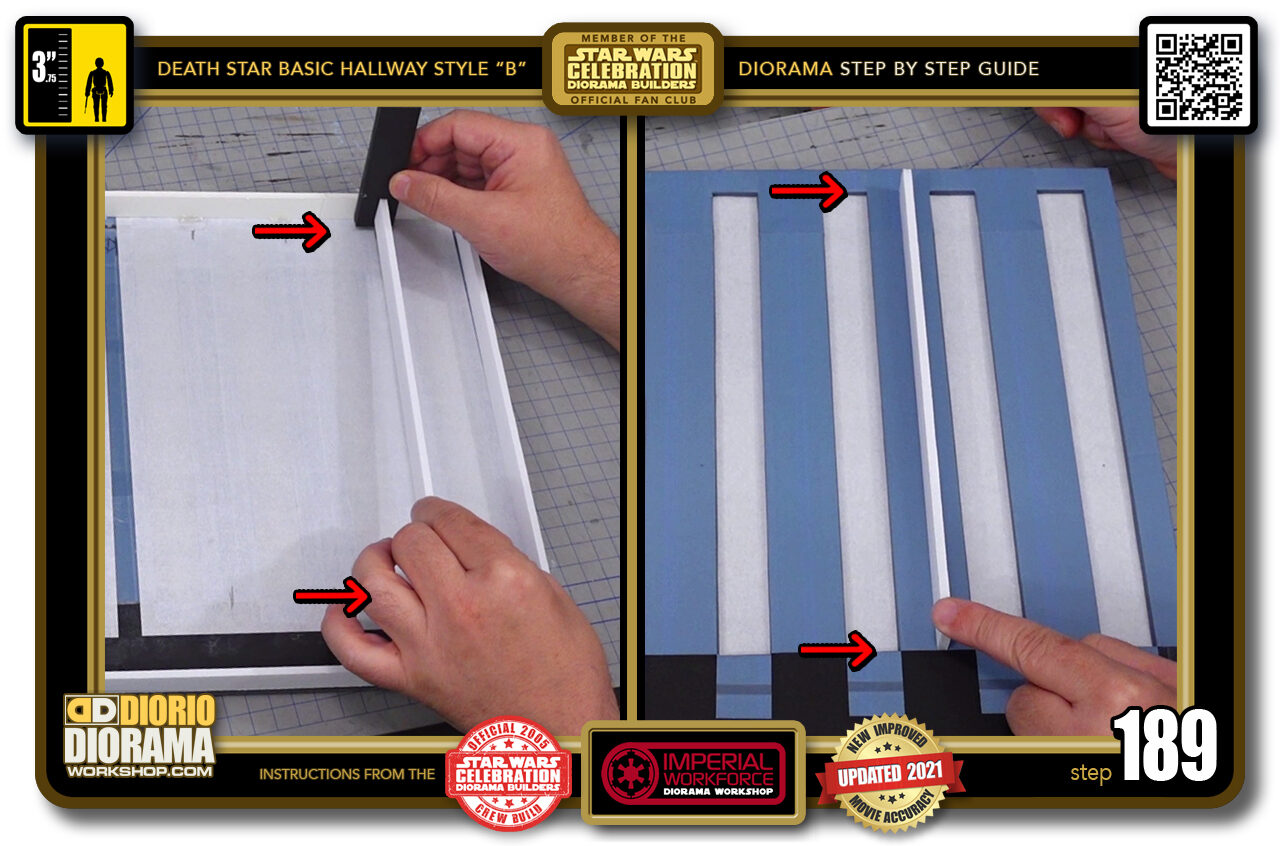
- STEP 189 > Placing your support strip against the 71cm front strip will position your LED light support strips exactly aligned with the white ceiling paper windows.
-
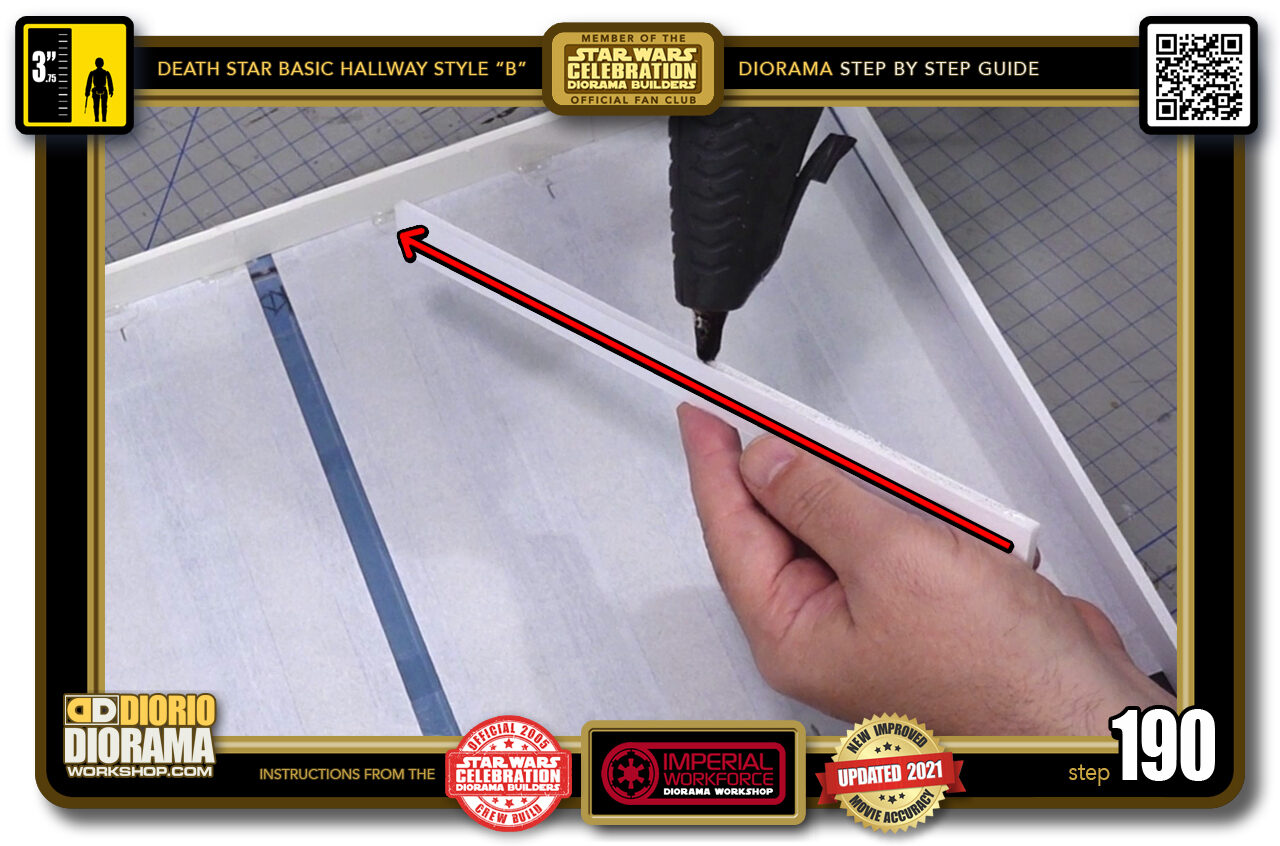
- STEP 190 > So grab one of your 27cm x 2cm LED light Spine Supports and put a line of hot glue along the spine.
-

- STEP 191 > Put your scrap double thickness spacer against the front frame strip (left image red arrow) then push the end of your LED strip against the Scrap Double spacer keeping the other end UP (centre image red arrow) When pushed against and lining up with your pencil marks, lower the other end to make full contact with the foamcore ceiling back side (centre image green arrow)last put bit pressure on your supports until hot glue cools down a few minutes (right image red arrows).
-
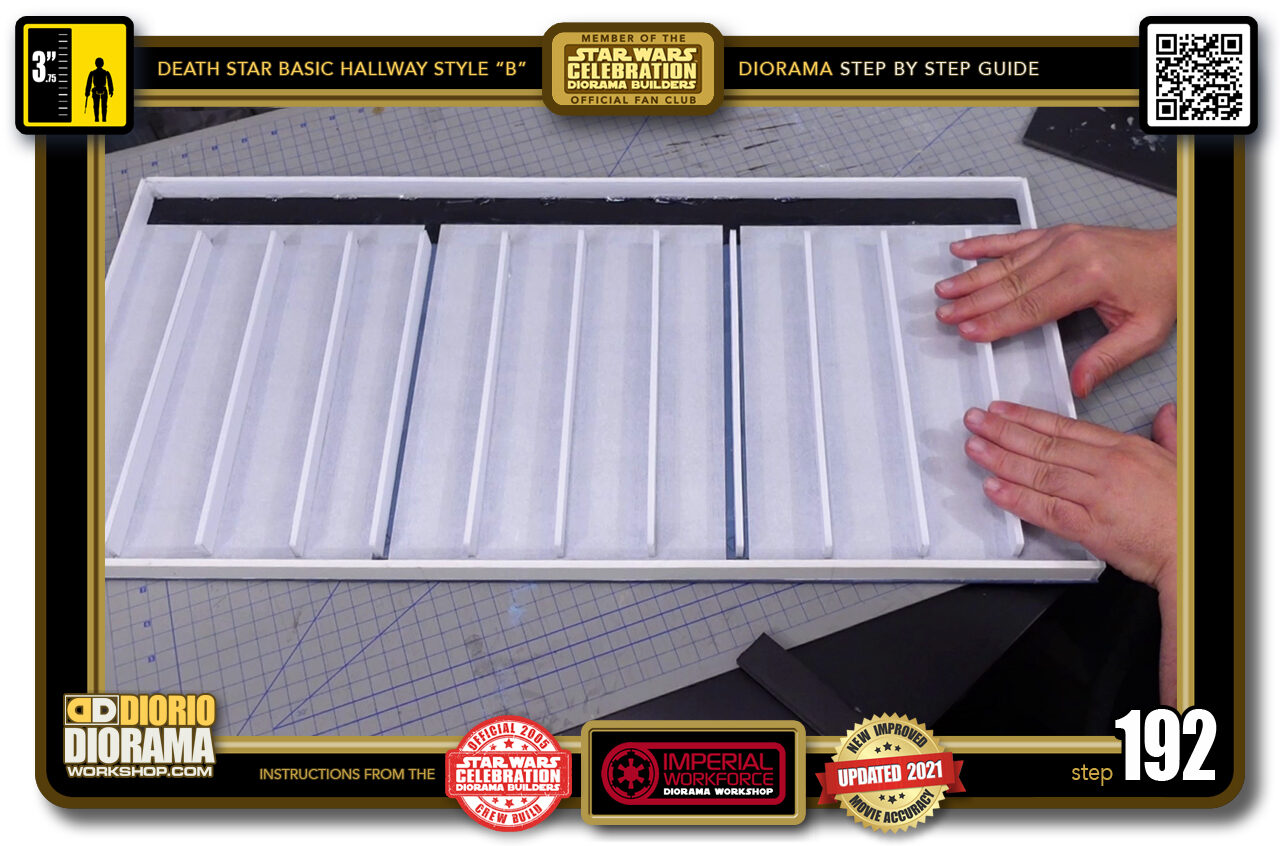
- STEP 192 > When all your supports are installed we can move onto the LED light strip.
-
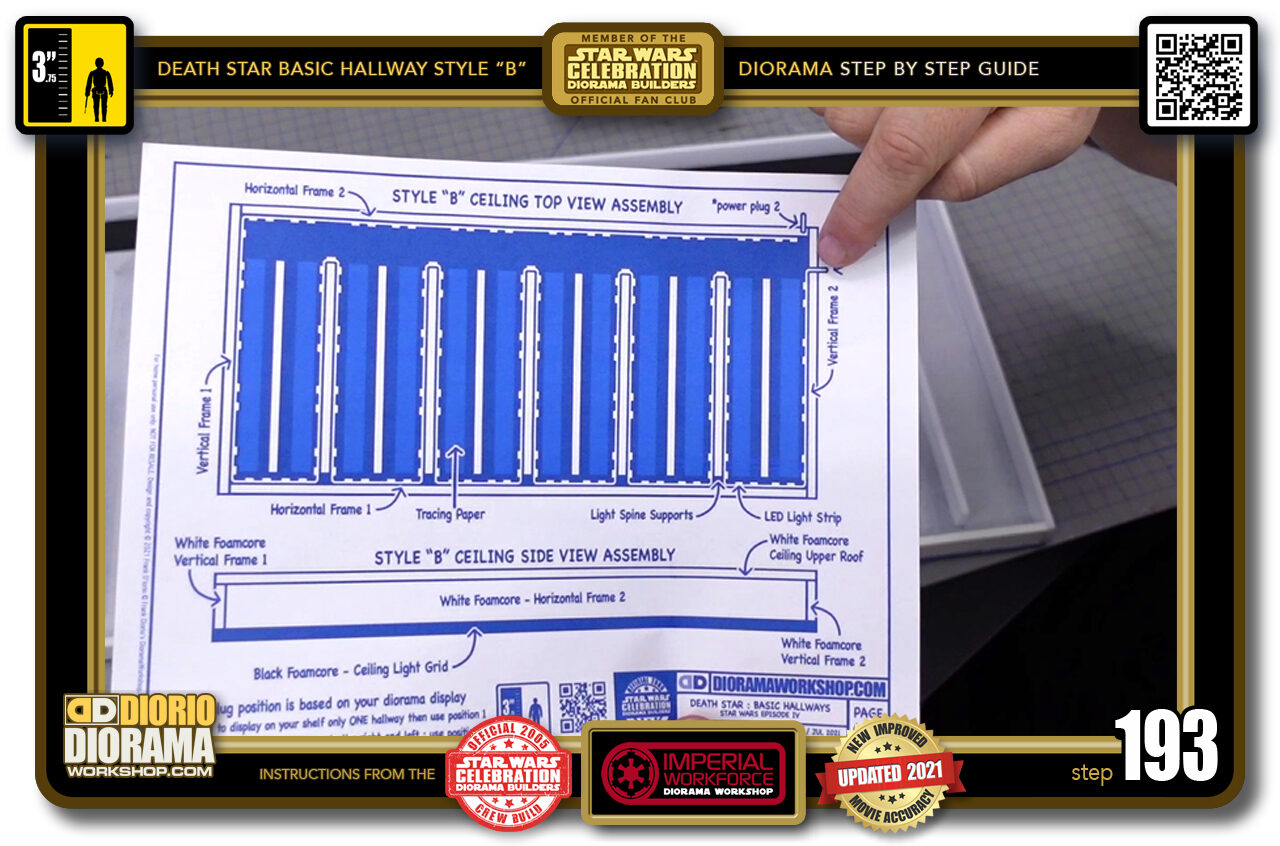
- STEP 193 > If you look at the blueprint you can see that you have 2 options to start your lighting.
-
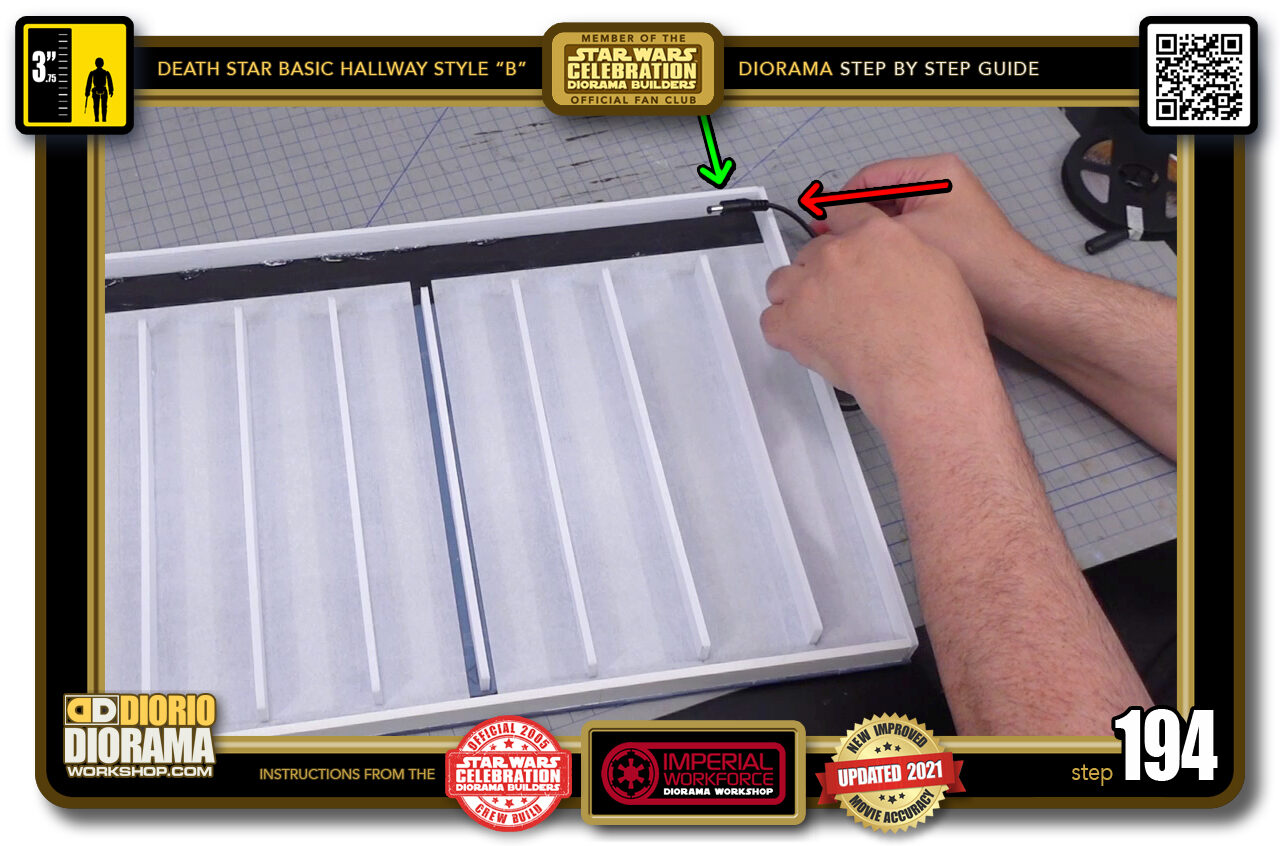
- STEP 194 > If you think you will be placing your dioramas side by side on your shelf, then you will want to make a hole in the rear (green arrow) to allow the 2 sides to get as close together as possible. If you are going to stack them on top of each other then you can make the hole on the right side corner (red arrow).
-
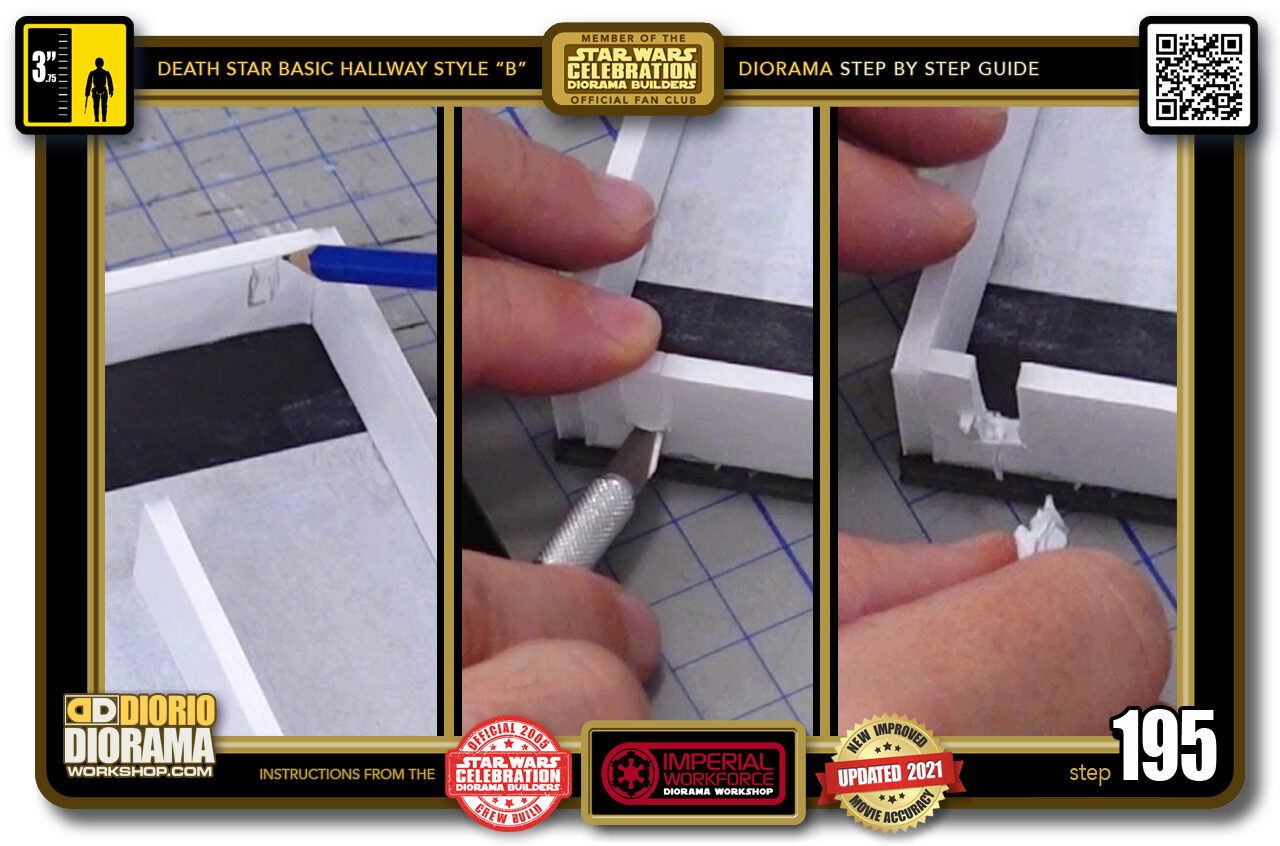
- STEP 195 > I decided to put my hole in the rear corner. So I put a small guide with my pencil (left image) Using a Xacto pen with pointy blade I cut along the pencil guide (centre image) Which gives me a small gap (right image).
-
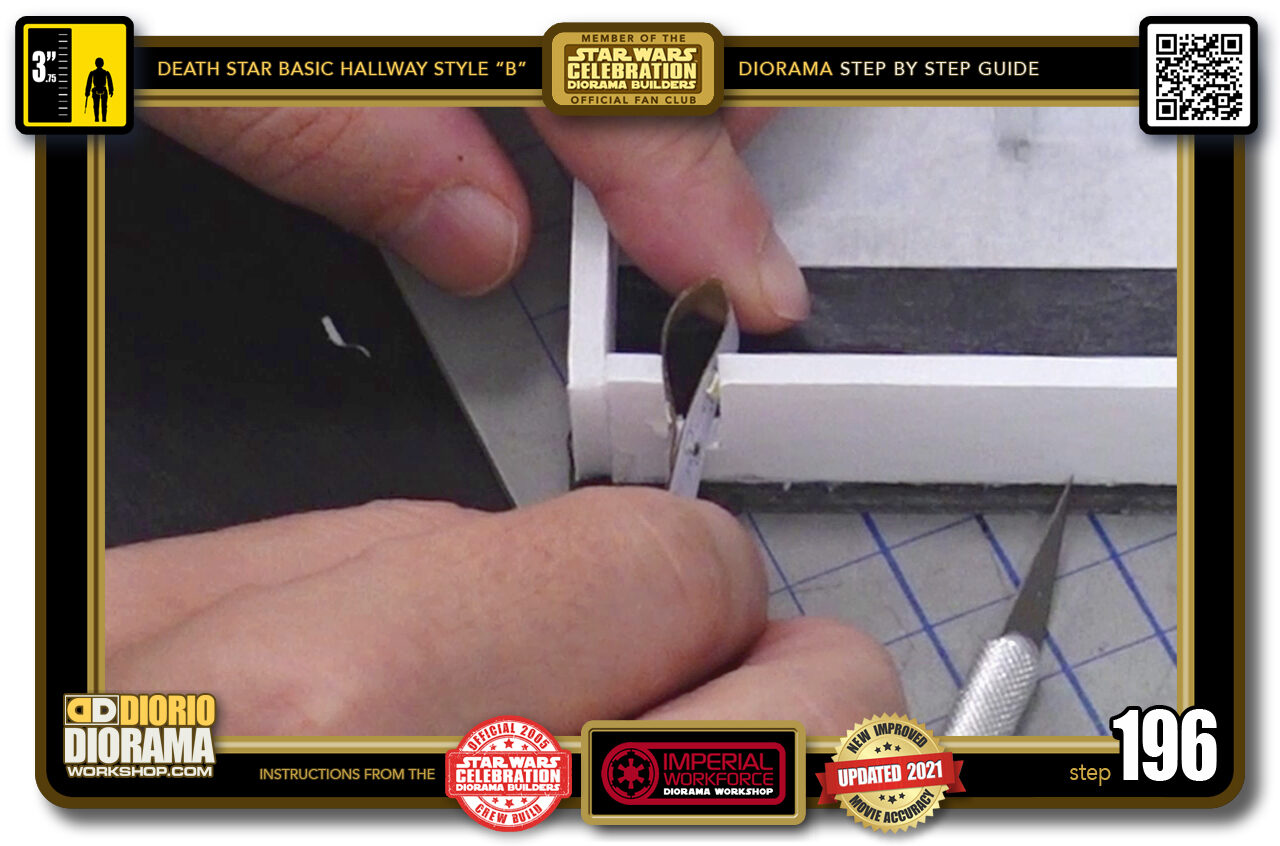
- STEP 196 > Wide enough to pass my LED power cable through.
-

- STEP 197 > You want the light to remain diffused and not see the individual LED sources so to get that effect you want the LED light strip to be attached against your supports (red arrow) and closer to the TOP of your support spines (green arrow) which leaves a nice space below
-
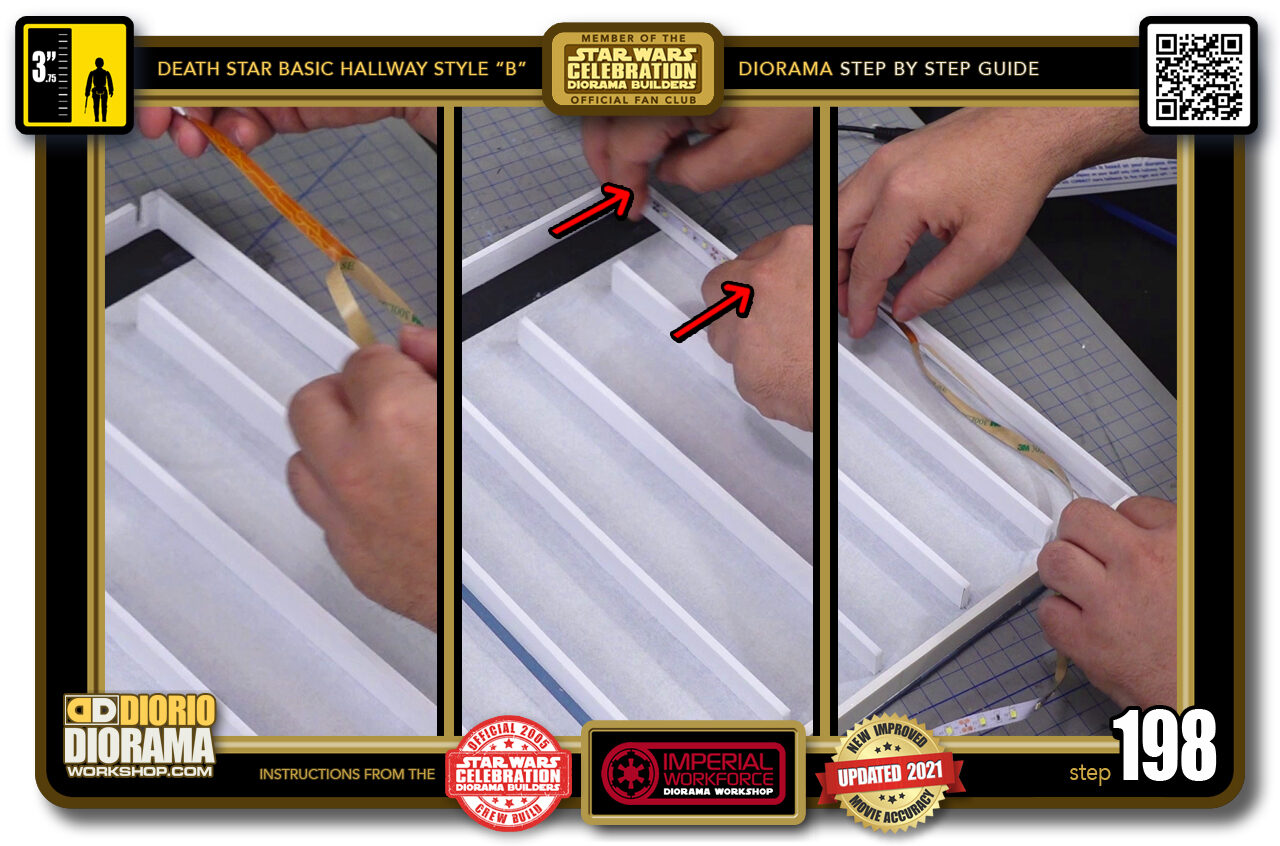
- STEP 198 > To get things started, peel back 10 cm or so (left image) and place the start of the LED (the power supply portion) through your corner gap to the outside of the ceiling frame. and then press the LED lights against the side near the top (centre image red lines) Then you can unroll more of your lights spool and align them with your side (right image).
-
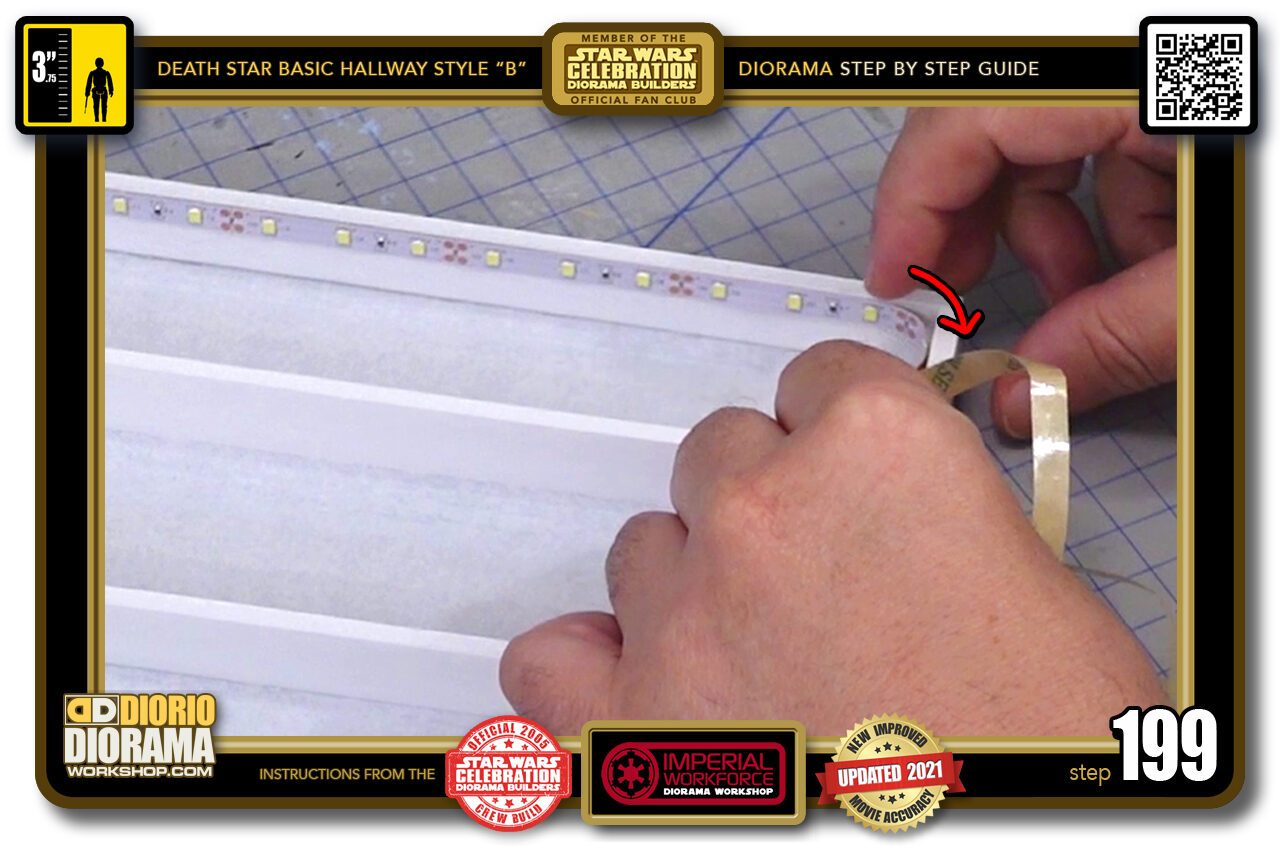
- STEP 199 > Peel and press the LED strip until you reach the corner. At this point you will want to do a loose 90 degree bend (red arrow) so that your LED light strip doesn't snap in half.
-
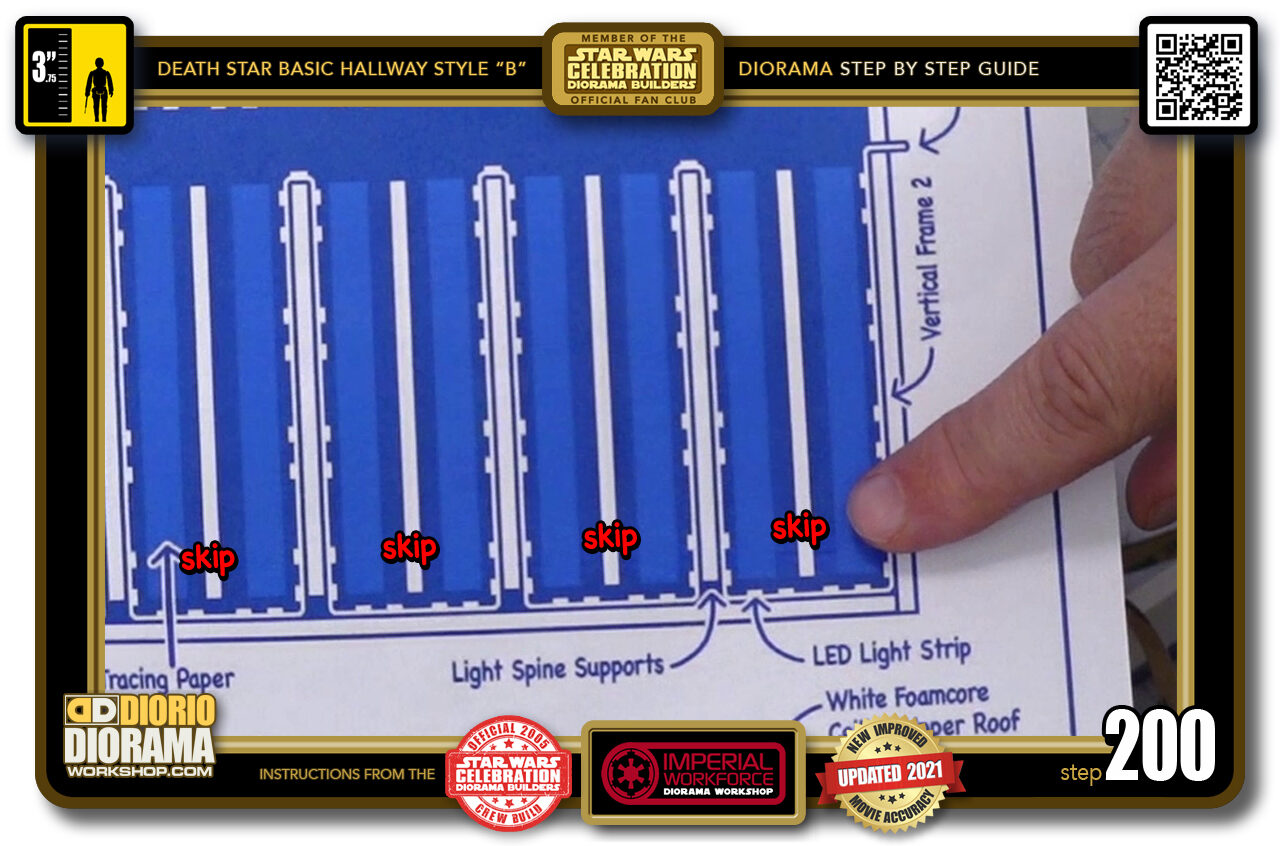
- STEP 200 > If you look at the blueprint you can see how I skip every other beam to snake myself all the way around the entire ceiling surface to give a bright and even lighting.
.
Did you already build this Diorama ? At home or at our Star Wars Celebration Diorama Builders workshop ? Would you like to show it in the site’s GALLERY VISITORS DIORAMAS section, YES ? That is Awesome !!! You can find out all the details on how to email me your photos on the VISITORS SUBMISSIONS INFO page … When I get your photos, I will create your very own page just like this one. You may not realize it but work does inspire others to join in the fun of making Action Figure Dioramas.
.
NOT FOR RESALE ALL Decals, tutorials and artwork are ©FrankDiorio (dioramaworkshop.com) and offered FOR FREE to the fans – that would be you ? so you can build and display my diorama designs in your very own home. I realize I cannot control what one does with my graphics once I place them on the web, I can only ask you as one fan to another, please respect the artist and do not be that jerk who uses my designs and tutorials to build a copy of my work only to sell it on EBAY or trade/sale groups and forums. Thank You. Frank.
.

.
.
If you have a facebook account, why not join the Official Diorama Builders Fan Club today, simply click the logo link below.
 .
.
Catch up with fellow visitors and exchange stories, read cool interviews with the crew, exchange photos, fun surprises and grab some FAN ONLY merchandise next year at actual future conventions ?
.
©2021 Frank Diorio DioramaWorkshop.Com
.
IF YOU LIKE WHAT YOU SEE, PLEASE SHARE WITH YOUR FRIENDS
USING THE SOCIAL MEDIA BUTTONS BELOW