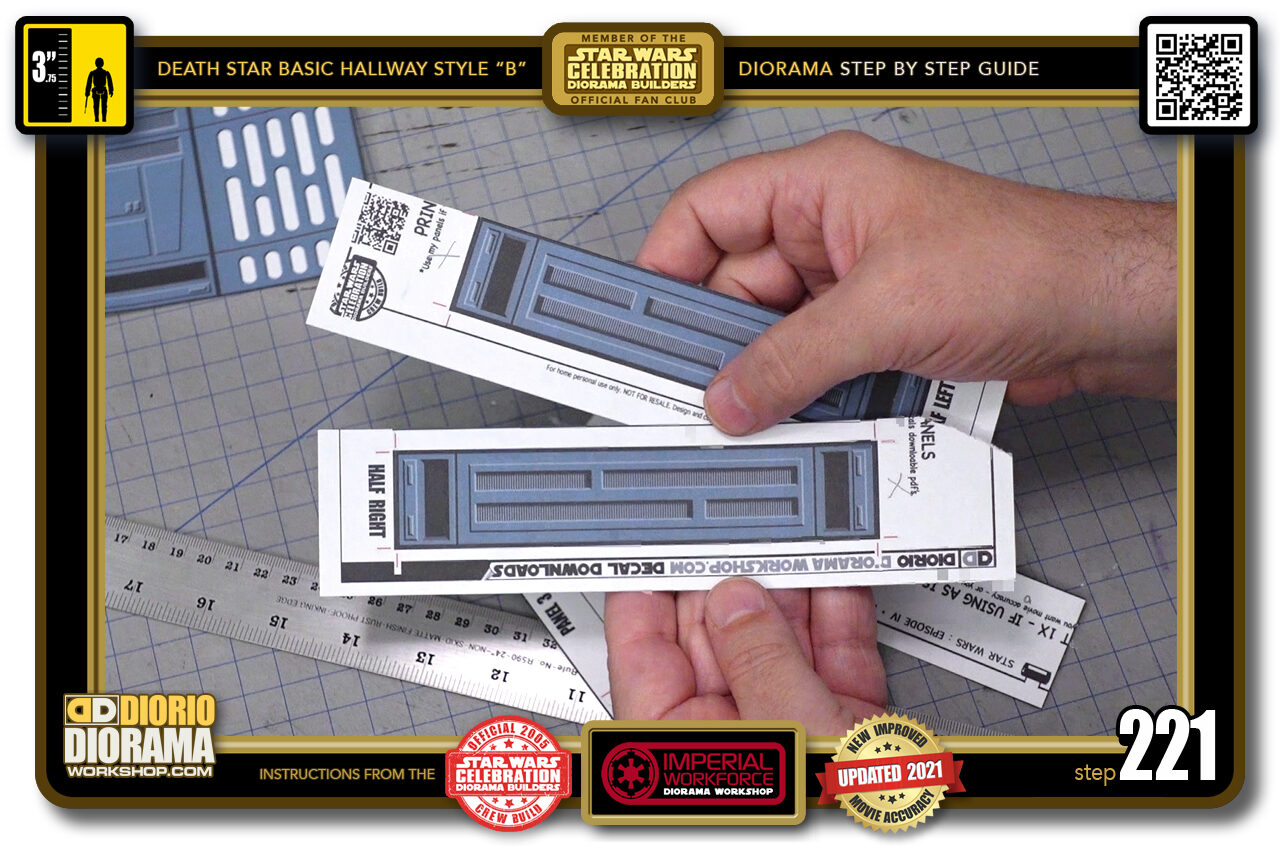
- STEP 221 > Put these 2 aside for a future project, you never know if you will need them and save on ink and full size label sheets.
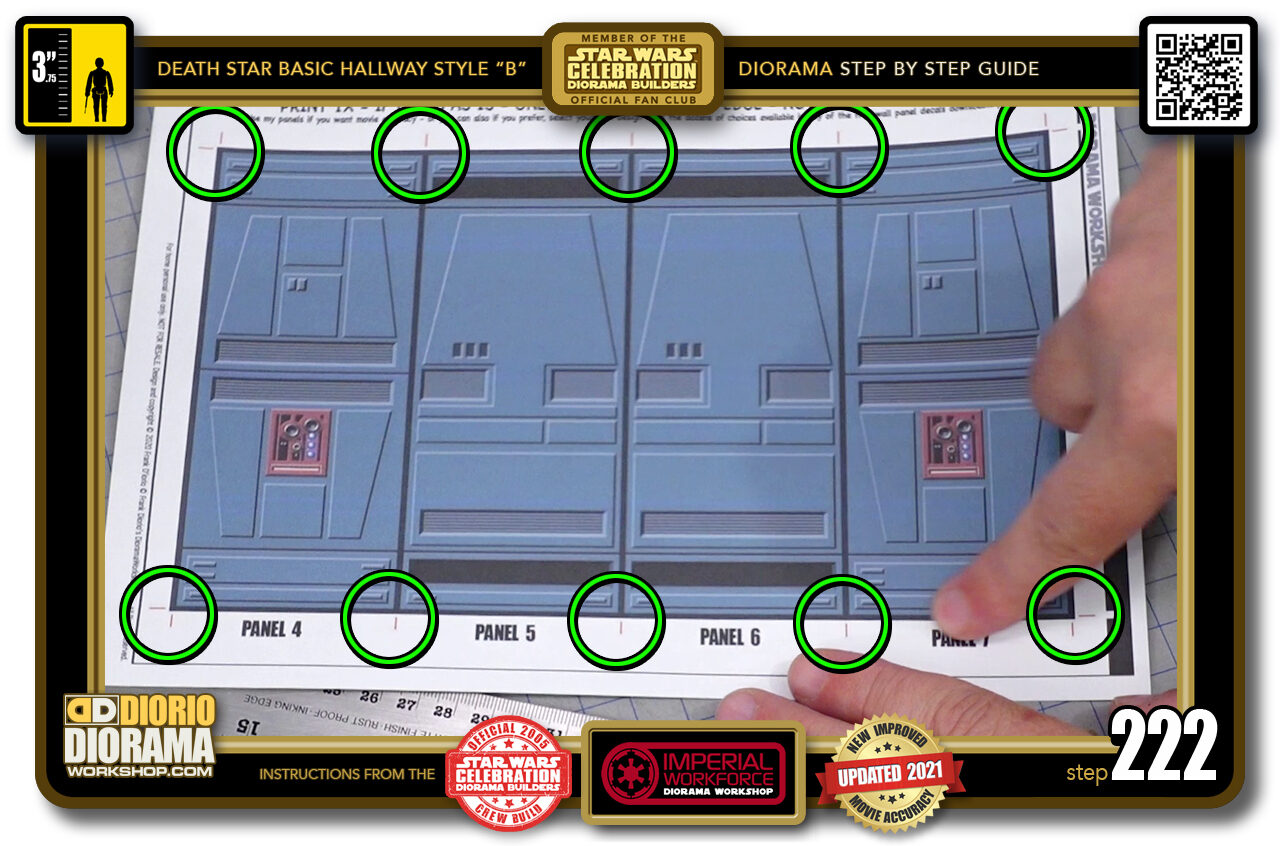
- STEP 222 > On this sheet, even though you have individual cutting guides (inside green circles)we will be using the 4 panels as is so we want to only slice along the outside of the joined panels.
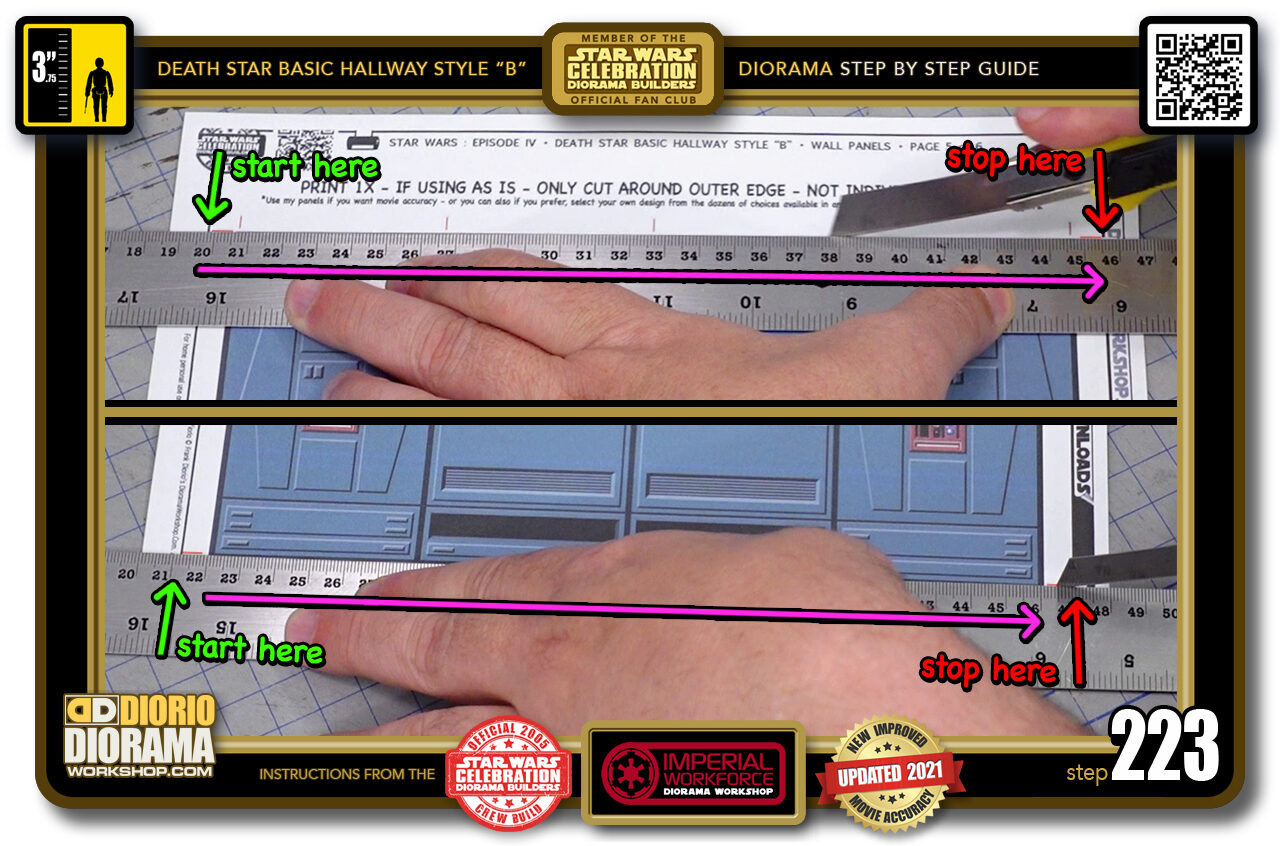
- STEP 223 > Like in Step 219, you want to do your horizontal cuts first and keep within the boundaries of your printed sheet.
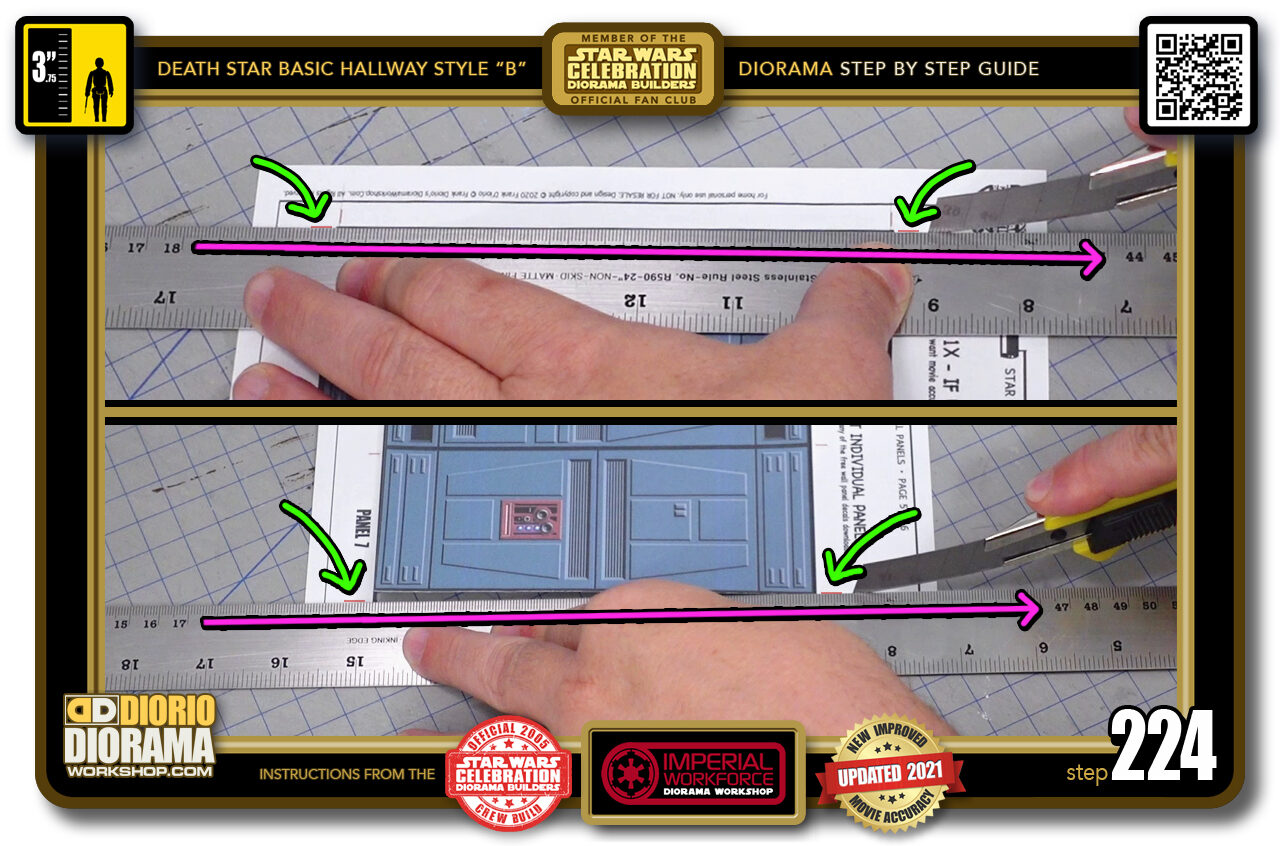
- STEP 224 > Now cut all the way across for the vertical guides.
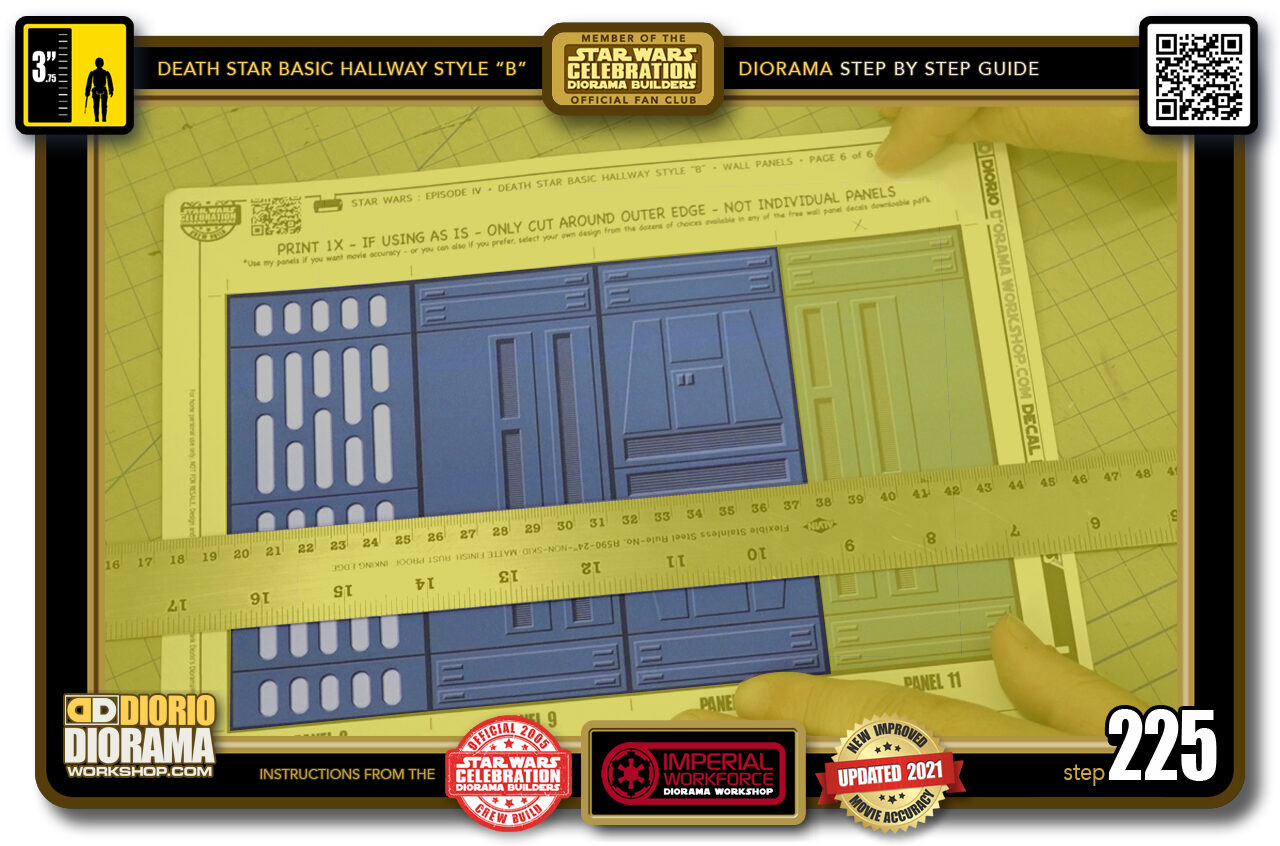
- STEP 225 > Now in this sheet we don't need the decal in the yellow zone but we will cut them all out anyways as not to waste but we will be putting that right panel away for future use.
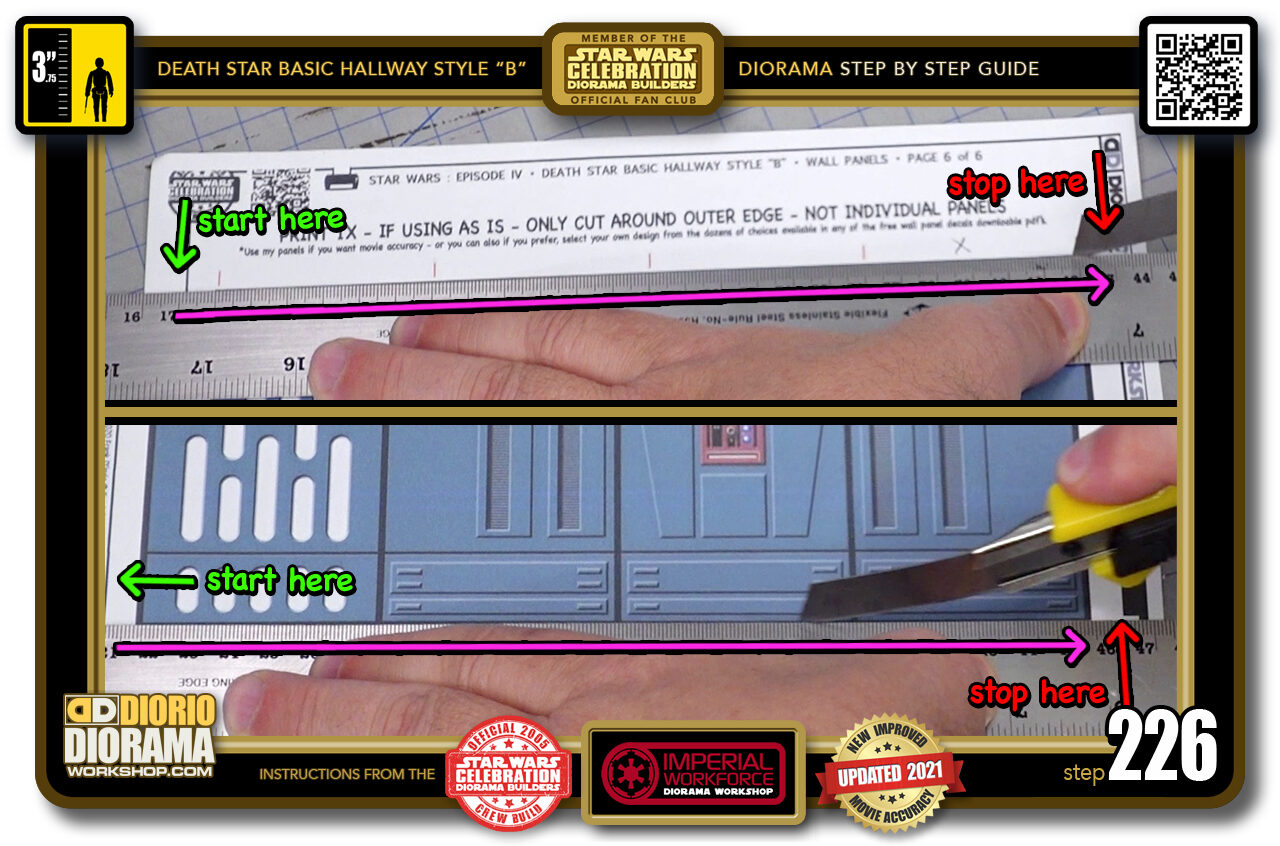
- STEP 226 > Do your horizontal cuts first on top and bottom of all 4 panels.
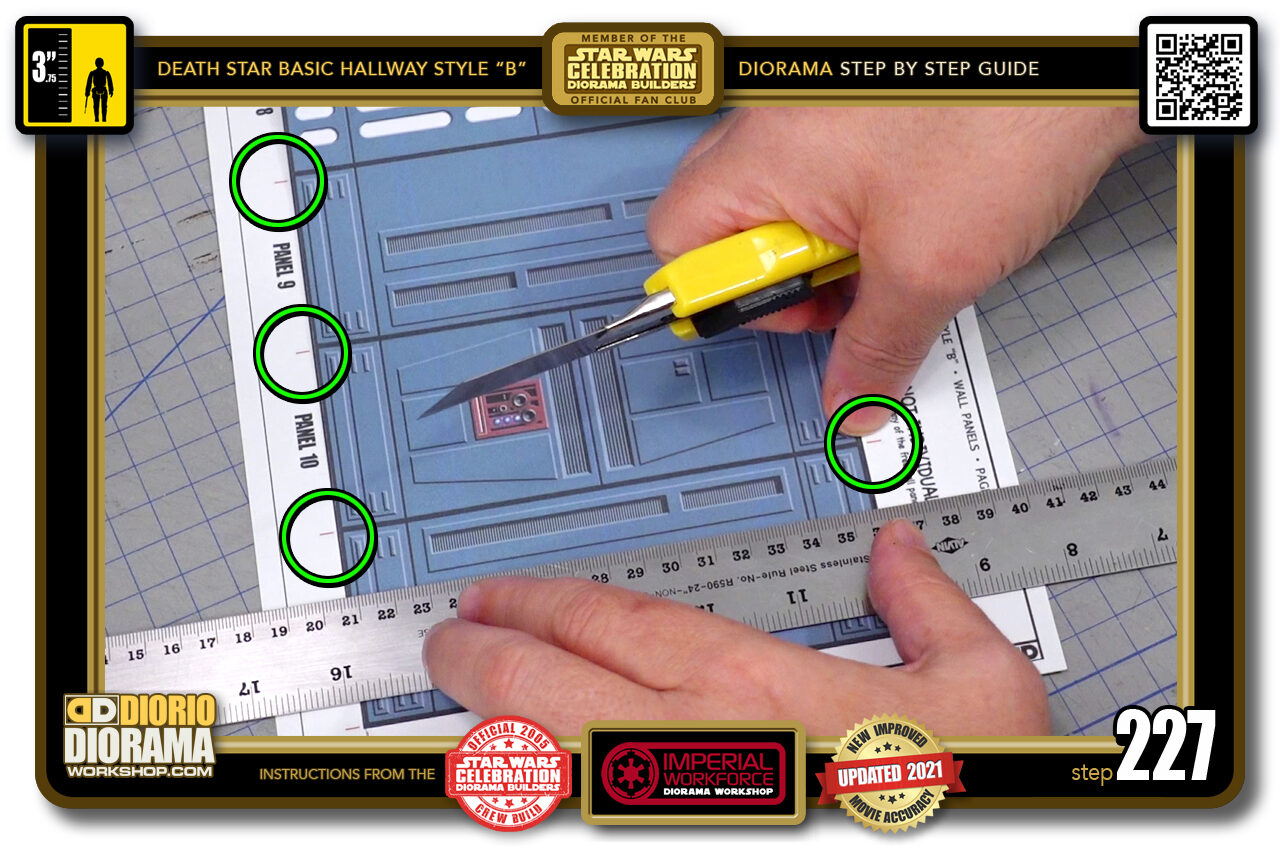
- STEP 227 > Now we want to align the individual guides to trim off between the 3rd and 4th panel. Cut that all the way through.
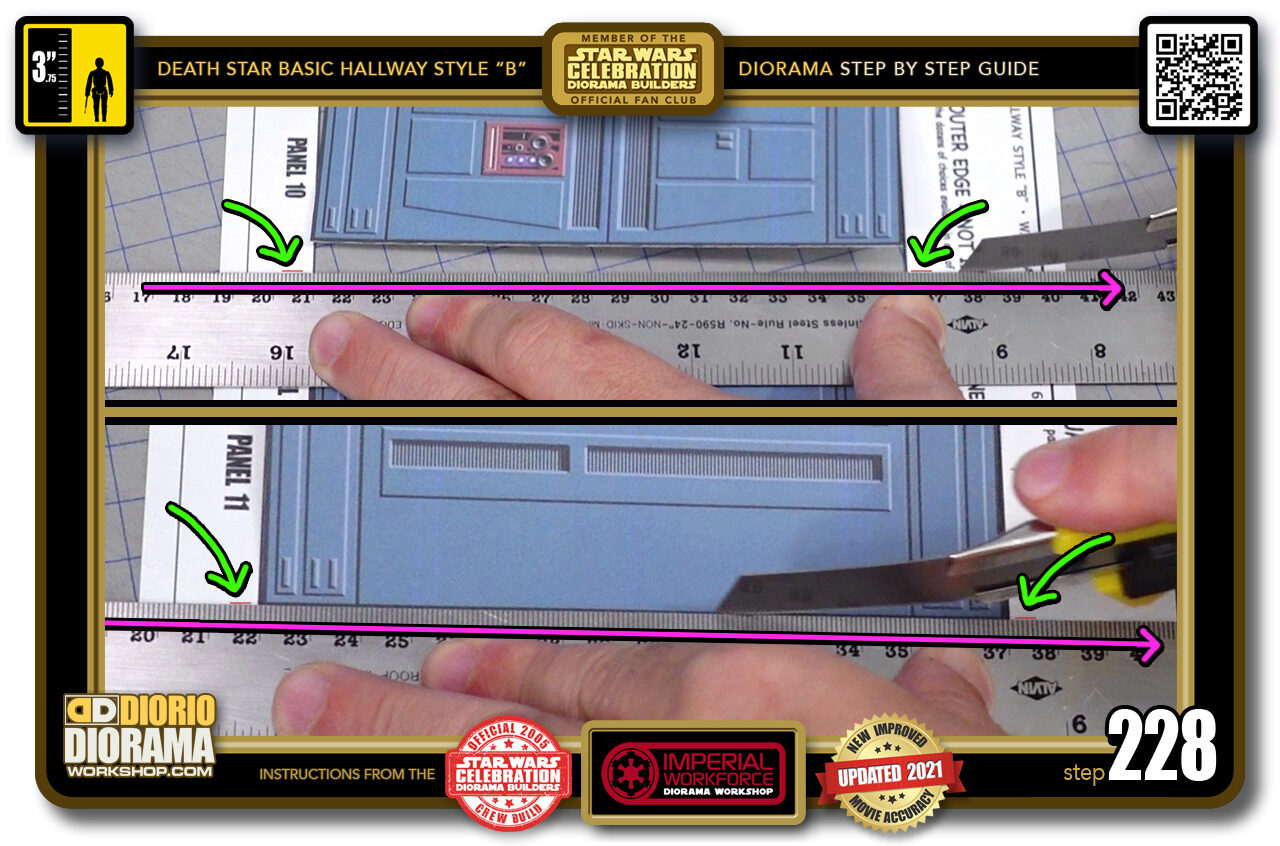
- STEP 228 > Now cut along the remaining vertical guides.
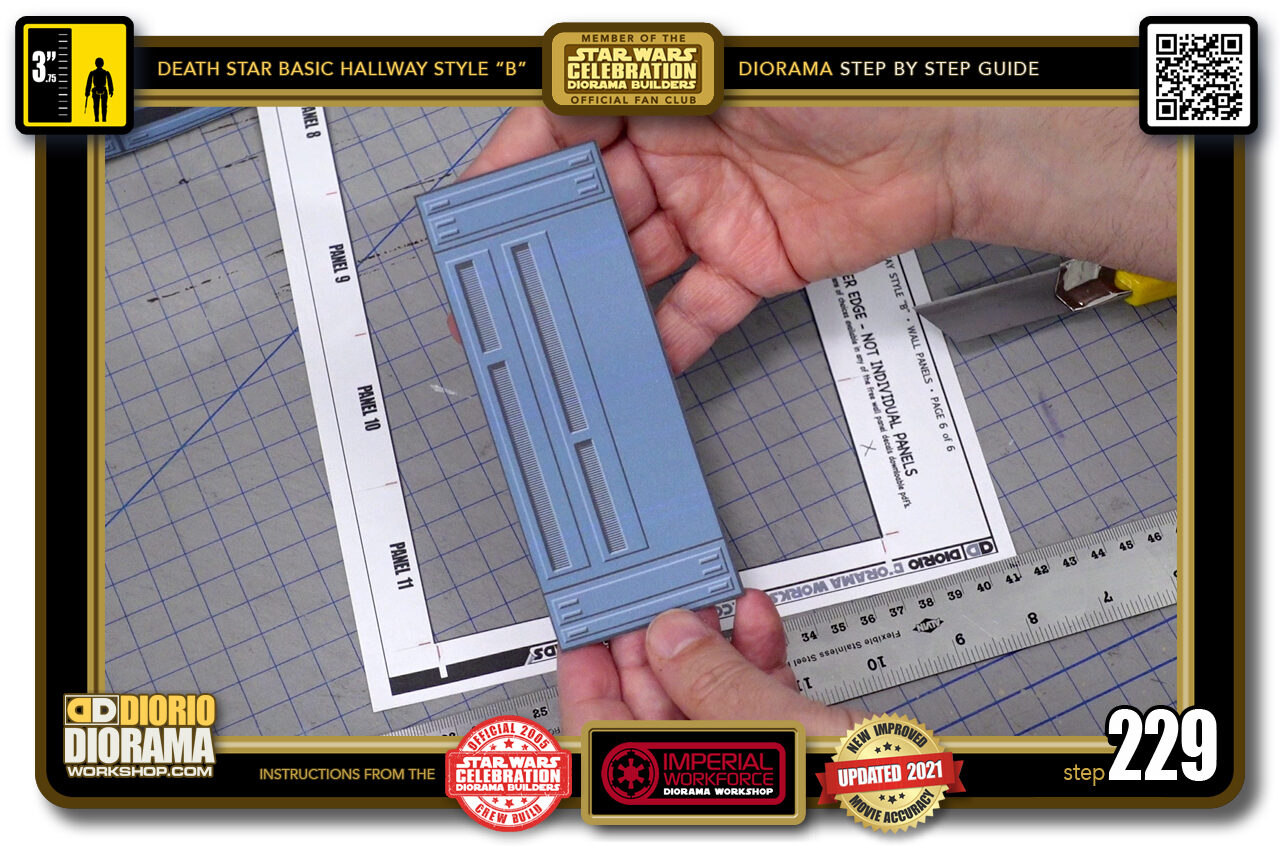
- STEP 229 > So this is the one we don't need, put it in a folder for future dioramas.
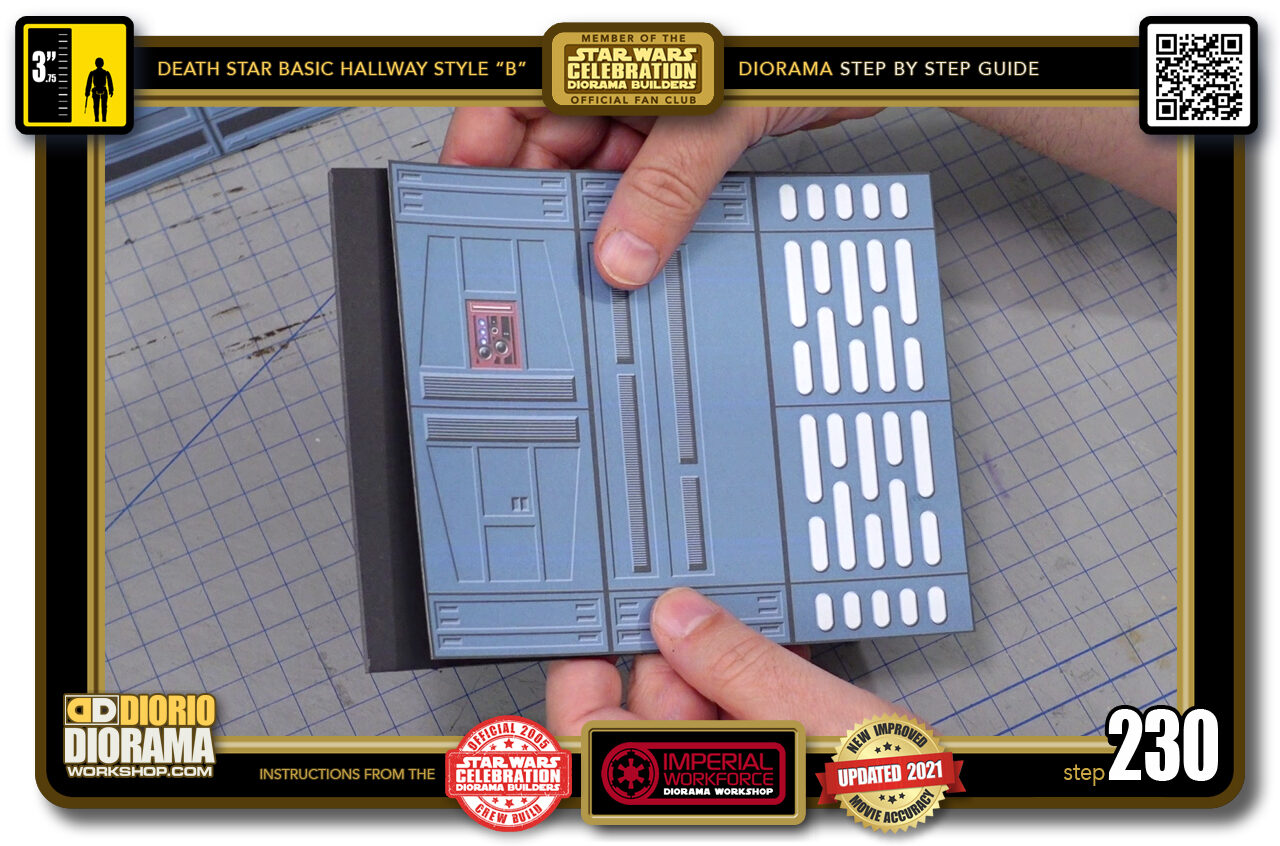
- STEP 230 > The other 3 will fit like this as 1 decal.
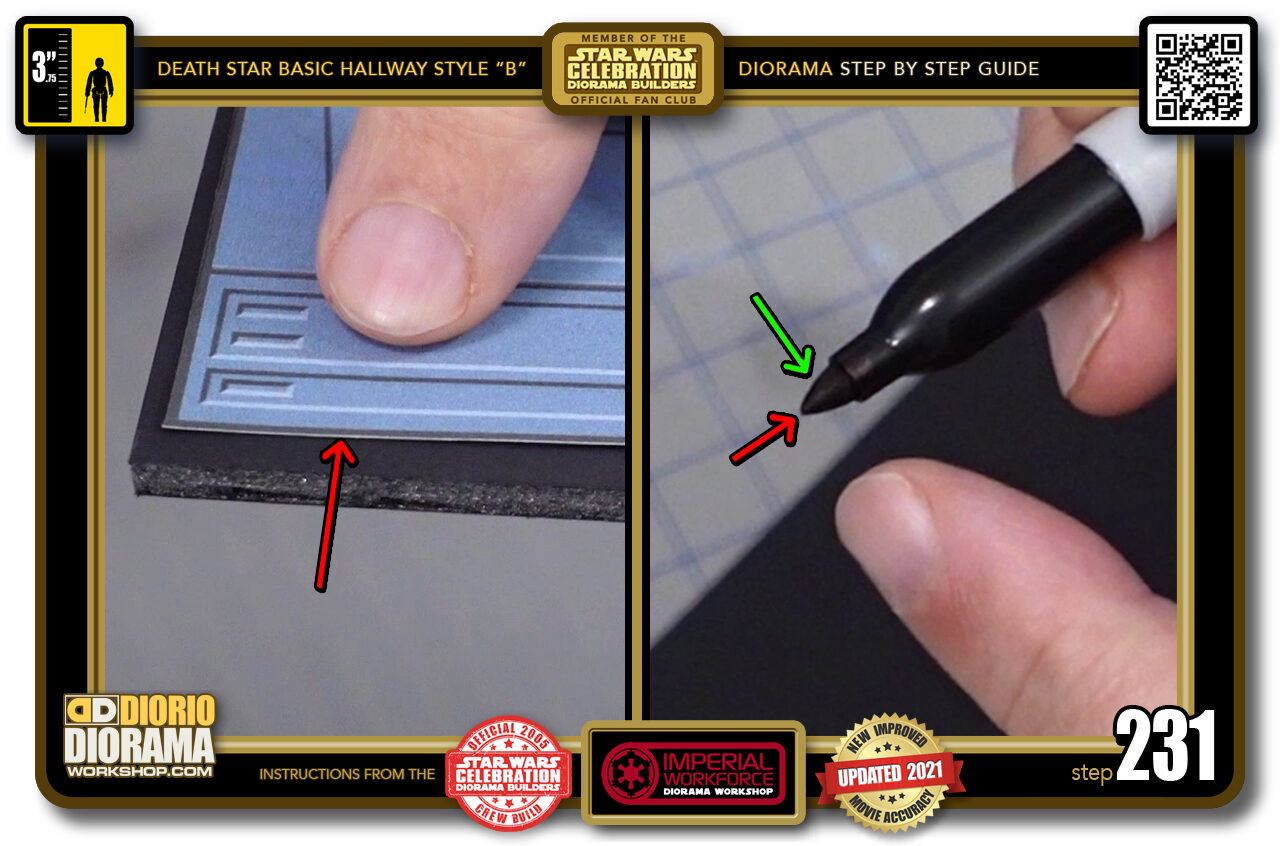
- STEP 231 > Now a trick I love to do that you don't have to but it really improved the look of your diorama is my Black Sharpie technique. You can see that the thickness of the decal creates a white line when put against the black foamcore (left image) By using the side edge (right image green arrow) of your sharpie pen, NOT the TIP (right image red arrow) your decals will blend in so perfectly like camouflage.
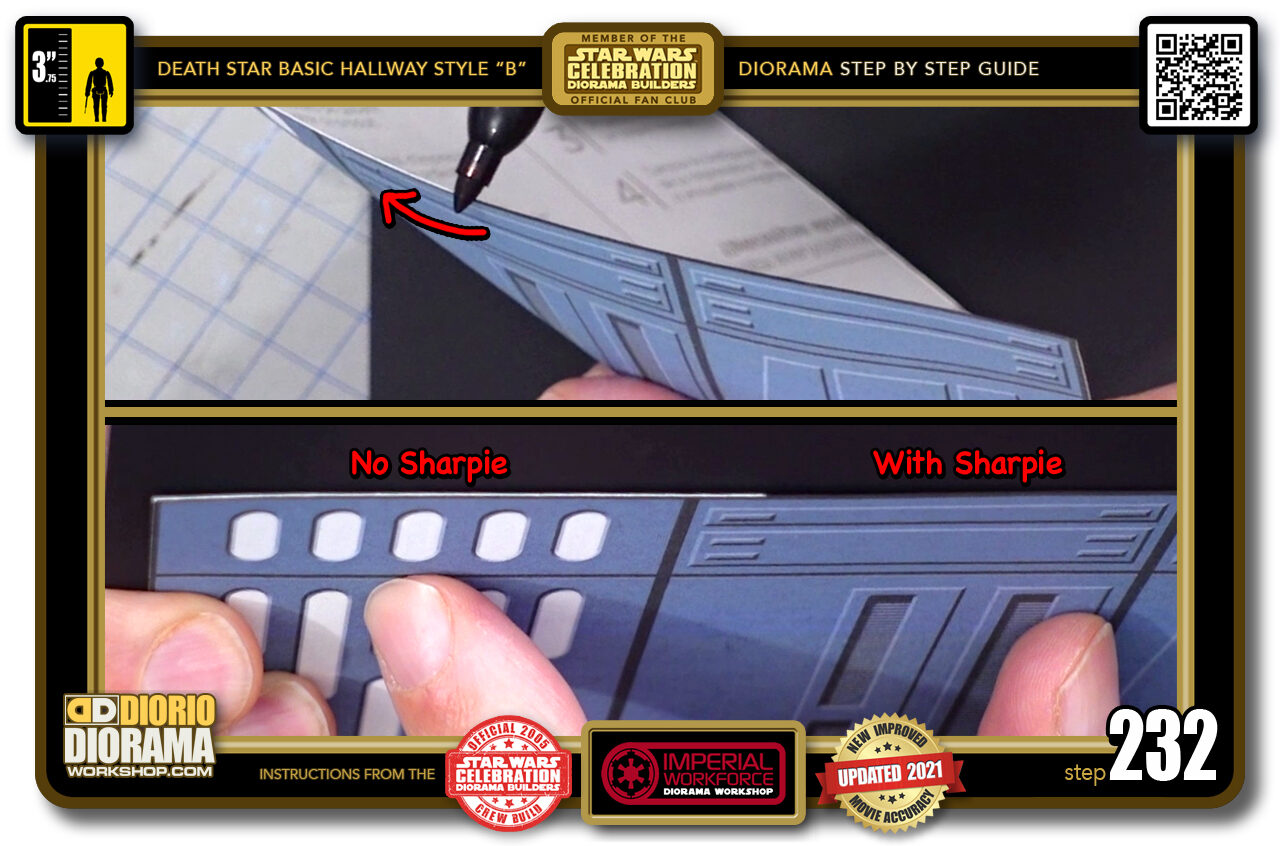
- STEP 232 > What you want to do is hold the decal facing away from you, and with your hand on the peeling side, lay the side of the black sharpie against the side of the decal and stroke it side to side (top image red arrow) When you place it onto your foamcore now, the decal will just blend to perfection (bottom image)
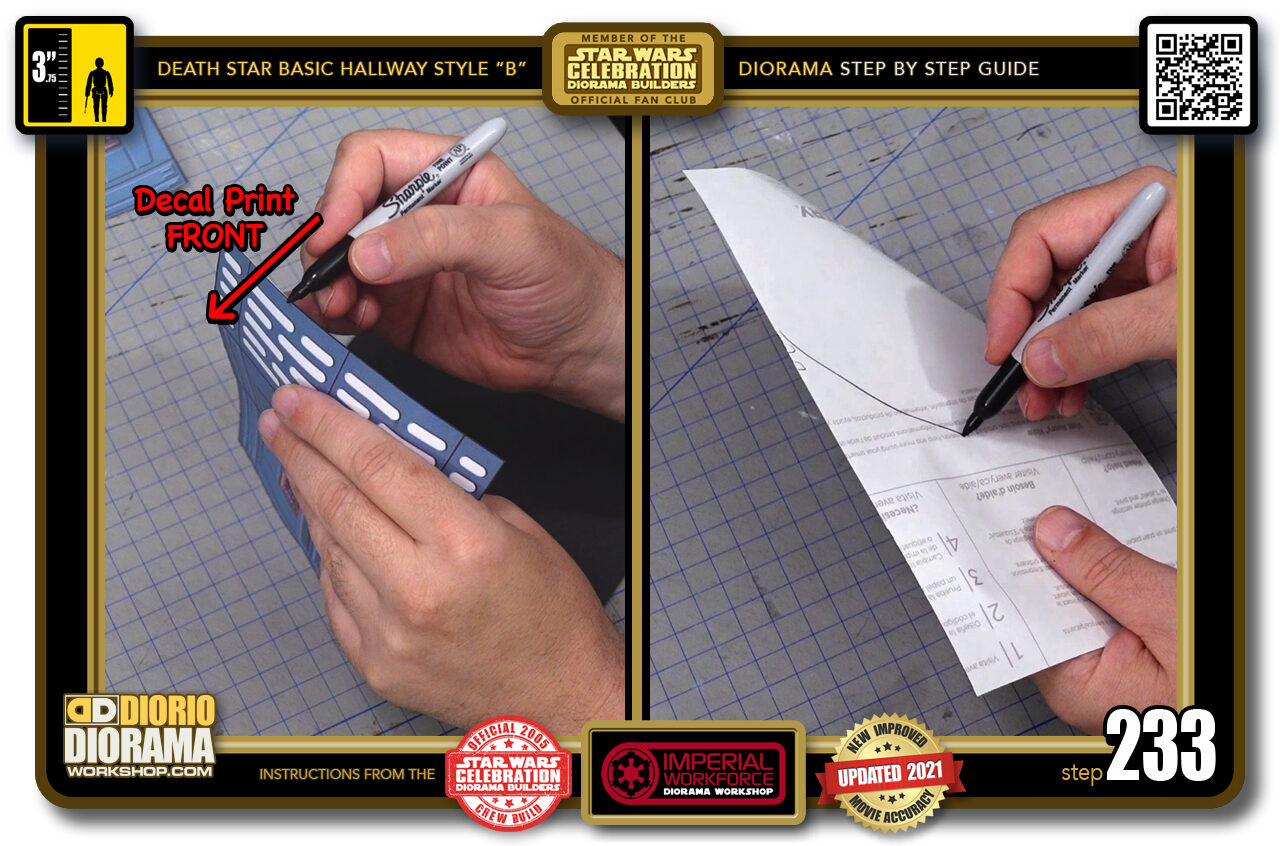
- STEP 233 > So when you colour the thickness of your decals sheets, remember to always have the image in FRONT of the pen (left image) This way if your hand slips and the pen goes onto the decal, you are damaging the rear wax paper and NOT the skin itself (right image)
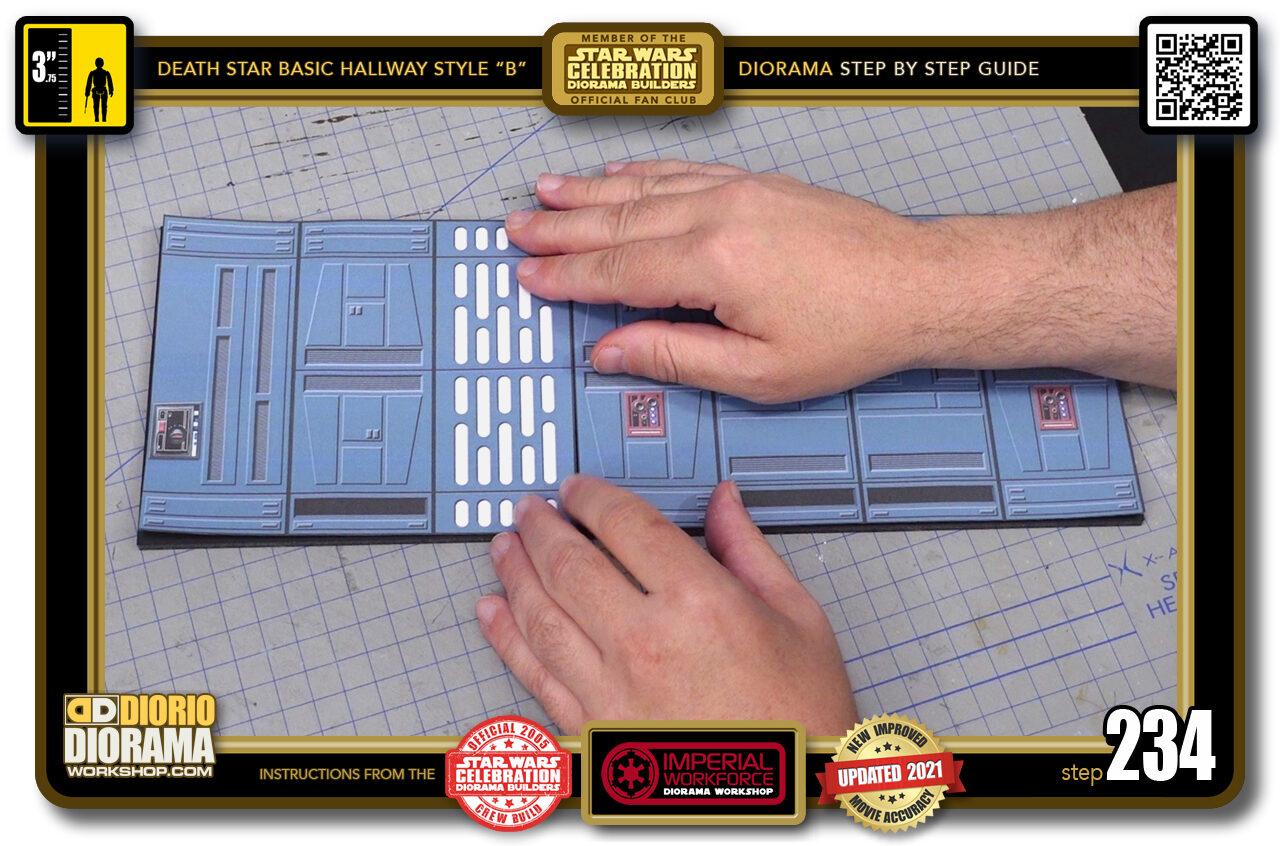
- STEP 234 > So lets start to attach our decals to our wall.
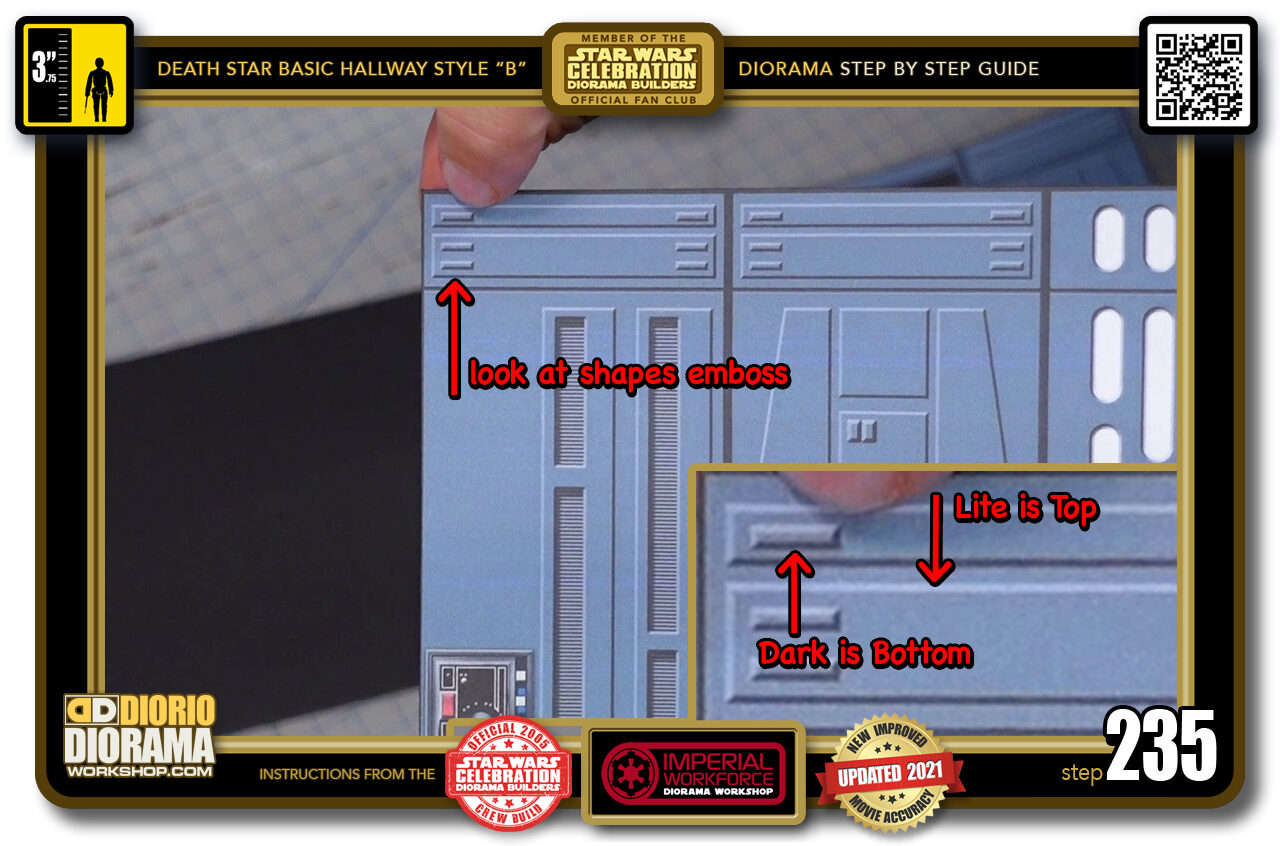
- STEP 235 > To find out if your decal is facing the right way is very easy in my design. If you look at any emboss element, you will see a white or light colour. This is the TOP. If the dark, black colour is on top your decal needs to be rotated 180 degrees.
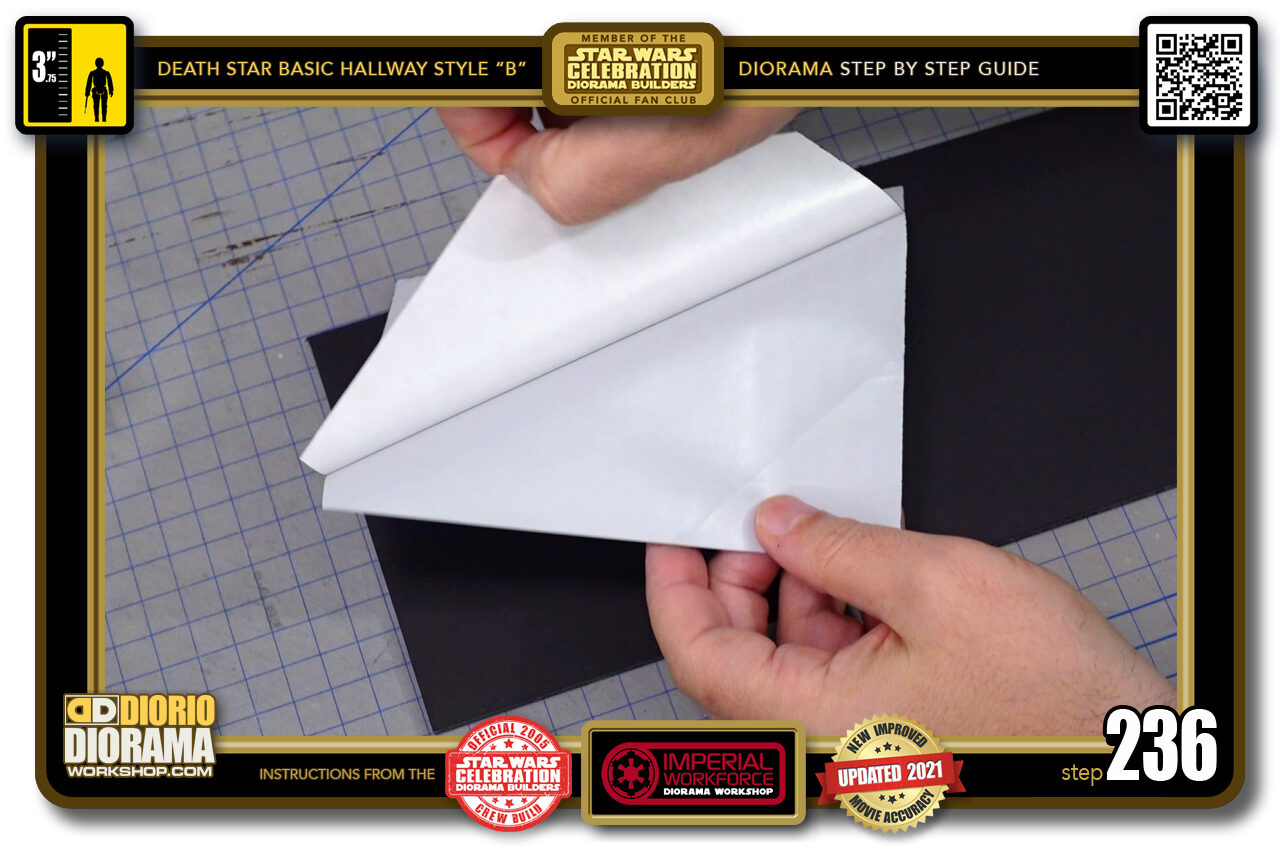
- STEP 236 > So peel your decal, if you used regular sheets again just use glue stick on both the paper and the foamcore surface.
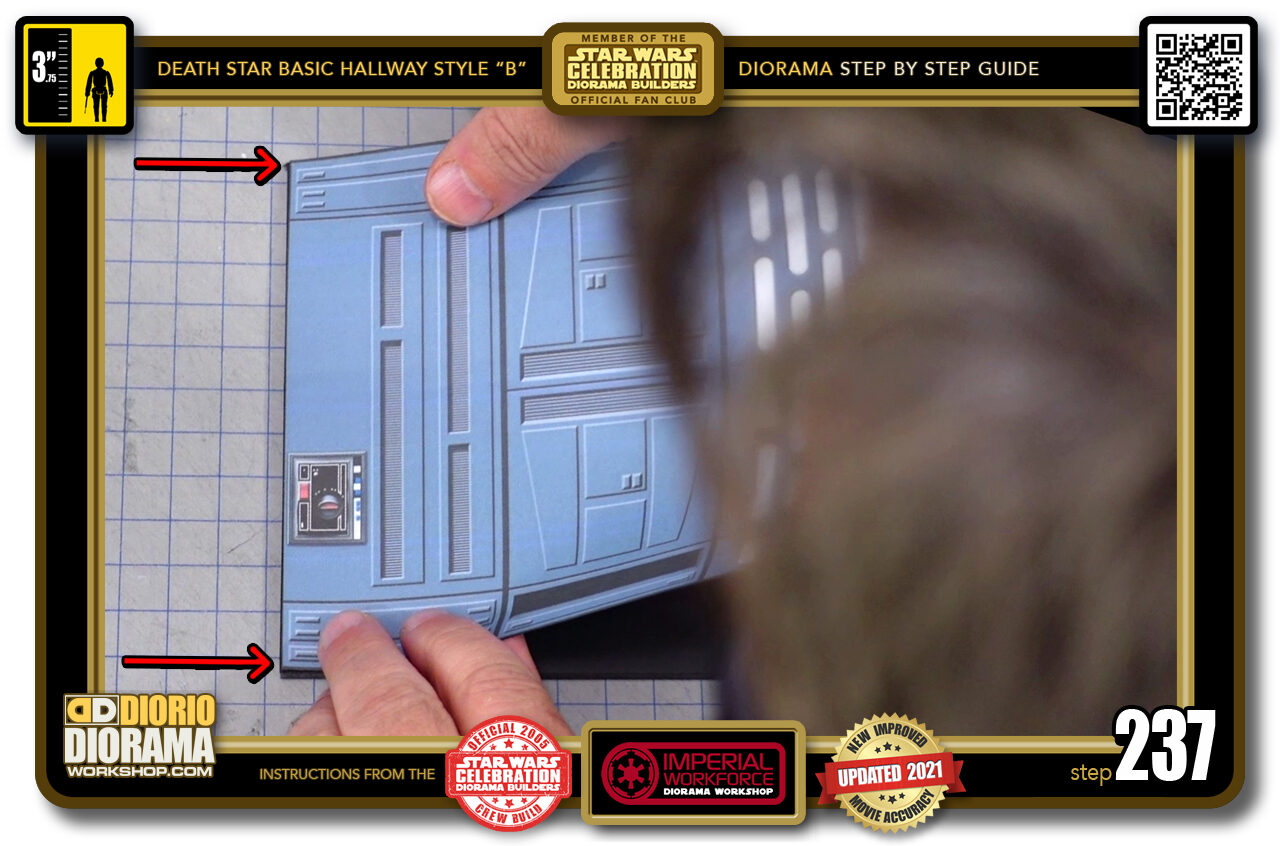
- STEP 237 > Align the decal to be centered at the top and bottom of the hallway wall (red arrows) and flush straight along the left side of the foamcore shape. KEEP THE TOP UP don't let it touch the surface just yet.
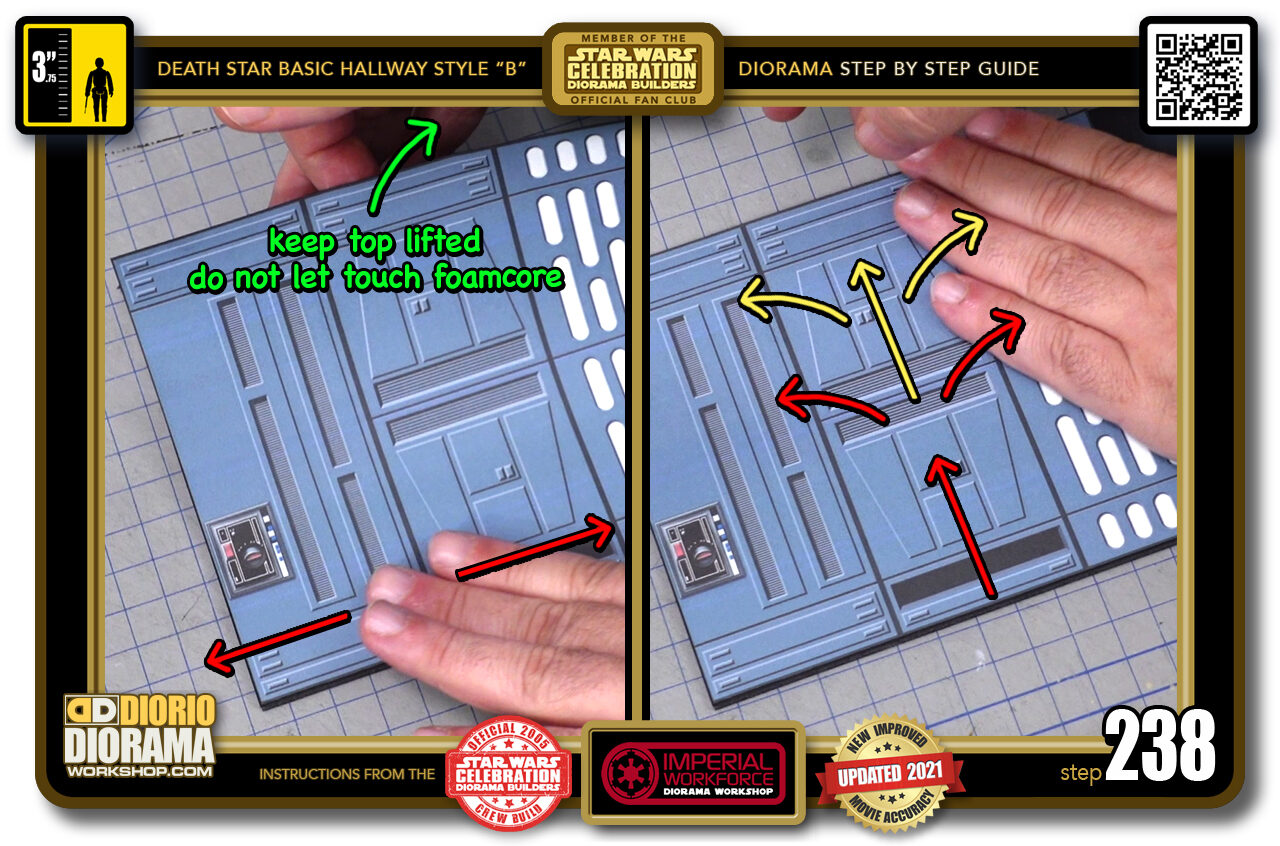
- STEP 238 > Keep the top raised off the surface still (left image green arrows) as your fingers gently press along the bottom cm (left image red arrows) Now go to the centre of your decal and move upwards and start to lower the top a little. Keep returning to the centre every time to you go to the sides (right image red arrows) Centre UP, Centre left, Centre Right, Centre UP a little more (right image yellow arrows) Centre left, Centre up, Centre right. Doing this will give you a nice smooth decal and avoid trapping air bubbles and folds.
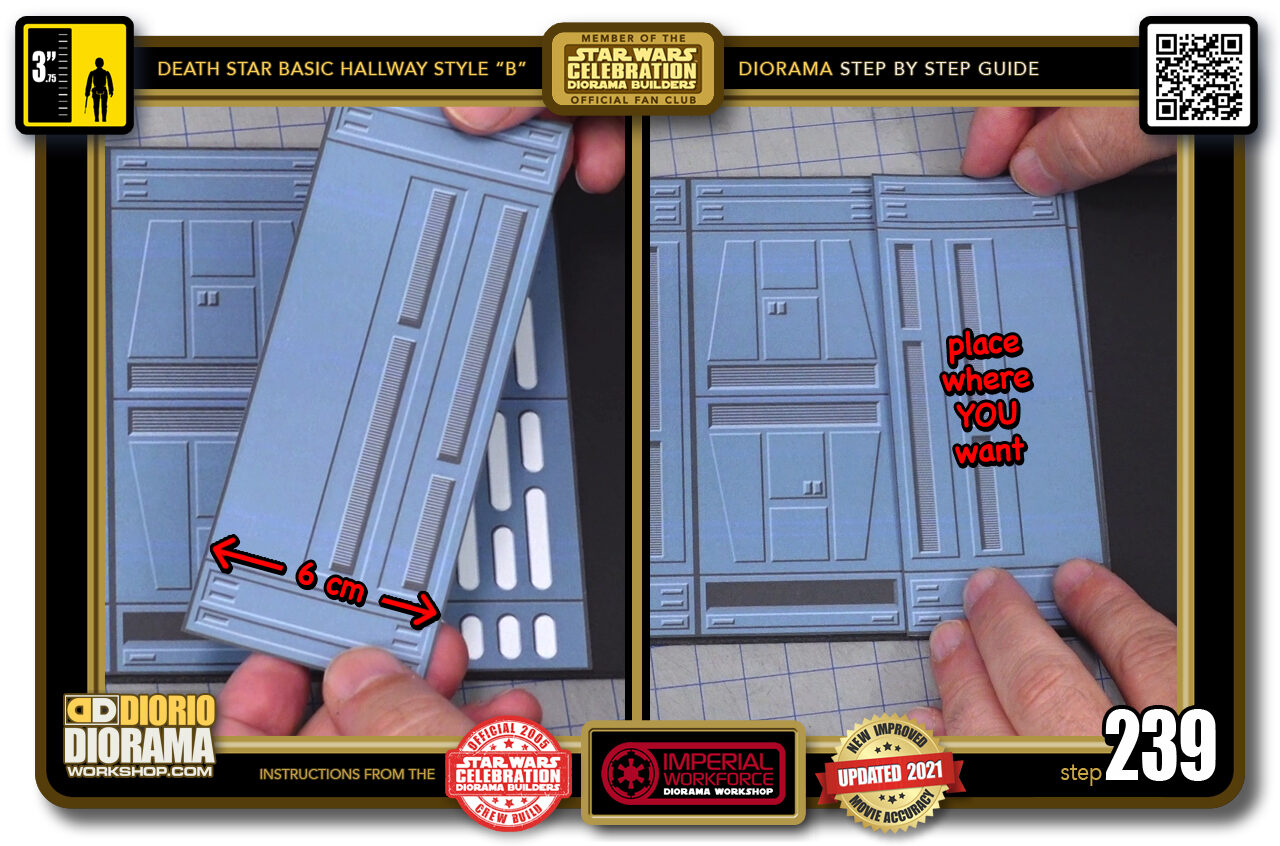
- STEP 239 > Now if you don't want to use the exact same decals as you see here in my diorama, all panels are the same 6cm width (left image) so you can download any of my Basic Hall Panel PDF's https://dioramaworkshop.com/tutorials-decals-death-star-basic-hallway-2020/ (left image) and you can place any of your choice overtop of one mine just like Lego (right image).
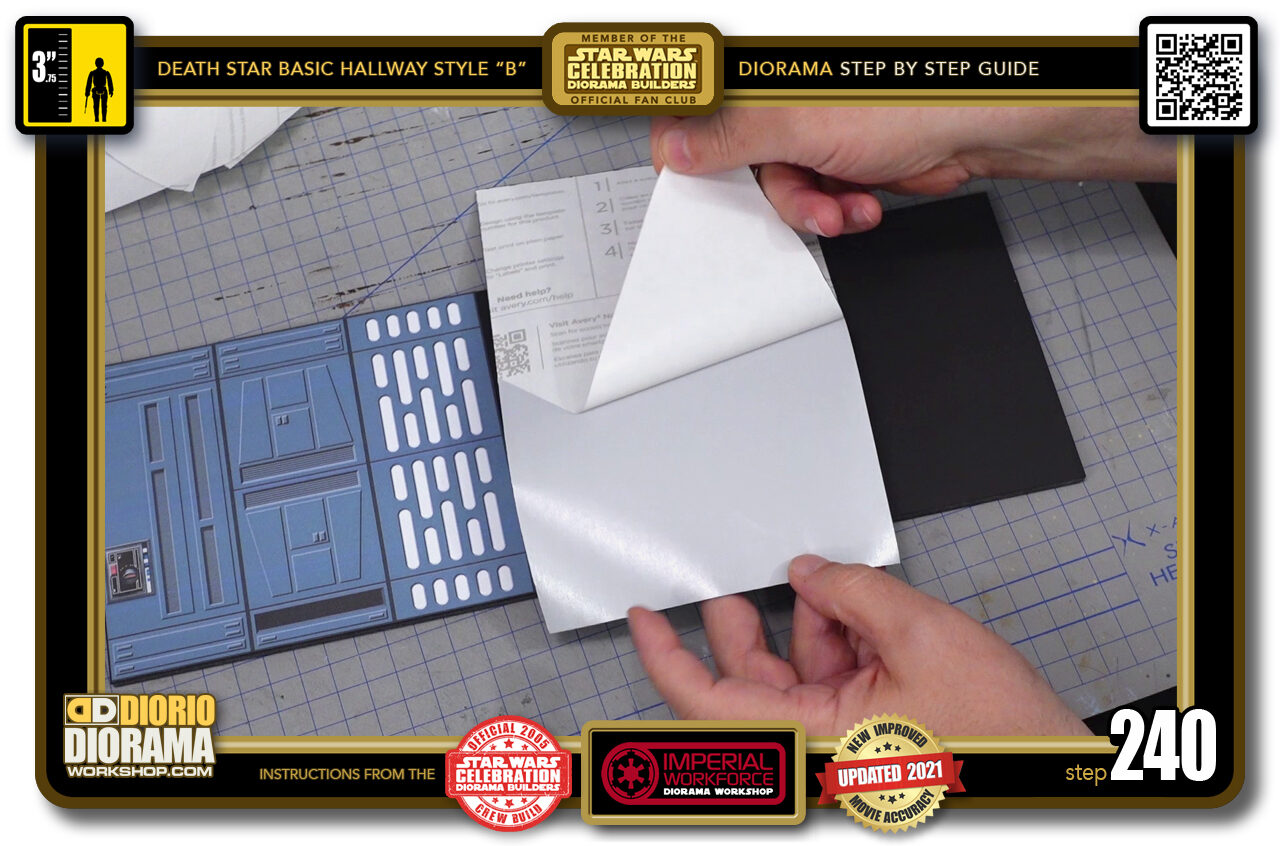
- STEP 240 > Peel back your decal.

.
Did you already build this Diorama ? At home or at our Star Wars Celebration Diorama Builders workshop ? Would you like to show it in the site’s GALLERY VISITORS DIORAMAS section, YES ? That is Awesome !!! You can find out all the details on how to email me your photos on the VISITORS SUBMISSIONS INFO page … When I get your photos, I will create your very own page just like this one. You may not realize it but work does inspire others to join in the fun of making Action Figure Dioramas.
.
NOT FOR RESALE ALL Decals, tutorials and artwork are ©FrankDiorio (dioramaworkshop.com) and offered FOR FREE to the fans – that would be you ? so you can build and display my diorama designs in your very own home. I realize I cannot control what one does with my graphics once I place them on the web, I can only ask you as one fan to another, please respect the artist and do not be that jerk who uses my designs and tutorials to build a copy of my work only to sell it on EBAY or trade/sale groups and forums. Thank You. Frank.
.
.
.
If you have a facebook account, why not join the Official Diorama Builders Fan Club today, simply click the logo link below.
 .
.
Catch up with fellow visitors and exchange stories, read cool interviews with the crew, exchange photos, fun surprises and grab some FAN ONLY merchandise next year at actual future conventions ?
.
©2021 Frank Diorio DioramaWorkshop.Com
.
IF YOU LIKE WHAT YOU SEE, PLEASE SHARE WITH YOUR FRIENDS
USING THE SOCIAL MEDIA BUTTONS BELOW


