


-

- STEP 161 > Place some glue stick to the corner foamcore surface (left box) as well as the entire back surface of your decal (right box).
-
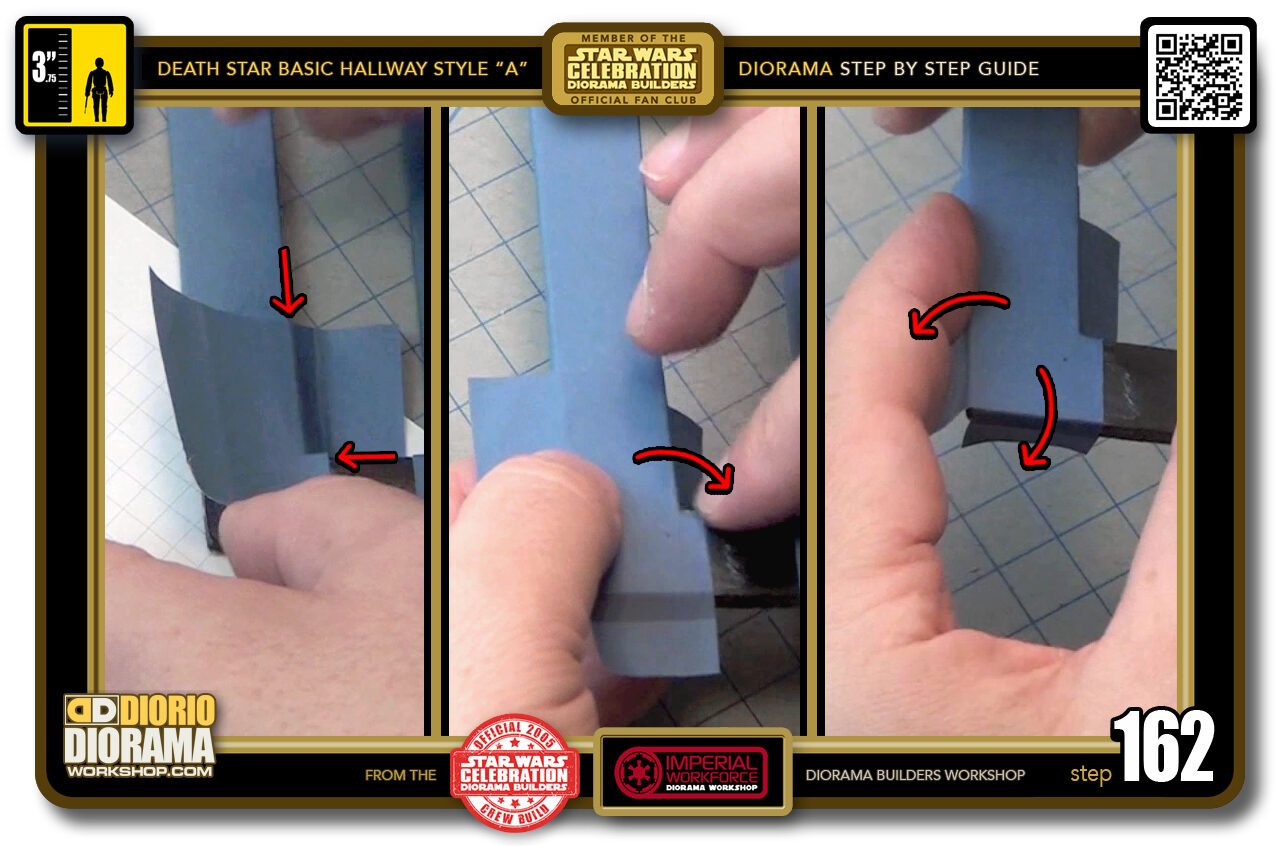
- STEP 162 > Remember we are mirroring the other corner, so the left box shows us where we want to align our decal. Then start the folds around the edges.
-
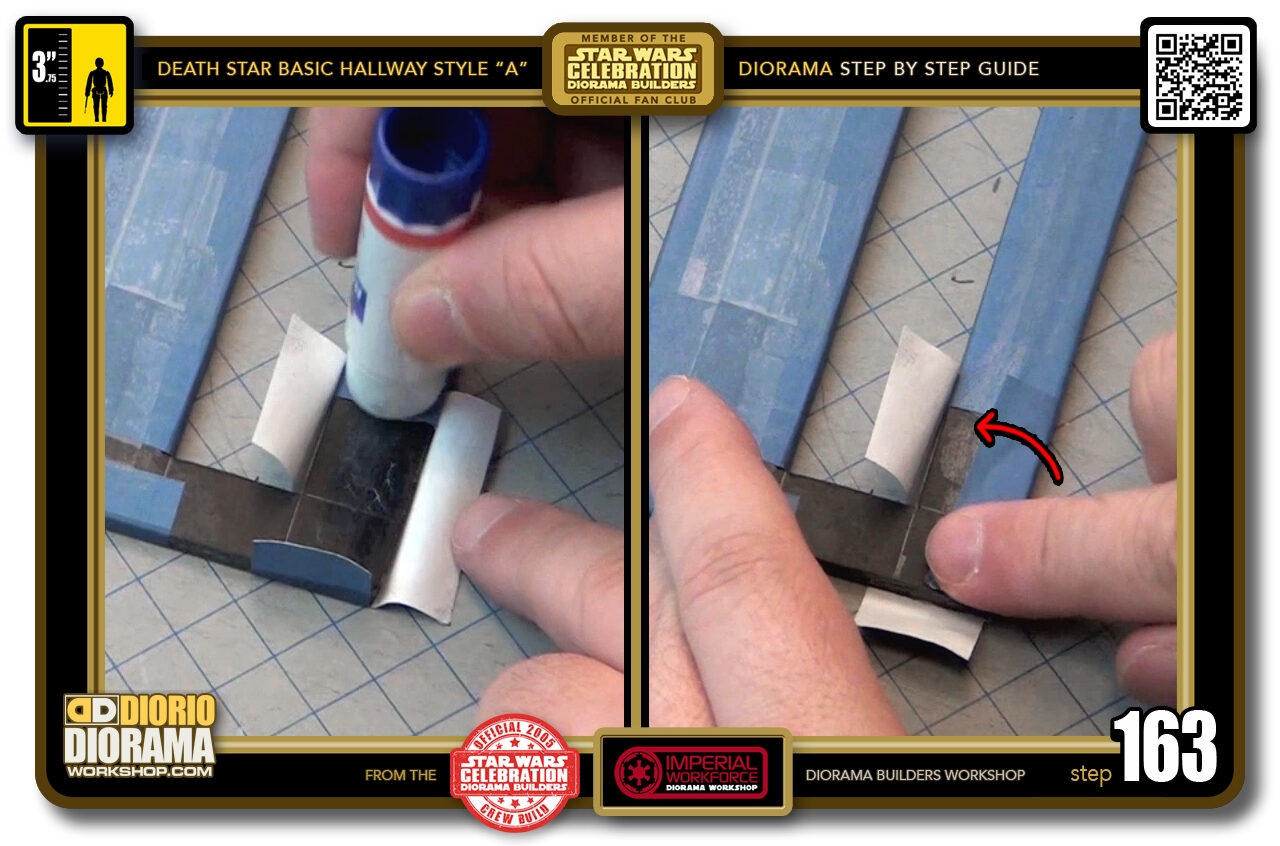
- STEP 163 > Flip your frame to it's back side and apply some glue stick to the foamcore surface (left box). Now PULL and FOLD the OUTER side flap over the "C1" edge.
-
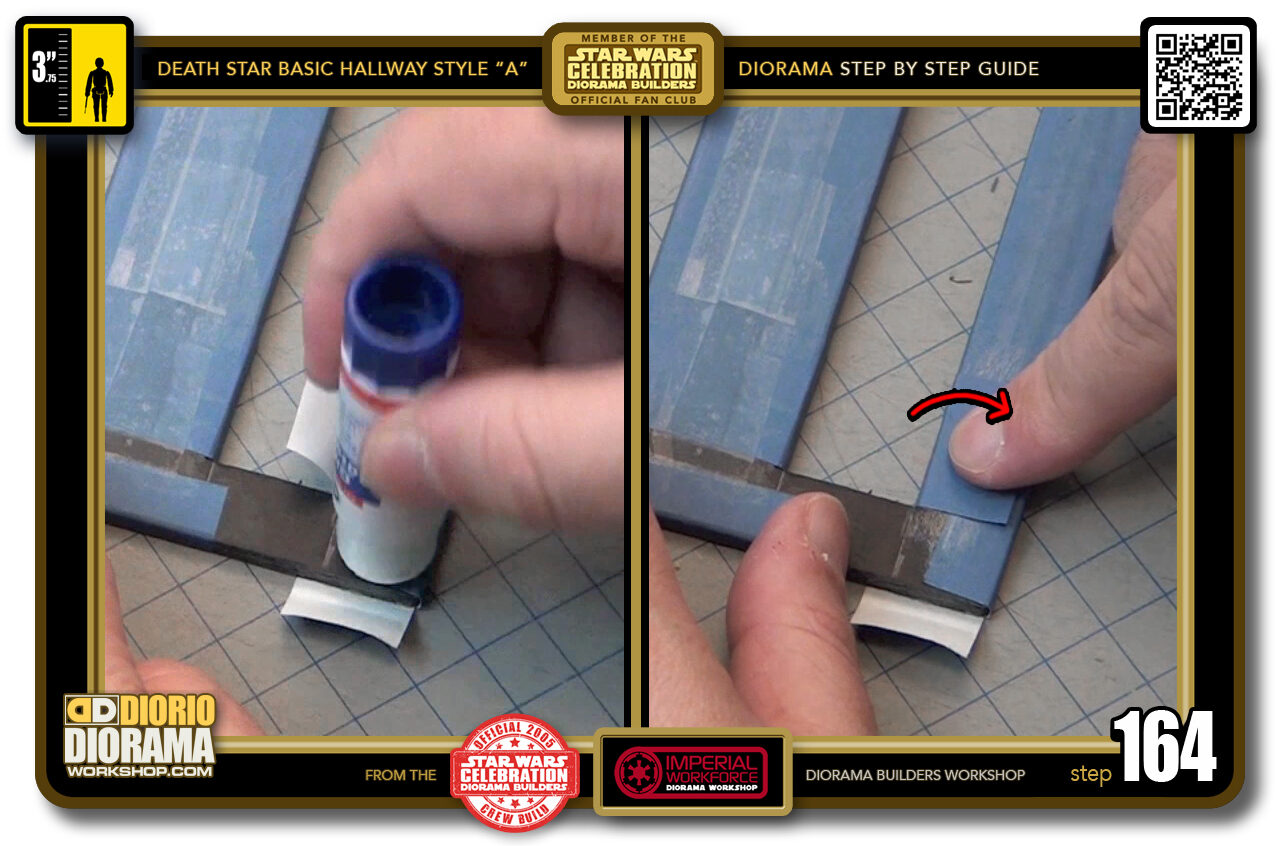
- STEP 164 > Place some glue stick over the decal and exposed foamcore (left box) then PULL and FOLD the INNER side's flap around the edge, pressing down to make sure it is secure (right box).
-
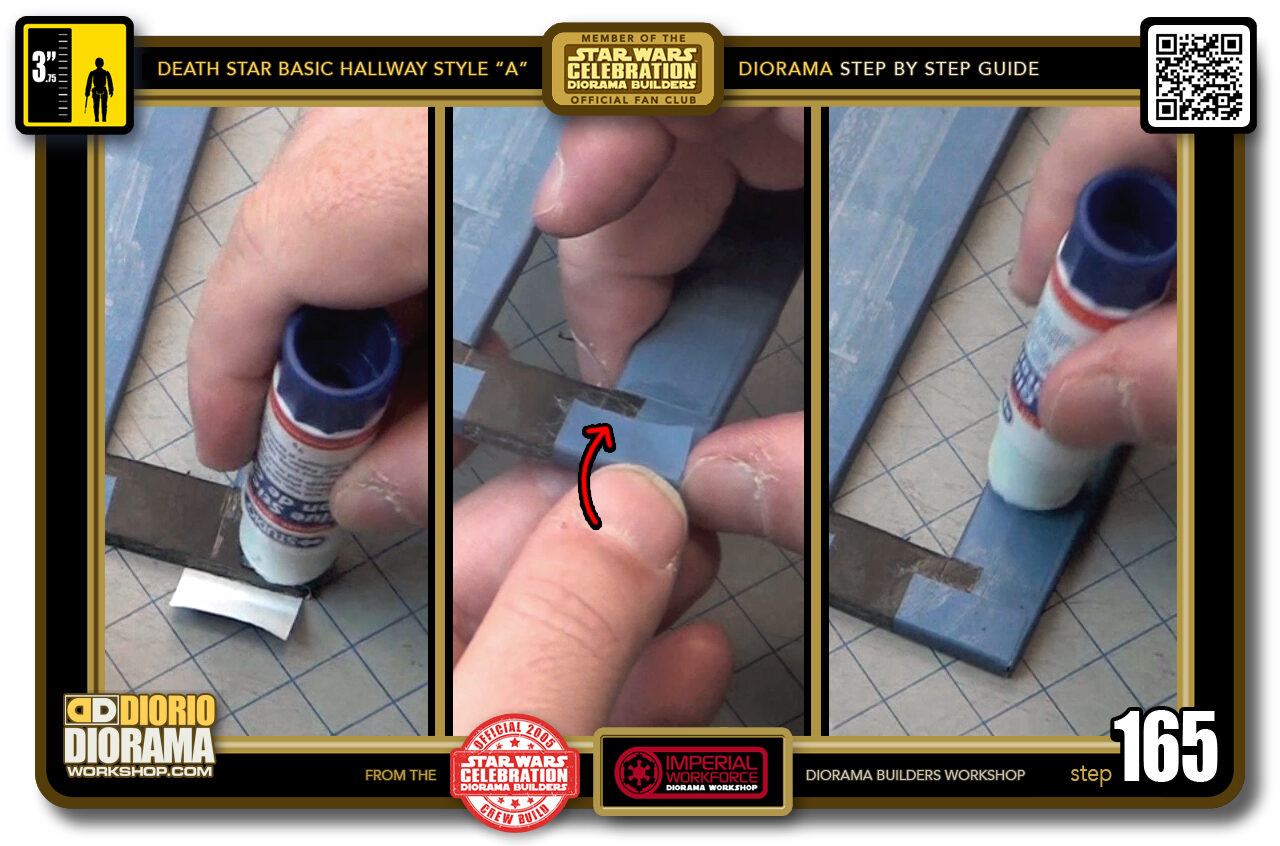
- STEP 165 > Some glue stick on the remaining area (left box) Pull and FOLD the front end flap over the front edge (centre box) and seal the deal with a coat of glue stick all over the seams (right box).
-
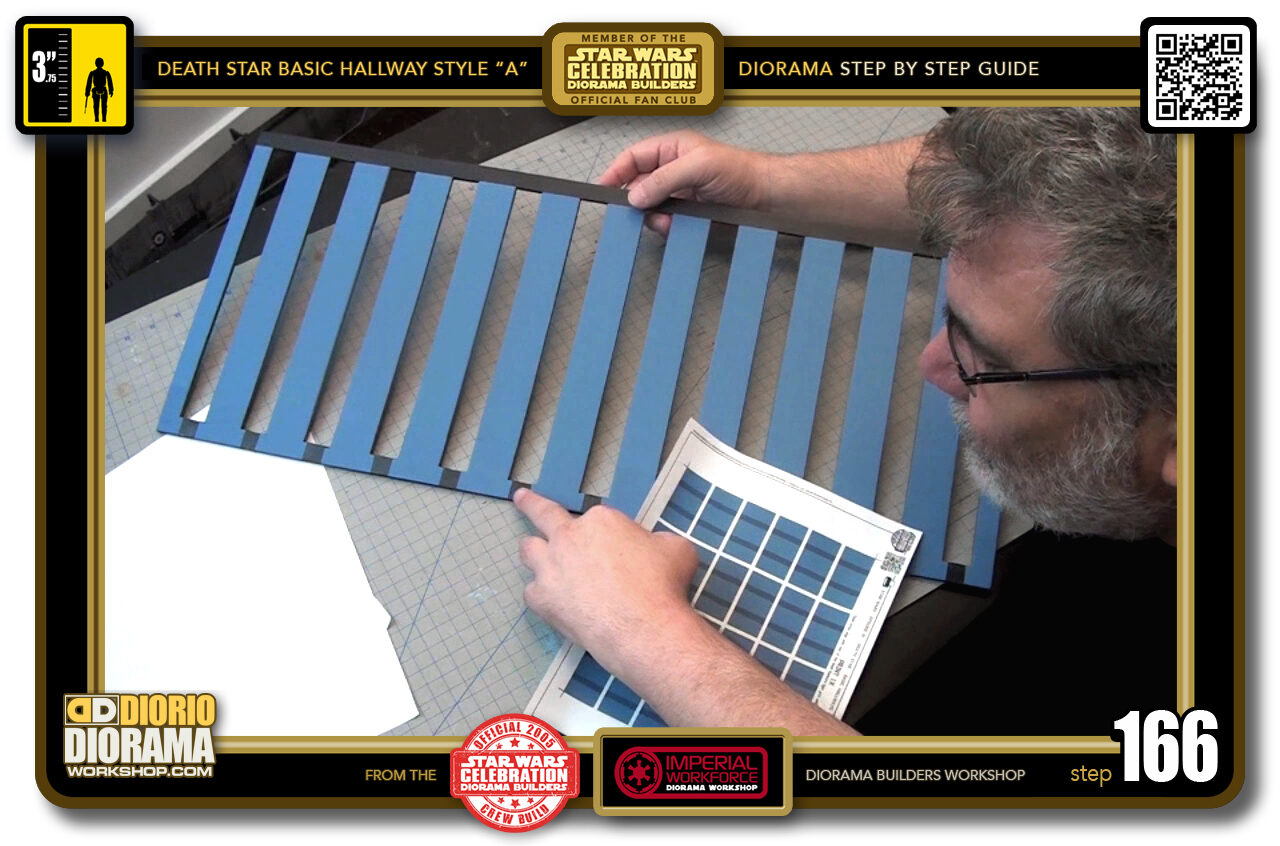
- STEP 166 > And there you have it all your end caps including the 2 modified corners are in place. You think you are finished right ? Well there is still ONE LAST decal to apply 🙂
-
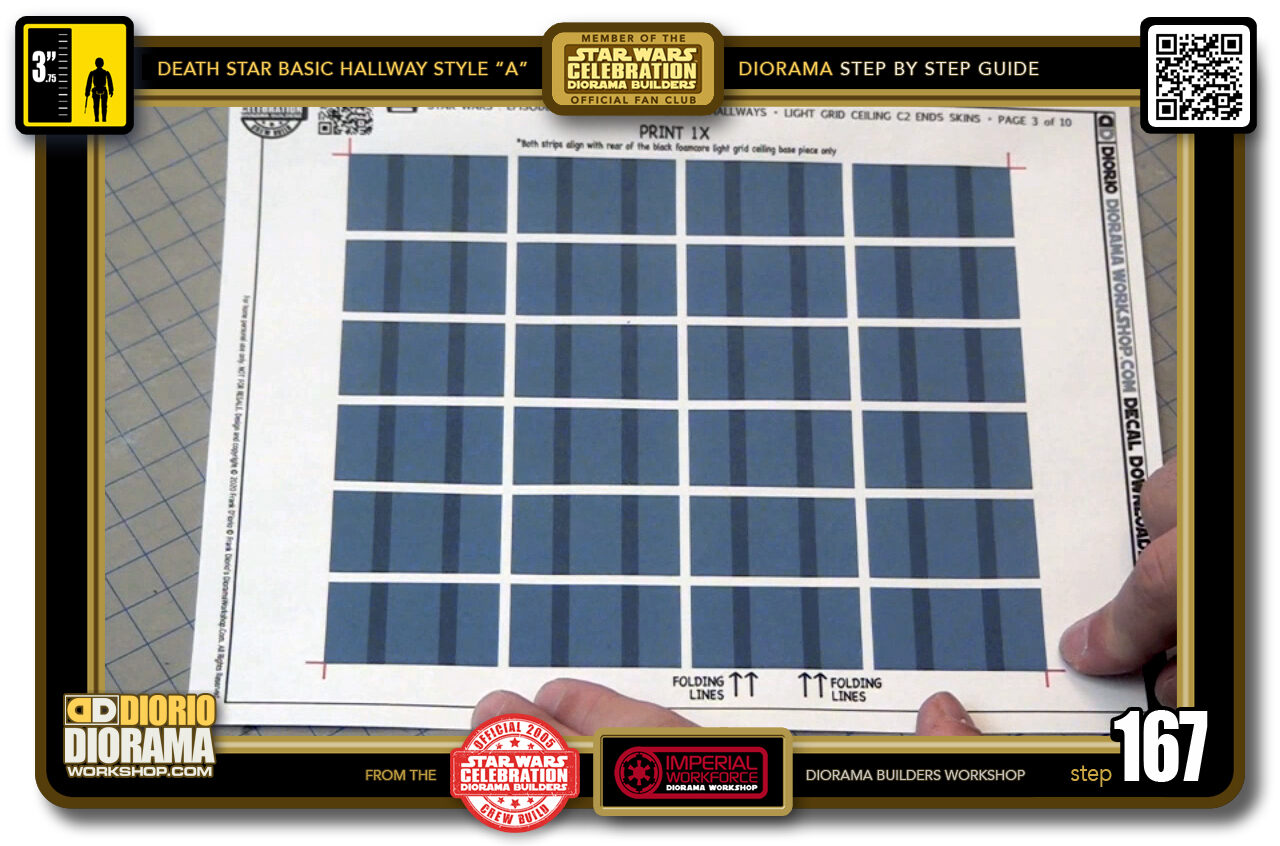
- STEP 167 > These are the rear strips that need to be folded over the opposite end of where you attached your caps.
-
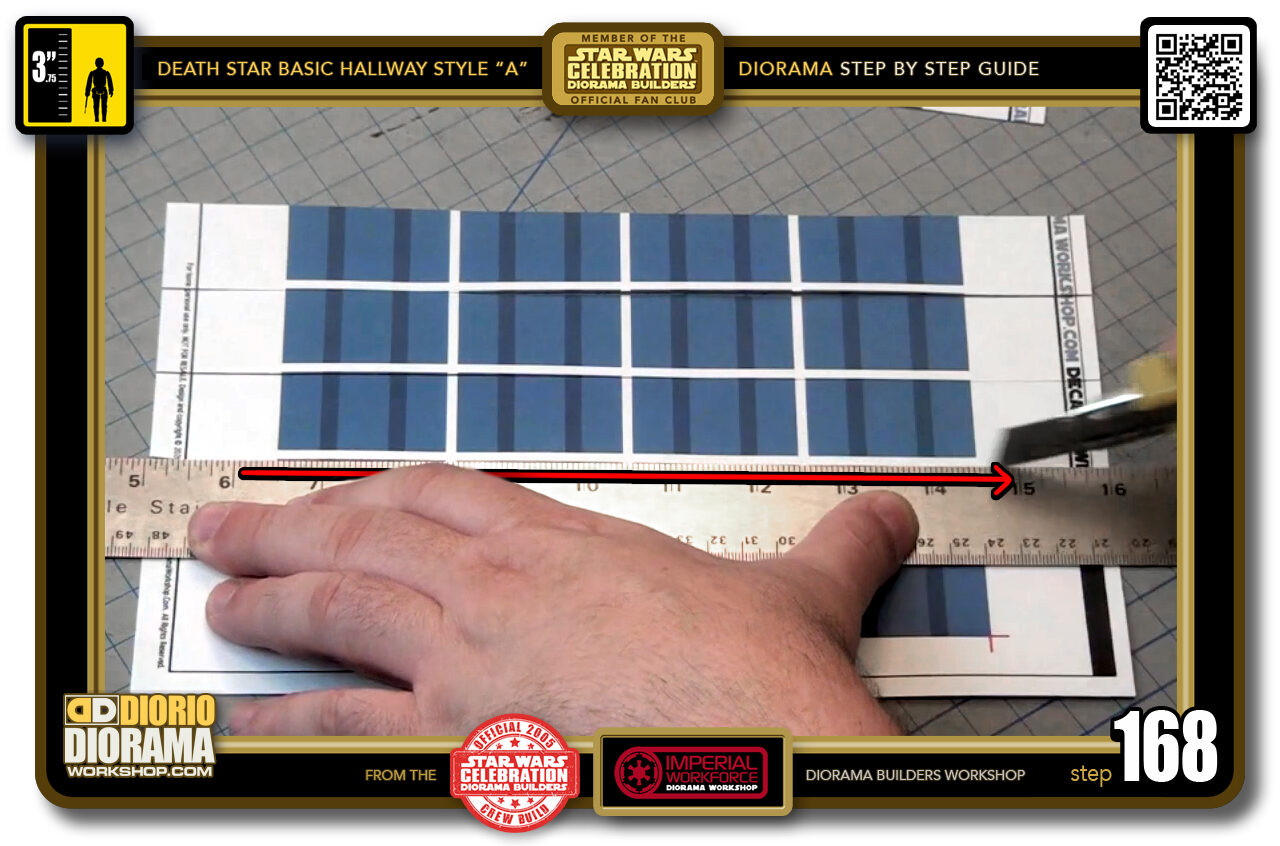
- STEP 168 > We need to cut them all first, the easiest way is to do all the long horizontal cuts first.
-
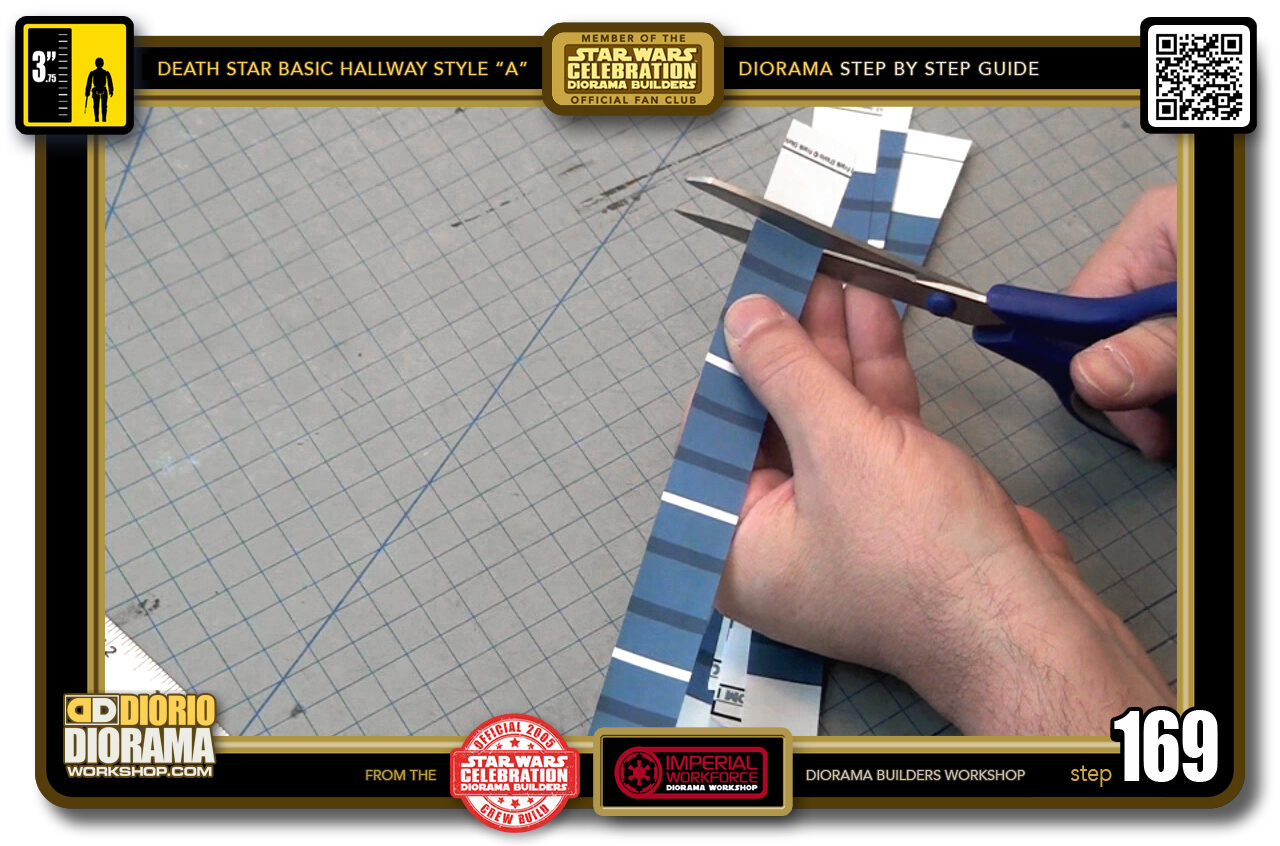
- STEP 169 > Once you have the long strips done, it's simple to trim out the side ends. REMEMBER to CUT a little INSIDE the BLUE. You DON'T WANT WHITE LINES around your shapes.
-
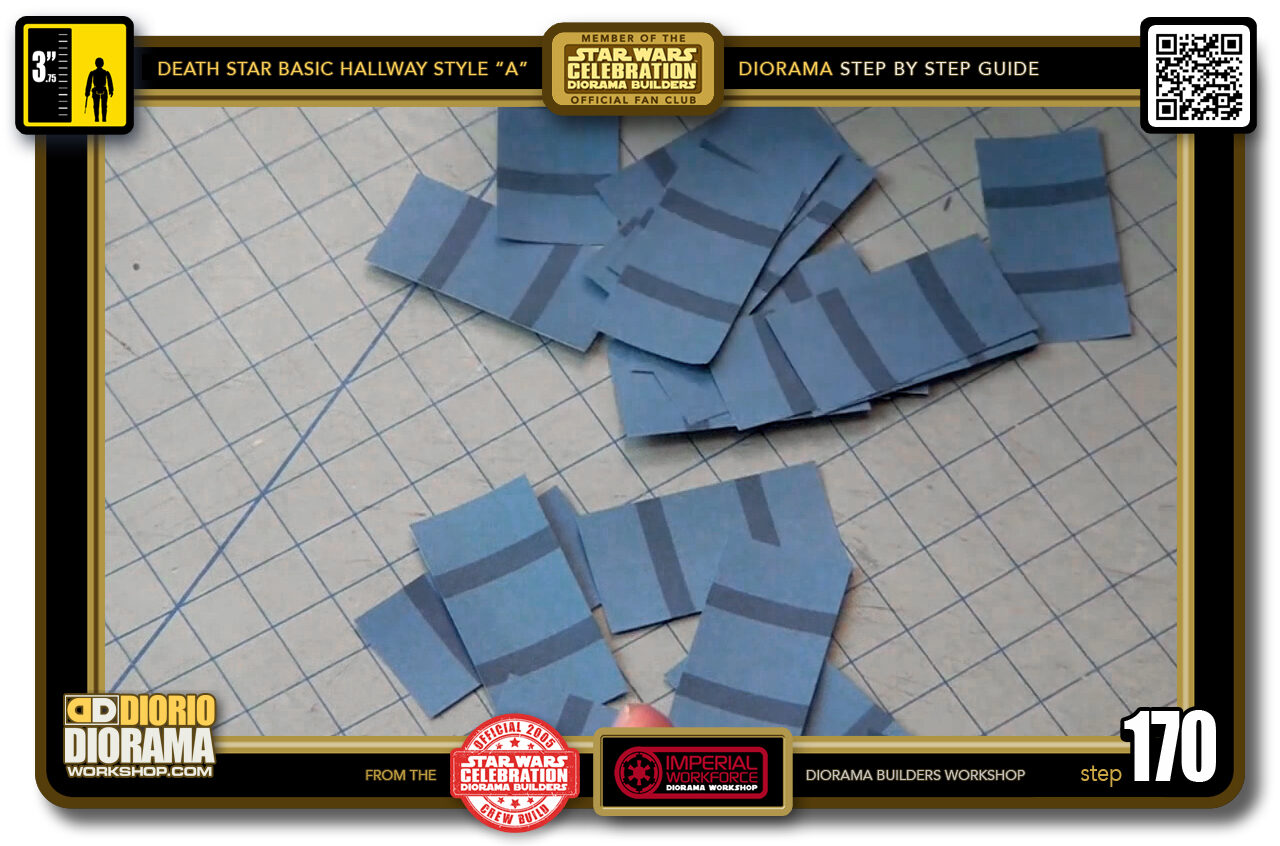
- STEP 170 > That was the easy part - now we have to FOLD along every DARK folding guides.
-

- STEP 171 > As you did for the main body and caps, start with soft pressure to get the fold started, then press harder until you pinch them real tight for a perfect 90 degree angle.
-

- STEP 172 > These will fit right over the ends like this. In the photo the decal is pushed to the right so you can see the alignment. The real position is right in the centre.
-

- STEP 173 > Apply some glue stick to your foamcore zone (left box) as well as everywhere on your decal surface (right box).
-
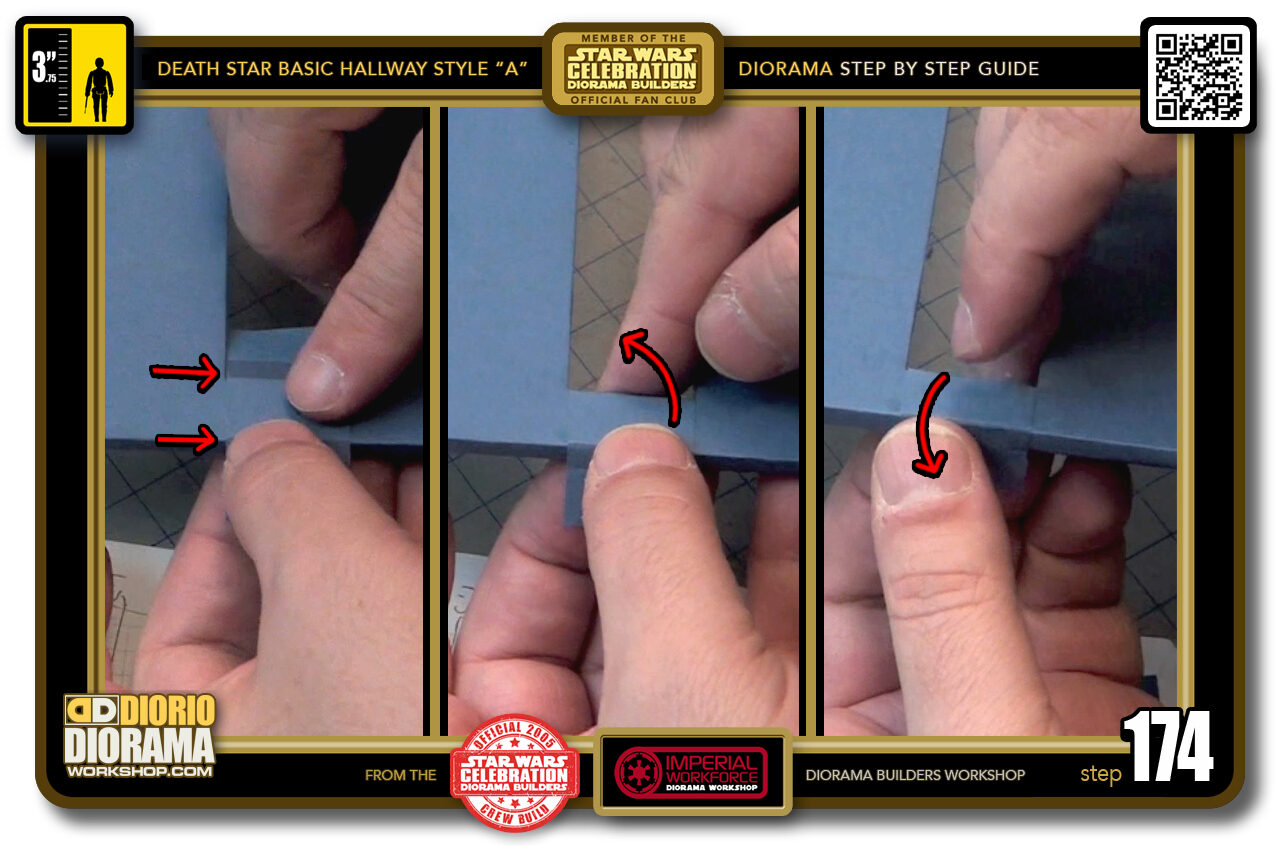
- STEP 174 > The application is very simple, first align the dark blue folding guides with each side's edge of your frame end (left box). Then gently FOLD over each flap around to the rear.
-
- STEP 175 > Flip your frame to it's back side and apply glue stick to the exposed area (left box) then Pull and FOLD over the INNER flap onto the foamcore surface (right box) Make sure your edge has no air bubbles.
-
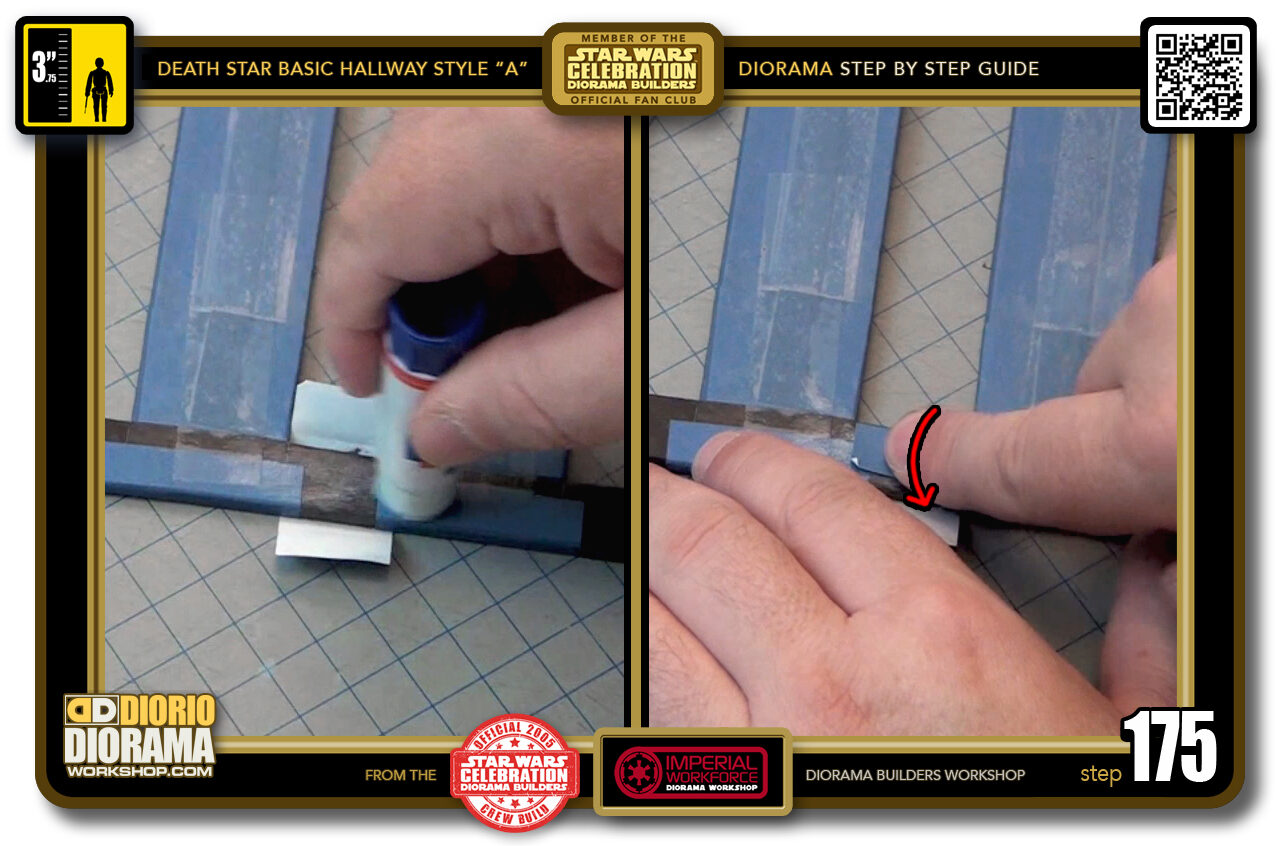
- STEP 176 > Some more glue stick goes over again this time on top of the first flap and remaining exposed foamcore (left box). Pull and FOLD over the edge as you see in the centre box and seal the seams with some glue stick (right box).
-
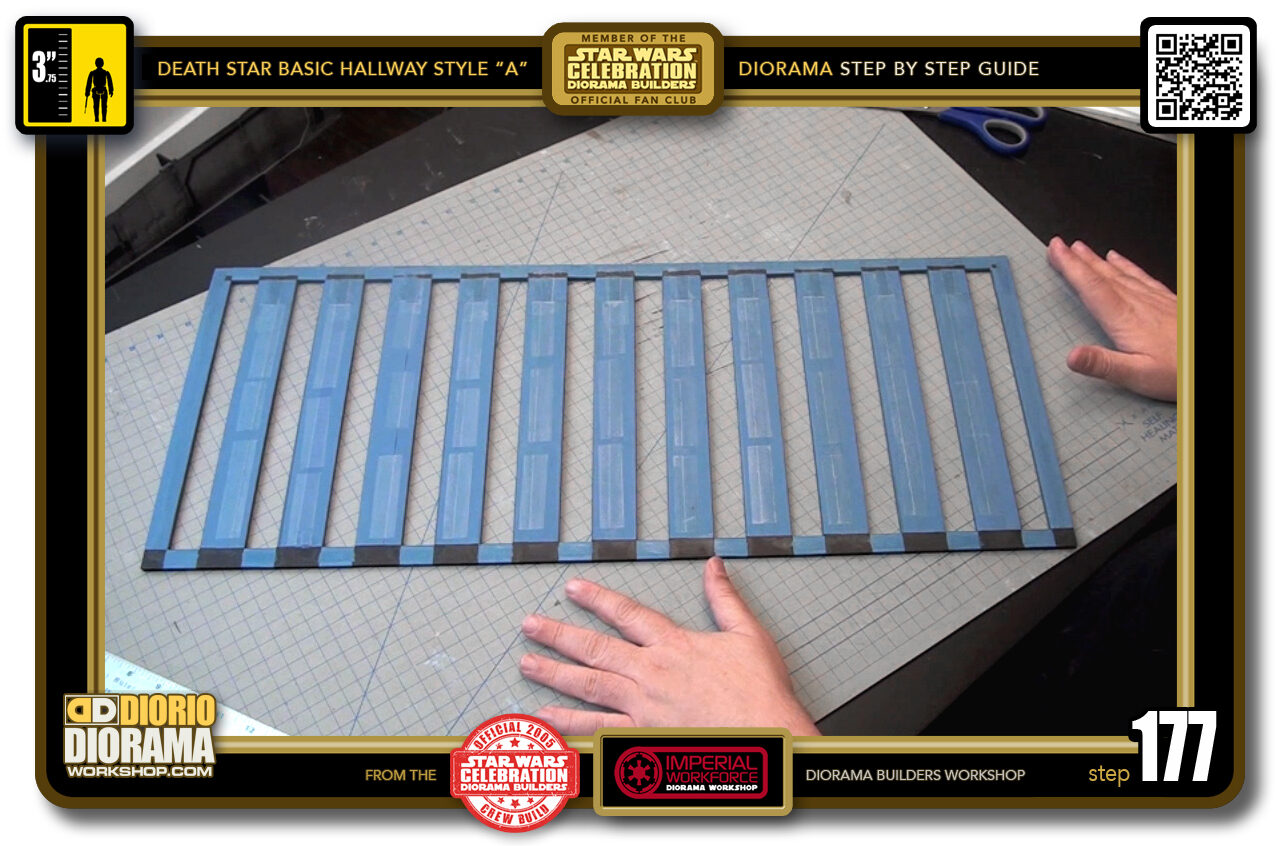
- STEP 177 > That was a LOT of EFFORT but your Ligh Grid ceiling bottom piece is now DONE !!! 🙂 Put it in a SAFE PLACE while the glue dries fully a good 30-60 minutes. WARNING: THIS IS VERY FRAGILE, so when you manipulate it BE GENTLE - the last thing you wanna do is fold it like an accordion after all that hard work. Trust me, I put it on the floor and stepped on the first one, I cried LOL.
-
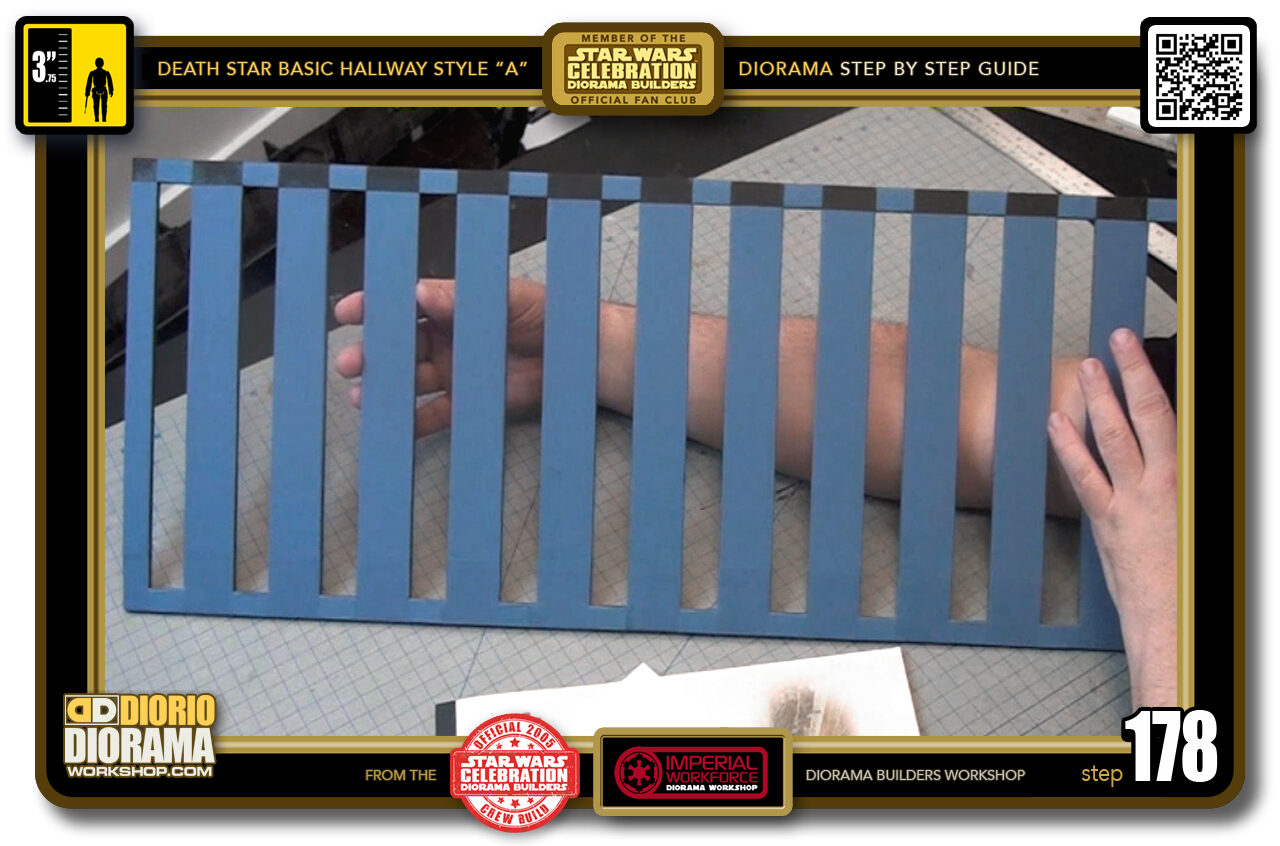
- STEP 178 > After an hour or so the glue stick is all dry and we are ready to apply the paper sheets that will cover the strip holes.
-
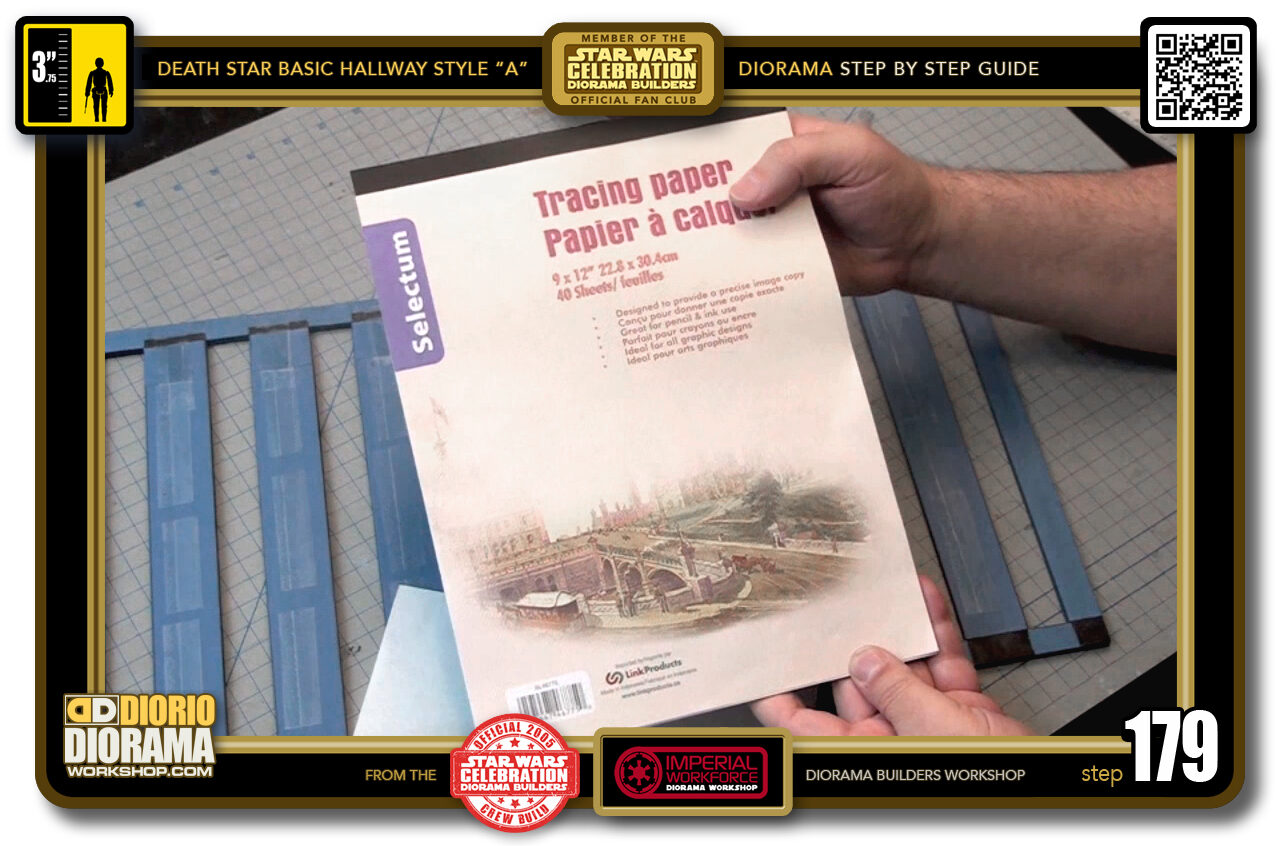
- STEP 179 > I was going to use wax paper but then was scared it would melt even if LED lights are cooler than the old school mini Christmas lights. So I discovered this at my dollar store. TRACING PAPER PAD !!! 🙂
-
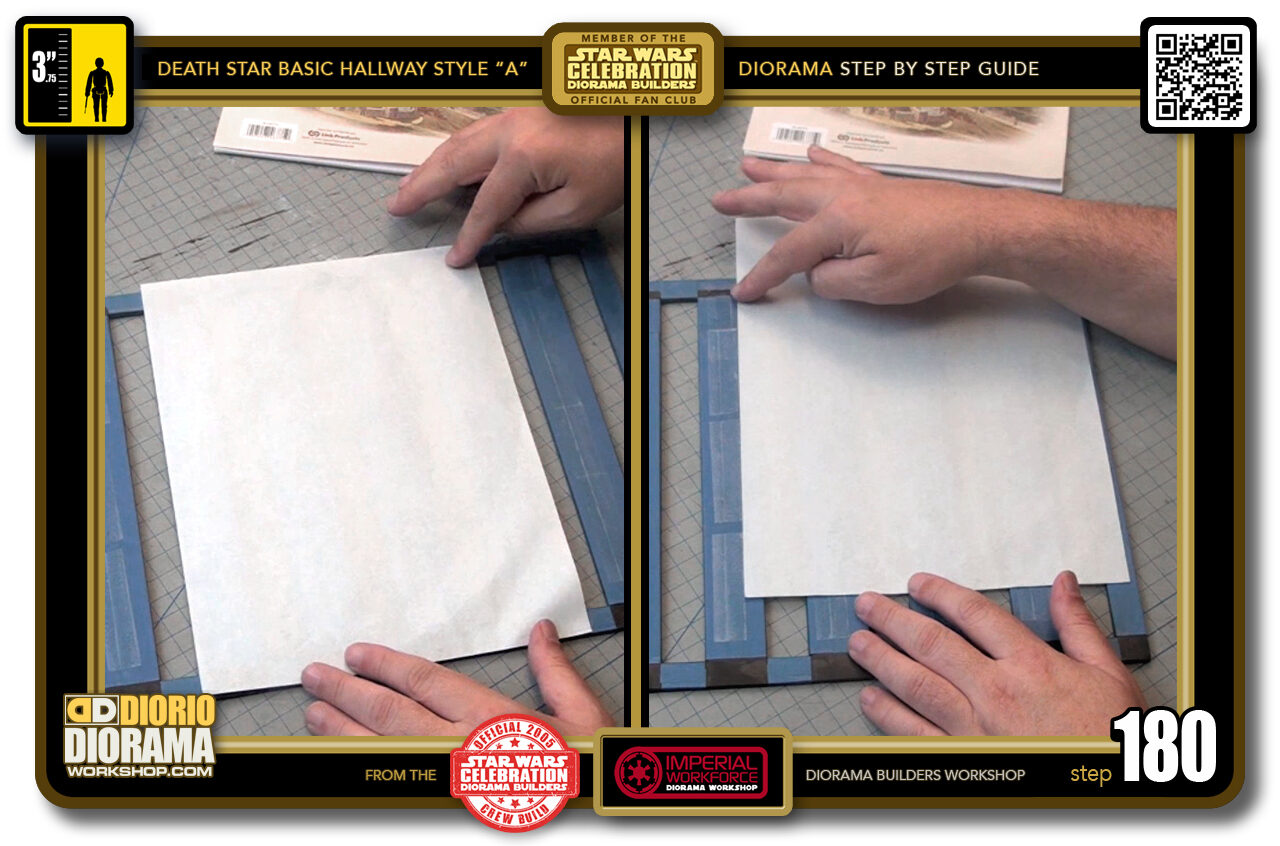
- STEP 180 > The sheets fit just right, a little too tall as you see on the left but PERFECT for fitting between the "C3" strips as you see on the right.

.
Did you already build this Diorama ? At home or at our Star Wars Celebration Diorama Builders workshop ? Would you like to show it in the site’s GALLERY VISITORS DIORAMAS section, YES ? That is Awesome !!! You can find out all the details on how to email me your photos on the VISITORS SUBMISSIONS INFO page … When I get your photos, I will create your very own page just like this one. You may not realize it but work does inspire others to join in the fun of making Action Figure Dioramas.
.
NOT FOR RESALE ALL Decals, tutorials and artwork are ©FrankDiorio (dioramaworkshop.com) and offered FOR FREE to the fans – that would be you ? so you can build and display my diorama designs in your very own home. I realize I cannot control what one does with my graphics once I place them on the web, I can only ask you as one fan to another, please respect the artist and do not be that jerk who uses my designs and tutorials to build a copy of my work only to sell it on EBAY or trade/sale groups and forums. Thank You. Frank.
.
.
If you have a facebook account, why not join the Official Diorama Builders Fan Club today, simply click the logo link below.
 .
.
Catch up with fellow visitors and exchange stories, read cool interviews with the crew, exchange photos, fun surprises and grab some FAN ONLY merchandise next year at actual future conventions ?
.
©2018 Frank Diorio DioramaWorkshop.Com
.
IF YOU LIKE WHAT YOU SEE, PLEASE SHARE WITH YOUR FRIENDS
USING THE SOCIAL MEDIA BUTTONS BELOW