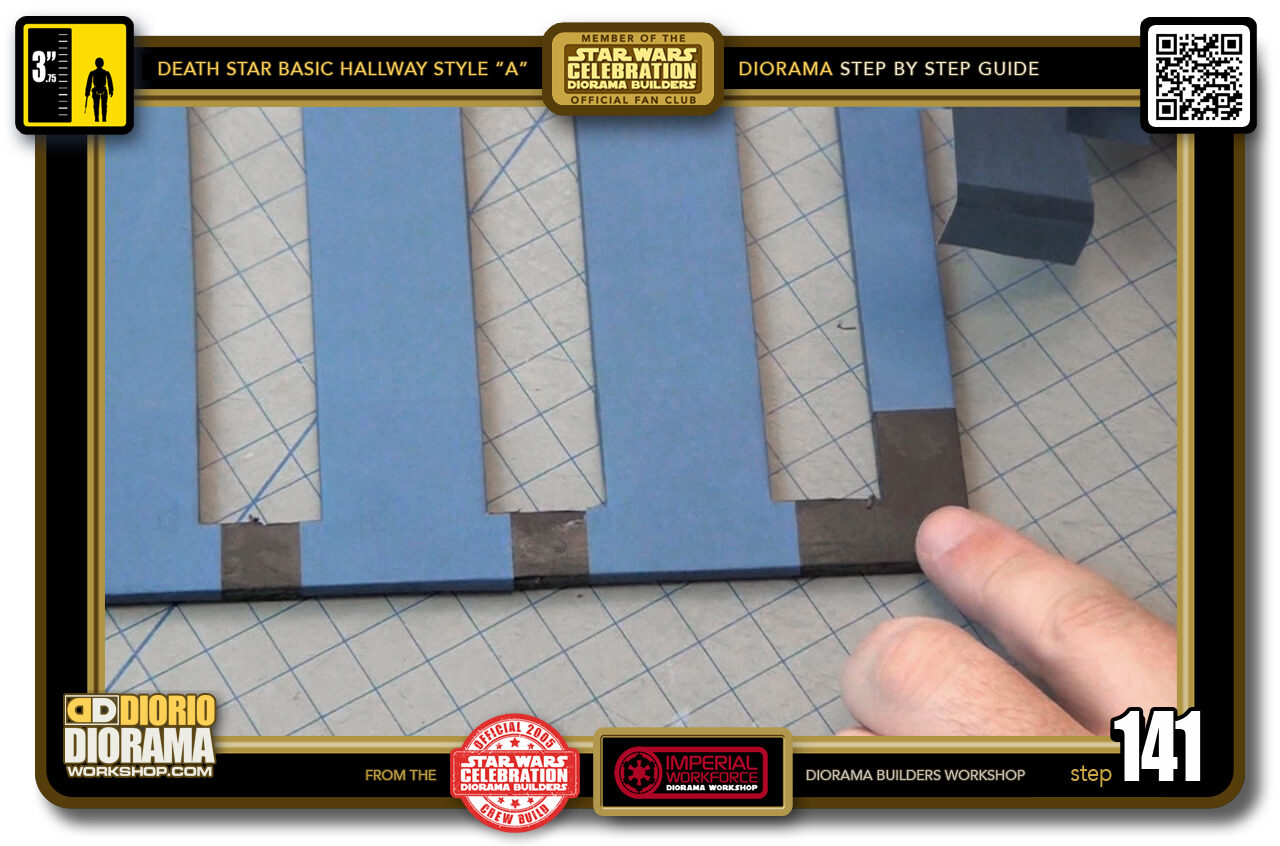
- STEP 141 > Now that you applied the end caps to all the regular "C3" strips it's time for the 2 "C1" corners. These as you see have 2 sides to fold which means we need to do slight modification to our decal caps first.
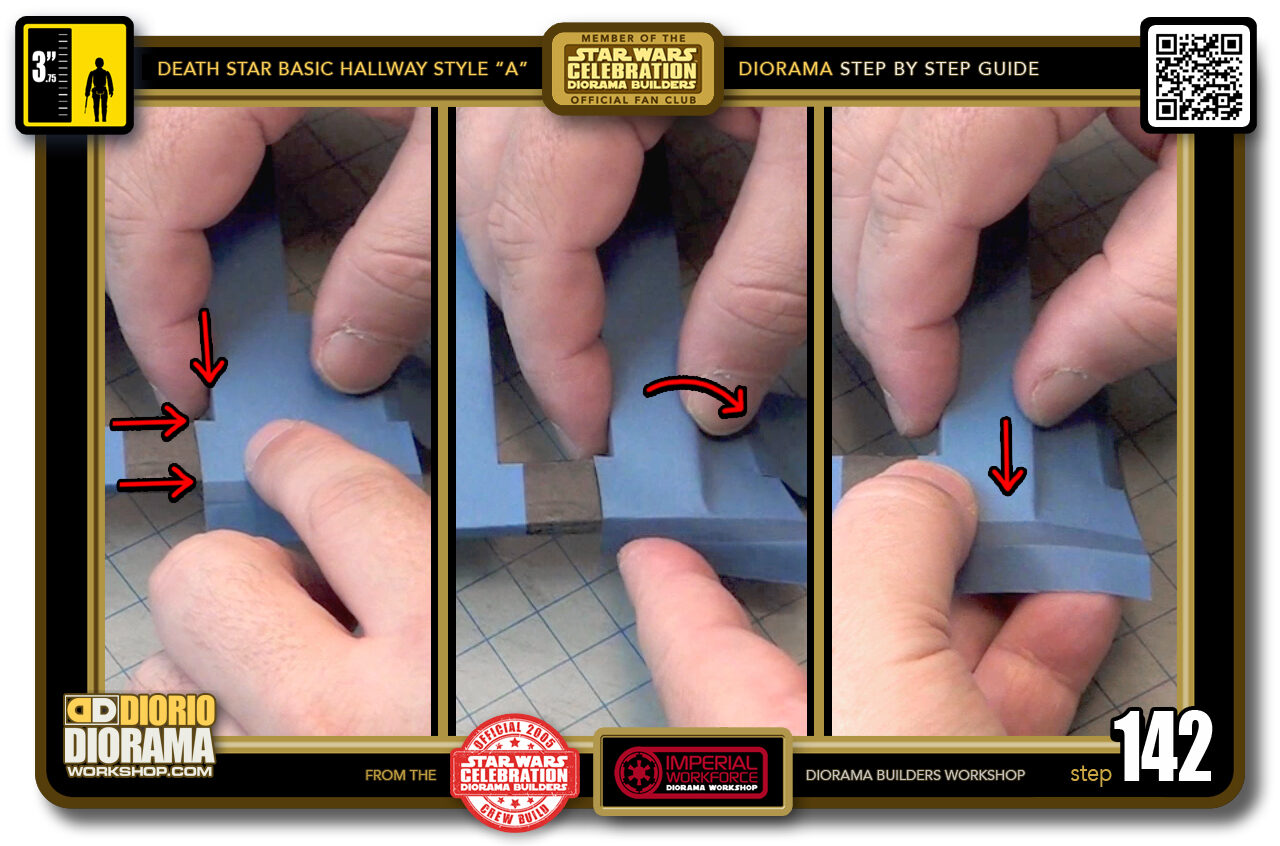
- STEP 142 > Grab a regular cap and align it as you did before but along the inner edges of the corner strip (left box) Now start folding over your decal along the outside edge (centre box). You will notice a small straight memory line begins to form but with the end folded over, it prevents it from going around properly. So remove the pressure from the bottom of the decal (right box) and concentrate on the outside edge only. Move your finger until you start to see a clear straight line.
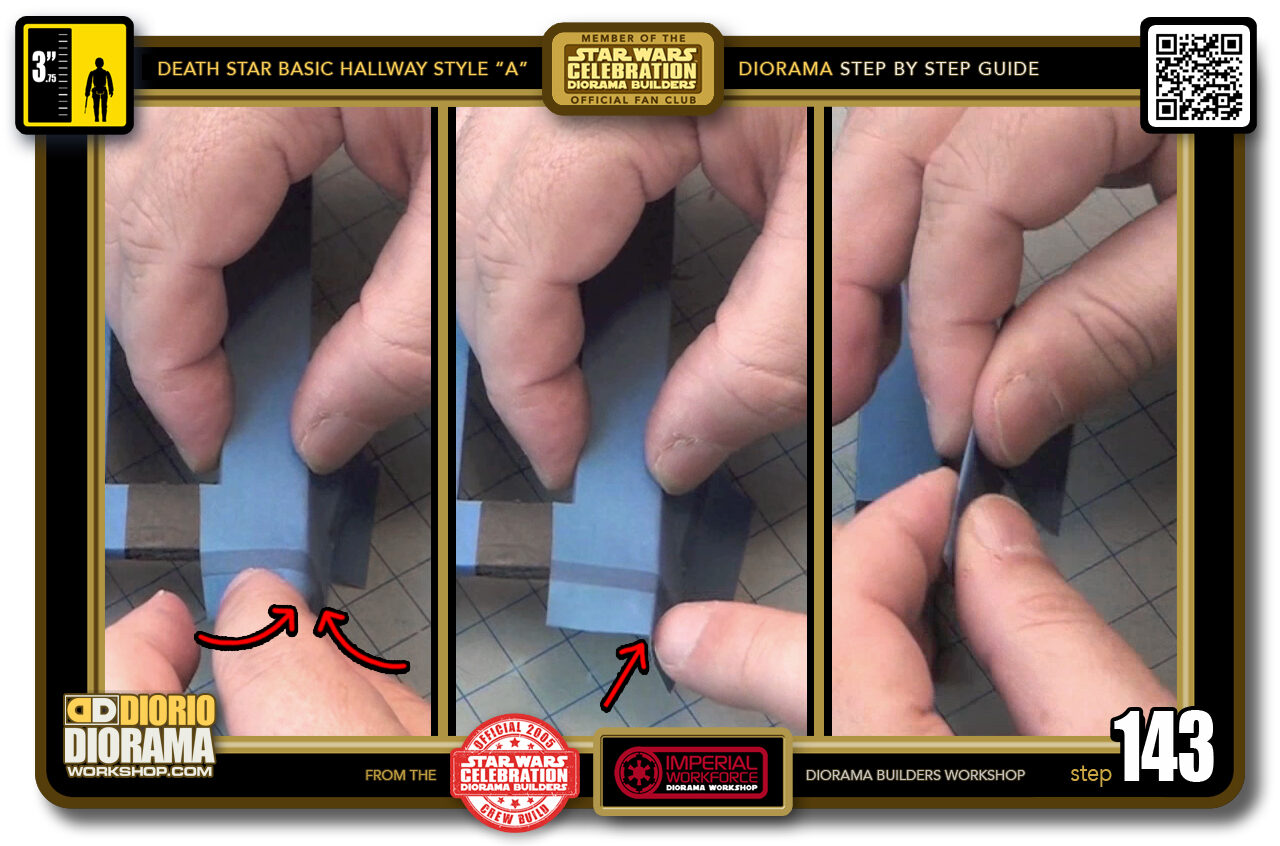
- STEP 143 > Now hold tight to the outer edges - right hand in my case - and GENTLY PINCH the top of your cap where it sticks out from the frame (left box) After you pinched, you will see that the pinch now continues the straight outer fold you created earlier (centre box). You can now remove the decal cap from the corner and just do a HARD PINCH (right box).
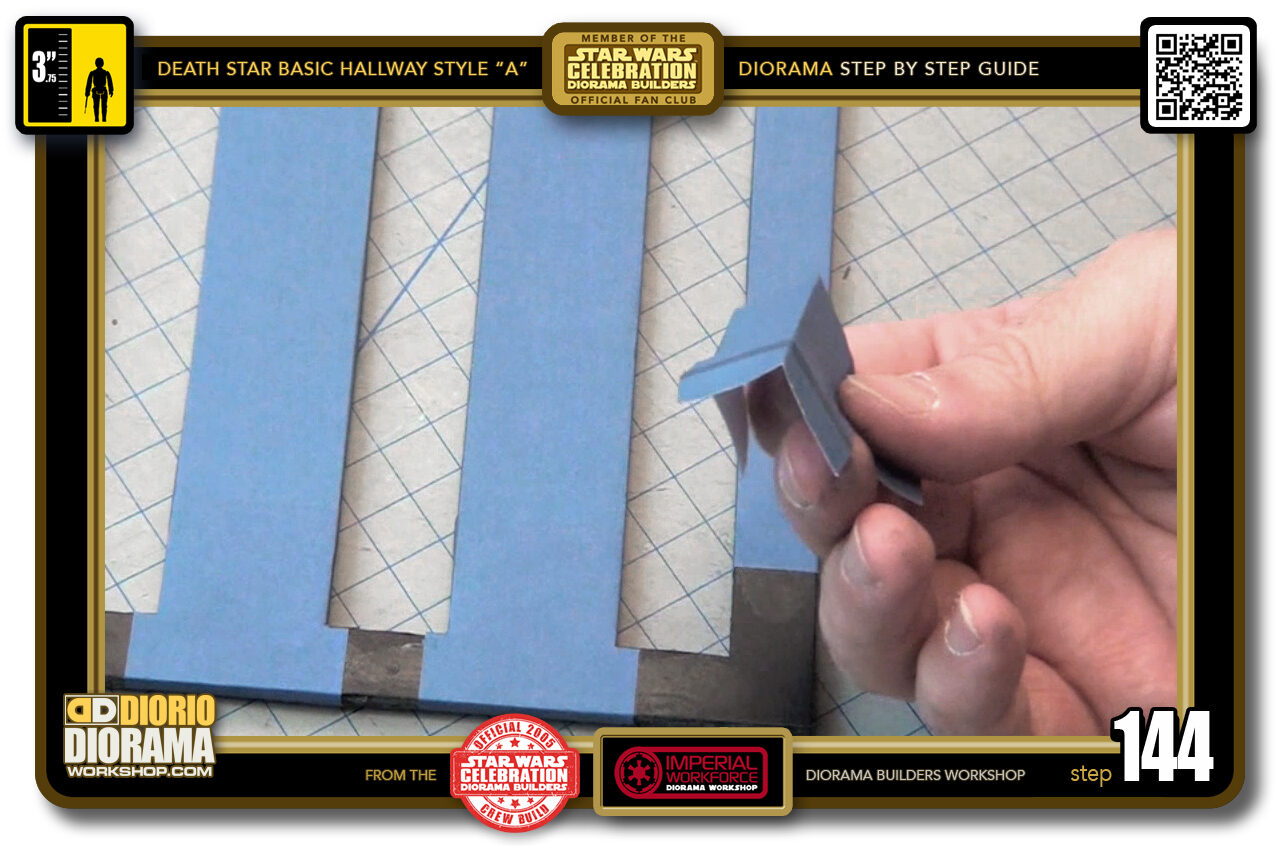
- STEP 144 > You will now have a crisp tight precise 90 degree fold like this.
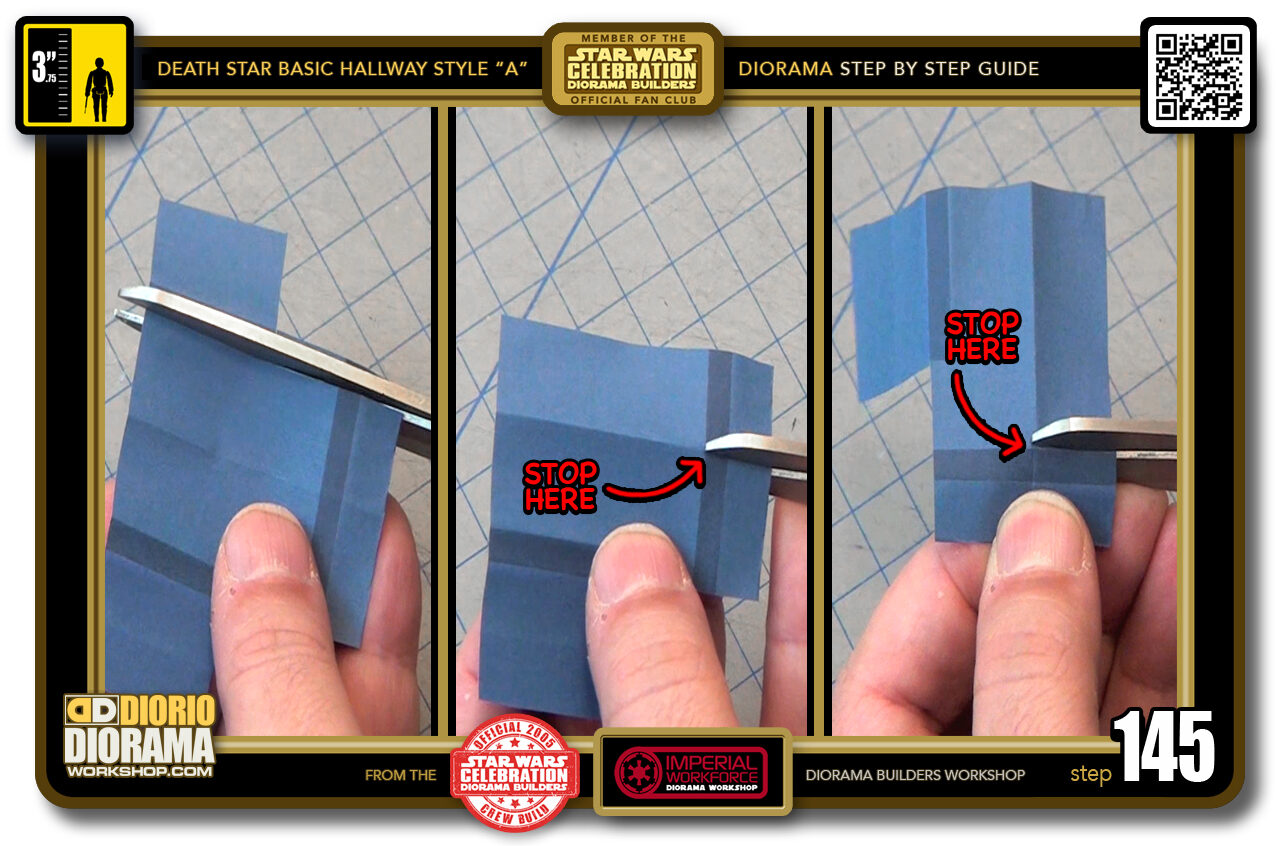
- STEP 145 > In order to have it wrap around both side edges properly we need to make some modified cuts. Start by removing the RIGHT FLAP (left box) by aligning your scissors with the already cut top side. Next you need to make a SLIT CUT along your new FOLD LINE making sure to STOP exactly where the dark folding blue guide ends (centre box). Last you want to cut off the RIGHT SIDE of the fold along the TOP of your dark blue folding guide. STOP when you connect to your SLIT CUT (right box).
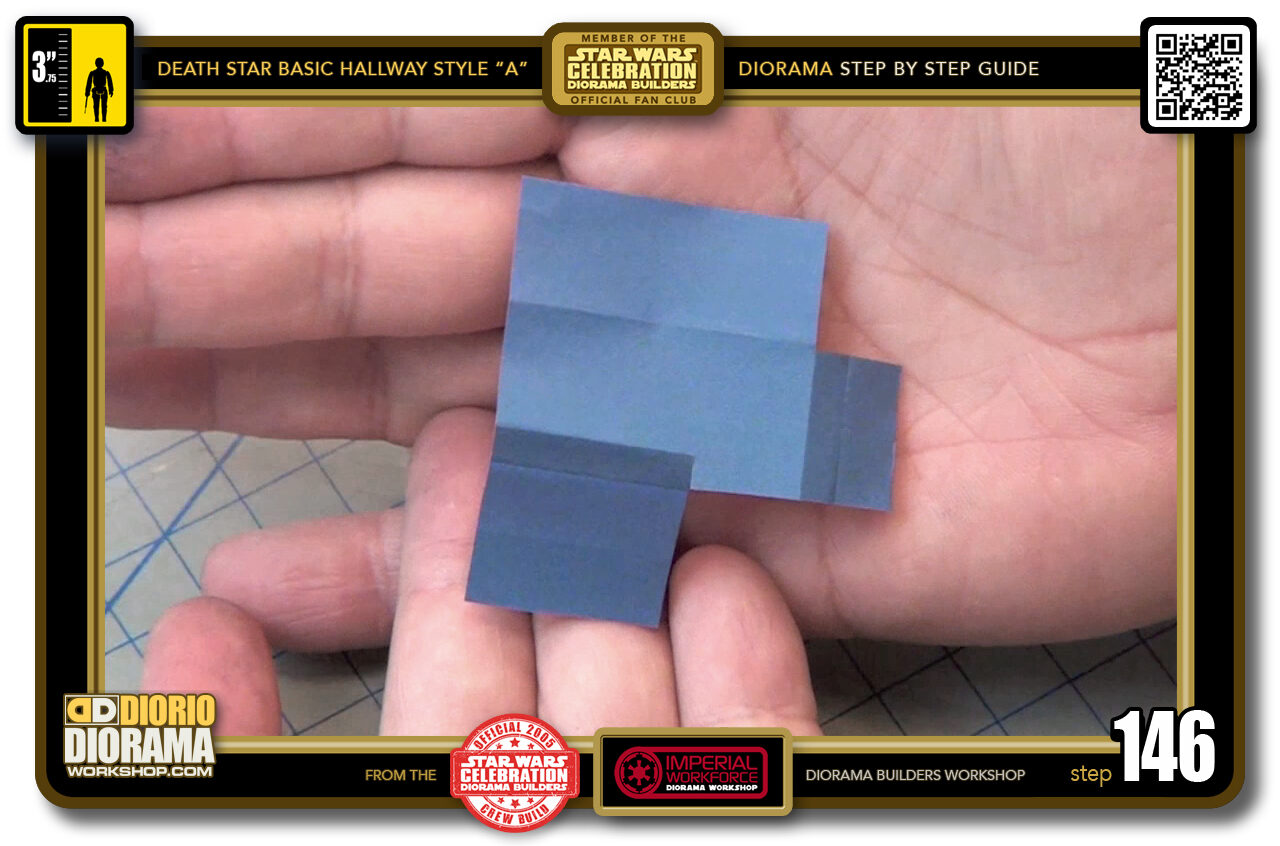
- STEP 146 > Your modified end cap should now look like this.
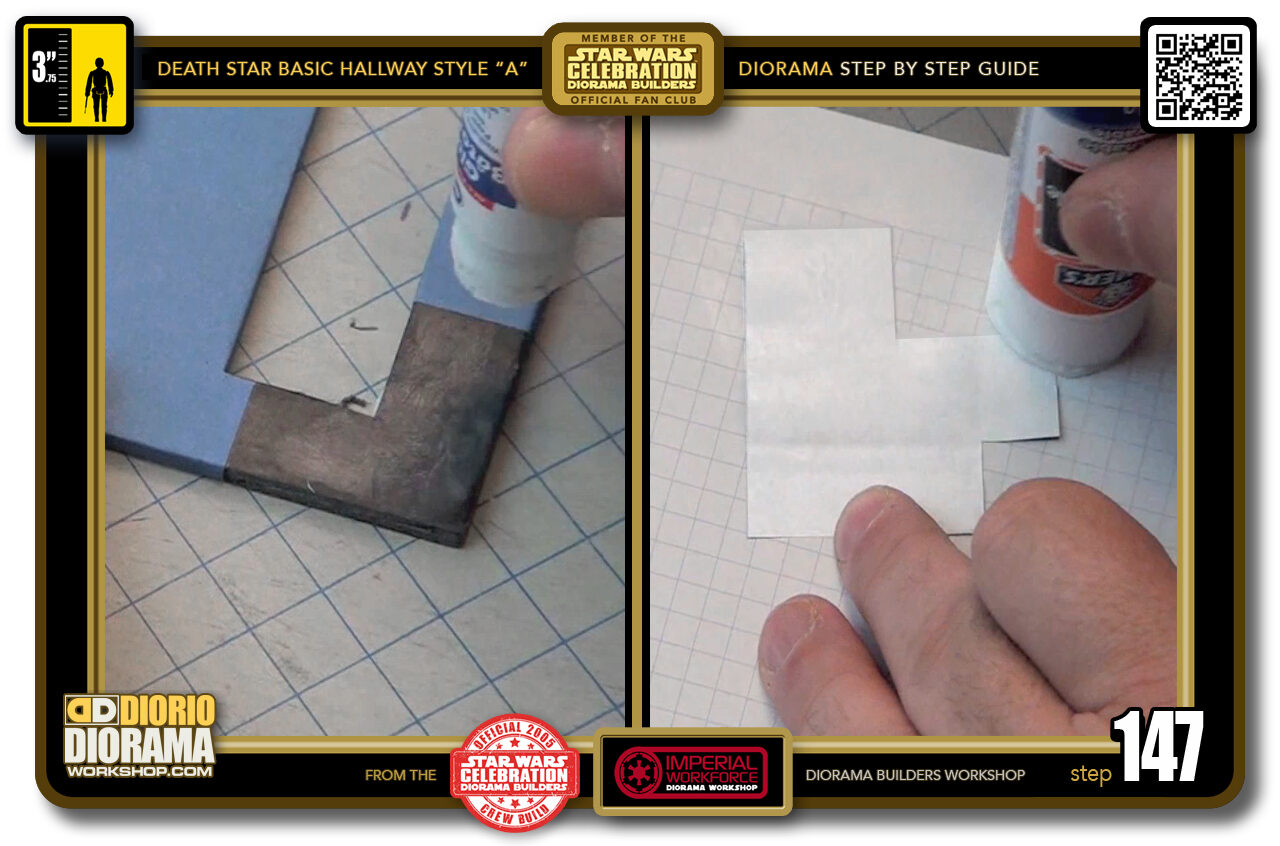
- STEP 147 > Apply glue stick to the frame's corner surface as seen on the left, then apply glue stick to the back of the decal. Make sure to cover the entire surface (right box).
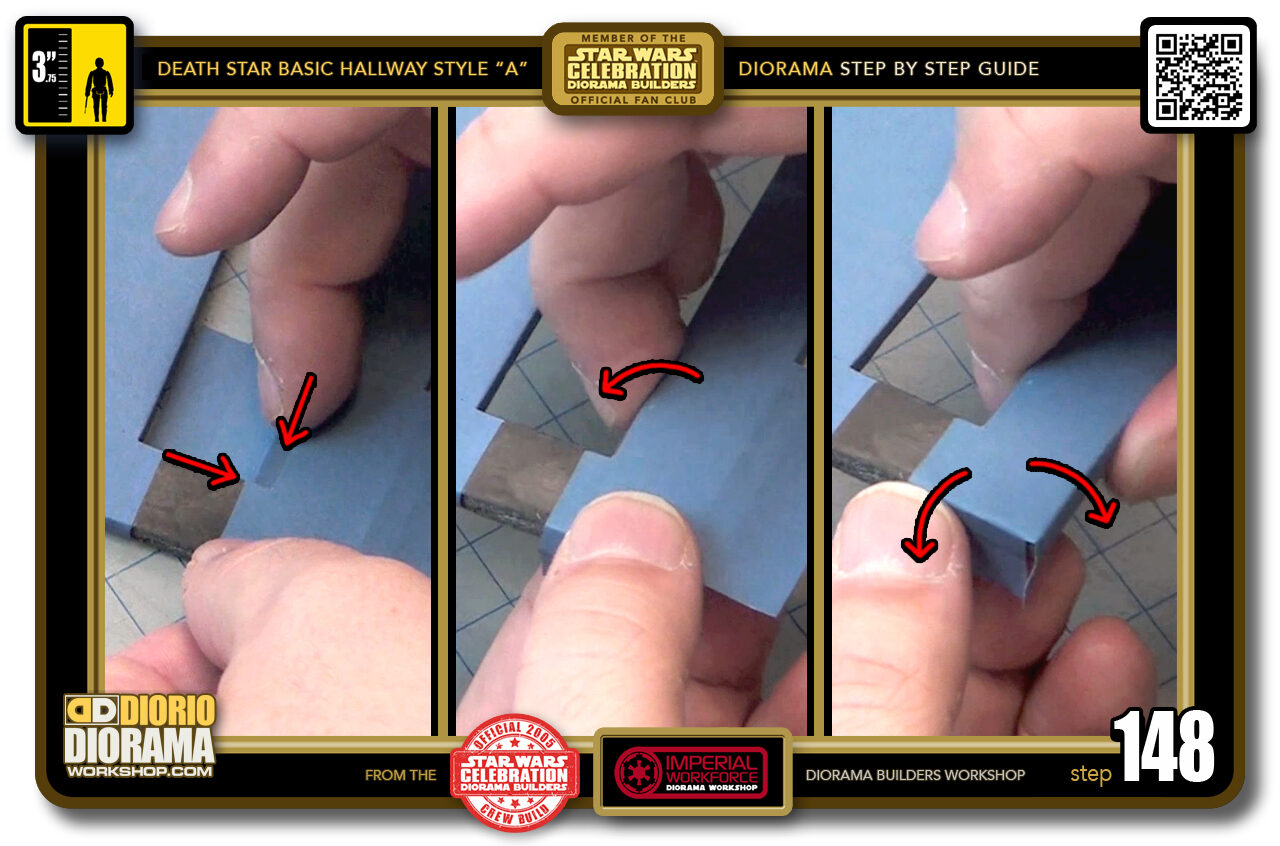
- STEP 148 > Start by carefully aligning the the INNER corner edges (left box red arrows). Then fold the flap over the inner edge first (centre box) followed by the 2 outside corner edges (right box).
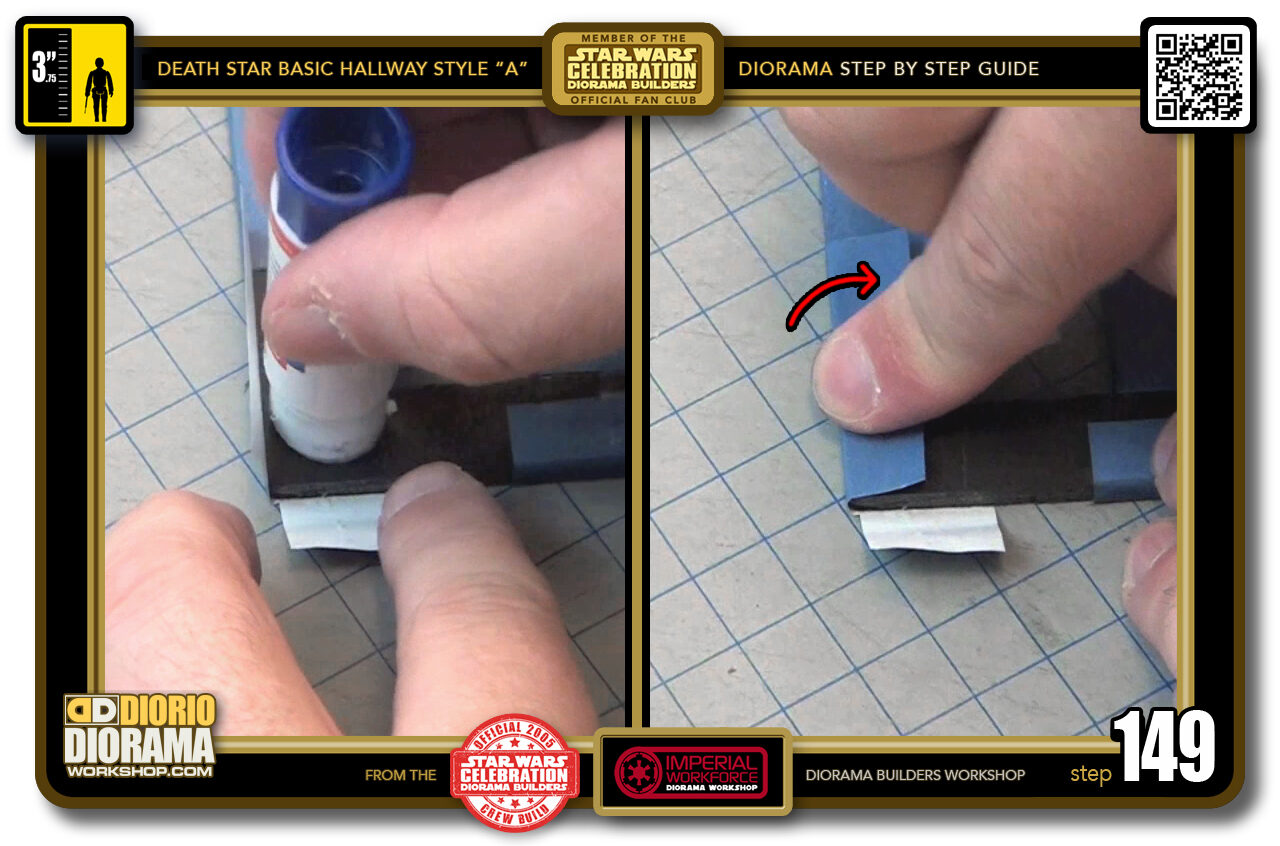
- STEP 149 > Flip over your frame to it's back side and apply some glue stick on the foamcore surface (left box). Then PULL and FOLD over the OUTER side flap until you make contact, press hard to secure in place when you are sure there are no bubbles or folds on the side (centre box).
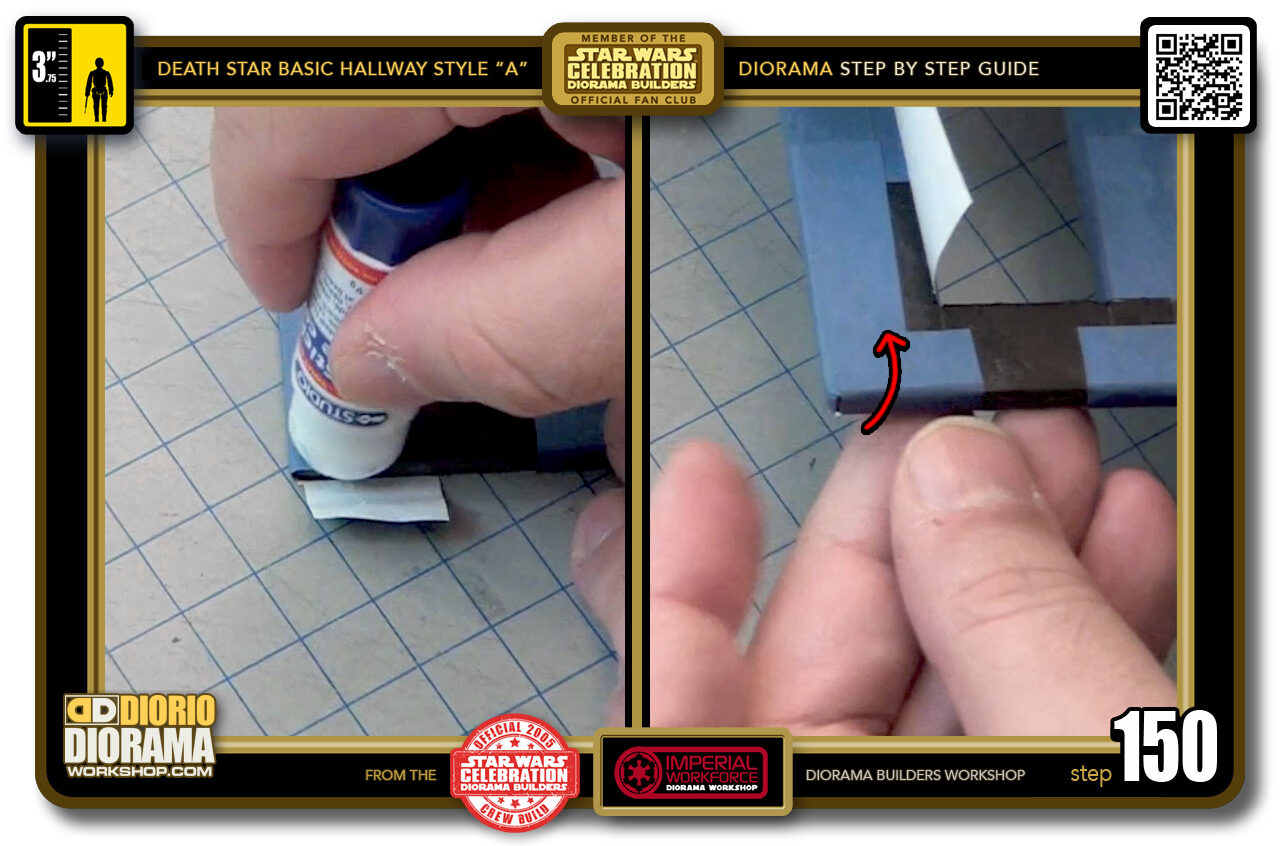
- STEP 150 > Apply some glue stick on the foamcore and decal area the front flap will come in contact with (left box) then carefully PULL and FOLD over onto the foamcore. Press with your finger to make sure there is full contact and secure.
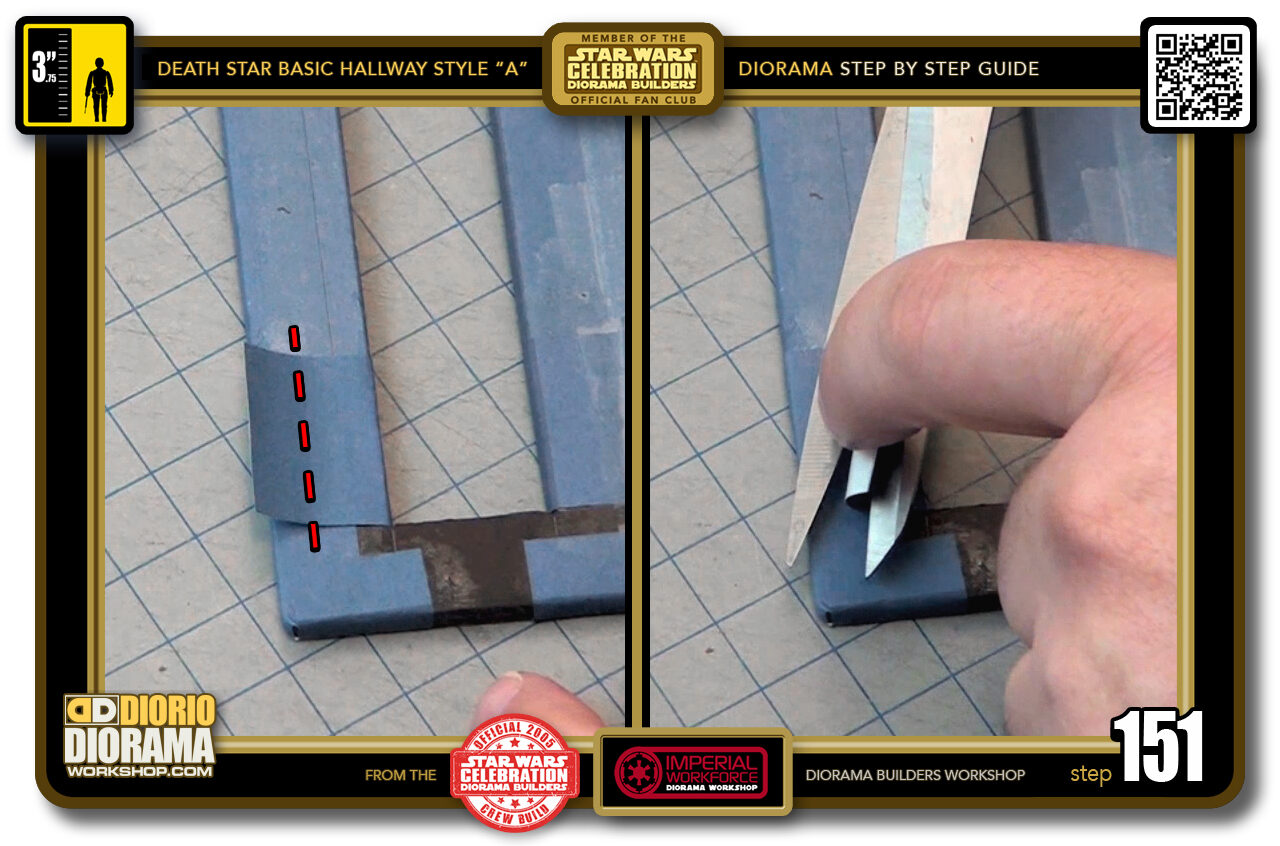
- STEP 151 > When you fold over the INNER flap you will notice it is too long, we need to trim approximately where the red dotted line can be seen in the left box. Use scissors to trim off the excess. This doesn't have to be perfect as it is hidden inside the light box ceiling when displaying your diorama.
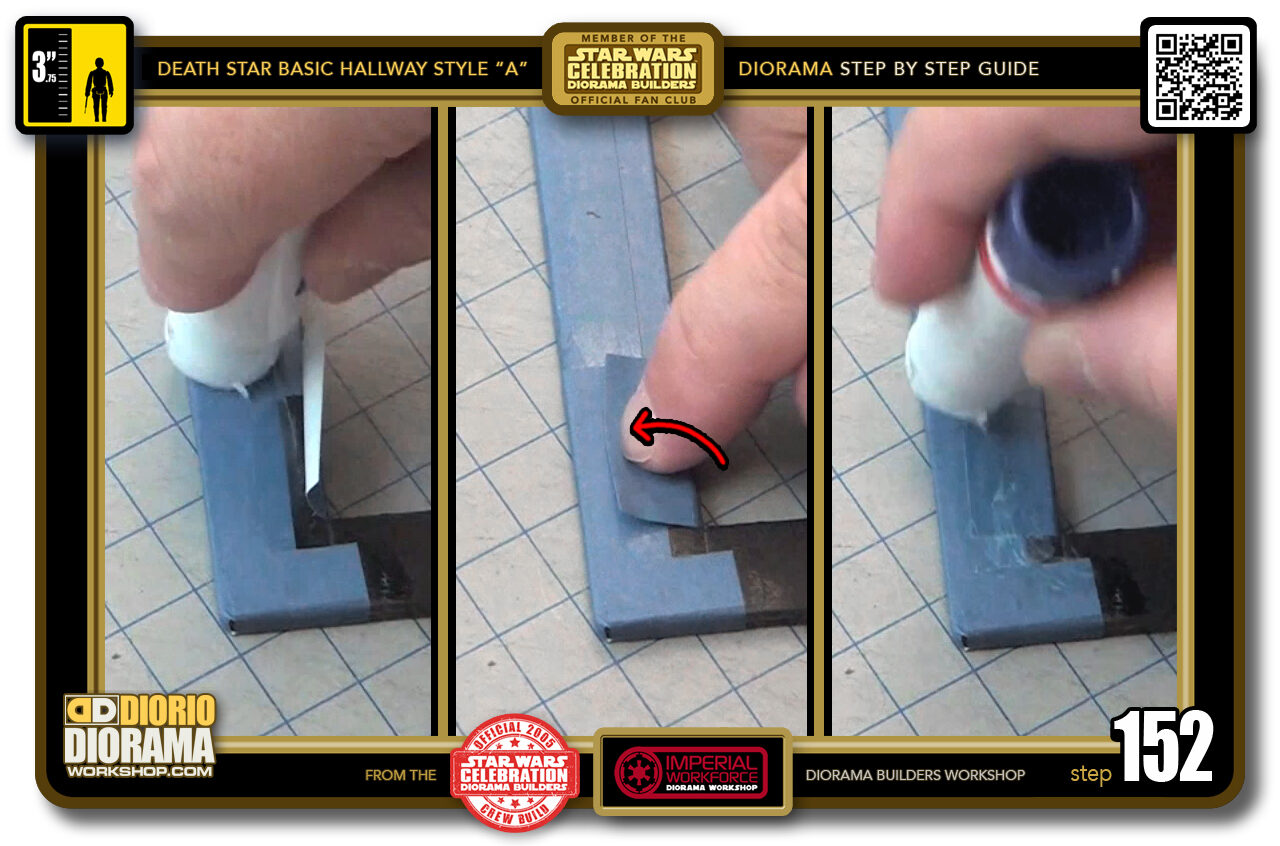
- STEP 152 > Now you can apply some glue stick along the top of your folded decal (left box) then Pull and FOLD over like you did for the other side's flap (centre box) and seal the seams with glue stick (right box).
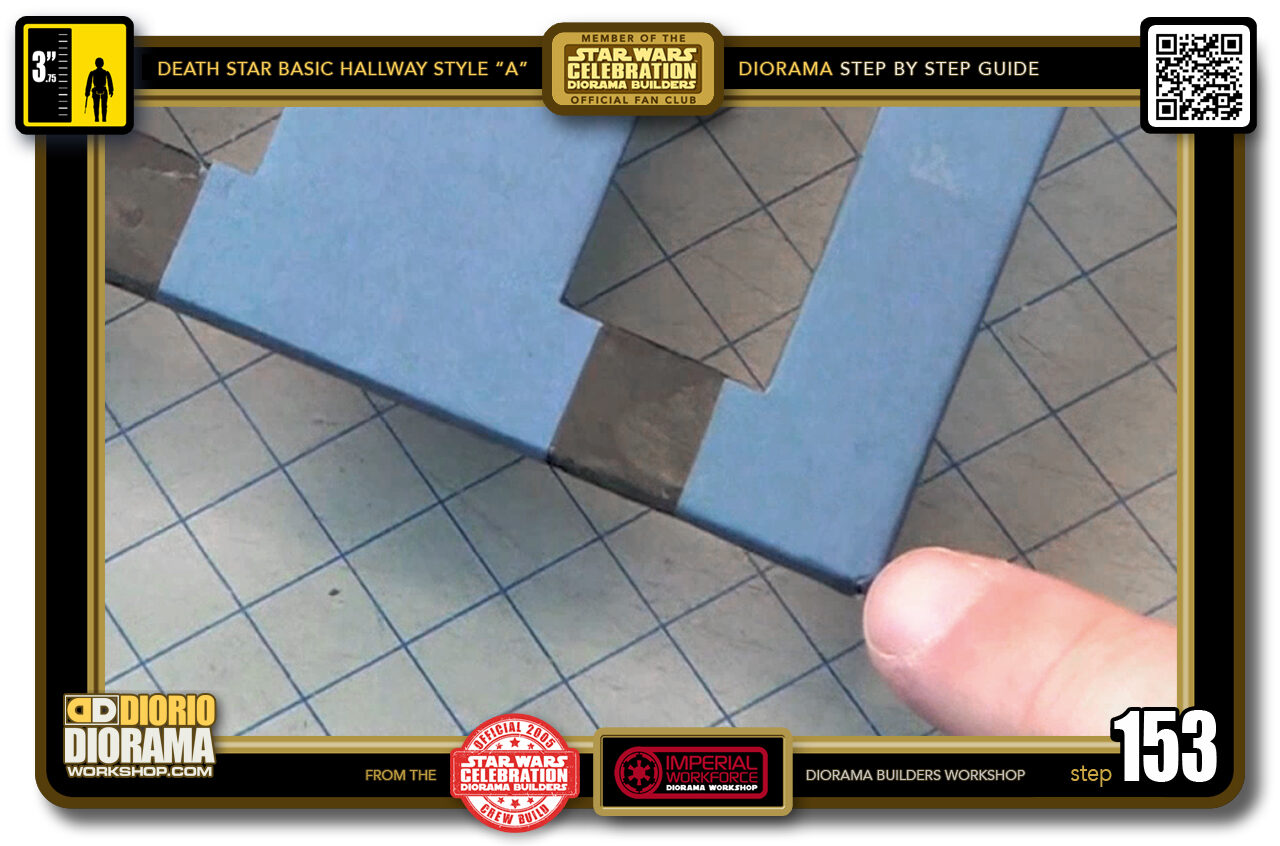
- STEP 153 > This is how your corner cap application should look like. Nice and Clean.
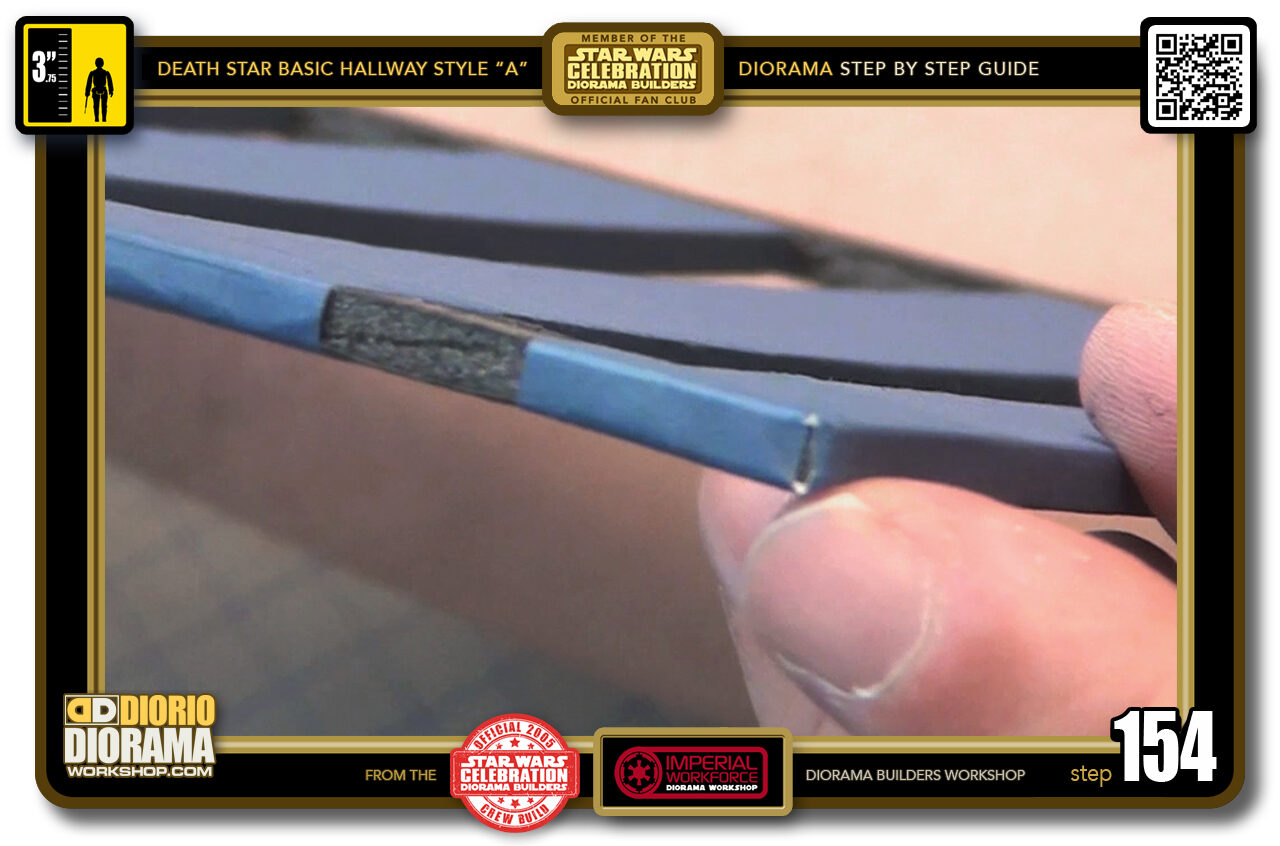
- STEP 154 > Now if there is a tiny gap between the 2 corner flaps, do not worry, yu won't really see it unless you know where to look and look real close 🙂
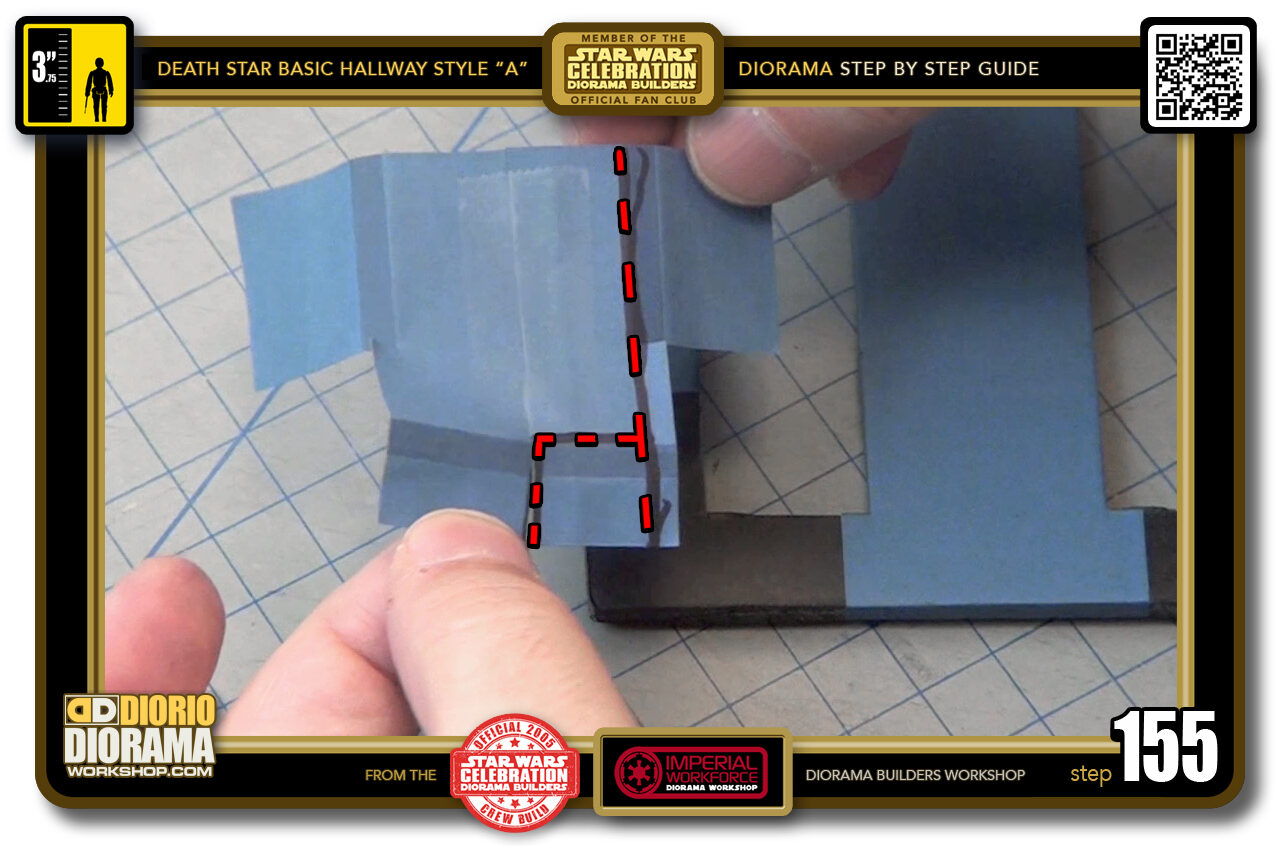
- STEP 155 > Now the opposite side's corner is the MIRROR of the one you just did which means we cannot just use the same modification cutting guide lines we just used in Step 145. We have to make new ones.
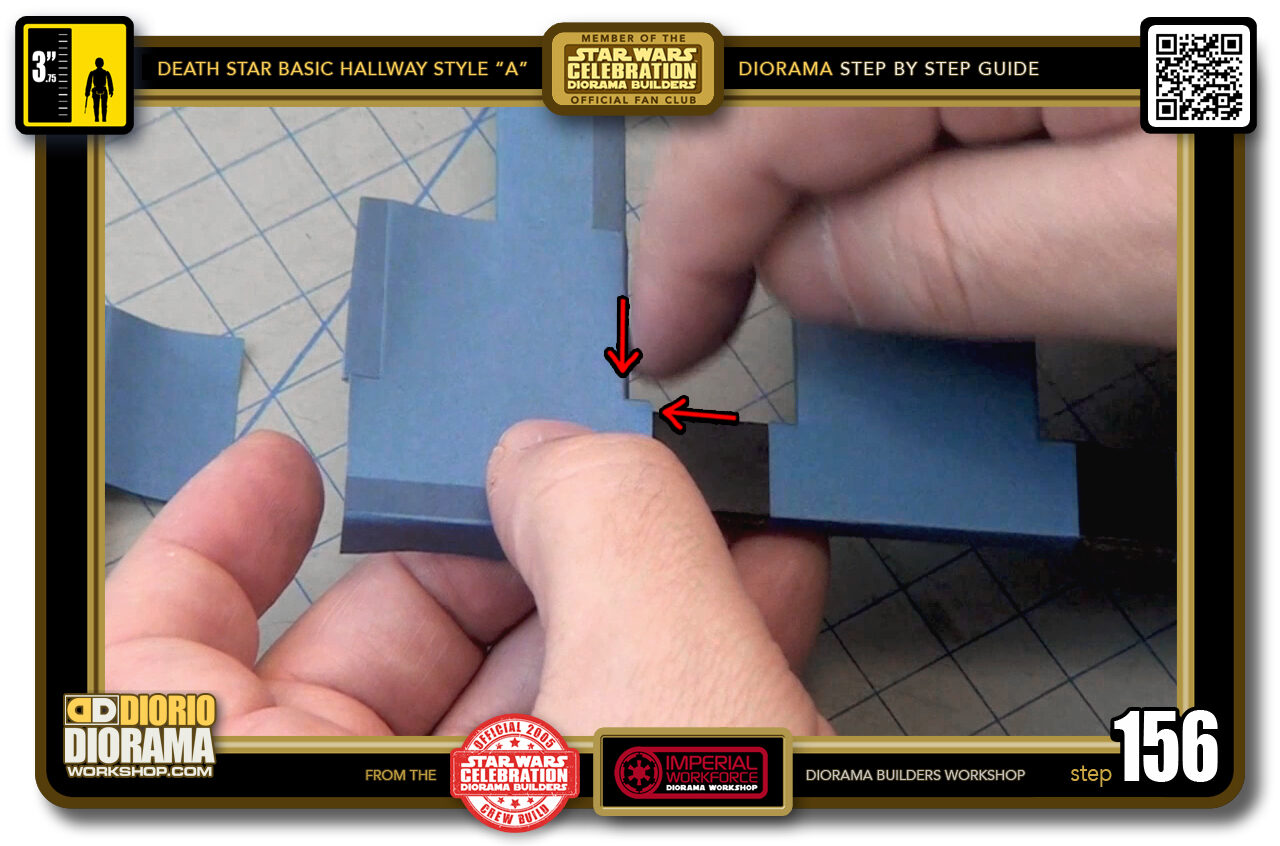
- STEP 156 > We now want to align the cap decal in this corner.
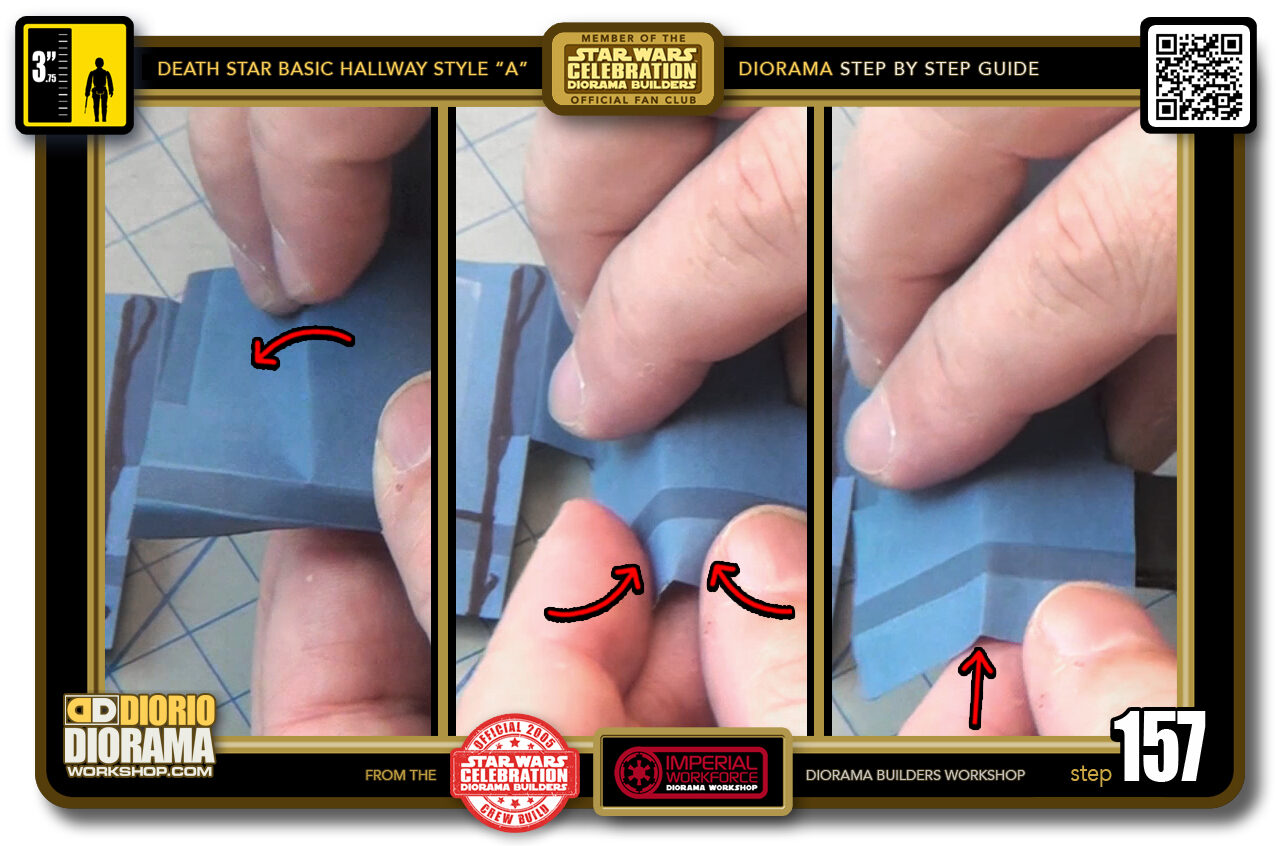
- STEP 157 > The folding techniques are the same though. Start folding the outside edge (left box) Release bottom and pinch (centre box) giving you your fold cutting guide (right box).
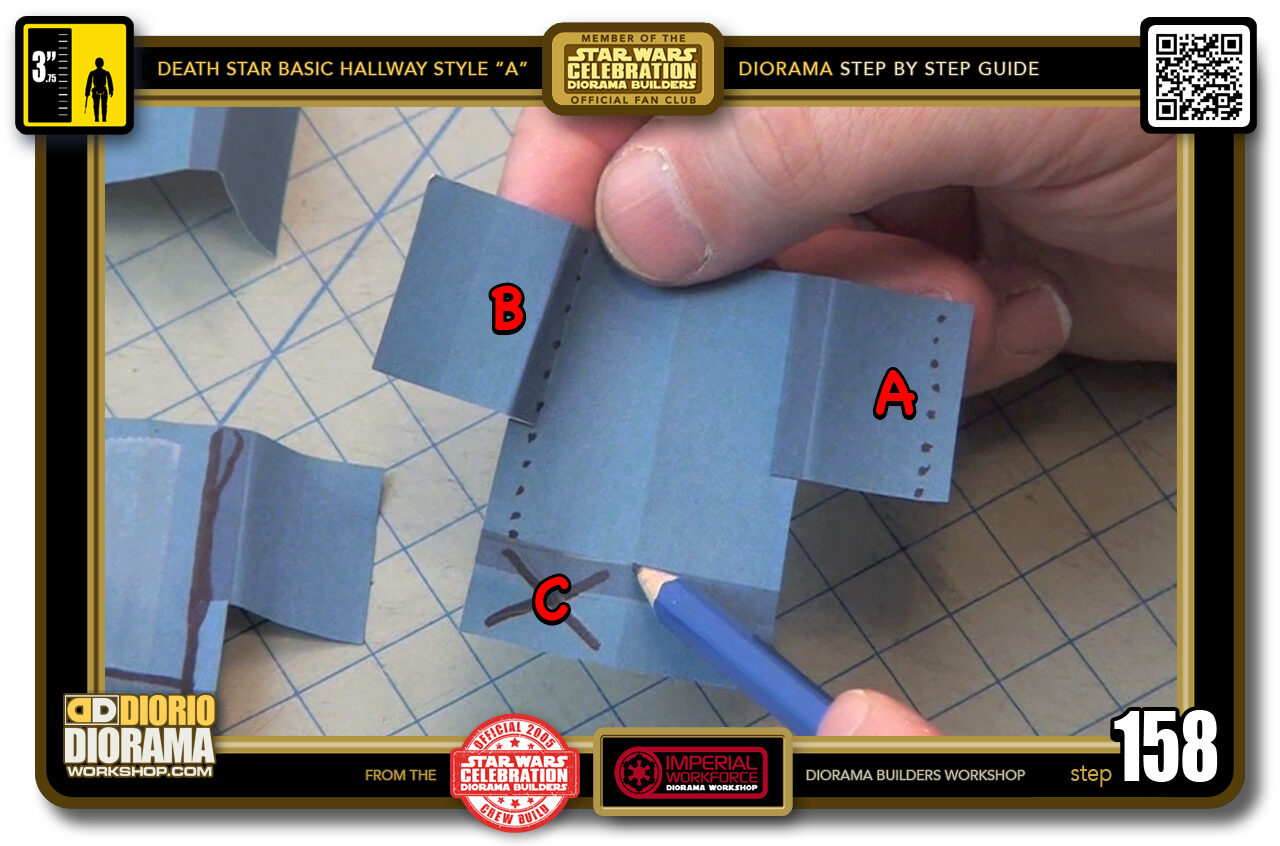
- STEP 158 > These are the 3 zones you need to cut out this time for your 2nd corner.
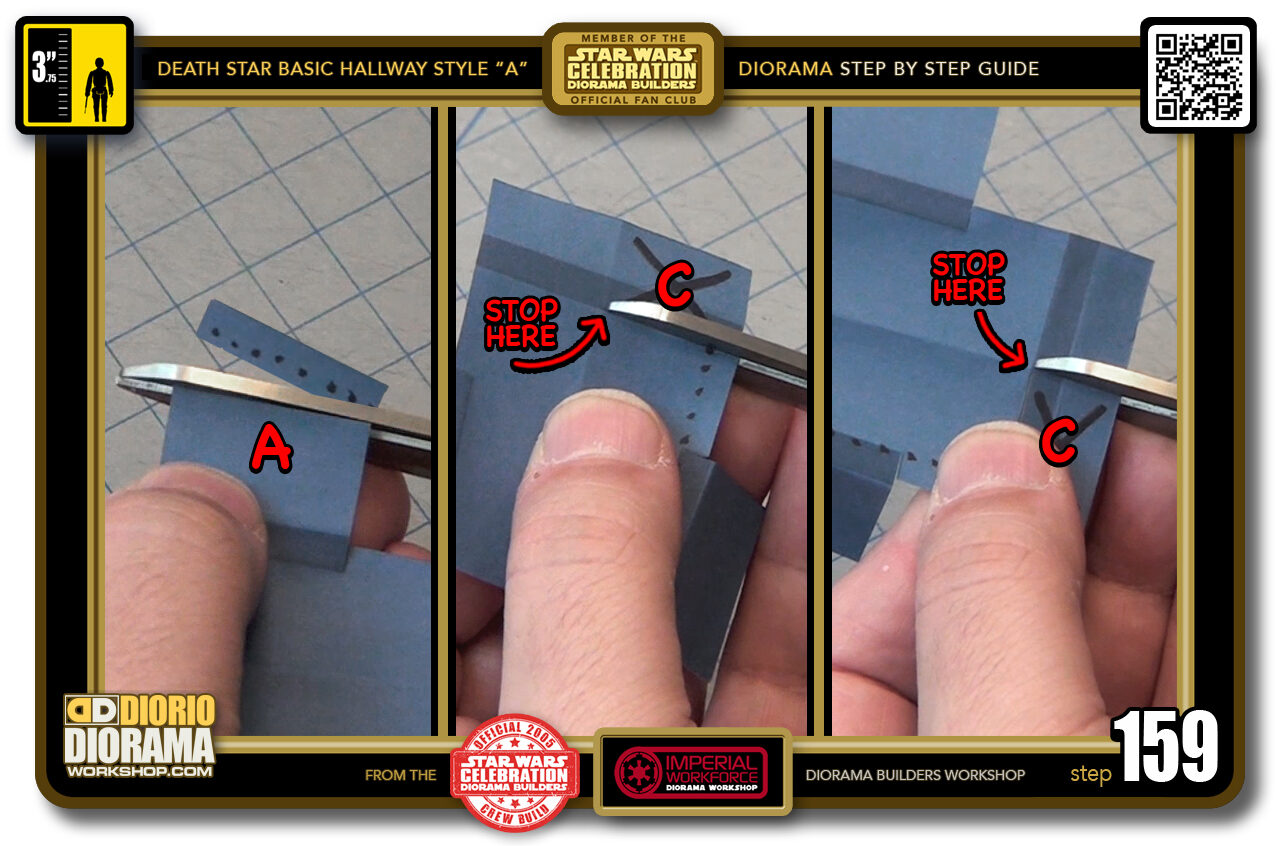
- STEP 159 > Start with removing the A excess (left box) then along the LEFT SIDE of your fold along the TOP of your DARK BLUE folding guide line and STOPPING exactly where you folded (centre box). Then finish by cutting along the fold until you connect with your left side cut (right box).
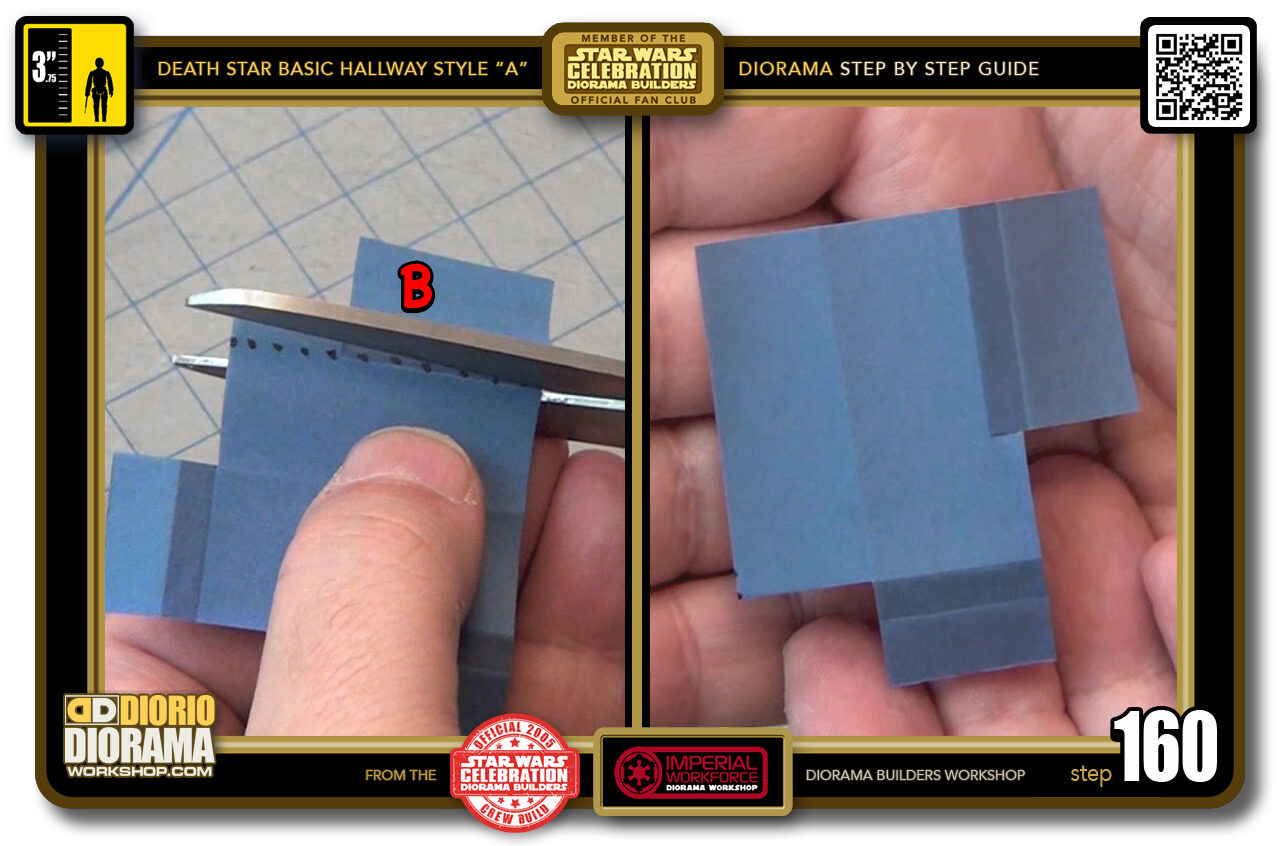
- STEP 160 > Last but not least along the edge of of your DARK BLUE guideline (dotted line in the left box) Your modified cap shape should now look like what you see in the right box.

.
Did you already build this Diorama ? At home or at our Star Wars Celebration Diorama Builders workshop ? Would you like to show it in the site’s GALLERY VISITORS DIORAMAS section, YES ? That is Awesome !!! You can find out all the details on how to email me your photos on the VISITORS SUBMISSIONS INFO page … When I get your photos, I will create your very own page just like this one. You may not realize it but work does inspire others to join in the fun of making Action Figure Dioramas.
.
NOT FOR RESALE ALL Decals, tutorials and artwork are ©FrankDiorio (dioramaworkshop.com) and offered FOR FREE to the fans – that would be you ? so you can build and display my diorama designs in your very own home. I realize I cannot control what one does with my graphics once I place them on the web, I can only ask you as one fan to another, please respect the artist and do not be that jerk who uses my designs and tutorials to build a copy of my work only to sell it on EBAY or trade/sale groups and forums. Thank You. Frank.
.
.
If you have a facebook account, why not join the Official Diorama Builders Fan Club today, simply click the logo link below.
 .
.
Catch up with fellow visitors and exchange stories, read cool interviews with the crew, exchange photos, fun surprises and grab some FAN ONLY merchandise next year at actual future conventions ?
.
©2018 Frank Diorio DioramaWorkshop.Com
.
IF YOU LIKE WHAT YOU SEE, PLEASE SHARE WITH YOUR FRIENDS
USING THE SOCIAL MEDIA BUTTONS BELOW


