


-
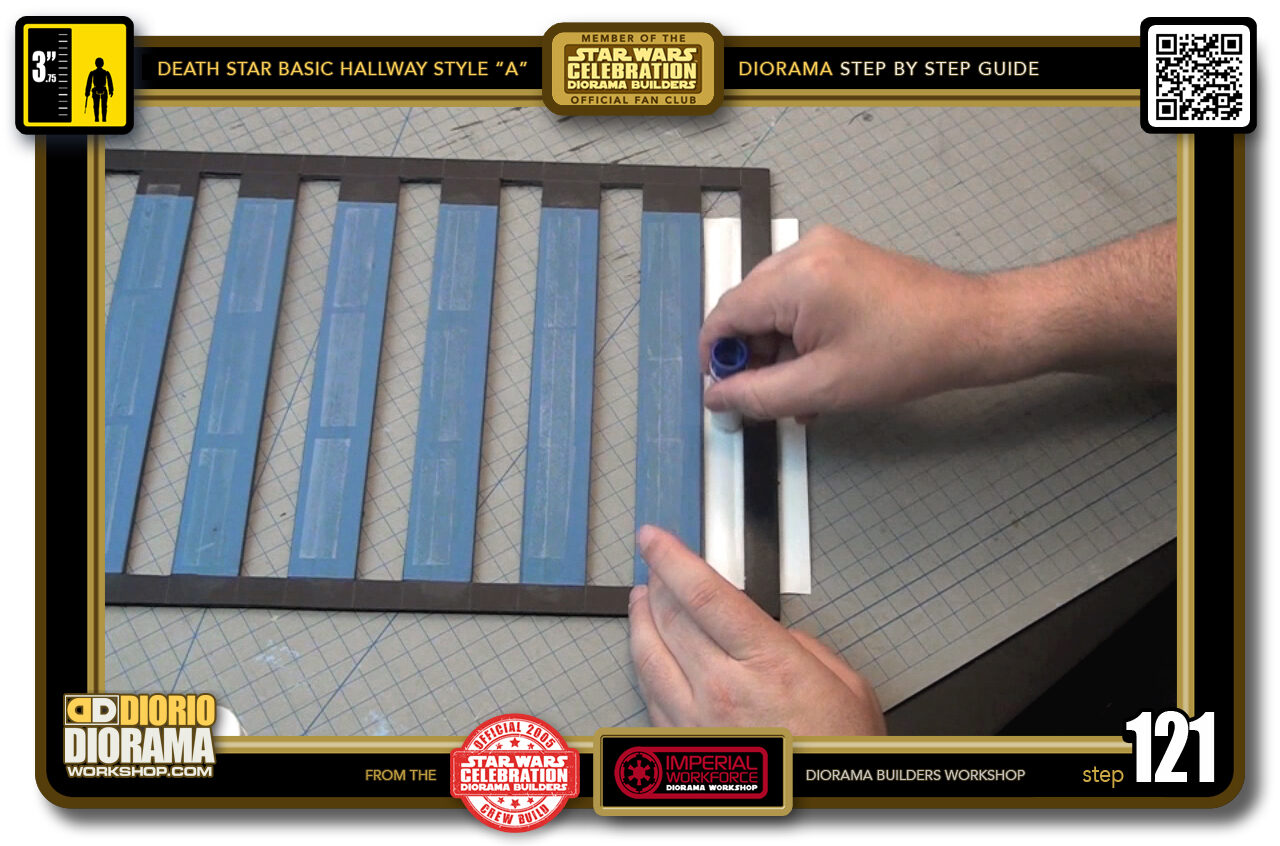
- STEP 121 > Apply a good amount of glue stick ONLY to the INSIDE portion of the decal.
-

- STEP 122 > Start by folding over a few times to make sure the fold memory is tight and then fold over to touch the foamcore surface. You can then apply more pressure to it starting at the centre moving to the outsides as seen in the centre box red arrows. Once secure, you can do one last pass to make sure there are no creases or air pockets (right box).
-
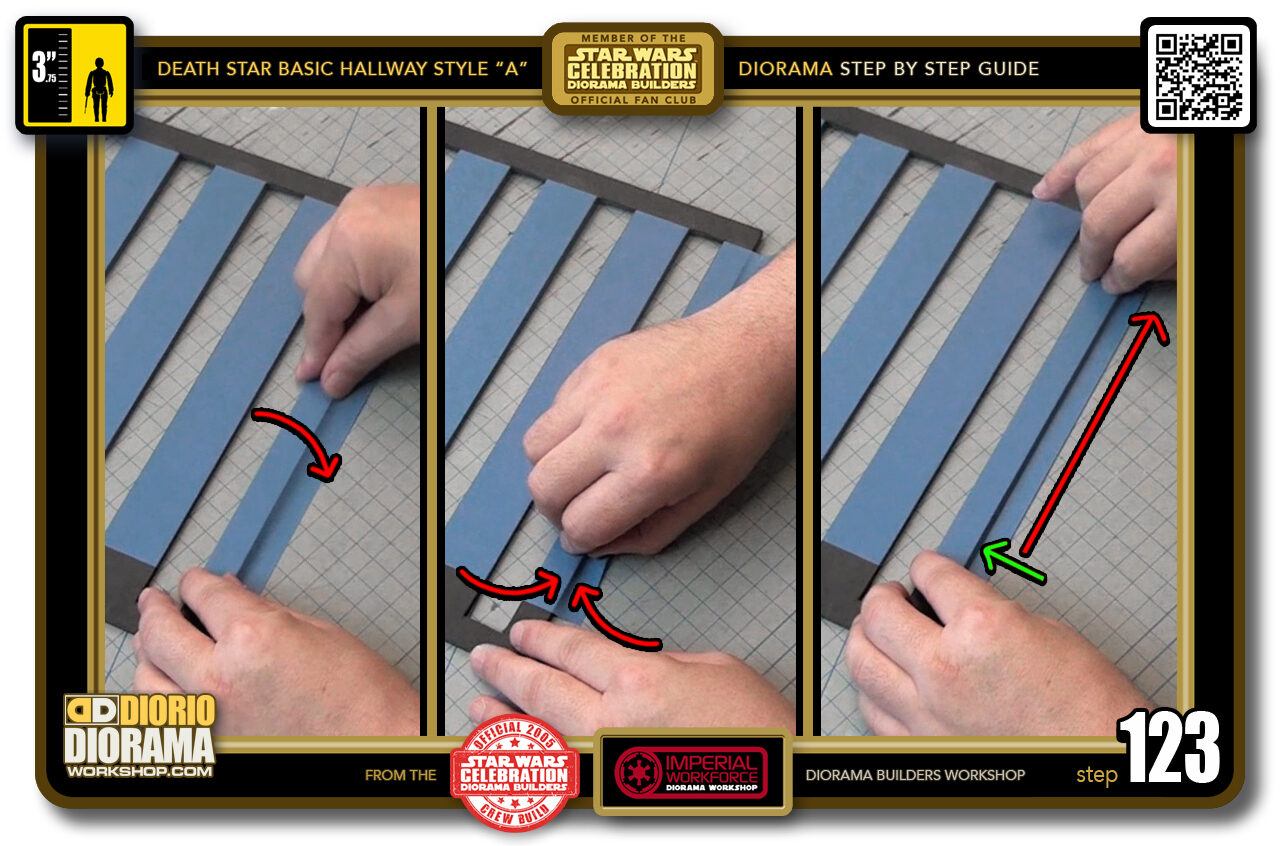
- STEP 123 > Time for the last fold. Repeat all the previous steps. Finger nail, pinch etc...
-

- STEP 124 > Flip the frame to it's back side and continue adding fold memory to the decal.
-
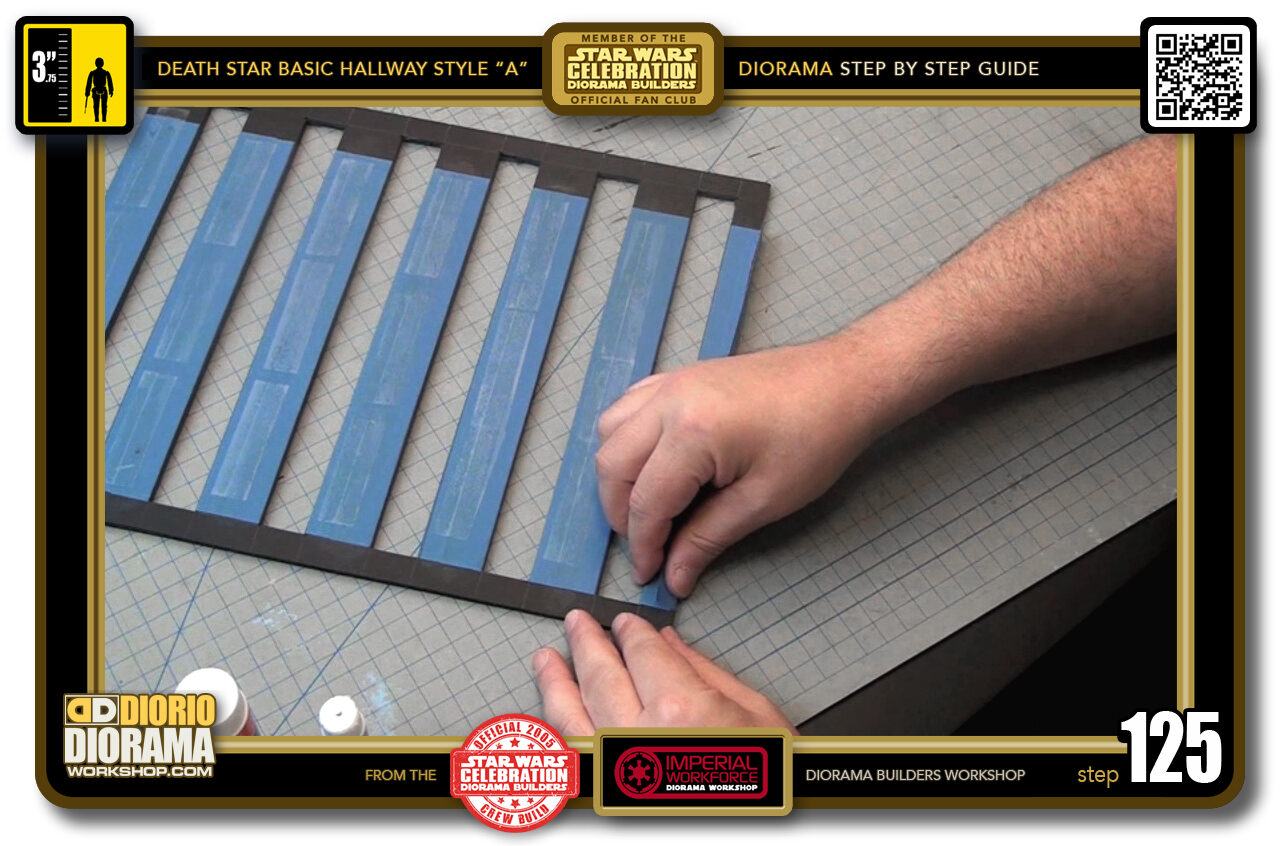
- STEP 125 > When you have a clean tight 90 degree corner you can start to glue it in place.
-

- STEP 126 > Apply a good amount of glue stick to th etop of your previous folded decal. NEVER USE HOT GLUE !!!
-
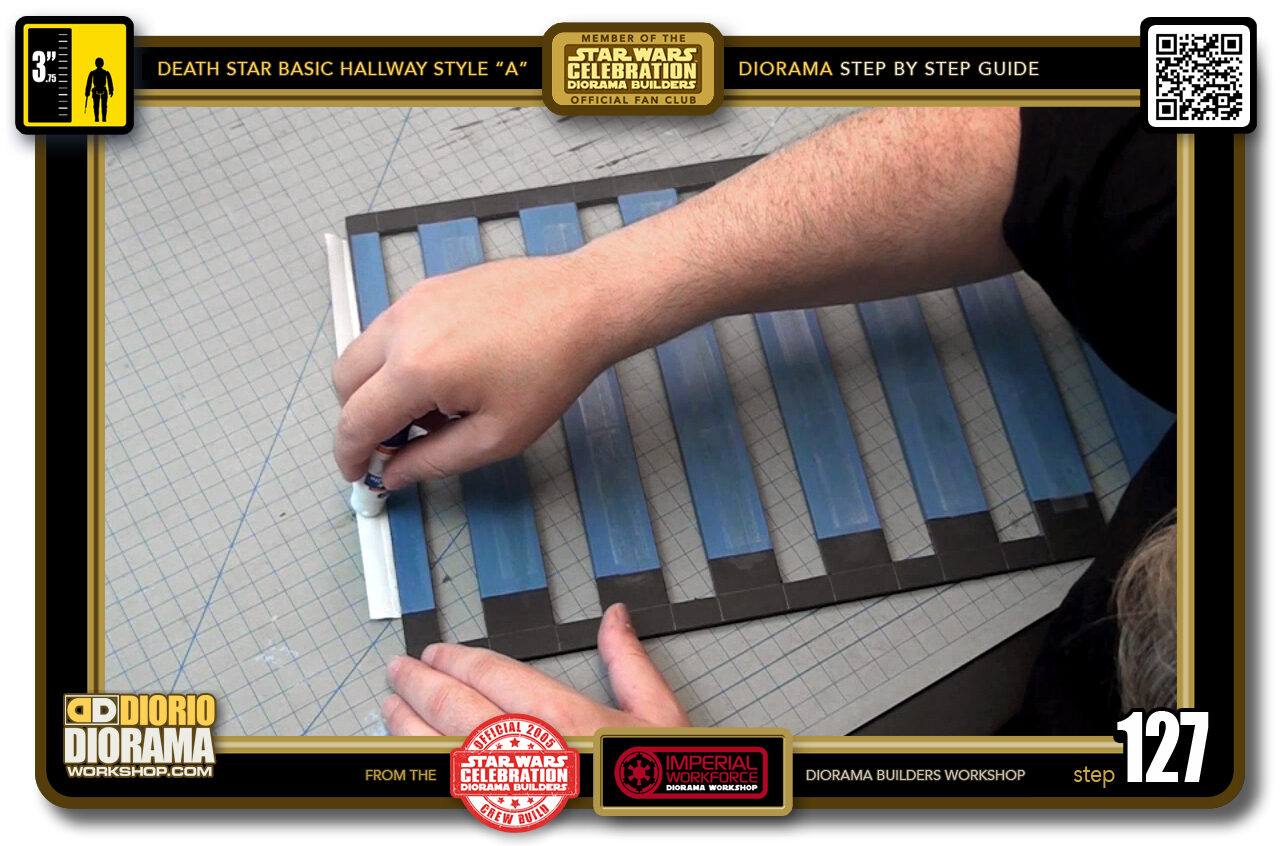
- STEP 127 > Some glue stick on the back of the decal.
-
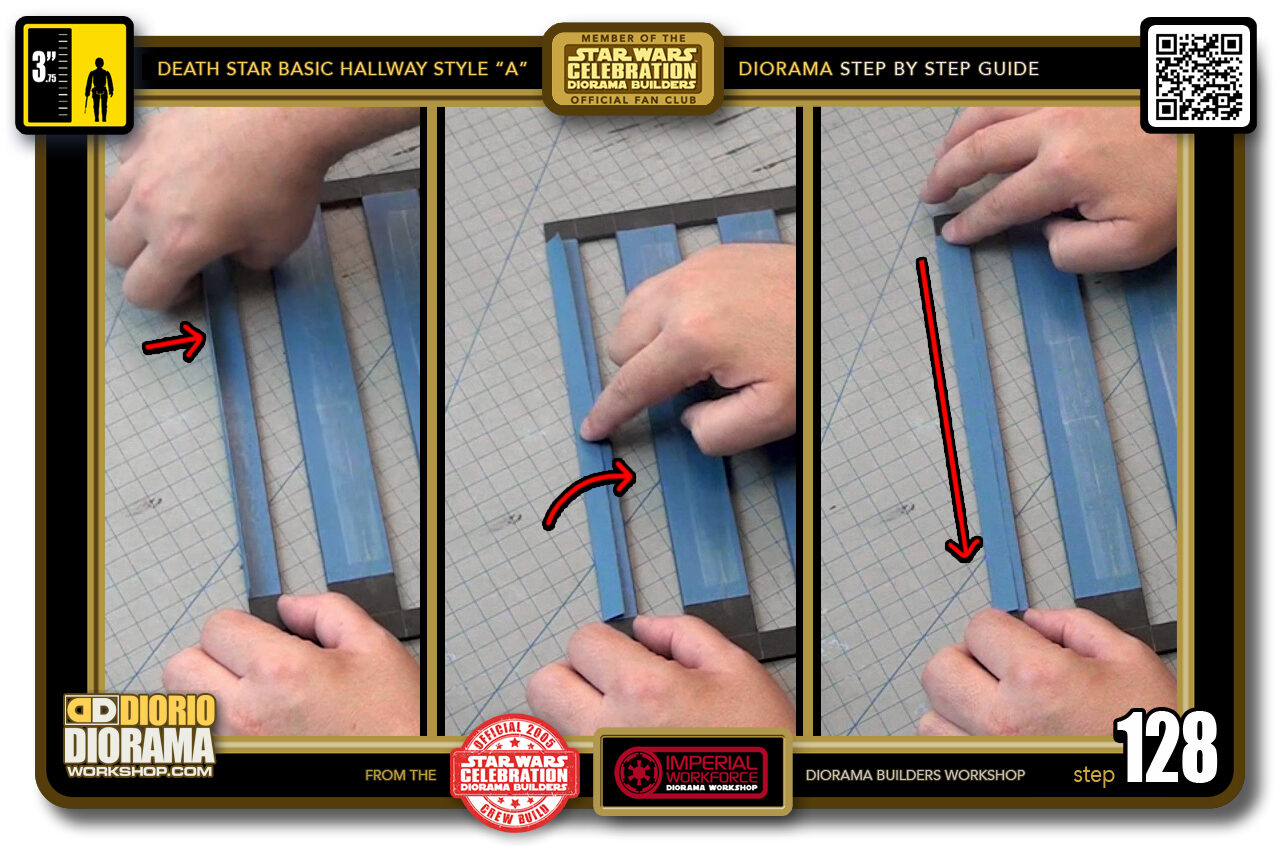
- STEP 128 > You know the drill... Fold again make that memory tight (left box) Start at the centre and fold onto the foamcore surface. Move your fingers outwards always returning to the centre to continue pushing outwards (centre box) and finally you can press down one last time to make sure all is nice and secure (right box).
-

- STEP 129 > Seal the seam with some glue stick.
-

- STEP 130 > ALL of your MAIN decal skins are done. We can move on to the end caps.
-
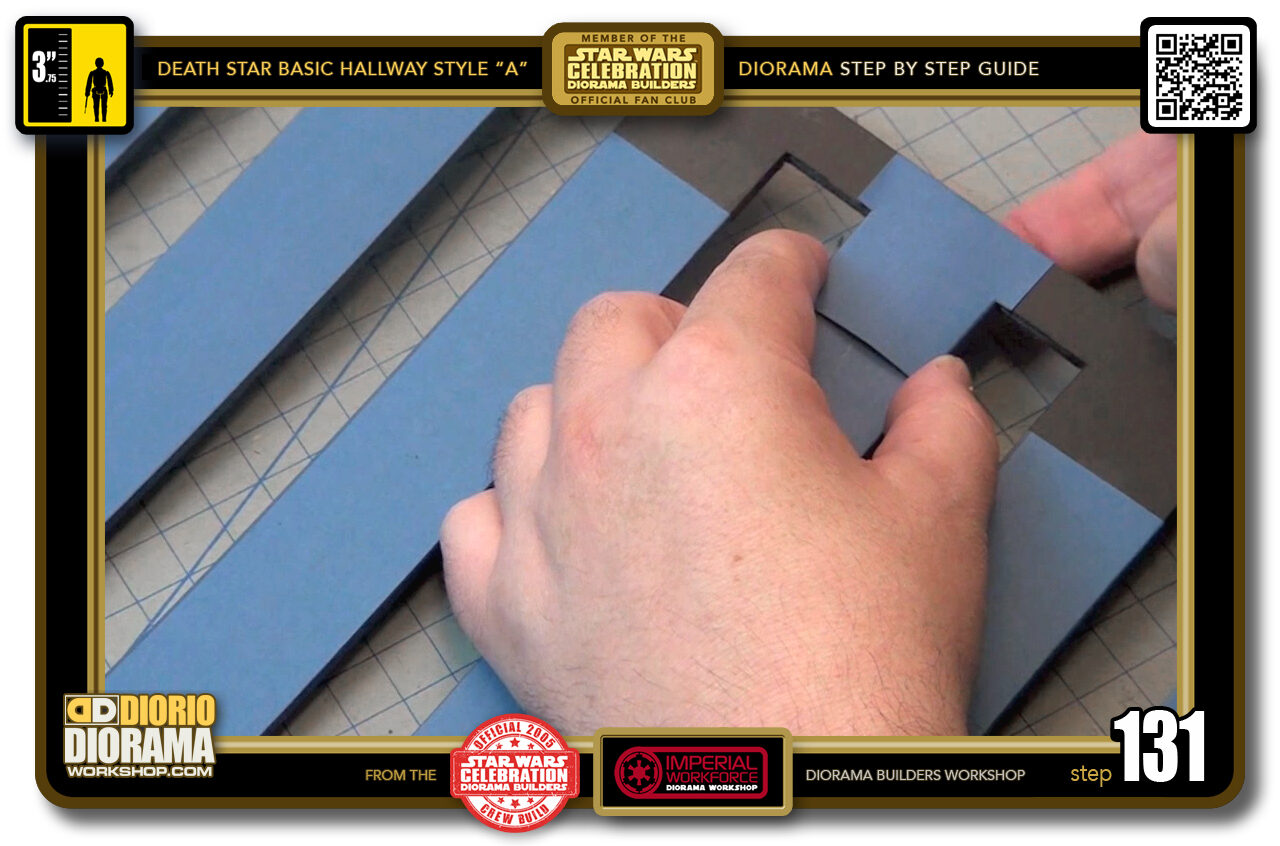
- STEP 131 > The ends will align and fold over the side edges as well as the front edge like you see here.
-
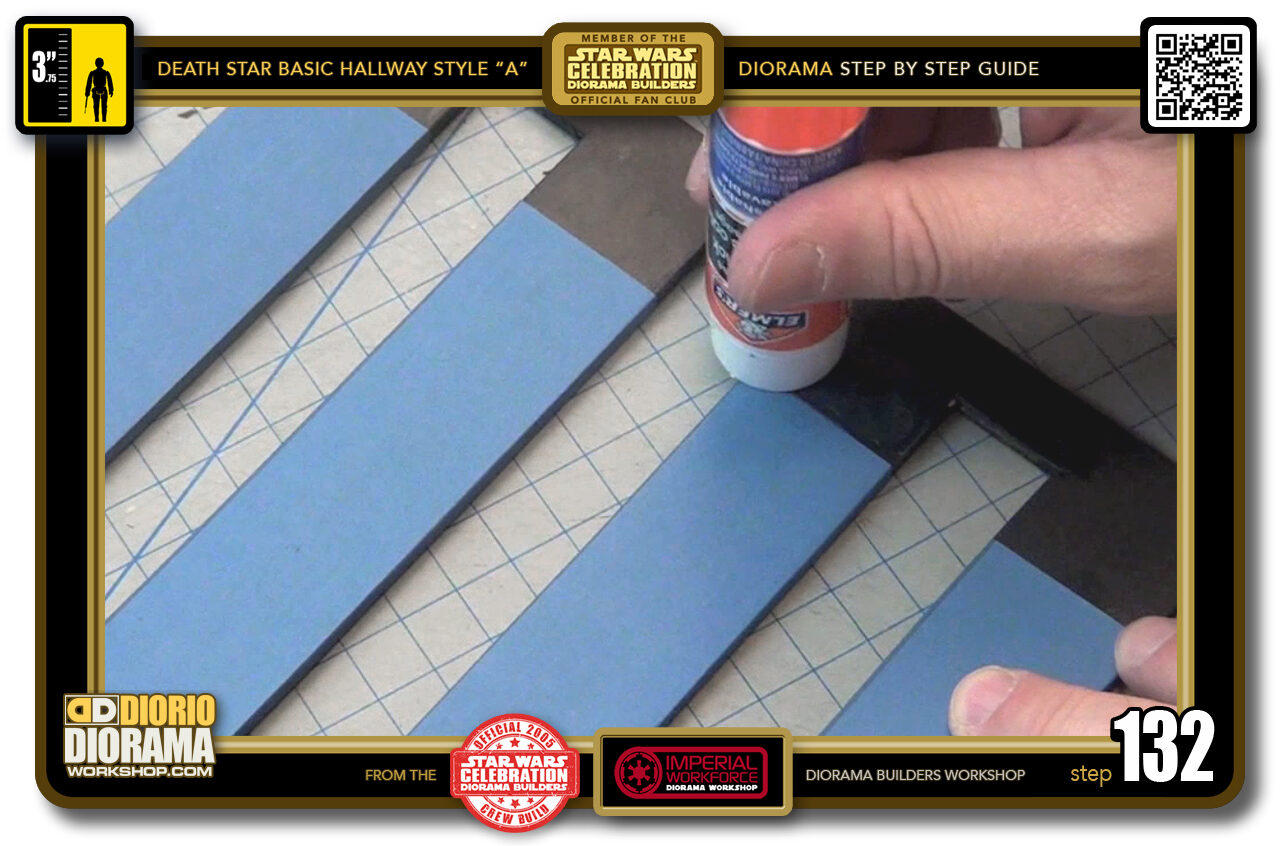
- STEP 132 > Start by putting some glue stick on the black foamcore and a LITTLE BIT on the end of the blue main decal colour. Since the 2 overlap slightly, you want the connection here to be super tight to hide the connection seam.
-

-
STEP 133 > Flip your decal and cover the entire surface with glue stick. It is SUPER IMPORTANT you get all the corners and edges.
FRANK TIP : When doing this, place a sheet of paper between the decal and the table as glue will end up being put on the outsides of the decals.
-
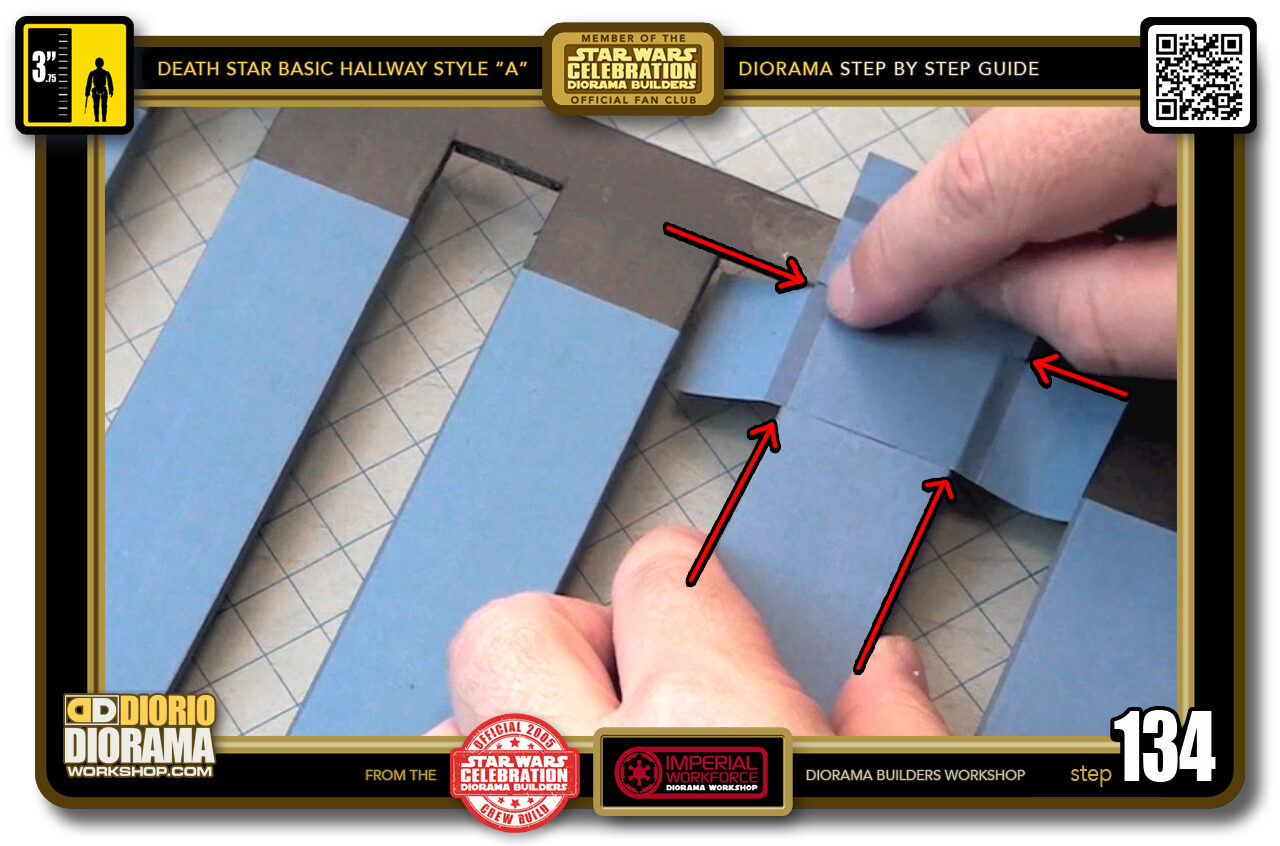
- STEP 134 > Carefully align the end cap dark folding guides with the "C3" strip edges in the same way you did the main body decals. You then also want the slit cuts you made into the blue colour to align precisely with the inner top edge of the frame. See the red arrows.
-
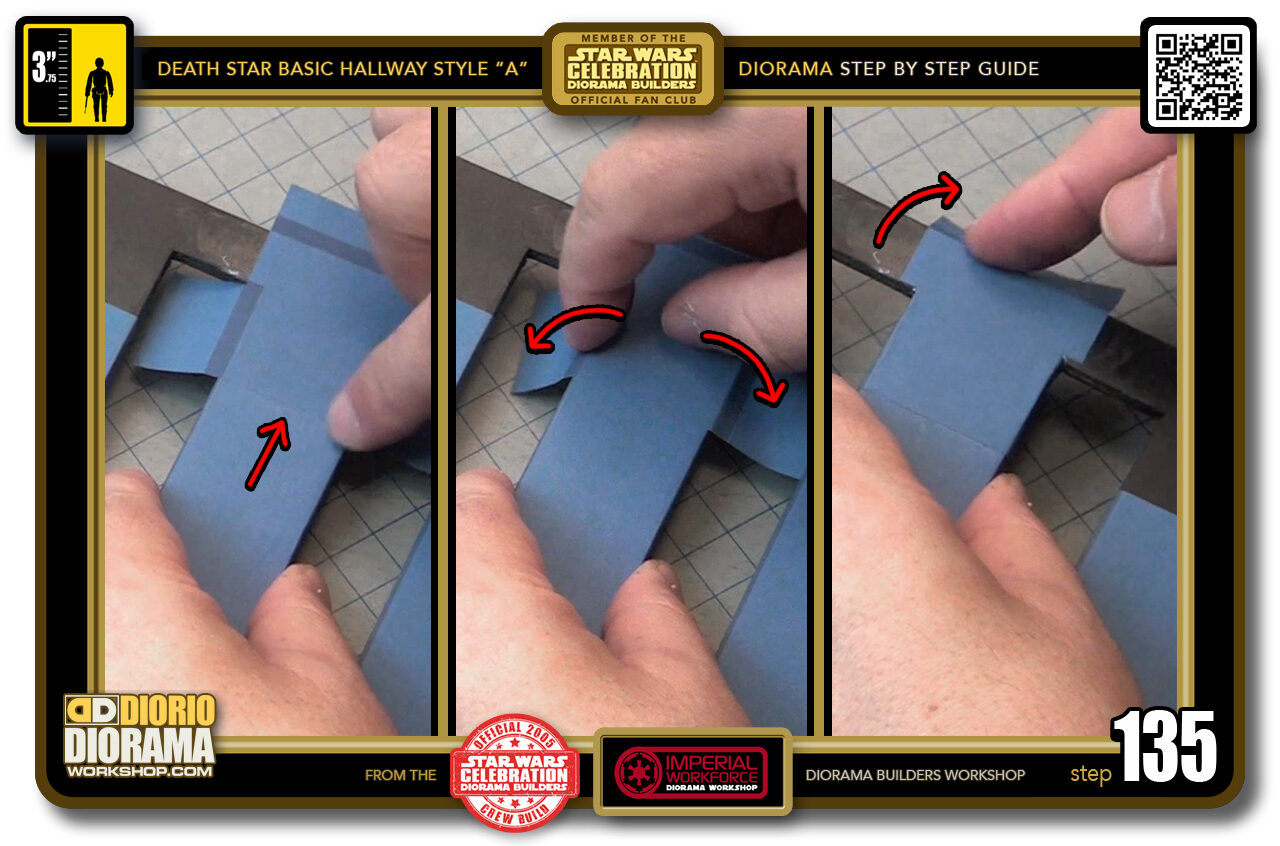
- STEP 135 > First start with joining the seam, once you are happy with the alignment, press along the contact point of the 2 decals (left box). Then start folding the outer side edges. (centre box). Press until you get a nice clean sharp fold. When that memory is done, move to the top, or front edge of your decal and fold over like you see in the right box.
-

- STEP 136 > With all memories nice and sharp, start with glue stick along the top of the foamcore frame (left box). Then PULL and FOLD OVER until you make contact. Press against the surface like you see in the right box.
-

- STEP 137 > Let's glue one of the side flaps, put some glue stick like in the left box. Pull and FOLD the side flap around and onto the foamcore sureface as seen in the right box.
-
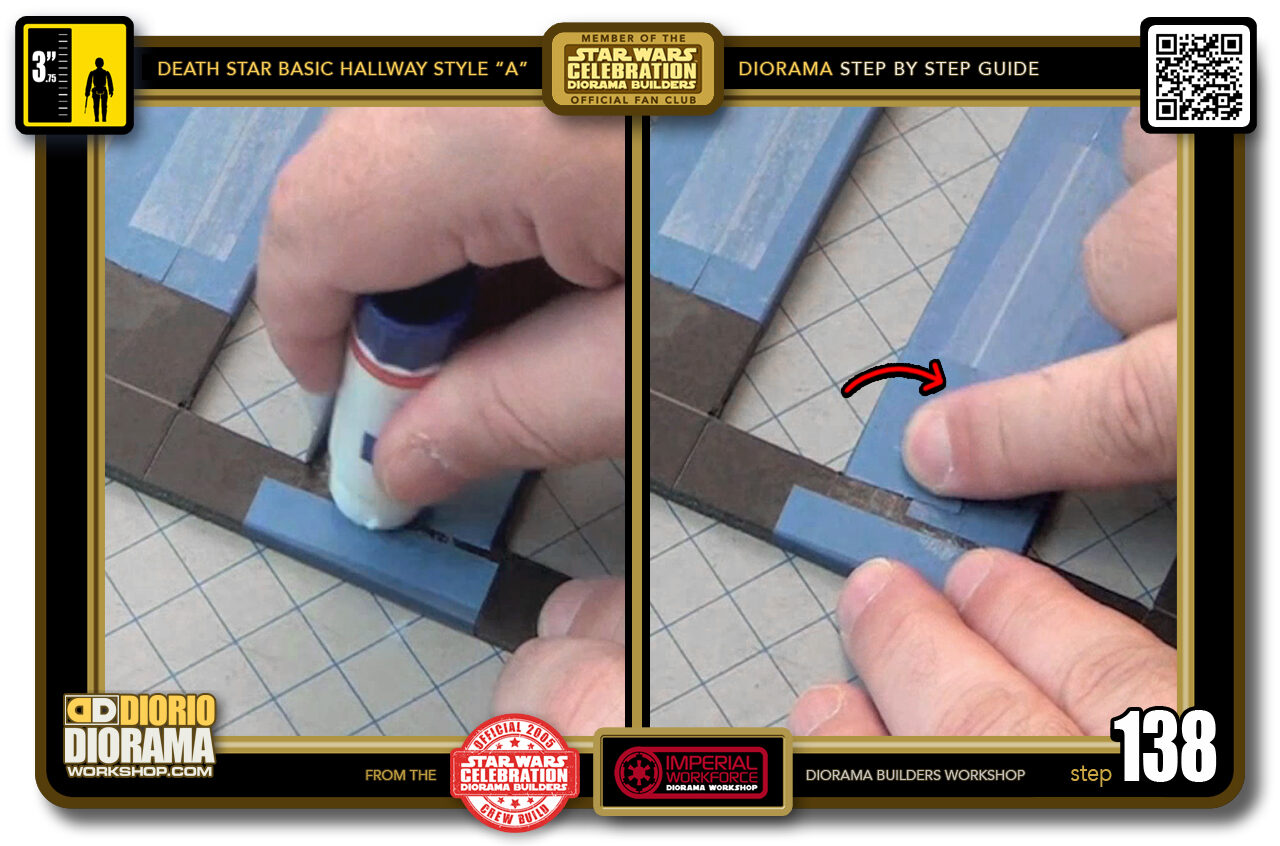
- STEP 138 > Moving to the last flap, some glue stick on top of the remaining surface (left box). Then PULL and FOLD onto the foamcore surface pressing down making sure the edges are clean, no bubbles or creases.
-

- STEP 139 > Seal the overlapping seams with your gluestick as seen in the left box then for added security as the glue dries, place a piece of scotch tape over the centre (right box).
-
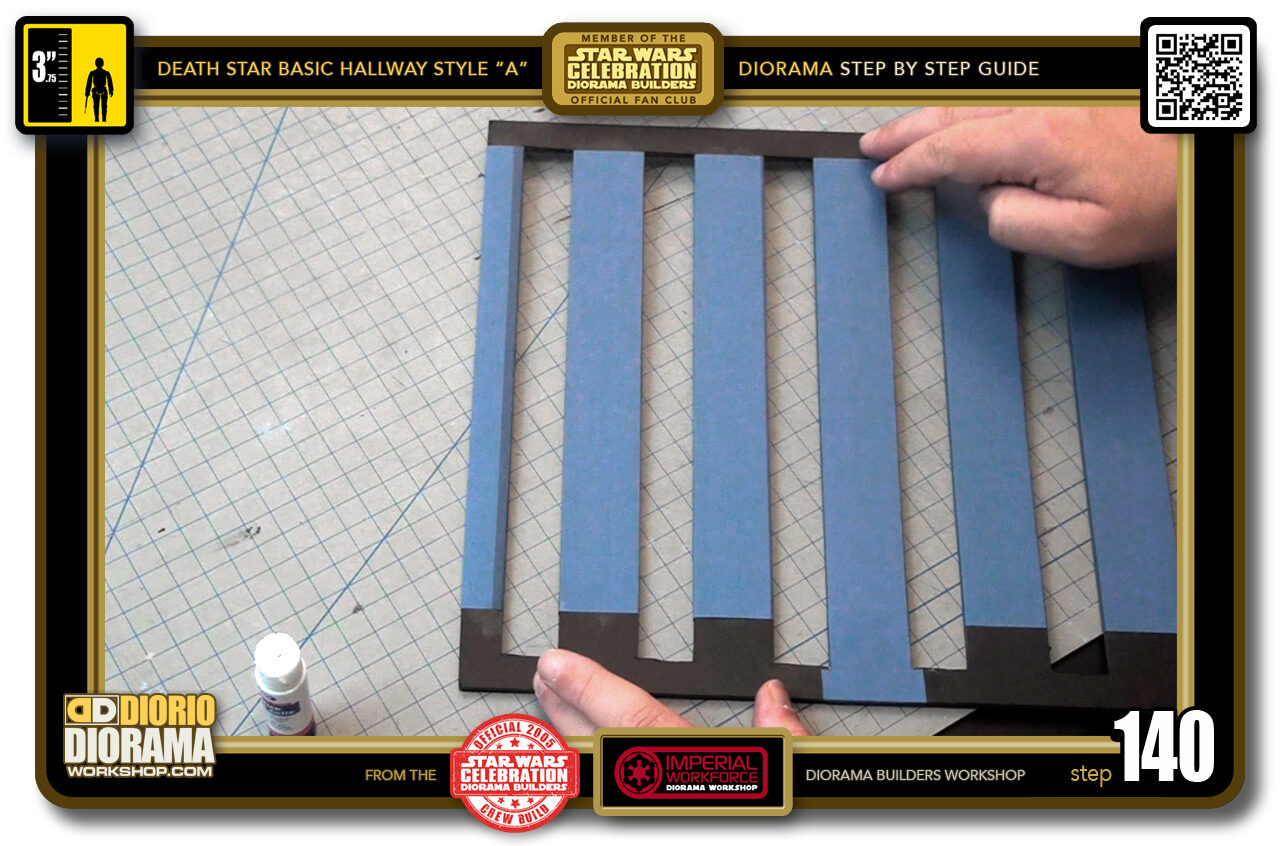
- STEP 140 > You now have a completed decal skin strip. Now repeat these same steps for all remaining regular "C3" strips. IMPORTANT: Save the 2 ends for last as you will have to modify the end cap decals for the 2 "C1" corners.

.
Did you already build this Diorama ? At home or at our Star Wars Celebration Diorama Builders workshop ? Would you like to show it in the site’s GALLERY VISITORS DIORAMAS section, YES ? That is Awesome !!! You can find out all the details on how to email me your photos on the VISITORS SUBMISSIONS INFO page … When I get your photos, I will create your very own page just like this one. You may not realize it but work does inspire others to join in the fun of making Action Figure Dioramas.
.
NOT FOR RESALE ALL Decals, tutorials and artwork are ©FrankDiorio (dioramaworkshop.com) and offered FOR FREE to the fans – that would be you ? so you can build and display my diorama designs in your very own home. I realize I cannot control what one does with my graphics once I place them on the web, I can only ask you as one fan to another, please respect the artist and do not be that jerk who uses my designs and tutorials to build a copy of my work only to sell it on EBAY or trade/sale groups and forums. Thank You. Frank.
.
.
If you have a facebook account, why not join the Official Diorama Builders Fan Club today, simply click the logo link below.
 .
.
Catch up with fellow visitors and exchange stories, read cool interviews with the crew, exchange photos, fun surprises and grab some FAN ONLY merchandise next year at actual future conventions ?
.
©2018 Frank Diorio DioramaWorkshop.Com
.
IF YOU LIKE WHAT YOU SEE, PLEASE SHARE WITH YOUR FRIENDS
USING THE SOCIAL MEDIA BUTTONS BELOW