


-
-
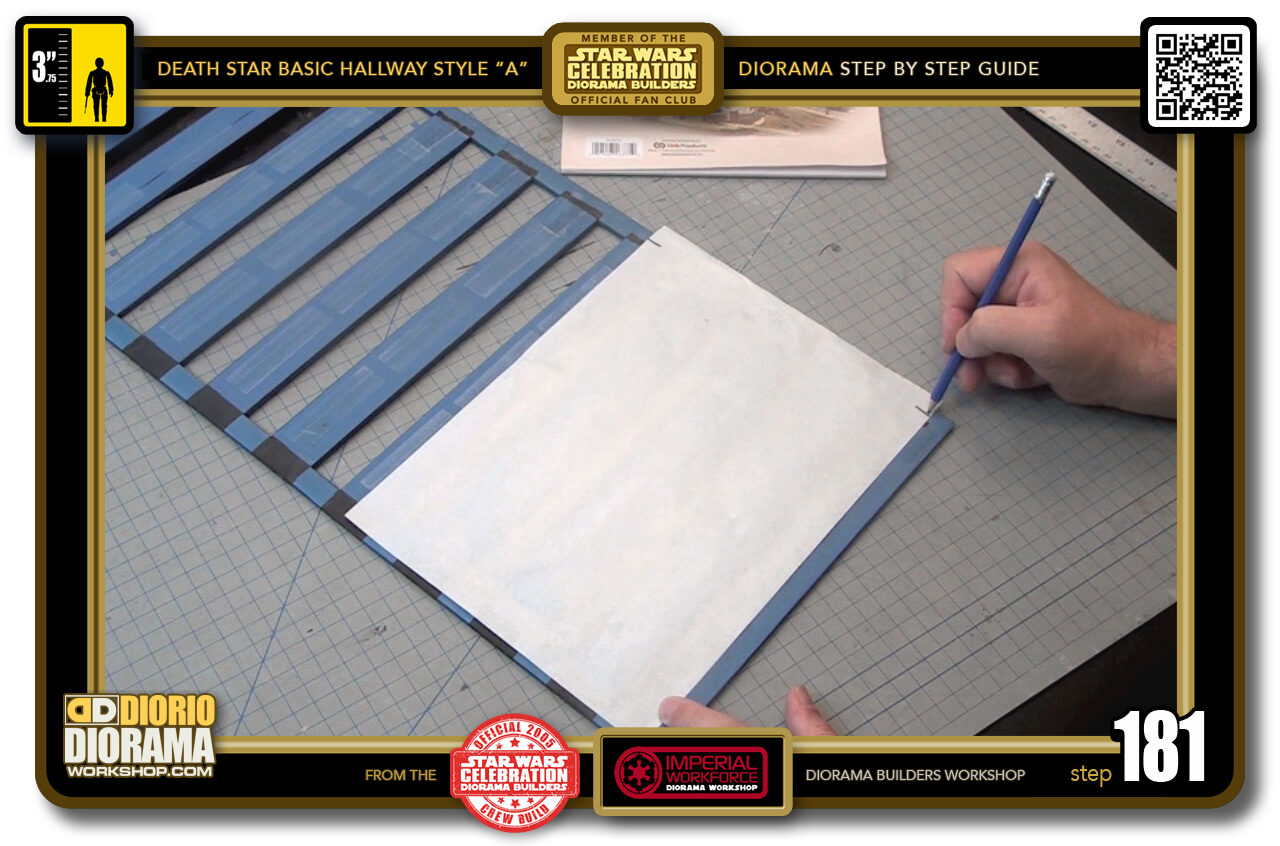
STEP 181 > This step maybe different for you depending how big the Tracing Paper Pad you bought is, if it matches mine or not. You can also buy it in rolls if you prefer that. If your sheet like mine, sticks out a little, we need to trim it.
Begin my placing the sheet bottom, seen on the left here in the photo, about 1/3 away from the edge so that it remains hidden when the ceiling box is assembled. With your pencil make a mark at about the same distance on the opposite end which would be the top of your paper, or the right in the photo.
-
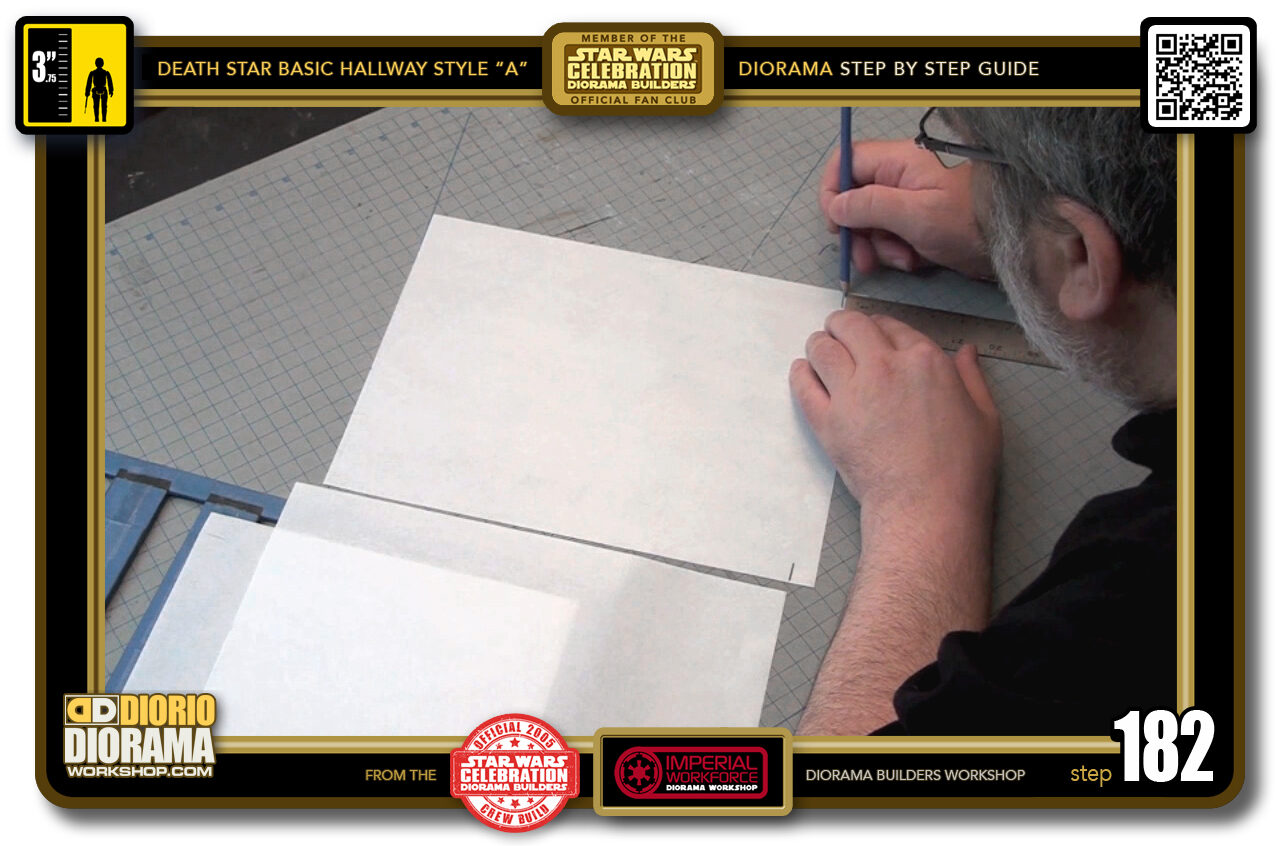
- STEP 182 > For my sheet, the mark came at 1.5 cm from the edge, so I measured that on the 2 other sheets. Make sure to place a pencil mark at both sides of your sheet top.
-
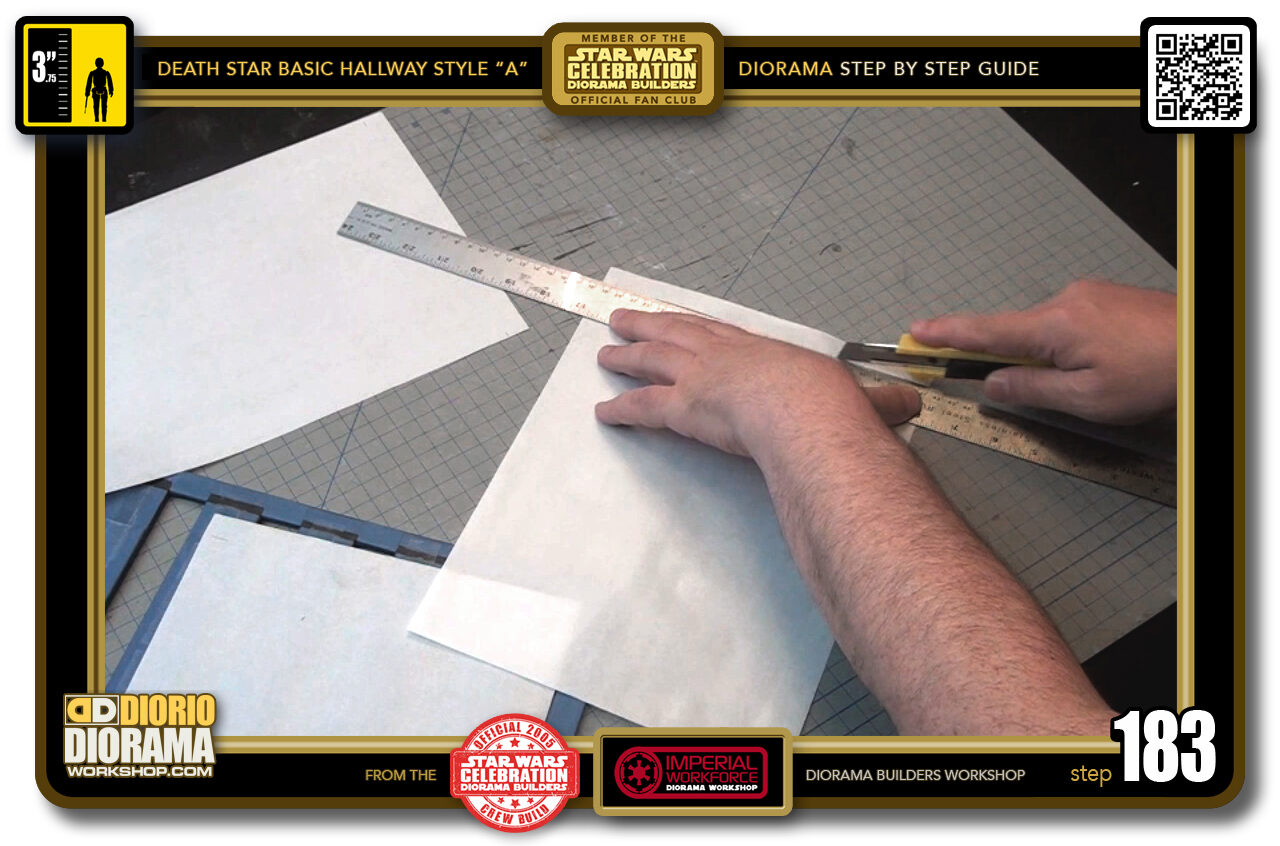
- STEP 183 > With the ruler I aligned the pencil marks and carefully and more important GENTLY CUT the top off the sheets. Since Tracing Paper is much thinner than regular paper, it can tear easily if you press too hard or use a dull blade. If you cut a lot of foamcore before, now might be a good time to switch blades for a fresh one.
-
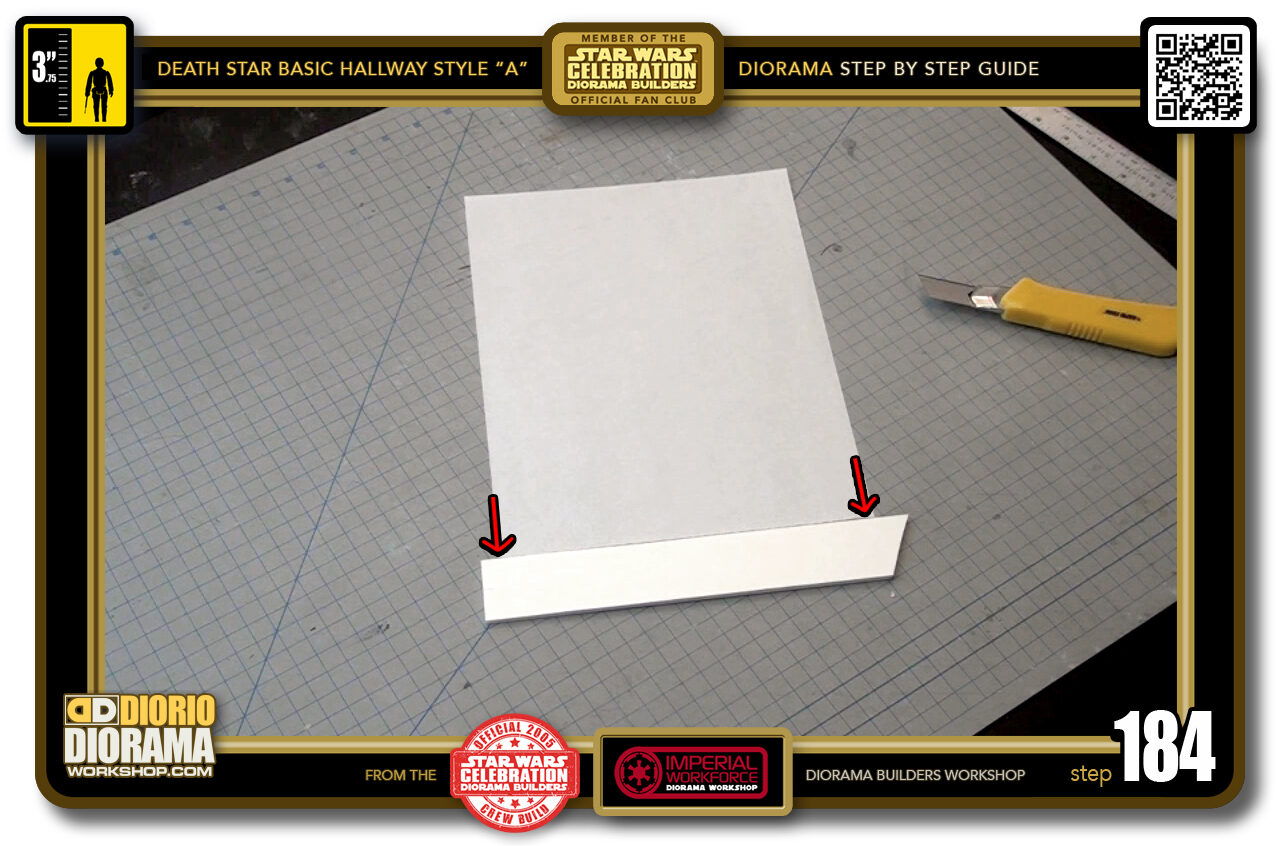
- STEP 184 > In order to apply the sheet properly you will need to find yourself a scrap of foamcore that is a little wider than the paper itself.
-
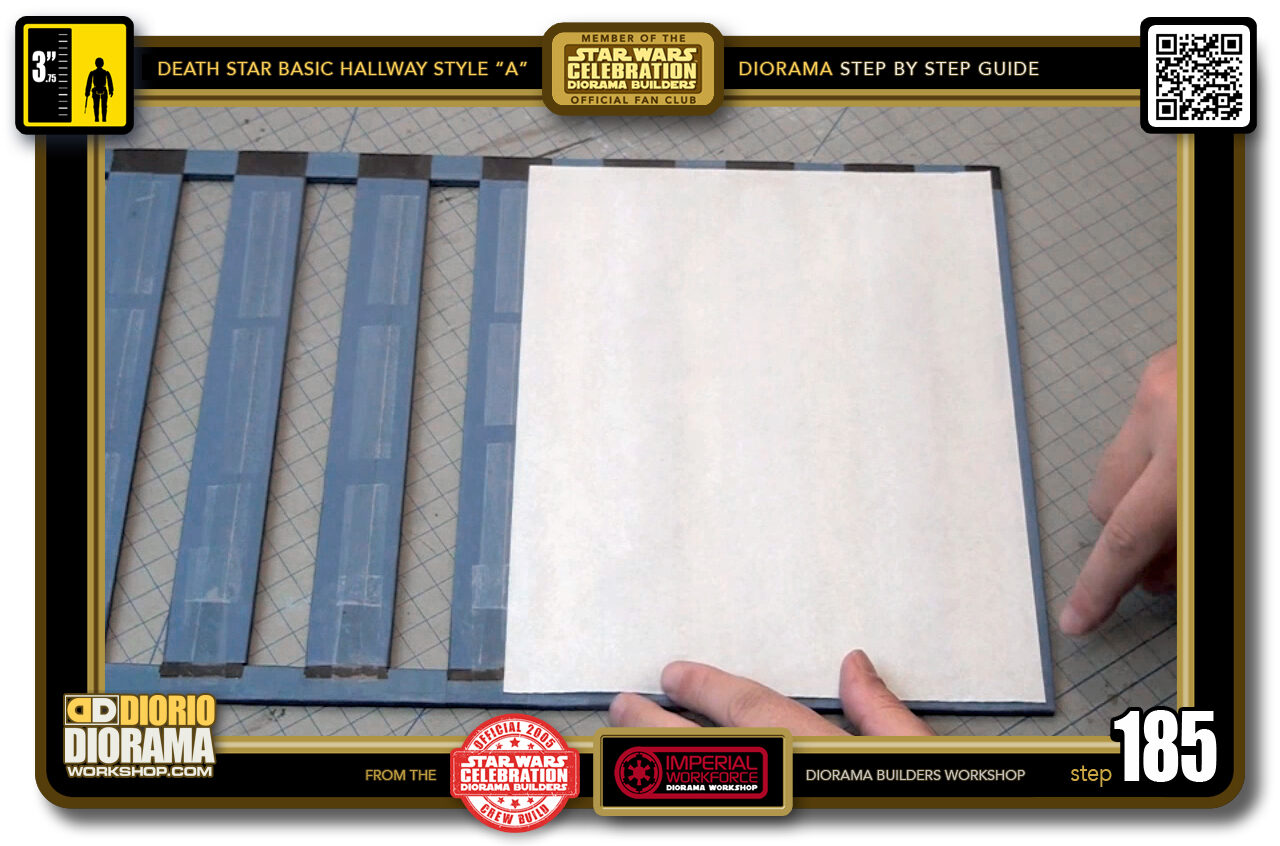
- STEP 185 > Do a dry run to see if your paper fits just like mine. 1/3 gap at the top and bottom and 1/3 from the right side which by chance, aligns it about half way down the "C3" Strip on the left.
-
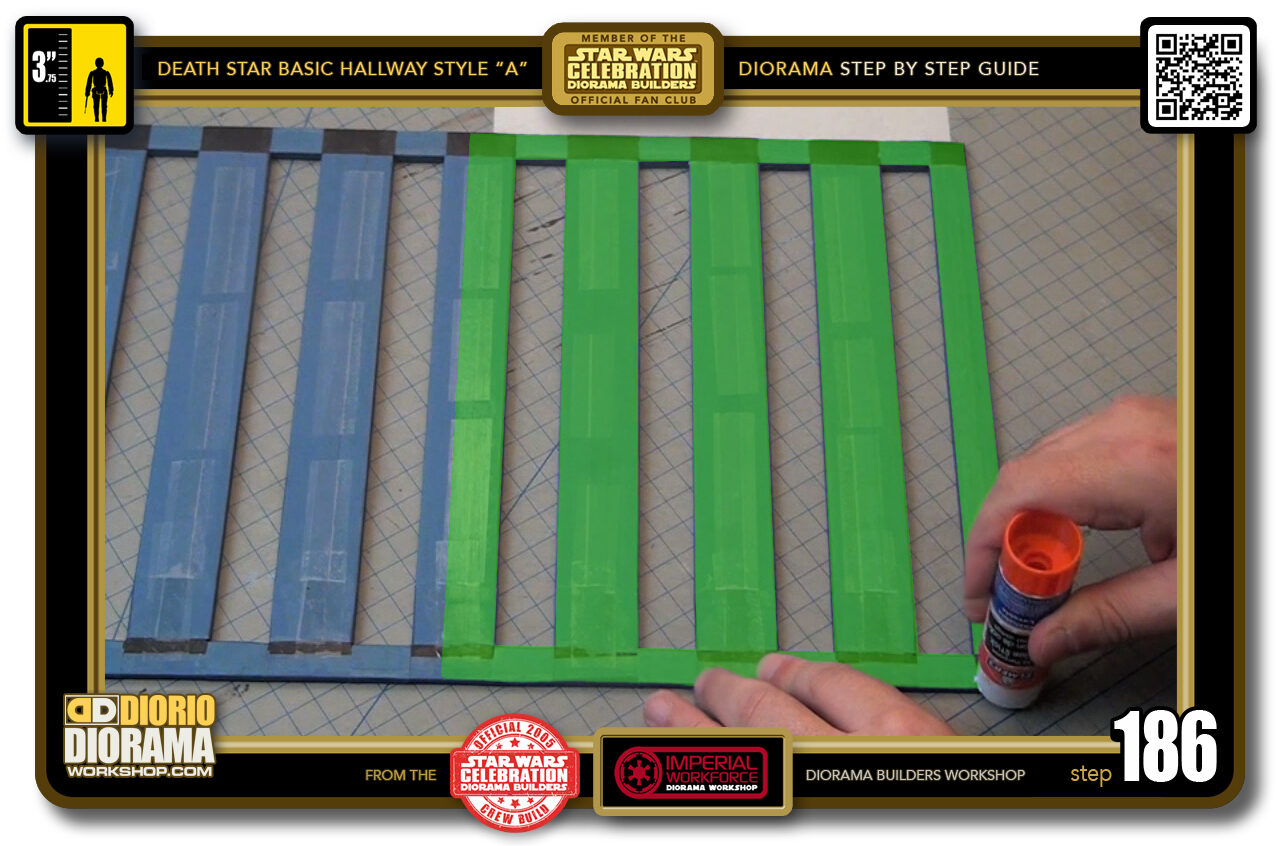
- STEP 186 > The green zone here represents the size of your sheet of Tracing Paper. You want to apply a good amount of glue stick all over this foamcore surface. NEVER EVER USE HOT GLUE TO ATTACH TRACING PAPER.
-
-
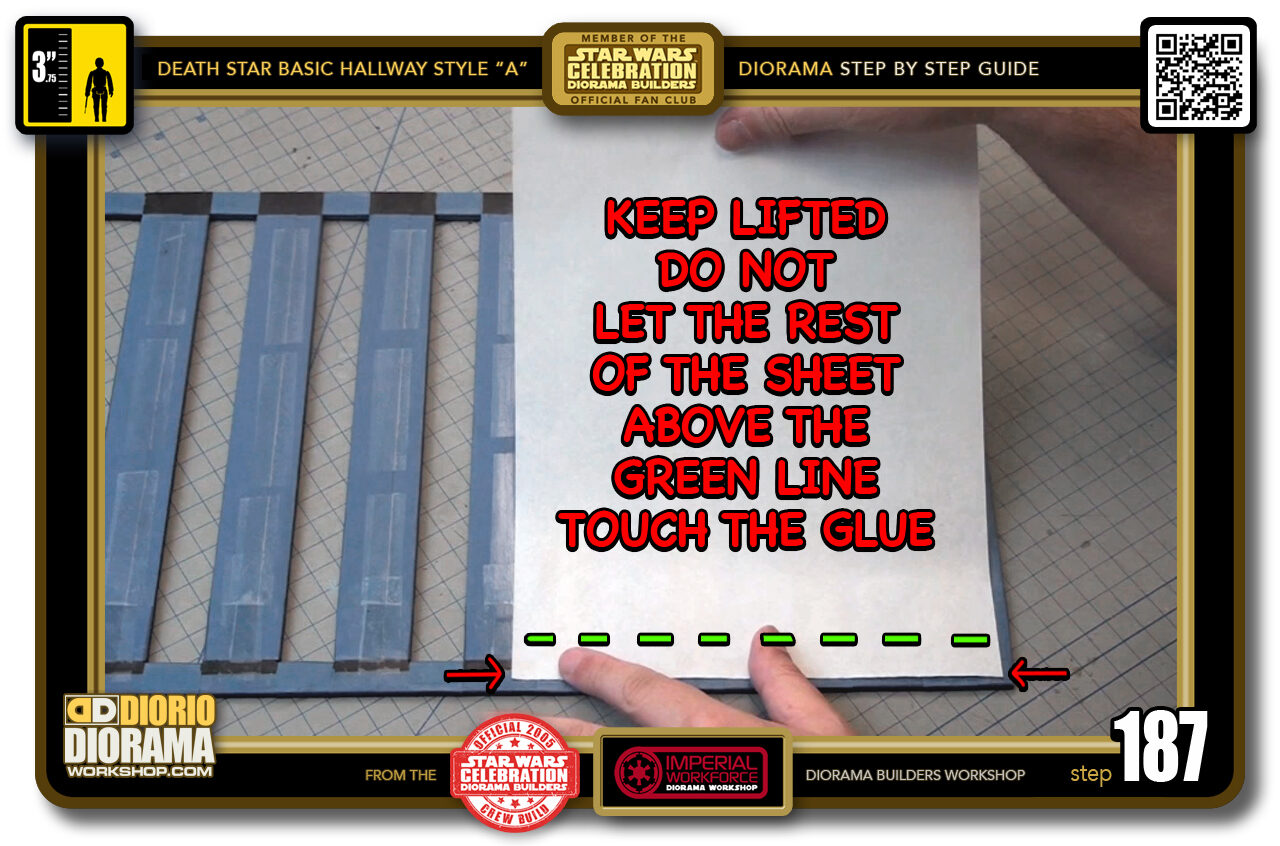
STEP 187 > There is a specific technique to apply this that is easier to understand when you watch the youtube video version of this tutorial but I will try to explain it in text.
You want the tracing paper to land perfectly smooth onto the foamcore frame and because of how thin and light it is, you can very easily get folds and creases where you want a flat white surface exposed on the other side which will be the one seen in your diorama. When the paper touches the glue you are doomed, it's locked in and you won't be able to peel it back off without tearing it. This is why you need to use the scrap foamcore as your "pusher" device and your other hand to prevent the rest of the paper from touching the foamcore.
So begin by aligning the bottom of your sheet as close to and parallel to the edge. Remember to not place it completely against the bottom but to keep that 1/3 gap. Press GENTLY with your finger ONLY BELOW the GREEN dotted line. VERY IMPORTANT : YOU MUST ALWAYS KEEP YOUR HOLDING HAND HIGH UP. You DON'T want the paper touching any of the rest of the frame.
-
-
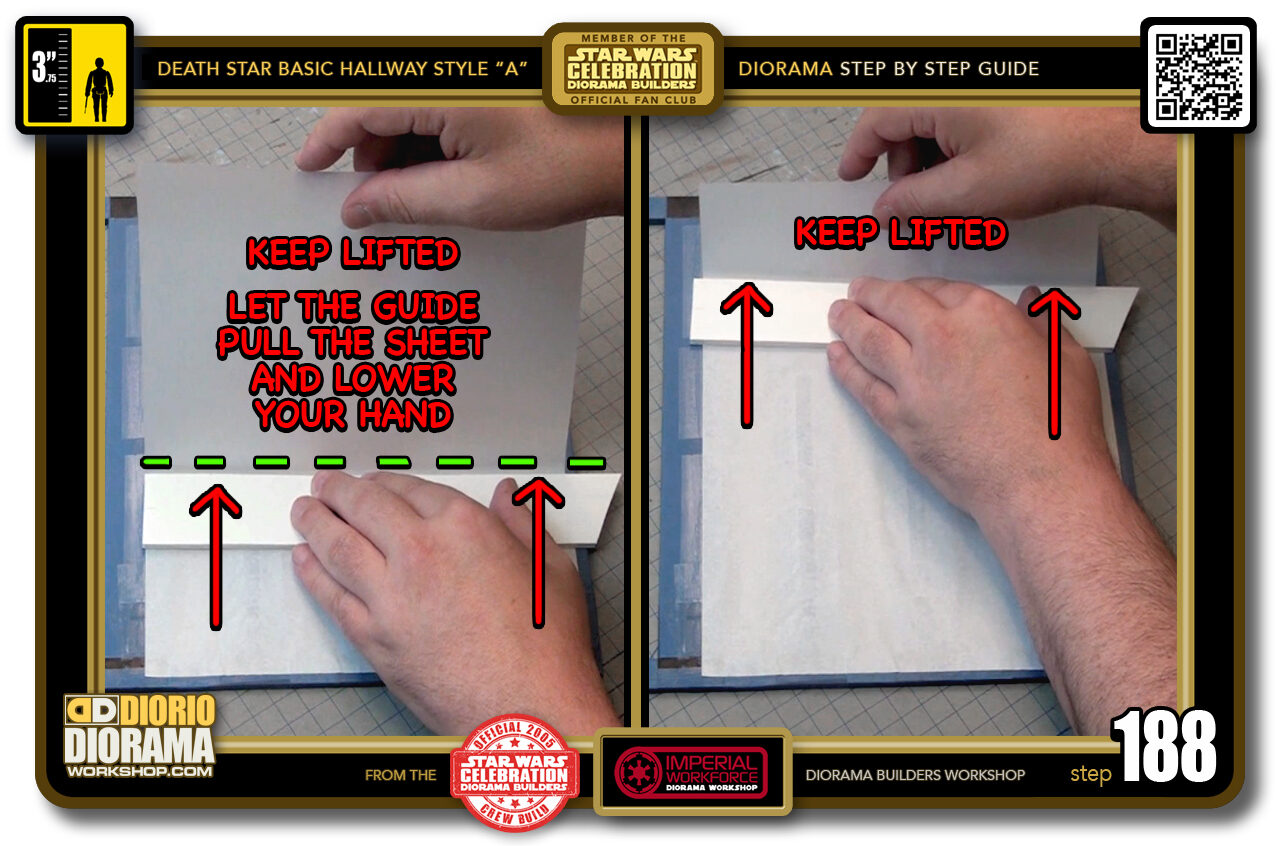
STEP 188 > You will now place your scrap guide flat onto the frame ON THE GREEN LINE of Step 186. You are going to SLOWLY MOVE THE GUIDE UP. Keep the guide level with the green dotted line. KEEP YOUR OTHER HAND UP but loose enough so that when the guide moves up, it will want to drag the top part of the paper lower and lower to make it touch the foamcore.
ALLOW your hand to LOWER as your foamcore goes upwards until eventually it reaches the top and the paper slips from your fingers and completely touches the foamcore surface. The guide is what will guarantee you a FLAT CLEAN connection.
-
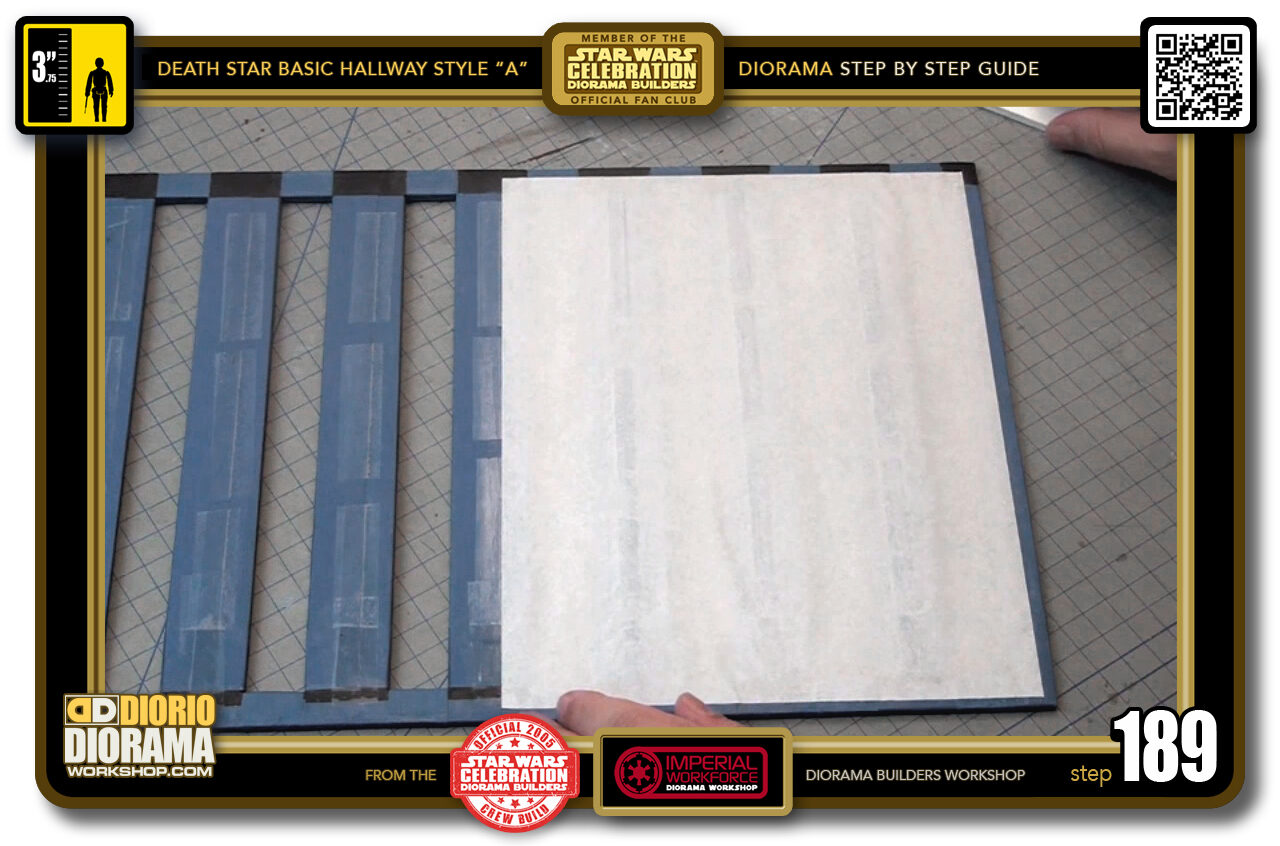
- STEP 189 > Now remember that you are working with VERY THIN FRAGILE paper. When manipulating the frame from this point on, you DON'T want to POKE a hole through the cut gaps.
-
-
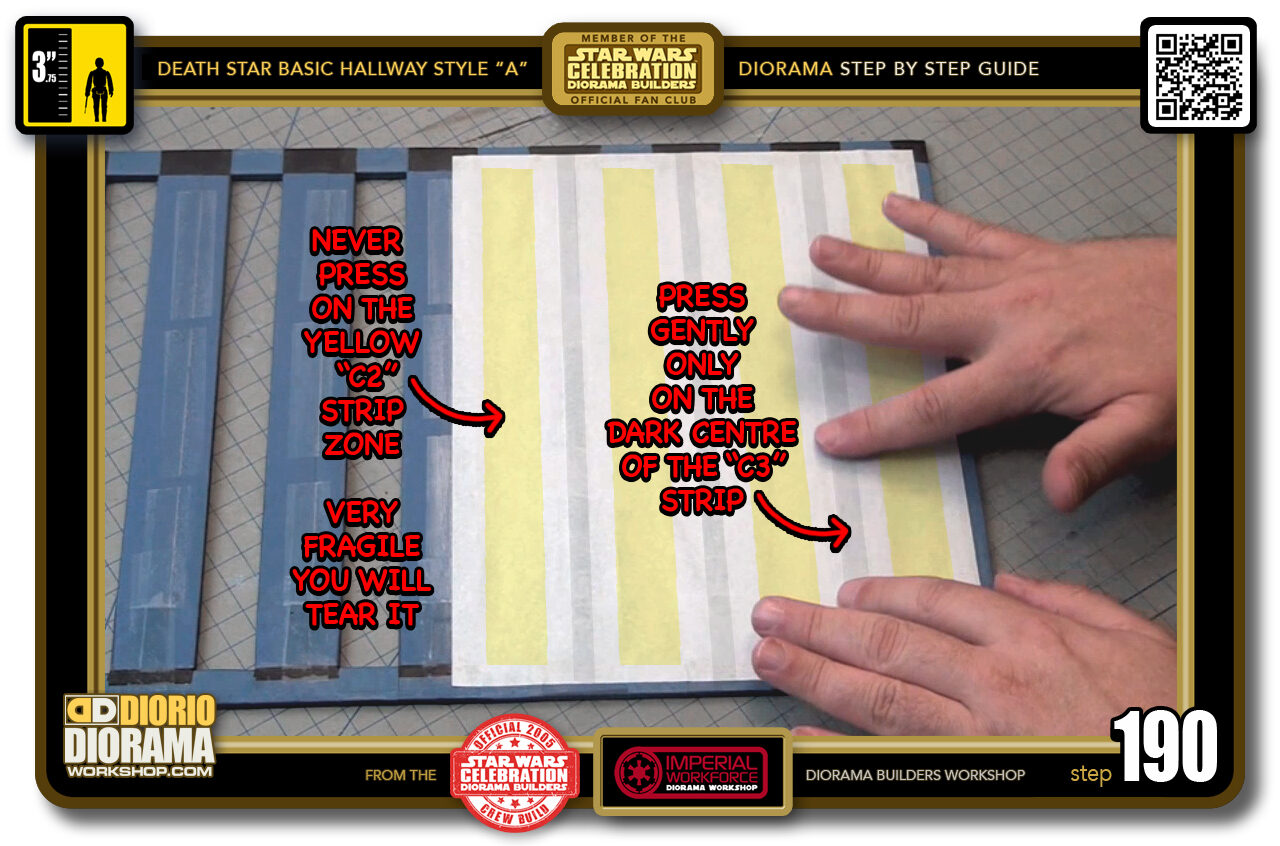
STEP 190 > If you look at Step 189 photo, you will notice that you can see a kind of darker line at the centre of the "C3" strips where the glue stick seems to have seeped in differently because of the decal overlap. I exaggerated those black lines for this photo as well as added yellow colour to identify the cut "C2" shapes that now if pressed against, will cause your finger to poke through and cause a tear in your ceiling light panel (tracing paper)
So what you want to do is CAREFULLY use your index finger to press against the CENTRE ONLY of your "C3" strip, or the darker black area I was talking about.
-
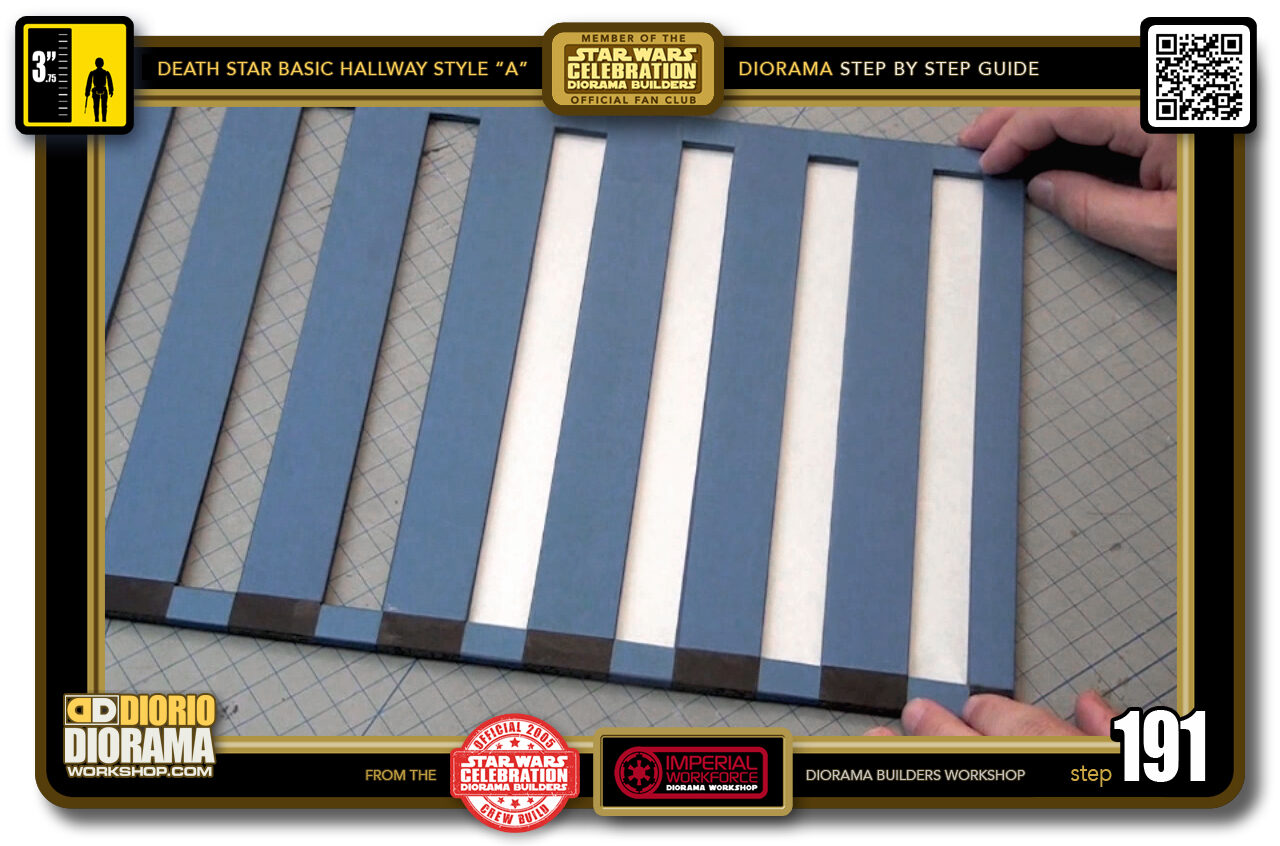
- STEP 191 > This is the result you get when you flip your ceiling to the side it will be exposed in your displayed diorama. Doesn't it just look amazing ? Wait till you see it lit up later on... 🙂
-
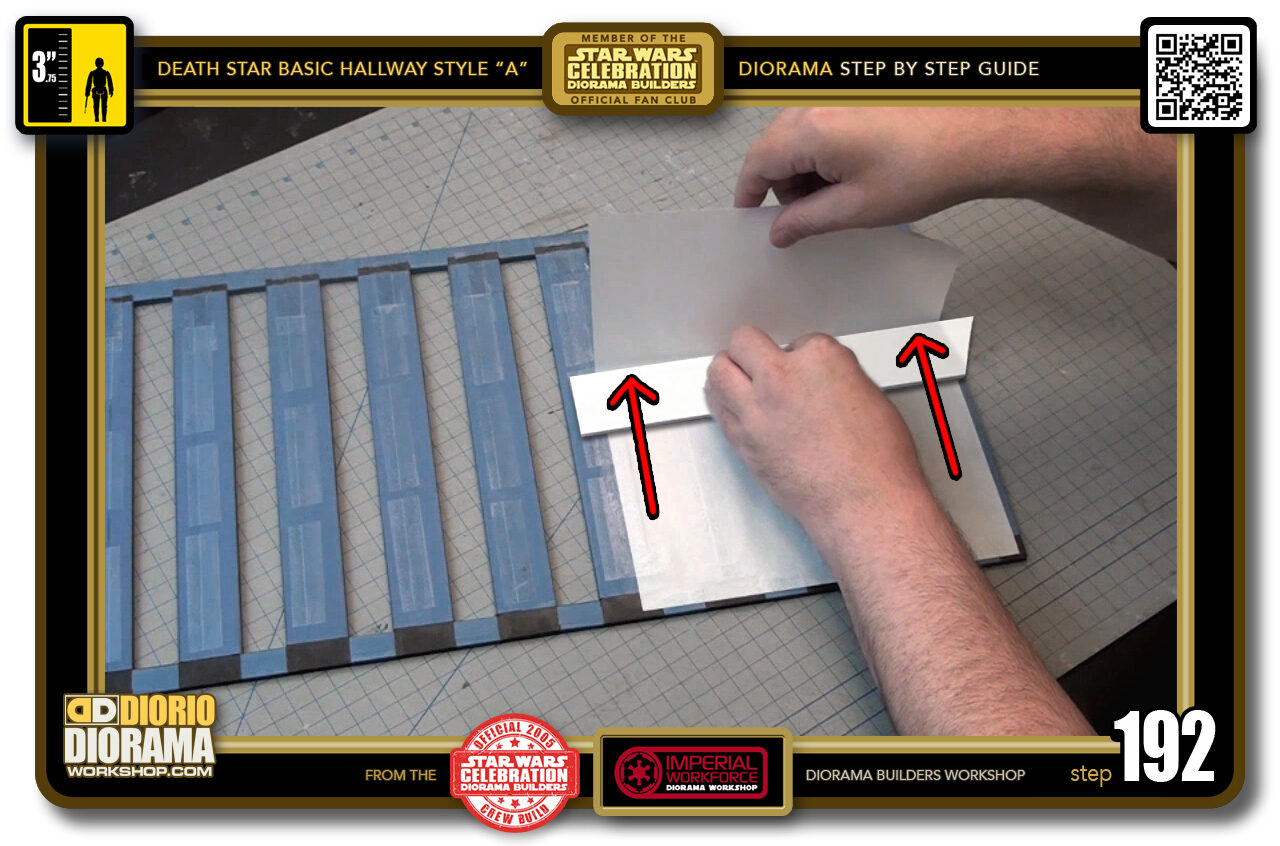
- STEP 192 > Repeat the application technique on the opposite side. Do your dry run, apply your glue stick, align the tracing paper at the bottom, leave the 1/3 gap, place your scrap guide level with the edge and slowly move it up as you let the paper lower to the surface and make contact.
-
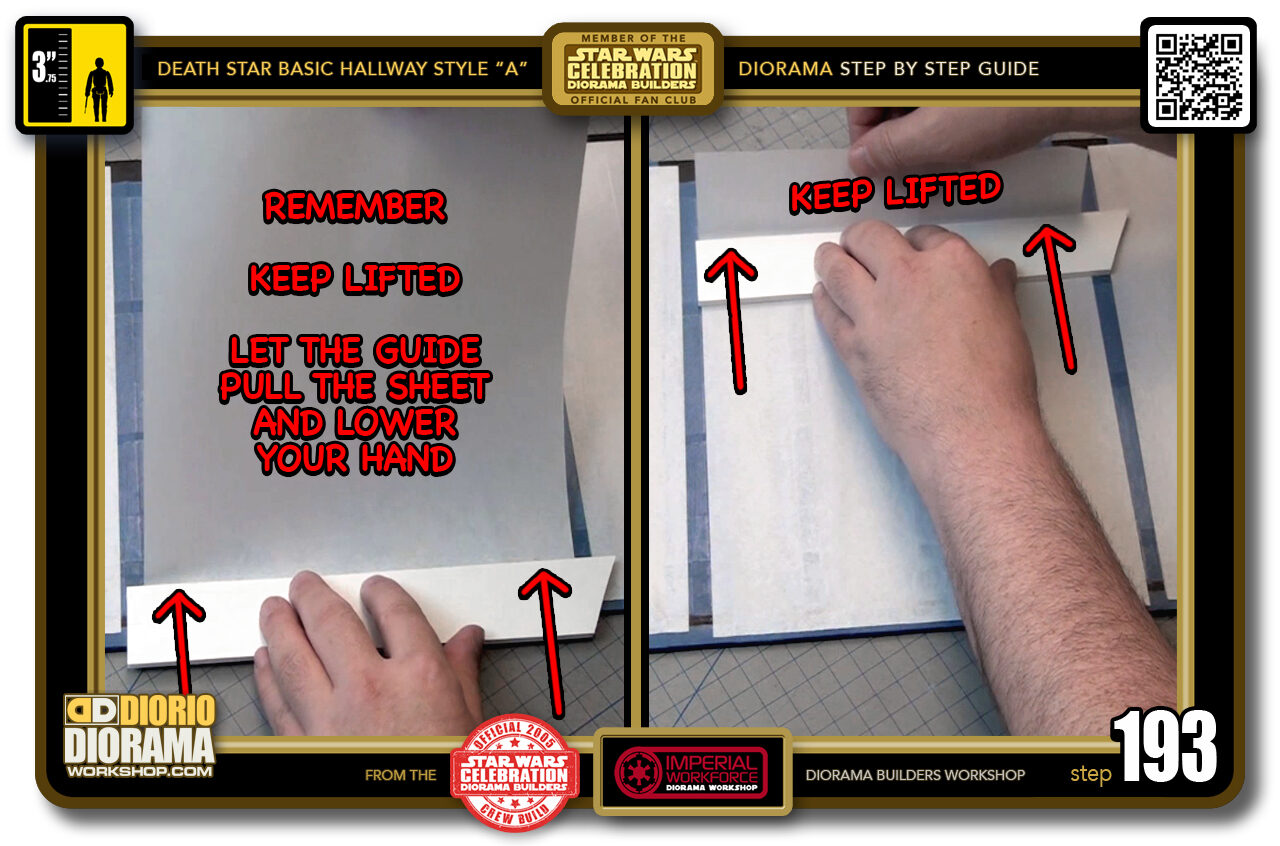
- STEP 193 > Now it so happens by luck that the pad I bought, the paper fits perfectly in the centre without any trimming except for the top 1.5 cm excess. Just as you did for the other 2 sheets, dry run to glue stick to let only the bottom touch and move your way to the top.
-
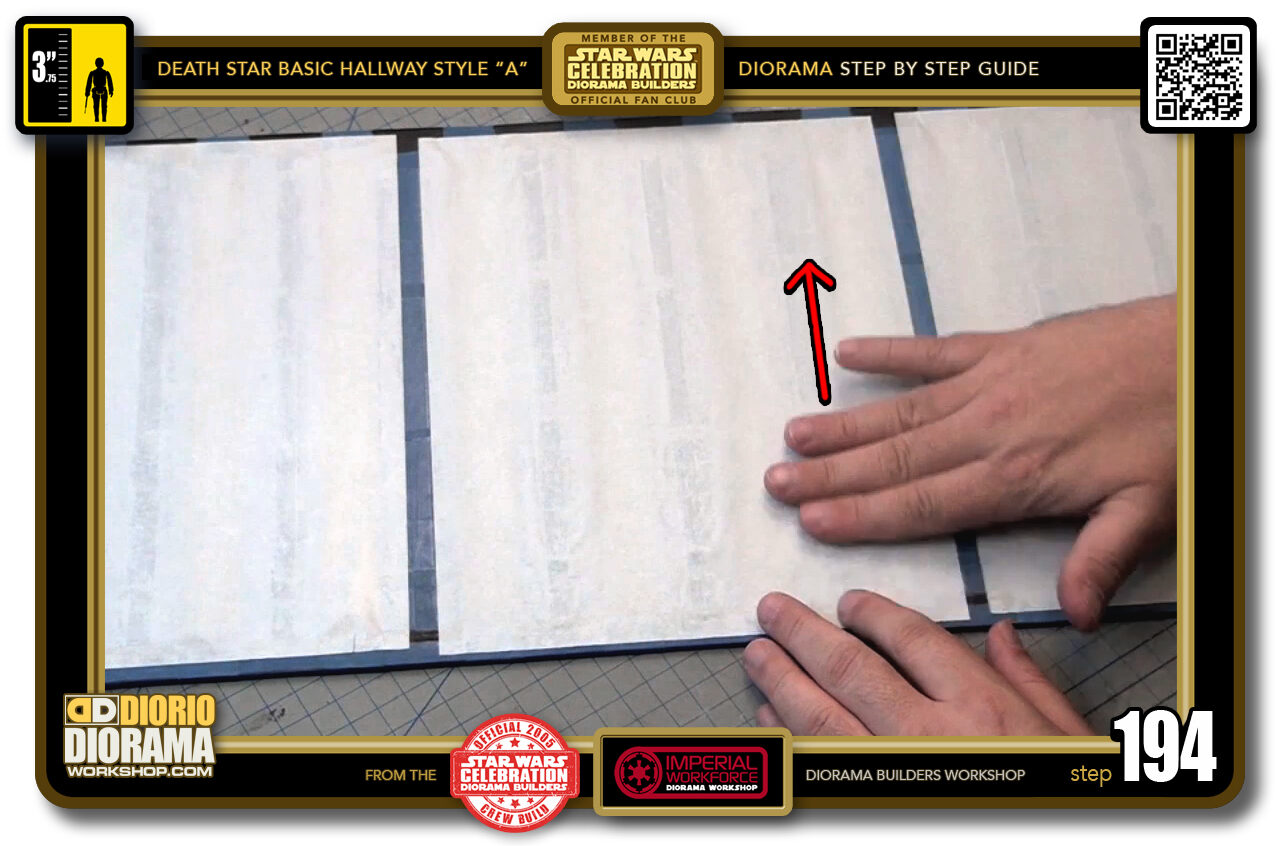
- STEP 194 > Finish the tracing paper application by GENTLY pressing against the centre "C3" strips. DO NOT PRESS in the "C2" area, after all this work you don't want holes.
-
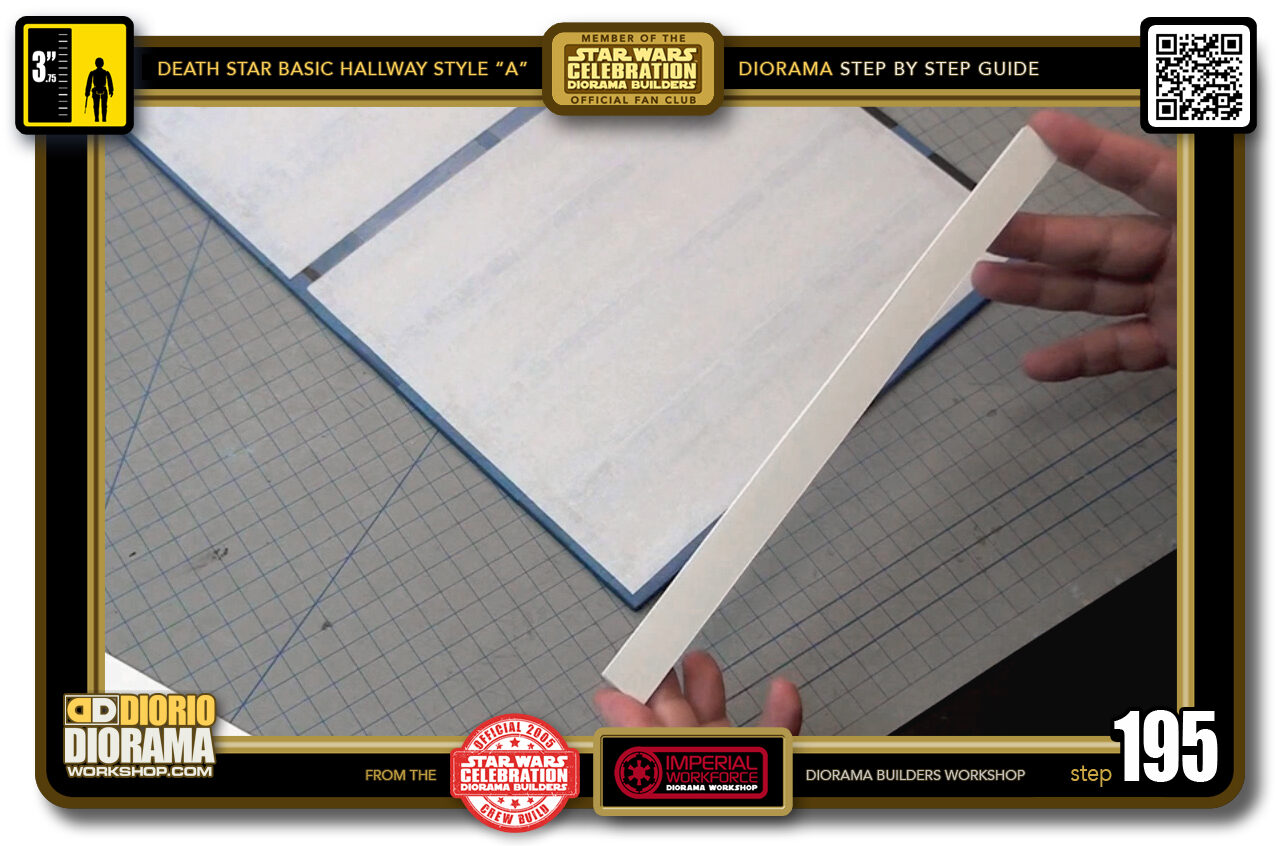
- STEP 195 > It's time to attach the 2 cm sides to create your frame and give you the proper height to fit your LED light strips. Grab one of your 30 cm x 2cm white foamcore strips.
-
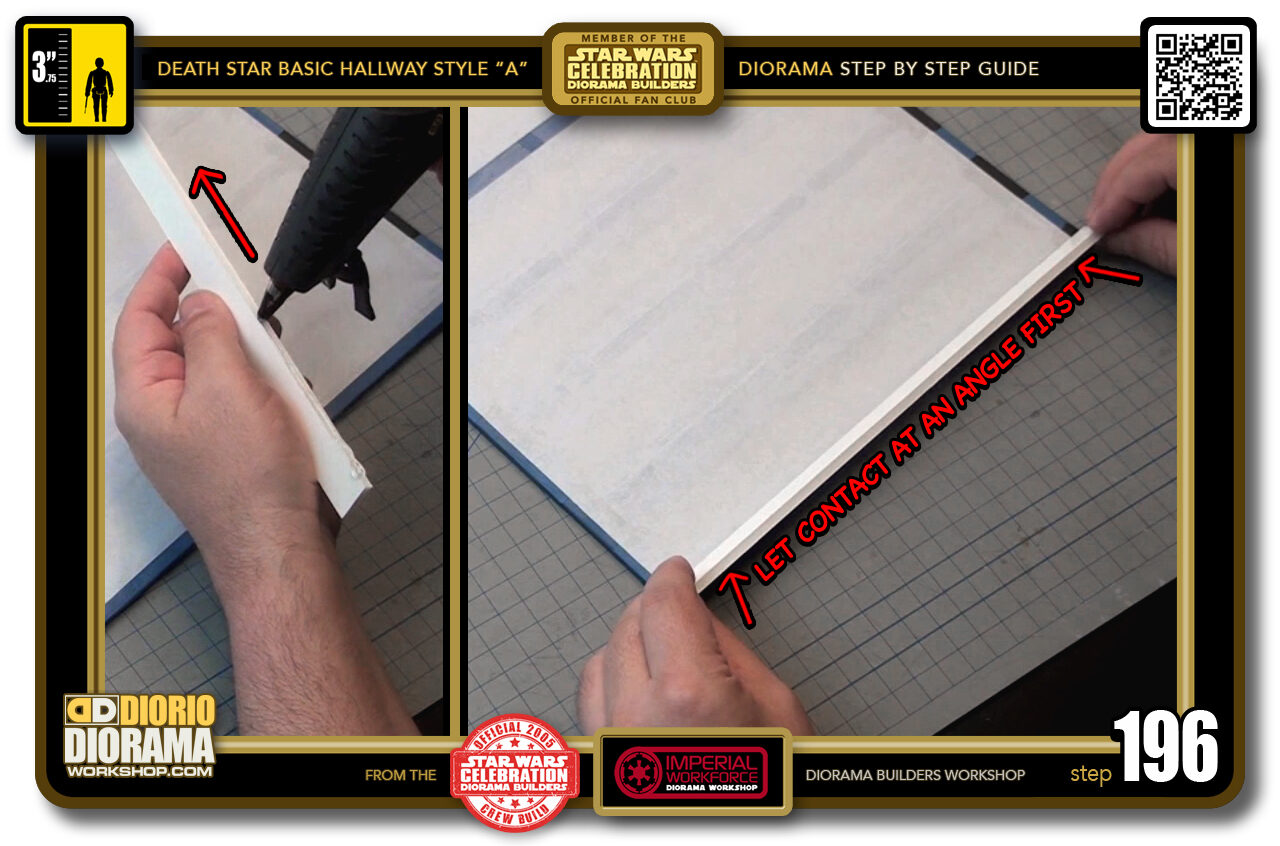
- STEP 196 > Squeeze a line of hot glue along the spine (left box) and carefully lower it towards the frame. To avoid a mess, lower it at an angle first, so that only the outside corner edge makes contact (right box). Make certain you are FLUSH on both sides.
-
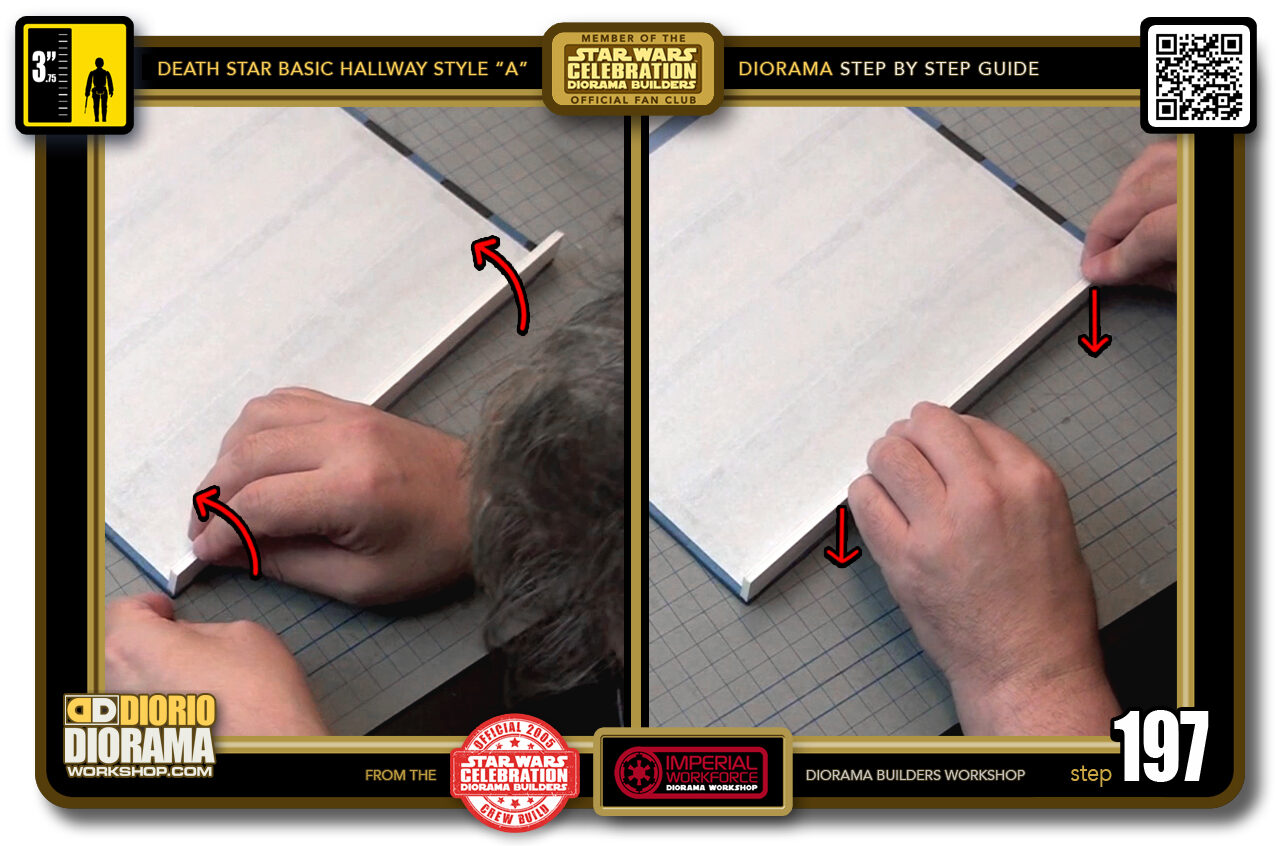
- STEP 197 > Now you can rotate the strip until the other edge touches and your strip makes complete contact. (left box) Make sure you are aligned and flush along the length of your frame, then press down and keep pressure for a minute or so until the hot glue cools down (right box).
-
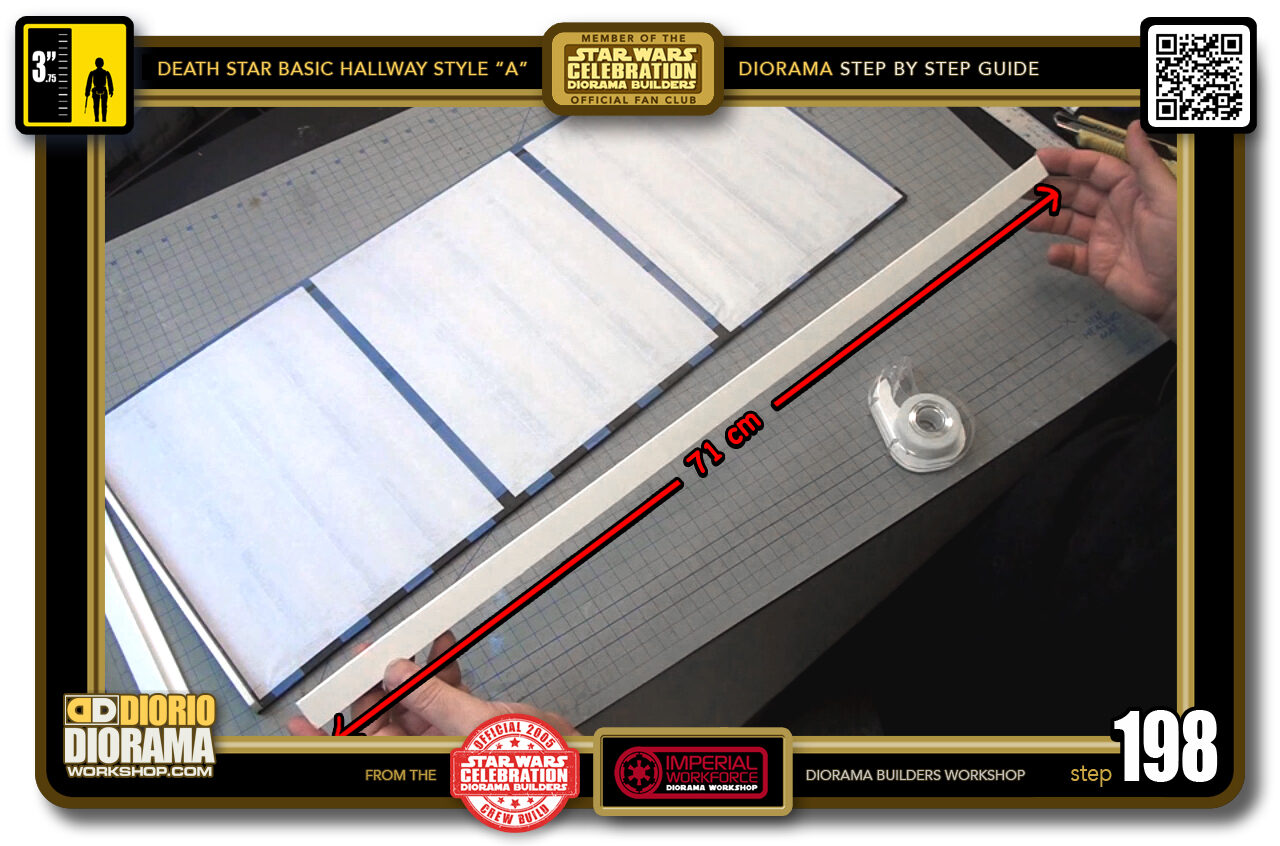
- STEP 198 > Now grab one of your 71 cm (or shorter if you changed my blueprint dimensions to fit your shelf) white foamcore strips.
-
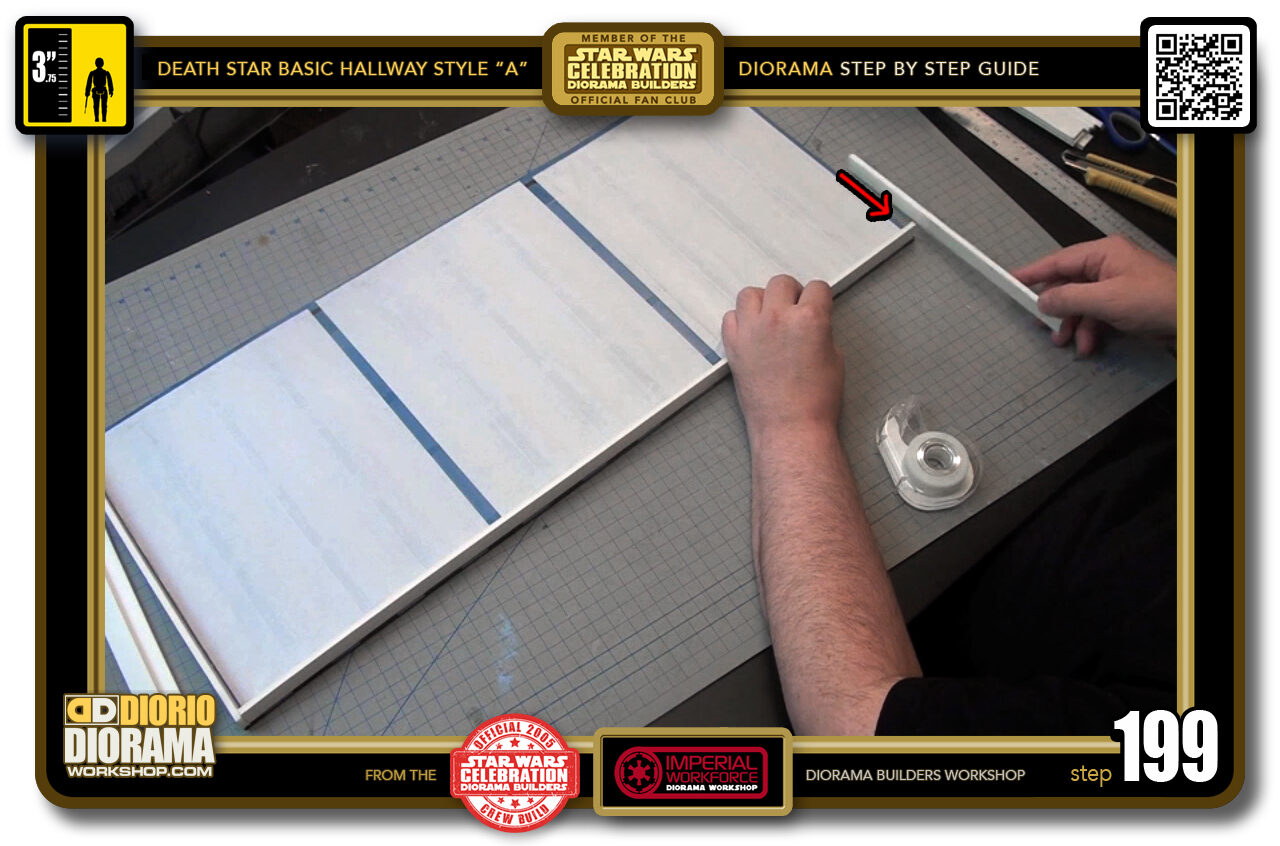
- STEP 199 > Do a dry run first to make certain when you place your other end's 30 cm strip, there is enough of a ledge on the frame to allow it to rest properly flush with the full end length of the frame.
-
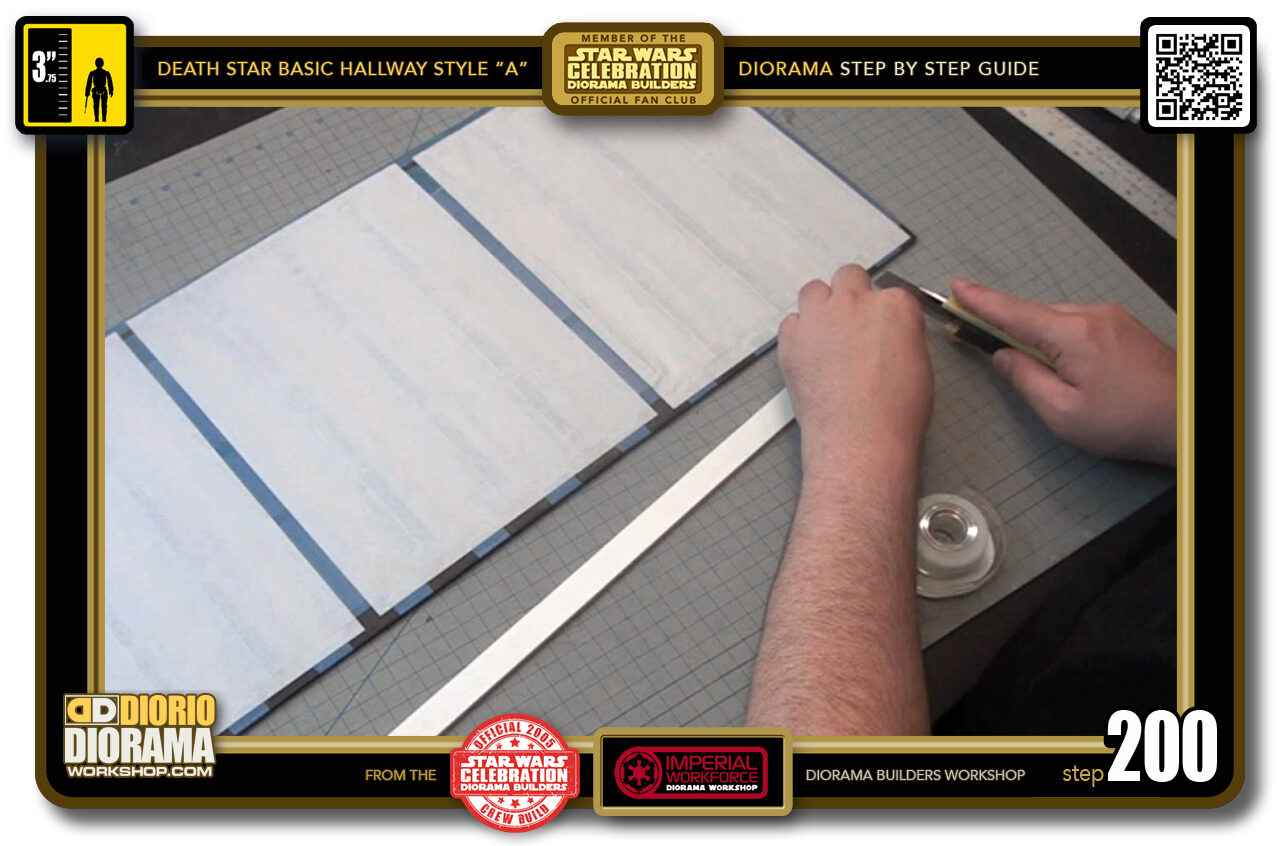
- STEP 200 > I needed to trim just a hair on mine as my 71 cm piece was slightly pushing the 30 cm strip off the ledge.

.
Did you already build this Diorama ? At home or at our Star Wars Celebration Diorama Builders workshop ? Would you like to show it in the site’s GALLERY VISITORS DIORAMAS section, YES ? That is Awesome !!! You can find out all the details on how to email me your photos on the VISITORS SUBMISSIONS INFO page … When I get your photos, I will create your very own page just like this one. You may not realize it but work does inspire others to join in the fun of making Action Figure Dioramas.
.
NOT FOR RESALE ALL Decals, tutorials and artwork are ©FrankDiorio (dioramaworkshop.com) and offered FOR FREE to the fans – that would be you ? so you can build and display my diorama designs in your very own home. I realize I cannot control what one does with my graphics once I place them on the web, I can only ask you as one fan to another, please respect the artist and do not be that jerk who uses my designs and tutorials to build a copy of my work only to sell it on EBAY or trade/sale groups and forums. Thank You. Frank.
.
.
If you have a facebook account, why not join the Official Diorama Builders Fan Club today, simply click the logo link below.
 .
.
Catch up with fellow visitors and exchange stories, read cool interviews with the crew, exchange photos, fun surprises and grab some FAN ONLY merchandise next year at actual future conventions ?
.
©2018 Frank Diorio DioramaWorkshop.Com
.
IF YOU LIKE WHAT YOU SEE, PLEASE SHARE WITH YOUR FRIENDS
USING THE SOCIAL MEDIA BUTTONS BELOW