


-
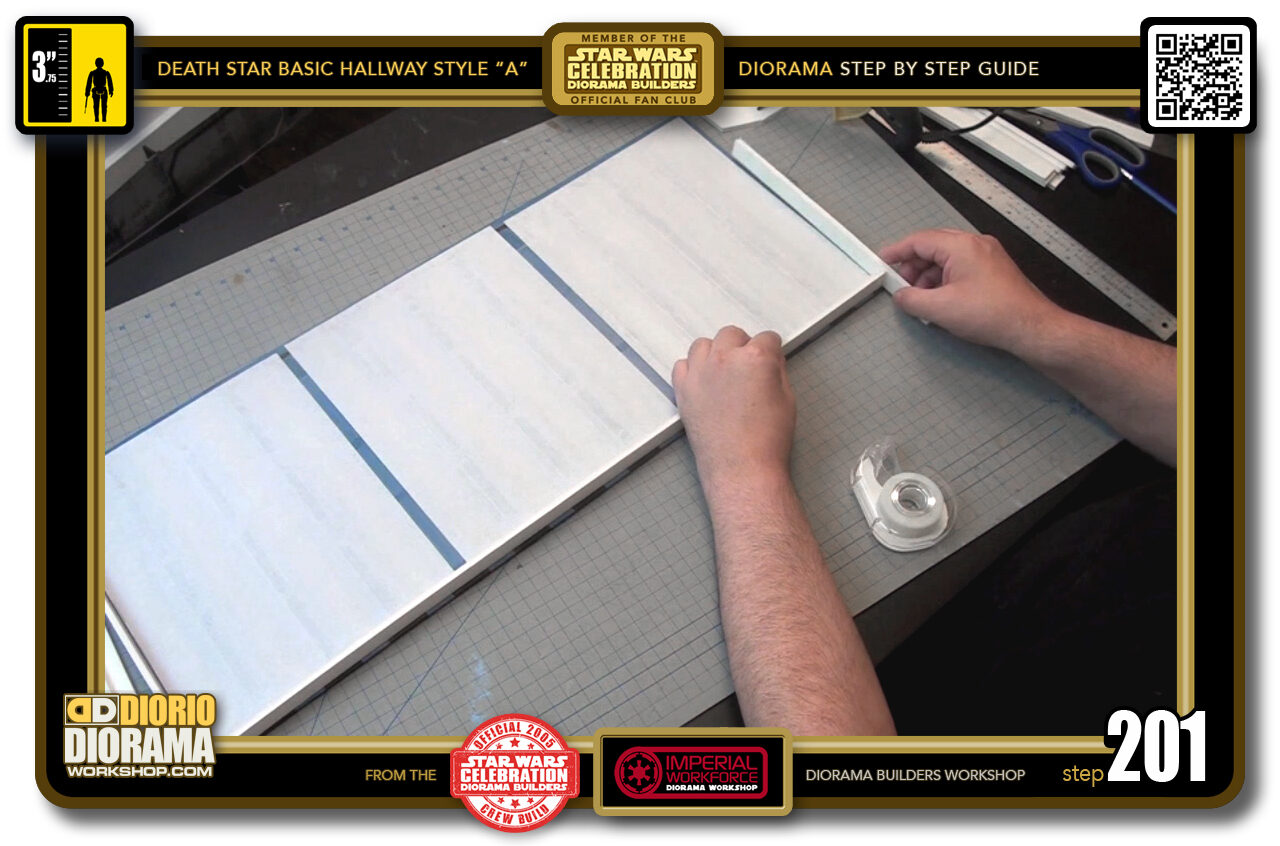
- STEP 201 > Now that I end strip fits perfectly I can now attach the 71 cm side strip.
-
-
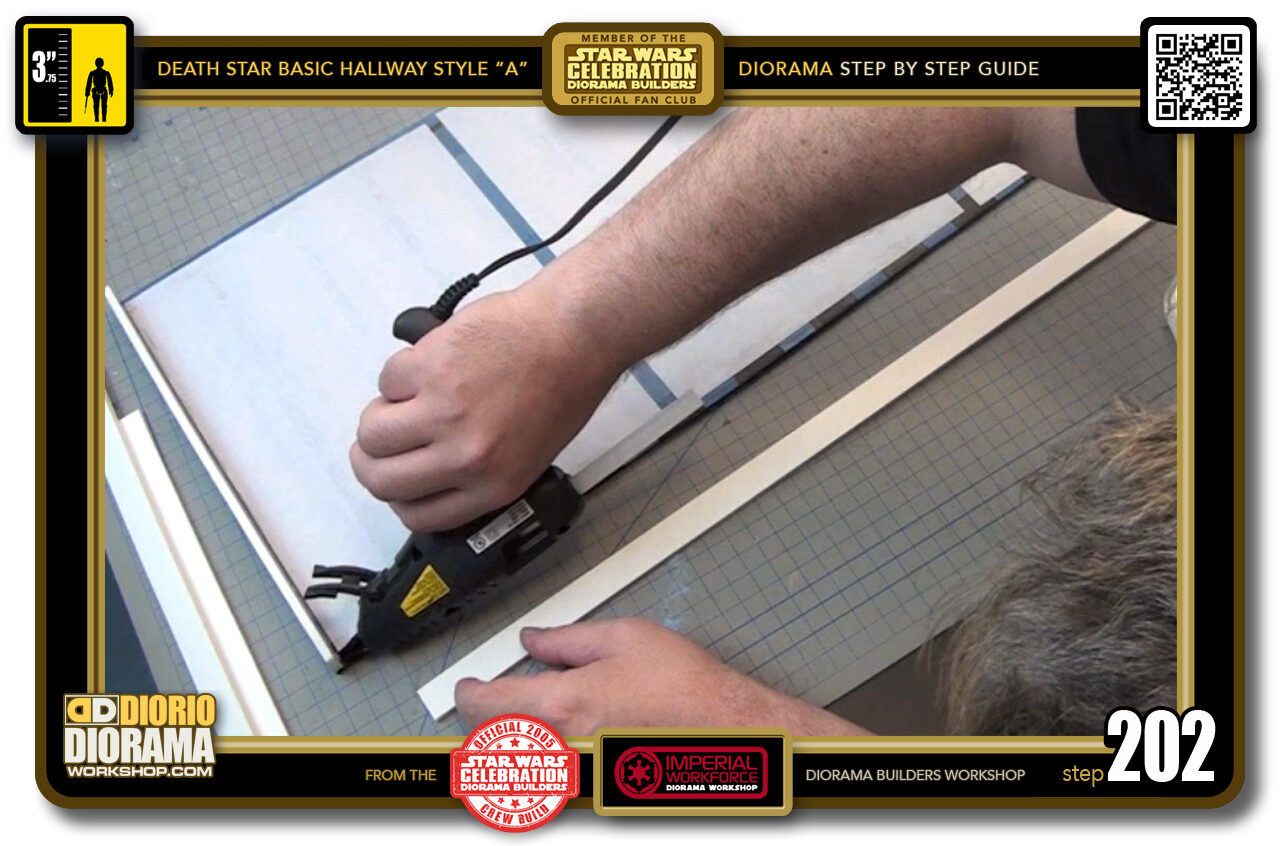
STEP 202 > Because of the length of the strip, it is easier to apply the hot glue to the frame instead of the strip itself plus there is less risk to have hot glue make contact onto the "C2" open area below the tracing paper.
Begin with a dab of hot glue on the side end of your 30 cm piece.
-
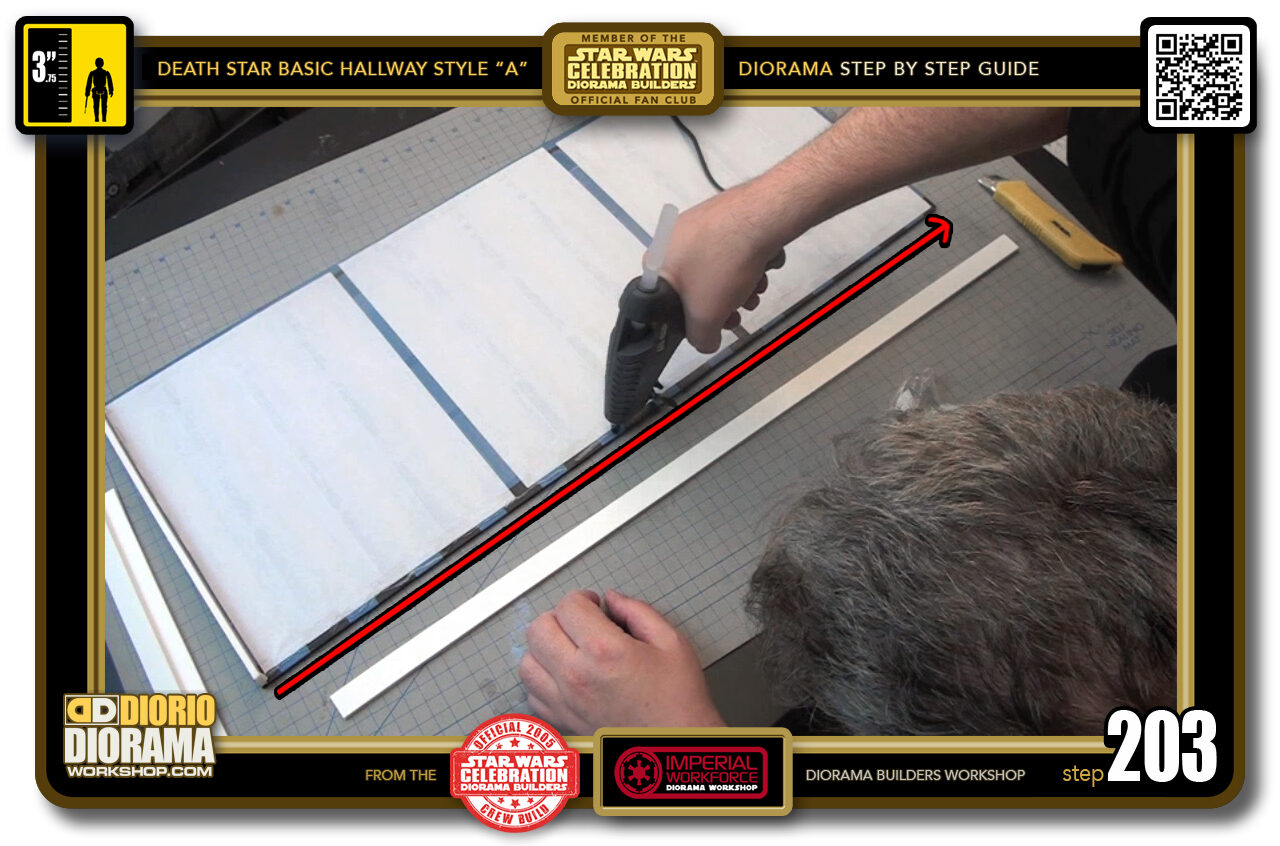
- STEP 203 > Place a long thin line of hot glue all the way down the frame to the other end making sure to always keep a 1/3 ish gap from the outer frame's edge. DO NOT LET ANY HOT GLUE FALL INTO THE "C2" ZONES. You will see it when the light is lit as a huge shadow. NOT GOOD.
-
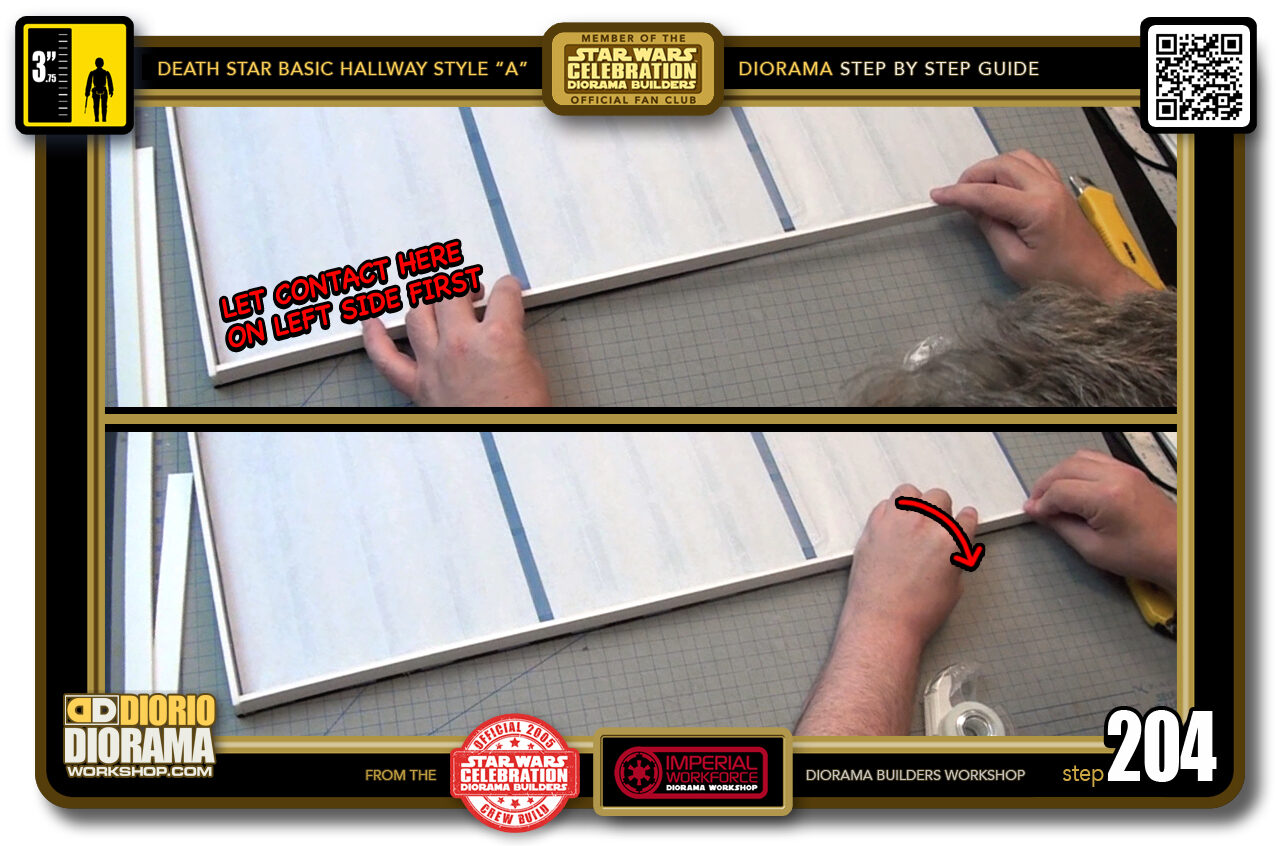
- STEP 204 > Start by keeping the right side of the strip at a higher level than the left side. Place the left side of your strip against the left corner 30 cm strip. Align flush with the ceiling light strip frame's edge (top box). Lower the right side of the strip until you make complete contact with the rest of the foamcore. Remember to keep an eye along the edge as you lower so that your strip remains flush (bottom box).
-
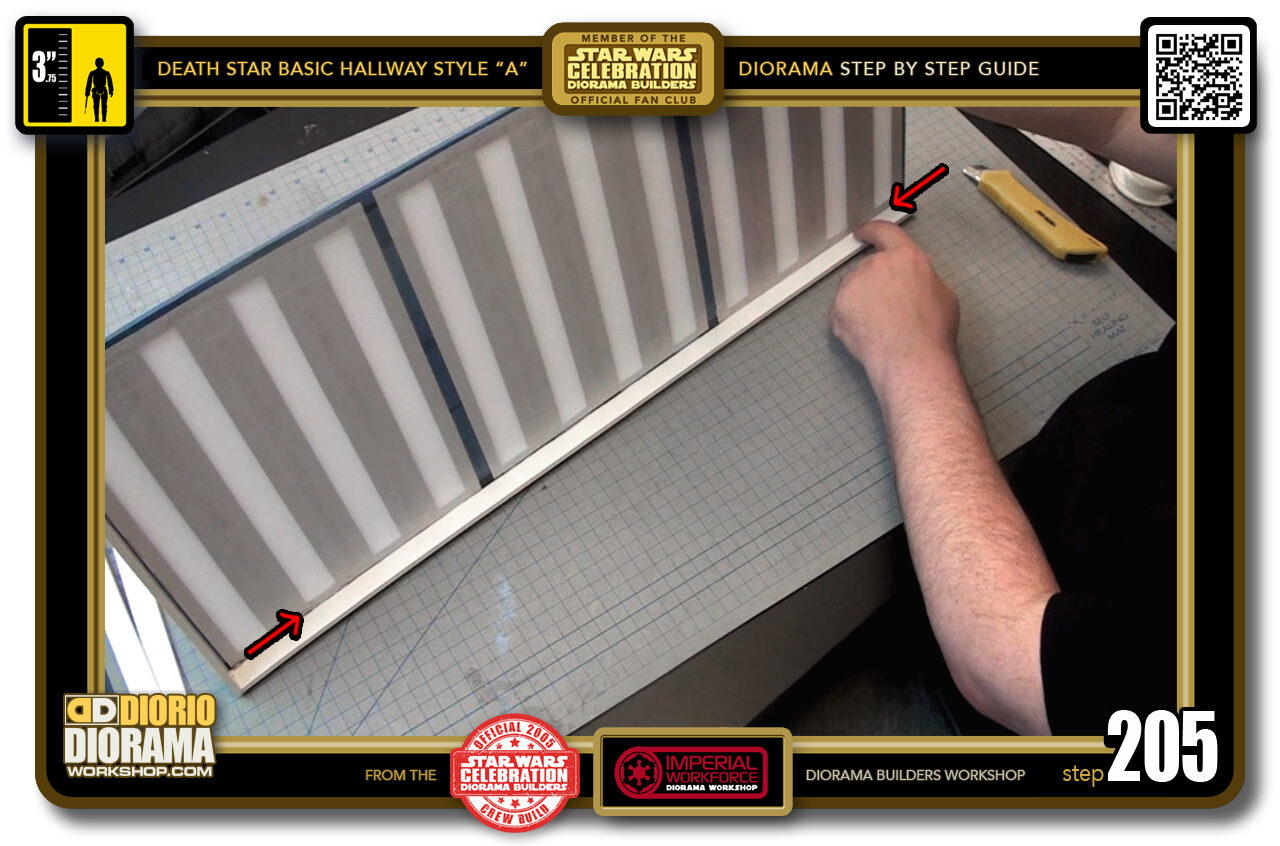
- STEP 205 > If ever we need to make a stronger bond later, you can squeeze some hot glue directly onto the inside connecting angle.
-
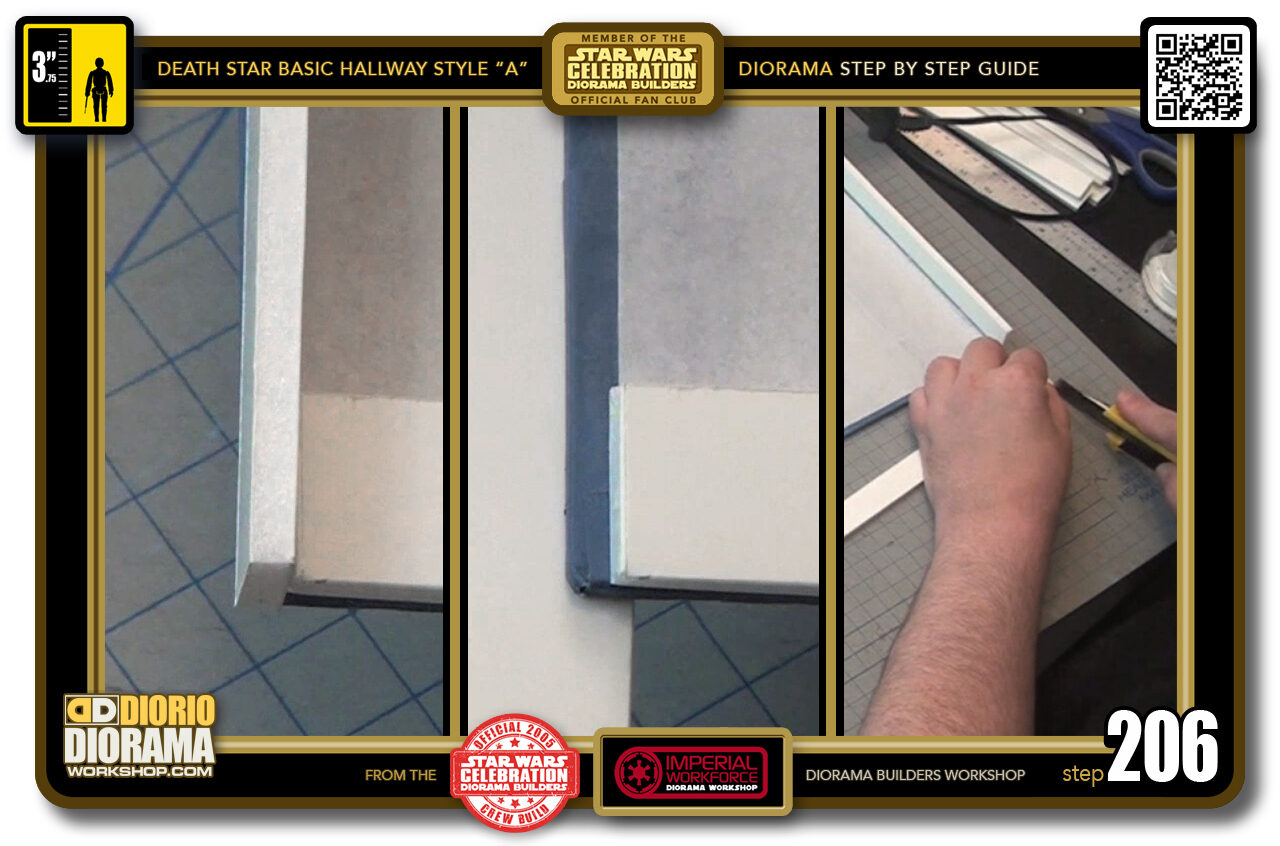
- STEP 206 > Just as we did in Step 199, dry run your 2nd 71 cm strip with your 2nd 30 cm end strip. If the 30 cm pokes out over the edge of the frame, make a mark with your pencil and trim off the excess off the 71 cm strip.
-
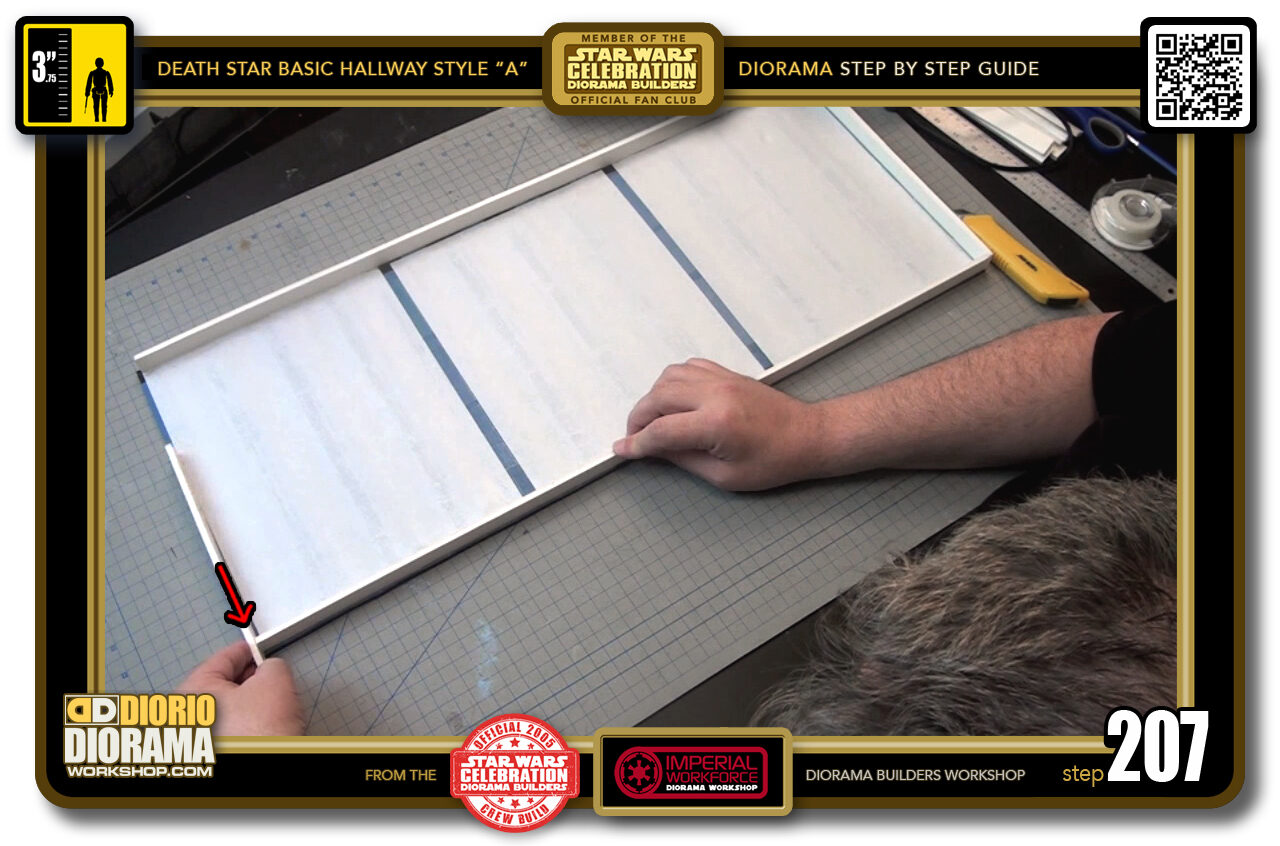
- STEP 207 > Perfect fit, time to glue.
-
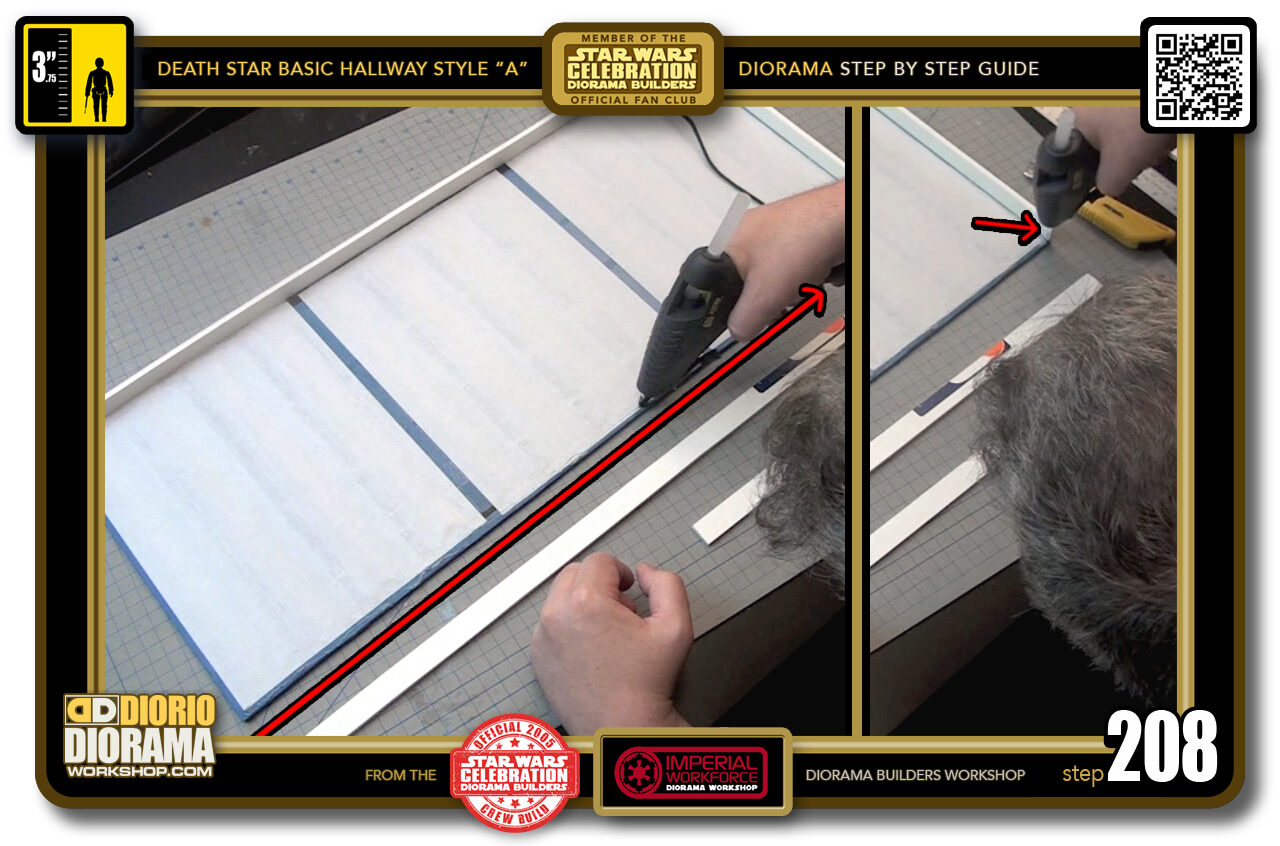
- STEP 208 > As we did for the other side, place a thin line all the way across the frame keeping your 1/3 ish distance from the edge (left box). When you reach the end, place a small dab up the corner of your first 30 cm strip (right box).
-
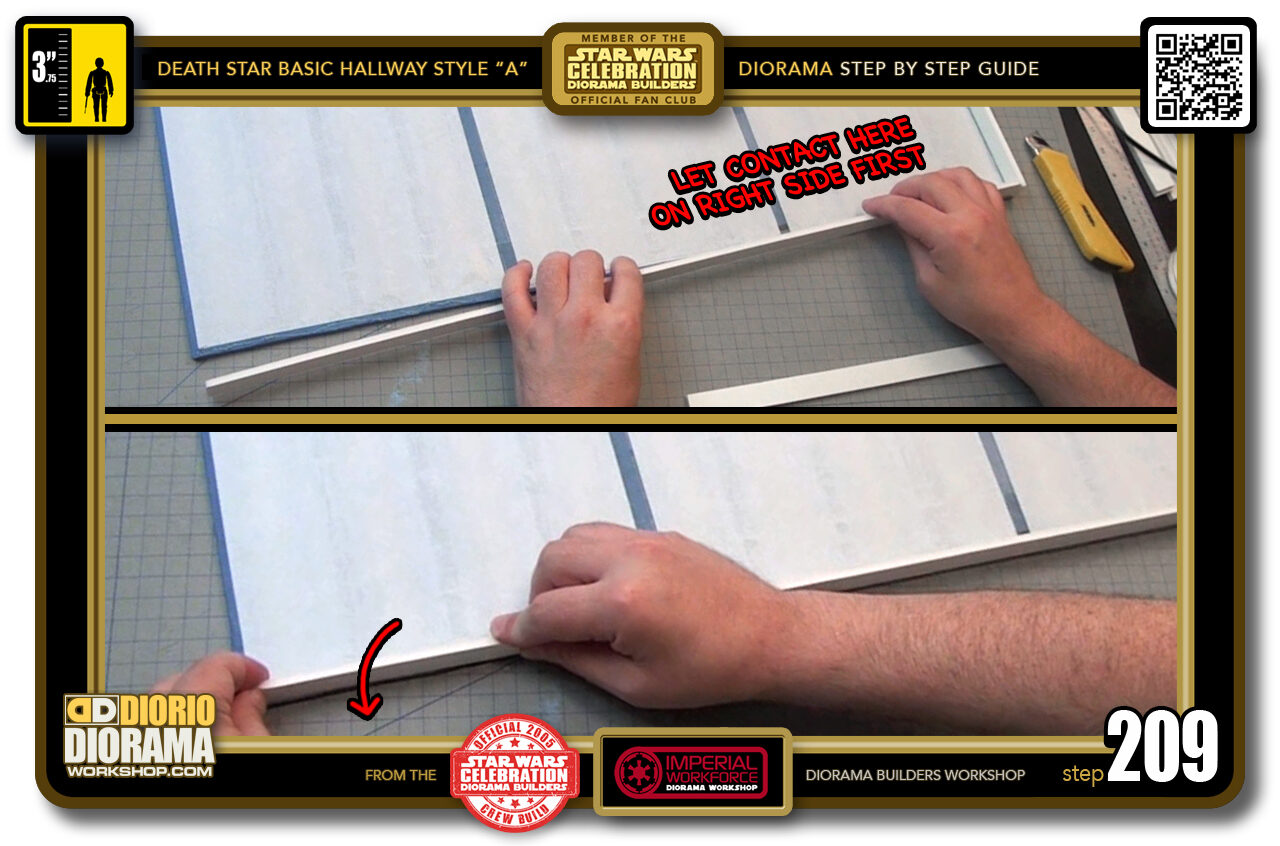
- STEP 209 > This time, keep the left side of your strip raised up, and lower the right side against the corner first (top box) move your way towards the left keeping it flush as you lower the left side (bottom box) until you reach the end and make full contact with the foamcore ceiling frame.
-
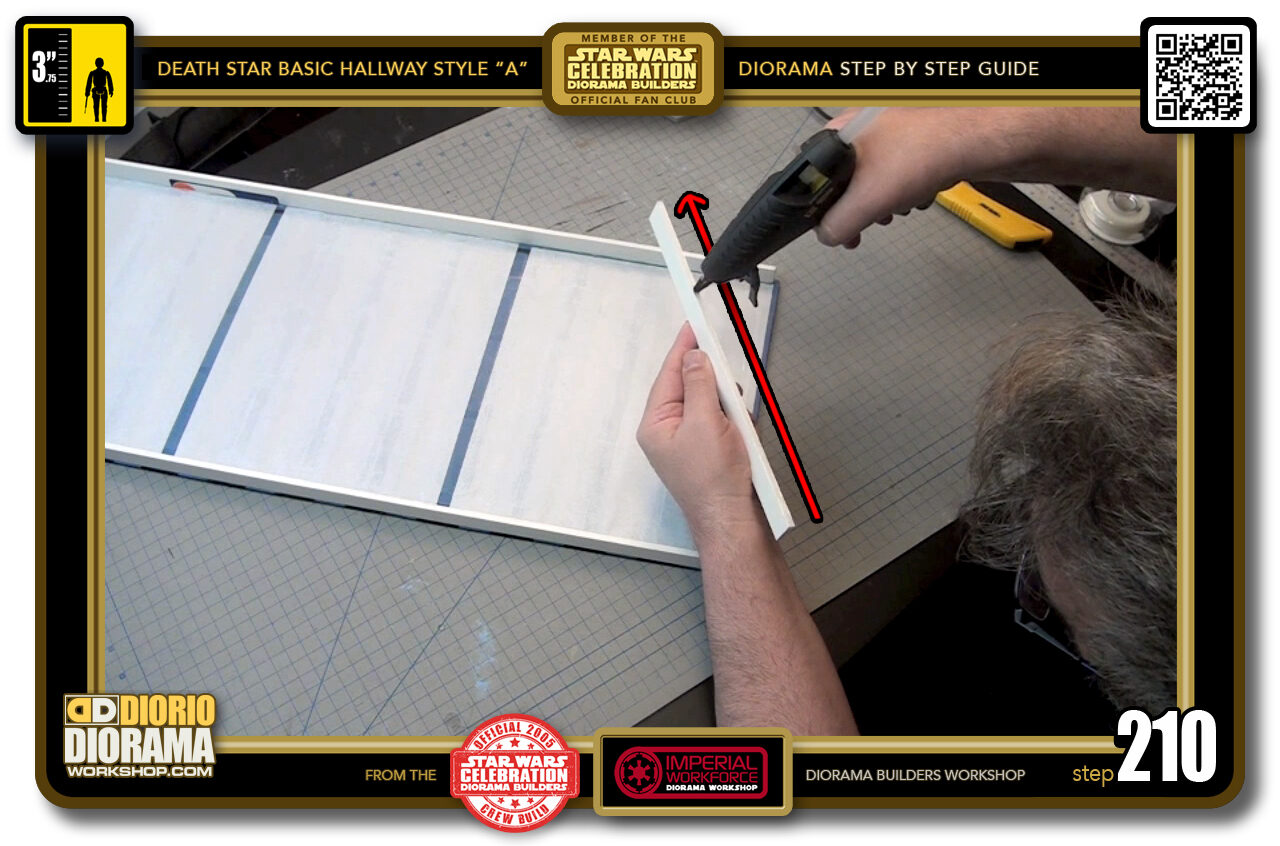
- STEP 210 > Grab your 2nd 30 cm end strip and apply a line of hot glue along it's spine.
-
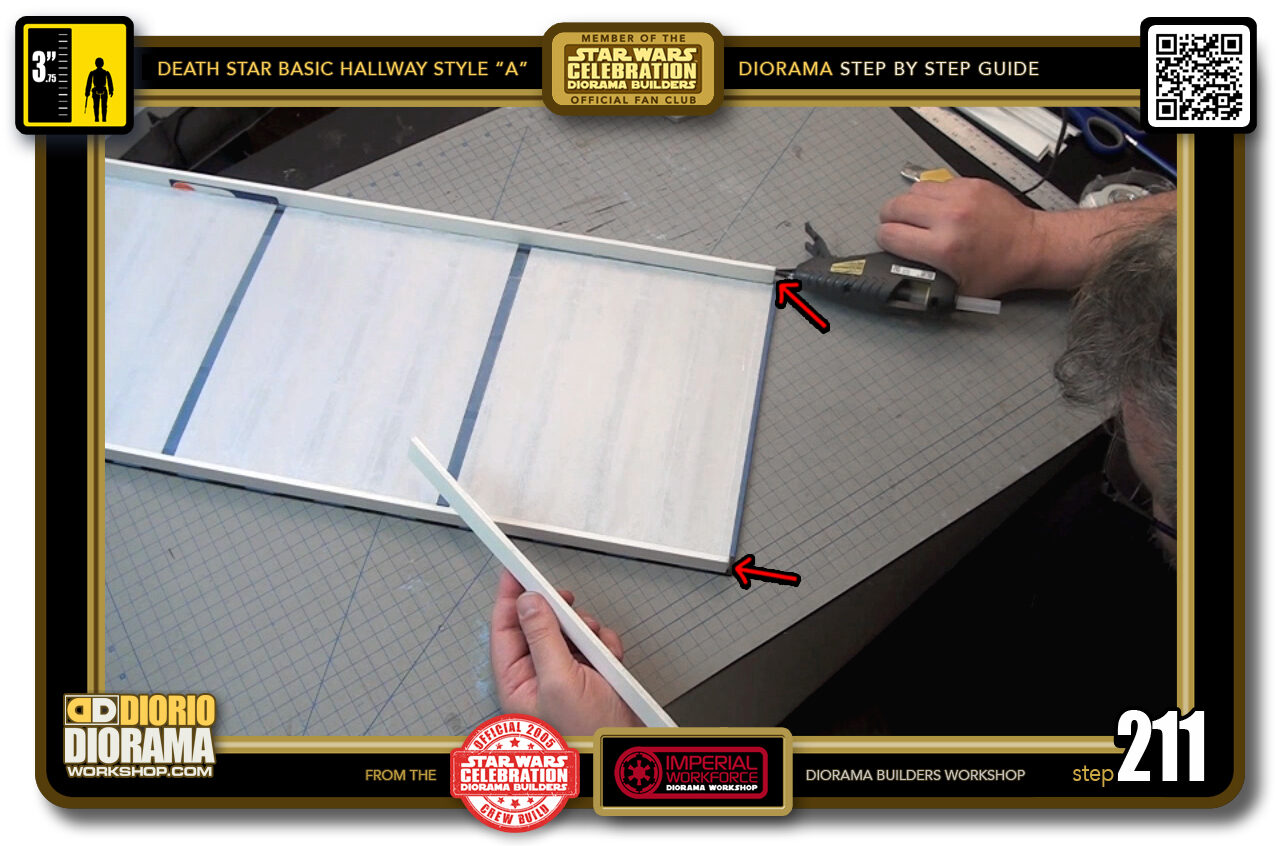
- STEP 211 > Squeeze 2 small globs of hot glue on each corner of the 71 cm strip outer ends.
-
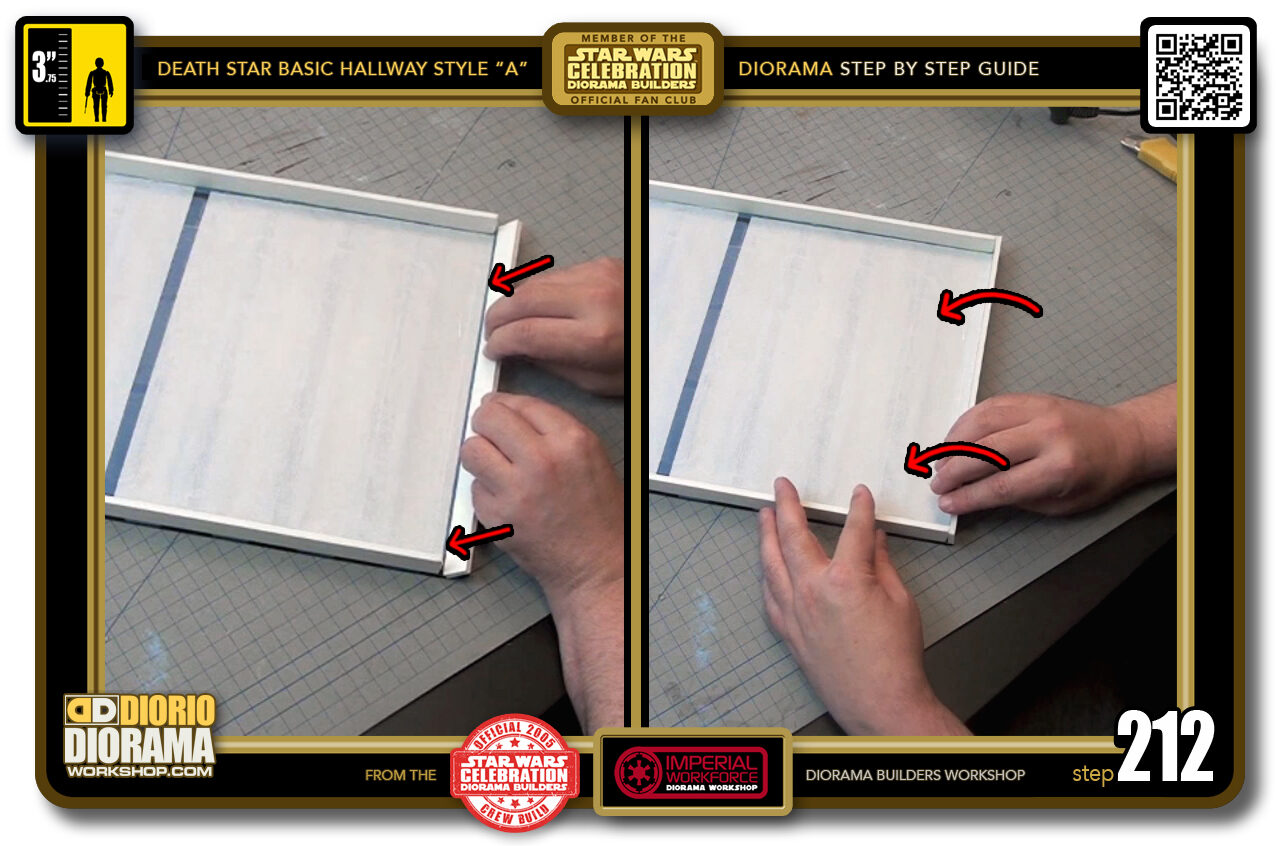
- STEP 212 > Attach the strip in the same manner as you did the first one. Make the initial contact angled (left box) and rotate until you make full contact with the sides as well as the floor - well ceiling foamcore 🙂
-
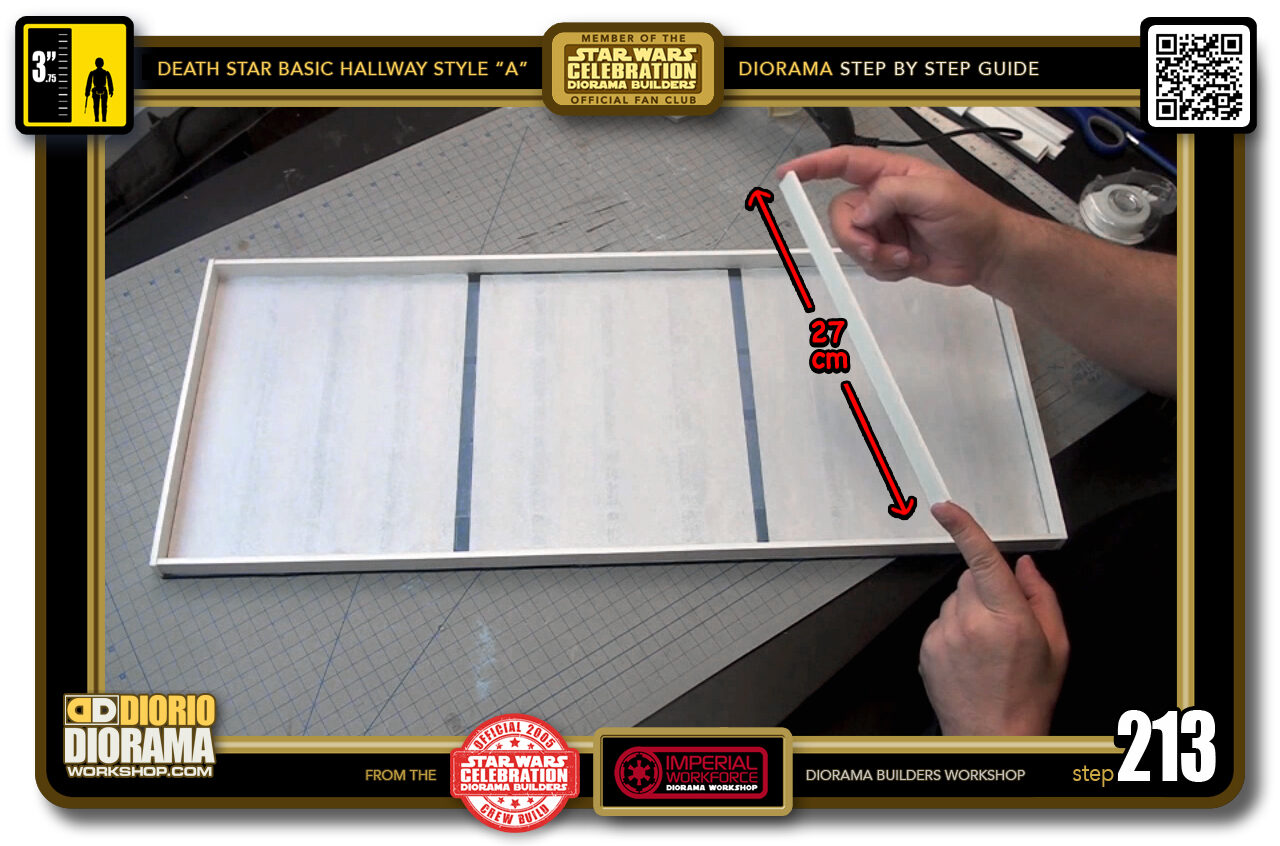
- STEP 213 > Now remember those 27 cm strips you cut ? (maybe longer if making a Style B or C Basic hallway)
-
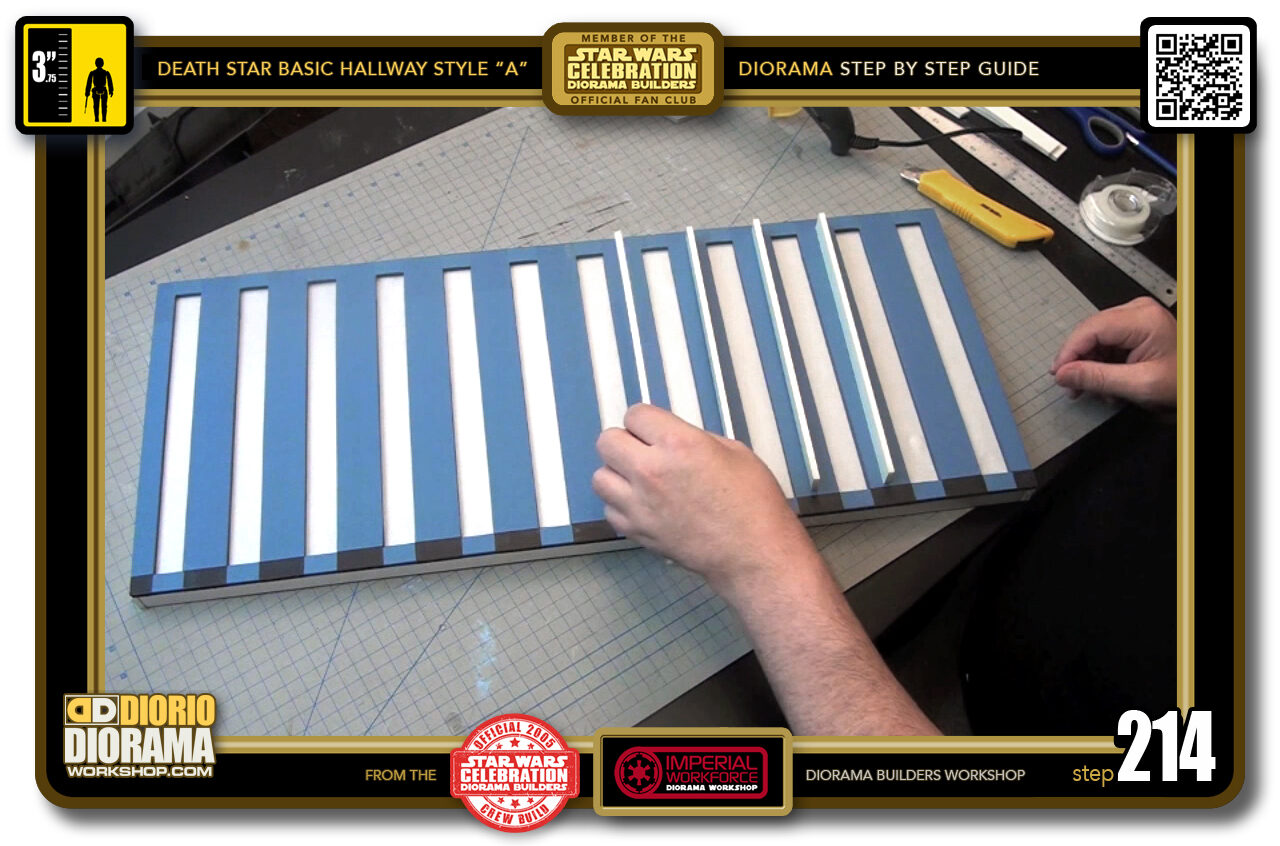
- STEP 214 > These strips will be placed along the centre of every "C3" as shown here but on the other side obviously 🙂
-
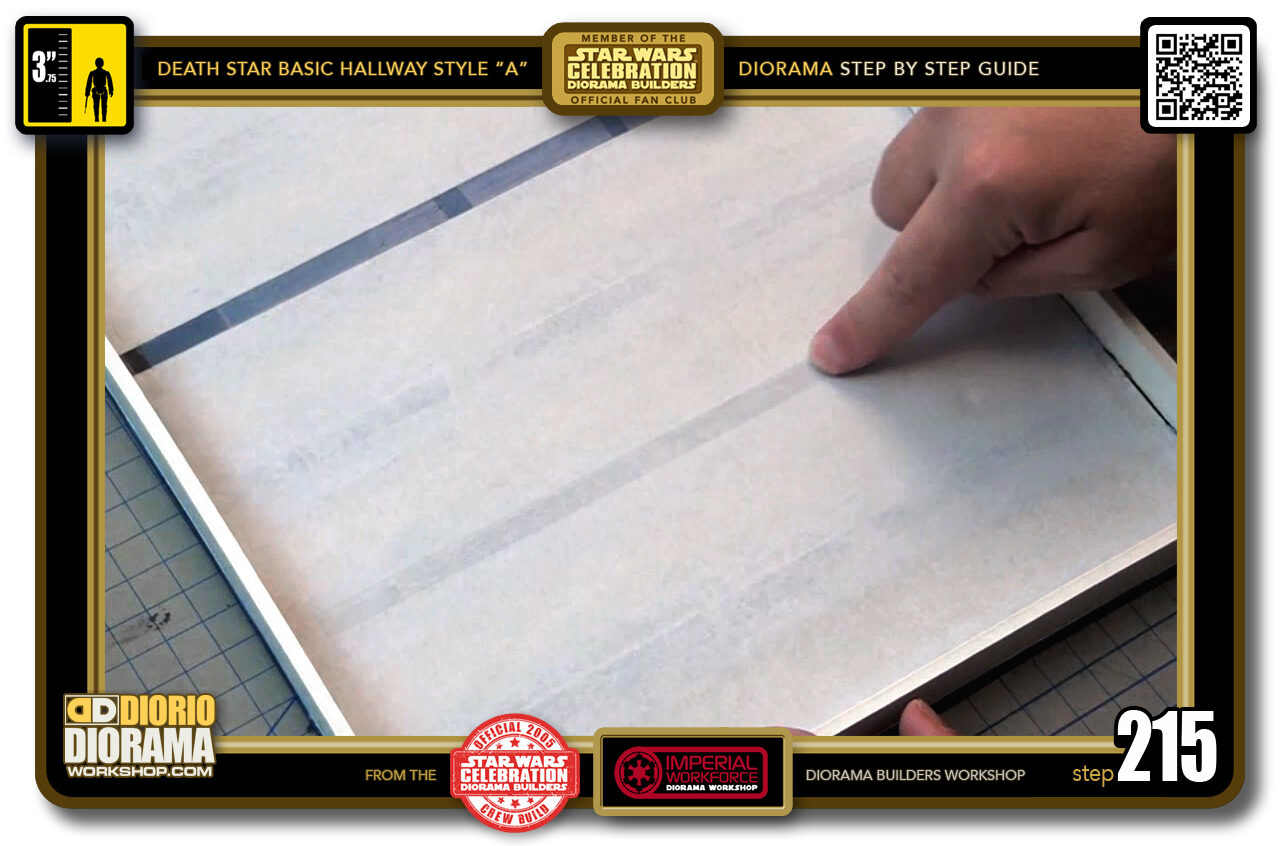
- STEP 215 > When you flip your ceiling to the inner side you can see darker colour in the centre of your "C3" beams. This is where you will be attaching the LED support strips.
-
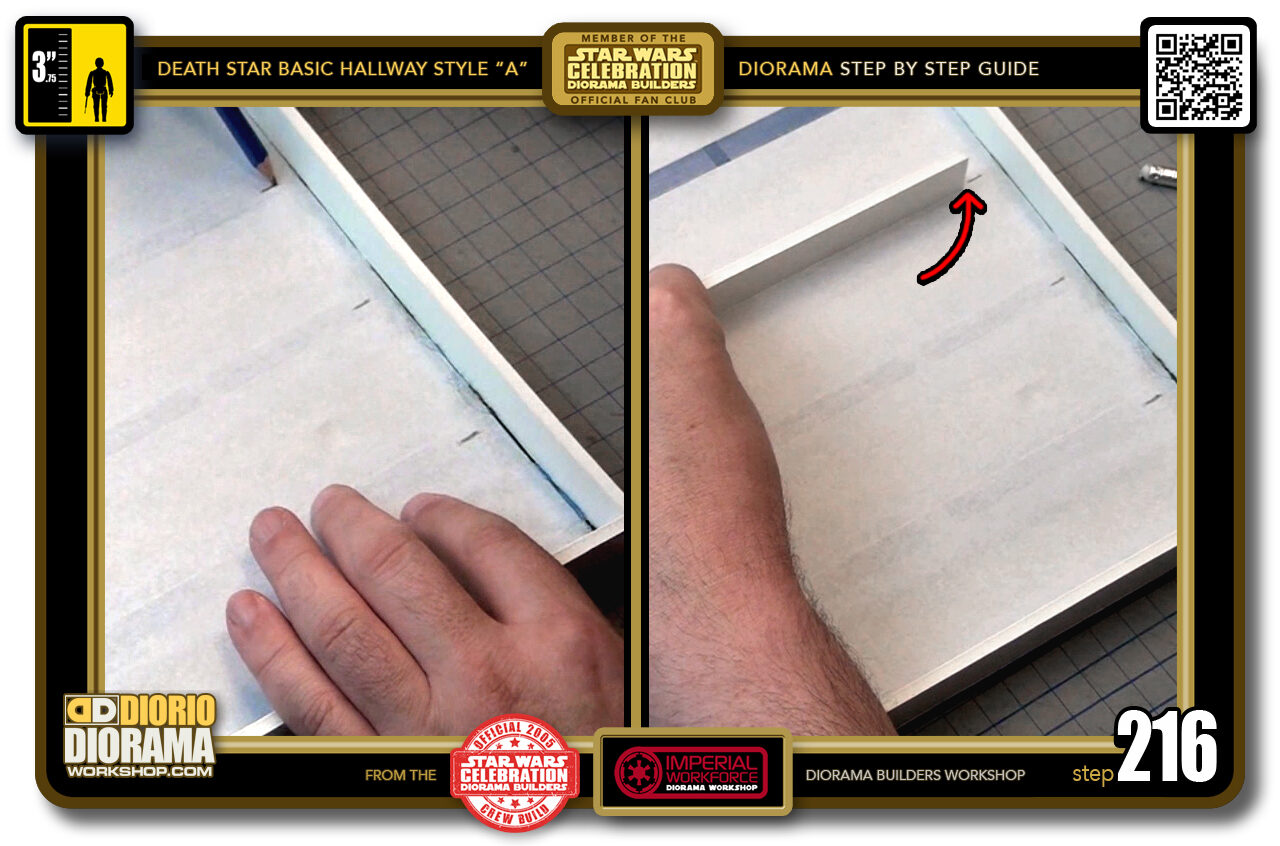
- STEP 216 > First thing to do to make it easier on yourself is to place pencil marks at the top of each "C3" beam centre or darker colour zone (left box). These pencil guides will help you easier identify where to place your strips (right box) The length of the strips are short enough to create a slight gap on each side that will allow the LED lights to wrap around through to the other sides.
-

-
STEP 217 > Another trick to make it more simple and keep a constant space between the 71 cm strip and placement of the LED supports.
Start by grabbing 2 scrap pieces of foamcore (left box) they don't have to be this long. Any shape will do really. Place a glob of hot glue on one of the pieces (centre box) and press them against each other (right box).
-
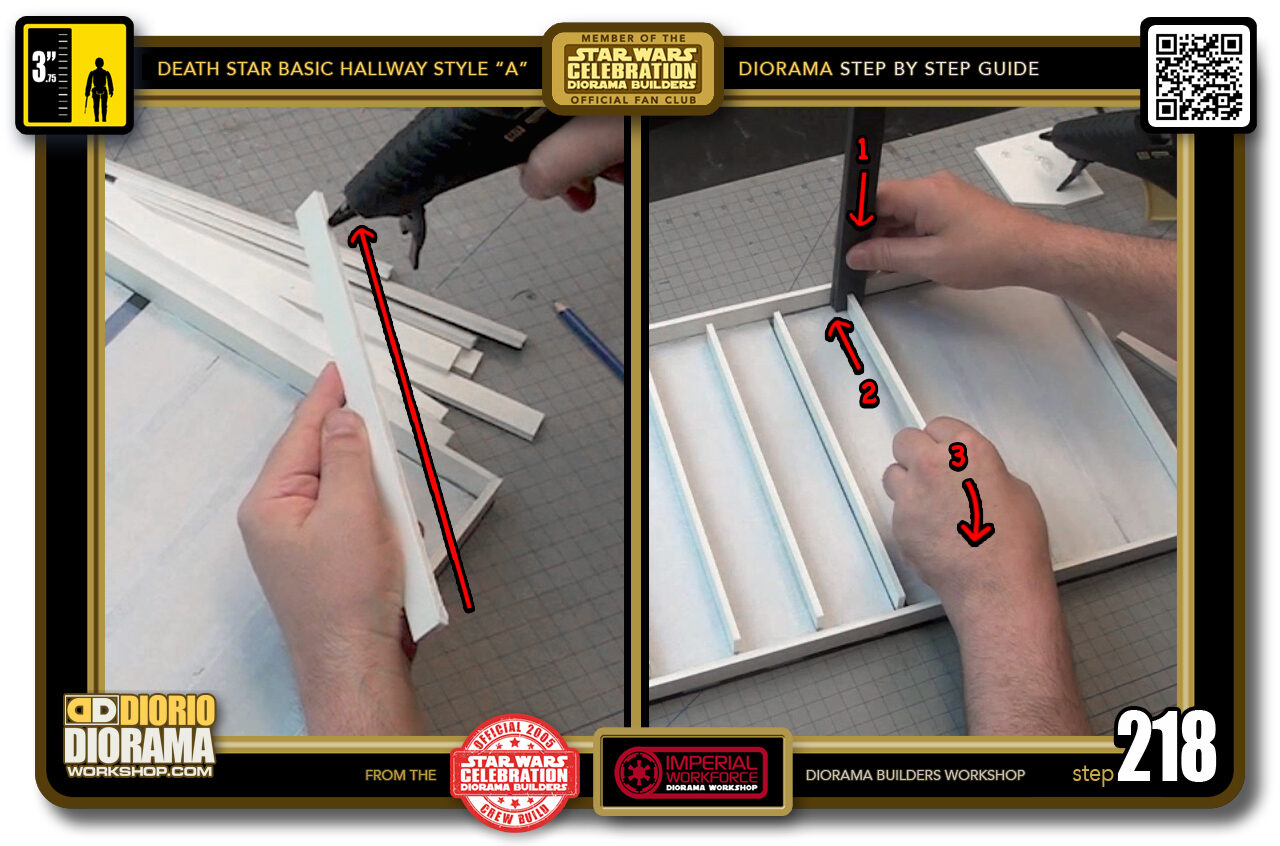
- STEP 218 > To place your LED supports, place a line of hot glue along the spine of your strip (left box). Now grab your scrap double foamcore thick divider and place it against the side of your 71 cm strip (right box) then press the end of your LED support strip against it and lower onto the "C3" beam surface.
-
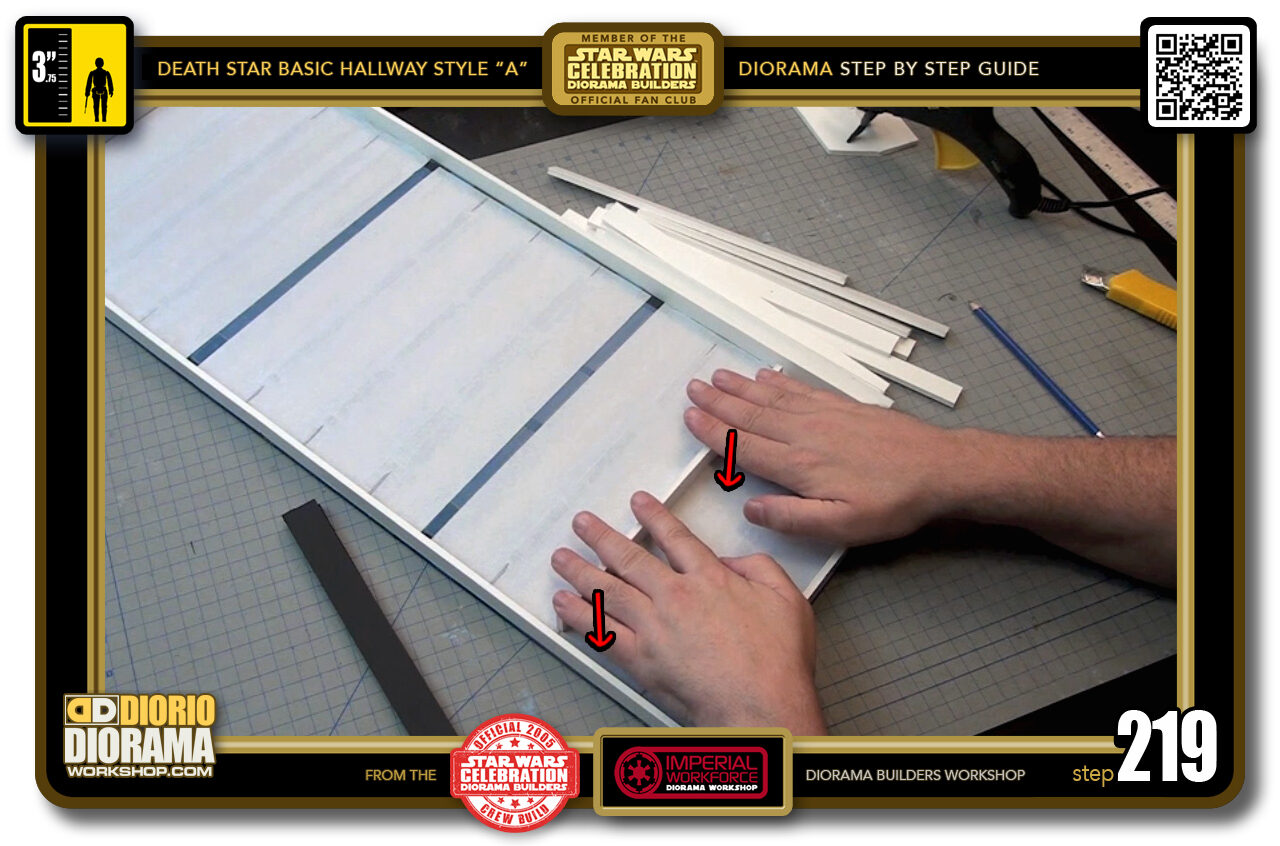
- STEP 219 > Now press down against the frame and hold for a minute or so until the hot glue cools down. Now repeat Step 218 to 219 for the remaining LED support strips.
-
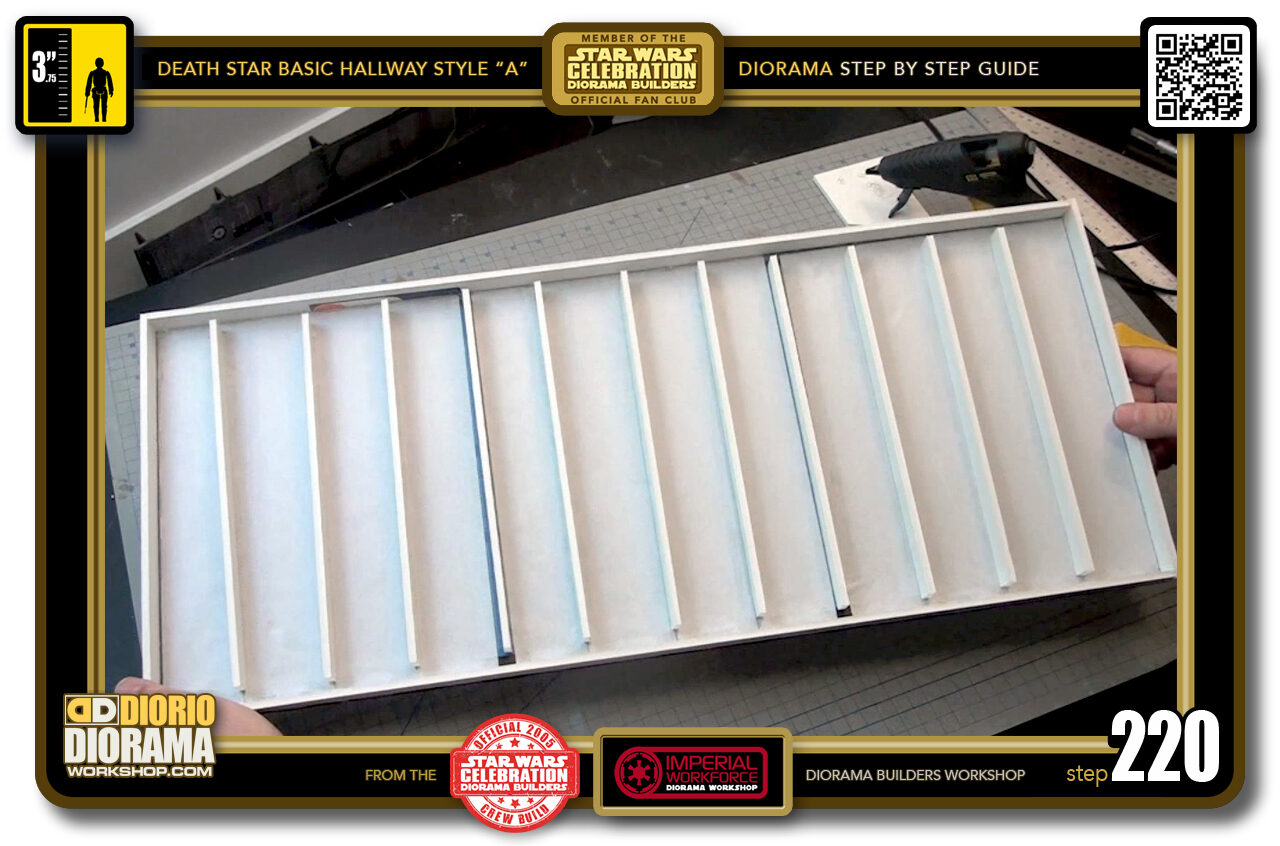
- STEP 220 > When all LED supports are attached, your ceiling will look like this.

.
Did you already build this Diorama ? At home or at our Star Wars Celebration Diorama Builders workshop ? Would you like to show it in the site’s GALLERY VISITORS DIORAMAS section, YES ? That is Awesome !!! You can find out all the details on how to email me your photos on the VISITORS SUBMISSIONS INFO page … When I get your photos, I will create your very own page just like this one. You may not realize it but work does inspire others to join in the fun of making Action Figure Dioramas.
.
NOT FOR RESALE ALL Decals, tutorials and artwork are ©FrankDiorio (dioramaworkshop.com) and offered FOR FREE to the fans – that would be you ? so you can build and display my diorama designs in your very own home. I realize I cannot control what one does with my graphics once I place them on the web, I can only ask you as one fan to another, please respect the artist and do not be that jerk who uses my designs and tutorials to build a copy of my work only to sell it on EBAY or trade/sale groups and forums. Thank You. Frank.
.
.
If you have a facebook account, why not join the Official Diorama Builders Fan Club today, simply click the logo link below.
 .
.
Catch up with fellow visitors and exchange stories, read cool interviews with the crew, exchange photos, fun surprises and grab some FAN ONLY merchandise next year at actual future conventions ?
.
©2018 Frank Diorio DioramaWorkshop.Com
.
IF YOU LIKE WHAT YOU SEE, PLEASE SHARE WITH YOUR FRIENDS
USING THE SOCIAL MEDIA BUTTONS BELOW