


-
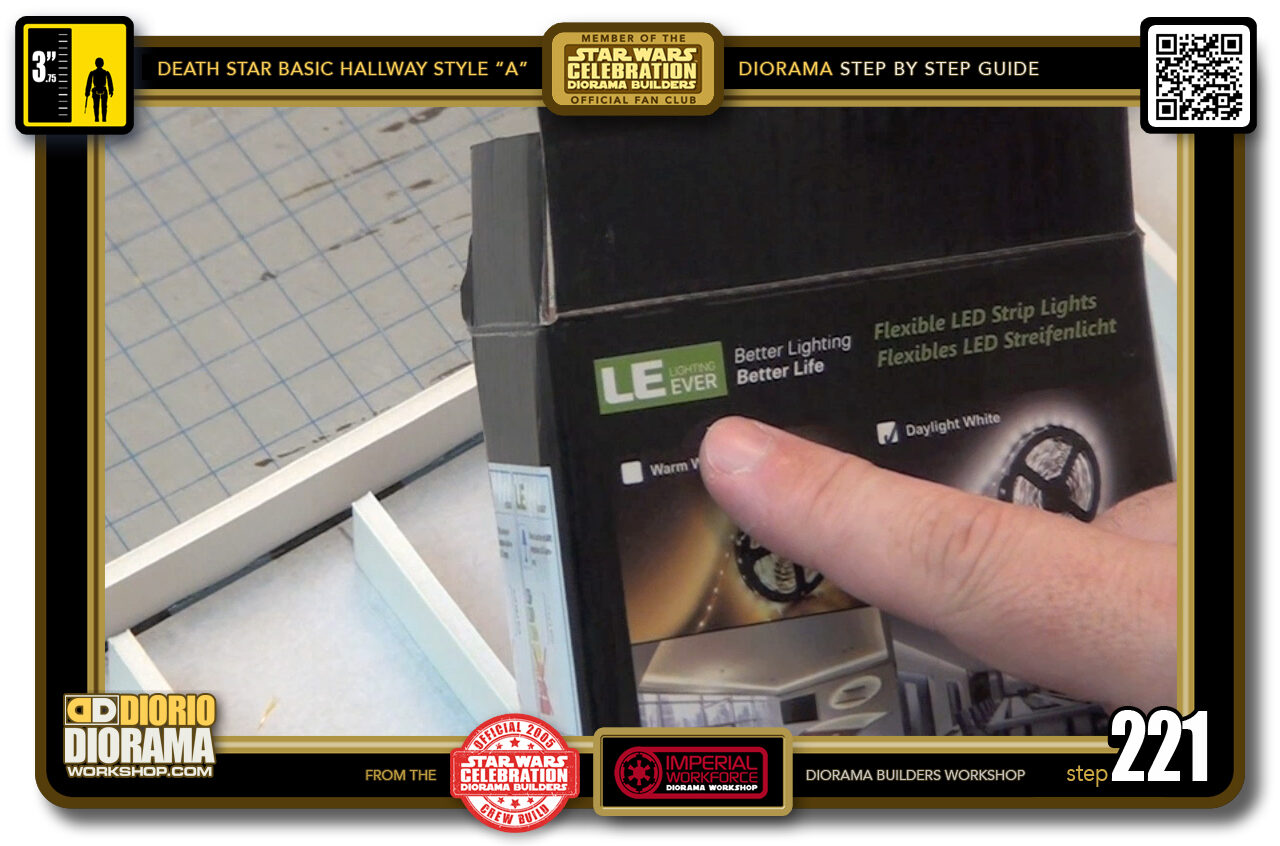
- STEP 221 > These are the LED strips I got from Amazon fit just right for this project and only cost $20 which I found to be a good price since I would have to buy several for the many rooms and hallways I will build after this to create the MEGA Death Star 🙂
-

-
STEP 222 > Now you will need to make a small hole to allow the LED power supply to exit the inside of the framed ceiling box.
If you are doing just this ONE diorama with no intention to connect more hallways on the sides, then you can make your hole on the right side 30 cm corner. If you plan stacking more side by side to extend the length of your hallway, you will need to make the hole in the corner of the 71 cm strip.
-

- STEP 223 > The blueprints show you how the LED lights will wrap around each beam after you make the power supply access.
-
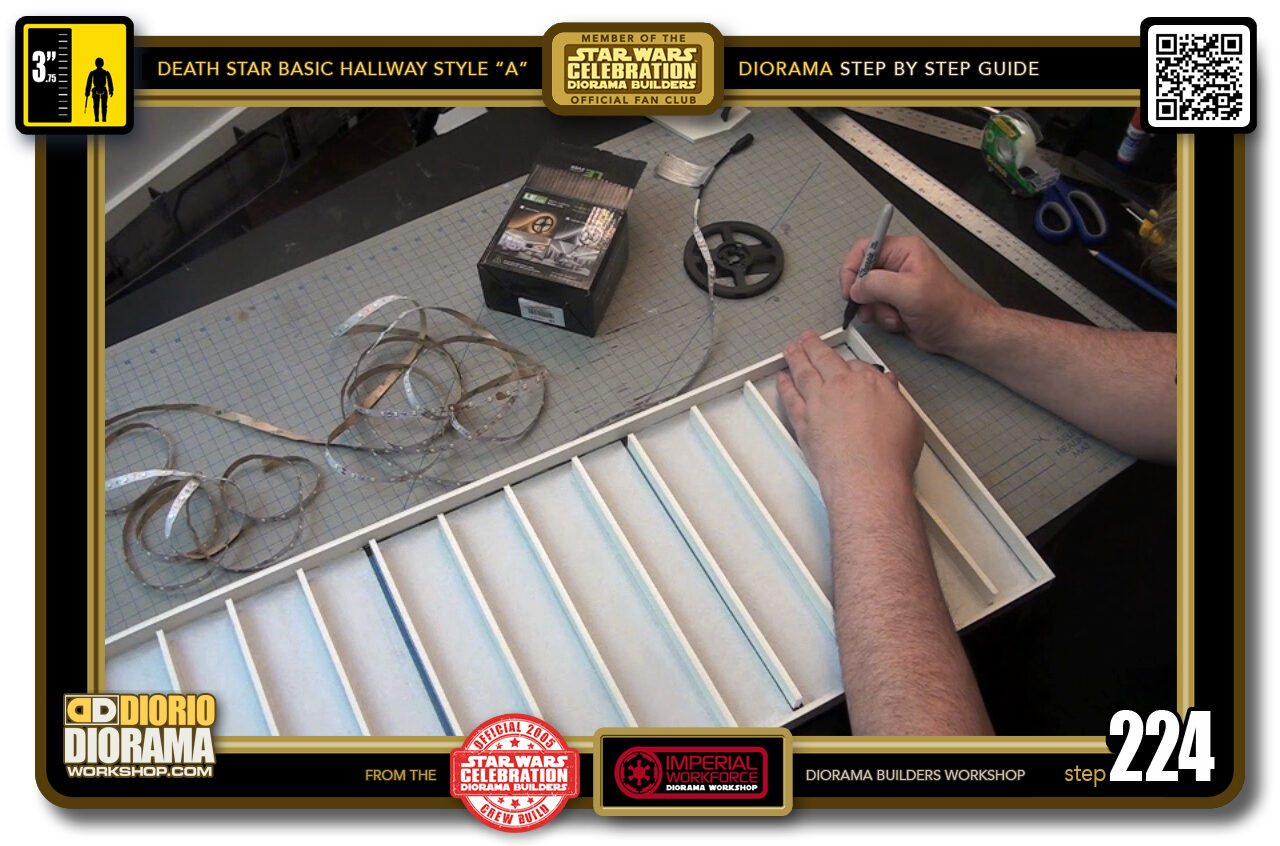
- STEP 224 > Based on what I described in Step 222, Take a black sharpie and make a mark on the area you will cut out for the power supply. In my case, at the top corner of the 71 cm strip.
-
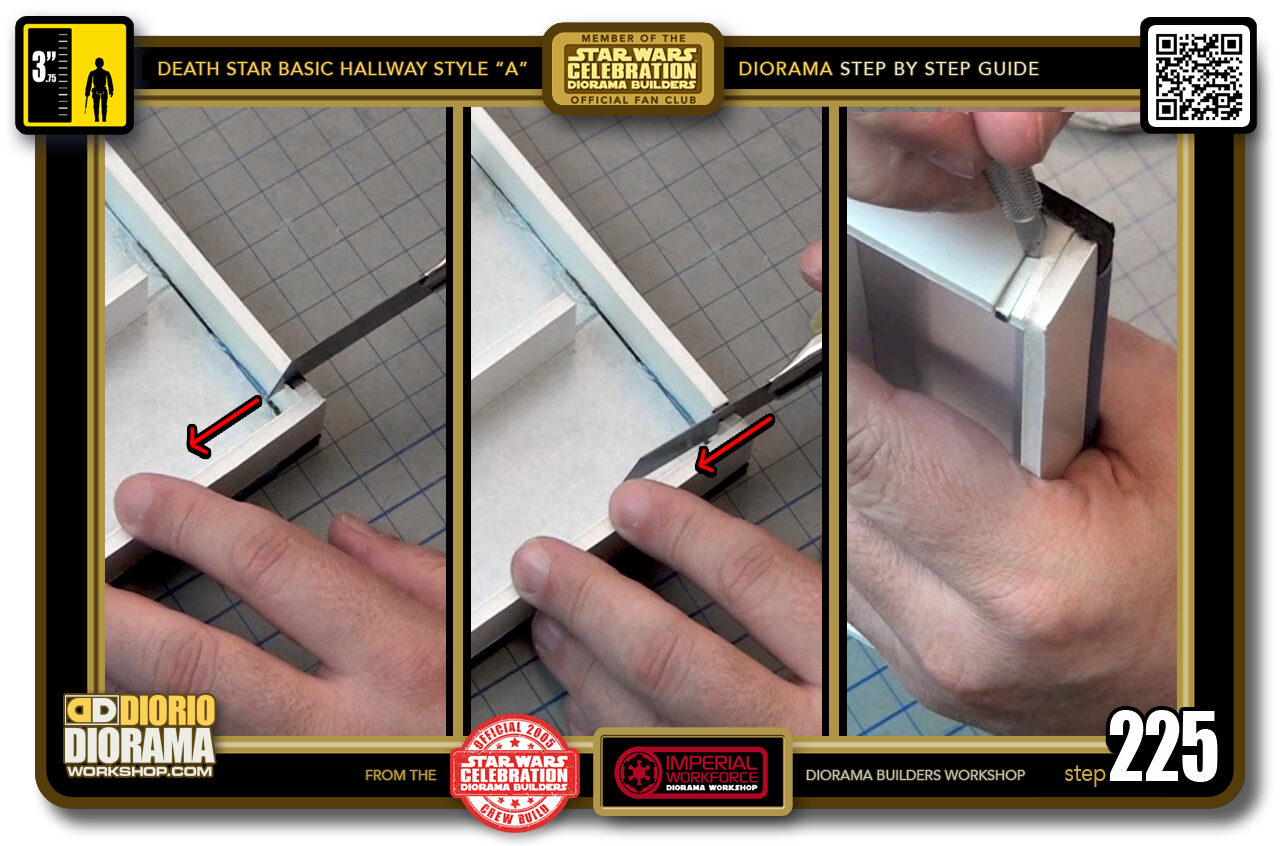
- STEP 225 > Start by placing your X-Acto blade on one side of your sharpie mark with the extended blade on the outside of your ceiling frame and slide it towards the inside which will cause the blade to slide down to make the first slit cut (left box) Repeat the same motion on the other side of your black sharpie mark (centre box) and lastly switch to your X-Acto pen with pointy blade and stick it in between the 2 slits (right box).
-
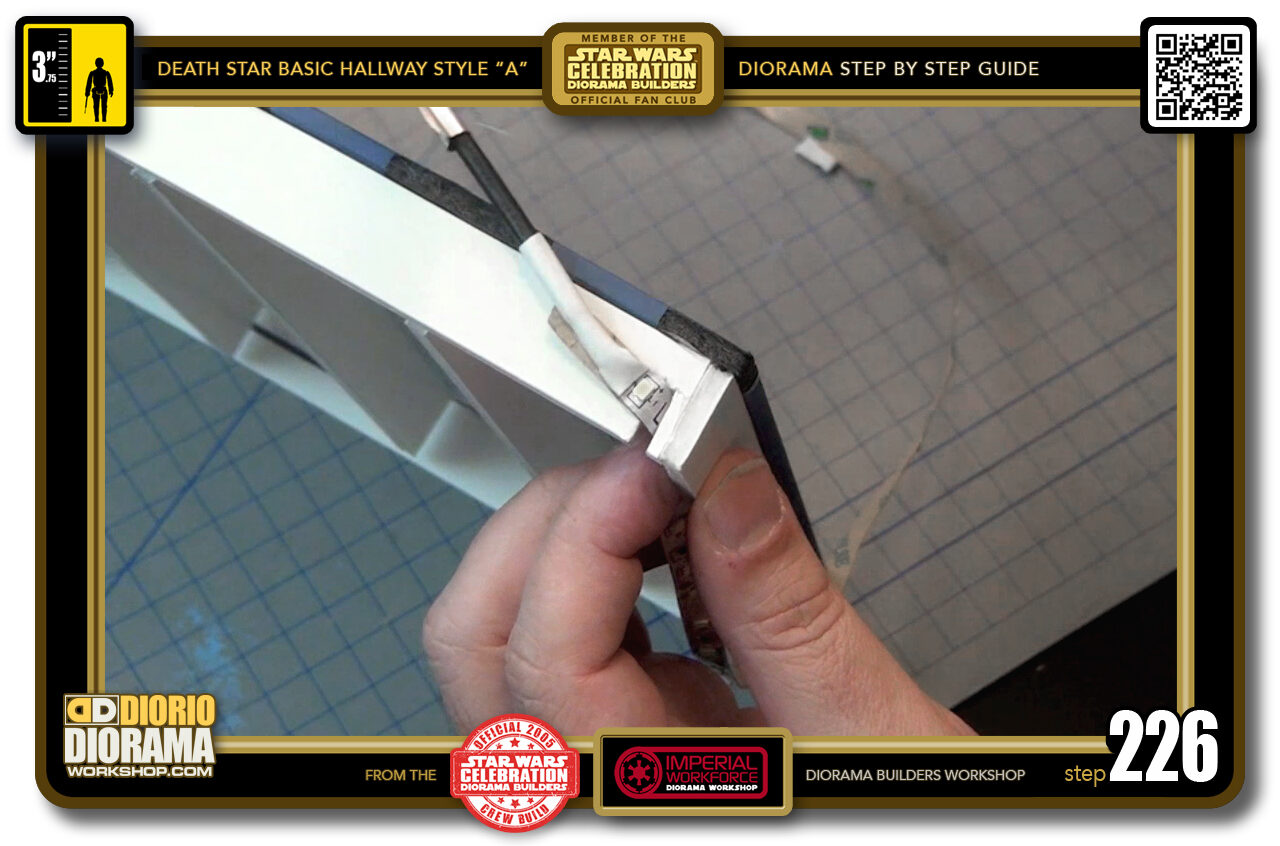
- STEP 226 > You now have a small gap large enough to let your LED strip exit to the outside of your ceiling. This will be your starting point for the inside placement of the LED lights.
-

-
STEP 227 > Follow the blueprint instructions and attach the LED lights along the 30 cm end strip. Just pull enough of the lights to reach the bottom and peel back 6-7 inches at a time and press it along the foamcore strip (left box). Once you reach the end corner, the lights will be placed along the bottom along the 71 cm strip (right box).
FRANK NOTE : Try to keep the strip closer to the top of the 2 cm support strip. DO NOT ATTACH TOUCHING THE BOTTOM. Even though LED don't heat up as much as old school Christmas tree mini light, you want to not have them press close to the tracing paper.
-
-
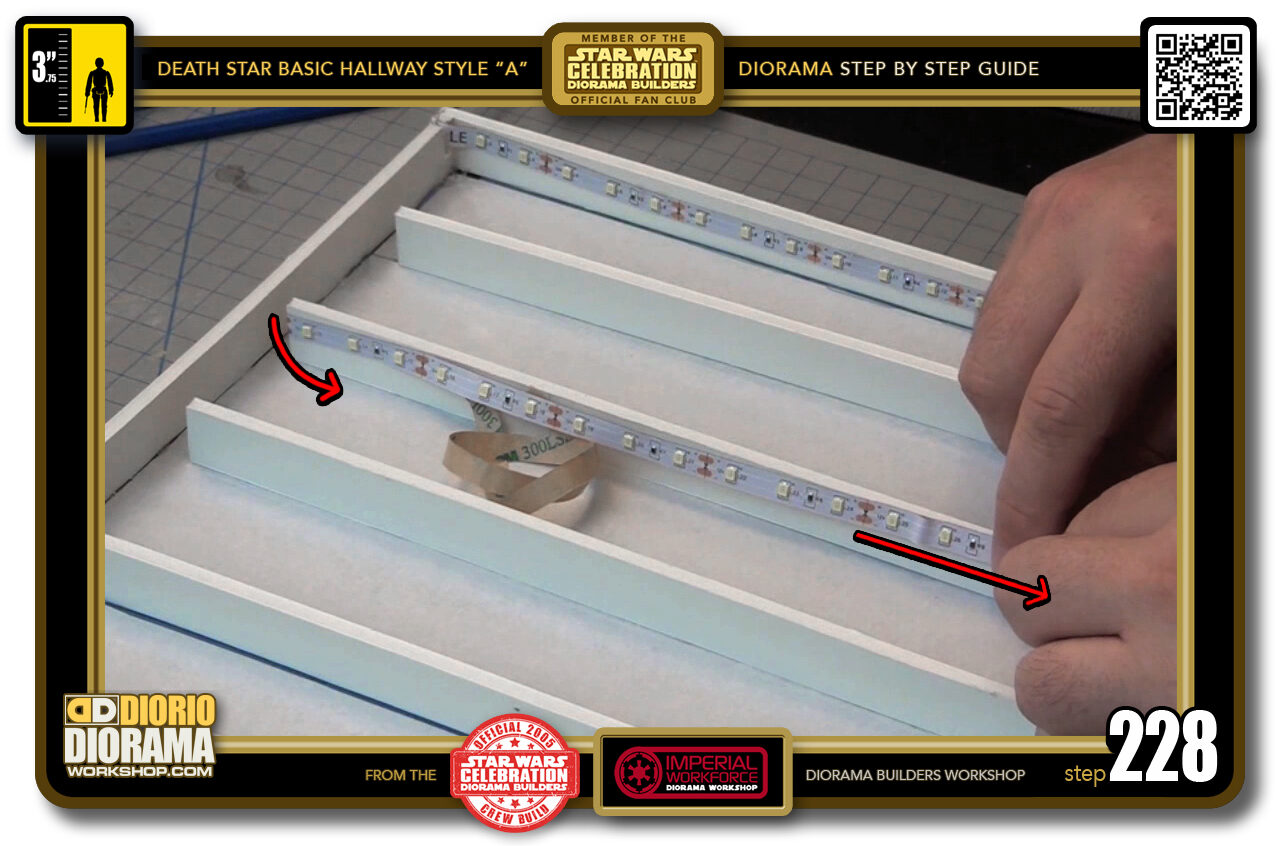
STEP 228 > When you reach the 2nd LED Support strip, make the light strip go back up the right side to the top, around the end and down the opposite side as seen in the blueprints guide and Step 223 photo.
FRANK TIP : When you peel the backing of the LED double side tape, do small amounts then press lights to the foamcore. Don't try to attach the whole length in one take. It will be easier to avoid mistakes and not being able to pull off the lights from the support once contact is made.
-

- STEP 229 > After a few supports, I found it confusing sometimes following the blueprints instructions of where to go up and where to go down, they all look the same after all 🙂 Using the blueprints, I placed a small black sharpie dot at the top of each support that the LED lights would curve around and attach to each side. You don't need to do this but I found it helped me speed things up moving forwards.
-

- STEP 230 > When you reach the end bottom corner, the LED will now move them up the opposite 30 cm strip from where you started going down (the photo looks like I'm going down, but I rotated the ceiling 180 degrees to have better access for peel and stick).
-

- STEP 231 > When placing the LED lights along the upper 71 cm strip (top box) I noticed that I had a slight excess that I was too nervous to trim, fearing the whole strip would lose power. So I decided to just have it exit the same hole the power supply exits and just temporarily taped it to the outside rear 71 cm strip (bottom box).
-

- STEP 232 > Time to do a test, office lights off, Ceiling LED's on. WOW look how cool that looks 🙂 Wasn't it worth all the long tedious steps to get this result 🙂
-
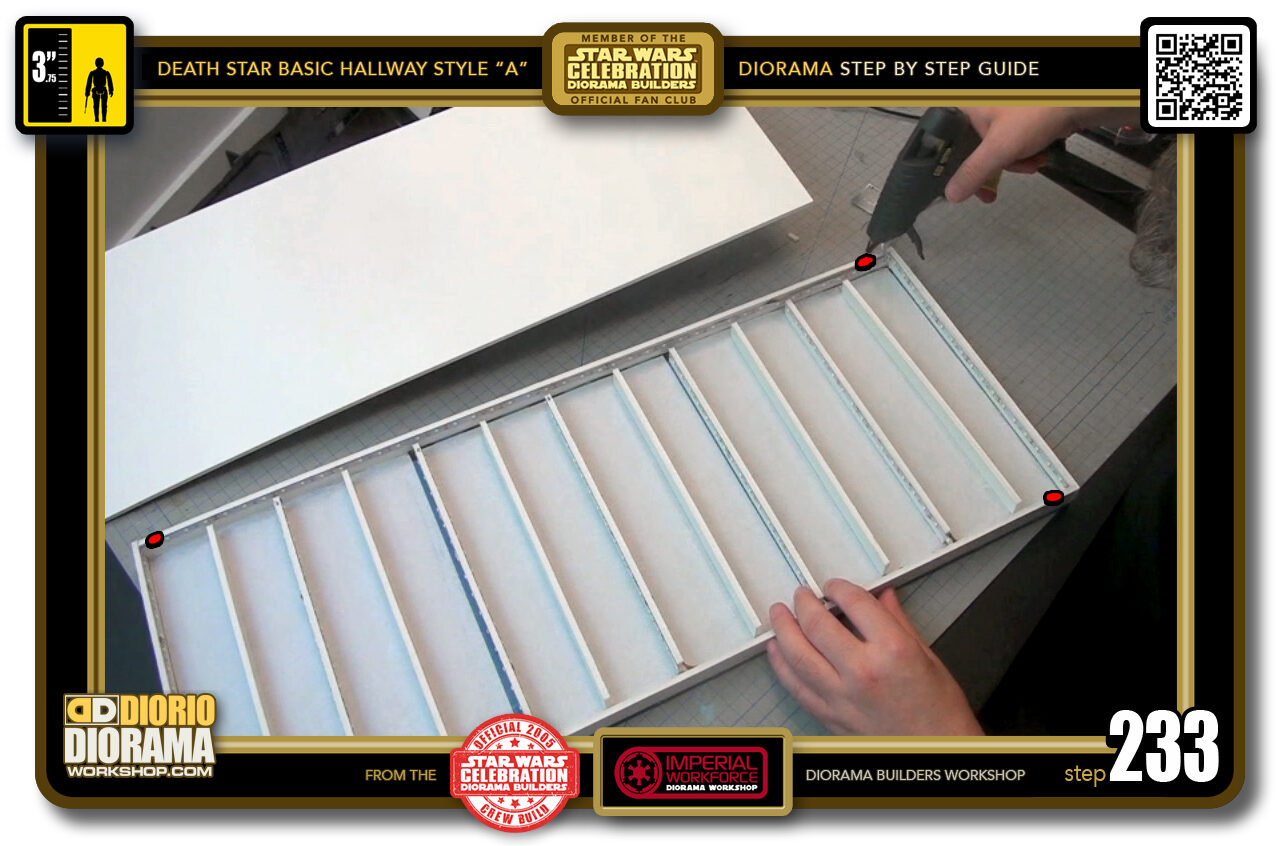
- STEP 233 > Now that all the LED's are attached to the supports, we can close the lid on this but NOT TOO TIGHT 🙂 I want to allow the possibility to re open it if I ever need to without causing too much damage. So all you need is a small dab of hot glue on each of the 4 corners tops. For the corner where you cut the power supply slit, place the glue a little offset so no hot glue melts a hole in the LED's.
-
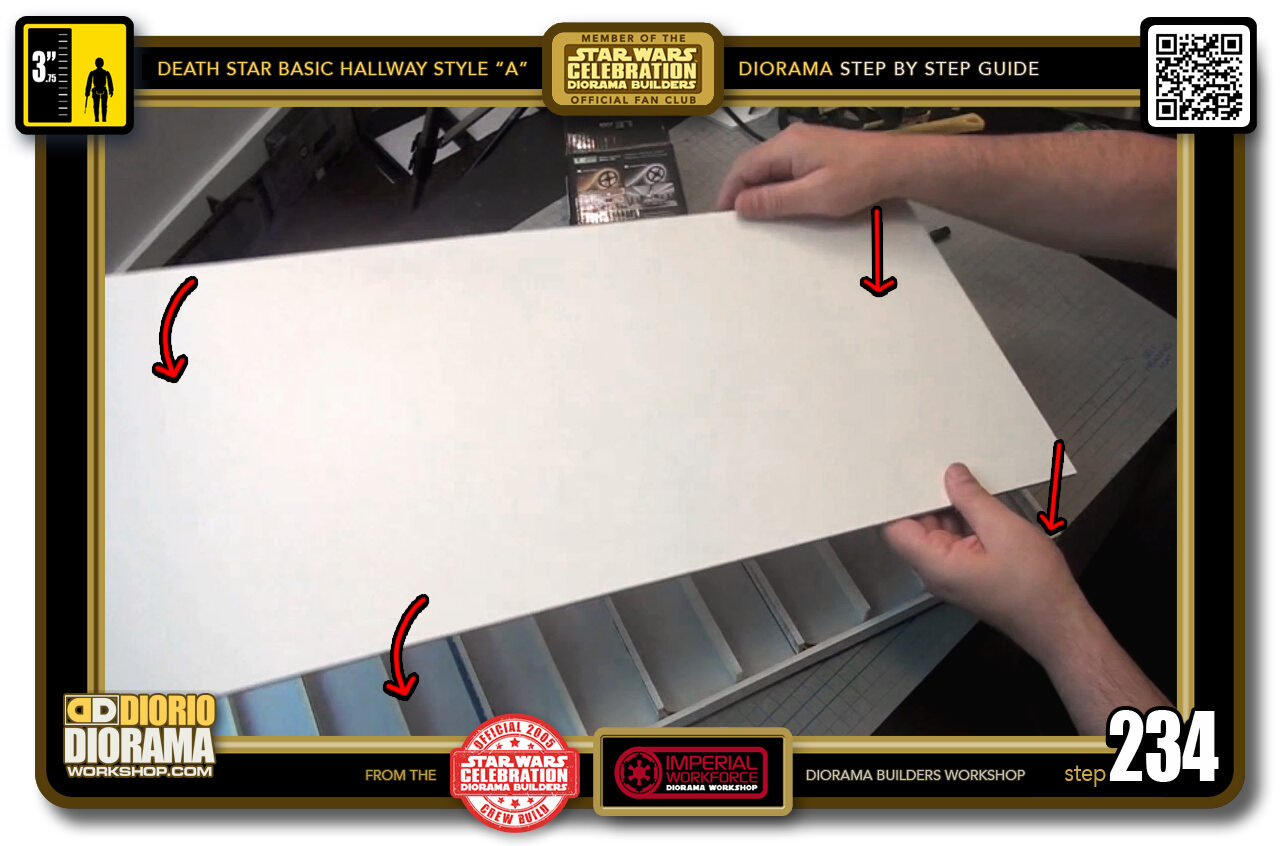
- STEP 234 > Grab your white top ceiling piece and place it over the frame, align it with the corners as close as you can and lower it down one corner at a time.
-

- STEP 235 > Press down for a minute or so until the hot glue cools down.
-
-
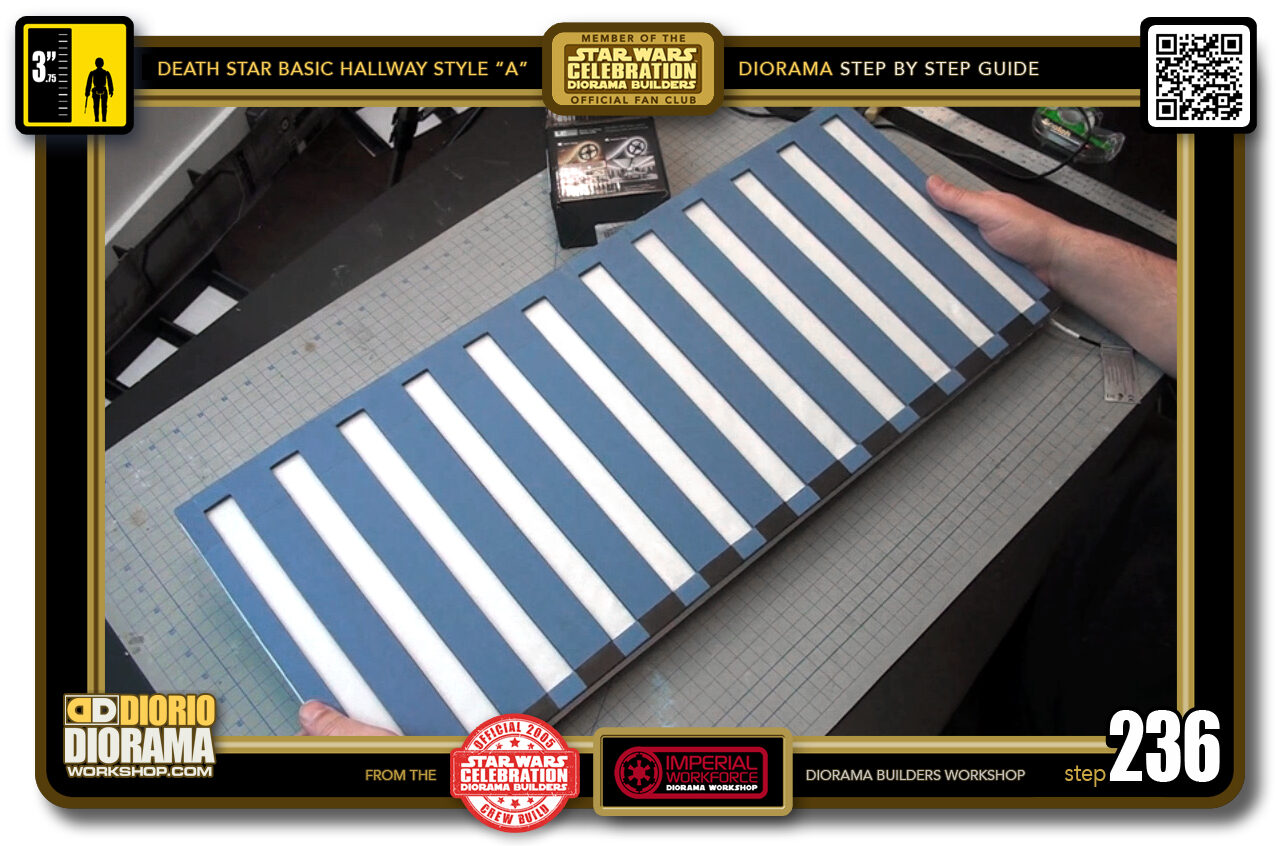
STEP 2306 > And there you go, your Death Star Basic Hallway ceiling is complete. Put it away in a safe place for now. After all this hard work, the last thing you want is for it to get damaged or stepped on like I did. I wanted to cry LOL.
FRANK'S NOTE : By the way, now that it has all it's supports and frames and ceiling top, it is back to being very sturdy, you can handle it without the fear of having it break as you spin or handle it.
-

-
STEP 237 > Let's move on to the floor. When I did this first build I used white foamcore but later found out I would have been better off using black. Which is why I mentioned it earlier in Step 017. So if you followed those instructions your piece should be black even though in my following photos it will be white. Sorry for the confusion.
So grab your black glossy vinyl, I use the DC FIX Brand, it's available on amazon. The link will be in this project's materials list page.
-

- STEP 238 > We want to unroll the proper length to cover the entire floor surface. We want extra at the start and finish that we can trim later to make sure there is no exposed foamcore in the event we swerve off the path during application.
-
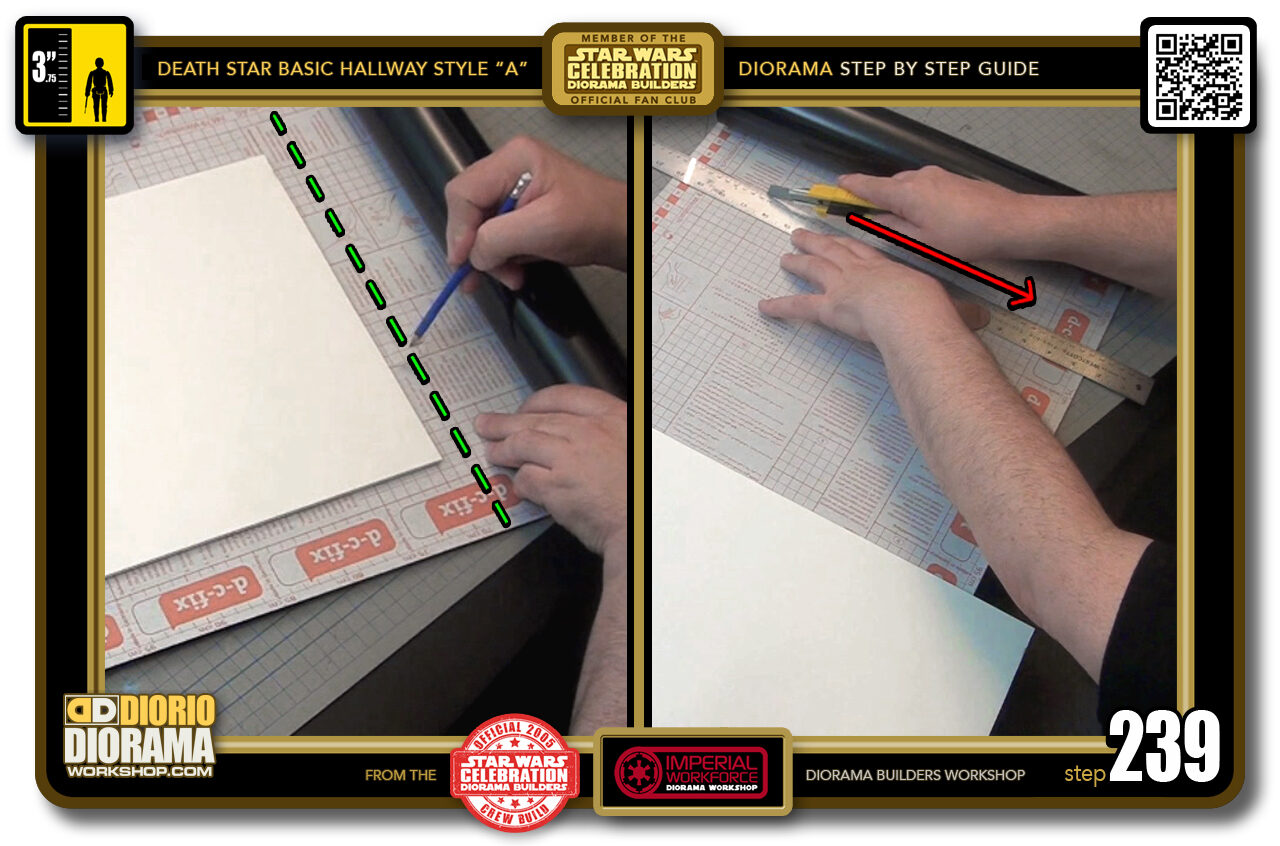
- STEP 239 > Unroll past the end of your floor enough to allow you to put pencil marks (green dotted line) 1 to 2 cm past the end of the foamcore as you did at the other end (left box). When you finish marking your cutting guide on the vinyl, grab your X-Acto knife and ruler, connect your guides or use the lines on the back if your vinyl has that too. Cut all the way across (right box).
-
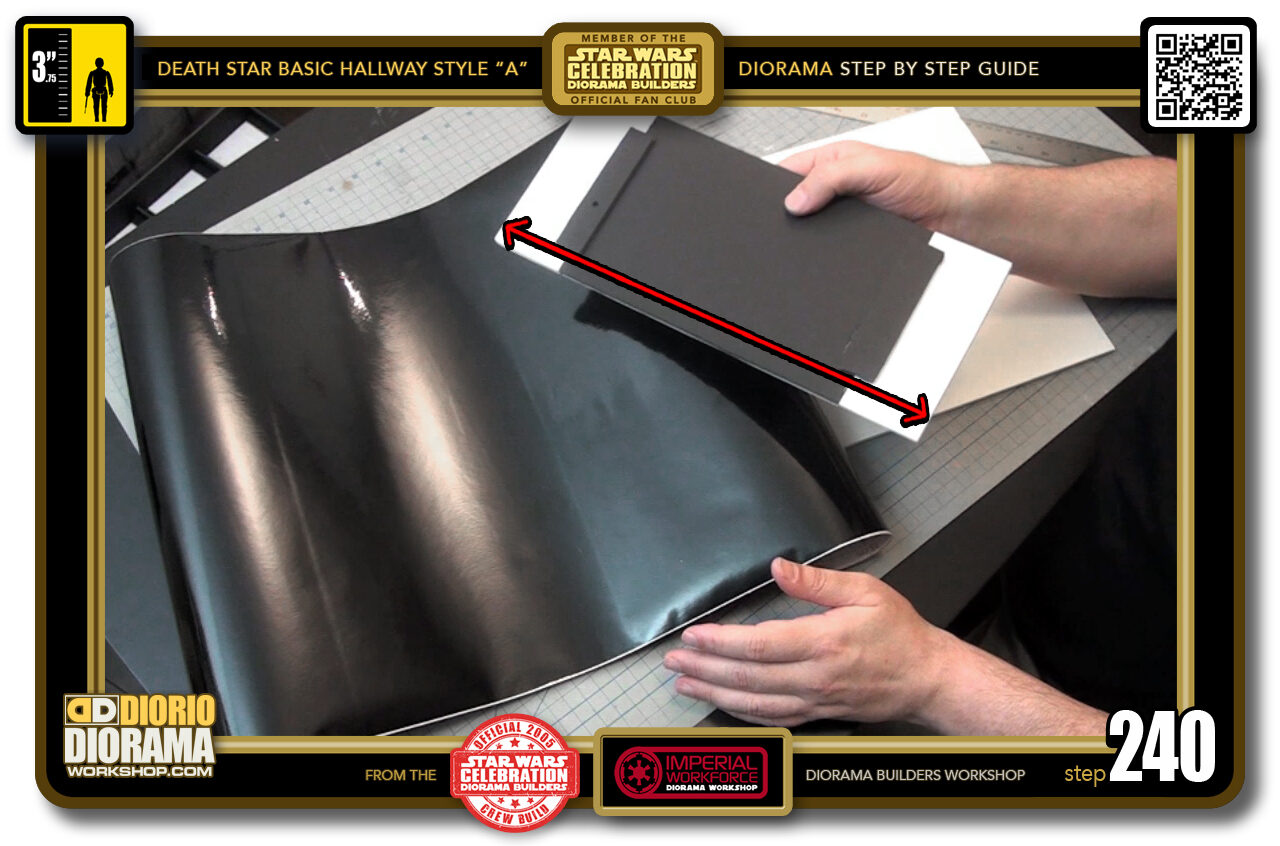
- STEP 240 > Now that we have the correct length, put away your roll, I know it's expensive, we don't want it damaged. You will need a scrap piece of foamcore that is at the minimum, as wide as your floor. You will be using this in the exact same technique we did for the tracing paper application.

.
Did you already build this Diorama ? At home or at our Star Wars Celebration Diorama Builders workshop ? Would you like to show it in the site’s GALLERY VISITORS DIORAMAS section, YES ? That is Awesome !!! You can find out all the details on how to email me your photos on the VISITORS SUBMISSIONS INFO page … When I get your photos, I will create your very own page just like this one. You may not realize it but work does inspire others to join in the fun of making Action Figure Dioramas.
.
NOT FOR RESALE ALL Decals, tutorials and artwork are ©FrankDiorio (dioramaworkshop.com) and offered FOR FREE to the fans – that would be you ? so you can build and display my diorama designs in your very own home. I realize I cannot control what one does with my graphics once I place them on the web, I can only ask you as one fan to another, please respect the artist and do not be that jerk who uses my designs and tutorials to build a copy of my work only to sell it on EBAY or trade/sale groups and forums. Thank You. Frank.
.
.
If you have a facebook account, why not join the Official Diorama Builders Fan Club today, simply click the logo link below.
 .
.
Catch up with fellow visitors and exchange stories, read cool interviews with the crew, exchange photos, fun surprises and grab some FAN ONLY merchandise next year at actual future conventions ?
.
©2018 Frank Diorio DioramaWorkshop.Com
.
IF YOU LIKE WHAT YOU SEE, PLEASE SHARE WITH YOUR FRIENDS
USING THE SOCIAL MEDIA BUTTONS BELOW