


-
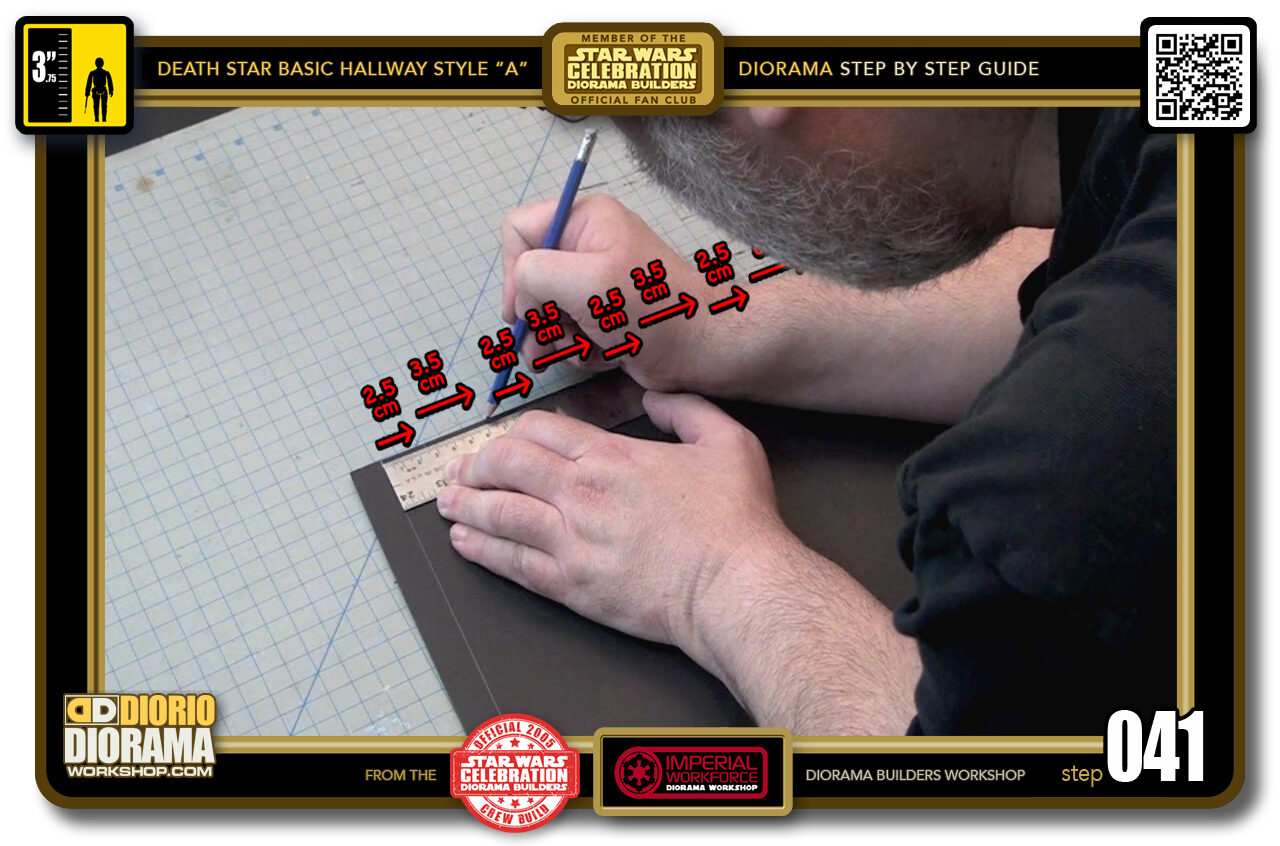
- STEP 041 > Now it's time to do the VERY SAME measurements at the top row. THIS is where it is SUPER IMPORTANT that your pencil marks MATCH AS CLOSE AS POSSIBLE the bottom row, so that when you cut, you ALWAYS have clean 90 degree lines all the way across.
-
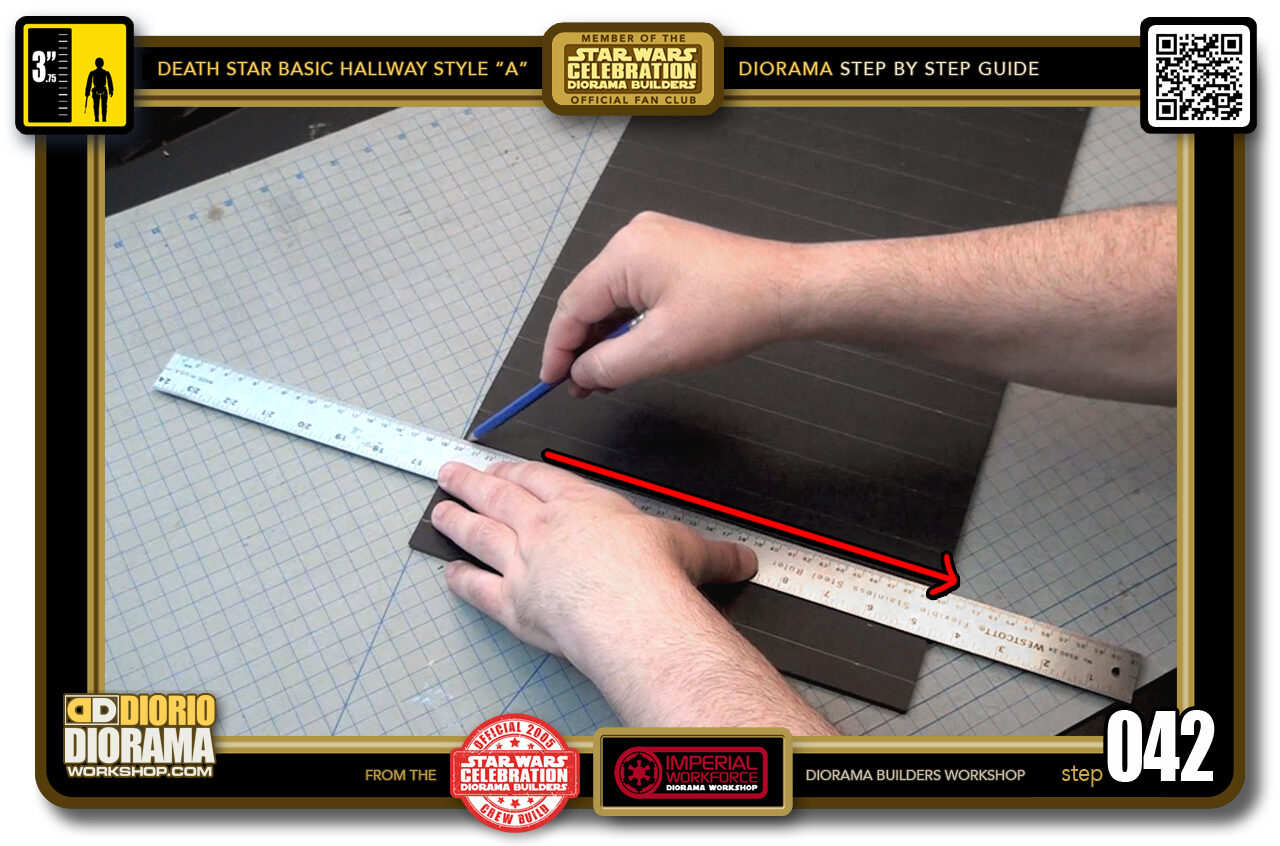
- STEP 042 > Once your top and bottom pencil marks are done, it's time to use your ruler and CONNECT them ALL to create your pencil cutting guide lines.
-
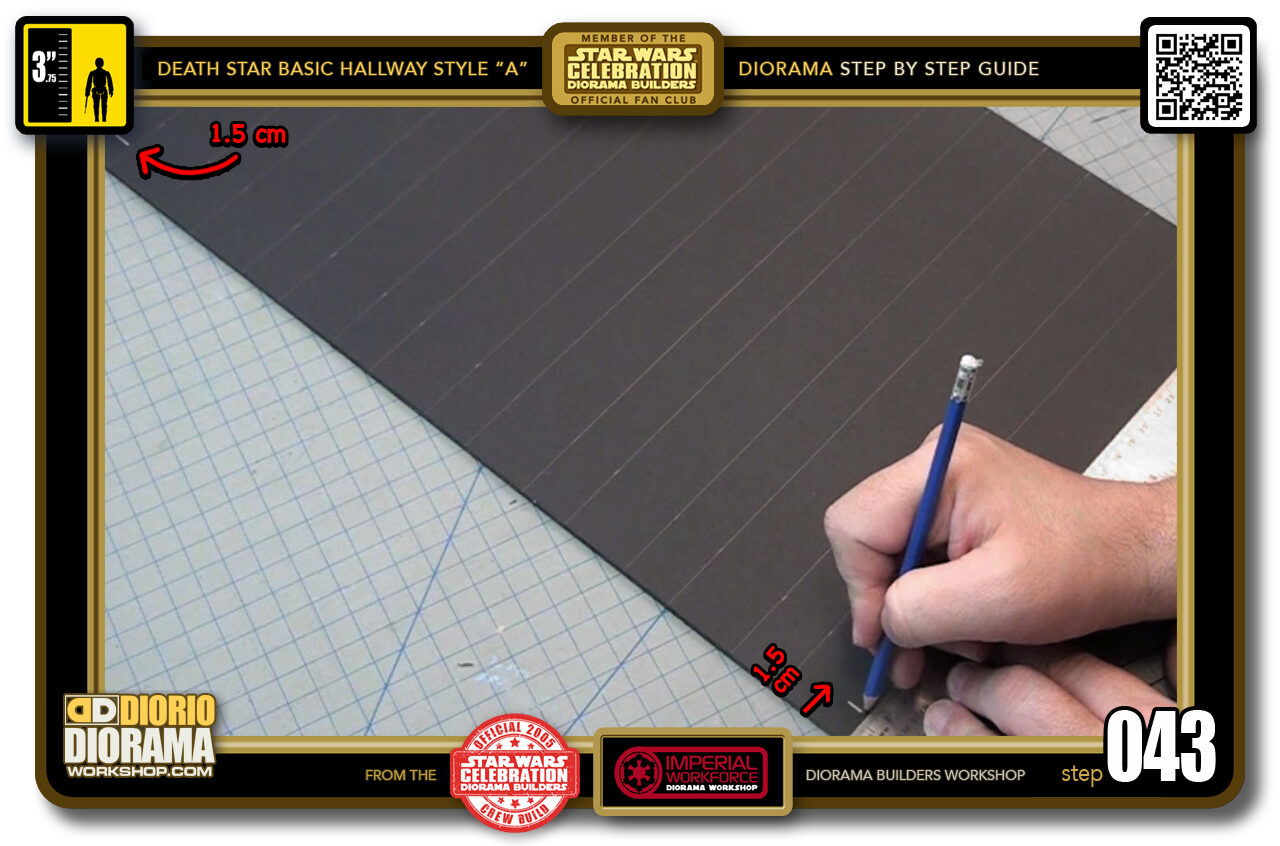
- STEP 043 > When those lines are done, we need to measure the top and bottom distance that create the frame. You need to measure 1.5 cm at the top and bottom of both corners
-
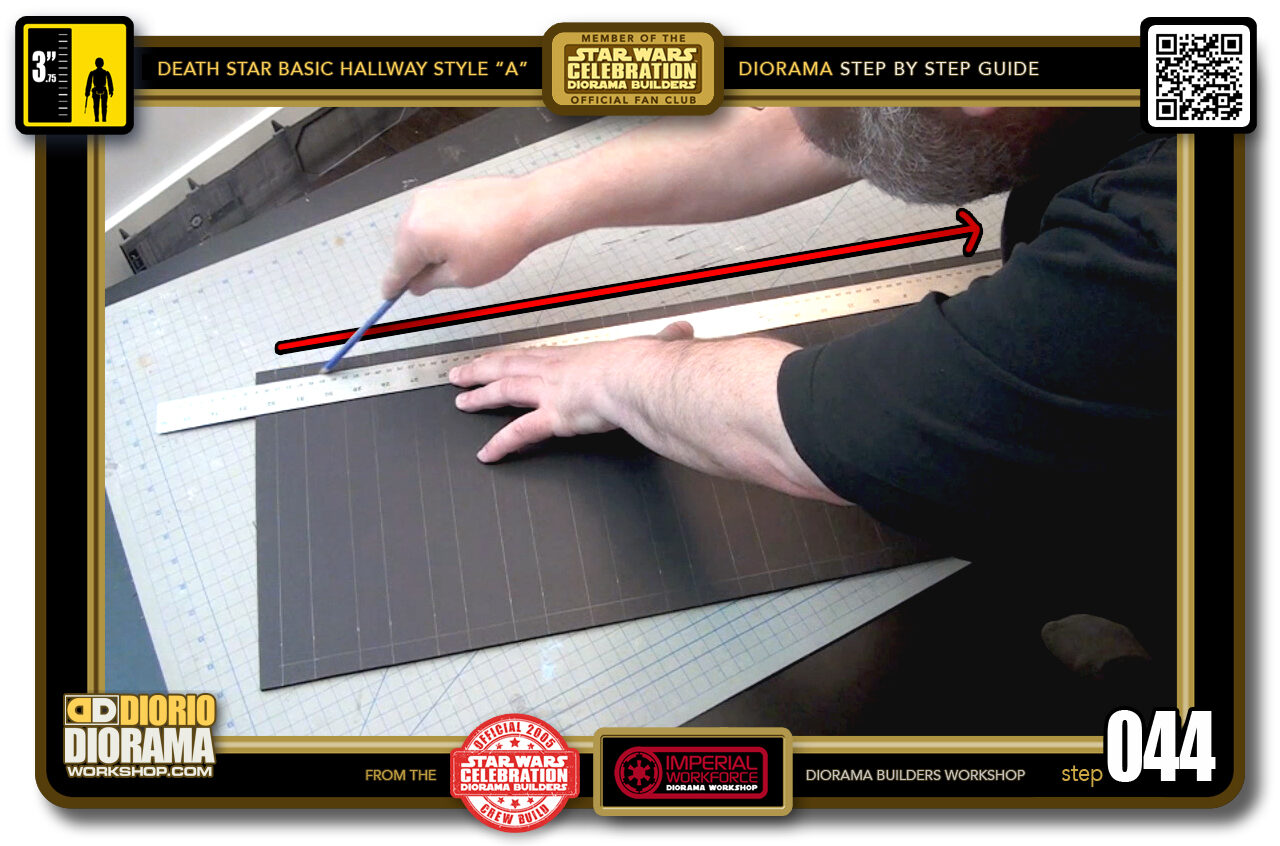
- STEP 044 > Place your ruler along these front and rear pencil marks and connect the dots with a nice clean straight line all the way across.
-
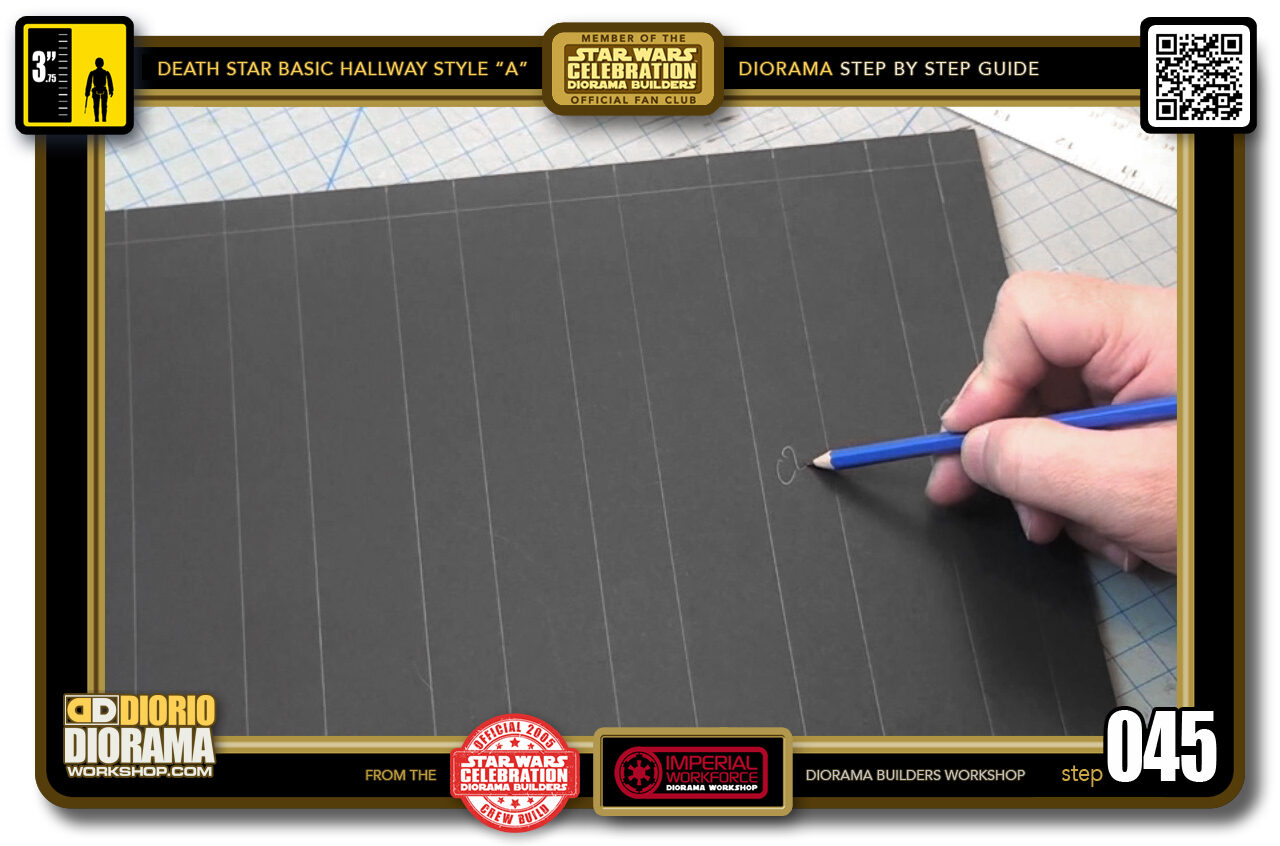
- STEP 045 > Since we have a TON of very similar lines, it can get very confusing so, we want to identify ALL the "C2" strips (the 2.5 cm wide ones) as these will be the ones that will be cut around and removed from the ceiling.
-

-
STEP 046 > Time to start cutting - DON'T BE SHY TO USE NEW BLADES as often as you want. We want CRISP CLEAN CUTS. For every line, we are going to start by aligning the X-Acto blades front end at a 90 degree with the foamcore surface. This will make sure ONLY the TIP touches and penetrates as you press STRAIGHT DOWN as shown on the left box red arrow.
Now you can LOWER the angle of your blade closer to the surface ( red arrow in center box) as you start cutting and pulling away from the insertion point ( red arrow in right box).
-
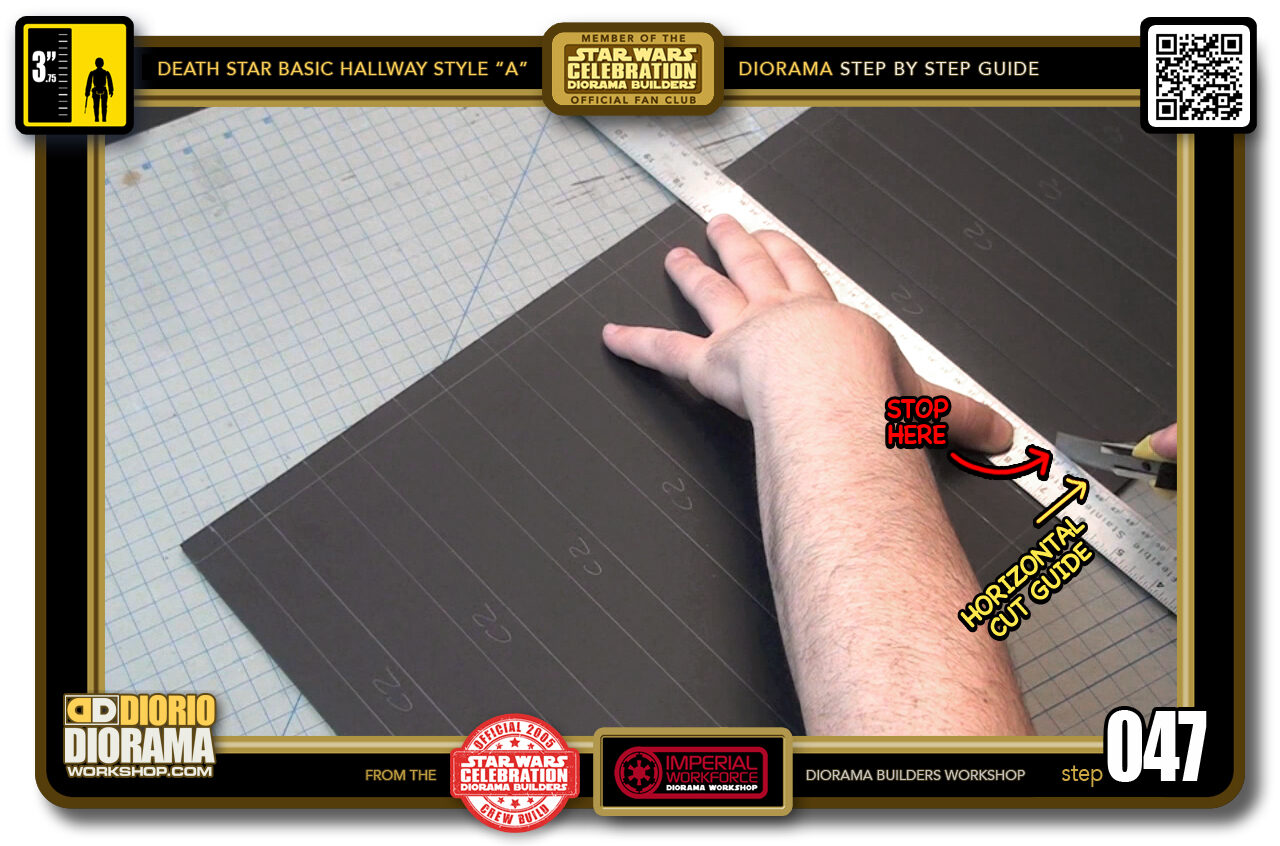
- STEP 047 > The MOST IMPORTANT PART of these cuts is to ALWAYS STOP BEFORE you reach the end of your horizontal guide line ( yellow arrow). After you complete all the cuts, you will spin the foamcore rectangle 180 degrees, and finish the cuts using the same starting technique of Step 046)
-
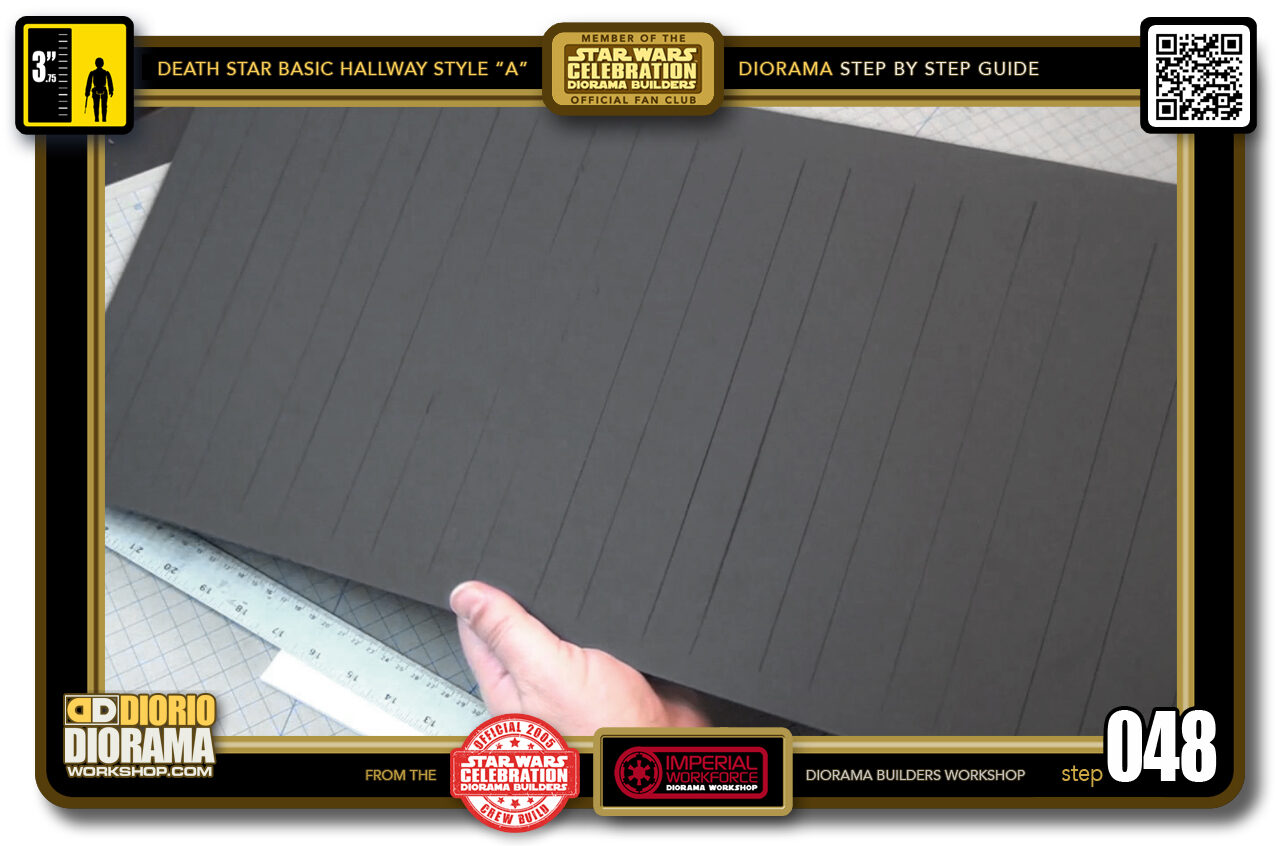
- STEP 048 > After doing all of your cuts, your foamcore resistance has weakened A LOT. So from this step forward manipulate with care, ESPECIALLY WHEN LIFTING off the work table surface. The LAST thing you want to happen after all this hard precise work is to have your ceiling RIP in TWO - I would Cry LOL.
-
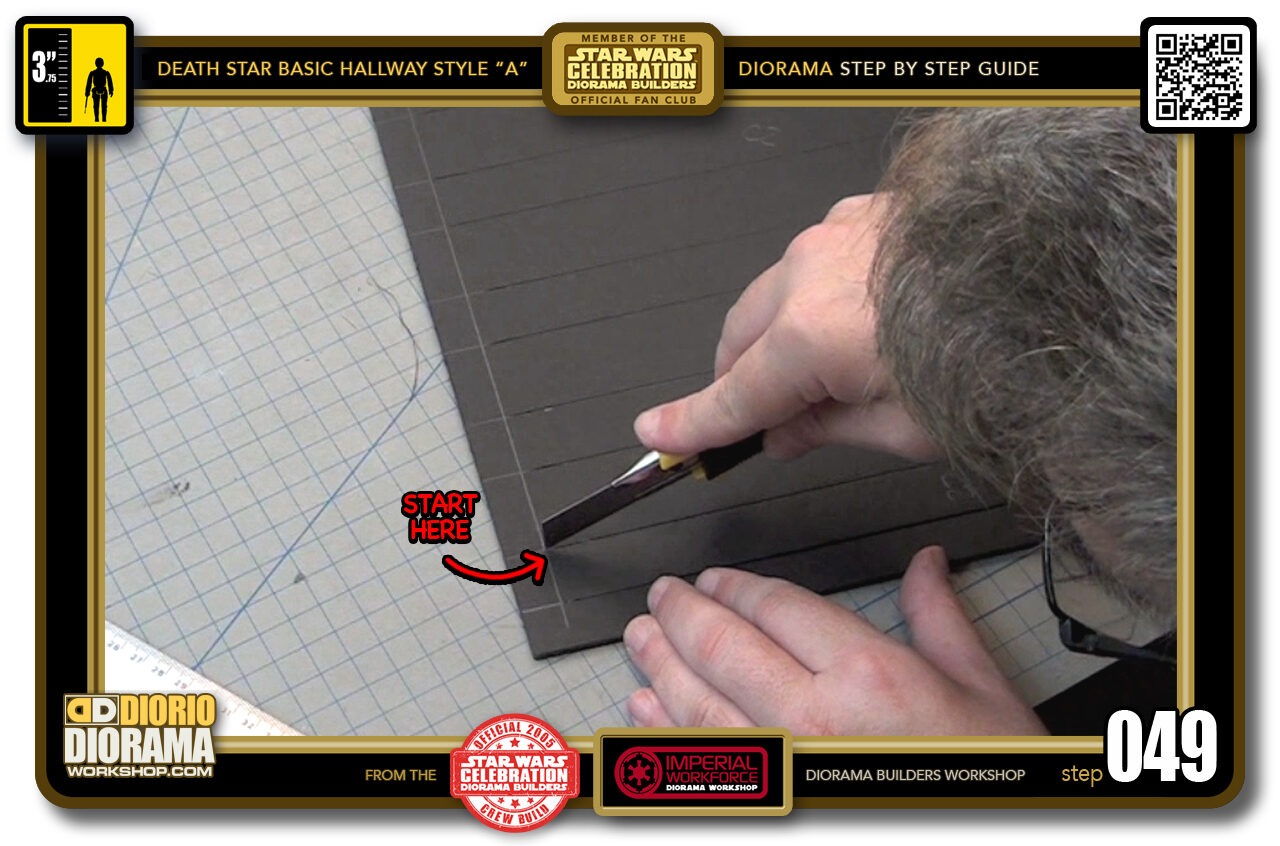
- STEP 049 > With the surface now spun around 180 degrees, Place your X-Acto knife in the same position as the LEFT BOX Step 046. PRESS DOWN and continue your movement... lower the knife angle closer to the foamcore and pull back until you connect with where you stopped the first go around.
-
-
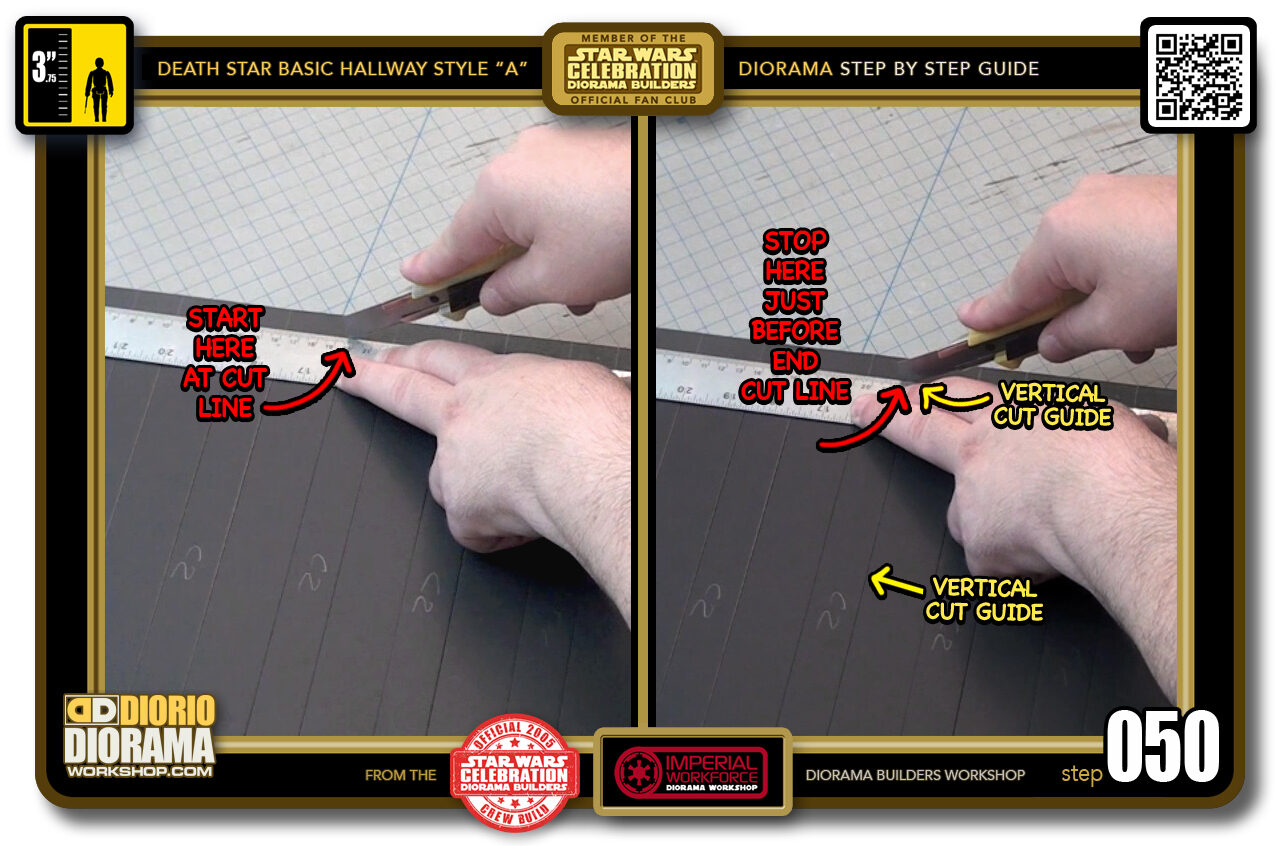
STEP 050 > With all the long cuts done, its time to connect the top and bottom, or front and back depending how you look at it. BE VERY PRECISE HERE. You don't have very wide to cut, only 2.5 cm which is almost where you reach after pushing down and penetrating your foamcore at the start.
VERY IMPORTANT !!!! REMEMBER TO MAKE SURE YOU ARE CUTTING INSIDE THE LINES you identified as C2. You DON'T want to cut the 3.5 cm C3 connection, that would be a disaster. ALWAYS TAKE YOUR TIME and DOUBLE CHECK it belongs to your C2 piece.
-
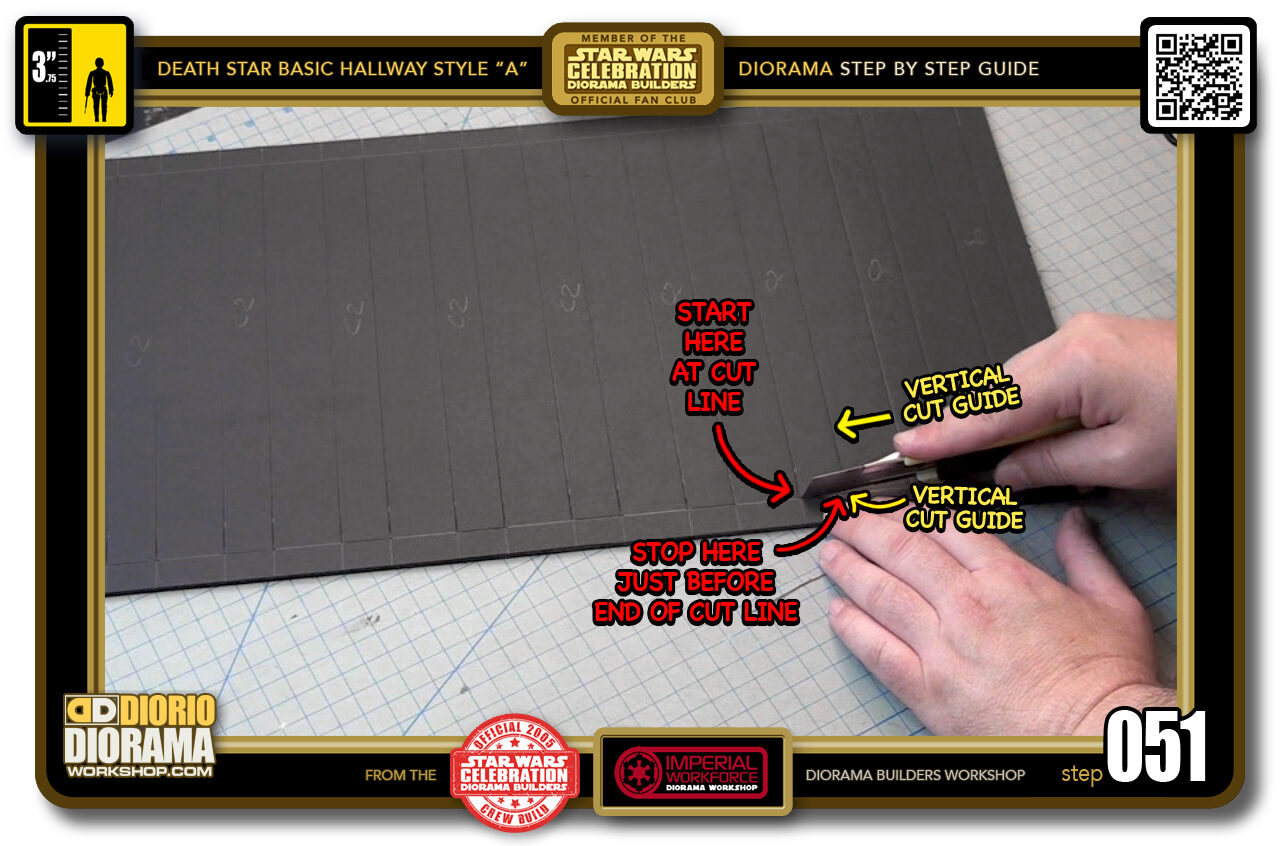
- STEP 051 > After you cut the first half, it's time to spin the foamcore REMEMBER SLOWLY - IT IS SUPER FRAGILE NOW - You know the technique by now, lift the blade 90 degrees, penetrate the tip of the blade by pressing down, lower the knife and pull back until you connect with the other sides slice.
-
-
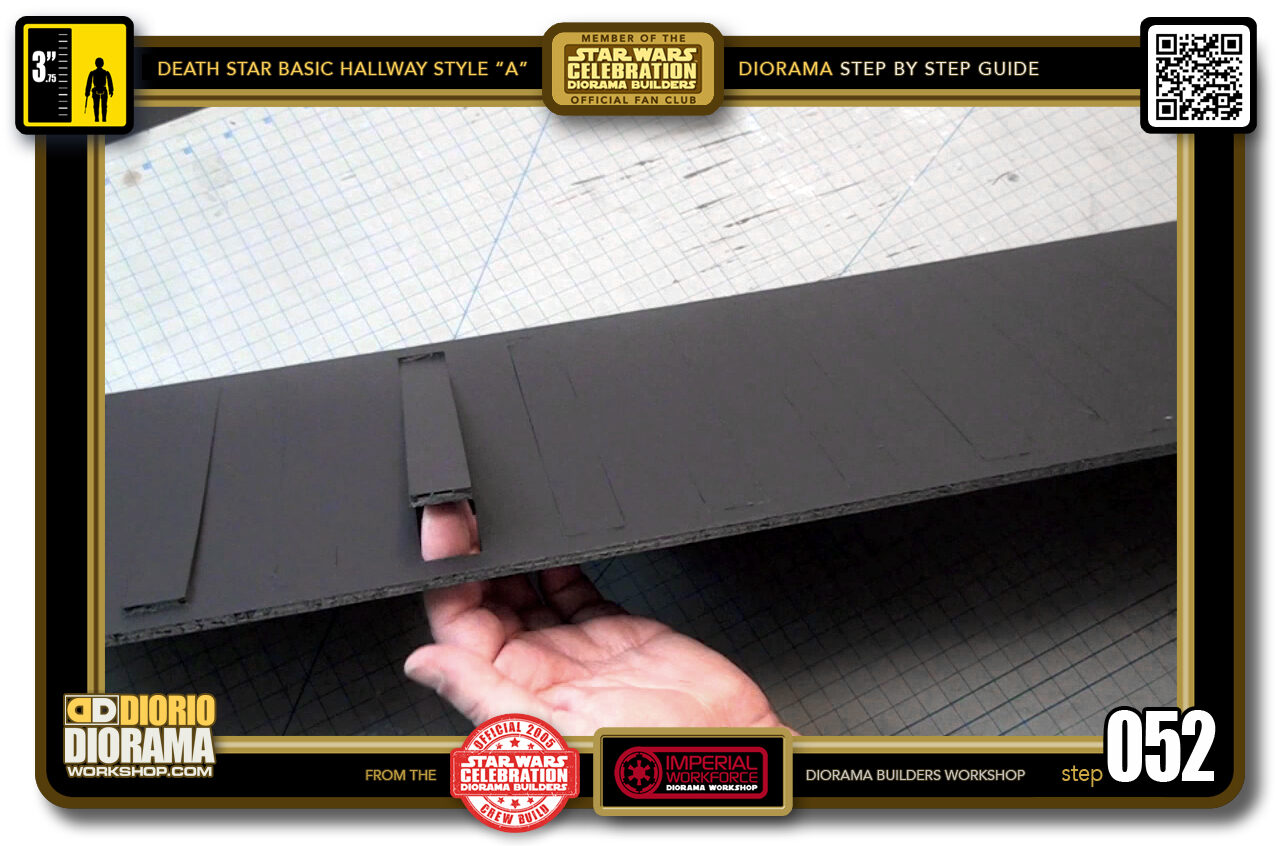
STEP 052 > Now CAREFULLY TURN THE CEILING AROUND - SUPER CAREFUL as it has lost its strength with all the cuts, the once strong foamcore rectangle is now very flimsy and SUPER DELICATE.
You will see that most of the cuts have gone through to the other side. poke each piece with your finger. Do it SLOW, if it's fully cut around it will POP OUT like this.
-
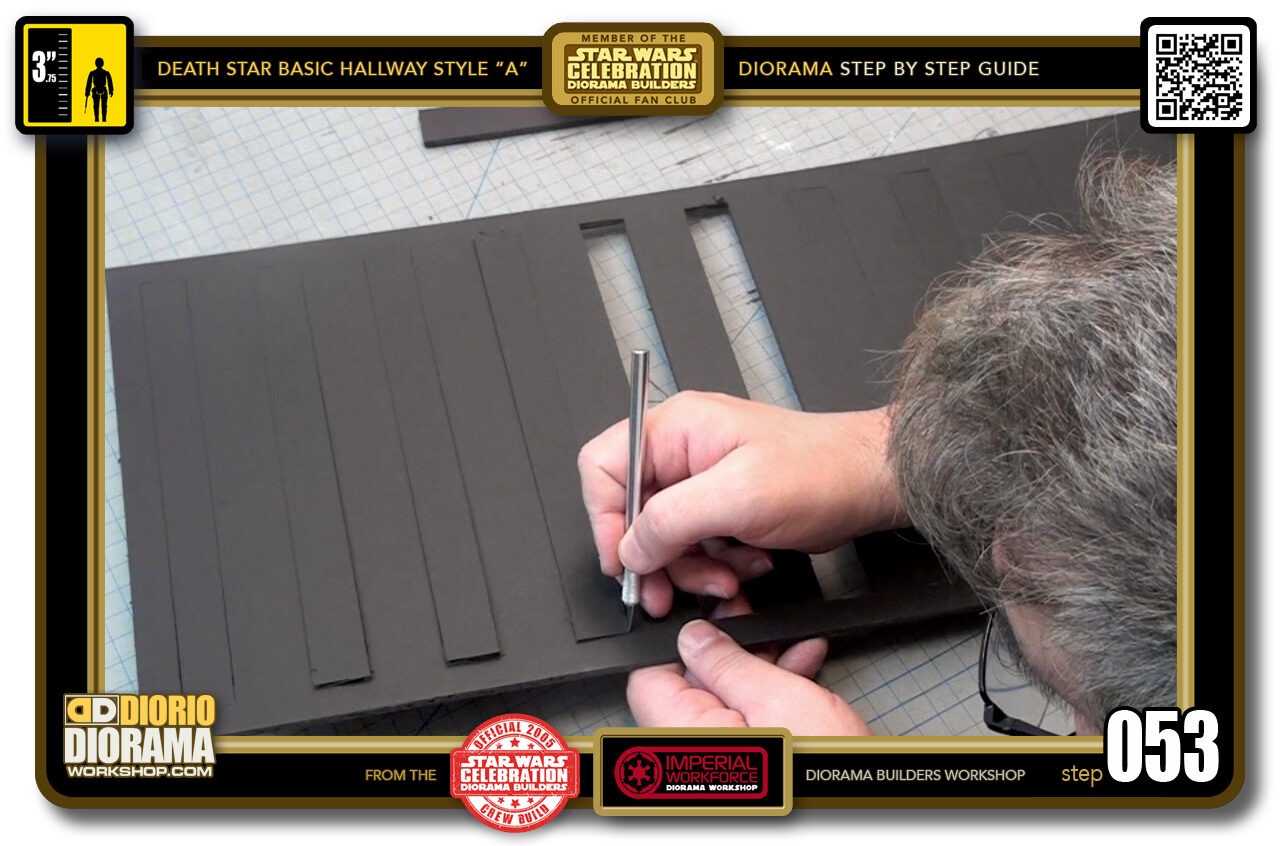
- STEP 053 > If some of the C2 rectangles are still slightly attached at the corners, use a X-ACTO PEN - with the super pointy tips, to carefully cut along the lines removing the imperfect seams. After doing this, the pieces should POP with NO problem.
-
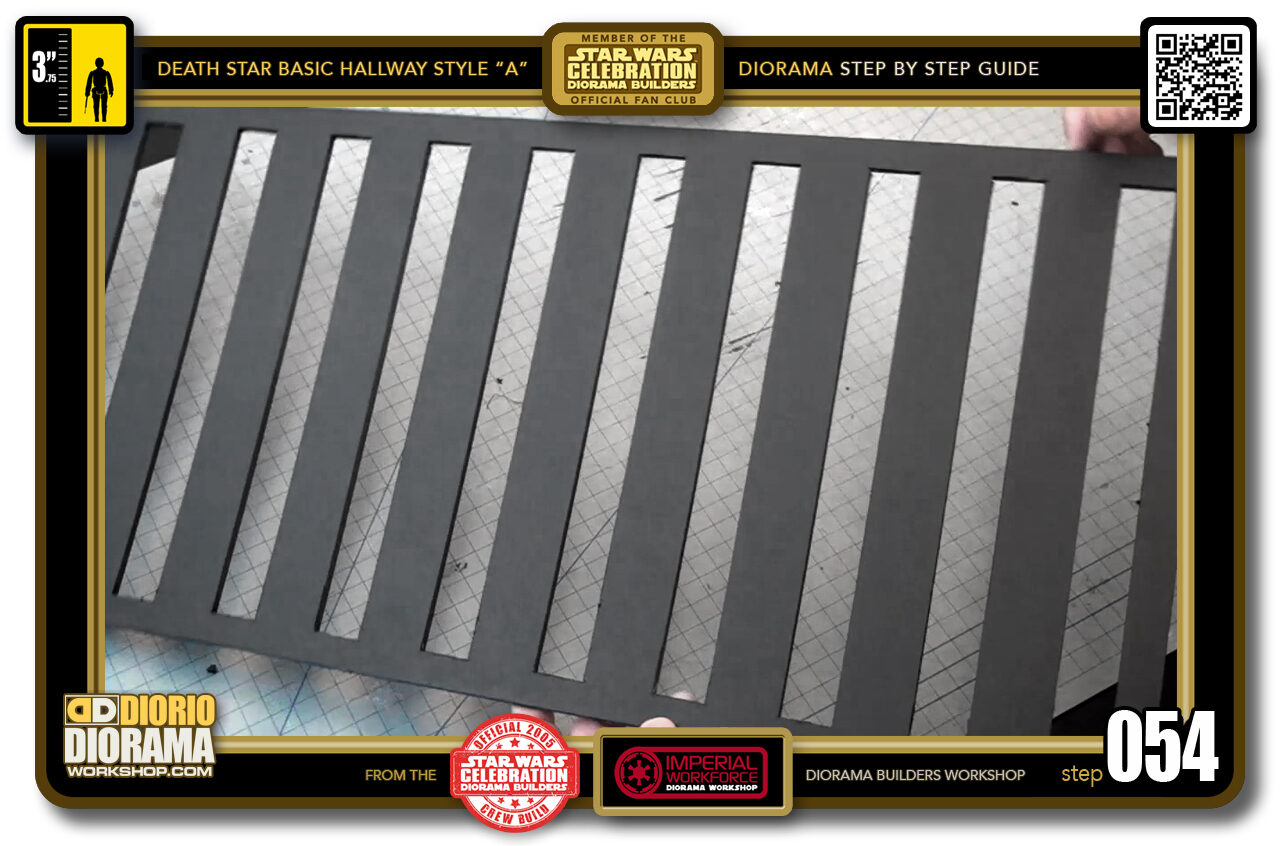
- STEP 054 > Your Ceiling's Light Grid bottom piece is complete. REMEMBER SUPER FRAGILE NOW - ALWAYS HANDLE with SUPER CARE.
-
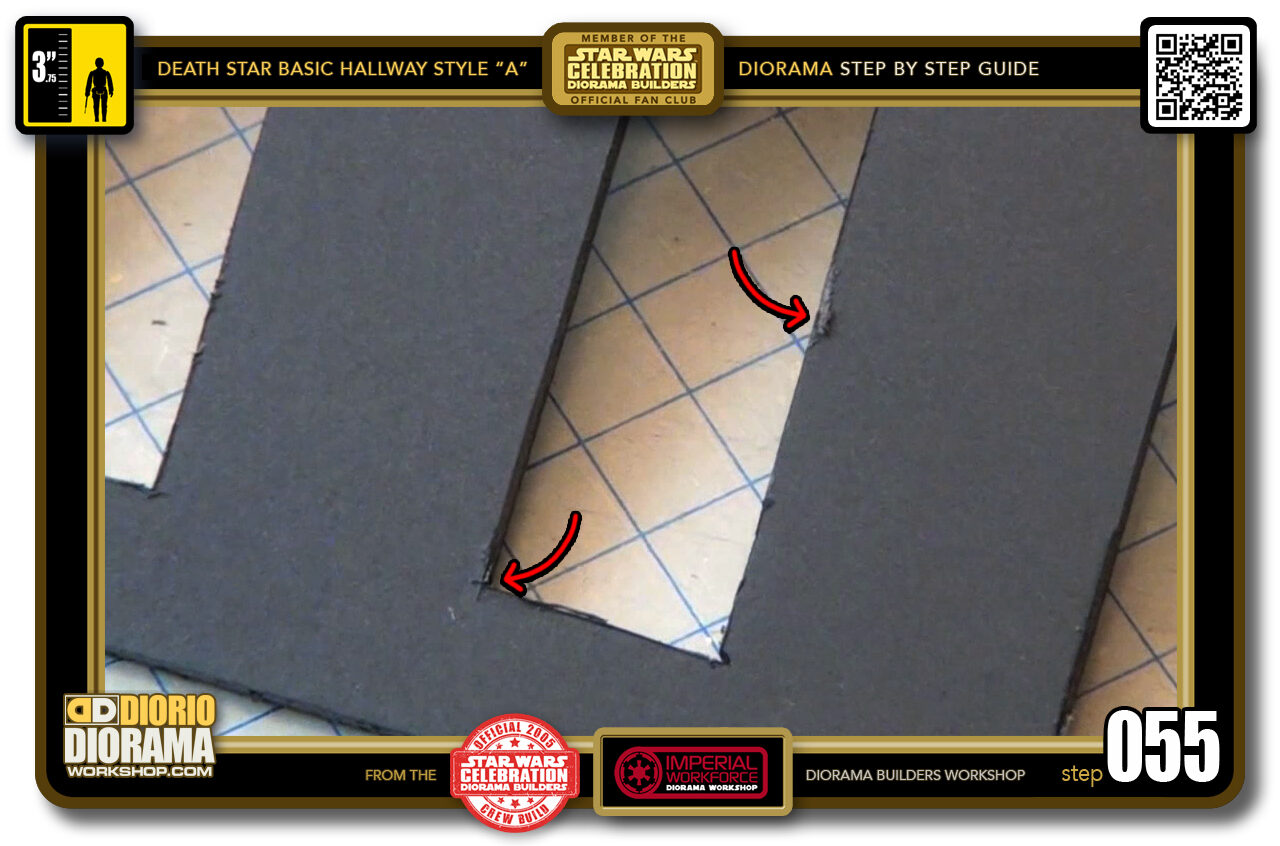
- STEP 055 > Now if you have slight imperfections and tears like this, don't worry, these will all be hidden when you apply the decal skins.
-
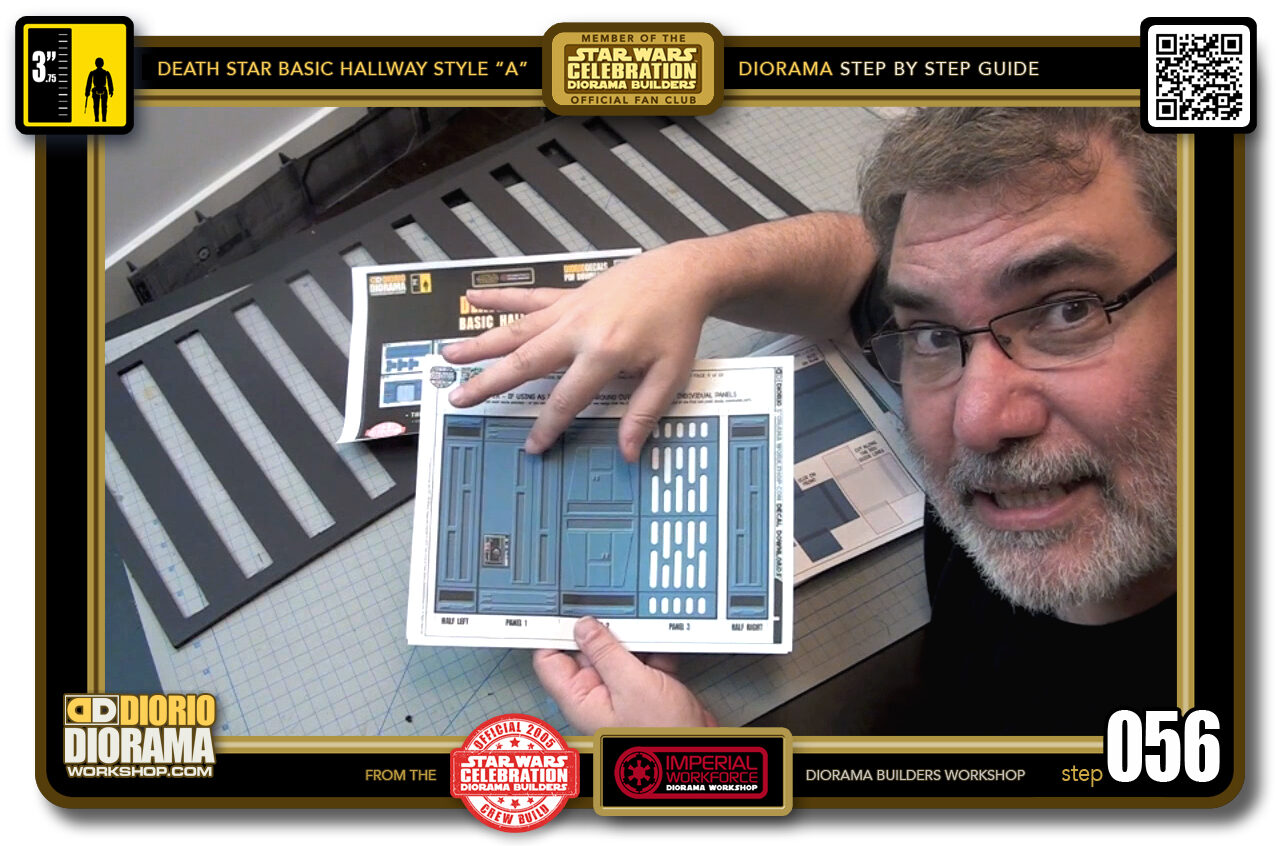
- STEP 056 > When you first print the Basic Hallway decals you will notice that the first sheets include the wall panels you are used to seeing in the movie. These will attach to the rear wall later on.
-
-
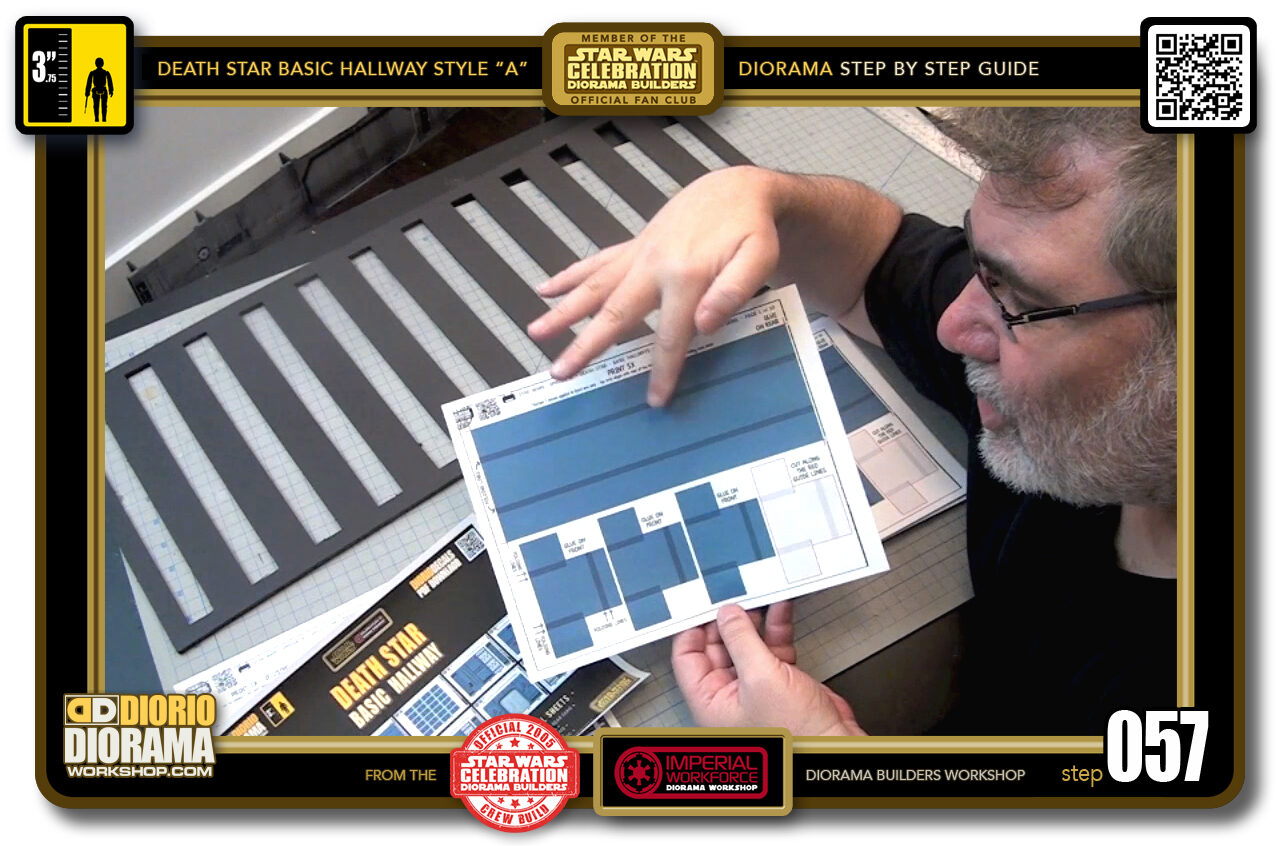
STEP 057 > These decals will look a little more odd, as they are NEW 2020 SKINS I have just created that will cover the ENTIRE Ceiling Light Grid and will have it match the exact colour of the wall panels, just like in the movie.
Of course to save time and money (on decal sheets and printer ink) you could skip the entire decal process but the result will not be the same WOW effect these will give you as with just using just plain black foamcore Strips (C3) and white foamcore ceiling like we originally used at Celebration III .
-
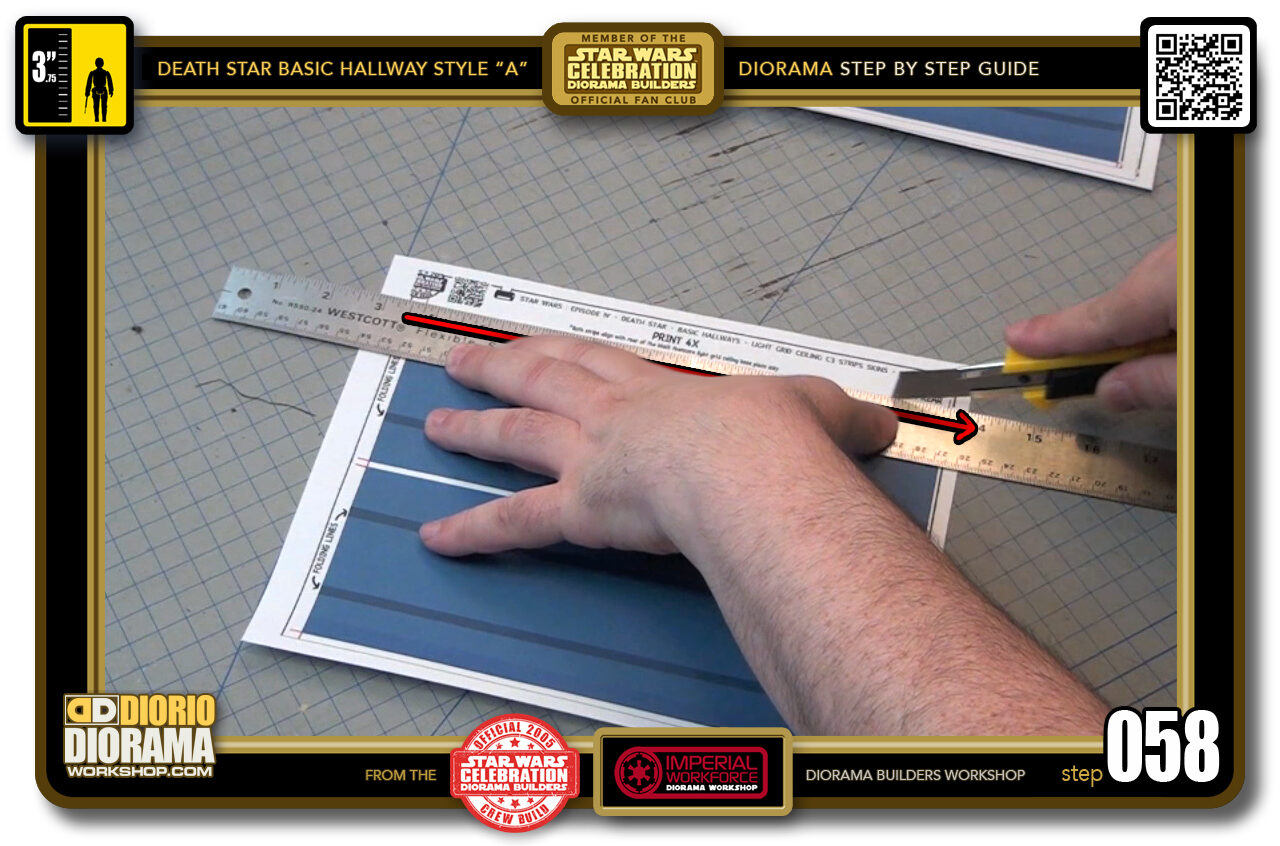
- STEP 058 > Good for you, you are continuing with the more tedious but jaw dropping NEW 2020 improved design 🙂 Simply use the red cutting guides to allign your ruler, and slice down with your X-Acto knife all the way around.
-
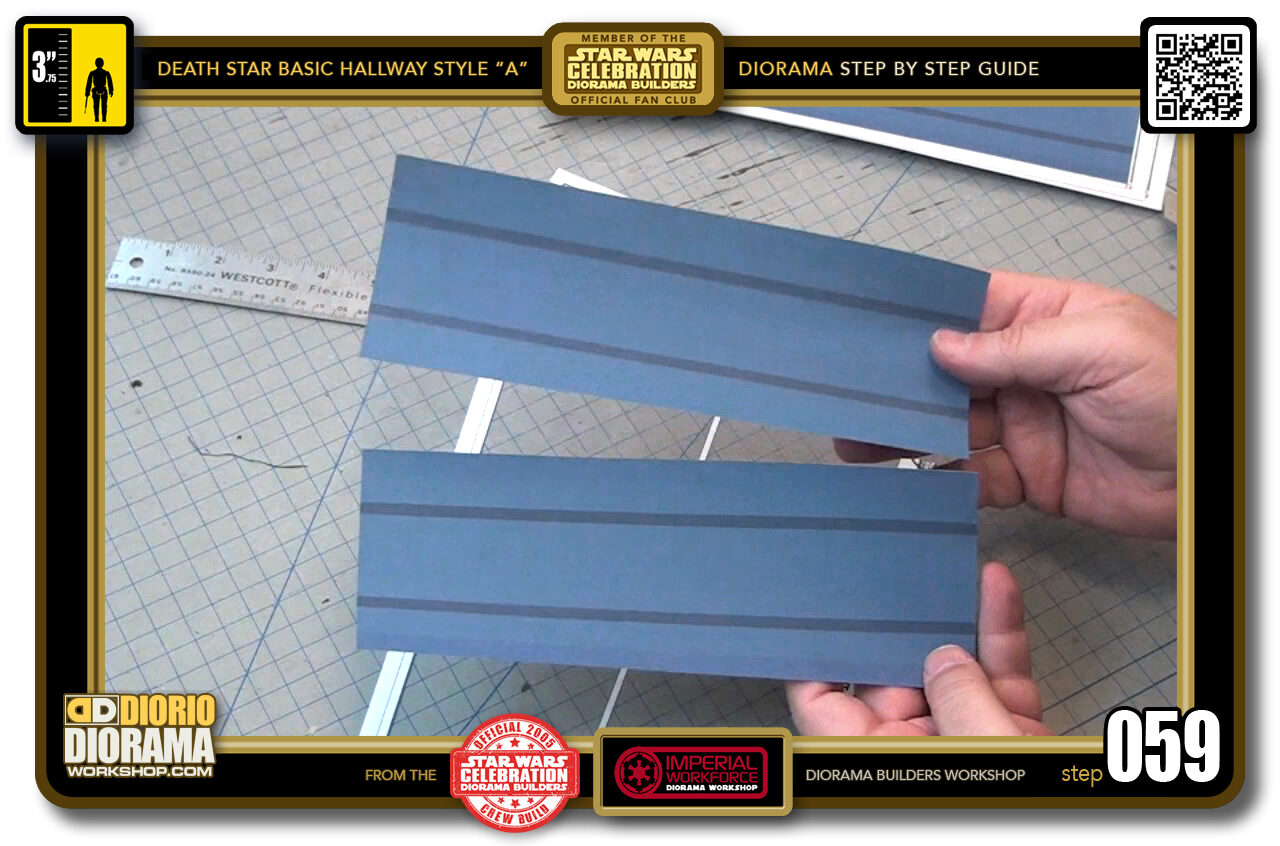
- STEP 059 > Each sheet will give you 2 nice rectangular skins like these.
-
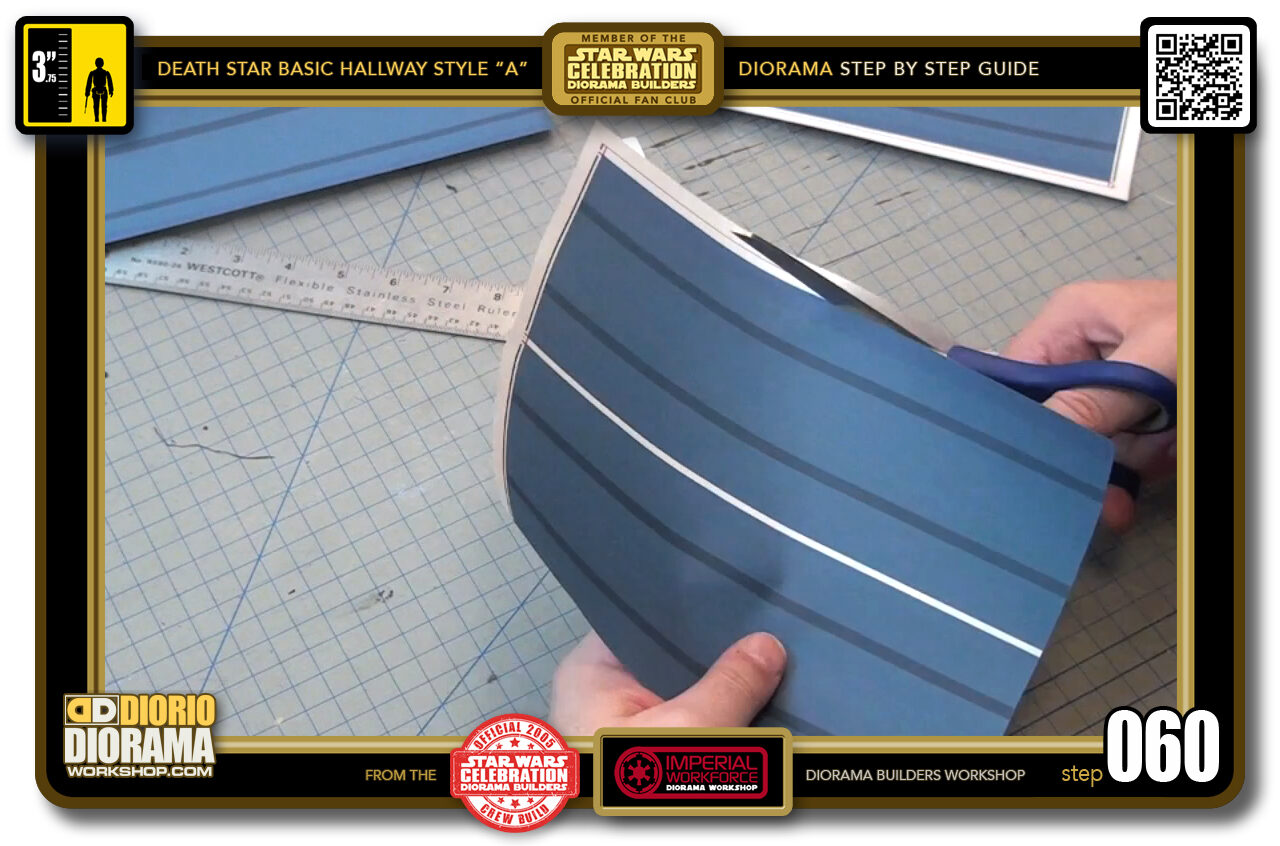
- STEP 060 > If you prefer scissors, you can use those also. Just make sure to try and stick as close to the line as possible with the scissor cutting a tad inside the blue colour. You DON'T want a WHITE thin LINE anywhere on the edges.

.
Did you already build this Diorama ? At home or at our Star Wars Celebration Diorama Builders workshop ? Would you like to show it in the site’s GALLERY VISITORS DIORAMAS section, YES ? That is Awesome !!! You can find out all the details on how to email me your photos on the VISITORS SUBMISSIONS INFO page … When I get your photos, I will create your very own page just like this one. You may not realize it but work does inspire others to join in the fun of making Action Figure Dioramas.
.
NOT FOR RESALE ALL Decals, tutorials and artwork are ©FrankDiorio (dioramaworkshop.com) and offered FOR FREE to the fans – that would be you ? so you can build and display my diorama designs in your very own home. I realize I cannot control what one does with my graphics once I place them on the web, I can only ask you as one fan to another, please respect the artist and do not be that jerk who uses my designs and tutorials to build a copy of my work only to sell it on EBAY or trade/sale groups and forums. Thank You. Frank.
.
.
If you have a facebook account, why not join the Official Diorama Builders Fan Club today, simply click the logo link below.
 .
.
Catch up with fellow visitors and exchange stories, read cool interviews with the crew, exchange photos, fun surprises and grab some FAN ONLY merchandise next year at actual future conventions ?
.
©2018 Frank Diorio DioramaWorkshop.Com
.
IF YOU LIKE WHAT YOU SEE, PLEASE SHARE WITH YOUR FRIENDS
USING THE SOCIAL MEDIA BUTTONS BELOW