


-

-
STEP 021 > First thing to do is align your ruler with the 71 cm markings and slice down your 3 horizontal lines with your X-Acto knife.
If your foamcore sides are starting to get jaggy (look like aero chocolate bar) time for new blade, or snap off the first 3-4 sections of your current blade. You want try keep clean smooth cuts to get the best contact with your Hot Glue later on.
-

- STEP 022 > Now to make it easier, align the top and bottom right 71 cm pencil marks with your ruler and cut all the way down.
-

- STEP 023 > You now have your 2x 71 cm width side strips, you need to make the depth strips. Grab your 3rd piece and place pencil marks at 30 cm and then another 30 cm which would be at 60 cm. the end tip will be trash.
-
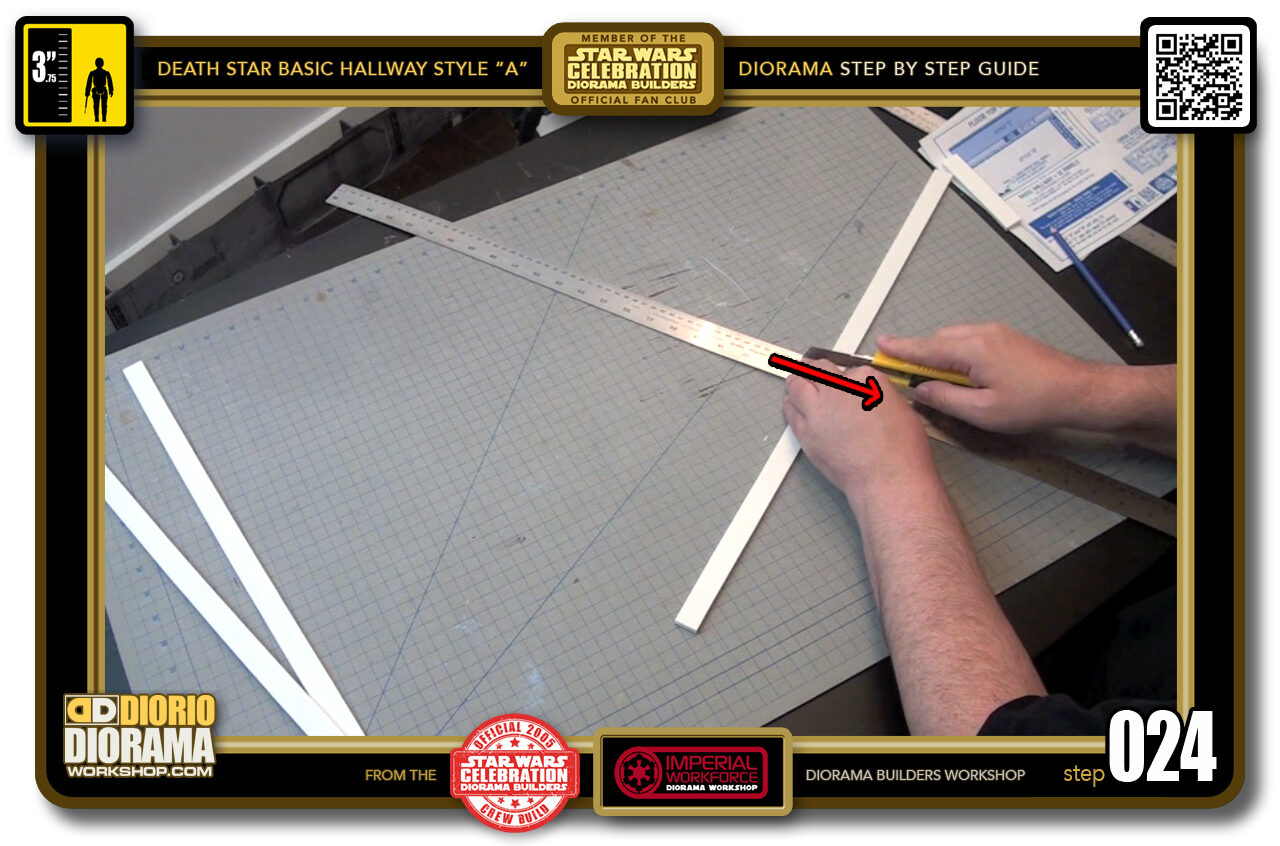
- STEP 024 > Cut off your 3rd strip into 2x 30 cm pieces. Toss the end away. You now have your 4 ceiling frame side supports.
-

- STEP 025 > Now in my design, if you look at the blueprints, you will notice that I placed extra 2cm high strips in the centre as well. This not only acts as extra strength to your ceiling to stack more basic hallways on top of each other, but will later act as your LCD Light Strip supports as well.
-

- STEP 026 > These strips will be glued to the middle centre of each C3 ceiling strips. You will notice they don't connect all the way to the end so that they can allow the lights to snake their way around and give you perfect even lighting.
-

-
STEP 027 > The length of your centre strips depend on what Style of hallway you are making. Since for now, we are doing STYLE "A" we need to cut 11x 27 cm wide and the same 2 cm height.
NOTE: 11 strips is ONLY IF you are doing the same 72 cm width as me, following an exact copy of my plans. If your shelf was shorter and you had to make your 72 cm width shorter, remove 1 strip for each 6 cm taken away from the 72 cm original width. Does this make sense ?
-

- STEP 028 > Since we need multiple 11 cm pieces, Start by measuring at the top and bottom of each side 27 cm markings with your pencil.
-

- STEP 029 > Connect the right side markings using a ruler and pencil.
-
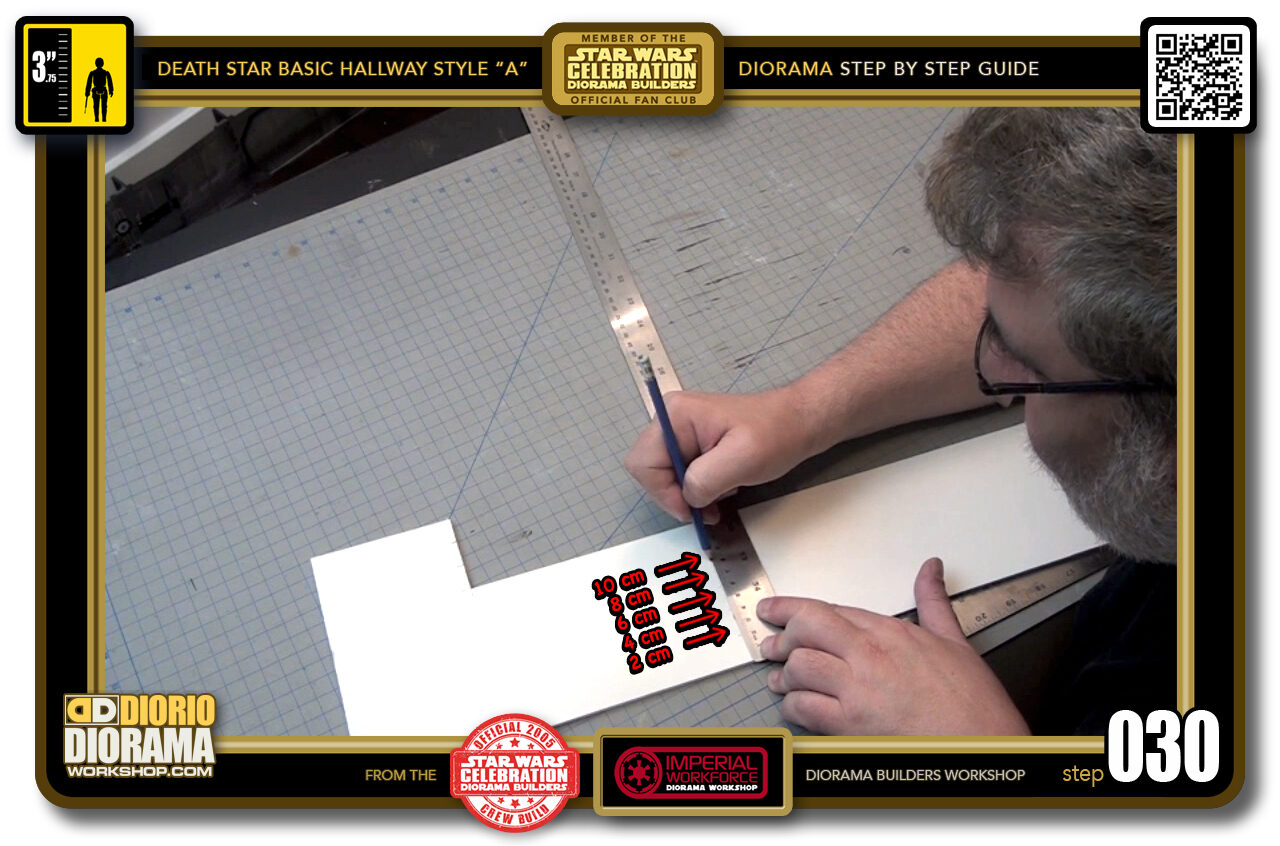
- STEP 030 > Now all strips are the same 2 cm, so make pencil marks at 2cm, 4 cm, 6 cm, 8 cm as high as your piece of foamcore allows you - in my case here - 10 cm.
-
-
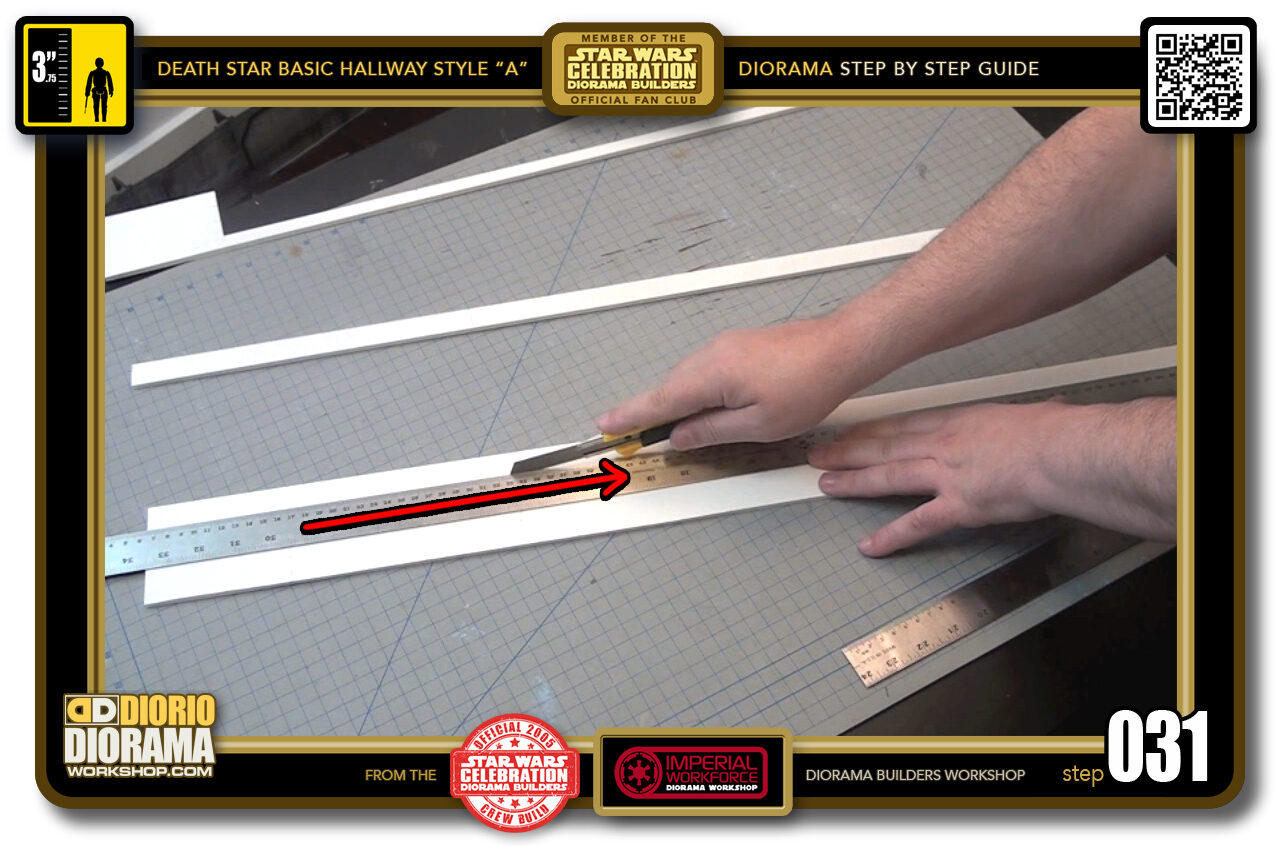
STEP 031 > Start by aligning your ruler at the long cuts, go from one end to the other making long 2 cm height strips.
VERY IMPORTANT : Since your ceiling must be level for you to stack different hallway levels on top of each other properly, YOU MUST take your time and make 500% sure your measurements are ALL EXACTLY 2 cm tall.
-

- STEP 032 > Now that you have 2 cm strips, it is easier for you to cut along the 27 cm cutting guide lines.
-

- STEP 033 > You should now have 11x 2 cm x 27 cm strips. That is all you need. If you cut more, you can keep them for your next hallway construction. Now put these strips in a safe place till we start glueing.
-

-
STEP 034 > It's time to make the bottom piece of our ceiling box - the CEILING LIGHT GRID. You will notice that the ends are HALF the size of the main repeating C3 beams. This is where we will begin.
VERY VERY IMPORTANT : It is KEY to MEASURE ULTRA PRECISE HERE. These cuts will create the exposed white ceiling area you see in the movie. You want the lines to be as perfect as possible.
-
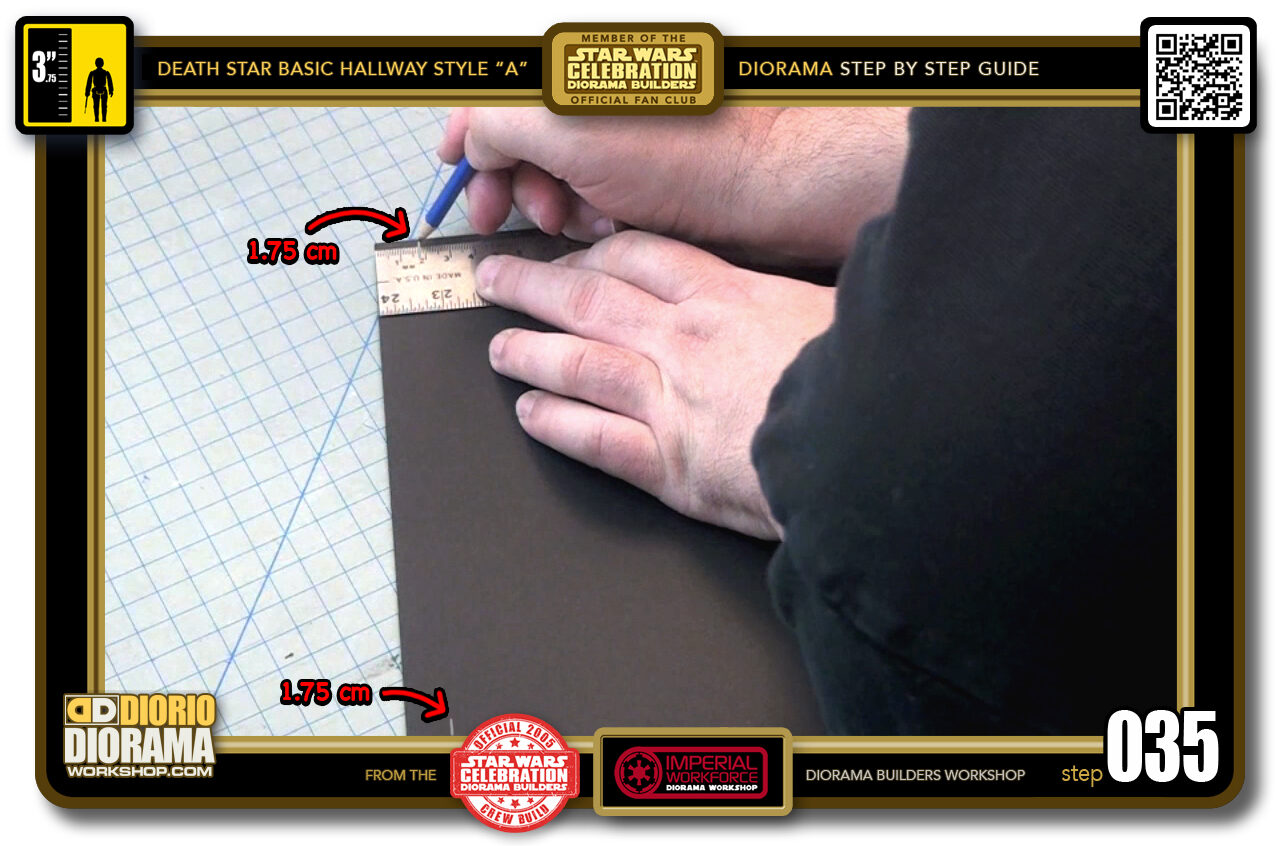
- STEP 035 > So the most important measure are your 2 first 1.75 cm top and bottom pencil marks on the LEFT SIDE of your rectangle. If they are not aligned exactly, it will ruin all of your other measurements and give you weird angled light beams. If you have a SQUARE RULER - use it to make sure you have a perfect 90 degree angle.
-
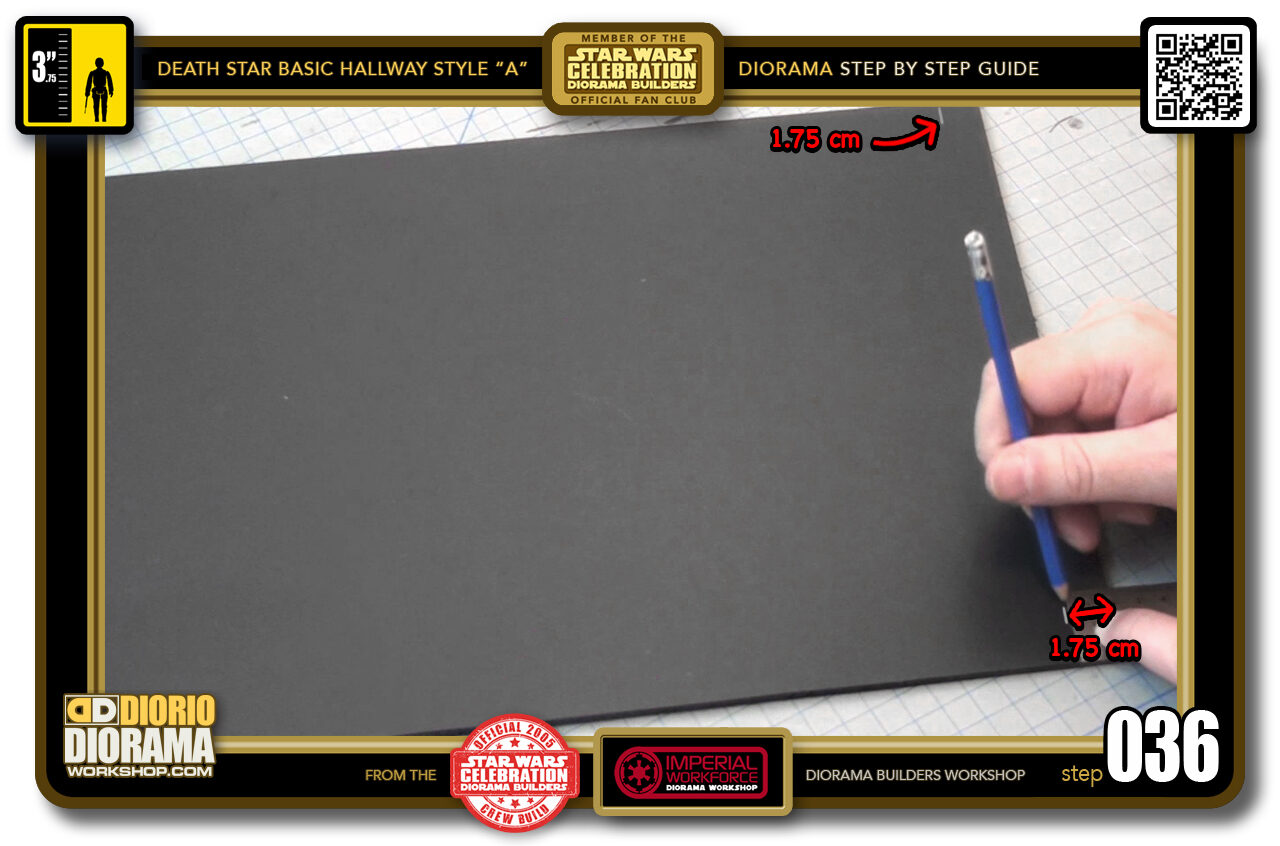
- STEP 036 > Draw the same PRECISE 1.75 cm pencil marks on the right side.
-
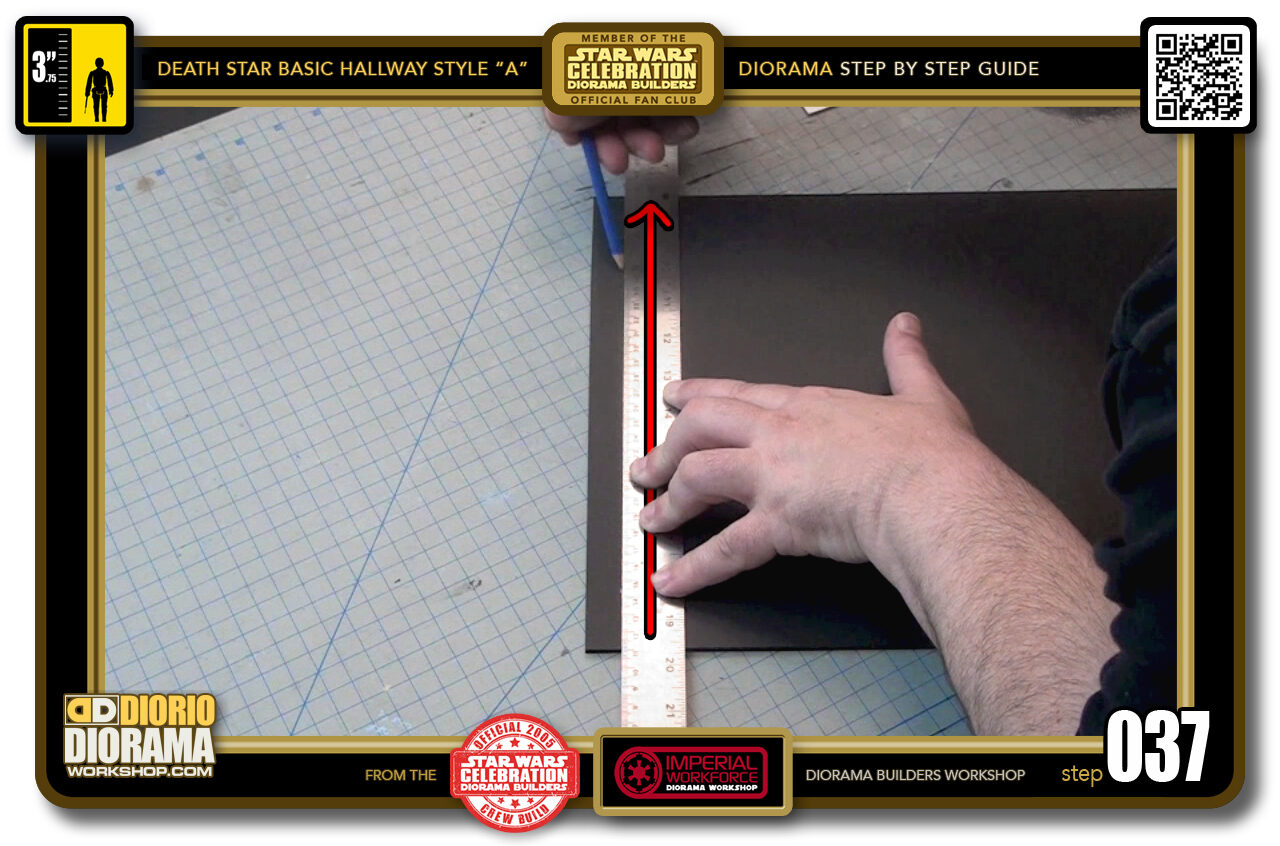
- STEP 037 > Grab your ruler and connect your left side top and bottom pencil marks all the way across.
-

- STEP 038 > Do the same on the right side.
-
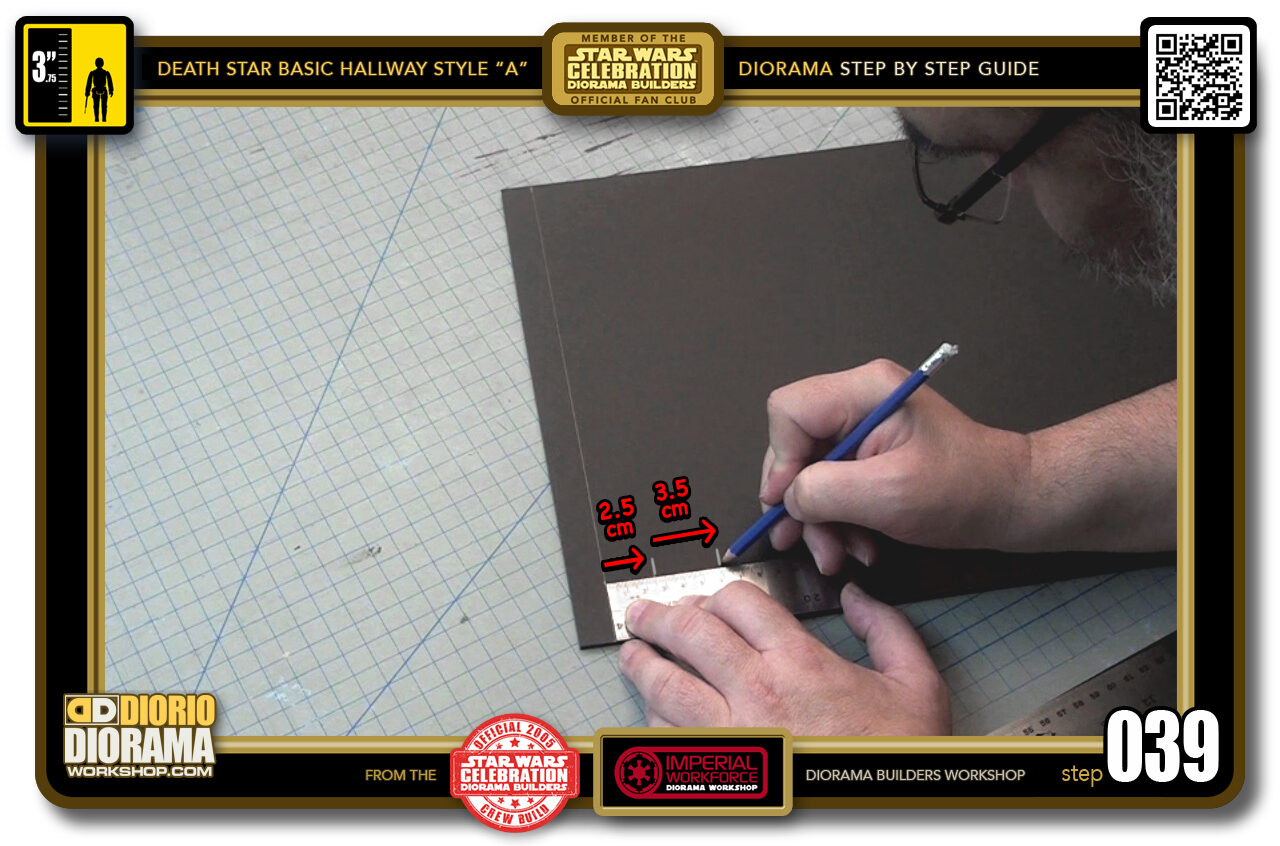
- STEP 039 > Now it's time to alter between 2.5 cm and 3.5 cm. IT IS VERY IMPORTANT TO BE PRECISE !!! Place your ruler at the end of your first measurement, then use your pencil to place a mark at 2.5 cm then 3.5 cm from the end of the 2.5 cm, then go to the end of the 3.5 cm and measure 2.5 cm...
-

- STEP 040 > Continue like this until you reach the very end of your rectangle. The LAST 2.5 cm should connect or end on your right side 1.75 cm marking of Step 038.

.
Did you already build this Diorama ? At home or at our Star Wars Celebration Diorama Builders workshop ? Would you like to show it in the site’s GALLERY VISITORS DIORAMAS section, YES ? That is Awesome !!! You can find out all the details on how to email me your photos on the VISITORS SUBMISSIONS INFO page … When I get your photos, I will create your very own page just like this one. You may not realize it but work does inspire others to join in the fun of making Action Figure Dioramas.
.
NOT FOR RESALE ALL Decals, tutorials and artwork are ©FrankDiorio (dioramaworkshop.com) and offered FOR FREE to the fans – that would be you ? so you can build and display my diorama designs in your very own home. I realize I cannot control what one does with my graphics once I place them on the web, I can only ask you as one fan to another, please respect the artist and do not be that jerk who uses my designs and tutorials to build a copy of my work only to sell it on EBAY or trade/sale groups and forums. Thank You. Frank.
.
.
If you have a facebook account, why not join the Official Diorama Builders Fan Club today, simply click the logo link below.
 .
.
Catch up with fellow visitors and exchange stories, read cool interviews with the crew, exchange photos, fun surprises and grab some FAN ONLY merchandise next year at actual future conventions ?
.
©2018 Frank Diorio DioramaWorkshop.Com
.
IF YOU LIKE WHAT YOU SEE, PLEASE SHARE WITH YOUR FRIENDS
USING THE SOCIAL MEDIA BUTTONS BELOW