


-
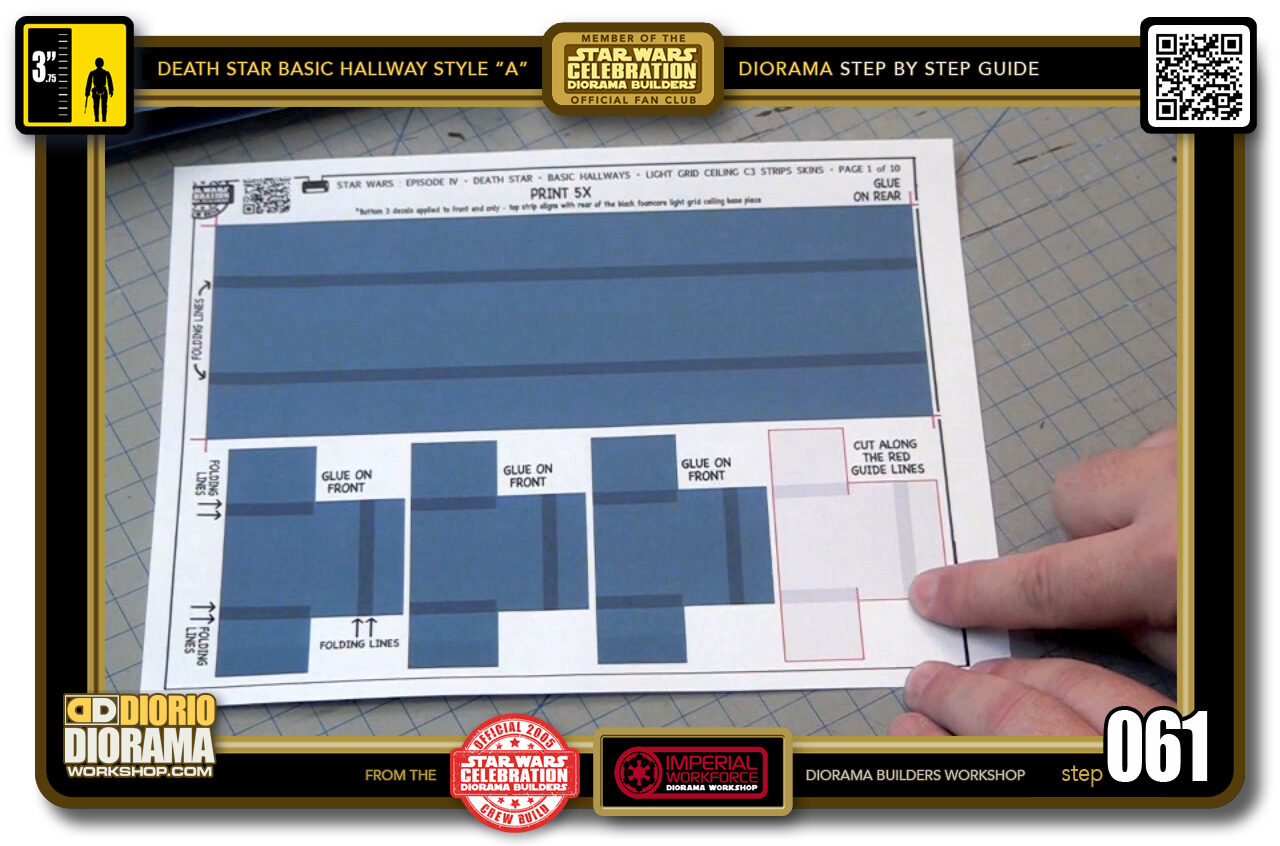
- STEP 061 > Page 1 of your pdf package is different in that it includes at the bottom 3x "C3" cap decals
-
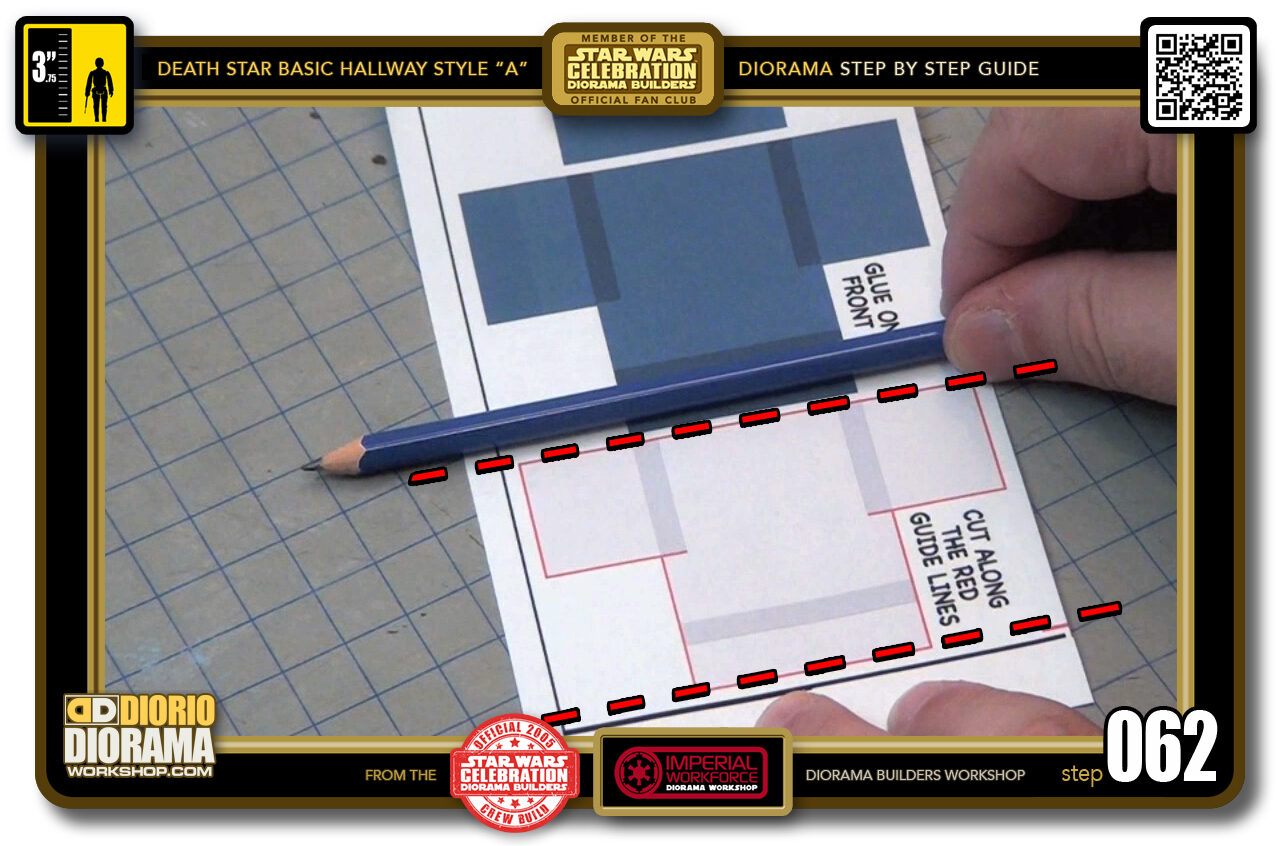
- STEP 062 > To cut these, it is easier to separate each cap by cutting only the top and bottoms as shown in the red dotted line.
-
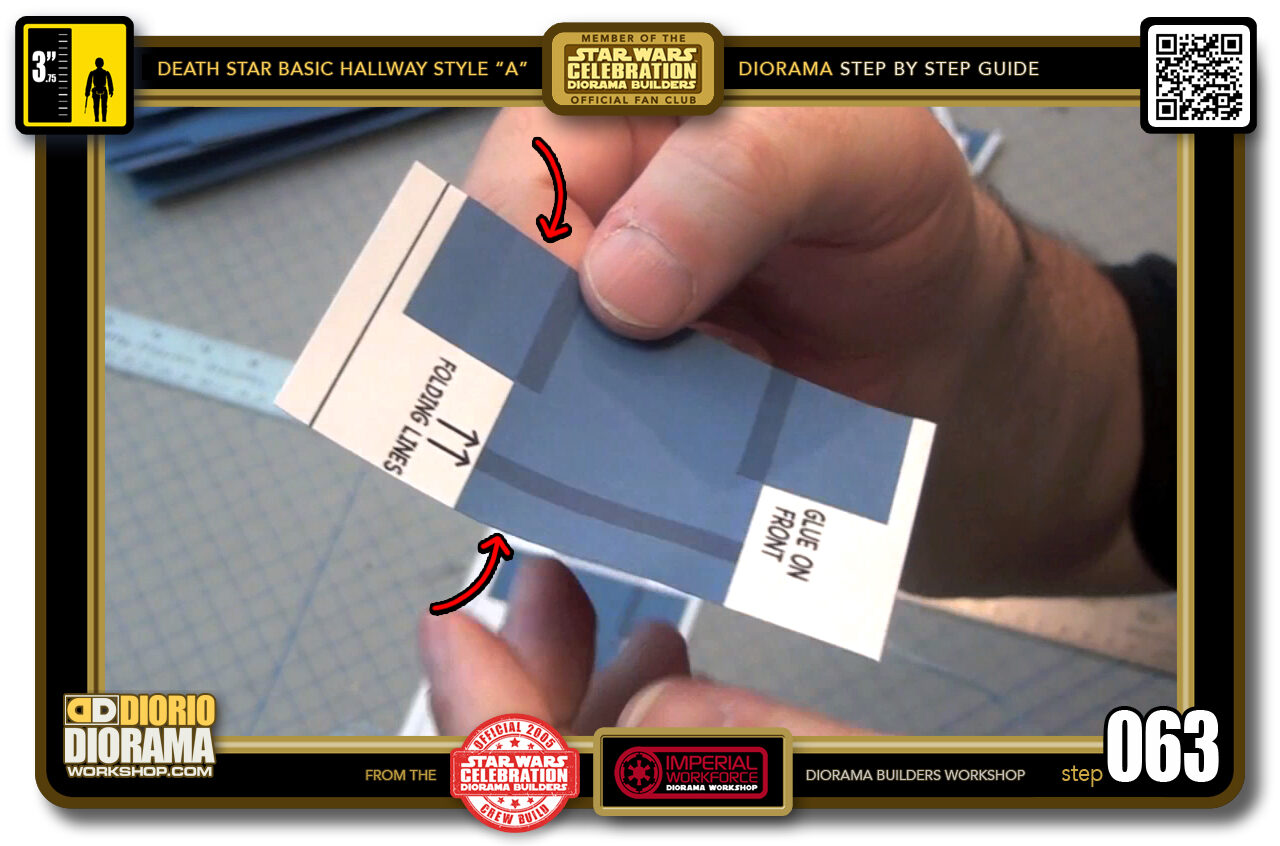
- STEP 063 > The only thing you need to make sure of, is to cut a little INSIDE the BLUE as to avoid seeing any WHITE edges like you see the red arrow pointing to.
-
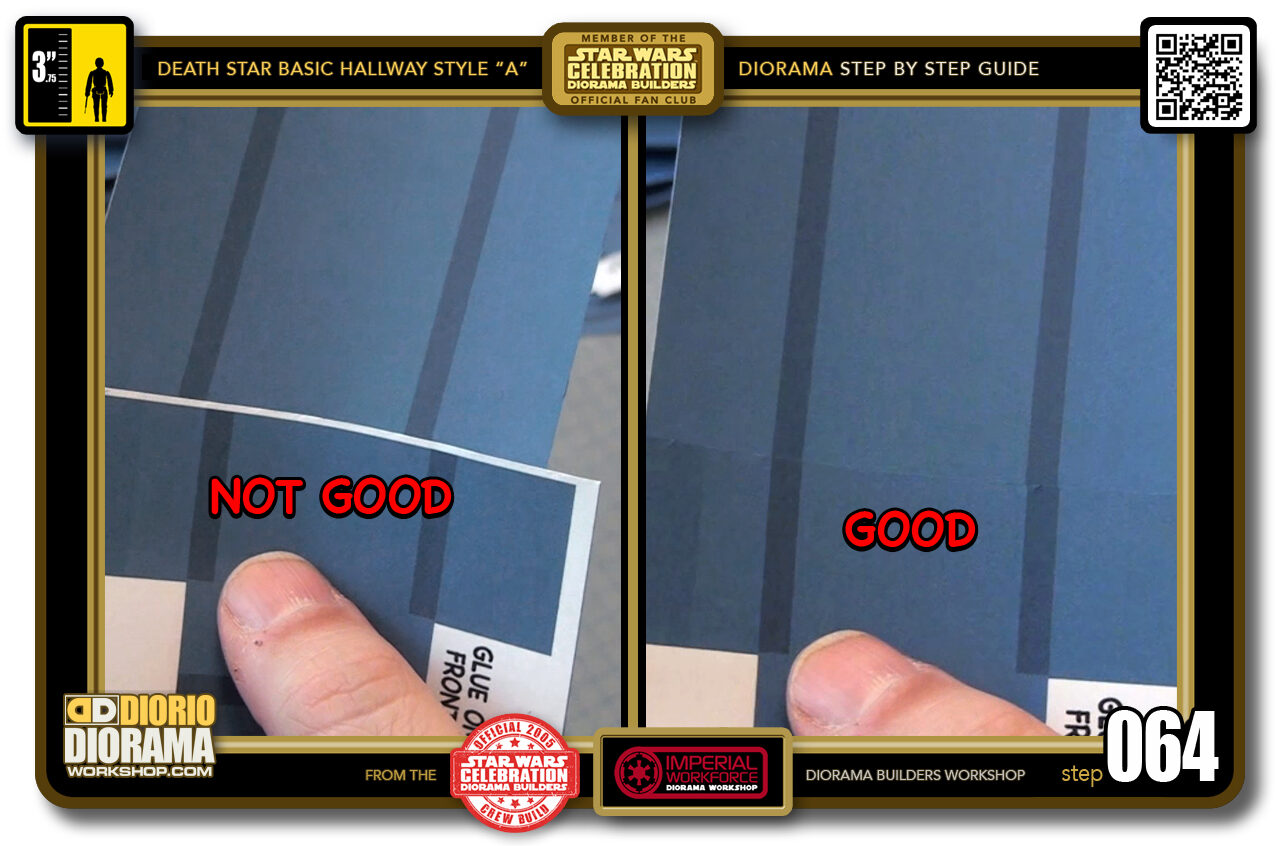
- STEP 064 > Since the cap will overlap the main body we want the colours to blend like on the right and not be distracted by a white line like we see in the left box.
-

- STEP 065 > So keep slicing with your ruler and exacto, for me the quickest - but if you feel more at ease with scissors, you can use that as well.
-
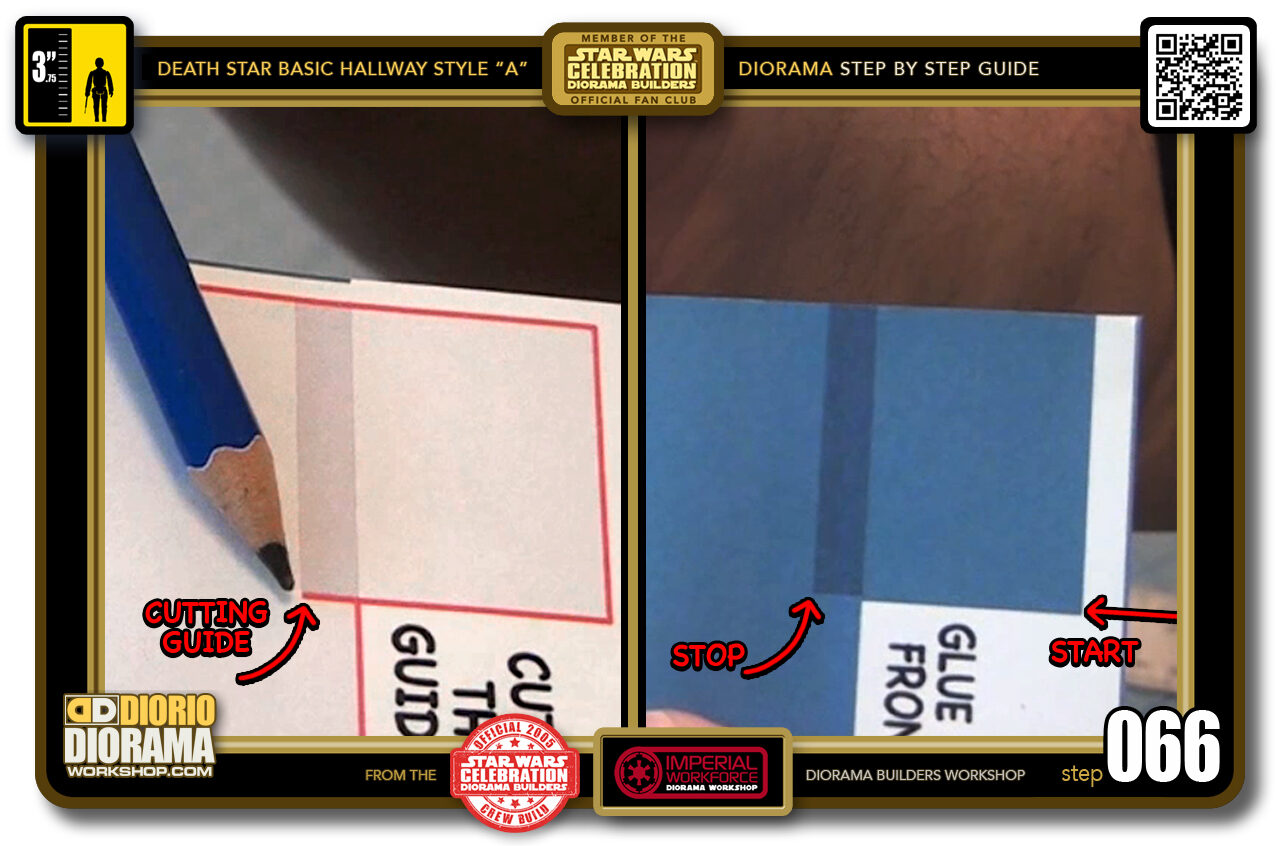
- STEP 066 > Once all your caps have been seperated at the top and bottom, it's time to attack the side cuts. The RED cutting guide on the left shows you that you need to follow through into the blue colour and stop EXACTLY where the dark blue rectangle ends (Red Arrow in the right box)
-
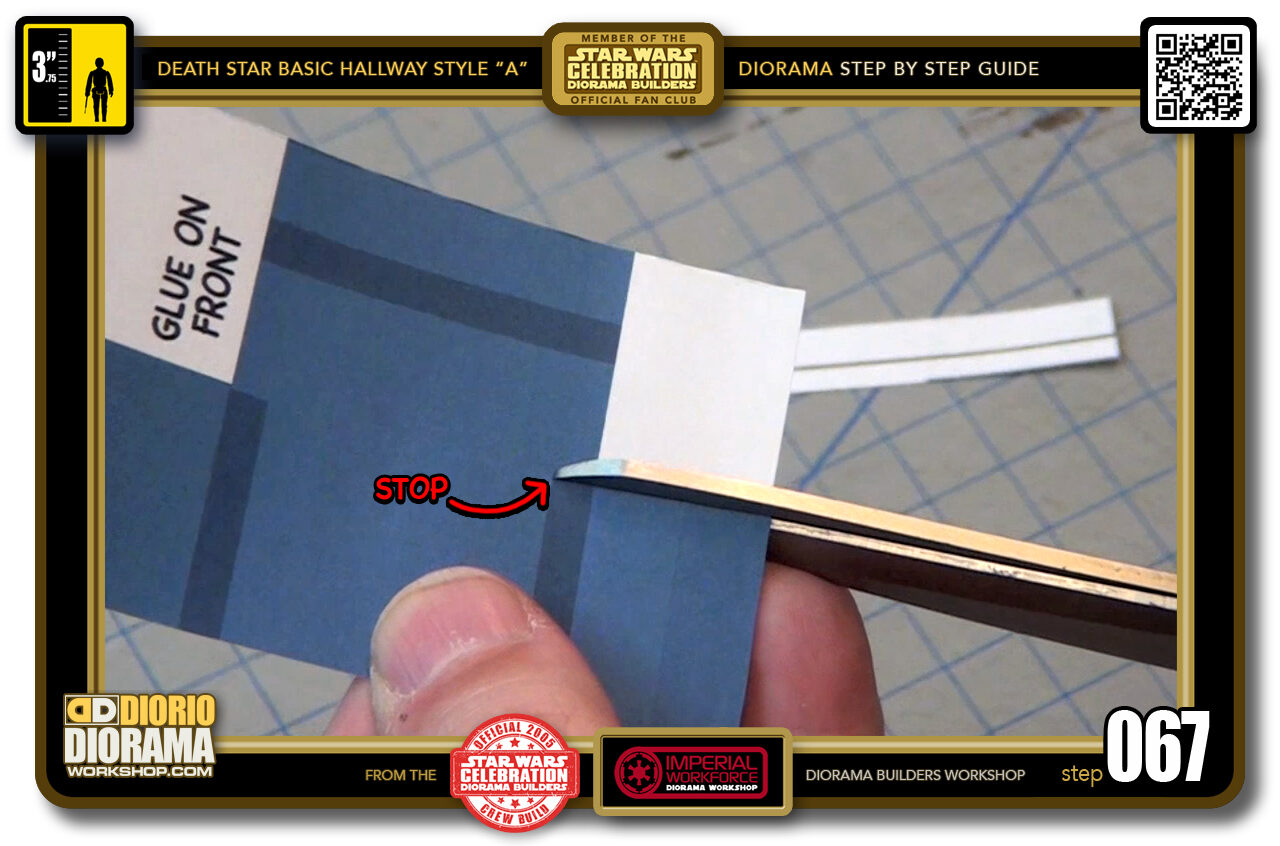
- STEP 067 > Simply align your scissors as straight as possible just a little inside the blue side line and push it forwards just enough for the tip to stop where the dark blue ends. Then CUT. Do this on BOTH SIDES.
-
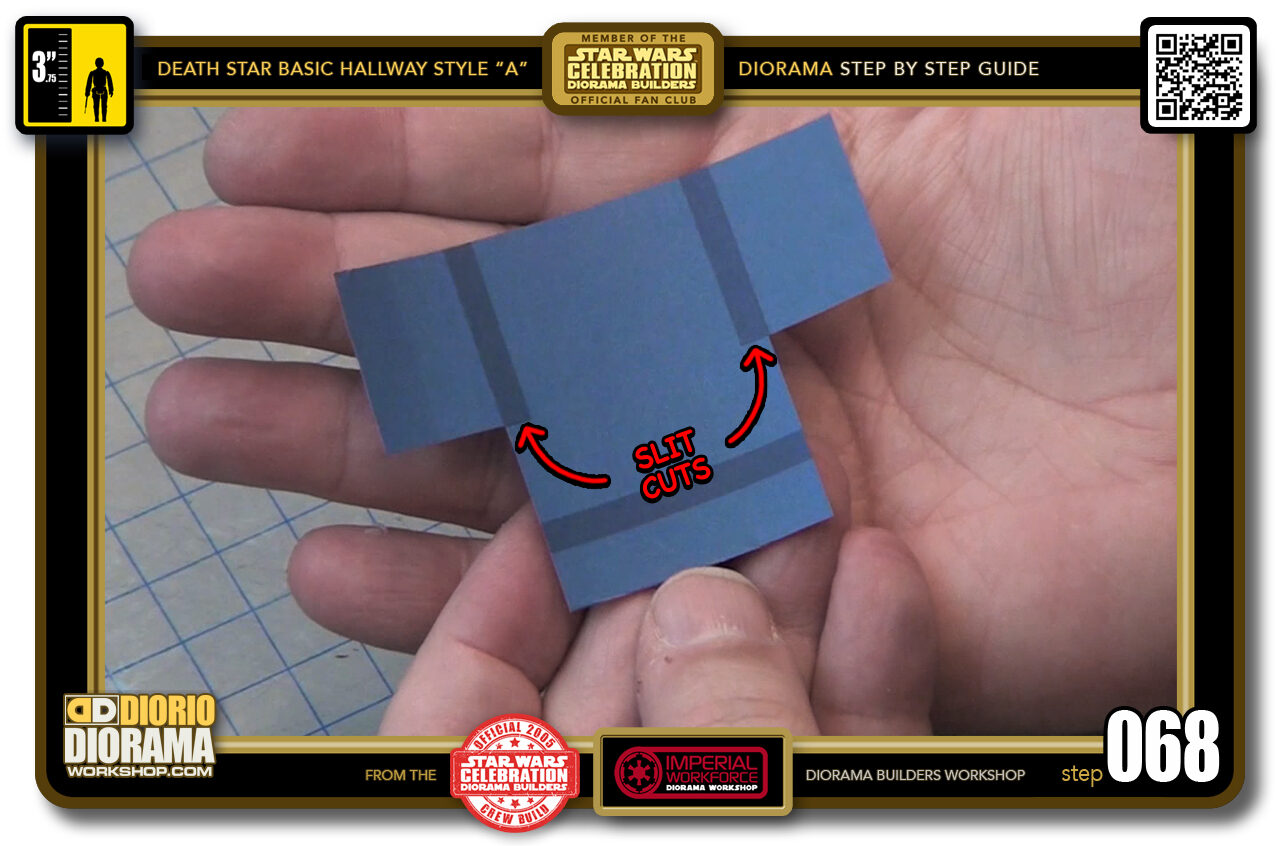
- STEP 068 > Once you cut off the rest of the white zone (always staying a bit in the blue) your cap piece will look like this. You will notice that where the red arrows point to are actually where your scissors stopped cutting.
-

- STEP 069 > These slits that you created allow you to fold over at the dark blue rectangle edges which will then wrap around to the rear of the ceiling's "C3" strips and secure themselves in place.
-
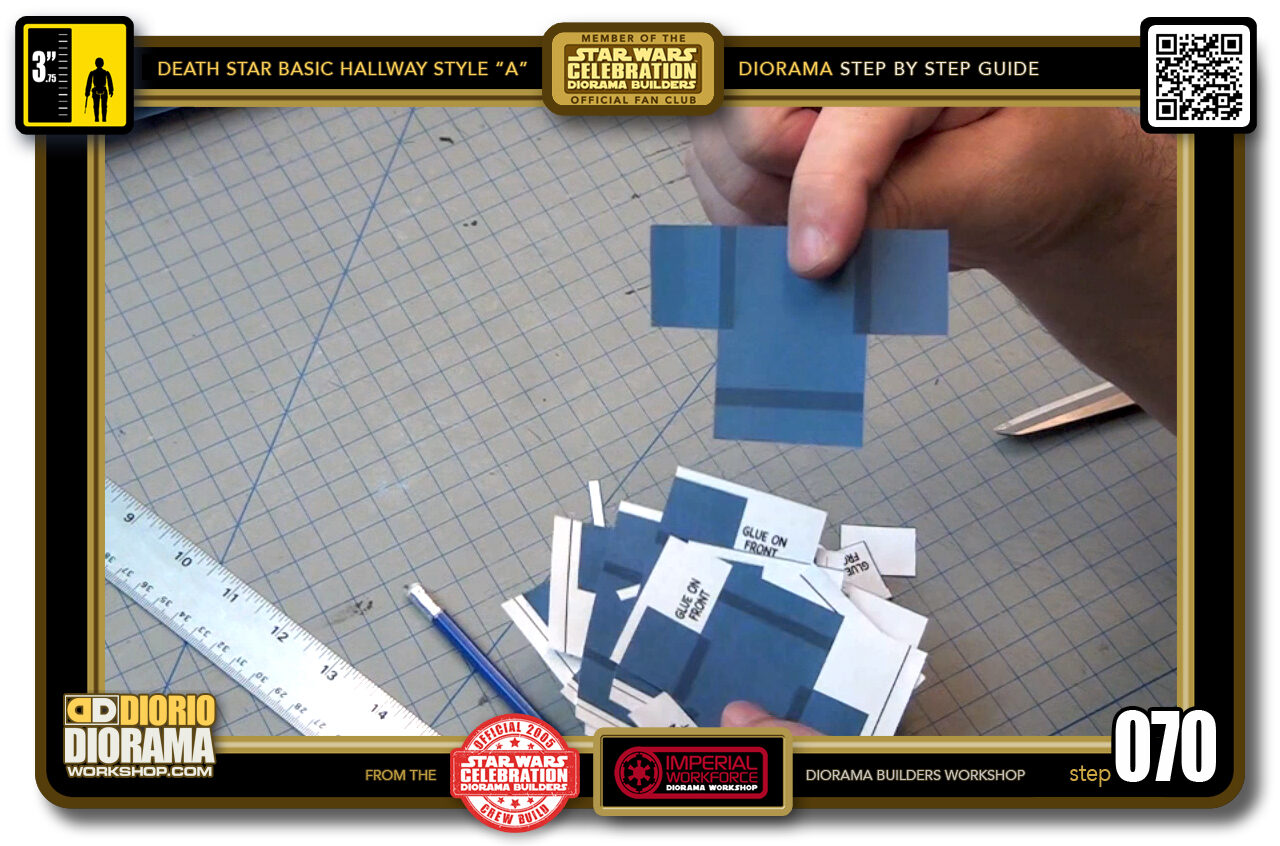
- STEP 070 > Now you just need to cut all the other caps just like this one.
-
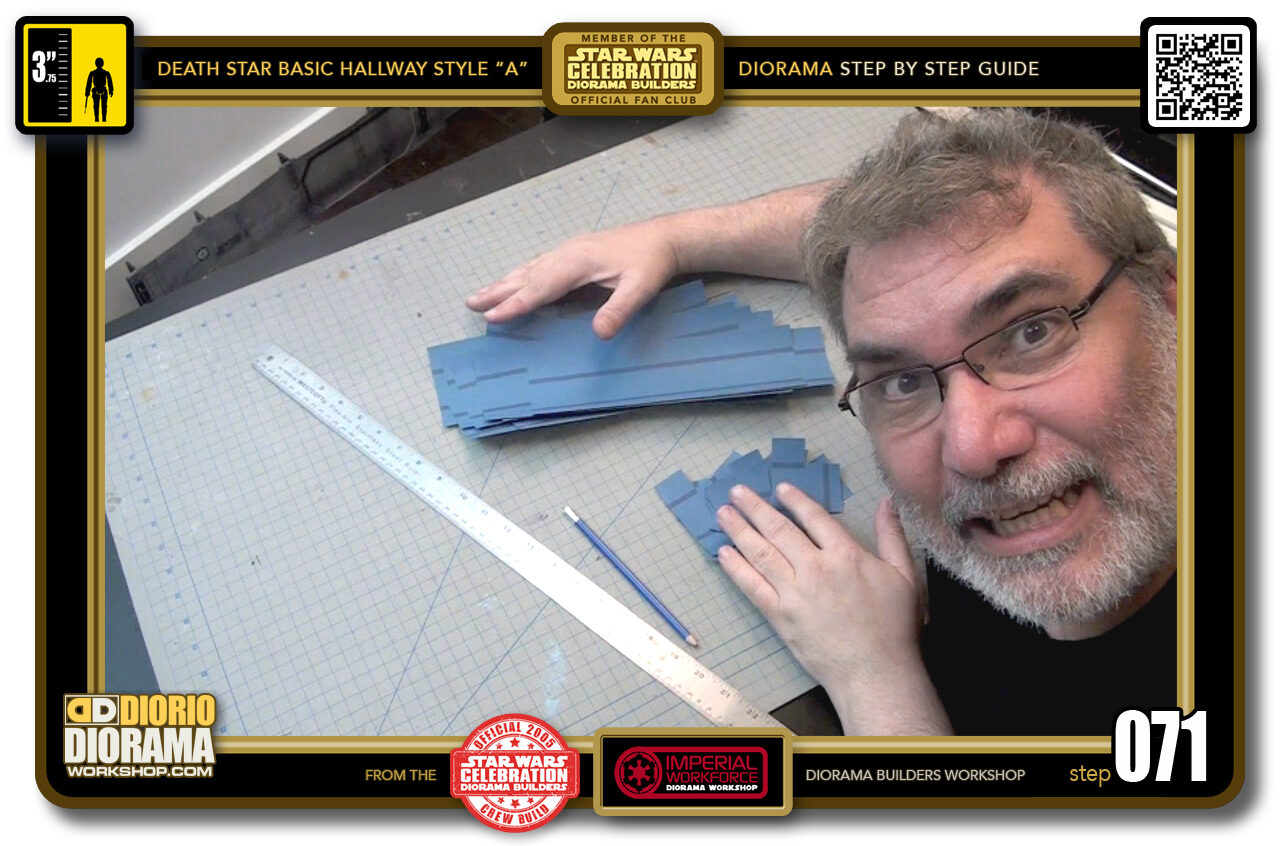
- STEP 071 > The boring repetitive cutting will all pay off in the end, trust me 🙂 Now if you thought that was long, we now have to FOLD EVERY cap piece 🙂 I bet you love me now LOL.
-
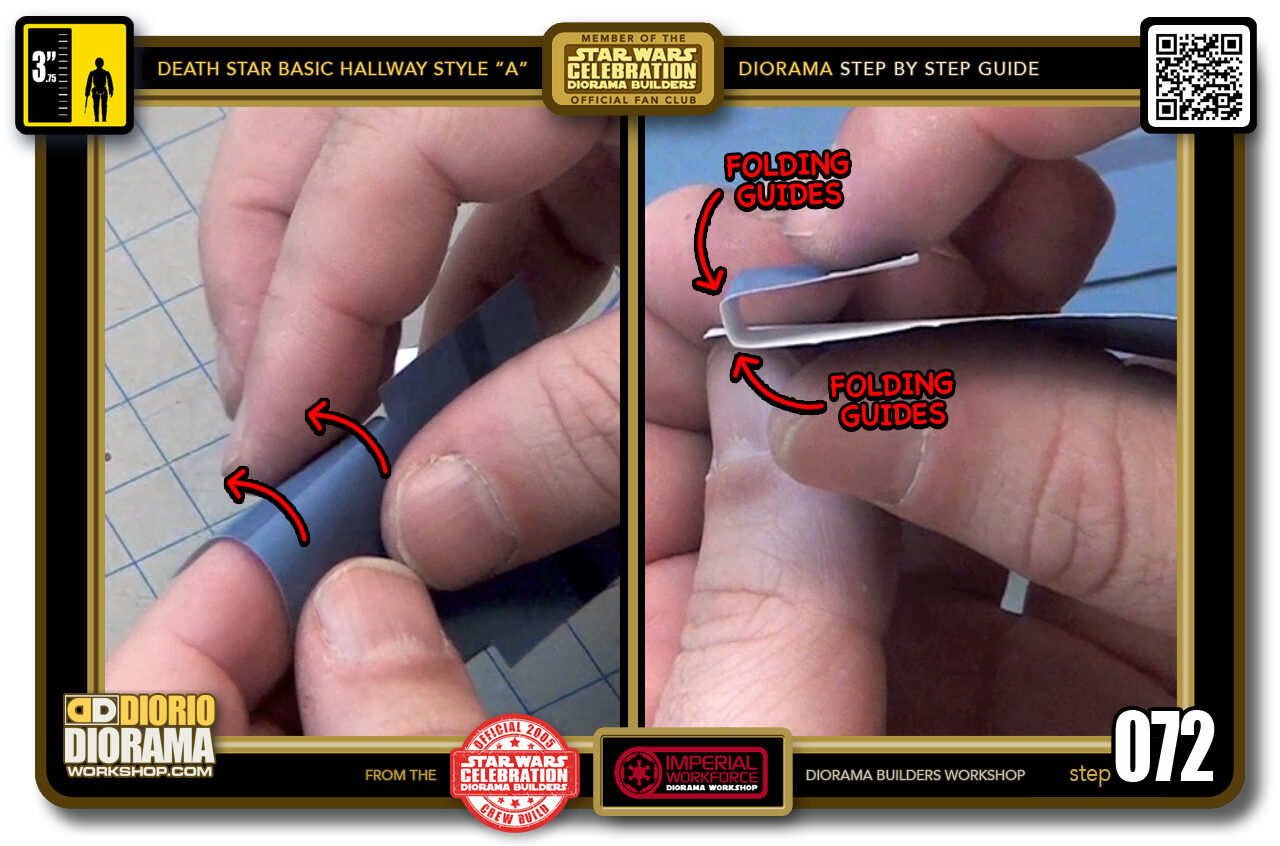
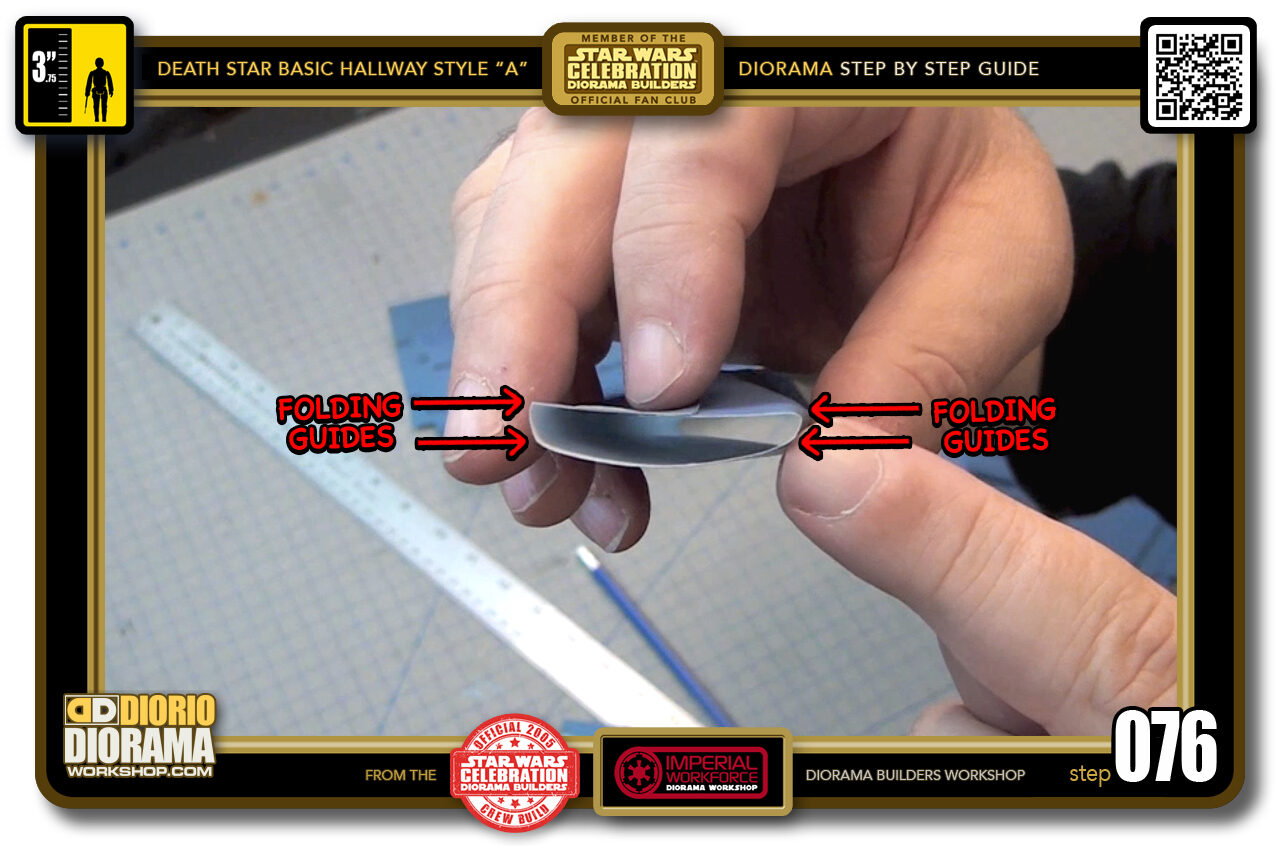
- STEP 072 > The good news is that I made it easy for you to know where to fold, simply follow the dark blue rectangle lines.
-
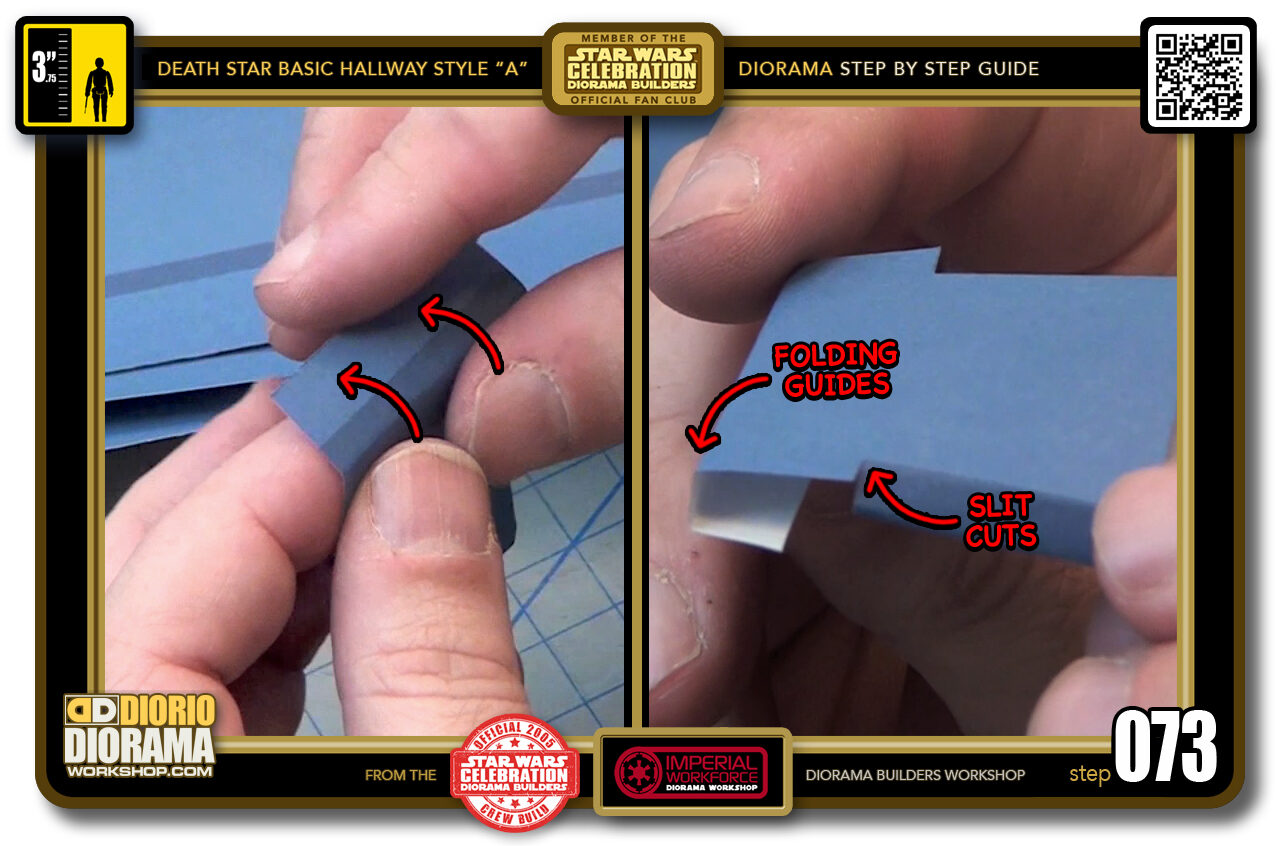
- STEP 073 > You want to first do a light memory by gently folding over and then as you start seeing the fold is following the guide line, then press harder and pinch until you get hard 90 degree angles. Do this for ALL your Caps.
-
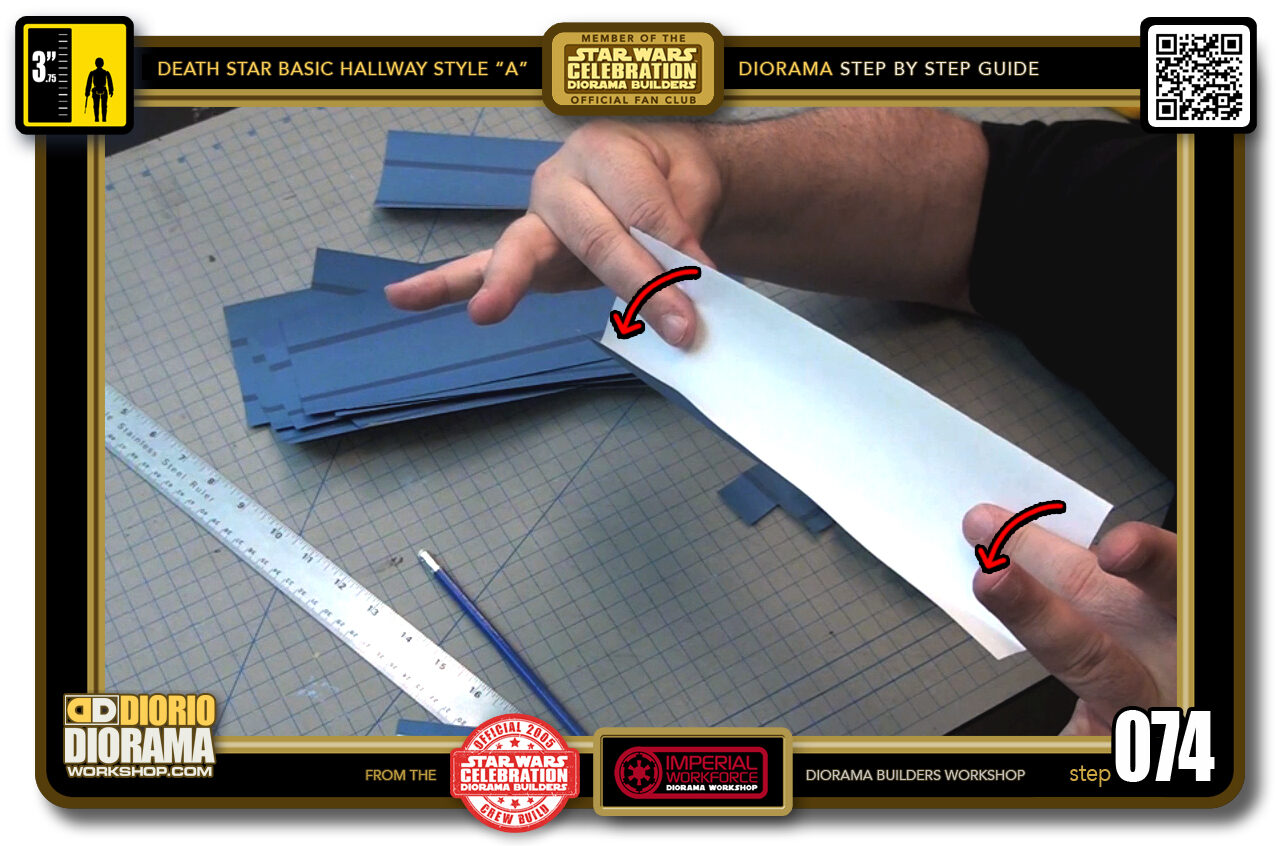
- STEP 074 > For the longer main body skins, the trick I found works best is to place your index fingers on each side on the white side of the decal. then with your thumb, roll over to get the curve started, which after a few times will start to fold along the lines.
-
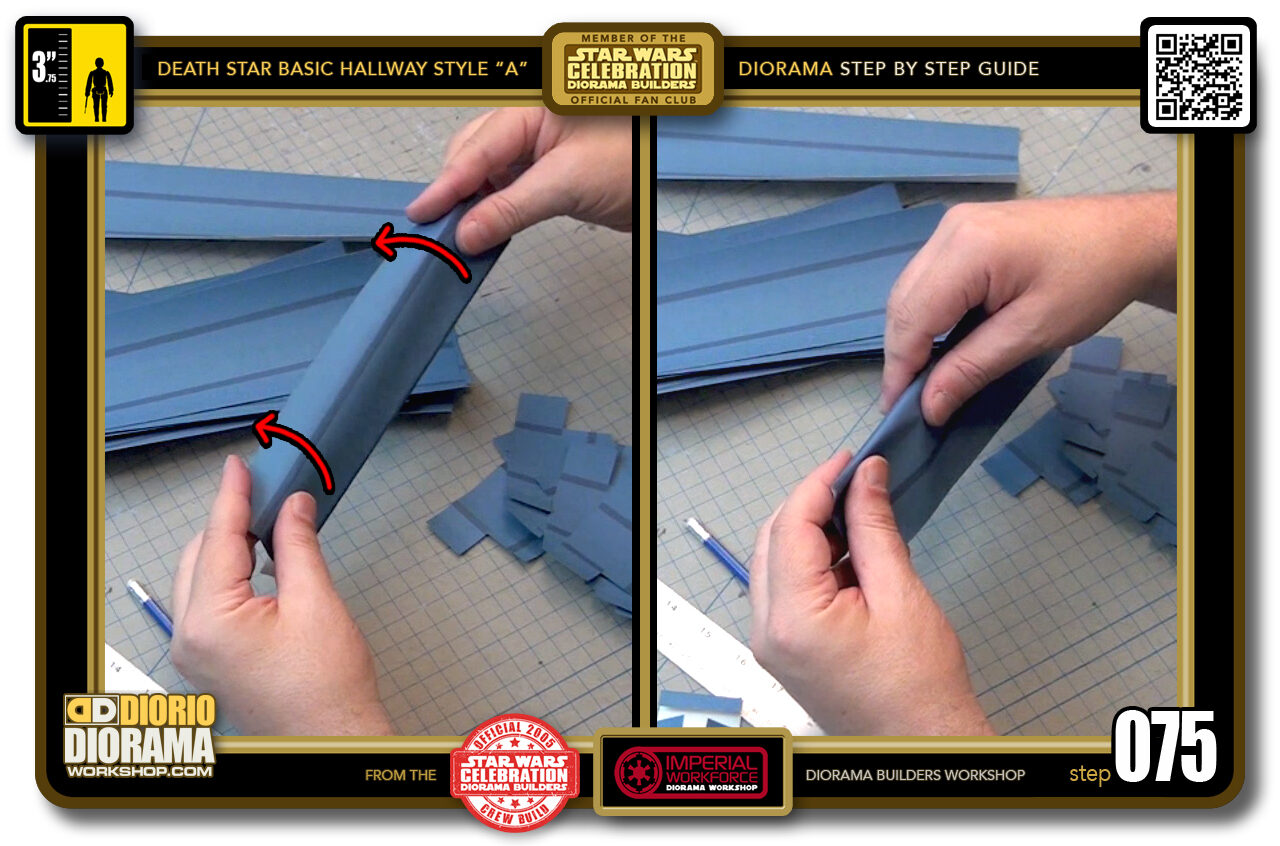
- STEP 075 > Once you see this happen, start rolling and pressing harder until you can pinch and the fold stays with the dark lines.
-
- STEP 076 > You will get a shape like this in the end. You can see how the strip would fit right inside. Well actually it's the decal that wraps all the way around 🙂
-
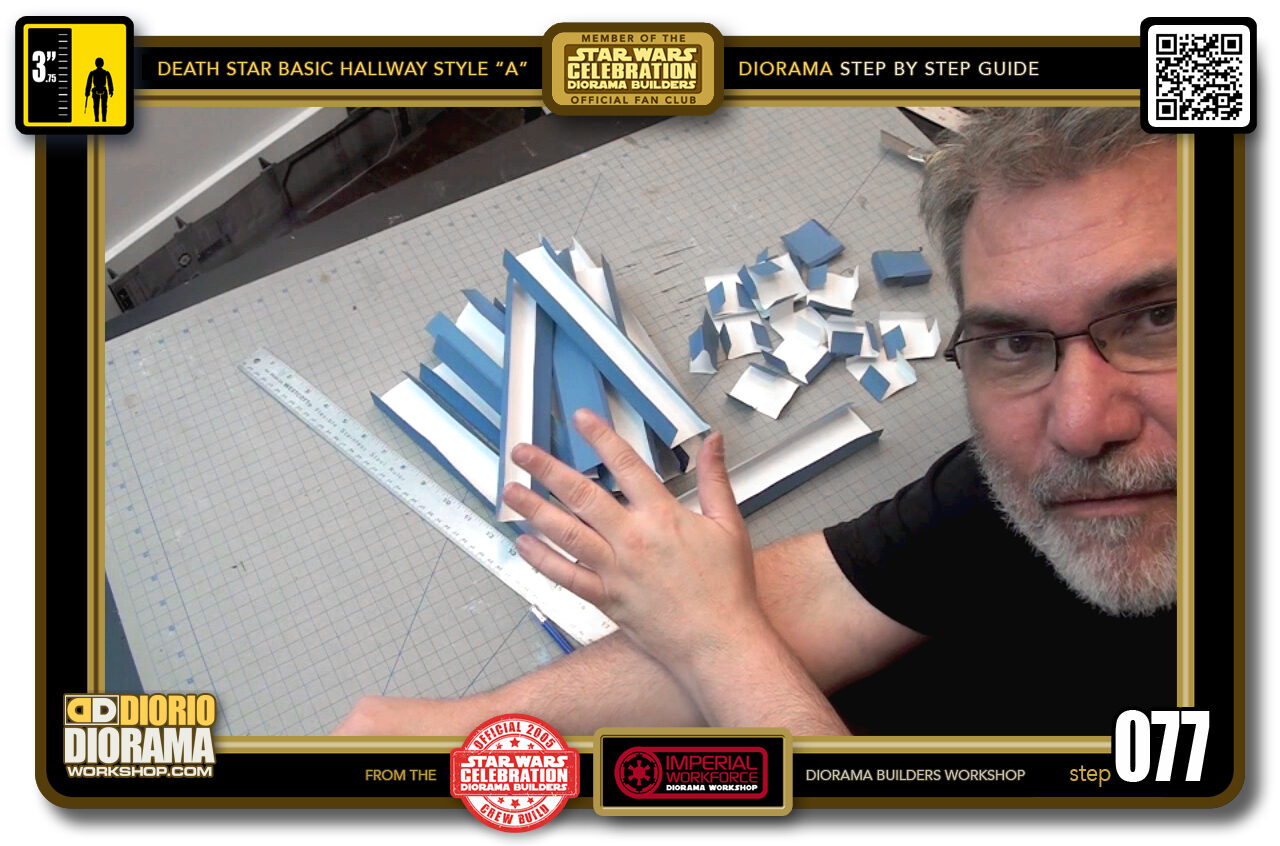
- STEP 077 > After a while, EVERYTHING will be FOLDED. It's time to move on to the glueing.
-
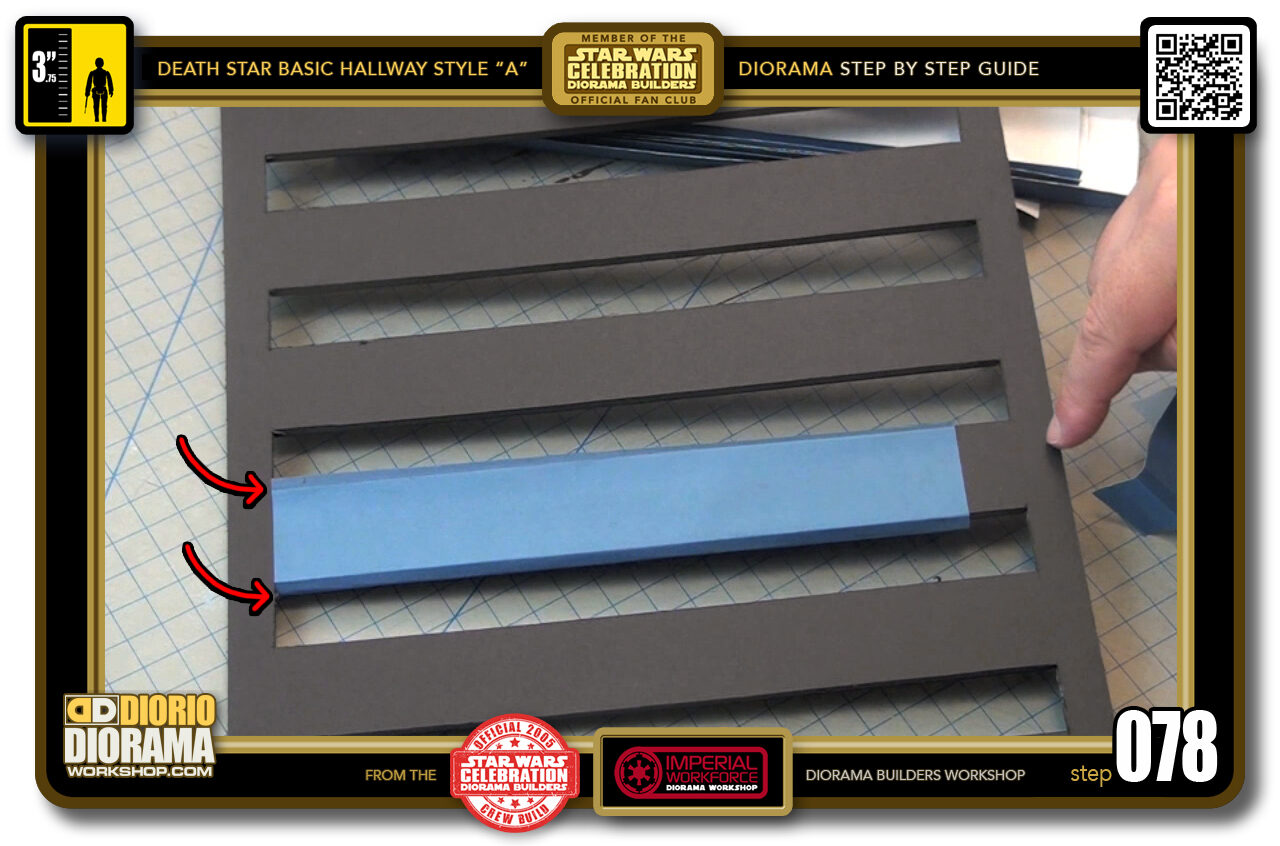
- STEP 078 > Now this is where the magic starts to happen. I am first doing a DRY RUN to show you how the 2 pieces attach to each other and the ceiling strip. First wrap the edges around a "C3" strip and push it down to the end.
-
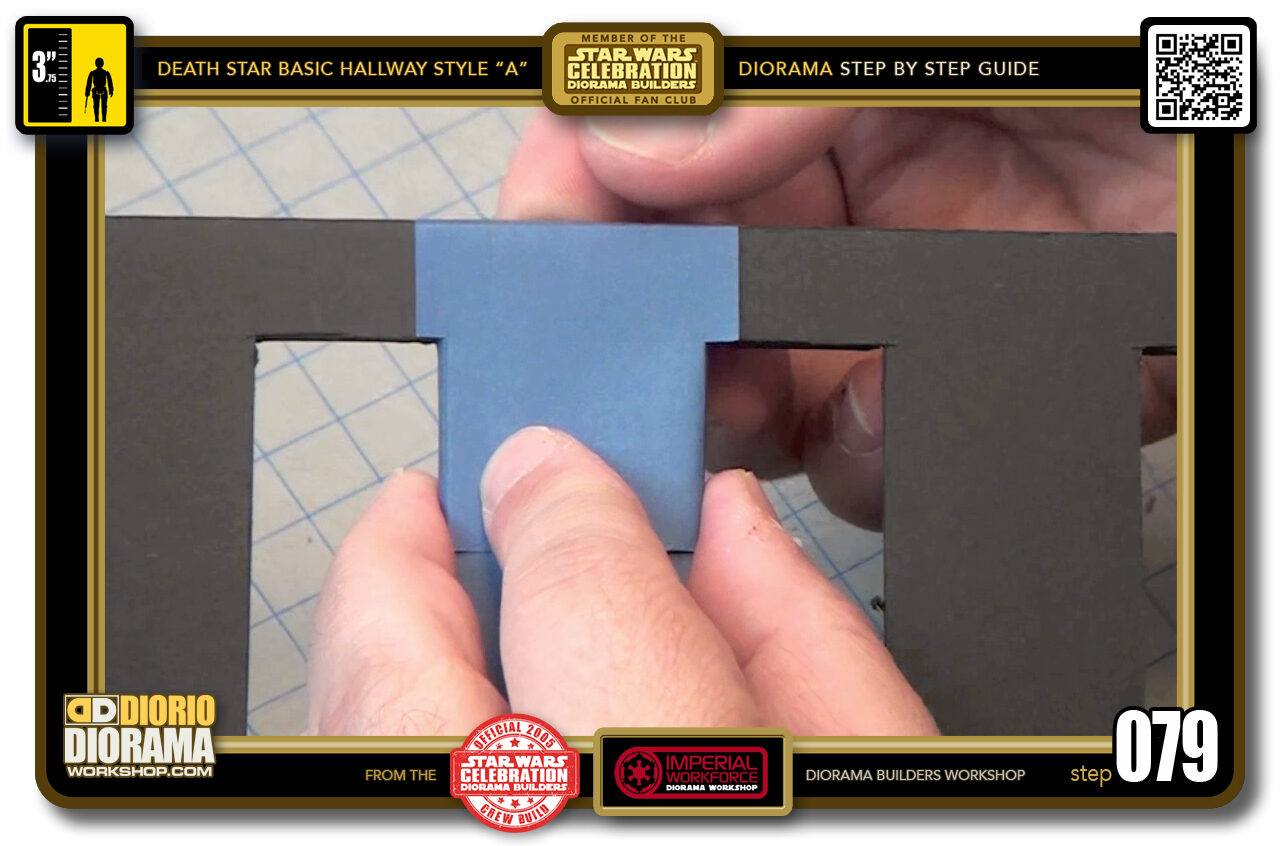
- STEP 079 > The end cap slightly overlaps the main body skin and wraps around the front edge of your frames just like this.
-
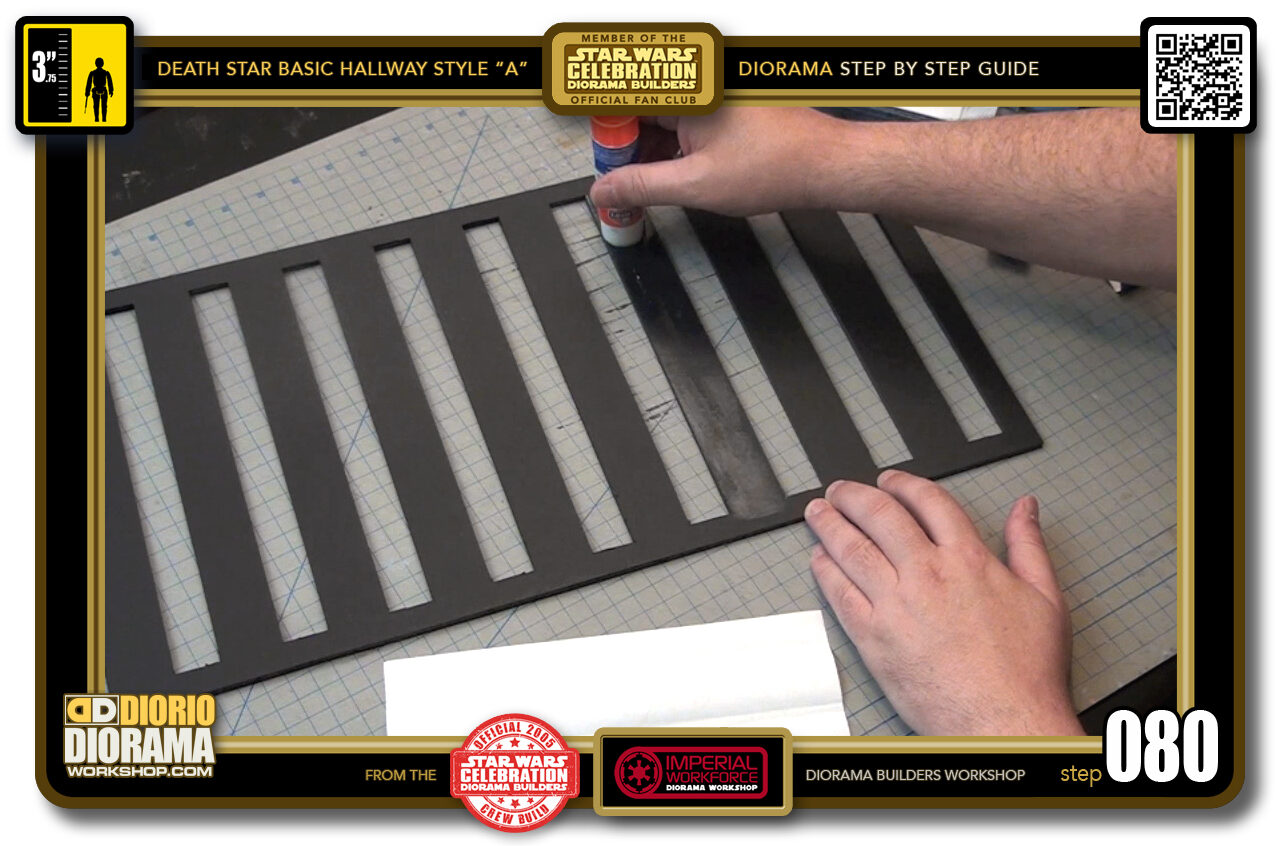
- STEP 080 > First thing is to cover the surface of your "C3" Strip with GlueStick. I prefer the dollar store mini ones because they are easier to reach the outsides. NEVER EVER USE HOT GLUE TO APPLY DECALS !!! You will get bumps and warping and a hot mess not to mention your decals will turn into caca 🙂

.
Did you already build this Diorama ? At home or at our Star Wars Celebration Diorama Builders workshop ? Would you like to show it in the site’s GALLERY VISITORS DIORAMAS section, YES ? That is Awesome !!! You can find out all the details on how to email me your photos on the VISITORS SUBMISSIONS INFO page … When I get your photos, I will create your very own page just like this one. You may not realize it but work does inspire others to join in the fun of making Action Figure Dioramas.
.
NOT FOR RESALE ALL Decals, tutorials and artwork are ©FrankDiorio (dioramaworkshop.com) and offered FOR FREE to the fans – that would be you ? so you can build and display my diorama designs in your very own home. I realize I cannot control what one does with my graphics once I place them on the web, I can only ask you as one fan to another, please respect the artist and do not be that jerk who uses my designs and tutorials to build a copy of my work only to sell it on EBAY or trade/sale groups and forums. Thank You. Frank.
.
.
If you have a facebook account, why not join the Official Diorama Builders Fan Club today, simply click the logo link below.
 .
.
Catch up with fellow visitors and exchange stories, read cool interviews with the crew, exchange photos, fun surprises and grab some FAN ONLY merchandise next year at actual future conventions ?
.
©2018 Frank Diorio DioramaWorkshop.Com
.
IF YOU LIKE WHAT YOU SEE, PLEASE SHARE WITH YOUR FRIENDS
USING THE SOCIAL MEDIA BUTTONS BELOW