


-
-
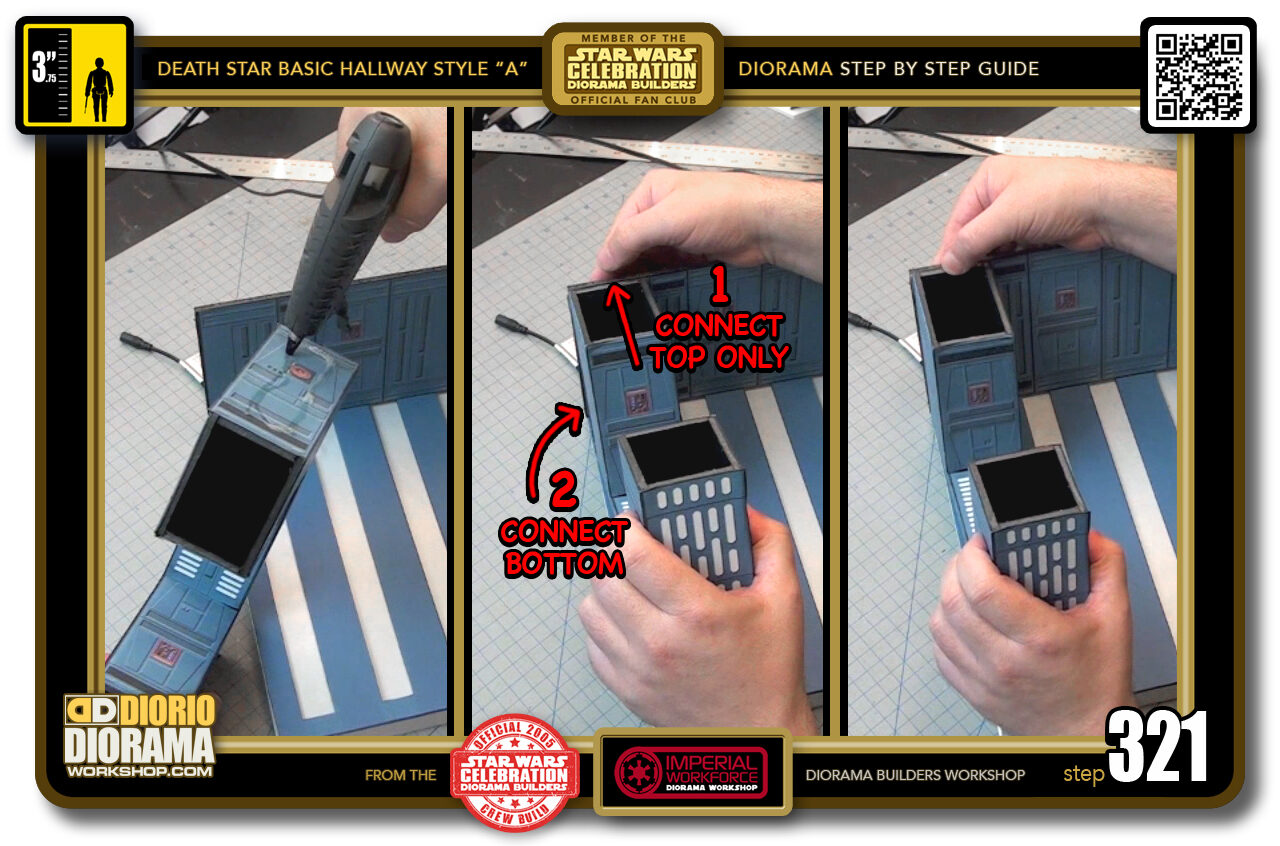
STEP 321 > REMEMBER YOU ARE GLUEING THIS UPSIDE DOWN !!! Start by putting hot glue on the end of the archway that is the widest (left box). Hold your archway at an angle with the 6cm x 6 cm column high enough for it to NOT TOUCH the foamcore ceiling surface. Align the bottom 6cm of the archway with the top (actually the bottom but upside down it looks like the top) of your wall's last 6cm wall panel as you slowly bring it closer to make contact at the TOP ONLY. When you have perfect alignment FLUSH with the outer edge, slowly lower the front (6cm x 6 cm column) towards the ceiling until it makes contact (centre box) Make sure it is completely FLUSH from top to bottom of the outer wall's edge (right box)
There is a panel where I put the glue because I originally had this side exposed when filming it's making of. If you build the archway for this basic hallway you likely would just have black foamcore here.
-
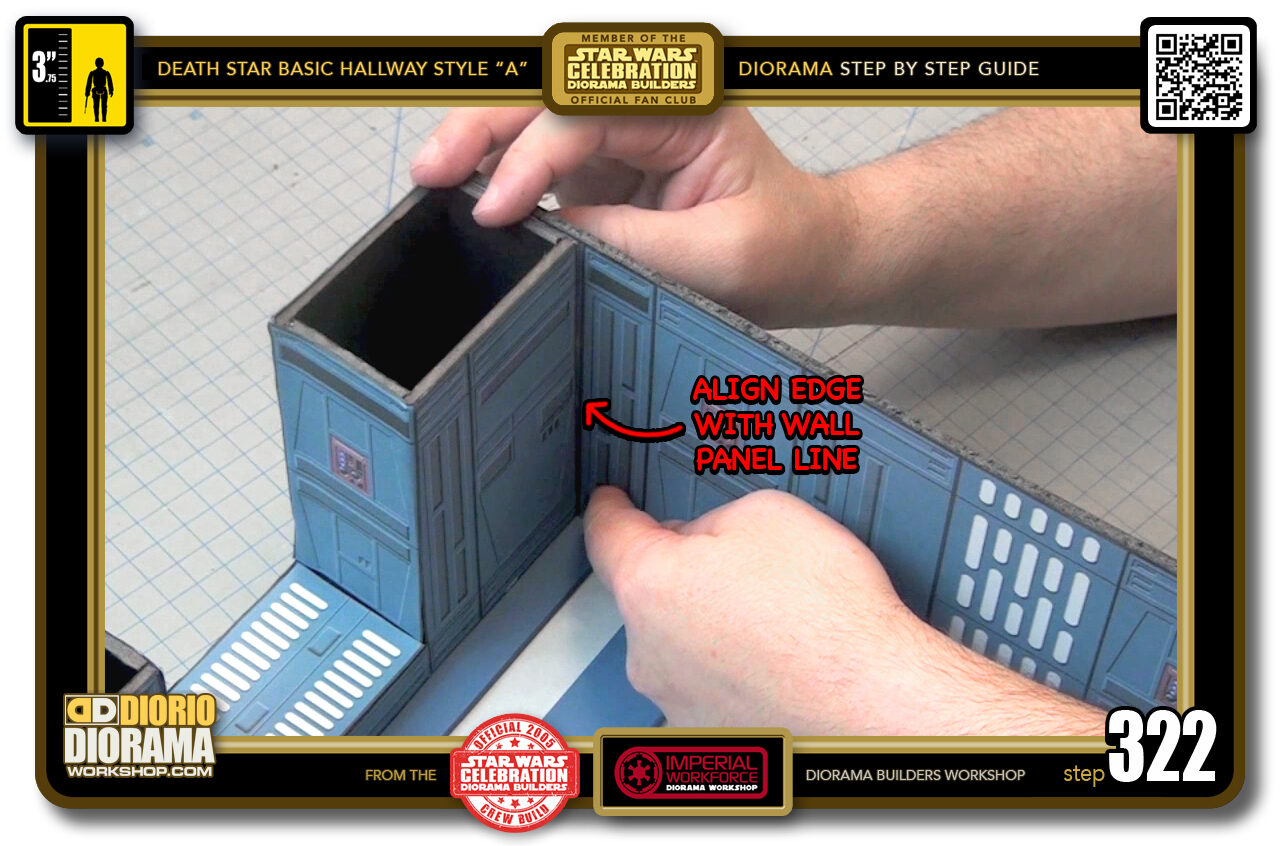
- STEP 322 > It's easier to see if you are perfectly aligned looking at the inside corner as your archway should be following an even connection with your half panel decal skin.
-
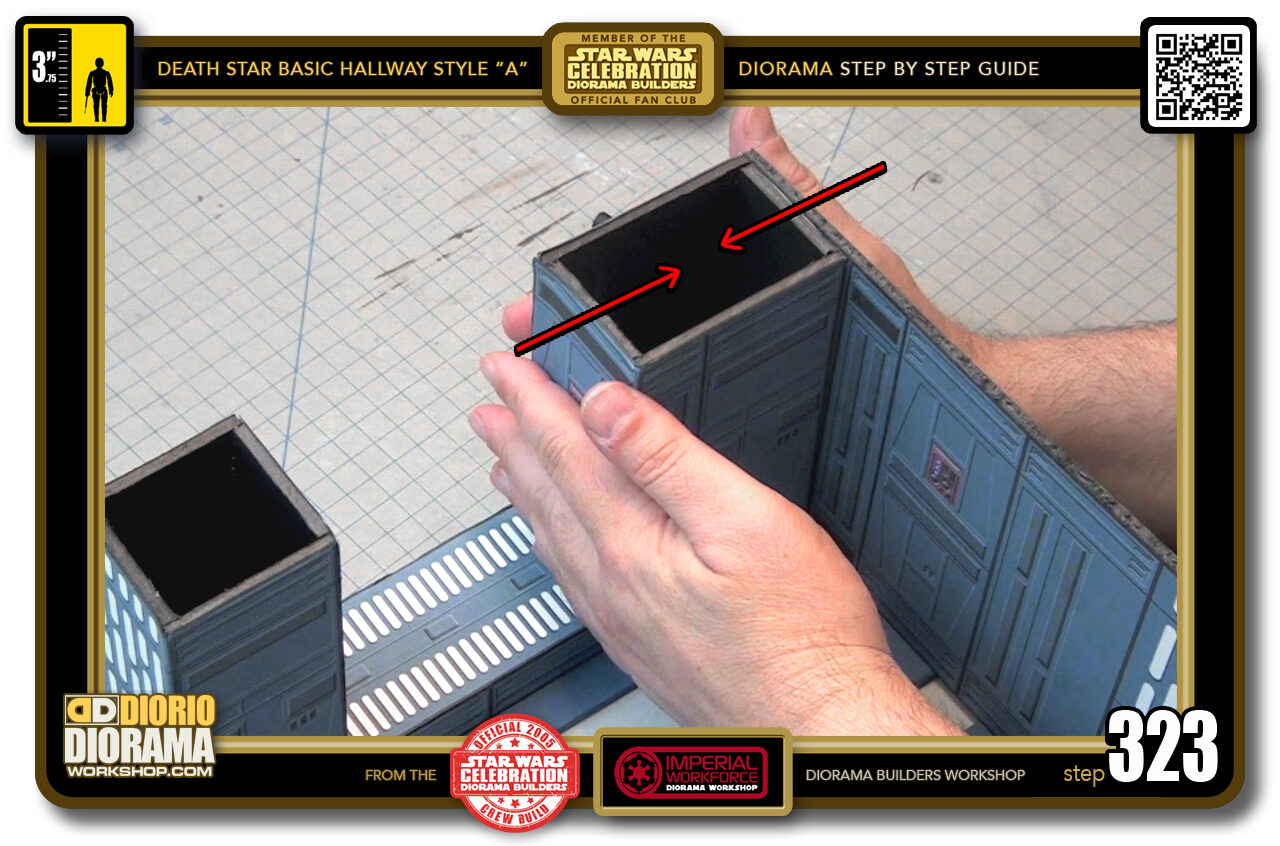
- STEP 323 > The
-
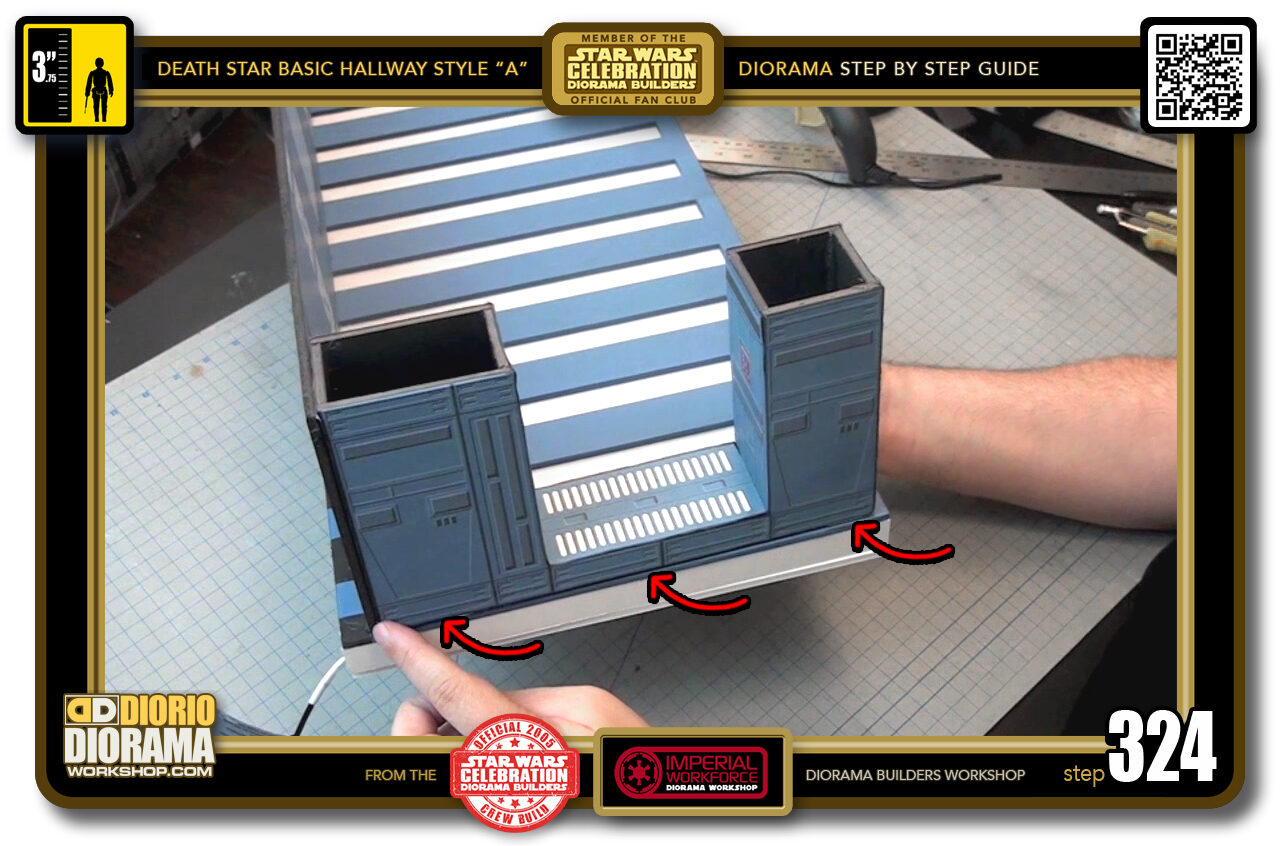
- STEP 324 > Remember it's important that you are FLUSH all the way across the ceiling edge (red arrows pointing)
-
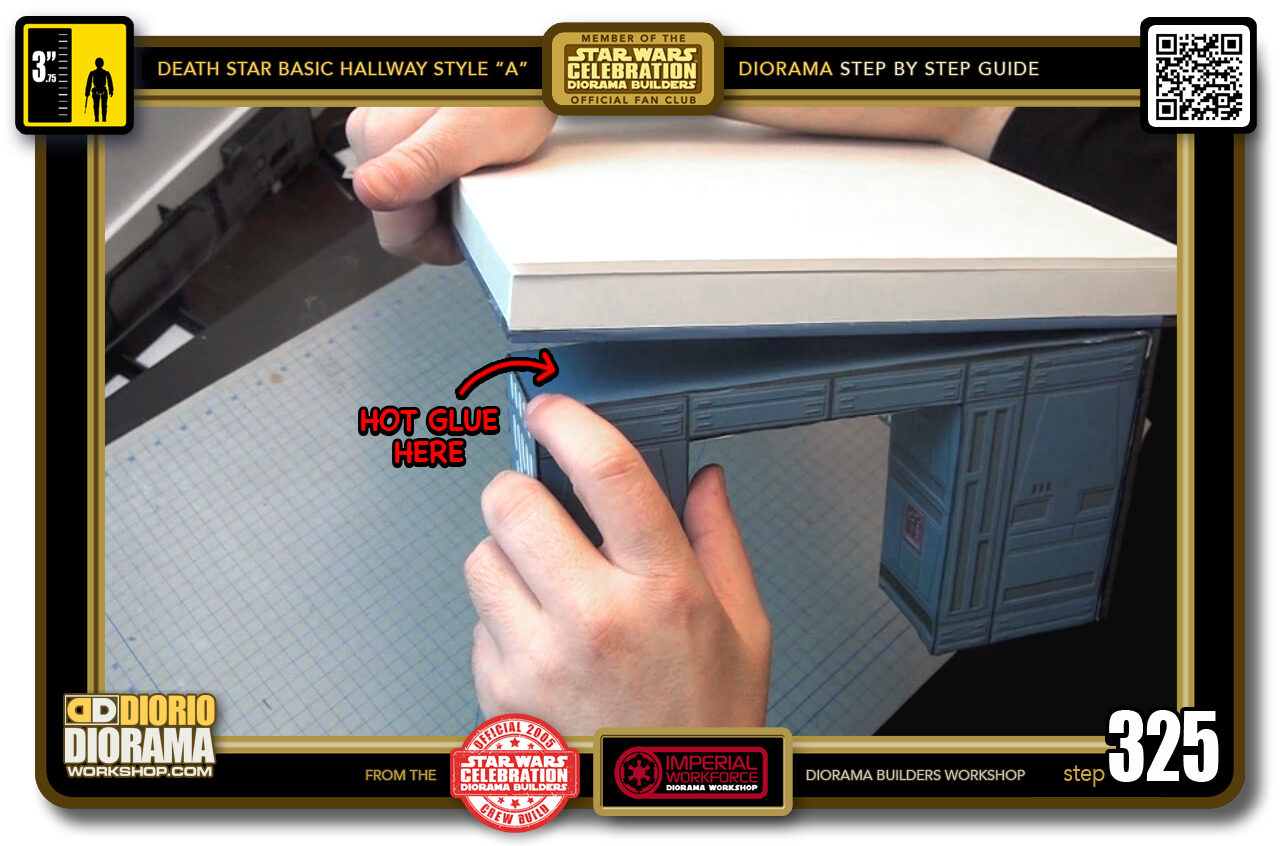
- STEP 325 > Since the only glue so far is the section of your archway that touches the rear wall, we can GENTLY LIFT the front of the ceiling off to expose enough of the archway's front top and allow us to put some hot glue on the surface.
-
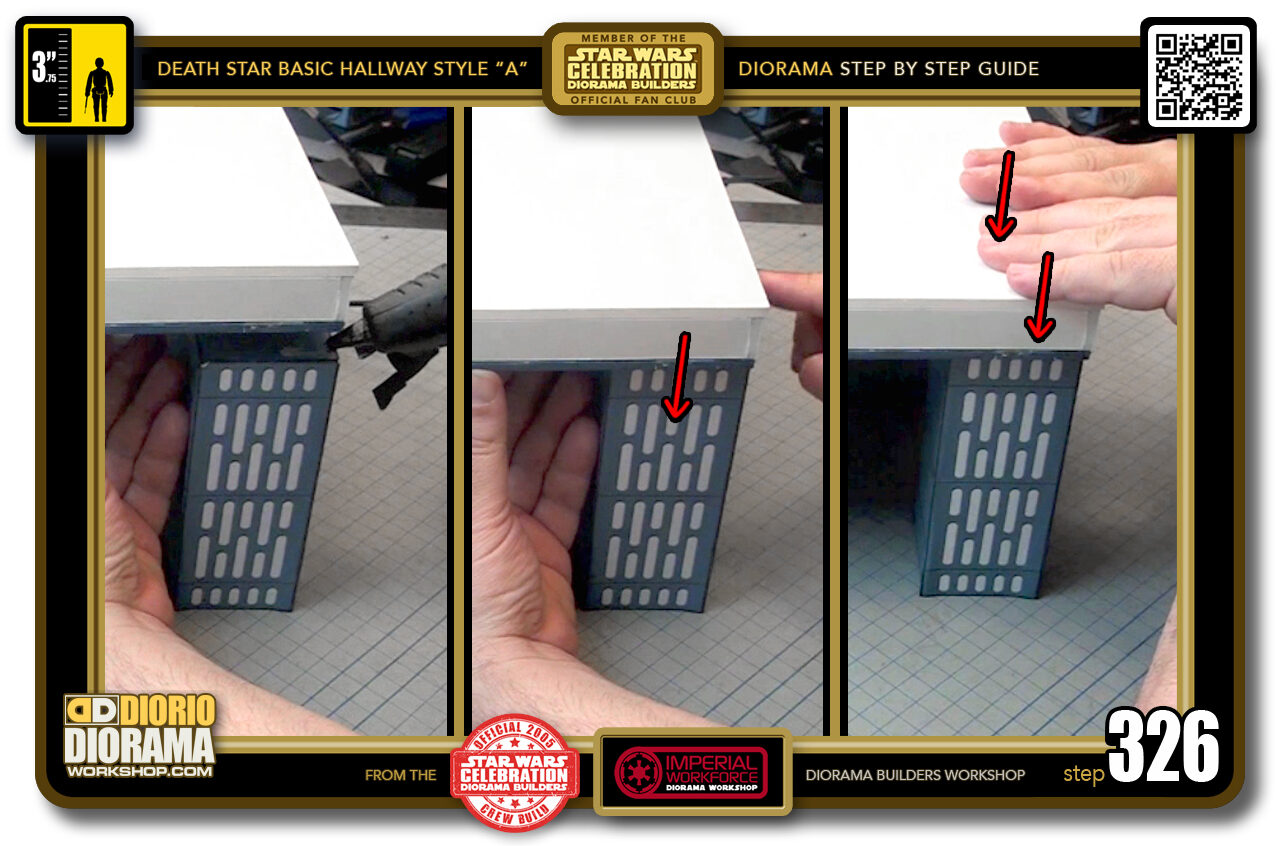
- STEP 326 > Gently keep the ceiling lifted just enough to fit the hot glue gun's nozzle in between the archway's 6cm x 6cm column top and the ceiling corner (left box). Slowly lower the ceiling making sure the alignment is just right and FLUSH with the ceiling's outside edge (centre box) Then you can keep some pressure for 1 to 2 minutes or so until the hot glue cools down (right box).
-
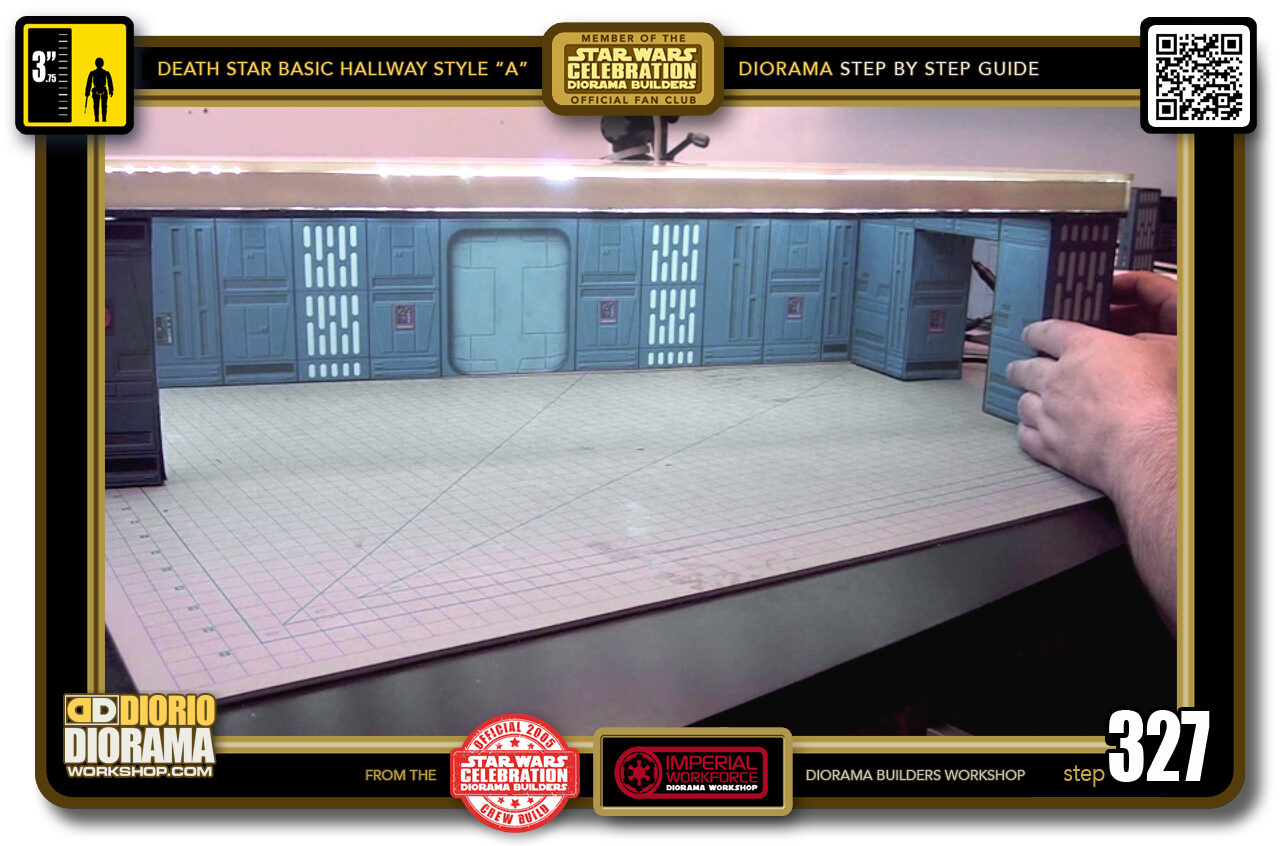
- STEP 327 > This is what our Hallway Archway accessory looks like as the right side support of our Basic Hallway.
-
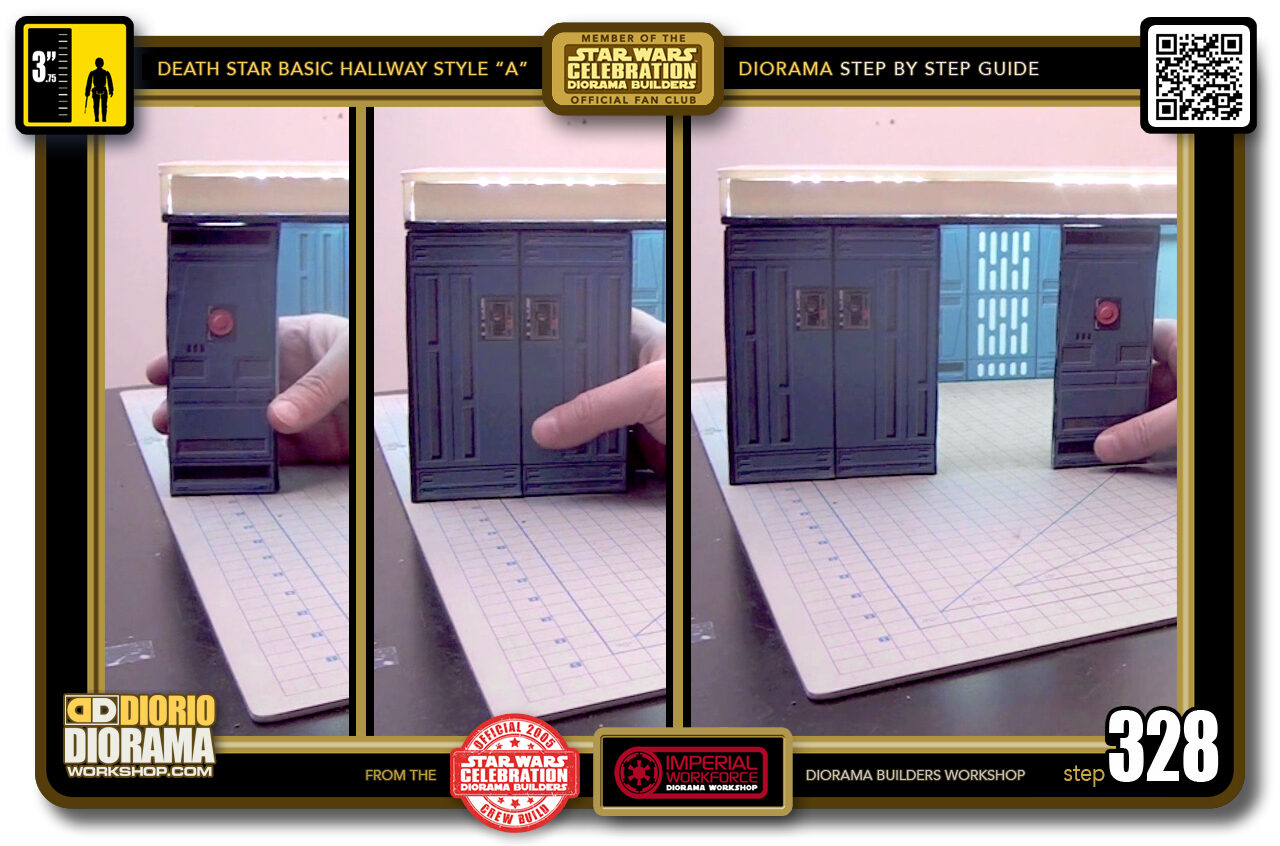
- STEP 328 > Now for the left side supports, you have many choices - remember it's all up to your imagination - you can place a Small Round Wall Panel in the corner (left box) or a Large Round Panel (centre box) or a combination of the 2, maybe with a gap in between to give it extra dimension and a spot for figures to walk through or hide (right box)
-
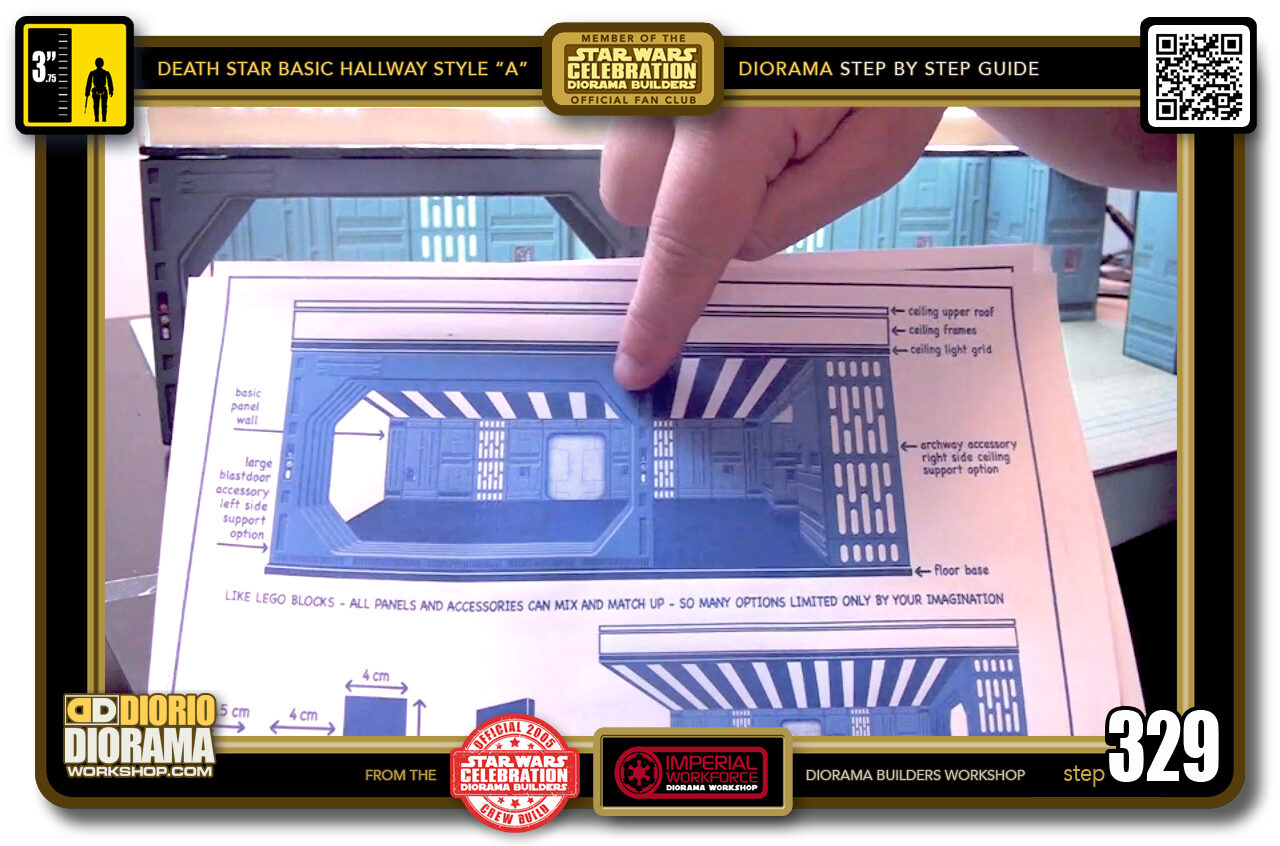
- STEP 329 > In my design, I chose to use one of the Large Blastdoors.
-
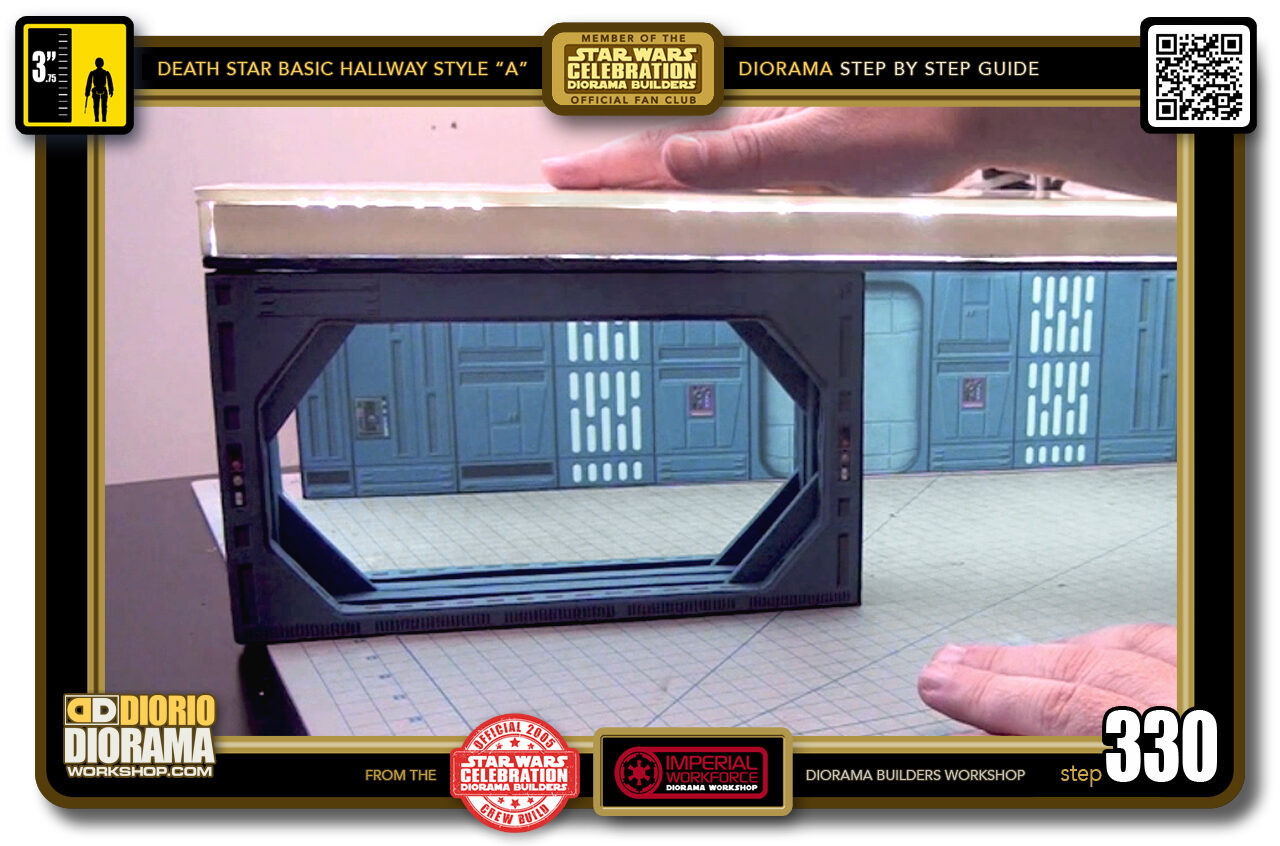
- STEP 330 > Not only does it make me smile 🙂 it instantly brings your mind onto the movie set.
-
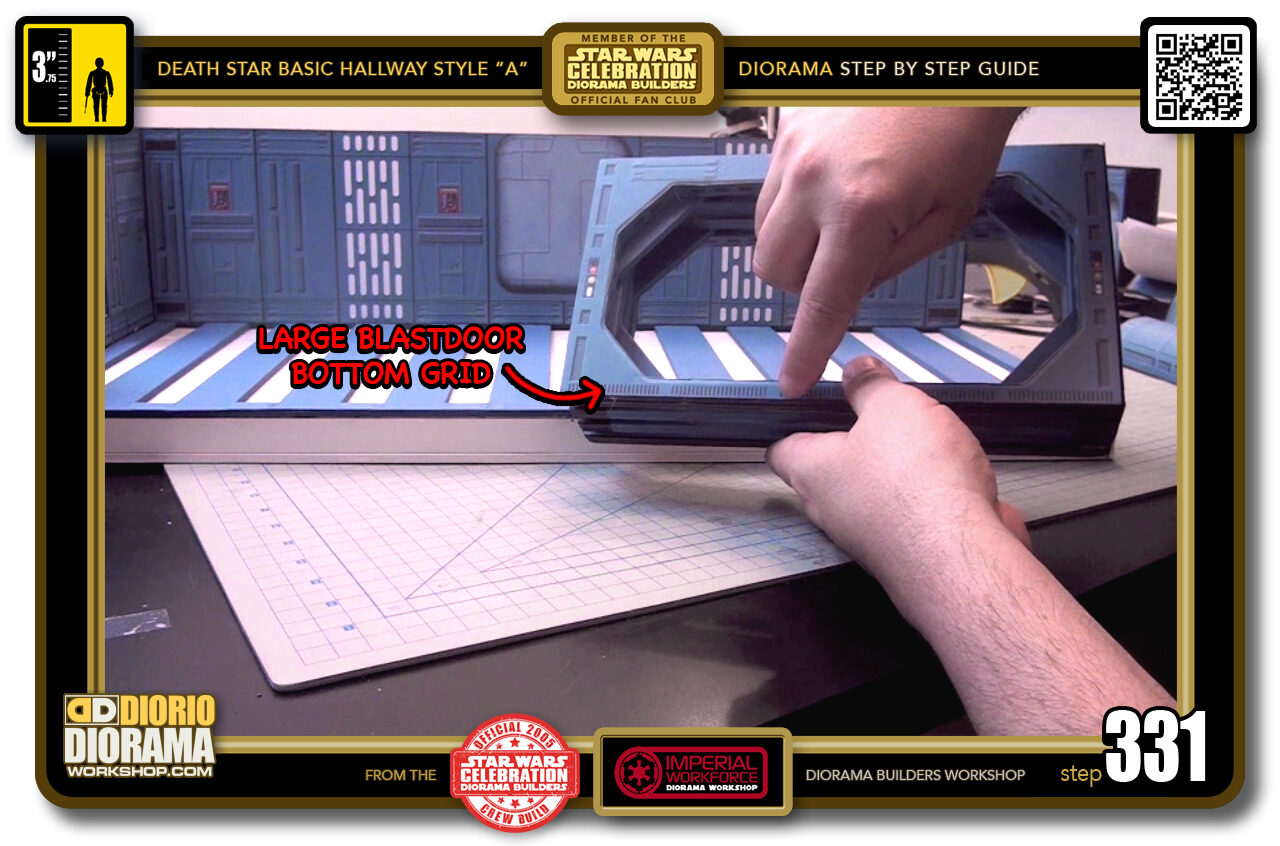
- STEP 331 > Remember we are glueing UPSIDE DOWN !!!! So you want the thin frame of the door (which is the bottom) to be at the TOP when you glue it on.
-
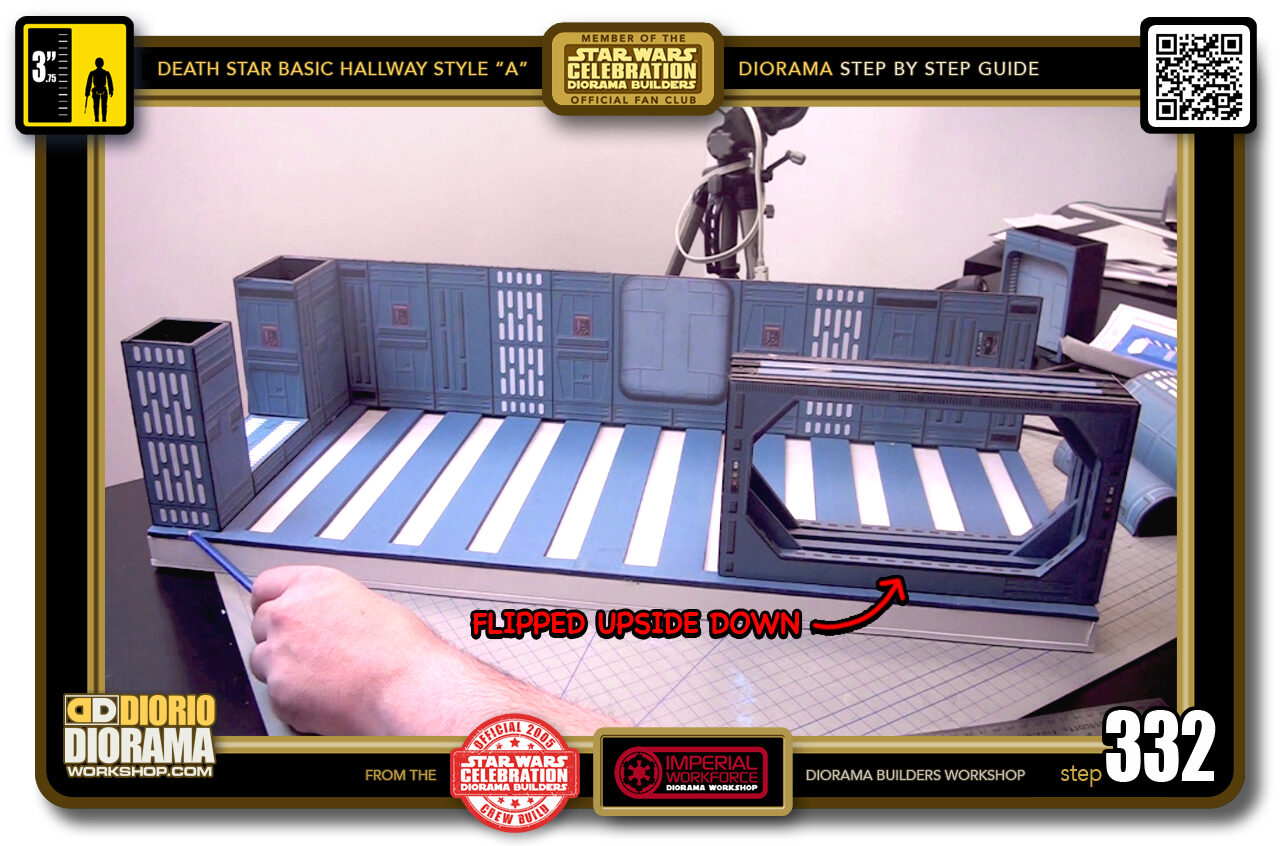
- STEP 332 > ALSO VERY IMPORTANT !!!! You can see that there is a 1cm space in between the Archway ceiling connection and the ceiling's edge (where the pencil is pointing to). So when you place your Large Blastdoor (or any support you chose), you need to KEEP that SAME 1cm space on the RIGHT side. And REMEMBER that your accessory support(s) needs to be placed UPSIDE DOWN !!!
-
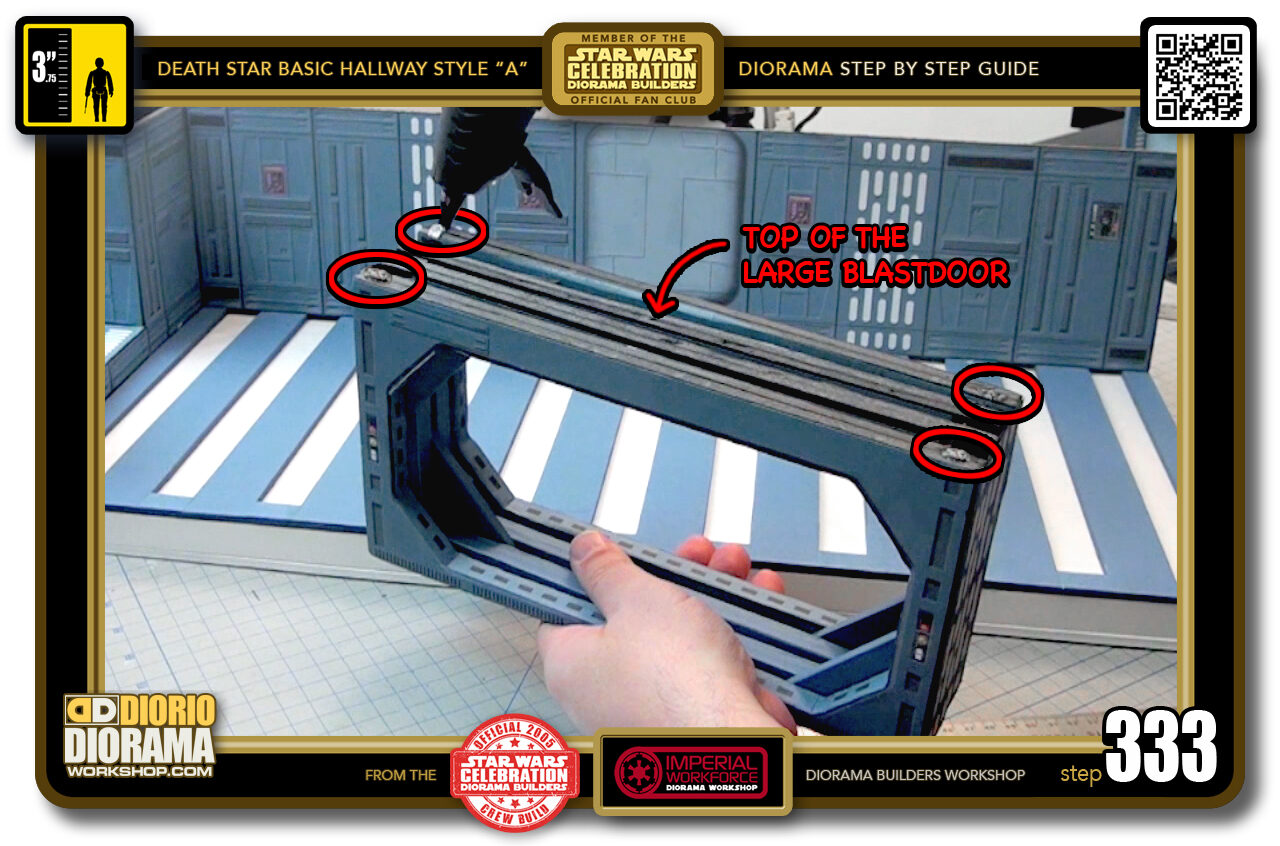
- STEP 333 > You don't need a ton of glue here. Just 4 drops of hot glue on each corner (red circles) is just perfect.
-
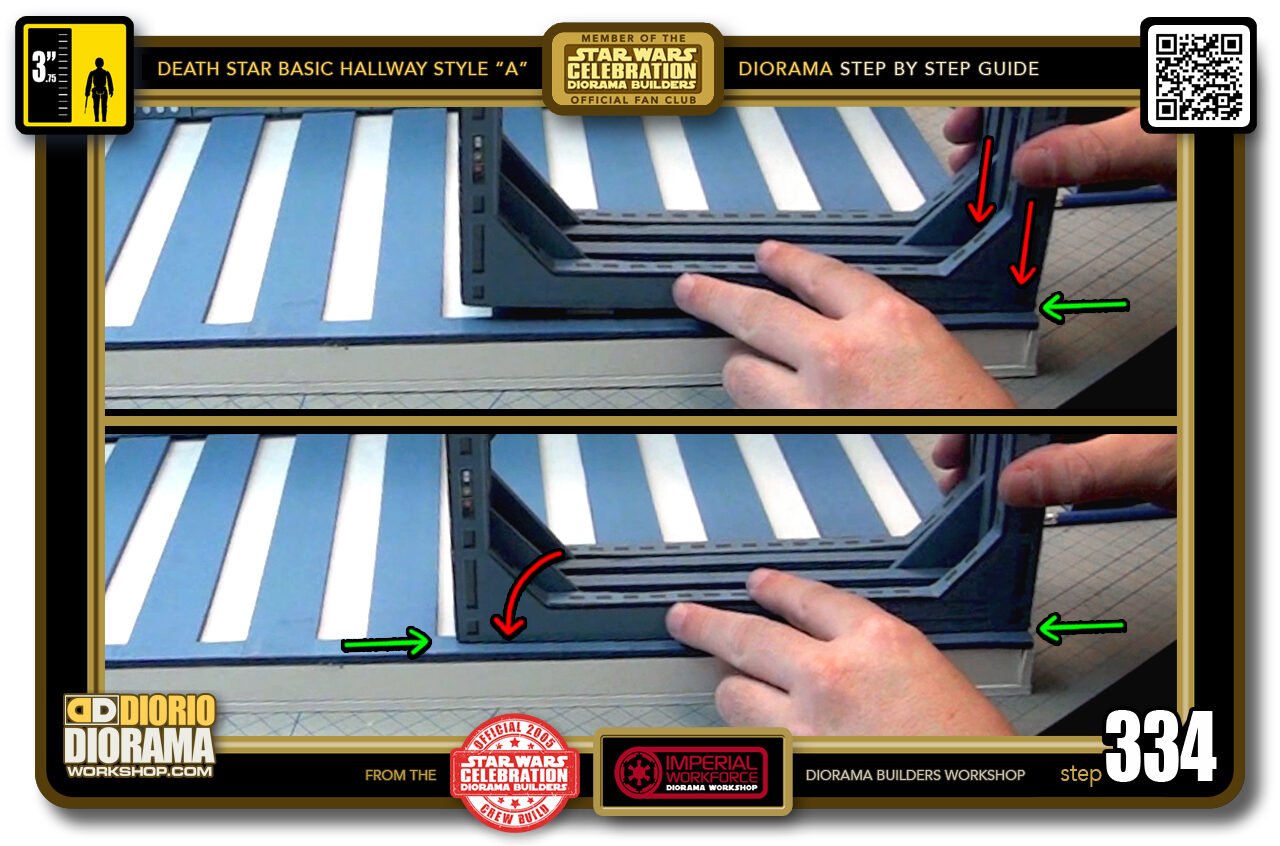
- STEP 334 > As you approach the ceiling, BE SURE to stay HIGH enough to prevent full contact with the entire ceiling. Start by aligning your build's RIGHT FRONT CORNER at 1 cm from the front edge (green arrow). Keep the left side of your blast door lifted as you lower it and allow contact with the RIGHT SIDE ONLY (top box) When you see that your Right outside edge is FLUSH with the outside edge of the ceiling, you can carefully lower the blast door's left side onto the ceiling surface (bottom box) REMEMBER TO KEEP 1 cm SPACE AT THE LEFT CORNER AS WELL. We want the blast doors to be parallel with the length of the ceiling's front edge.
-

- STEP 335 > When all is perfect, keep a little bit of pressure for 1 minute or so until the hot glue cools down.
-
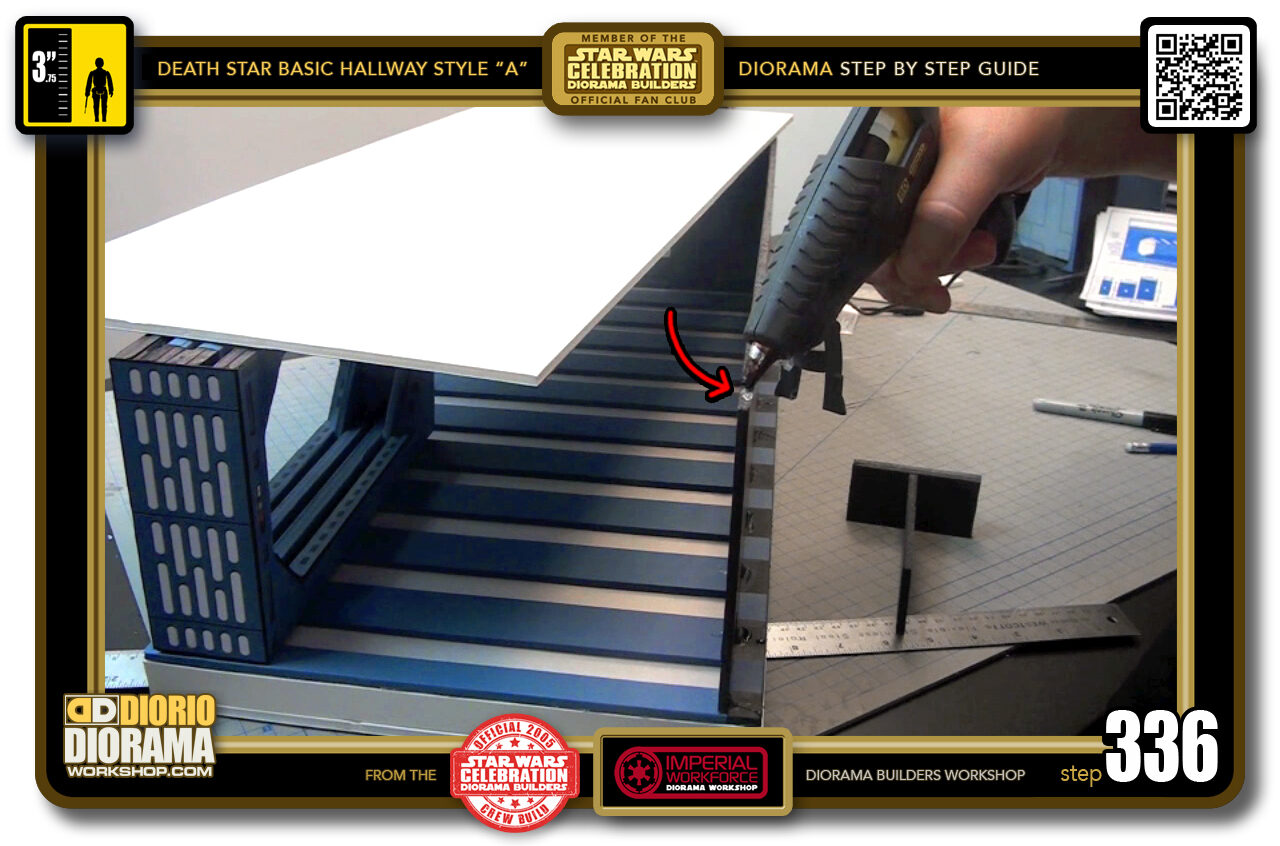
- STEP 336 > Now we can glue our floor. Your diorama is STILL UPSIDE DOWN. This is why your brain thinks you are gluing the ceiling 🙂 All we need is a small drop of hot glue at the corner of your rear wall.
-
-
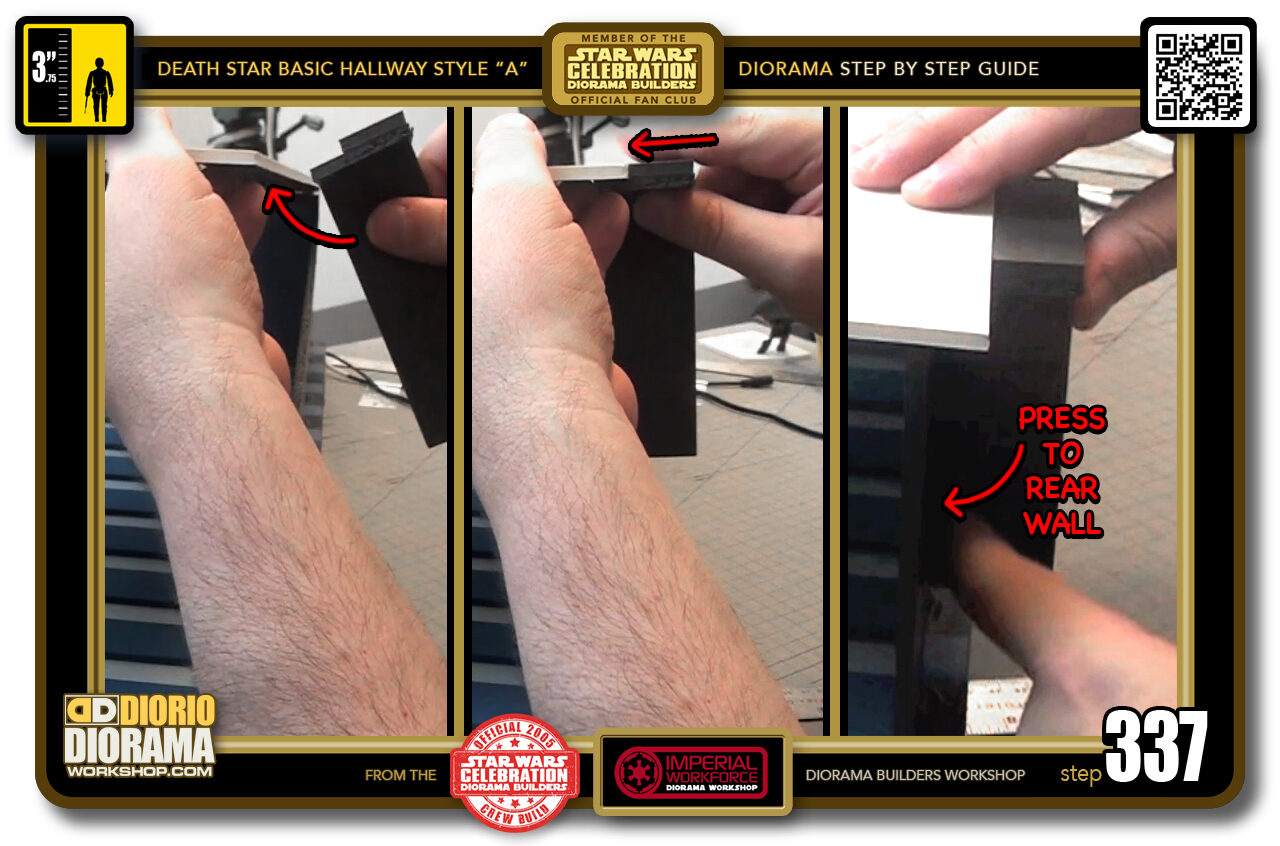
STEP 337 > Here is where our alignment guide thingamagig comes into play 🙂 It's a little dark in there so I will try and explain as best I can. If you are still confused, you can see it in motion in the YouTube channel Video making Of.
We want to place the guide under the floor so we can lower it onto the rear wall at the exact distance that we did for the ceiling. Place the floor (the side with the black glossy vinyl) onto the guide's "B" piece which is the long one (left box) Push the guide towards the floor until the "C" piece connects. It is basically your stopper (centre box). Now push your rear wall from the inside outwards until the long stem of the guide "A" connects and is straight FLUSH with the WALL. (right box)
FRANK NOTE: The "A" long piece makes sure your wall will be a perfect 90 degree angle with the floor and the "C" stopper makes sure that your distance is exactly the same as the connection with the ceiling.
-
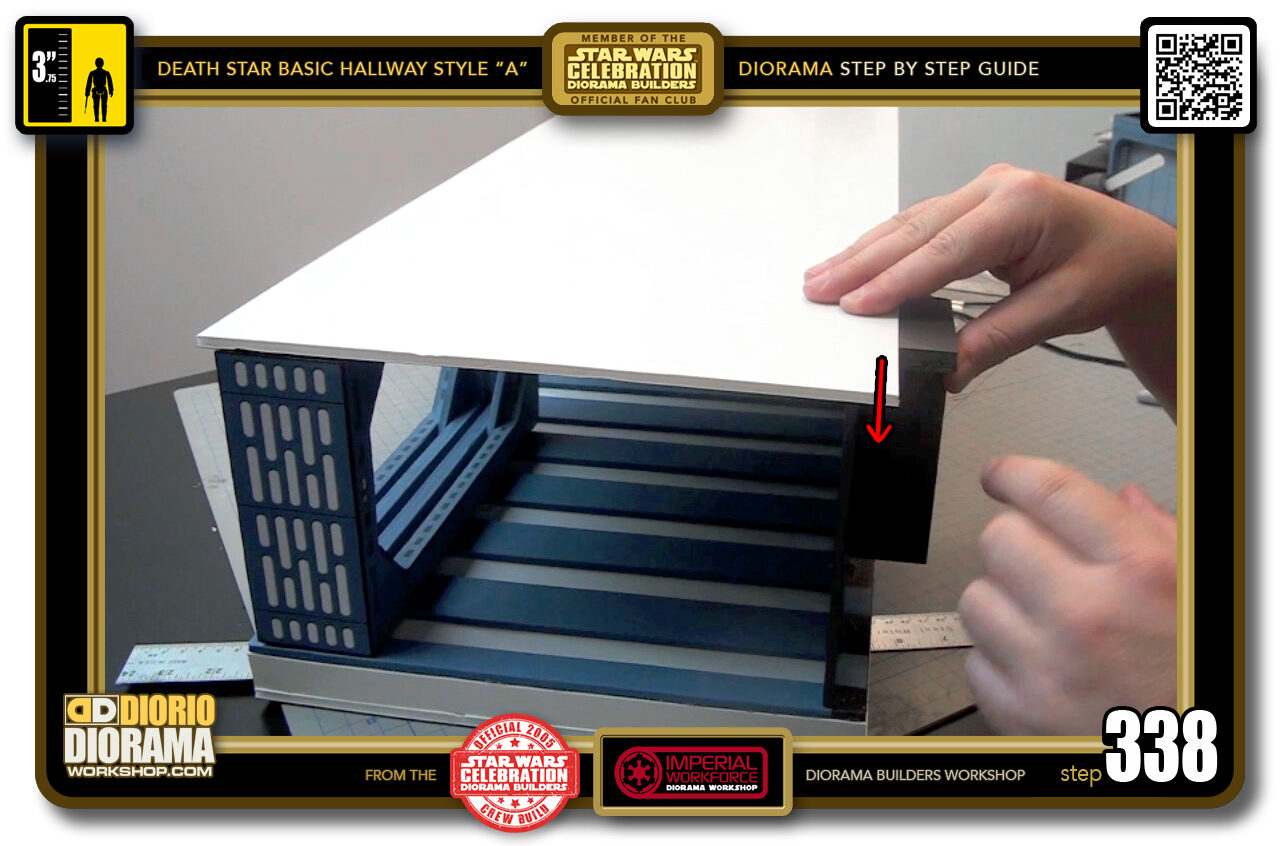
- STEP 338 > Now you can slowly lower the floor onto the rear wall corner. Remember to KEEP the contact with the wall and the long stem as you lower, giving you the perfect 90 degrees we need to make it just perfect.
-

- STEP 339 > Time to glue the other corner, use the same technique. Drop of hot glue (left box) Slide your guide under the floor and push it until it stops (centre box), align with the rear wall and lower, slide it down to make contact (right box).
-
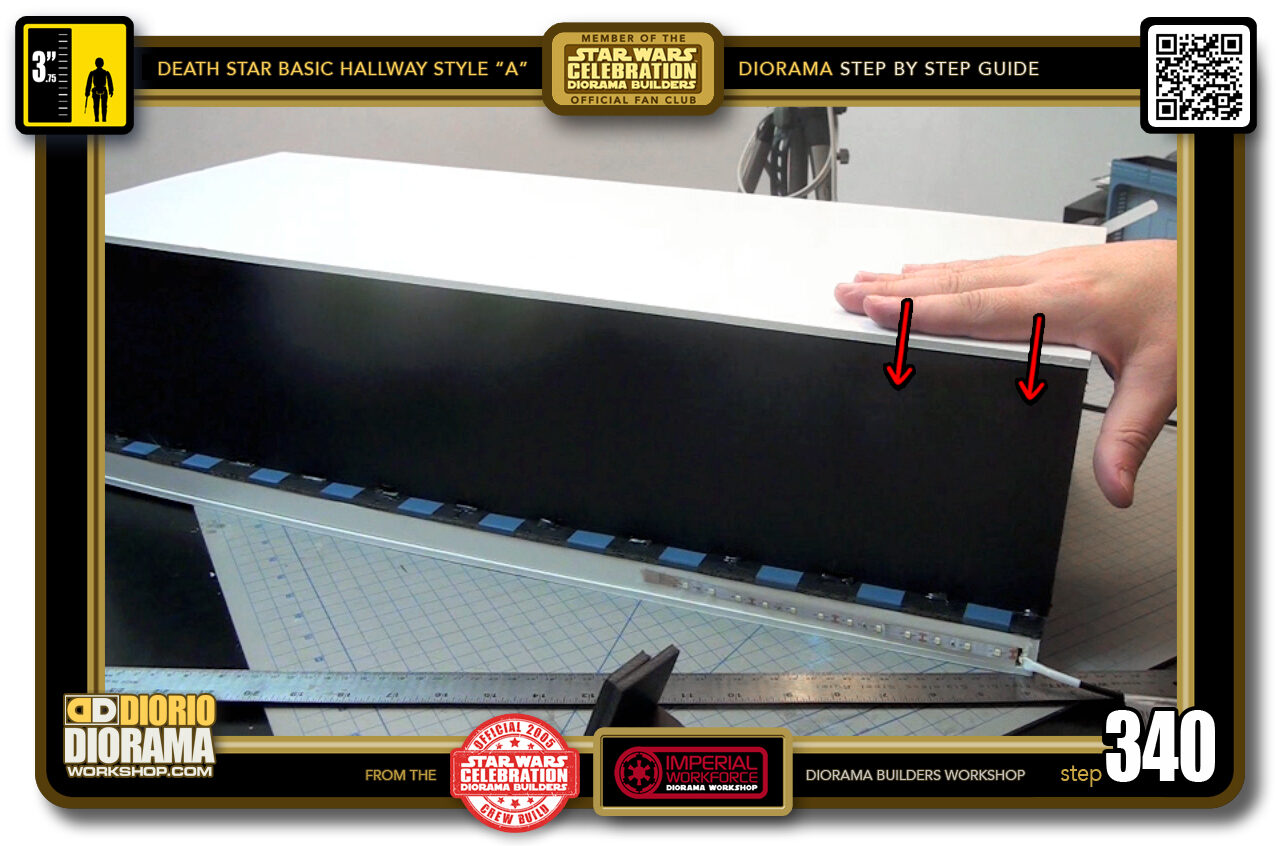
- STEP 340 > Keep some pressure for 1 minute or so until the hot glue cools down.

.
Did you already build this Diorama ? At home or at our Star Wars Celebration Diorama Builders workshop ? Would you like to show it in the site’s GALLERY VISITORS DIORAMAS section, YES ? That is Awesome !!! You can find out all the details on how to email me your photos on the VISITORS SUBMISSIONS INFO page … When I get your photos, I will create your very own page just like this one. You may not realize it but work does inspire others to join in the fun of making Action Figure Dioramas.
.
NOT FOR RESALE ALL Decals, tutorials and artwork are ©FrankDiorio (dioramaworkshop.com) and offered FOR FREE to the fans – that would be you ? so you can build and display my diorama designs in your very own home. I realize I cannot control what one does with my graphics once I place them on the web, I can only ask you as one fan to another, please respect the artist and do not be that jerk who uses my designs and tutorials to build a copy of my work only to sell it on EBAY or trade/sale groups and forums. Thank You. Frank.
.
.
If you have a facebook account, why not join the Official Diorama Builders Fan Club today, simply click the logo link below.
 .
.
Catch up with fellow visitors and exchange stories, read cool interviews with the crew, exchange photos, fun surprises and grab some FAN ONLY merchandise next year at actual future conventions ?
.
©2018 Frank Diorio DioramaWorkshop.Com
.
IF YOU LIKE WHAT YOU SEE, PLEASE SHARE WITH YOUR FRIENDS
USING THE SOCIAL MEDIA BUTTONS BELOW