


-
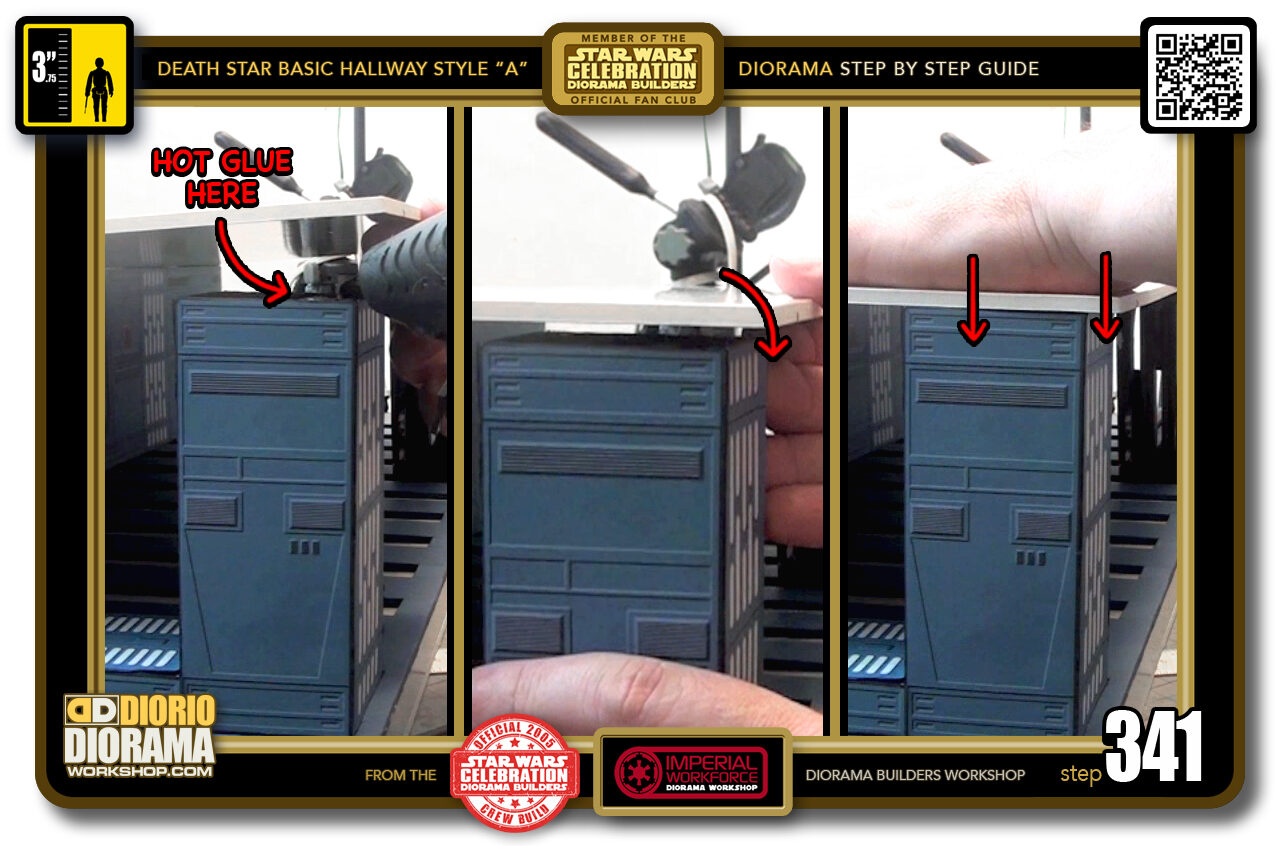
- STEP 341 > With the rear wall secure enough not to wiggle around, it's time to attach the floor to the right side support. Lift the floor high enough to allow the tip of the hot glue nozzle to fit in between and place a small glob on the corner (left box). Lower the floor and make contact with the glue as you make sure to have that same 1 cm space at the front that you have at the bottom (centre box). When all is aligned put some pressure for 1 minute or so until the hot glue cools down (right box).
-
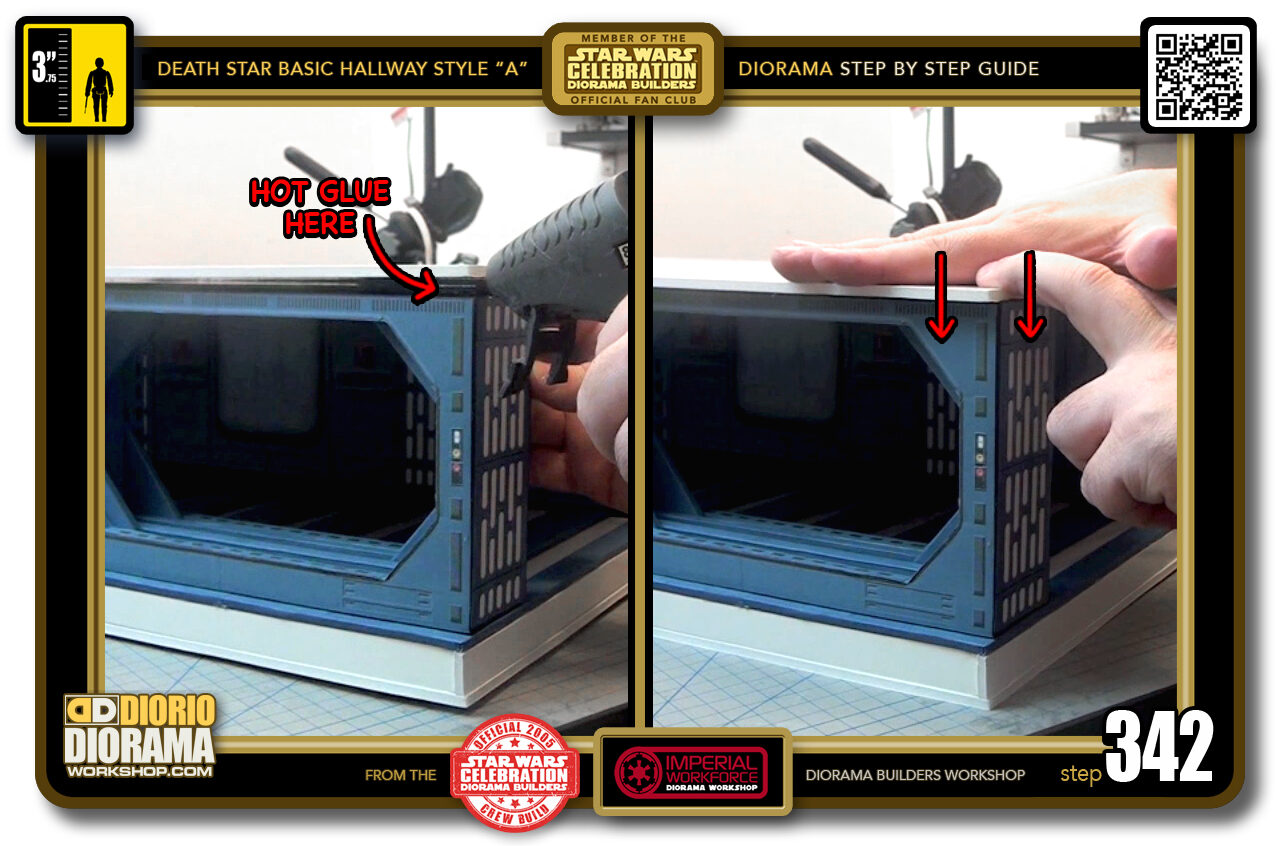
- STEP 342 > Same goes for the last corner. In this case, lift just high enough to fit the hot glue gun nozzle under the floor and put a small glob along the edge of the blast door (left box). Check your 1 cm space matches the other end and press down for 1 minute or so until the hot glue cools down (right box).
-
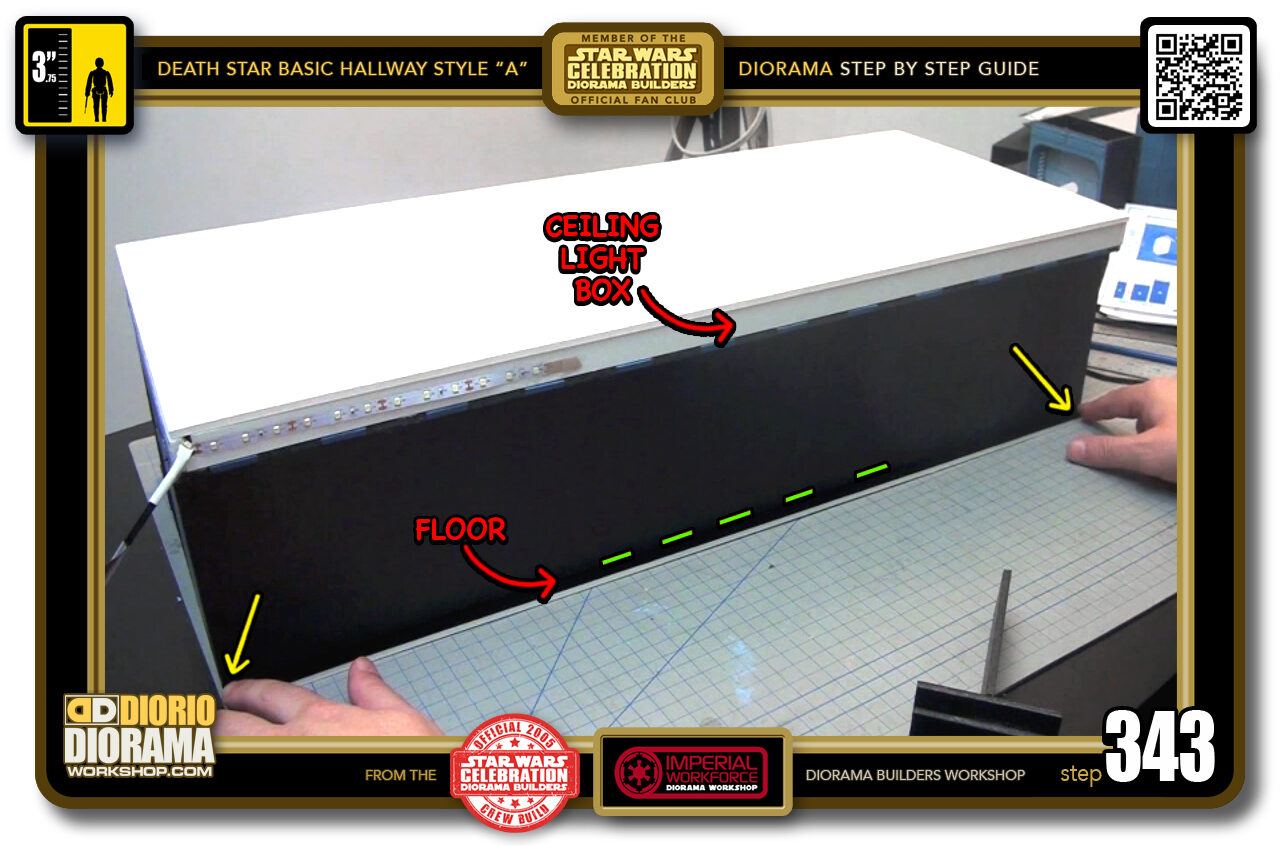
- STEP 343 > We are ALMOST done. FLIP YOUR DIORAMA BACK TO IT'S PROPER ORIENTATION - CEILING BOX ON TOP, FOAMCORE FLOOR AT BOTTOM. We currently have a drop of hot glue at each corner (yellow arrows). That was enough to help glue the front corners but if you press against the centre (green dotted lines) you should notice that it pushes towards the inside of the hallway. We need to place globby lines at the connection to make it super strong and never bend again.
-
-
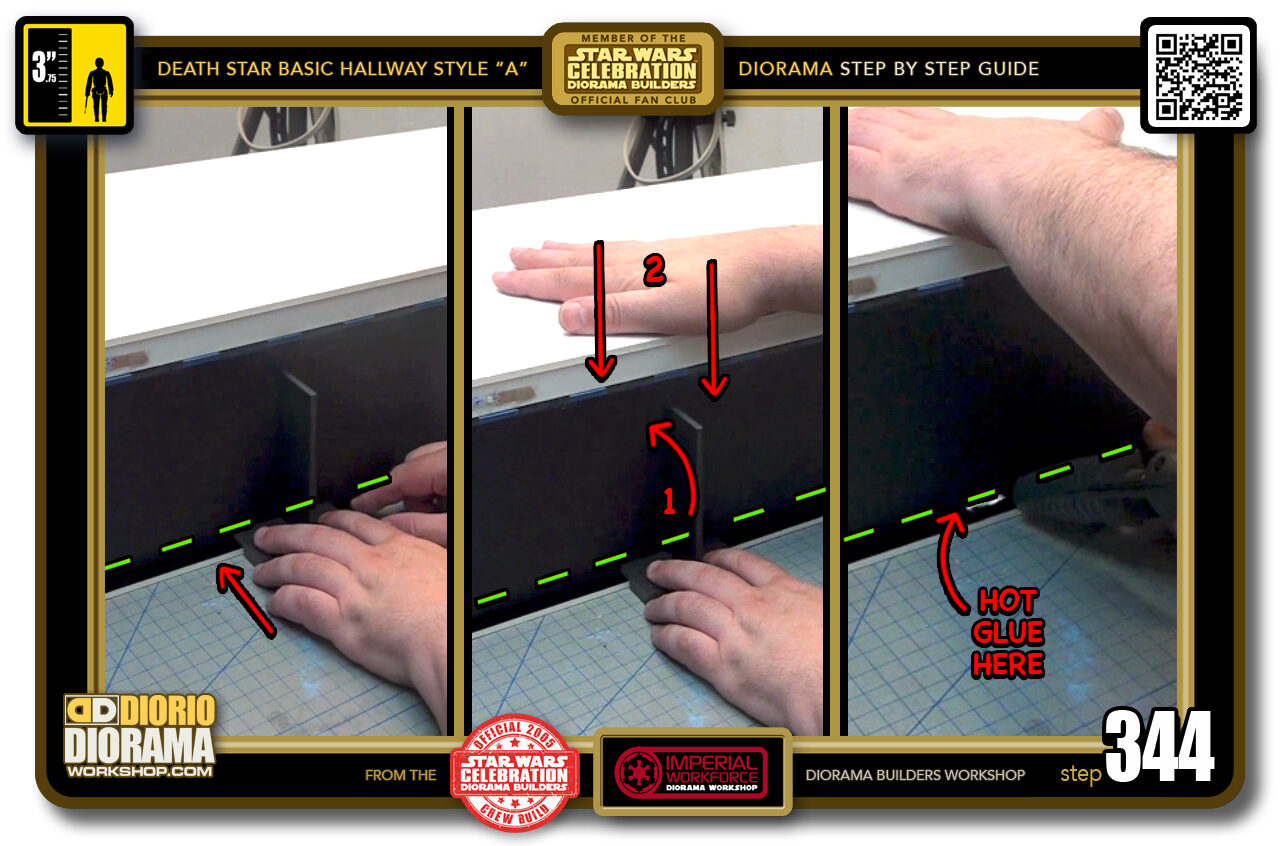
STEP 344 > I'm sorry the photos are black on black and hard to see, but I will explain and you should understand what I am doing because it resembles the same technique as Step 337 and Step 339.
First thing we want is make sure the rear wall is aligned exactly at it was when gluing it's corners, so grab your guide whatchamacallit and place it against the working surface and push until the stopper makes contact with the foamcore floor (left box) Now depending how your rear wall connected to your ceiling, you will have to either push the rear wall from the inside, until it comes to 90 degrees with the guides long spine or use the long spine to push the rear wall towards the inside of the hallway. Either way, your guide will make sure your wall's centre is a perfect 90 degrees with the floor (centre box).
Put a good amout of pressure on your ceiling to make sure the wall doesn't wiggle out of place (centre box). Now grab your hot glue and squeeze a good globby worm of hot glue on each side of your guide (right box)
Keep pressure for a good 5 minutes, hot glue worms don't cool down as fast as small lines or dots.
-
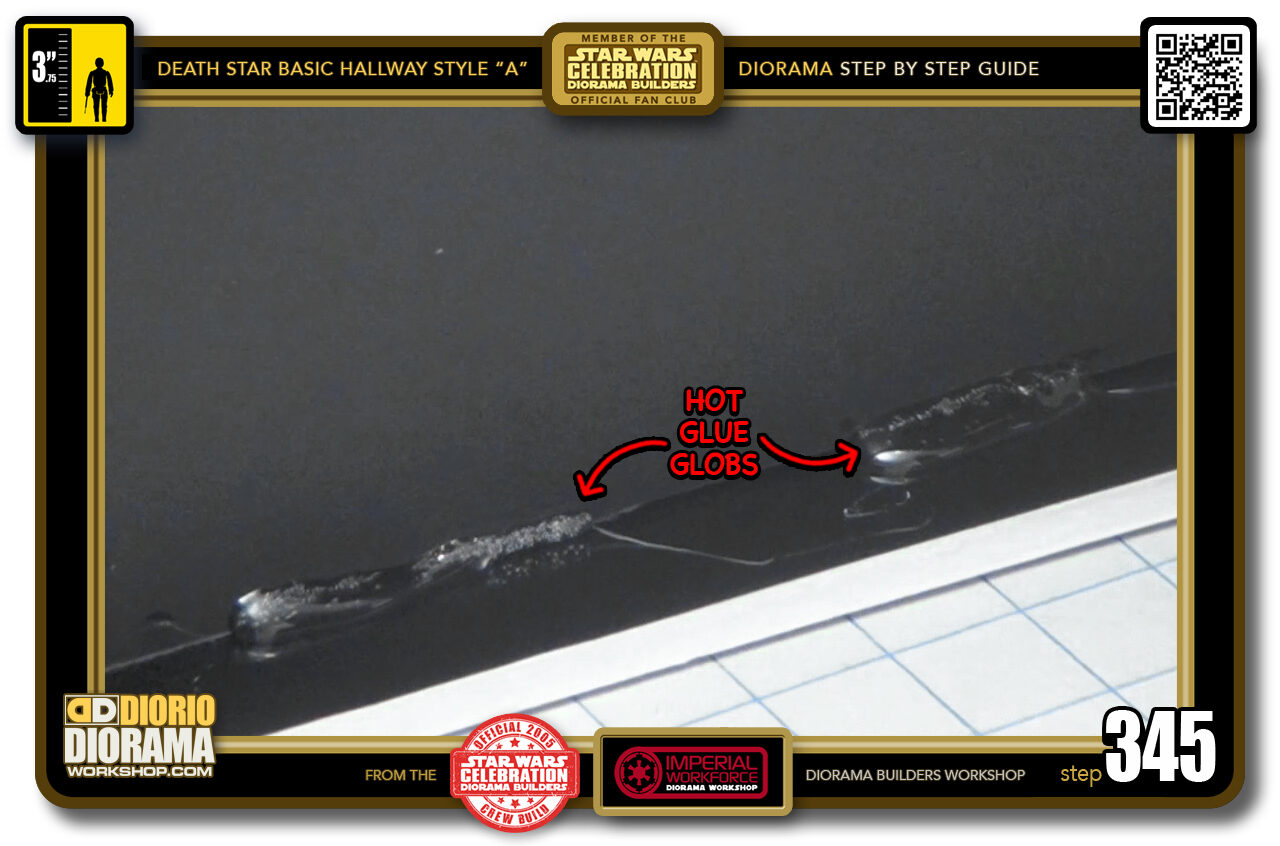
- STEP 345 > This is what your globby hot glue worms look like. You want them to be placed just where the wall and floor make contact, as close to the 90 degree connection as possible. KEEP PRESSURE UNTIL THIS COOLS DOWN !!! If you start letting go and the globs seem to be breathing, the glue is still HOT and you risk losing your perfect alignment.
-
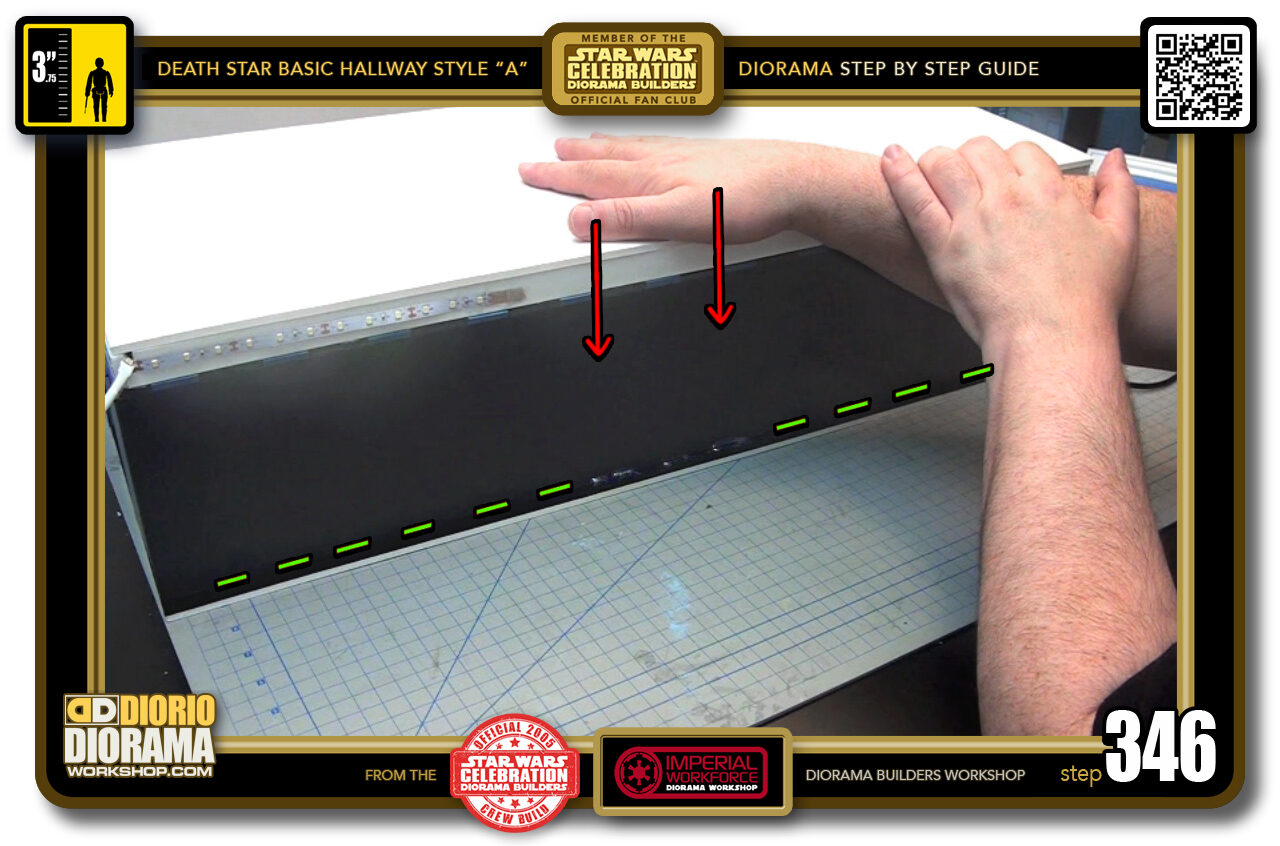
- STEP 346 > When the hot glue has cooled down, it is SAFE to remove your guide. With it out of the way, you can now squeeze another hot glue worm in between the first 2. Press down until centre worm cools down. Your rear wall is super secure and will never warp out of shape now. And guess what ? WE ARE DONE !!! 🙂
-
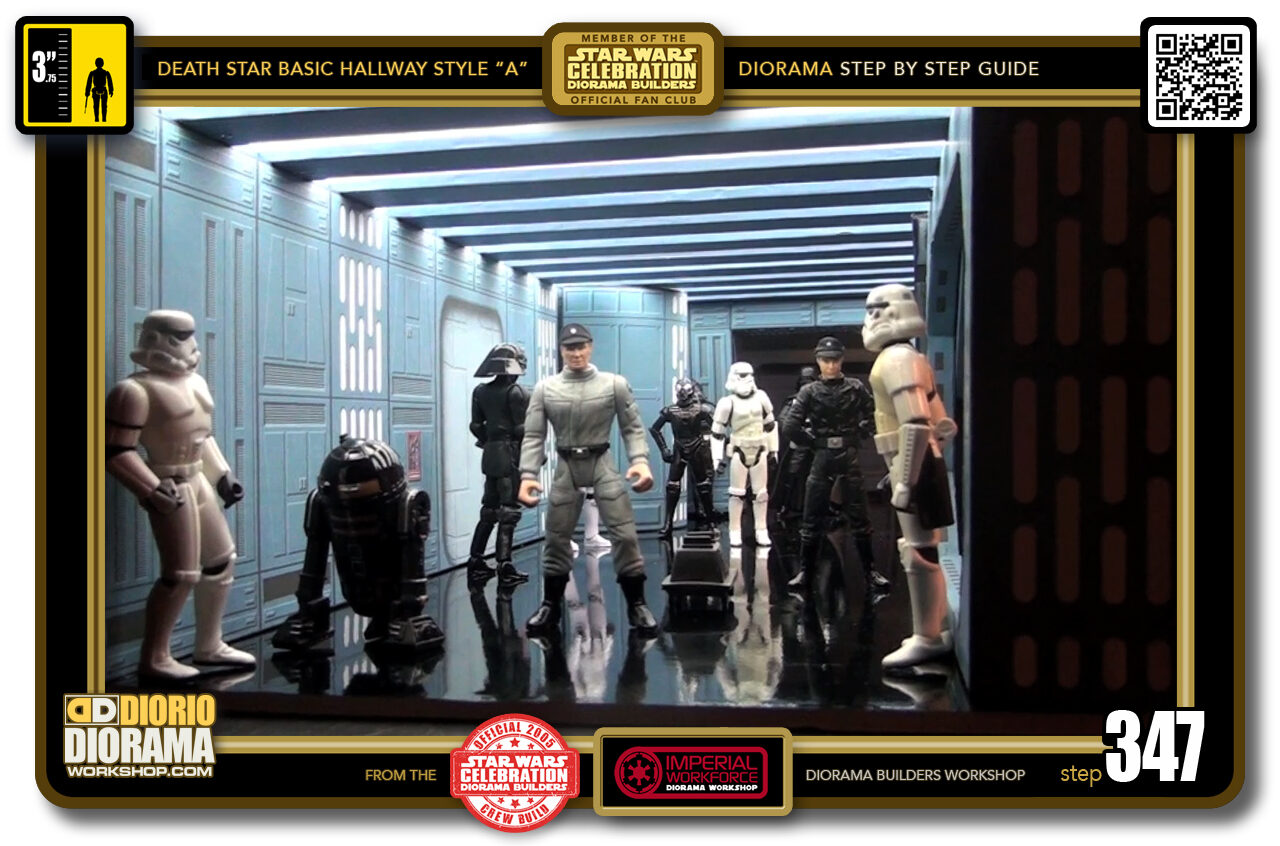
- STEP 347 > This is the best part - place all the figures you want and TURN ON the LED Lights 😀 Doesn't this just look too cool 😀
-
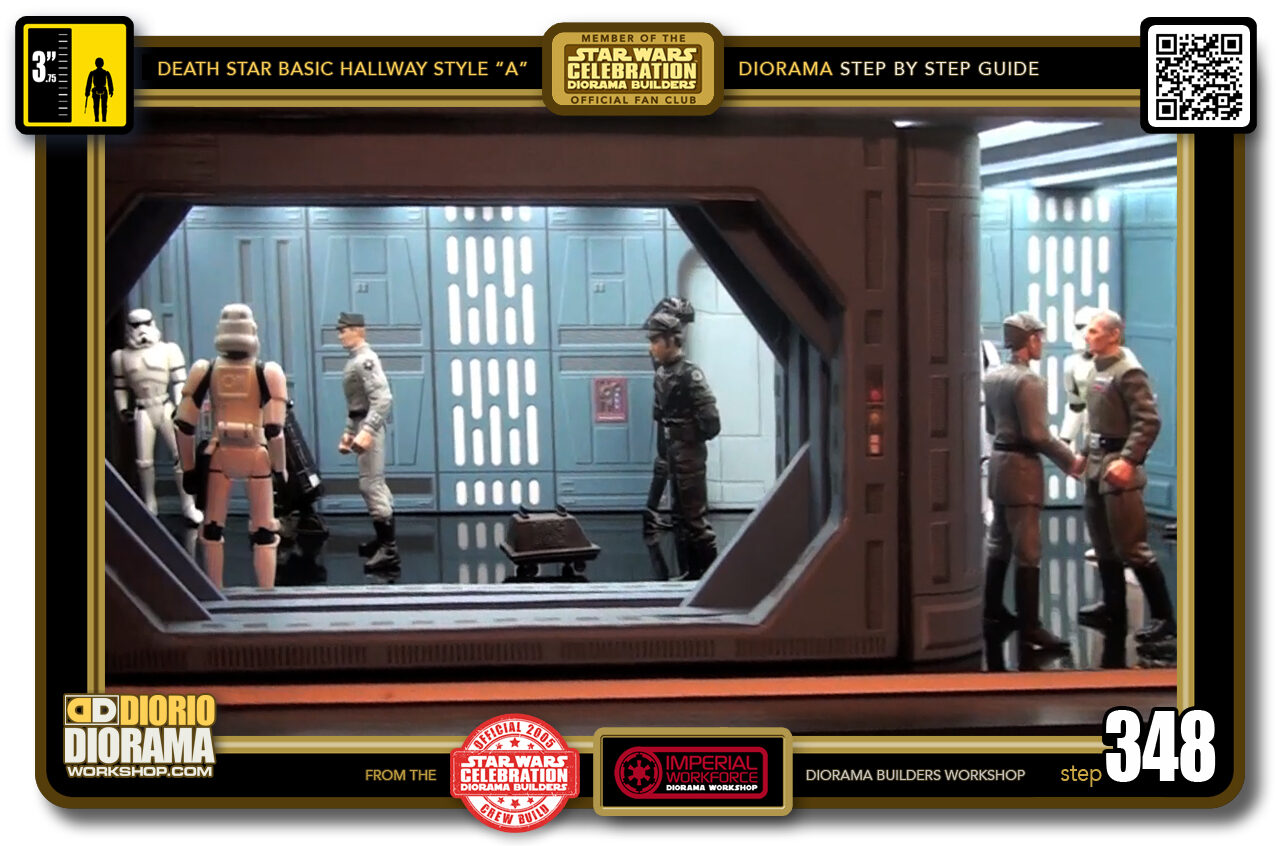
- STEP 348 > A peek through the Large Blast Doors really add epth to the simplest of Basic hallways.
-

-
STEP 349 > Now the cool thing is that yours will feel the same as all of ours, but it can look different if you changed things around using your imagination. 🙂 The entire Death Star is designed to connect and fit like Lego. Build this hallway, connect it to the Trash compactor or Briefing room, or stack them on top of each other for multi level displays. The sky is the limit !!!
I hope you enjoyed the build, I will post the Style "C" variation next and then the CURVED HALLWAY option, that recreates exactly what you see in the movie. If you build your Death Star, send me photos for the visitor gallery !!!

.
Did you already build this Diorama ? At home or at our Star Wars Celebration Diorama Builders workshop ? Would you like to show it in the site’s GALLERY VISITORS DIORAMAS section, YES ? That is Awesome !!! You can find out all the details on how to email me your photos on the VISITORS SUBMISSIONS INFO page … When I get your photos, I will create your very own page just like this one. You may not realize it but work does inspire others to join in the fun of making Action Figure Dioramas.
.
NOT FOR RESALE ALL Decals, tutorials and artwork are ©FrankDiorio (dioramaworkshop.com) and offered FOR FREE to the fans – that would be you ? so you can build and display my diorama designs in your very own home. I realize I cannot control what one does with my graphics once I place them on the web, I can only ask you as one fan to another, please respect the artist and do not be that jerk who uses my designs and tutorials to build a copy of my work only to sell it on EBAY or trade/sale groups and forums. Thank You. Frank.
.
.
If you have a facebook account, why not join the Official Diorama Builders Fan Club today, simply click the logo link below.
 .
.
Catch up with fellow visitors and exchange stories, read cool interviews with the crew, exchange photos, fun surprises and grab some FAN ONLY merchandise next year at actual future conventions ?
.
©2018 Frank Diorio DioramaWorkshop.Com
.
IF YOU LIKE WHAT YOU SEE, PLEASE SHARE WITH YOUR FRIENDS
USING THE SOCIAL MEDIA BUTTONS BELOW