


-
-
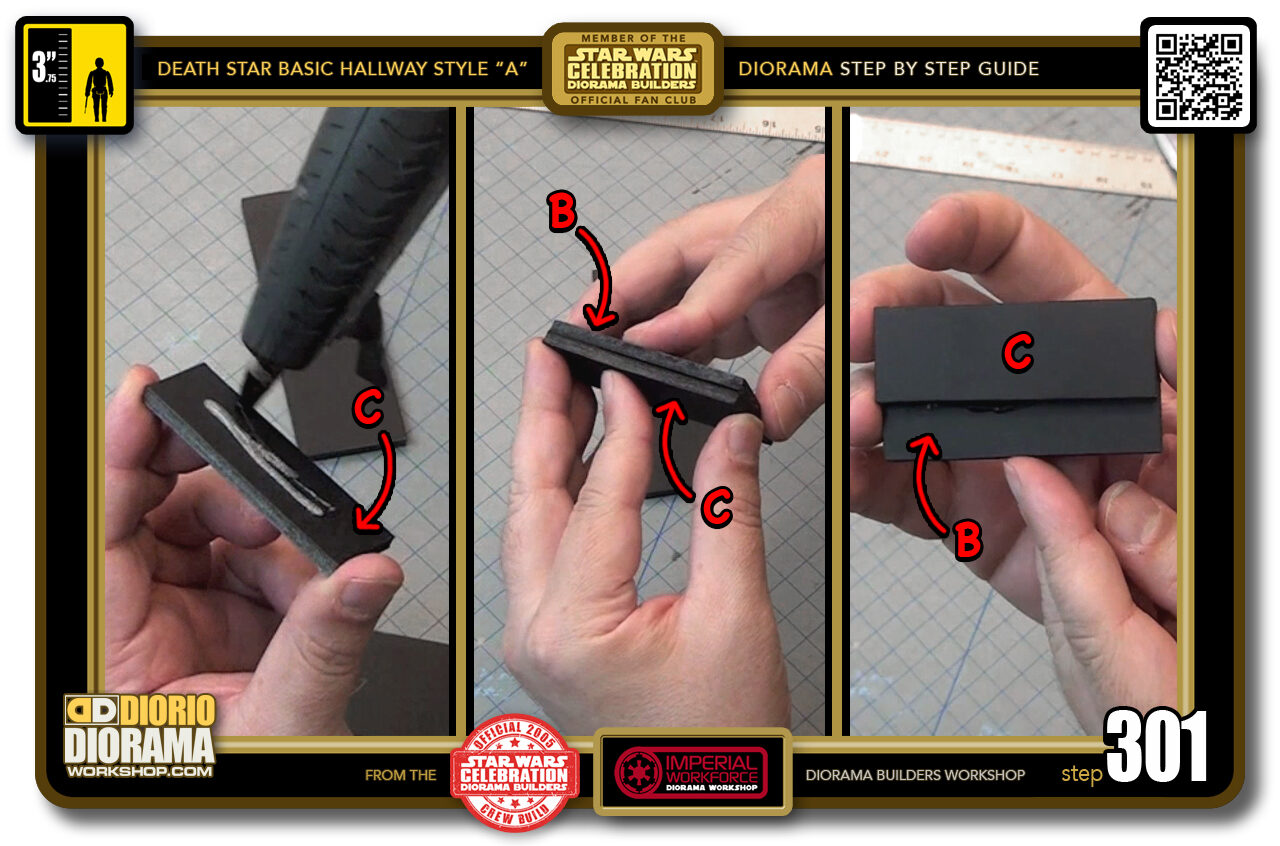
STEP 301 > To assemble your guide thingamagig 🙂 Put some hot glue on your C piece (left box). Then press the B piece against C making sure the rear is perfectly flush (centre box). This will give you a nice extension with B and allow C to act as your stopper to always give you the same even wall placement all the way across your hallway (right box).
FRANK TIP : When you press your 2 foamcore together (centre box) if you slightly rotate the pieces left and right and left and right as you press down, it smooshes the glue allowing the foamcore to get closer to each other and reduce the gap space between the 2 pieces.
-
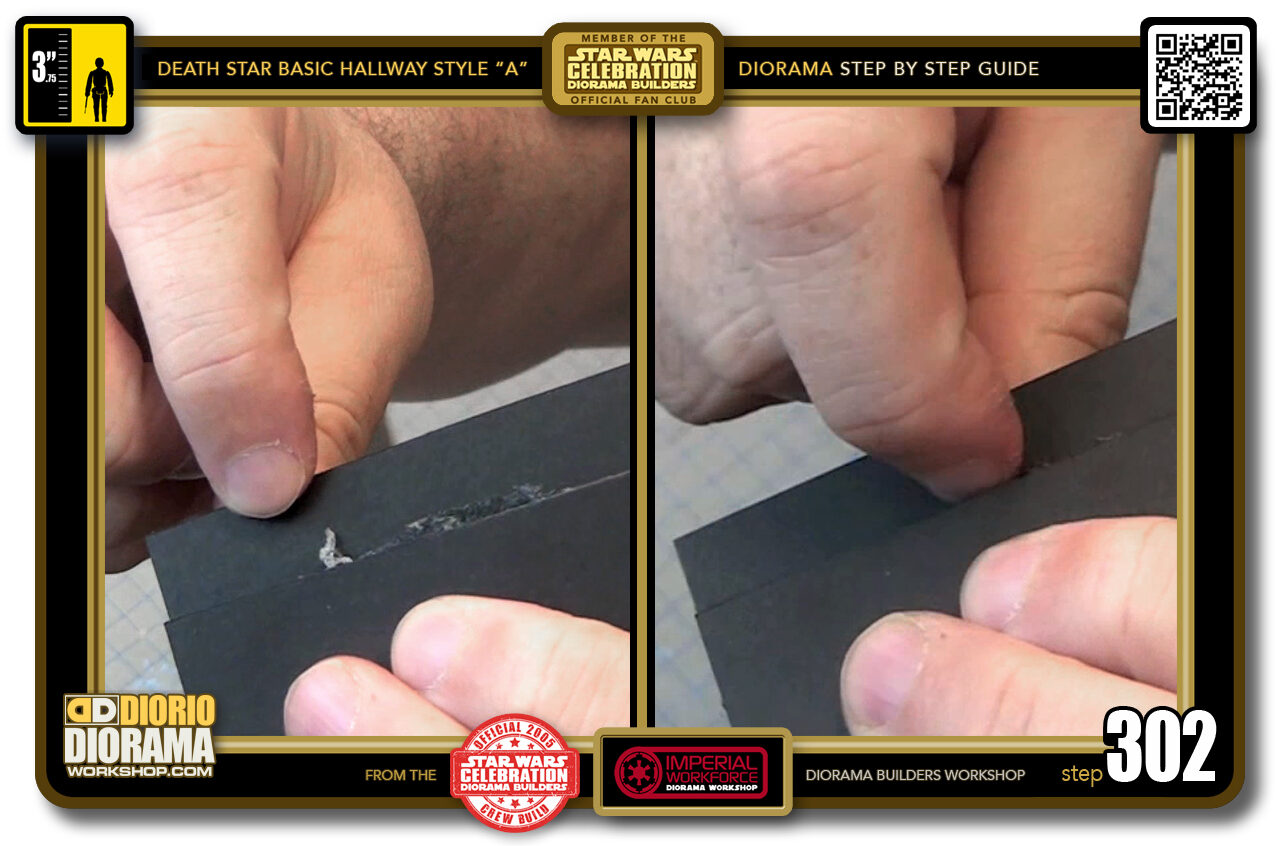
- STEP 302 > If you happen to create some hot glue snotty caca (left box) you can easily scrape them off once the hot glue cools off (right box) You will want this surface area as clean and smooth as possible as it will lay directly onto your floor and ceiling pieces later on.
-
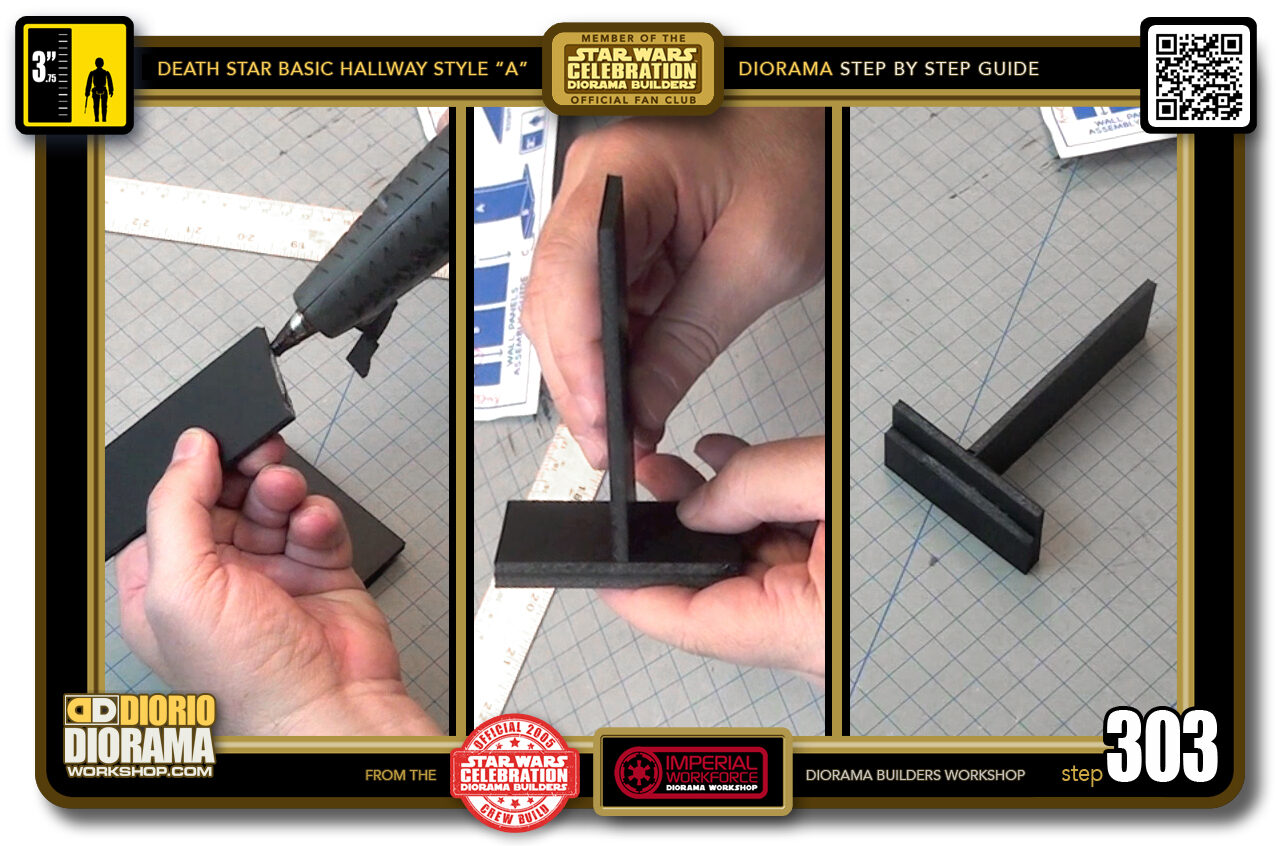
- STEP 303 > The last piece to attach it your spine support, which will act as your leveller to keep your walls at a perfect 90 degrees. Just a line of hot glue along the bottom (left box). Place it in the centre of your B/C base (centre box), just eyeball it but it MUST BE FLUSH so all 3 pieces can lay flat without wiggling. Let it stand laying flat for a minute or so until the hot glue cools down (right box).
-
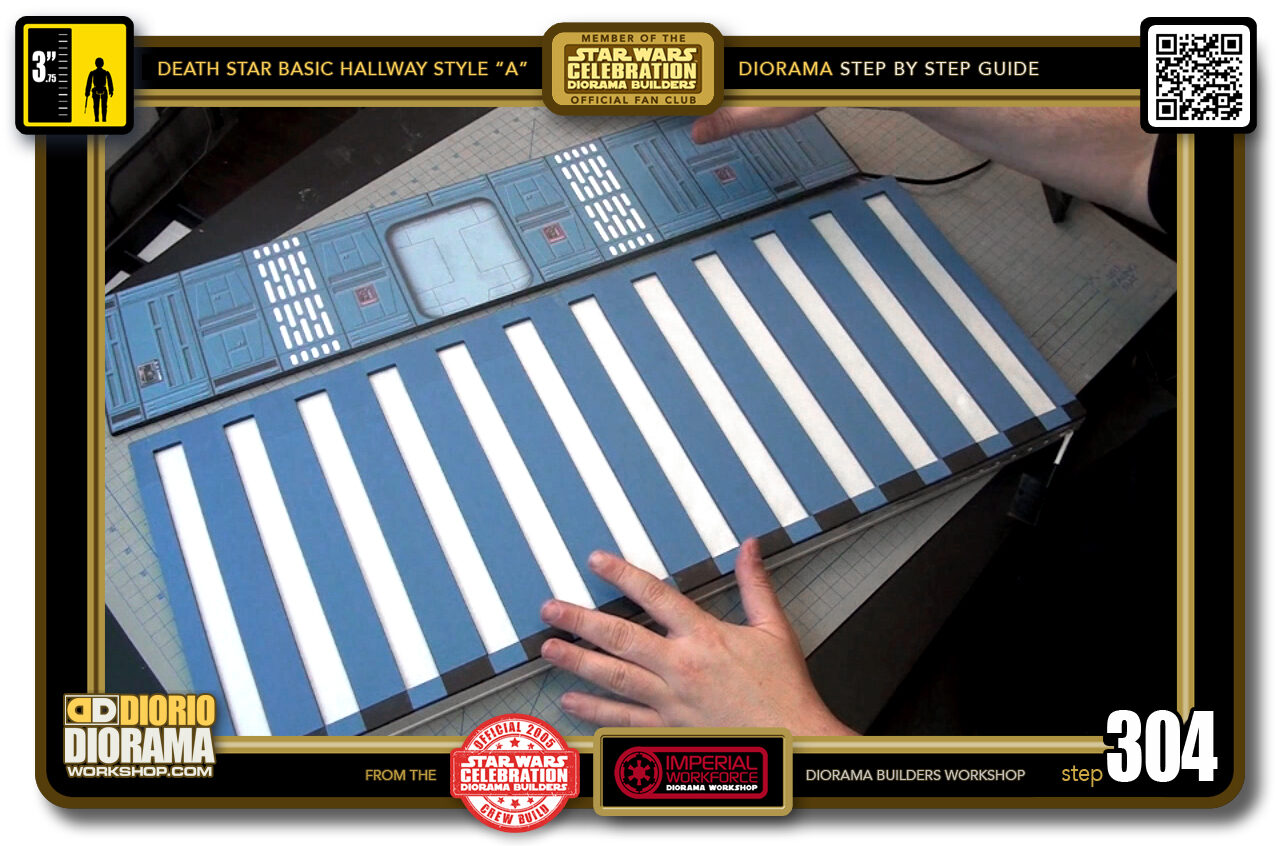
- STEP 304 > It is time to join your wall to your ceiling. I decided to do this because it is a little more complex than the floor and you want to make sure the ceiling is just perfect.
-
-
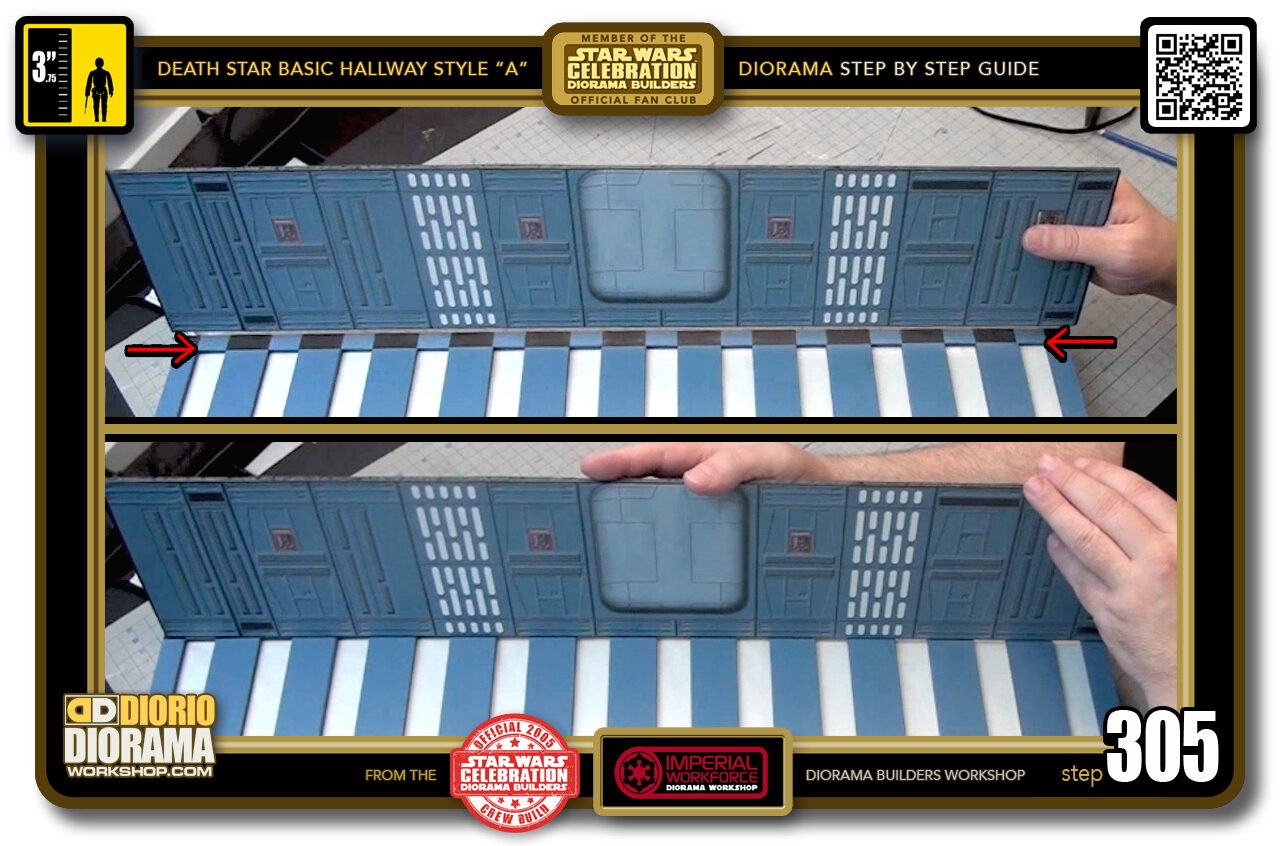
STEP 305 > Now the most important thing to remember is you are attaching to the CEILING even though it is lying flat on the table and your mind wants to think it's the floor. This means that your wall must be GLUEP UPSIDE DOWN !!!
Now the other important thing is that your wall will be aligned and glued along the ends of your white "C2" holes. See the red arrows in the top box. The rear, or back of the wall (NOT the FRONT) is flush with where the "C2" white light panels end (bottom box).
-
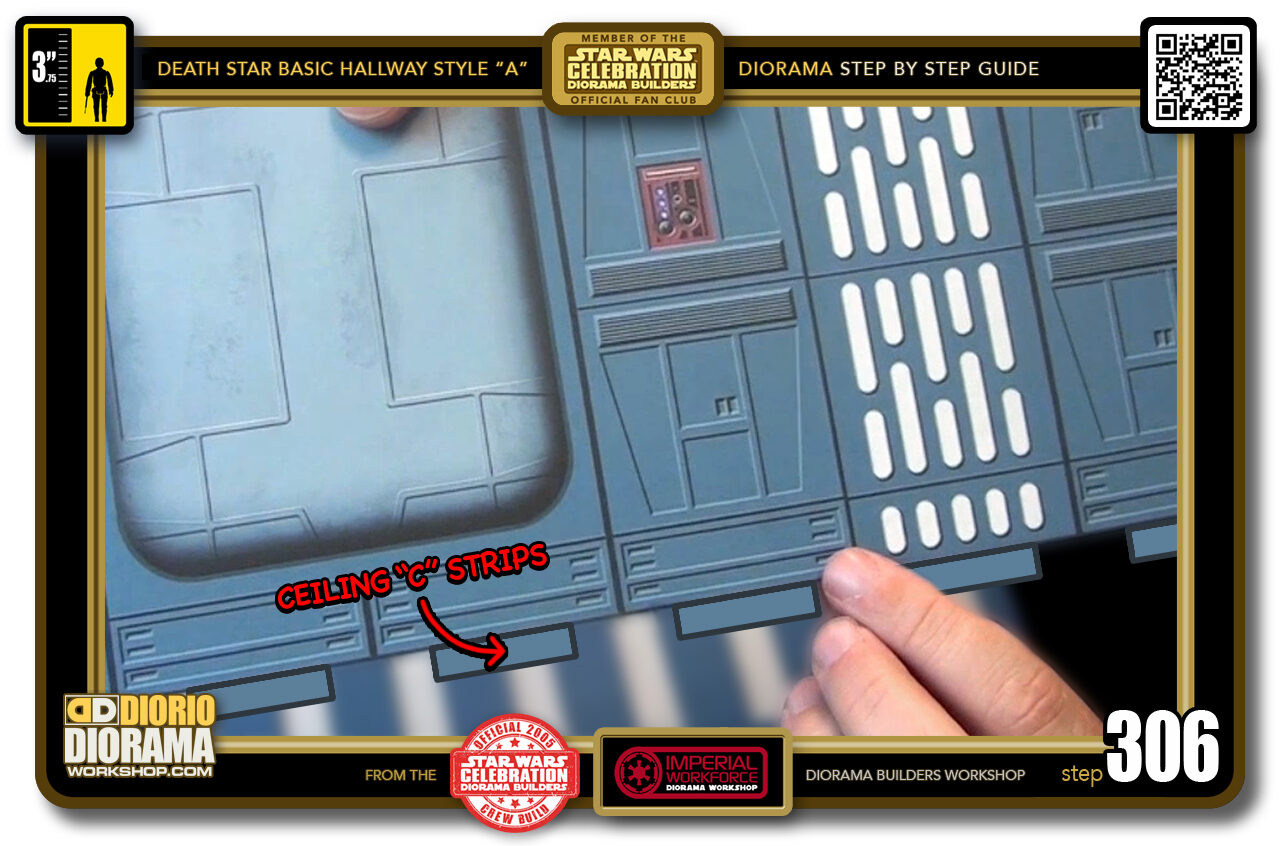
- STEP 306 > Also the "C3" beams fall right in the middle of your wall panels. Just look at the 2 little embossed details on each panels top sides, the beams should match up with the start and end of these details.
-
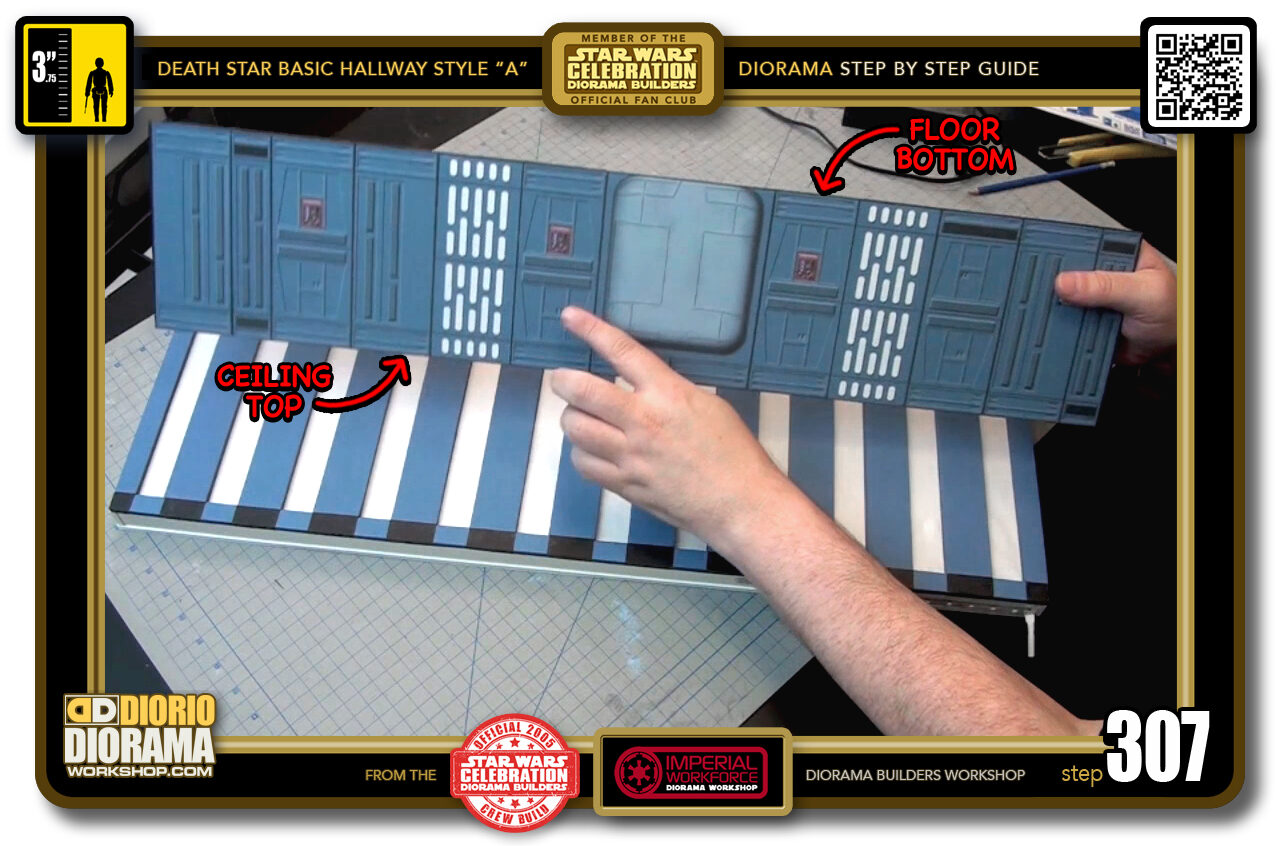
- STEP 307 > Again it is MOST IMPORTANT that your wall is flipped correctly - you want the FLOOR at the TOP and the CEILING at the BOTTOM.
-
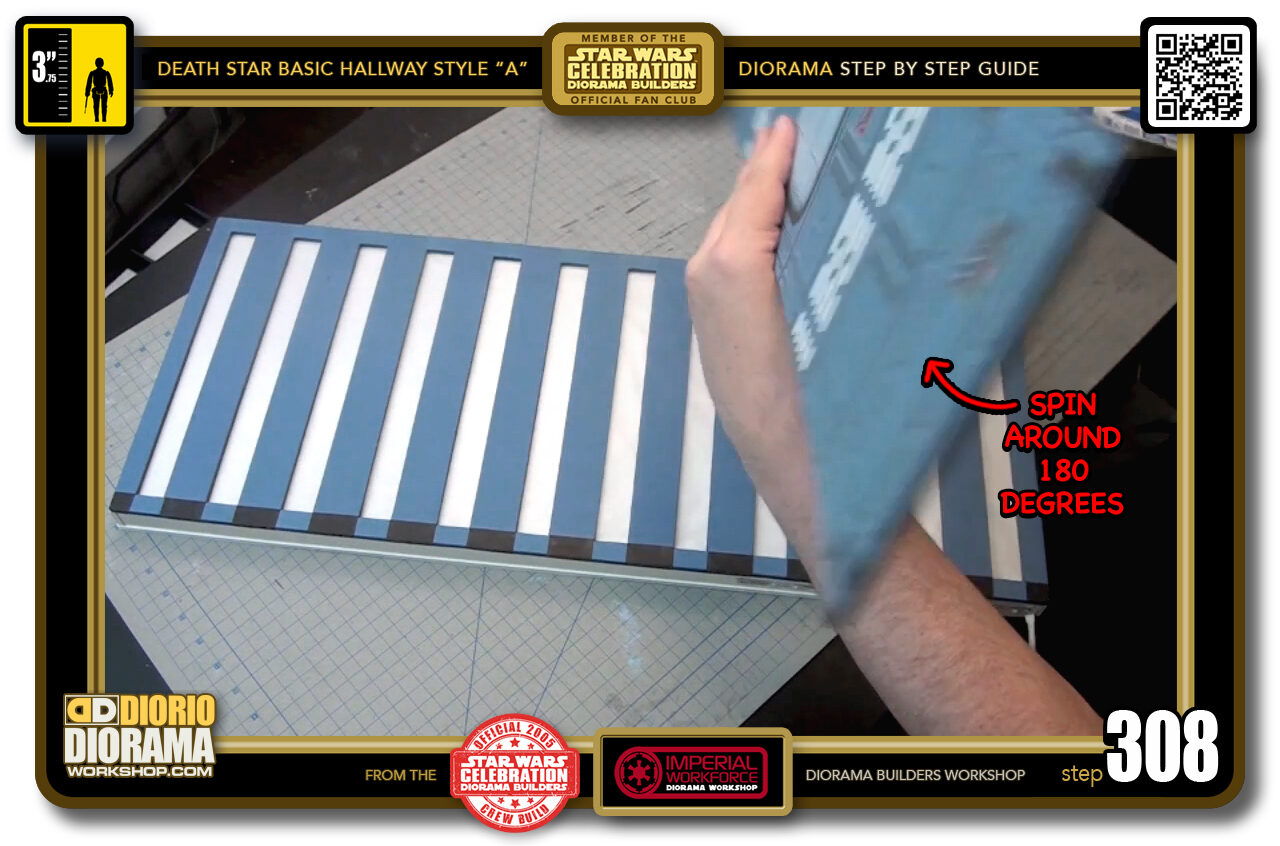
- STEP 308 > When your wall is upside down, rotate it 180 degrees...
-
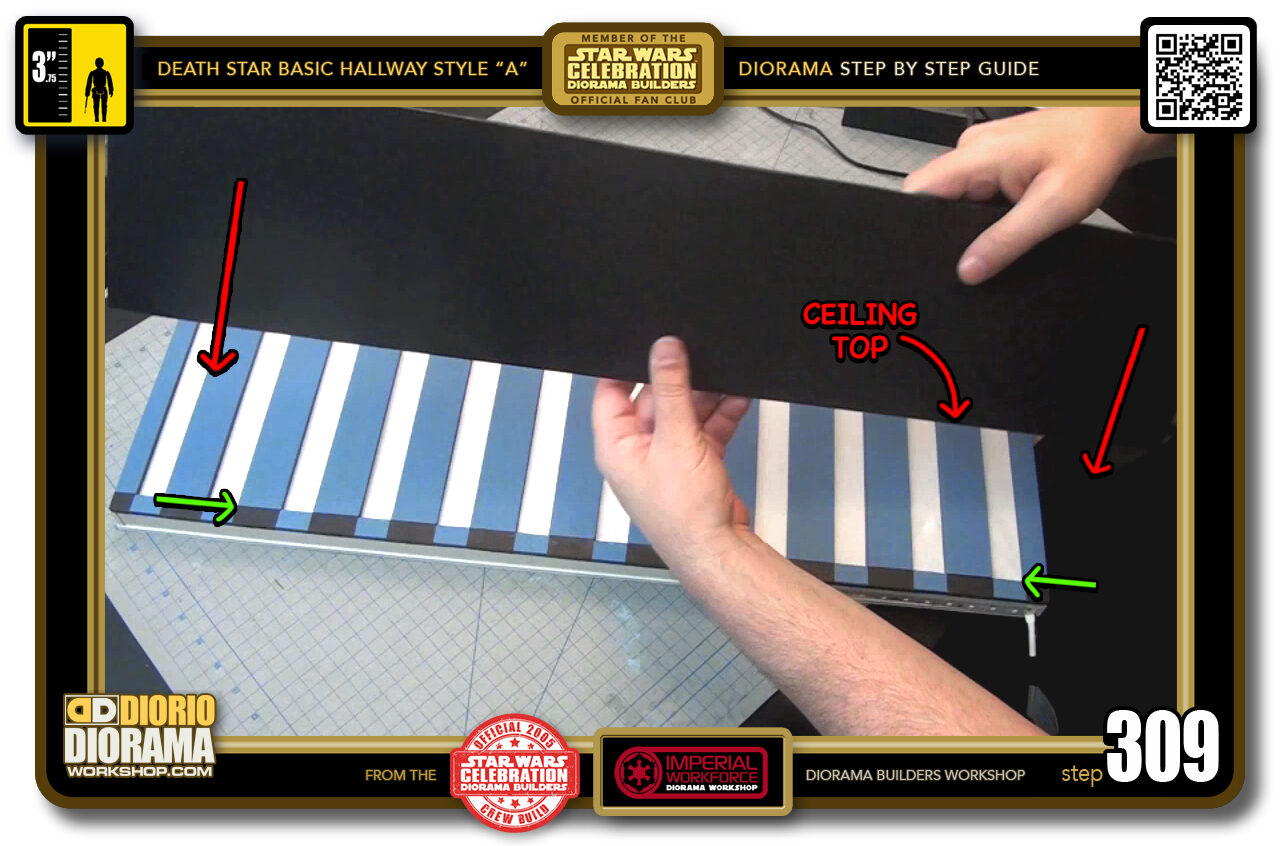
- STEP 309 > ... So that the back now faces you. When you glue it, You will lower it towards the ceiling and the rear of the wall (side with no decals) will lay FLUSH with where the "C3" main beam decal skins stop (green arrows).
-
-
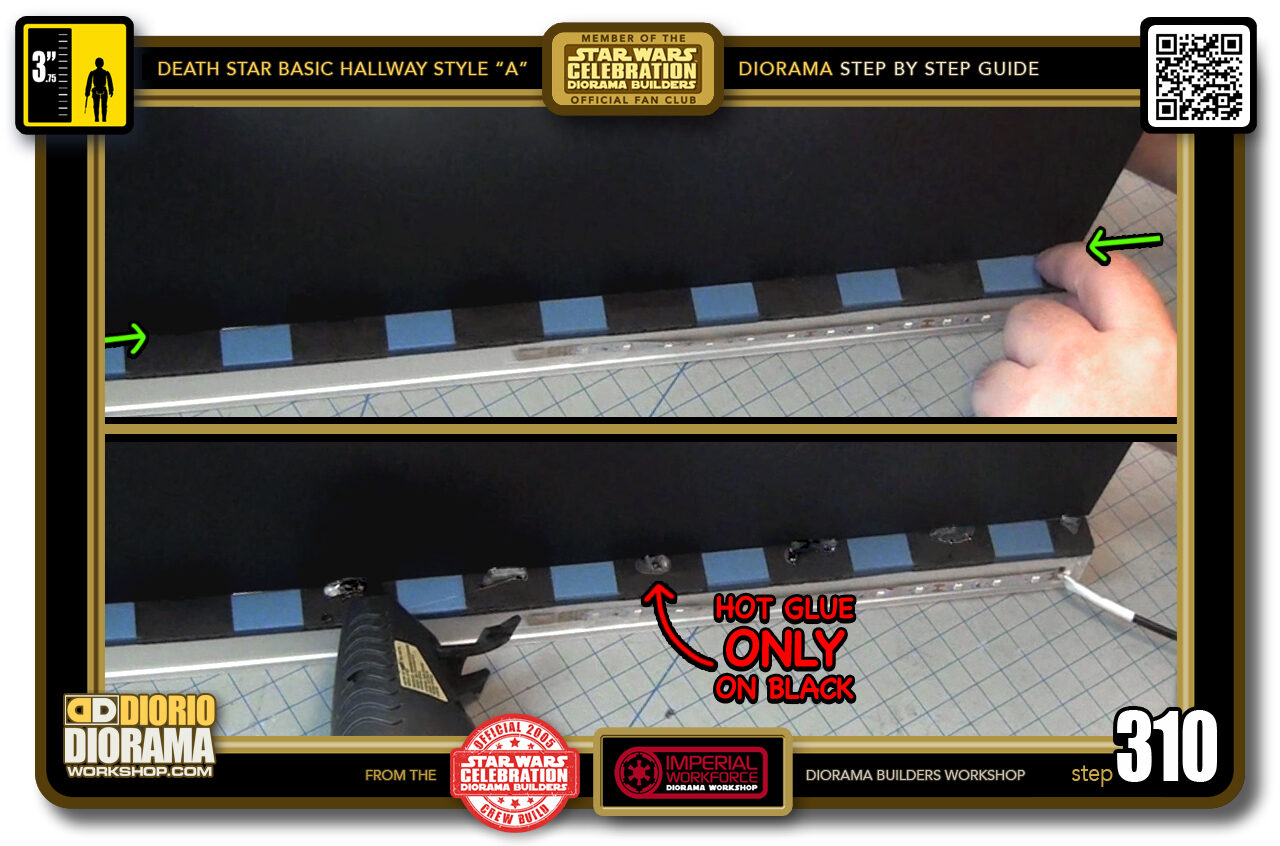
STEP 310 > Keep adjusting the position until it looks like the top box image. It lines up with the green arrows and if you look closely, you can see a little of the "C2" light strip holes.
When you are happy that is is perfectly flush press down on the wall to make sure it doesn't move out of alignment and put some globs of hot glue where the ceiling meets the floor but ONLY ON THE BLACK - NEVER ON THE BLUE DECALS.
IMPORTANT FACT : If you glue on the blue decals, because it is so hot it will drip, and flow down the "C2" edge onto the tracing paper like a water fall and by the time your hot glue cools down, leave a long mess on your light beam and ruin all of your hard work. So HOT GLUE THE BLACK AREA ONLY !!!
-
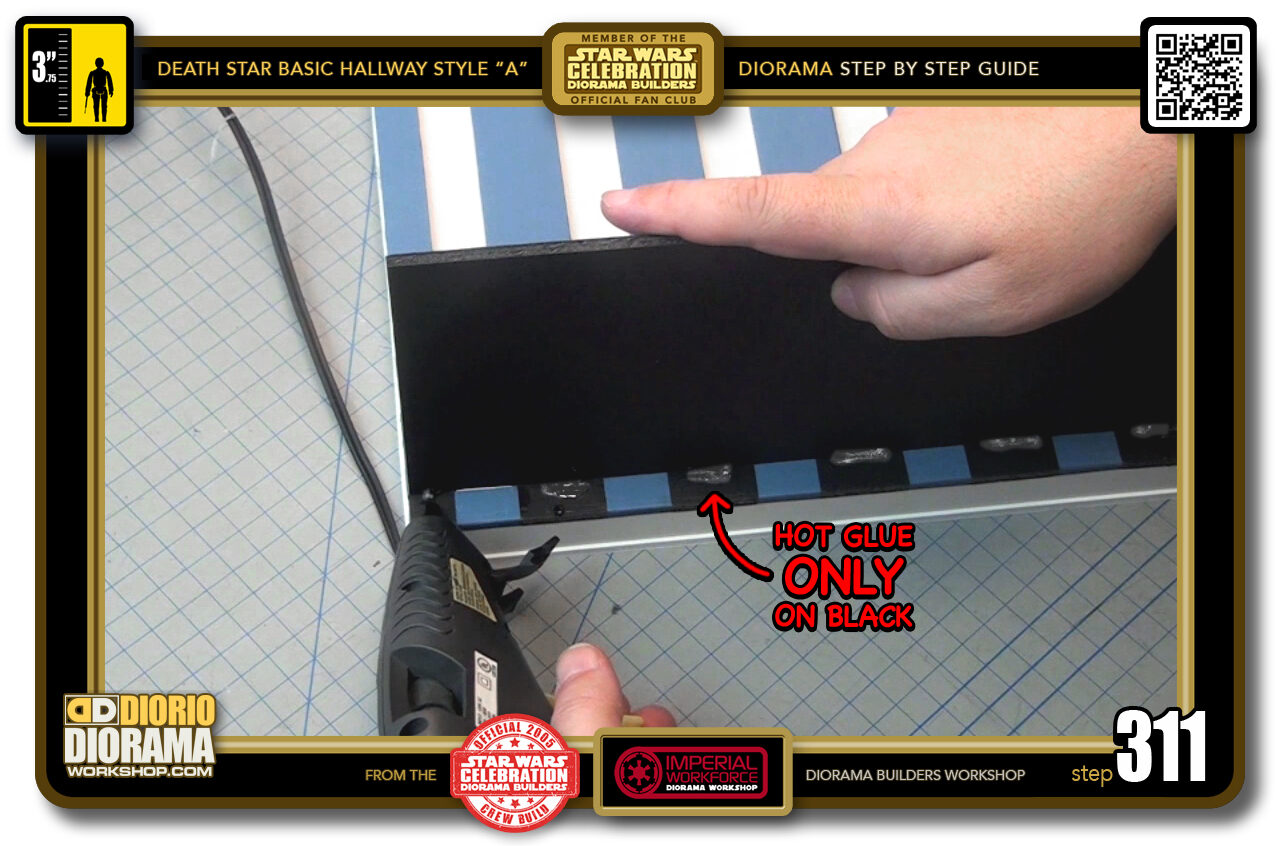
- STEP 311 > After the globs on the right side have cooled down and you know that that side of the wall is secure, you can move on to the left side. Make sure you are still aligned and FLUSH with the "C2" ends. Press down on the wall top so it doesn't wiggle it's way out of place and put your hot glue globs on the BLACK FOAMCORE ONLY.
-
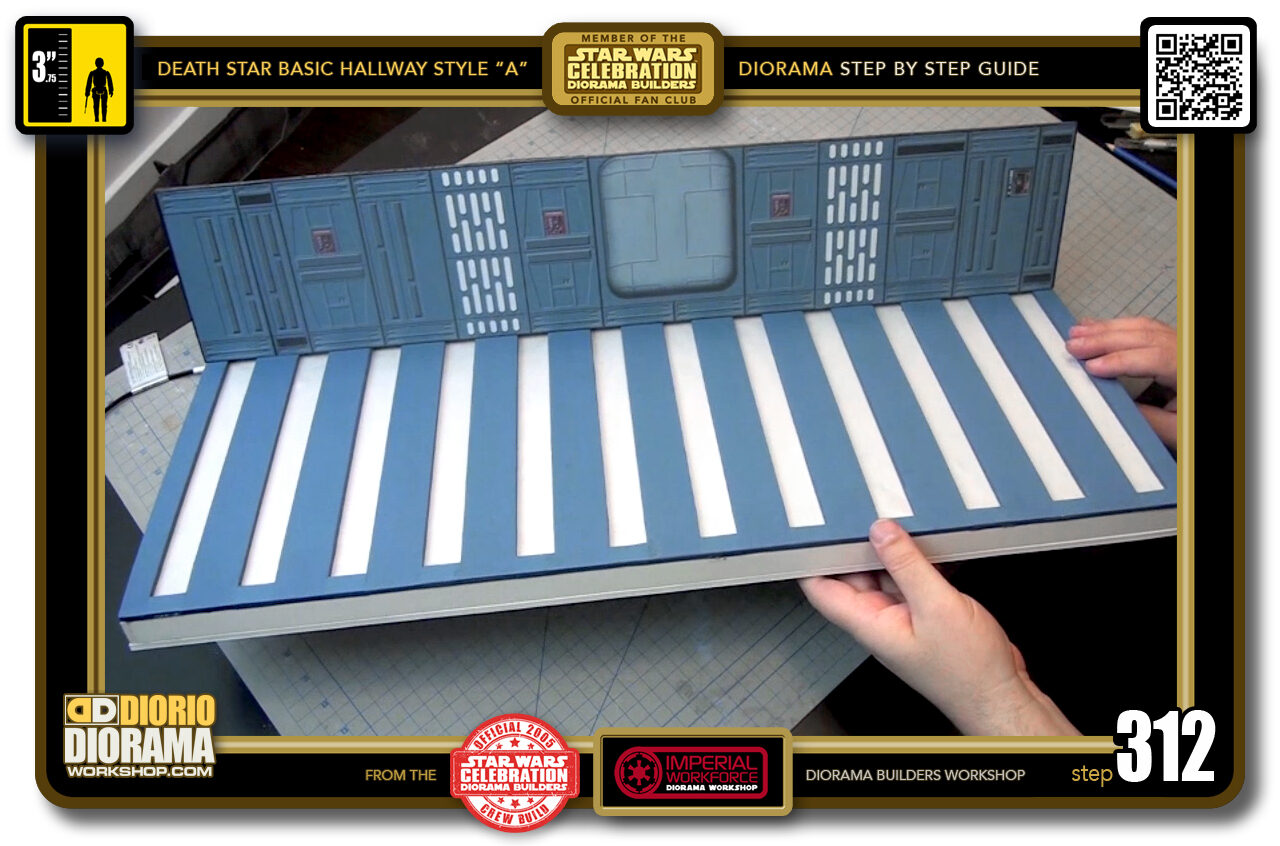
- STEP 312 > After 3-4 minutes, the hot glue should be cool enough for you to consider the top of the wall safely attached to the ceiling.
-
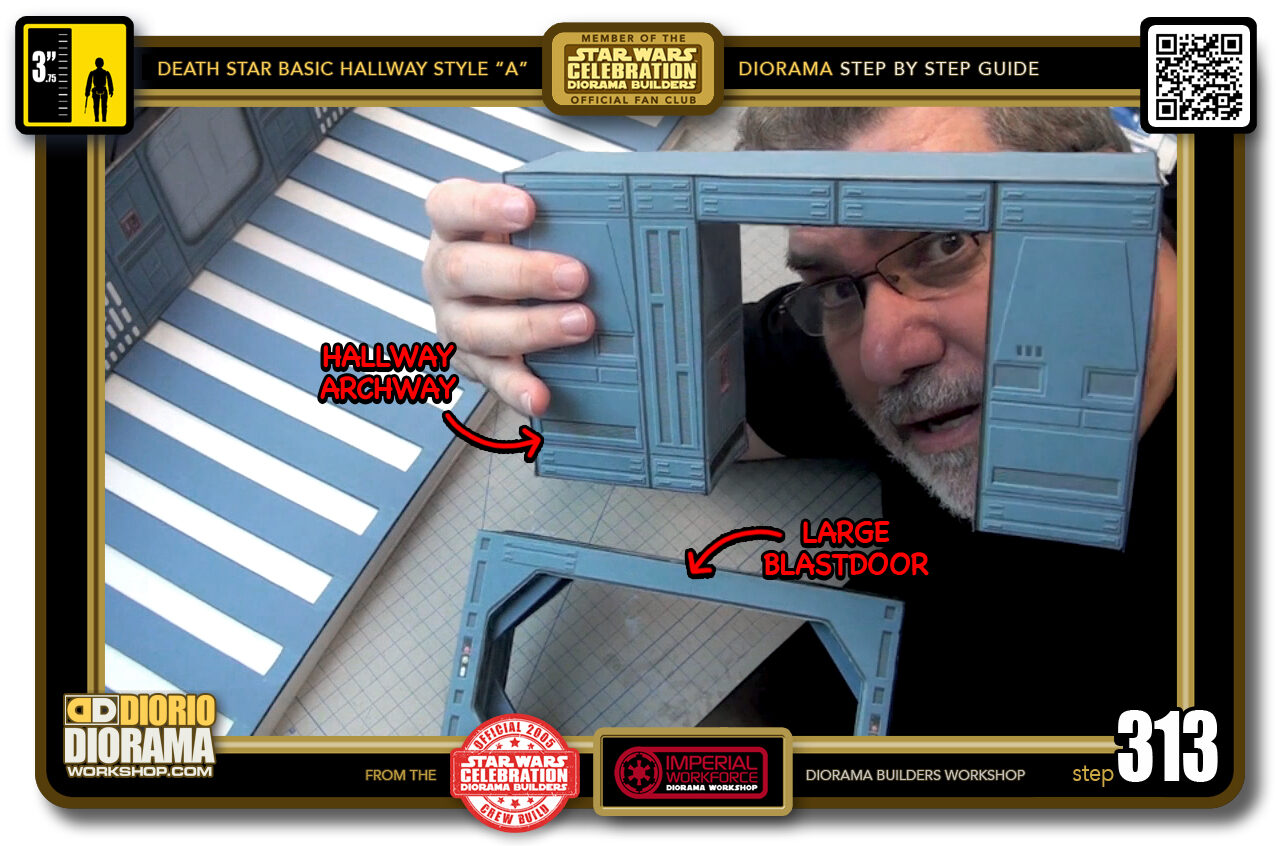
- STEP 313 > Now you need to select from the Death Star Accessory builds which options you want to use as the right side support. Full instructions for both the Large Blastdoors and Hallway Archway are available in the Tutorial menu's Speed Index page.
-
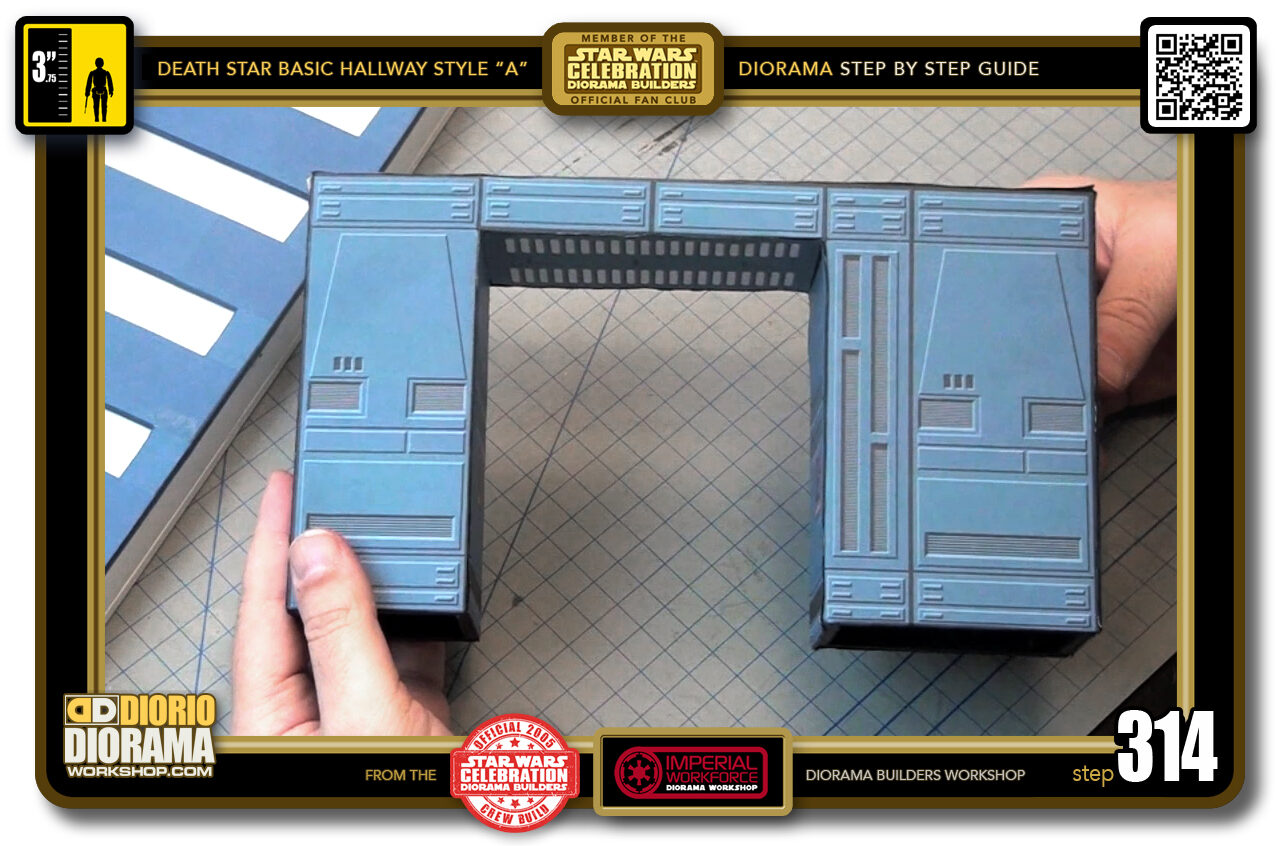
- STEP 314 > I am following the blueprints design and using the Hallway Archway accessory build.
-
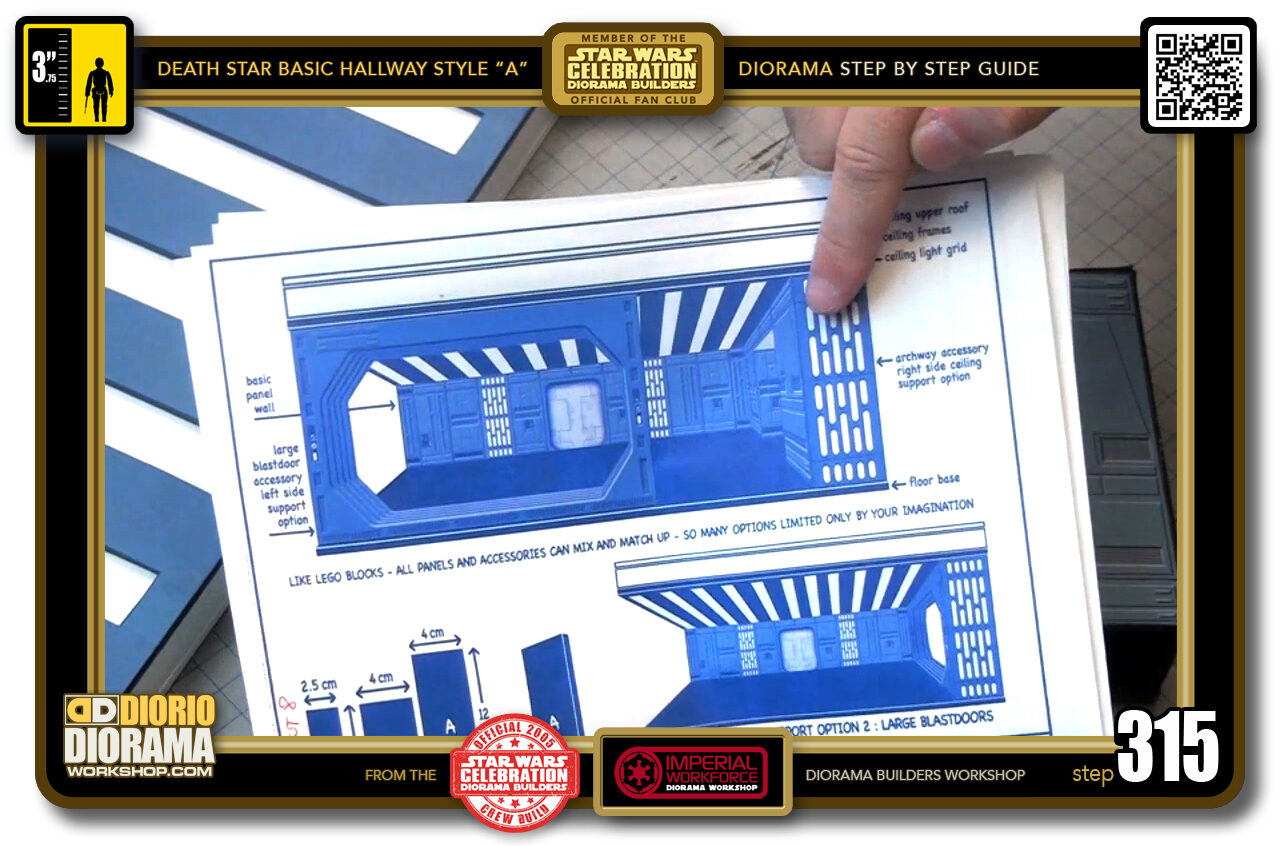
- STEP 315 > Your choice of support goes on the right side against the rear wall and not only makes your diorama look cool but will add enough strength to your hallway that it will allow you to stack 2-3 or more hallways on top of each other to expand your simple hallway diorama into a MEGA Death Star diorama 🙂
-
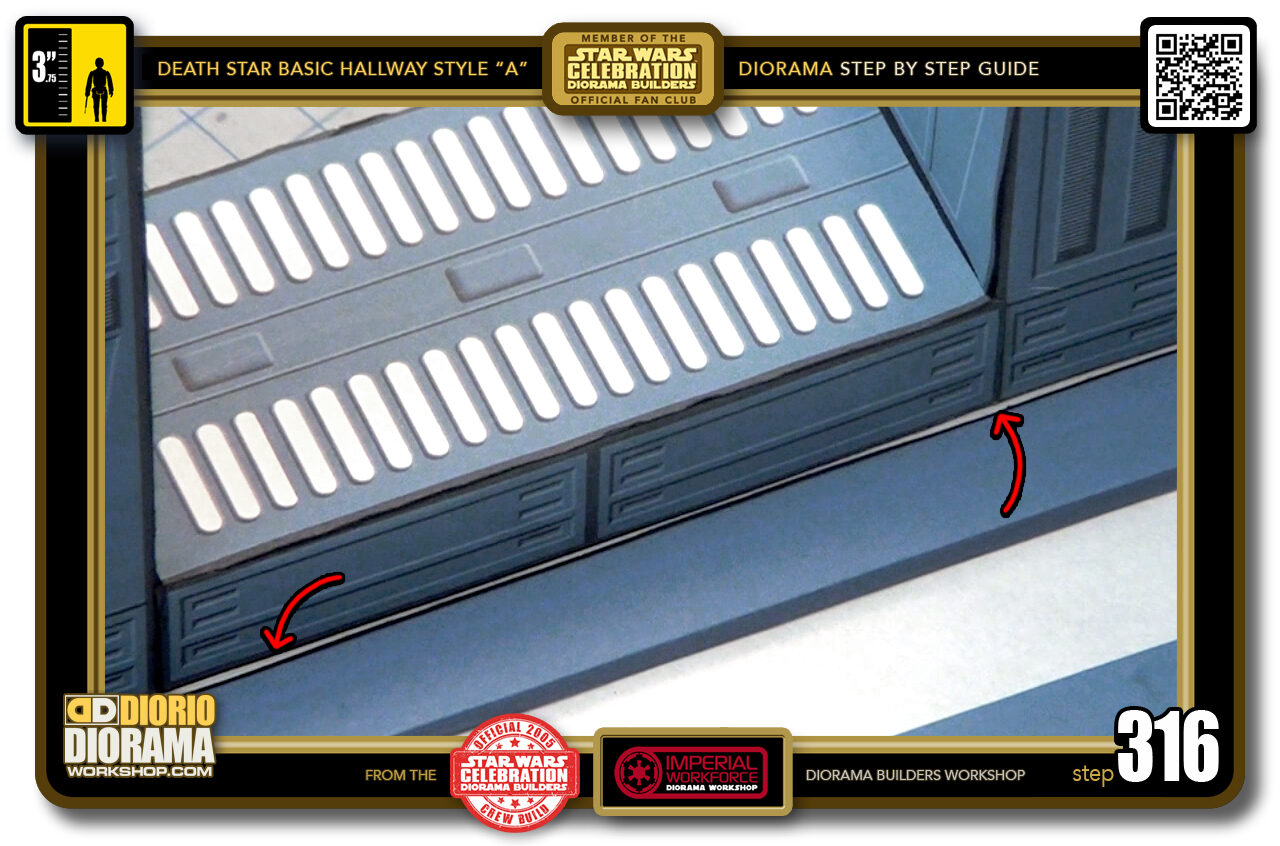
- STEP 316 > The top of your selection will go against the ceiling like this. If you happen to see some white peeking out from it's ceiling decal (red arrows) we need to trim that before glueing.
-
-
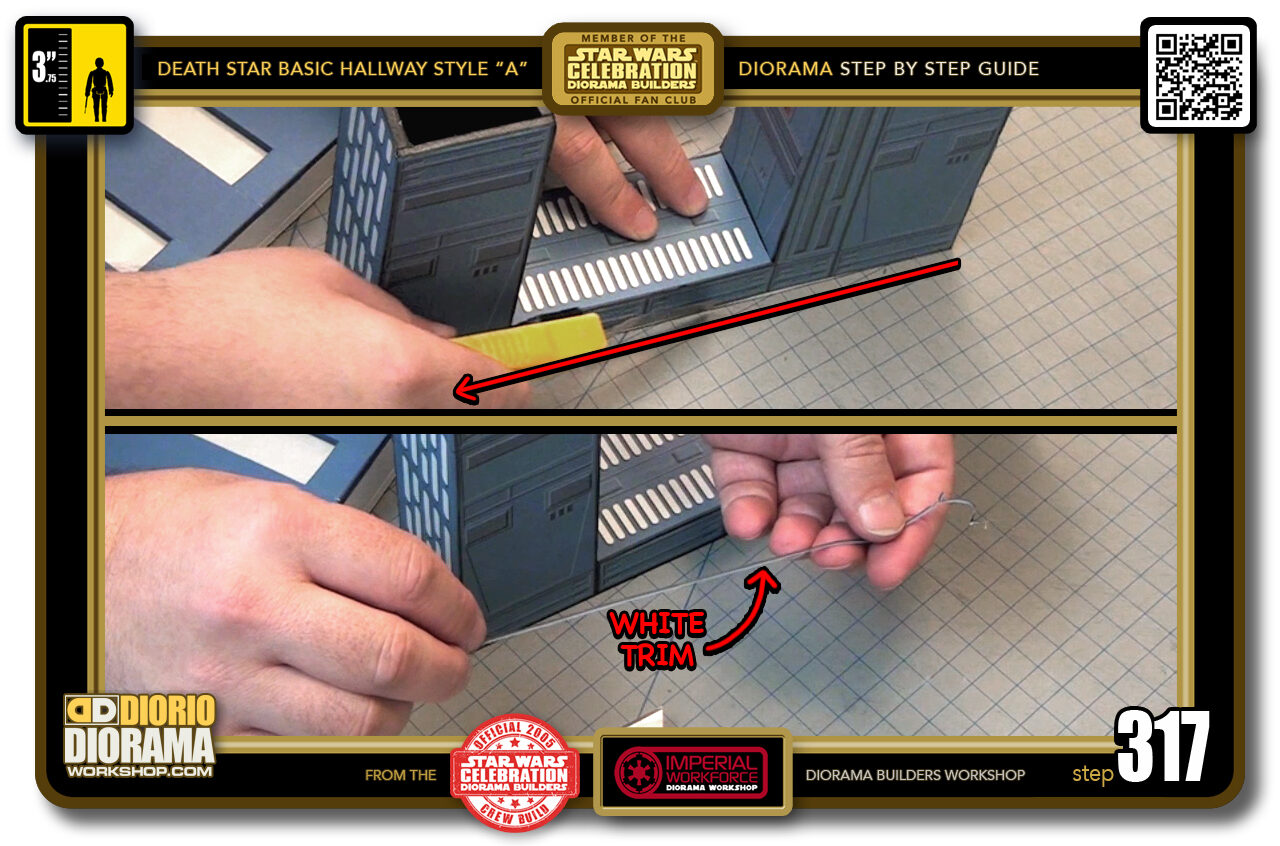
STEP 317 > Just extend your X-Acto knife blade to it's maximum length and gently press the side of the blade against the side of your accessory. Keep the blade low to the ground. Now SLOWLY pull back and trim the excess decal (top box). All you need to remove is the tiniest excess as you see in the bottom box.
FRANK TIP : When trimming excess like this - USE A NEW BLADE - you don't want to ruin the top like I did - see the next photo Step 318.
-
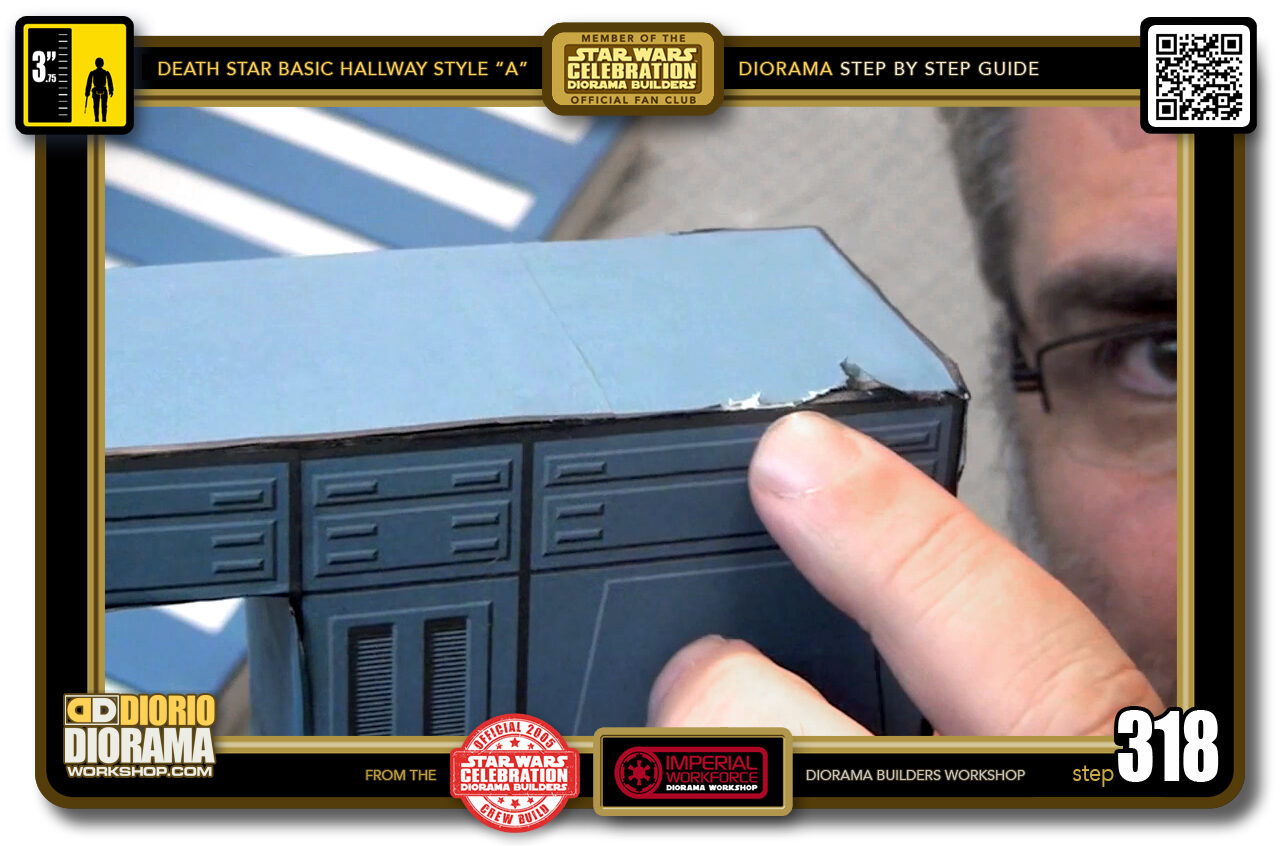
- STEP 318 > This is what happens if you use a OLD - DULL BLADE to trim. NOT GOOD.
-
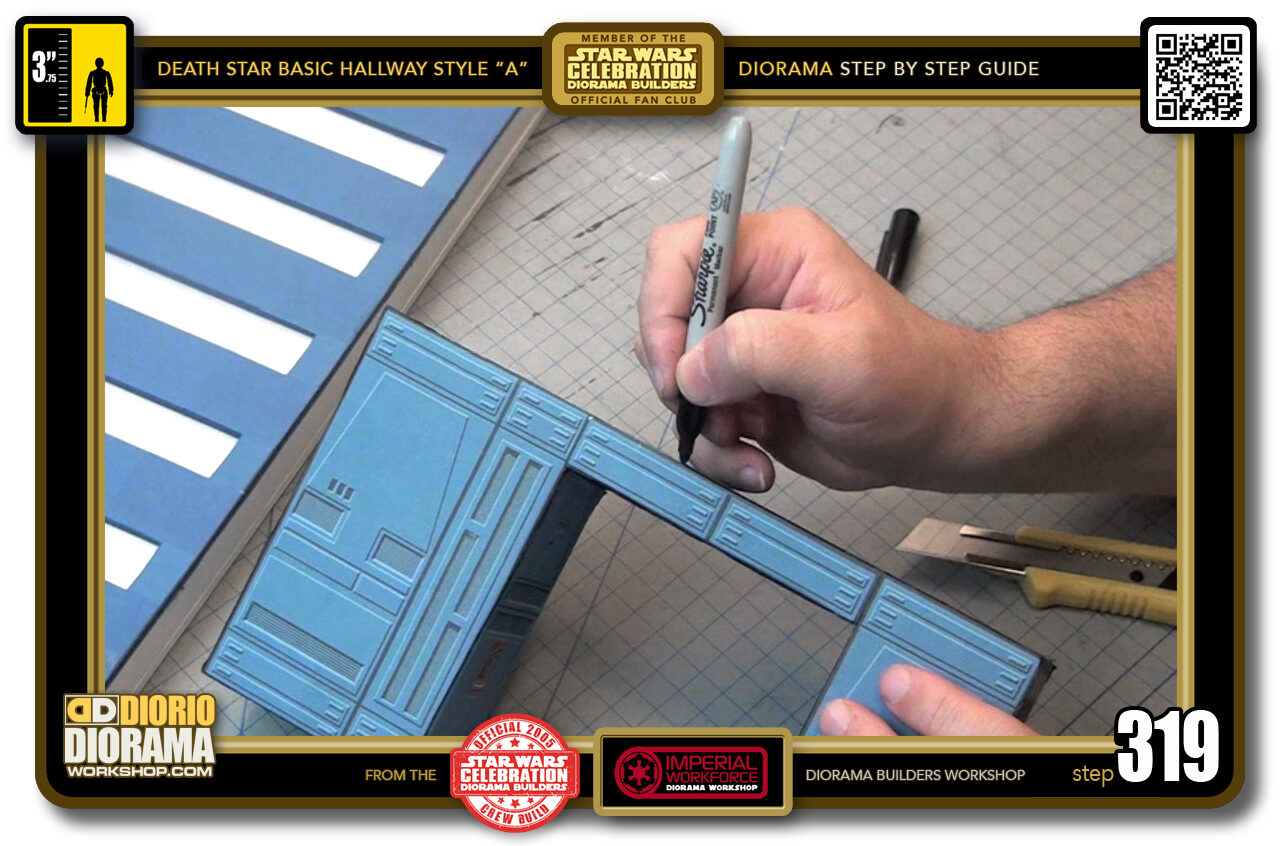
- STEP 319 > Since we trimmed off some decal, we exposed the white thickness of the paper again, so we will need to color the white black with your sharpie pen. Carefull NOT to go onto the actual front decal.
-
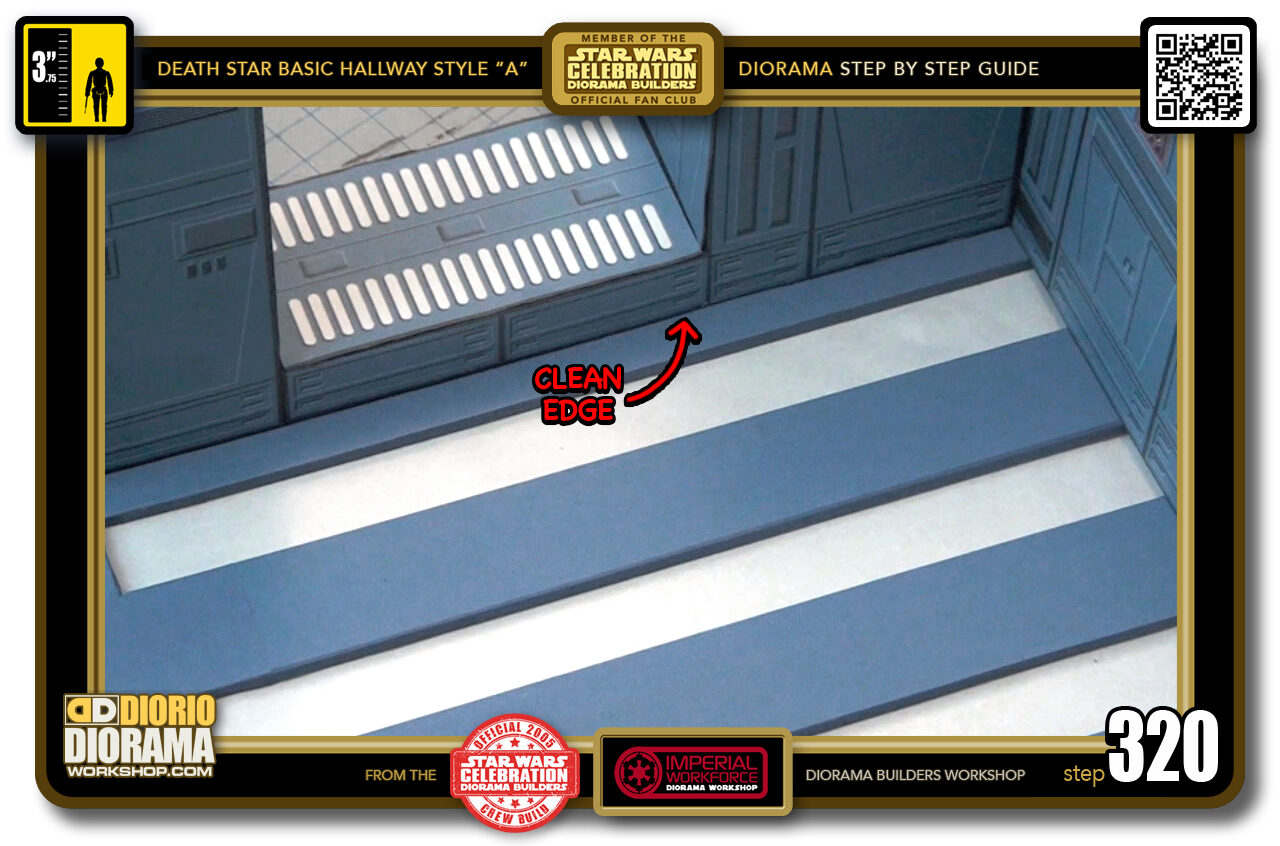
- STEP 320 > Now when you put your accessory back onto the ceiling, notice the HUGE difference no white line makes. We are ready to attach.

.
Did you already build this Diorama ? At home or at our Star Wars Celebration Diorama Builders workshop ? Would you like to show it in the site’s GALLERY VISITORS DIORAMAS section, YES ? That is Awesome !!! You can find out all the details on how to email me your photos on the VISITORS SUBMISSIONS INFO page … When I get your photos, I will create your very own page just like this one. You may not realize it but work does inspire others to join in the fun of making Action Figure Dioramas.
.
NOT FOR RESALE ALL Decals, tutorials and artwork are ©FrankDiorio (dioramaworkshop.com) and offered FOR FREE to the fans – that would be you ? so you can build and display my diorama designs in your very own home. I realize I cannot control what one does with my graphics once I place them on the web, I can only ask you as one fan to another, please respect the artist and do not be that jerk who uses my designs and tutorials to build a copy of my work only to sell it on EBAY or trade/sale groups and forums. Thank You. Frank.
.
.
If you have a facebook account, why not join the Official Diorama Builders Fan Club today, simply click the logo link below.
 .
.
Catch up with fellow visitors and exchange stories, read cool interviews with the crew, exchange photos, fun surprises and grab some FAN ONLY merchandise next year at actual future conventions ?
.
©2018 Frank Diorio DioramaWorkshop.Com
.
IF YOU LIKE WHAT YOU SEE, PLEASE SHARE WITH YOUR FRIENDS
USING THE SOCIAL MEDIA BUTTONS BELOW