


-
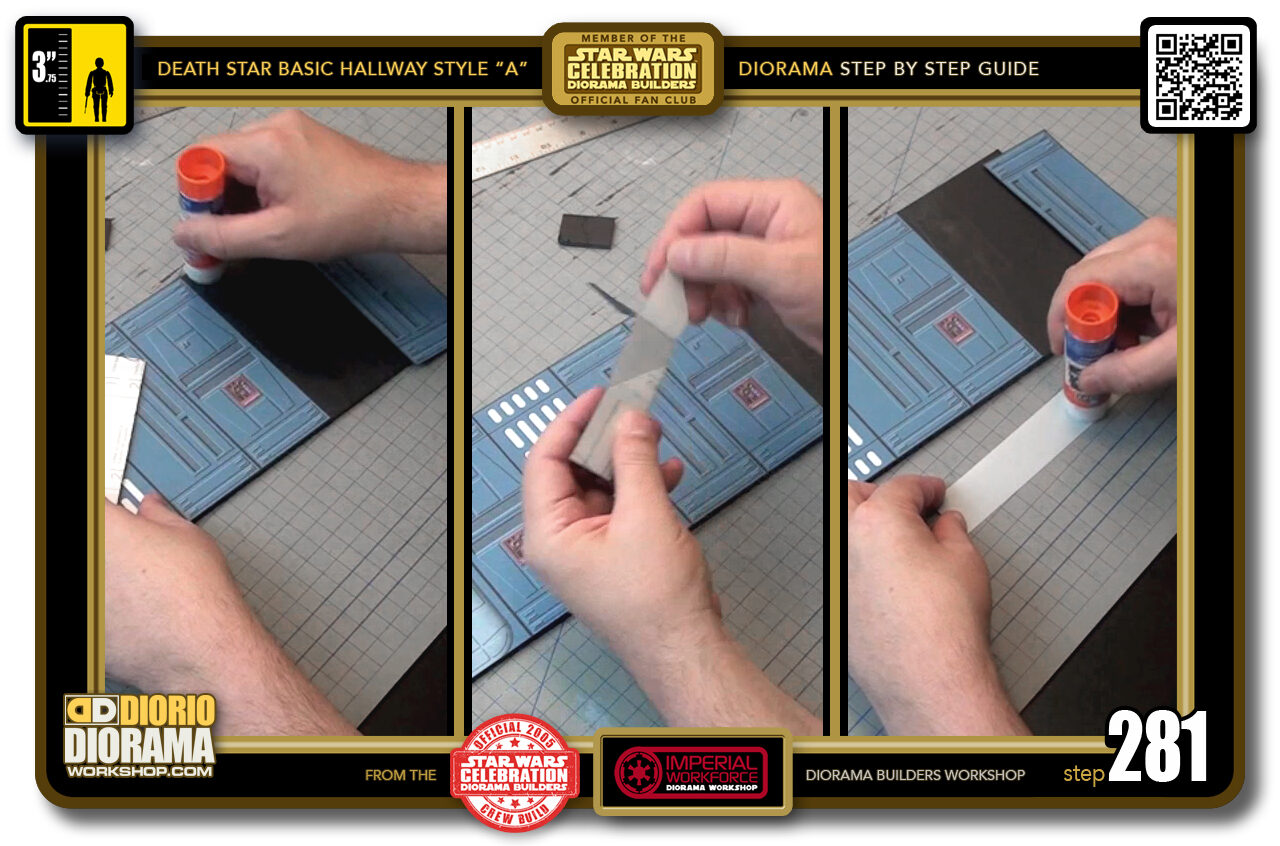
- STEP 281 > Time to insert the half panel. Start with gluestick on the foamcore wall (left box) Peel your decal and add some gluestick to the back to allow better positioning and alignment (right box).
-
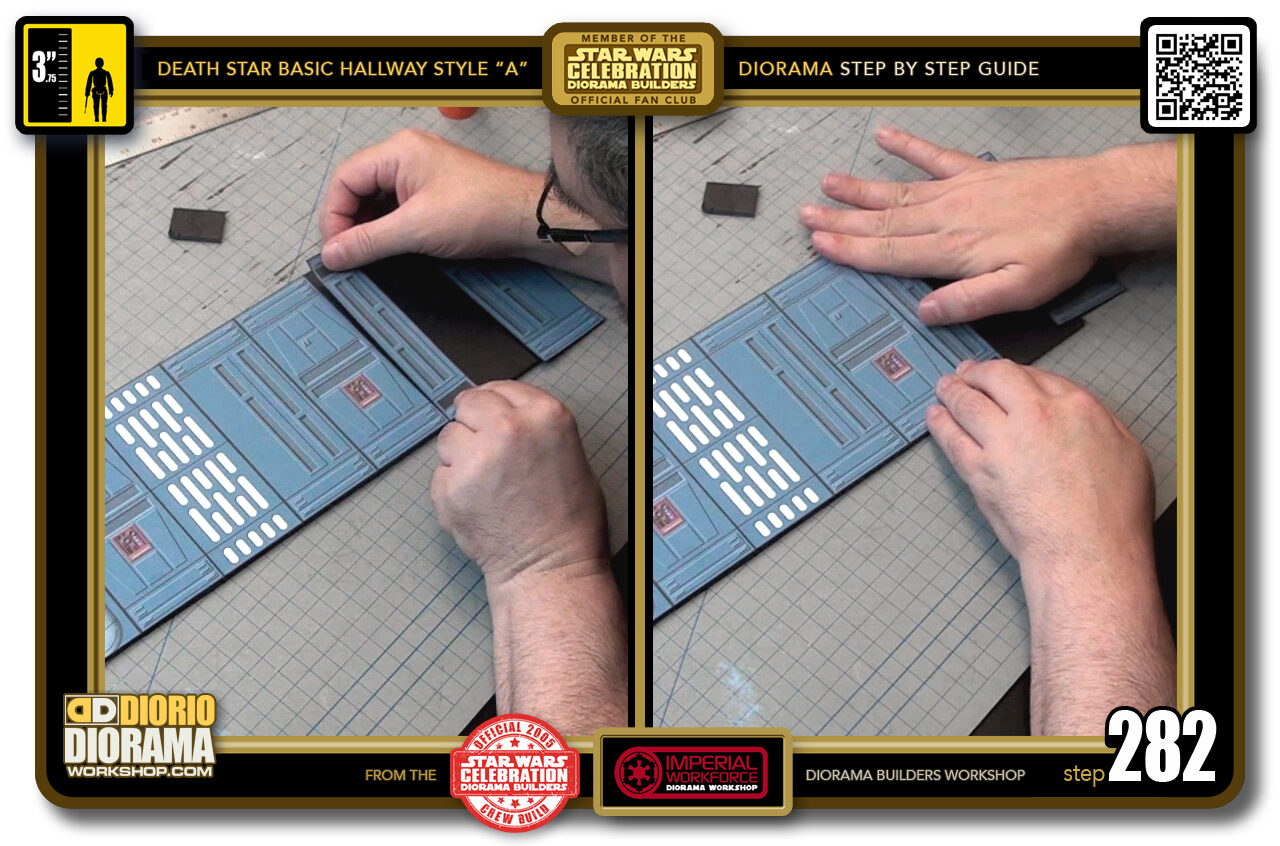
- STEP 282 > First align the bottom corners and press down slightly so you can then spin the top part to align it with the side of the panel on it's left (left box). When you are happy with the position, press down to make full contact with the foamcore surface (right box).
-

- STEP 283 > The last panel doesn't really matter what design it is since it will be hidden by your right support accessory... either the large blastdoor or hallway archway. Apply your gluestick, peel the decal sheet and apply some more gluestick to it's back.
-
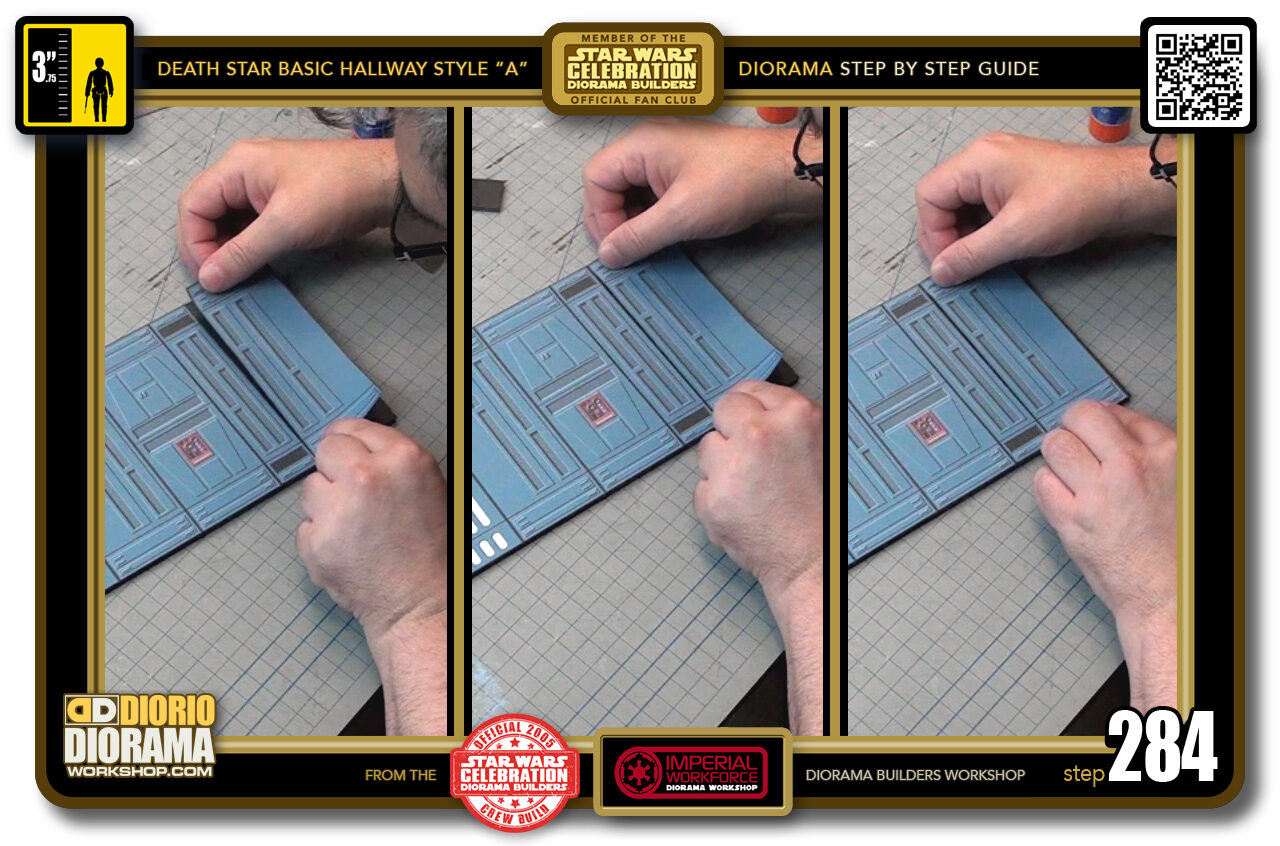
- STEP 284 > Again, align the bottom corner flush with the previous panel and floor edge (left box) swing it against the top left corner, making sure both decal details match up (centre box) then lower the right side of the decal onto the foamcore surface (right box).
-
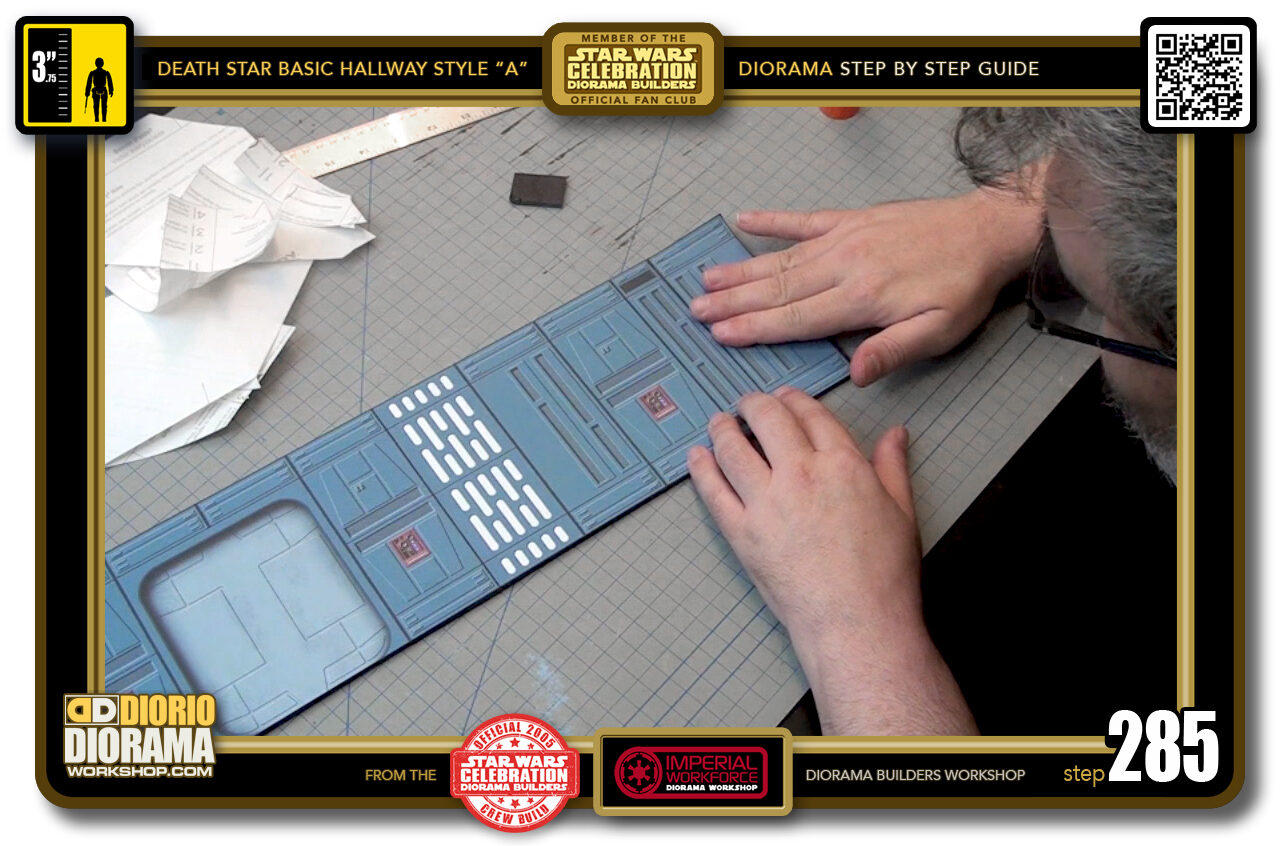
- STEP 285 > Once you made full contact you can press down harder with your hand to make sure it is super secure and going nowhere.
-
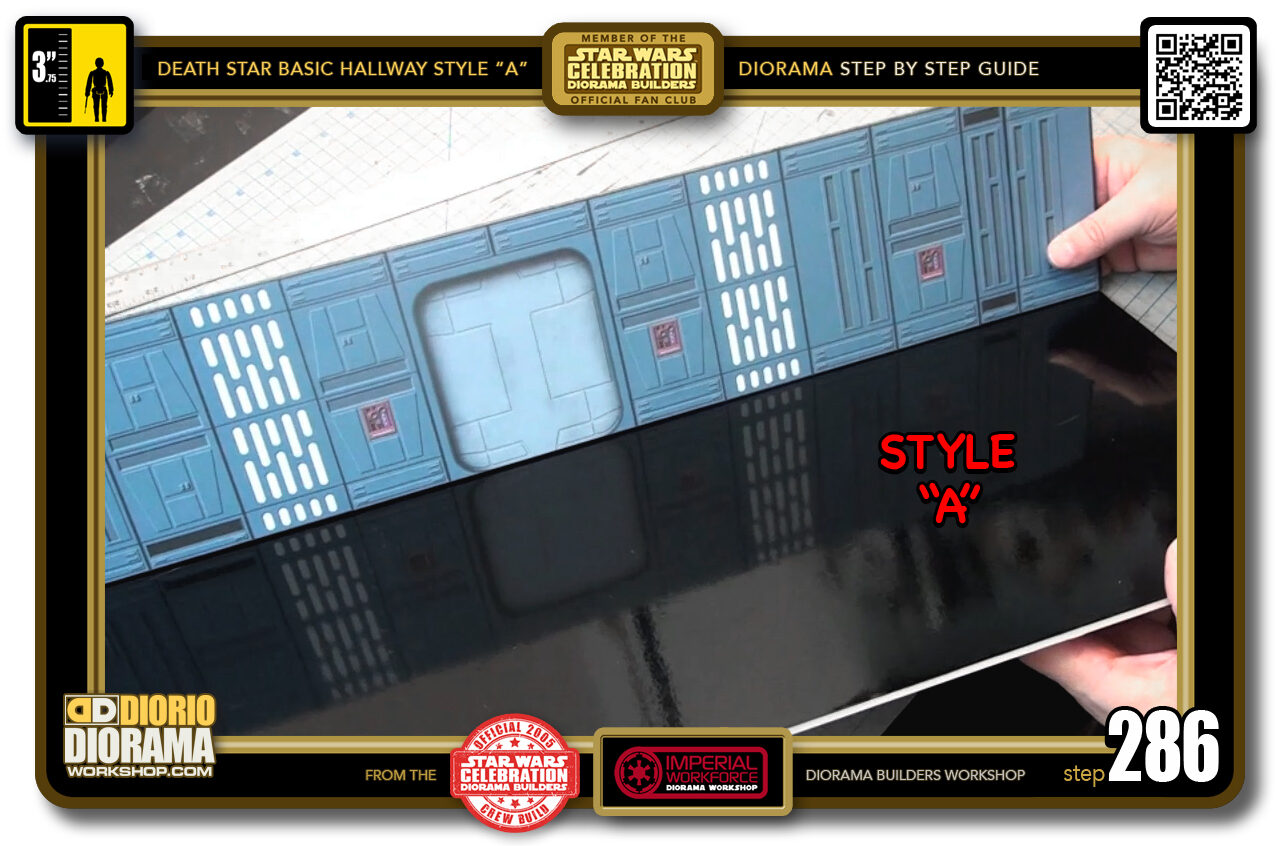
- STEP 286 > Your rear wall is now complete. This being Style "A" it will be placed like this 1.5 cm from the back of the floor piece.
-
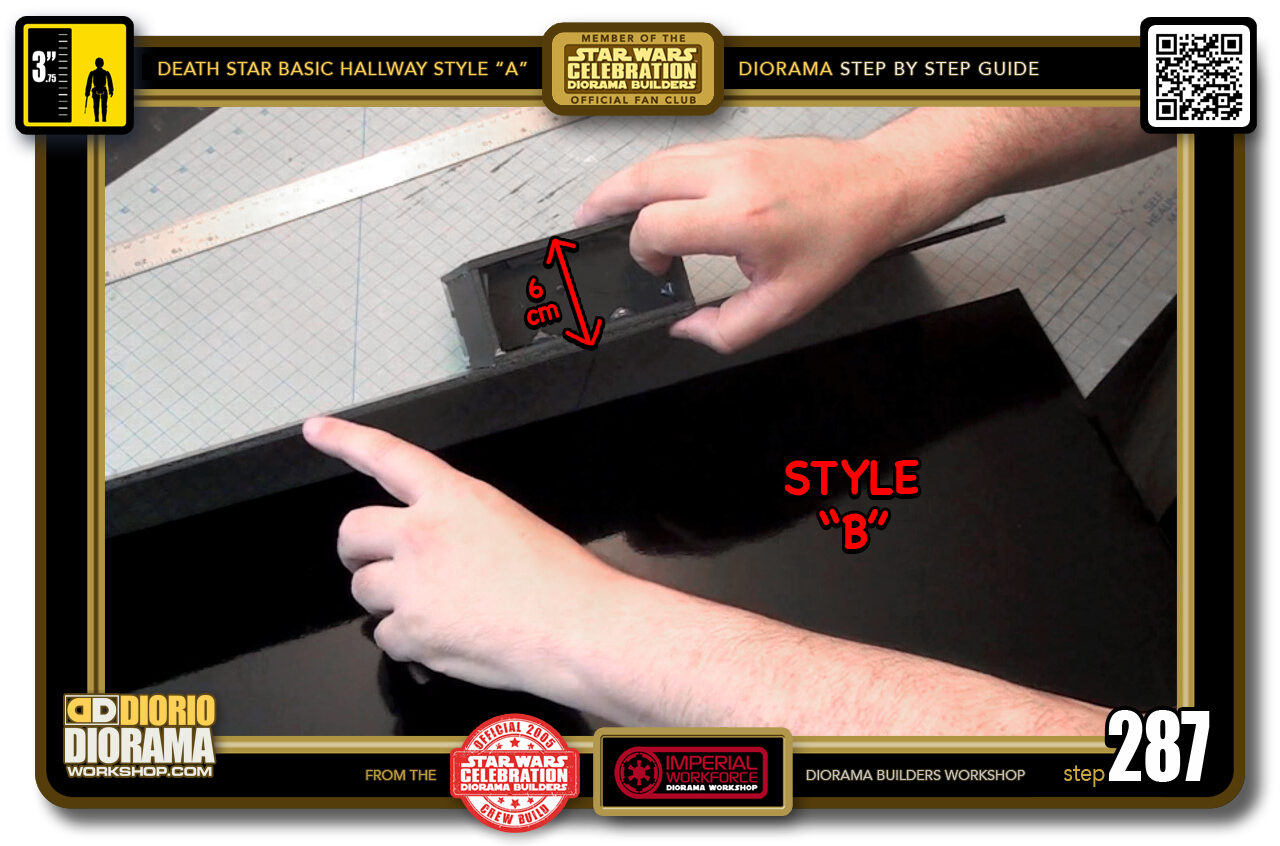
- STEP 287 > Now if you were making a Style "B" hallway, your floor would be 6 cm deeper to accommodate the Basic Door thickness.
-
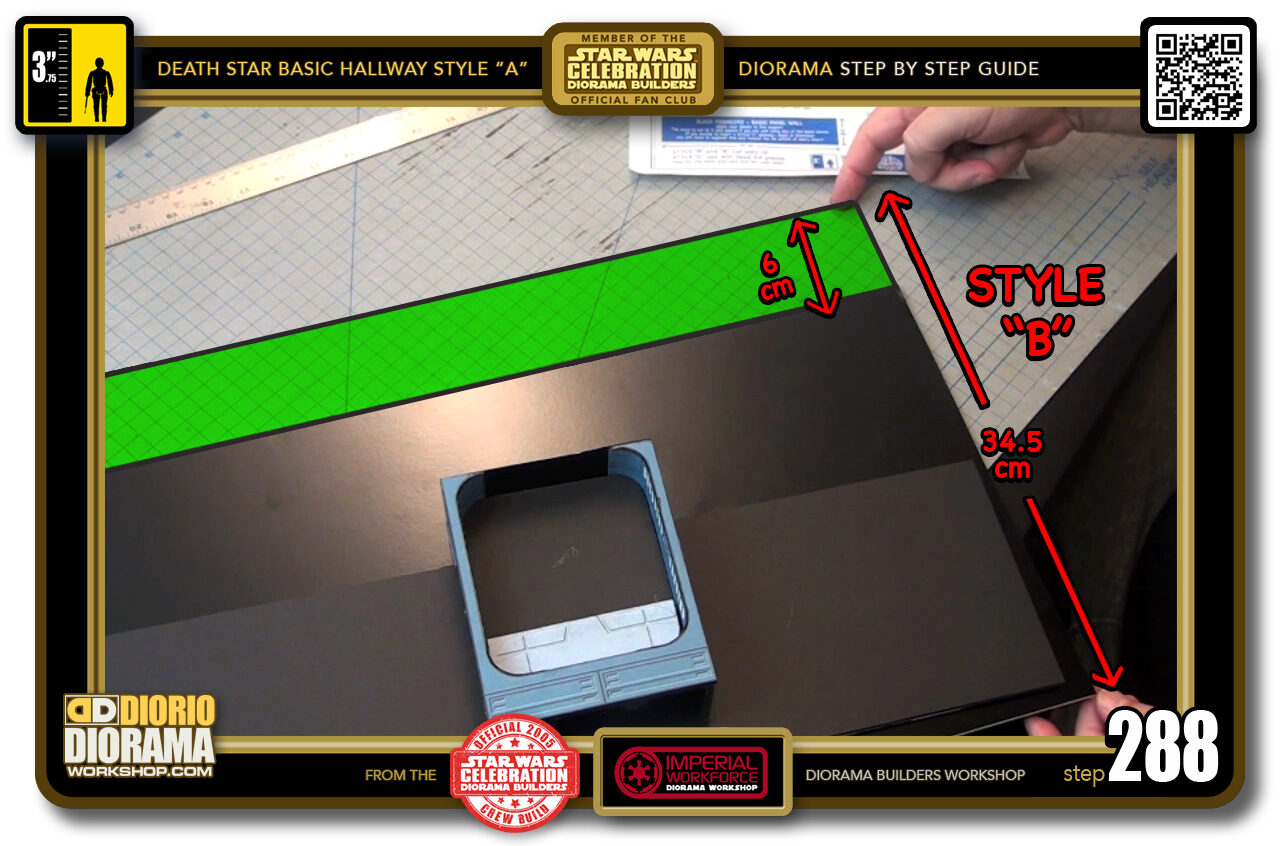
- STEP 288 > Remember Style "B" is with a CLOSED DOOR so you don't see past it meaning your floor would be 34.5 in depth but the same 72 cm wide. Your Basic Door would be placed anywhere in the green zone.
-

-
STEP 289 > The most complex - don't let that term scare you - of the 3 Basic Hallway designs is the Style "C". I say complex because it has 2 layers of hallway : the main hallway (same as Style "A" and "B") but a rear hallway (purple zone) that can be seen by the sides but best of all through the Basic Door itself, adding much more dimension to your scene.
The Style "C" is also the BIGGEST of the Basic Hallways with a full depth of 48 cm which includes the 30 cm main hallway, rear wall which aligns with the front of the basic Door, the extra green zone which is the thickness of the door and includes the 2nd wall aligned to the rear of the Basic Door and your purple zone 12 cm 2nd hallway that has it's own (3rd) wall.
FRANK NOTE : There will be a separate Making Of for the Style "C" hallway to show you how to build the 2nd hall and how it can connect to other hallways you build. See the links in the Tutorial menu Speed Index page.
-
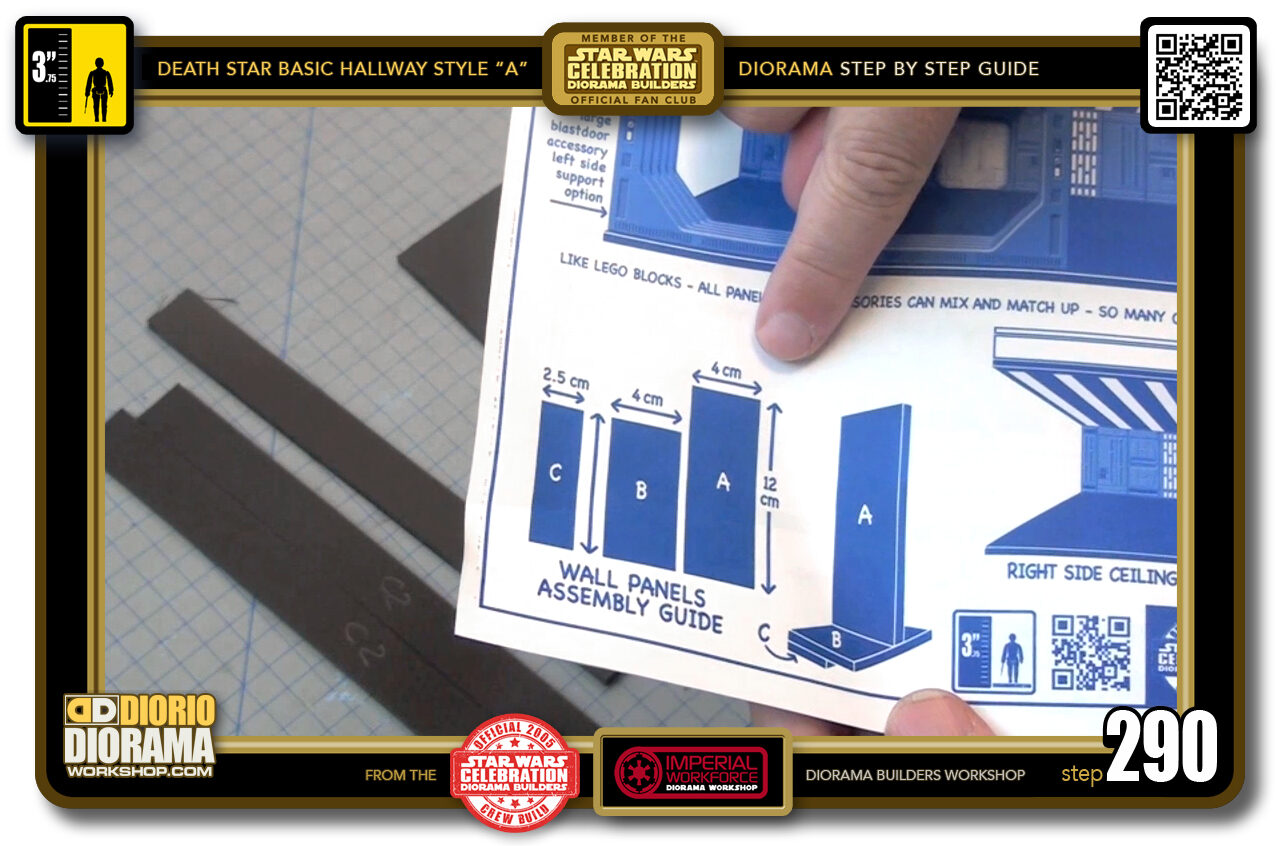
- STEP 290 > To help us align the walls properly, I designed this little contraption guide. Let's make it now, it can be used for future hallways later on as well.
-
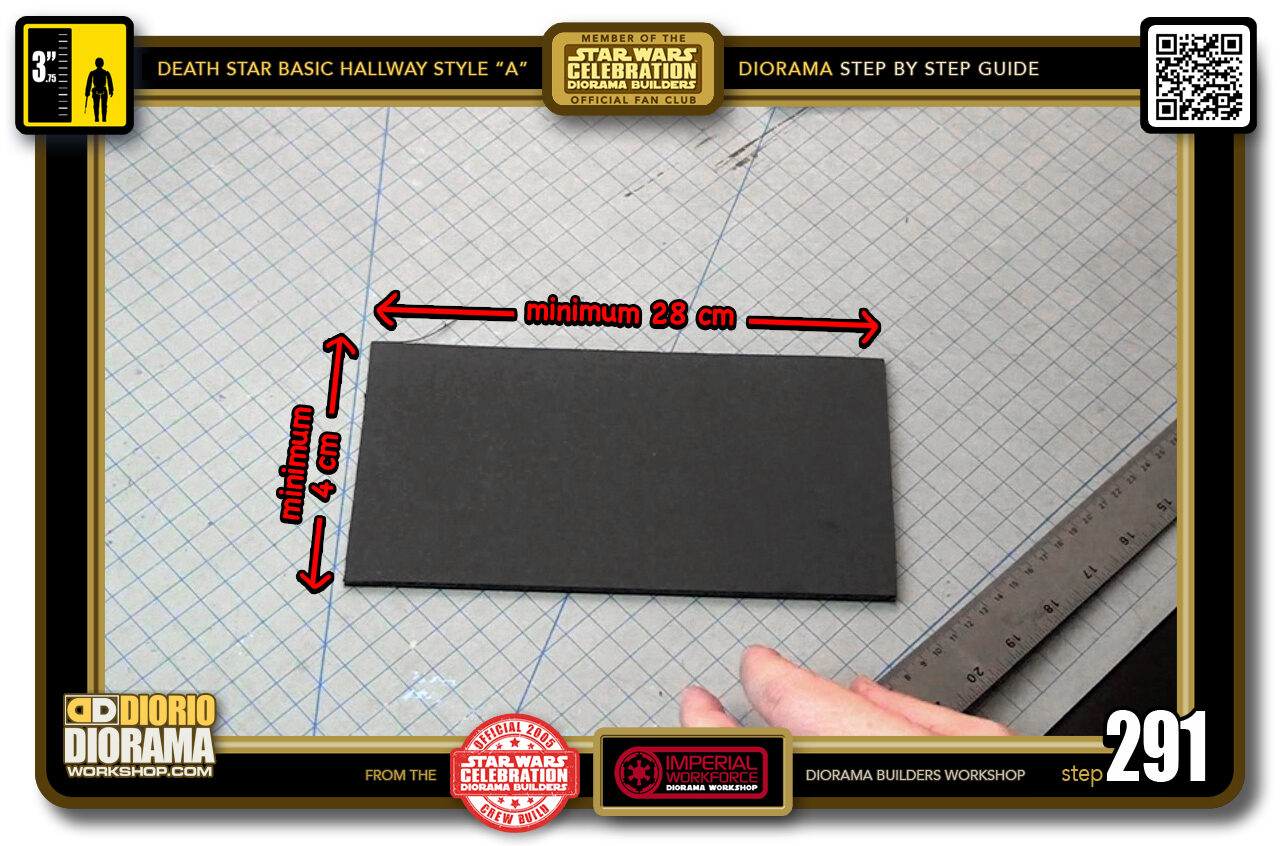
- STEP 291 > Grab a piece of foamcore, can be white or black, doesn't really matter, that is at MINIMUM 28 cm wide x 4 cm tall.
-
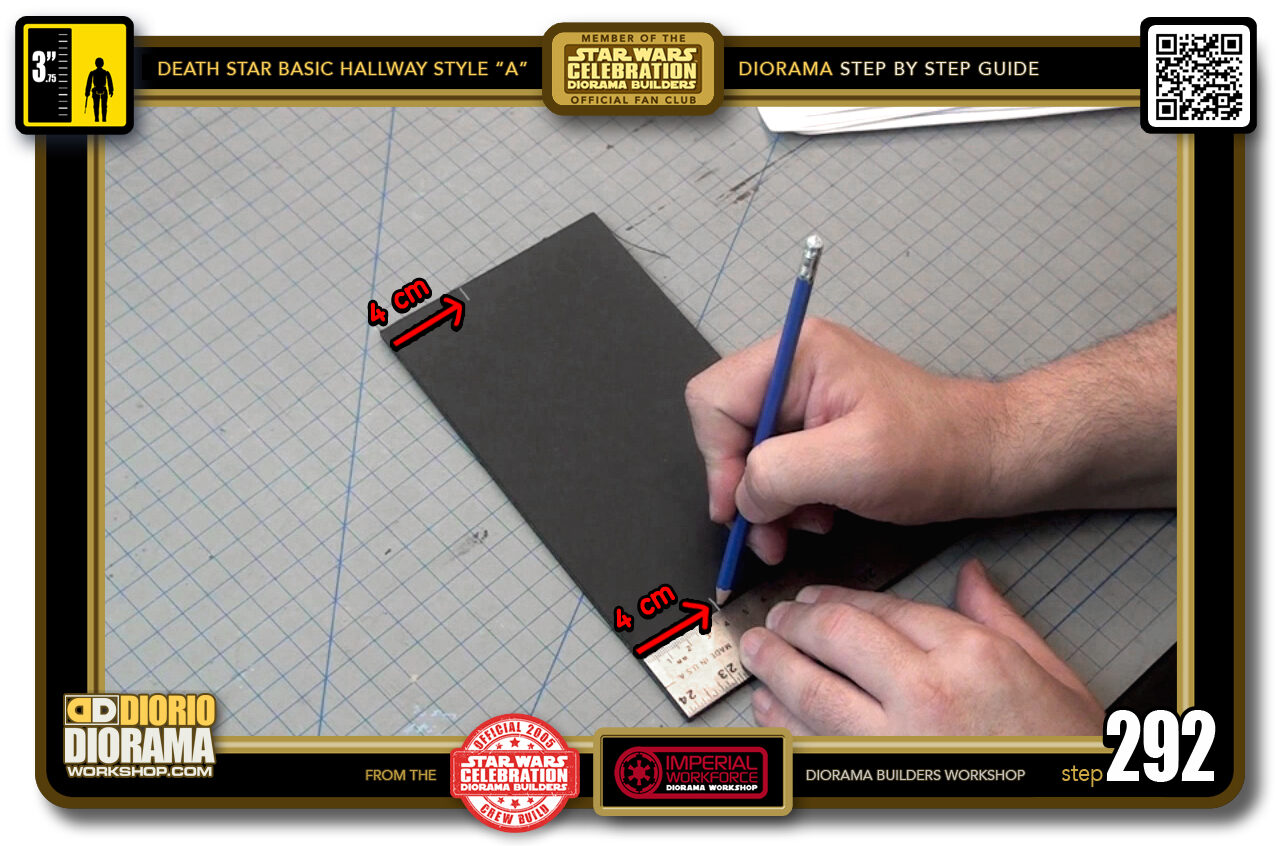
- STEP 292 > Start by placing pencil marks 4cm at the top and bottom of your foamcore rectangle.
-
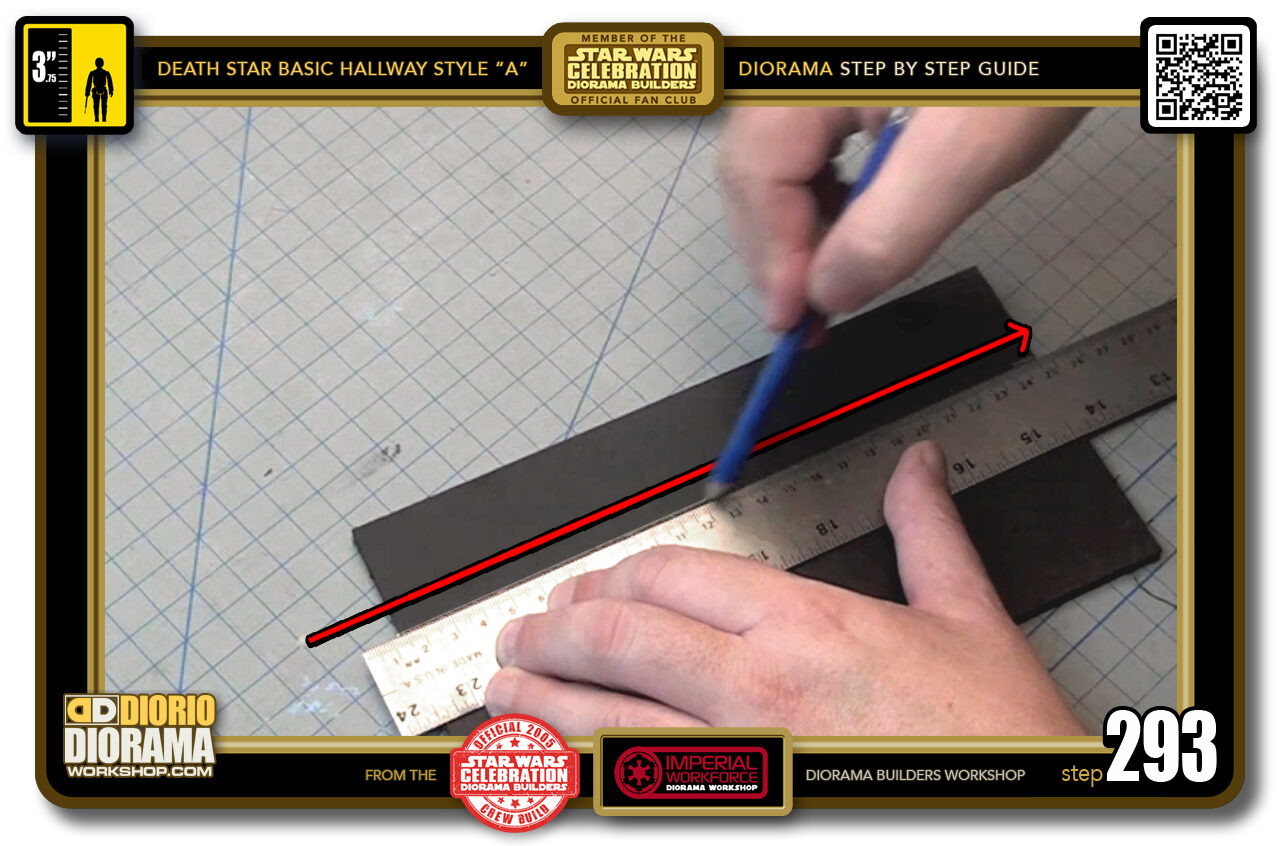
- STEP 293 > Align your ruler with the markings and trace a connecting straight line with your pencil.
-
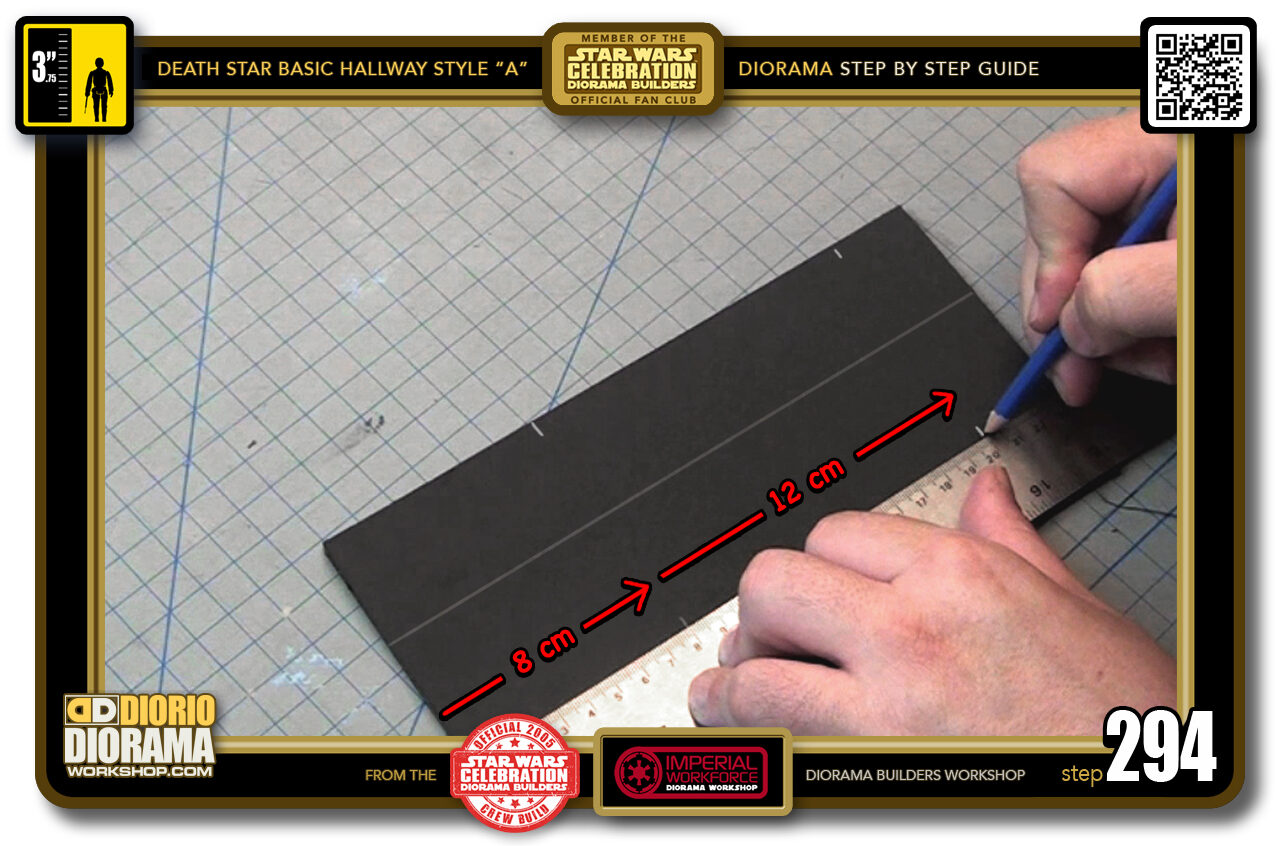
- STEP 294 > Next measure 8 cm at the top and bottom followed by 12 cm from the end of your 8 cm.
-
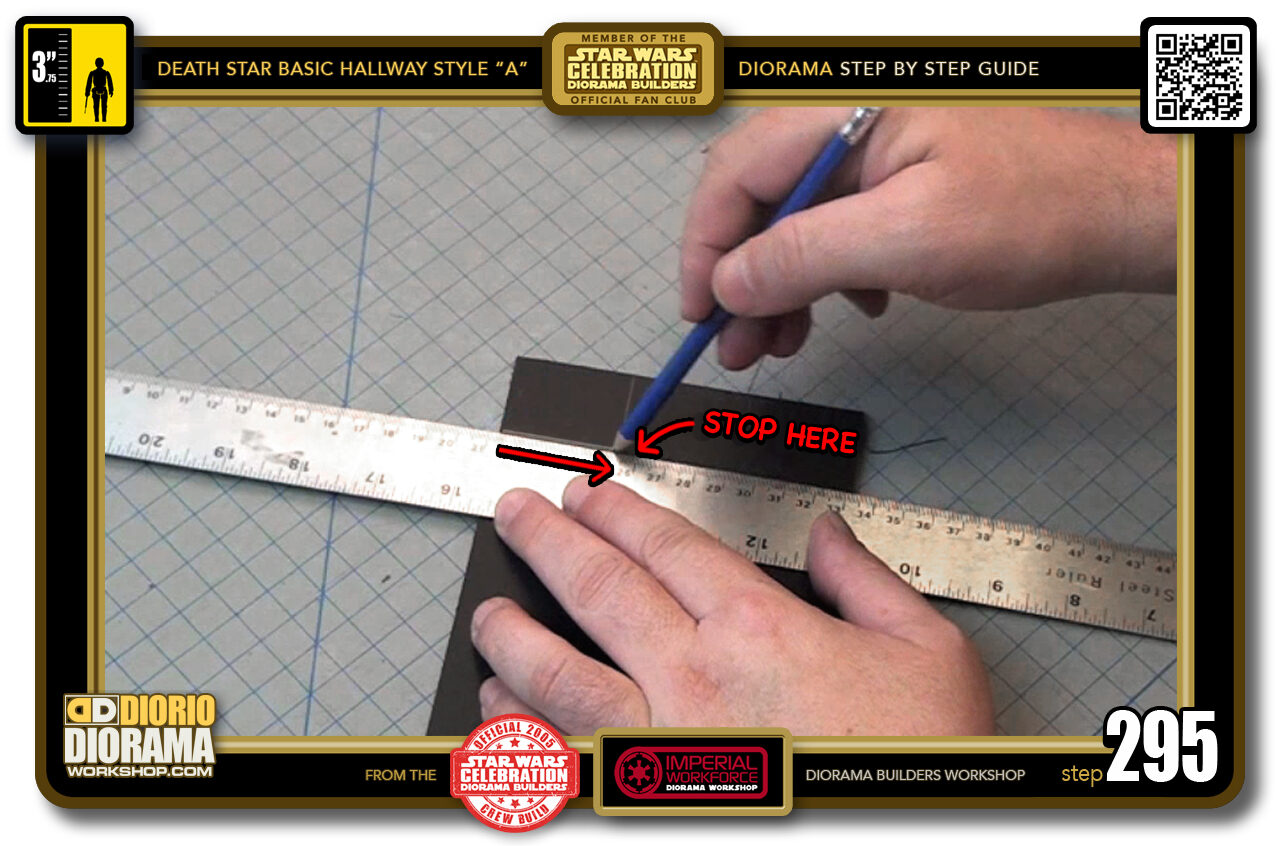
- STEP 295 > Align the right ends of your 12 cm marks with your ruler and trace a line with your pencil from the top but STOP at the 4cm line you traced in Step 293.
-

- STEP 296 > Now align the end of your 8 cm mark, which is also the start of your 12 cm mark, and trace a line from the top to the bottom.
-
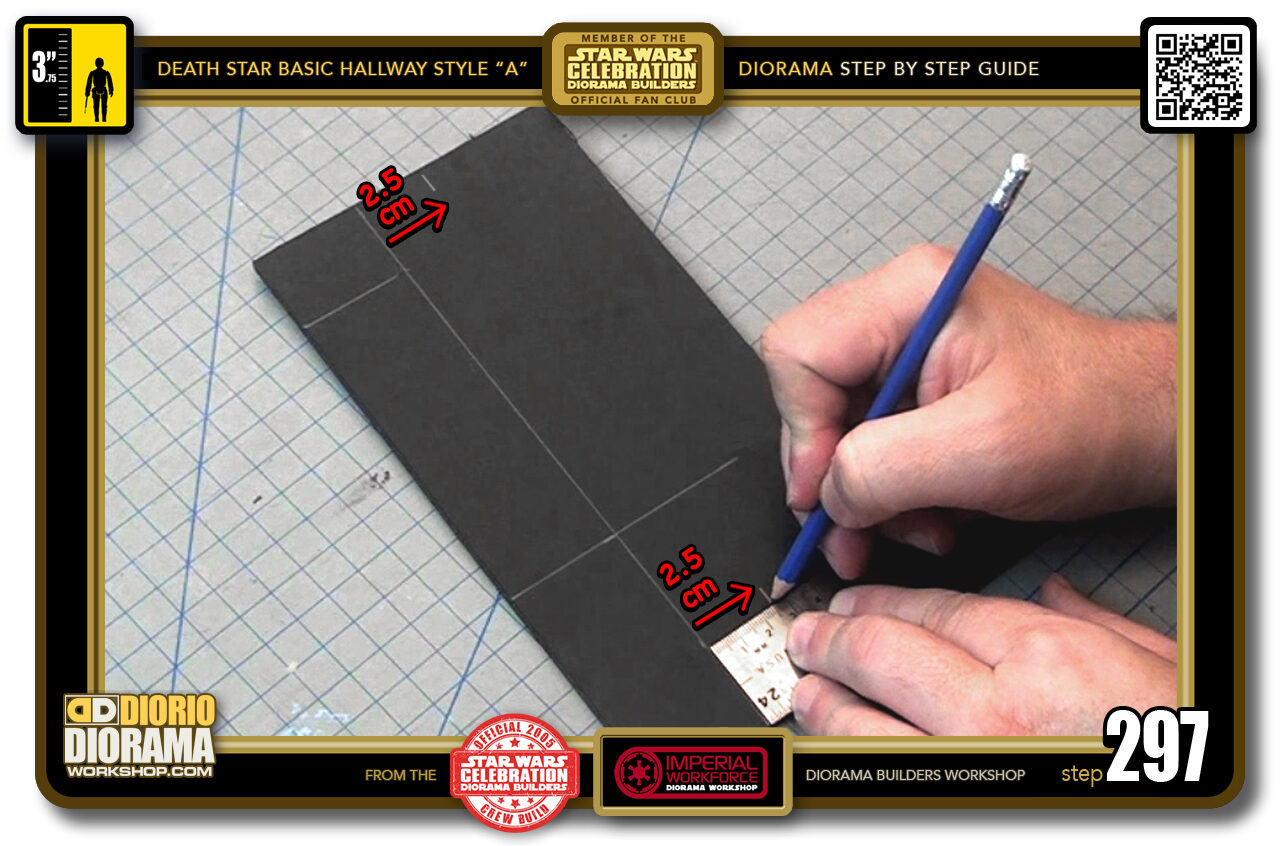
- STEP 297 > Now using your first 4 cm line (Step 293) as your starting point, place your ruler against it and measure 2.5 cm outward at the top and bottom of your rectangle.
-

- STEP 298 > Align your ruler to these 2 marks and draw a straight line starting at the left until you pass over the 8 cm line you drew at Step 296.
-
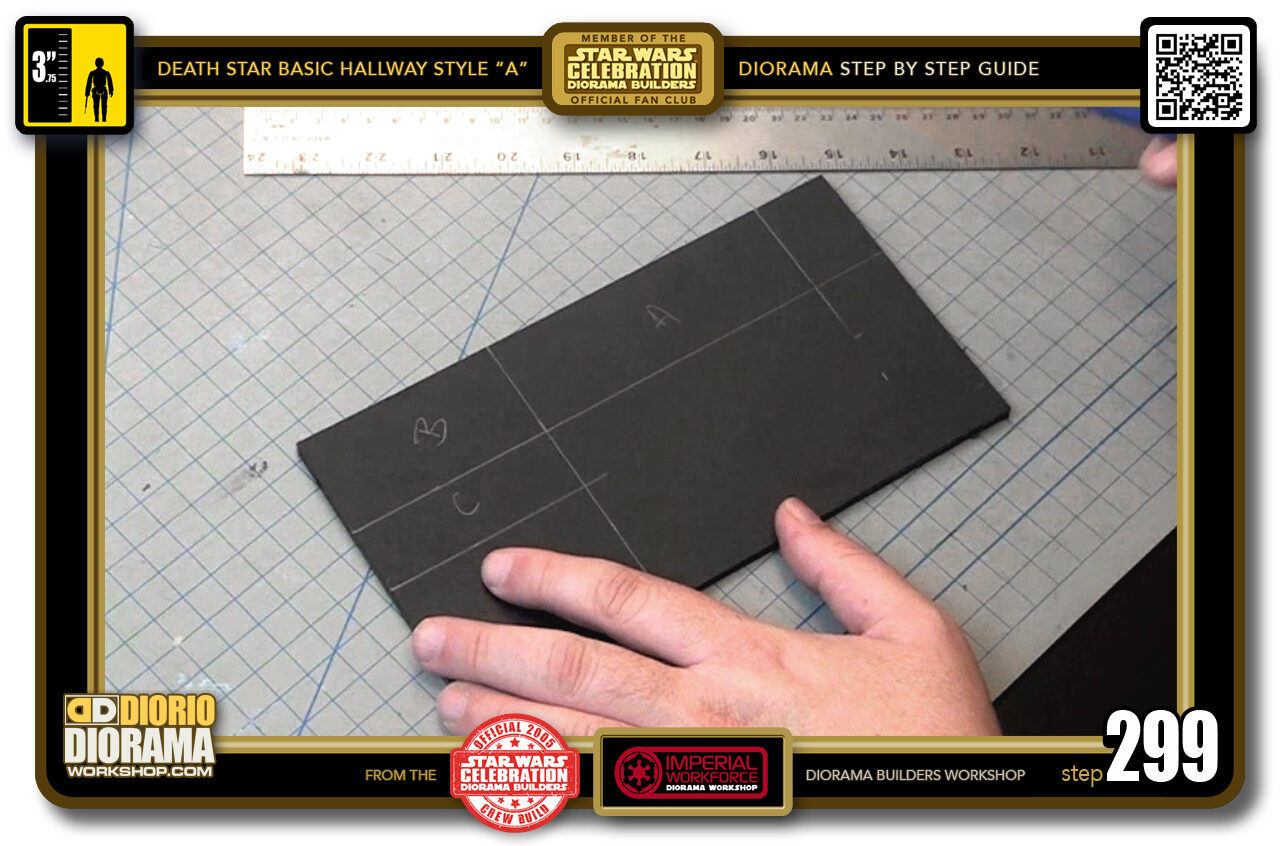
- STEP 299 > These are the 3 pieces you will be cutting out and using to make your assembly wall guide contraption.
-

- STEP 300 > Use your X-Acto knife to cut along the proper lines until you get your A-B-C pieces.

.
Did you already build this Diorama ? At home or at our Star Wars Celebration Diorama Builders workshop ? Would you like to show it in the site’s GALLERY VISITORS DIORAMAS section, YES ? That is Awesome !!! You can find out all the details on how to email me your photos on the VISITORS SUBMISSIONS INFO page … When I get your photos, I will create your very own page just like this one. You may not realize it but work does inspire others to join in the fun of making Action Figure Dioramas.
.
NOT FOR RESALE ALL Decals, tutorials and artwork are ©FrankDiorio (dioramaworkshop.com) and offered FOR FREE to the fans – that would be you ? so you can build and display my diorama designs in your very own home. I realize I cannot control what one does with my graphics once I place them on the web, I can only ask you as one fan to another, please respect the artist and do not be that jerk who uses my designs and tutorials to build a copy of my work only to sell it on EBAY or trade/sale groups and forums. Thank You. Frank.
.
.
If you have a facebook account, why not join the Official Diorama Builders Fan Club today, simply click the logo link below.
 .
.
Catch up with fellow visitors and exchange stories, read cool interviews with the crew, exchange photos, fun surprises and grab some FAN ONLY merchandise next year at actual future conventions ?
.
©2018 Frank Diorio DioramaWorkshop.Com
.
IF YOU LIKE WHAT YOU SEE, PLEASE SHARE WITH YOUR FRIENDS
USING THE SOCIAL MEDIA BUTTONS BELOW