


-
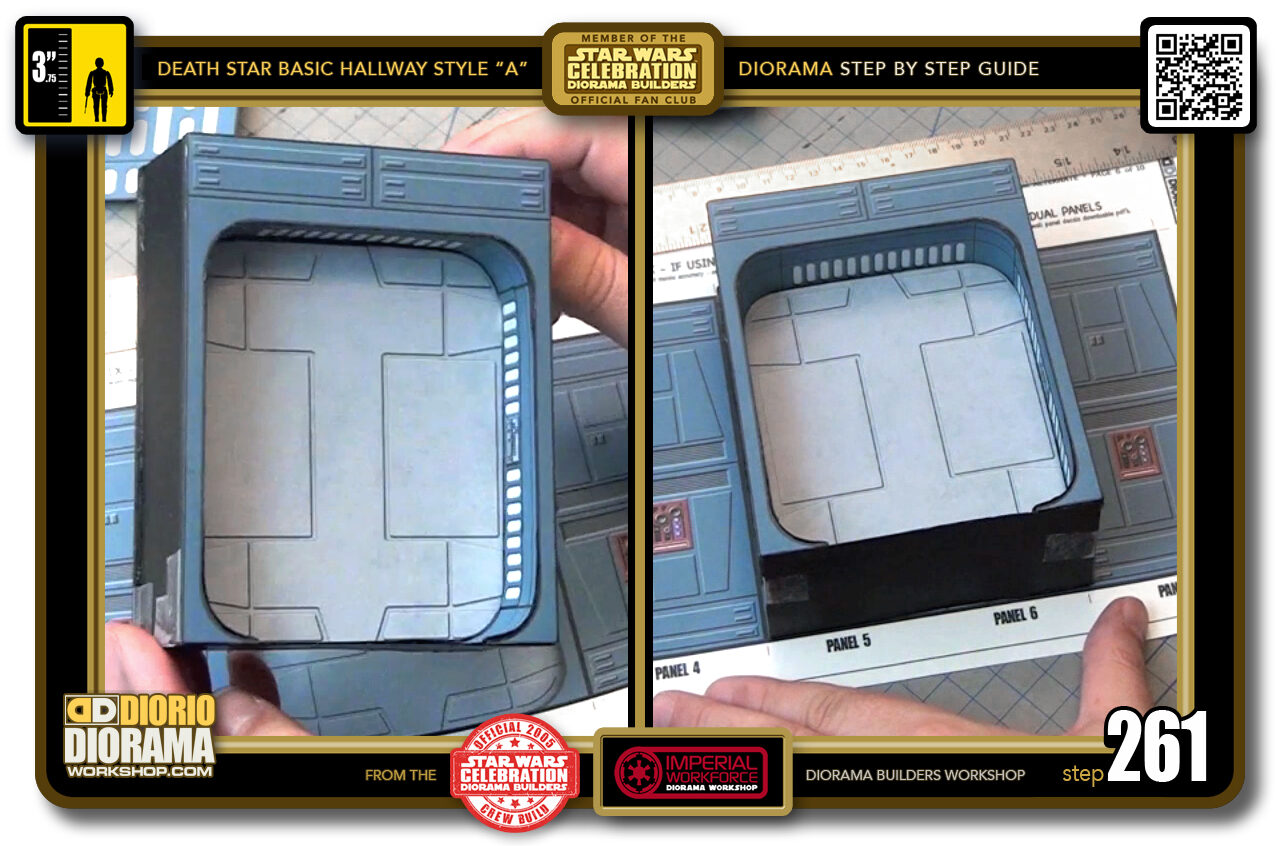
- STEP 261 > If you were making a Style "B" or "C" you would be using the real 3D Basic Door (left box). As you can see it fits exactly in the same space - 2 panels wide - as the illusion decal (right box).
-
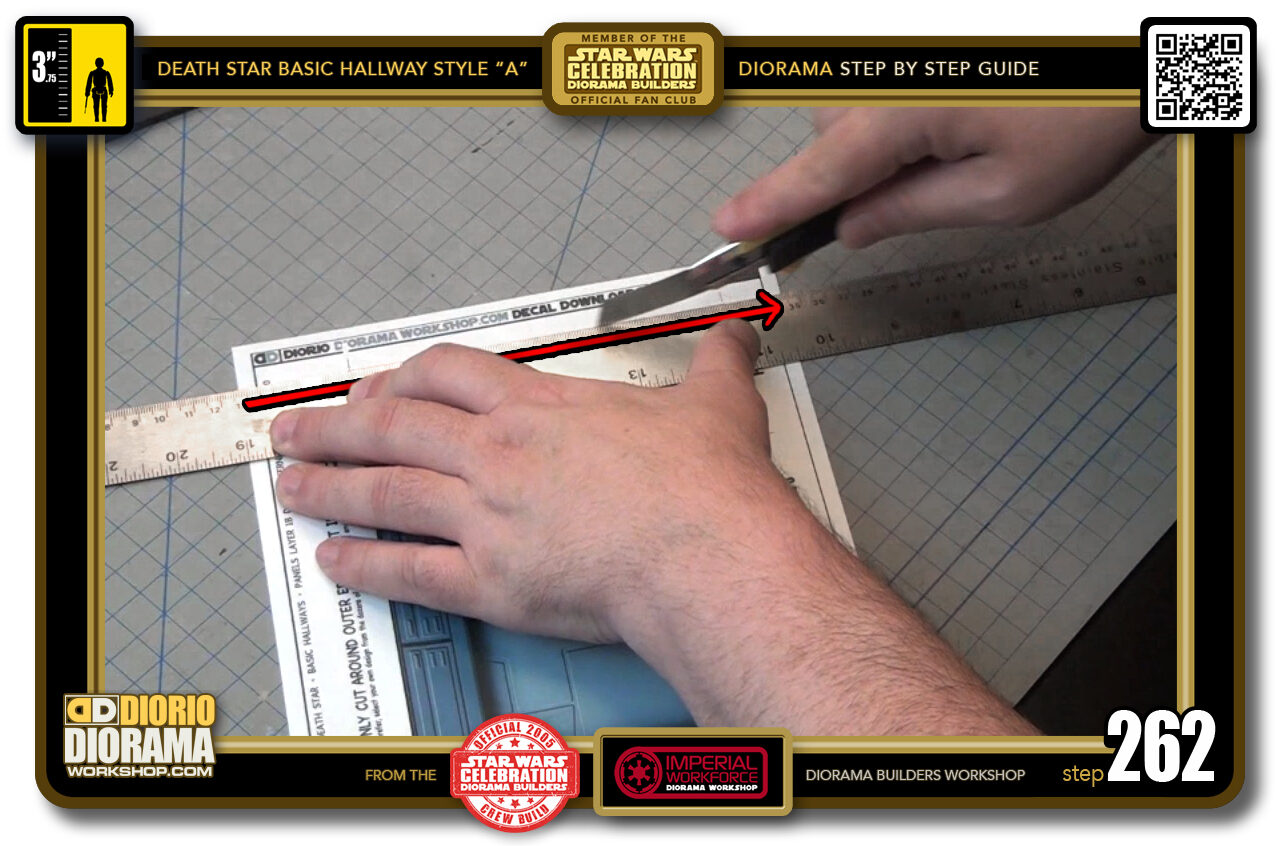
- STEP 262 > After doing the horizontal cuts (the ones that don't cut all the way across the sheet) we can do the vertical cuts.
-

- STEP 263 > Giving us a nice clean 4 panel wide decal.
-

- STEP 264 > Same for our next decal sheet. Horizontal cuts, top and bottom followed by the vertical cuts where you can slice all the way through if you wish.
-
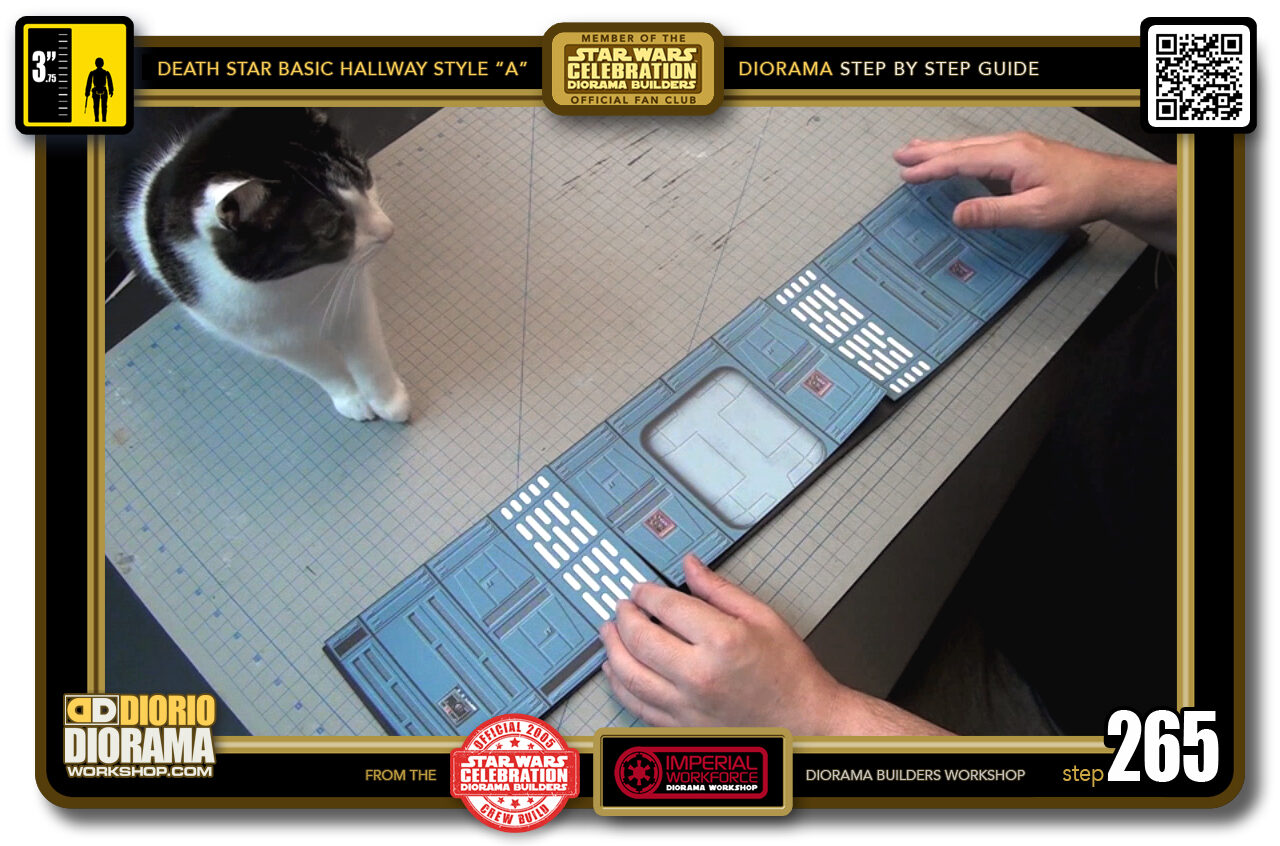
- STEP 265 > Time for a dry run - OH !!! We have a visitor 🙂 I don't see Nelly all day and when I start to build she pops up. Happens EVERY time LOL.
-
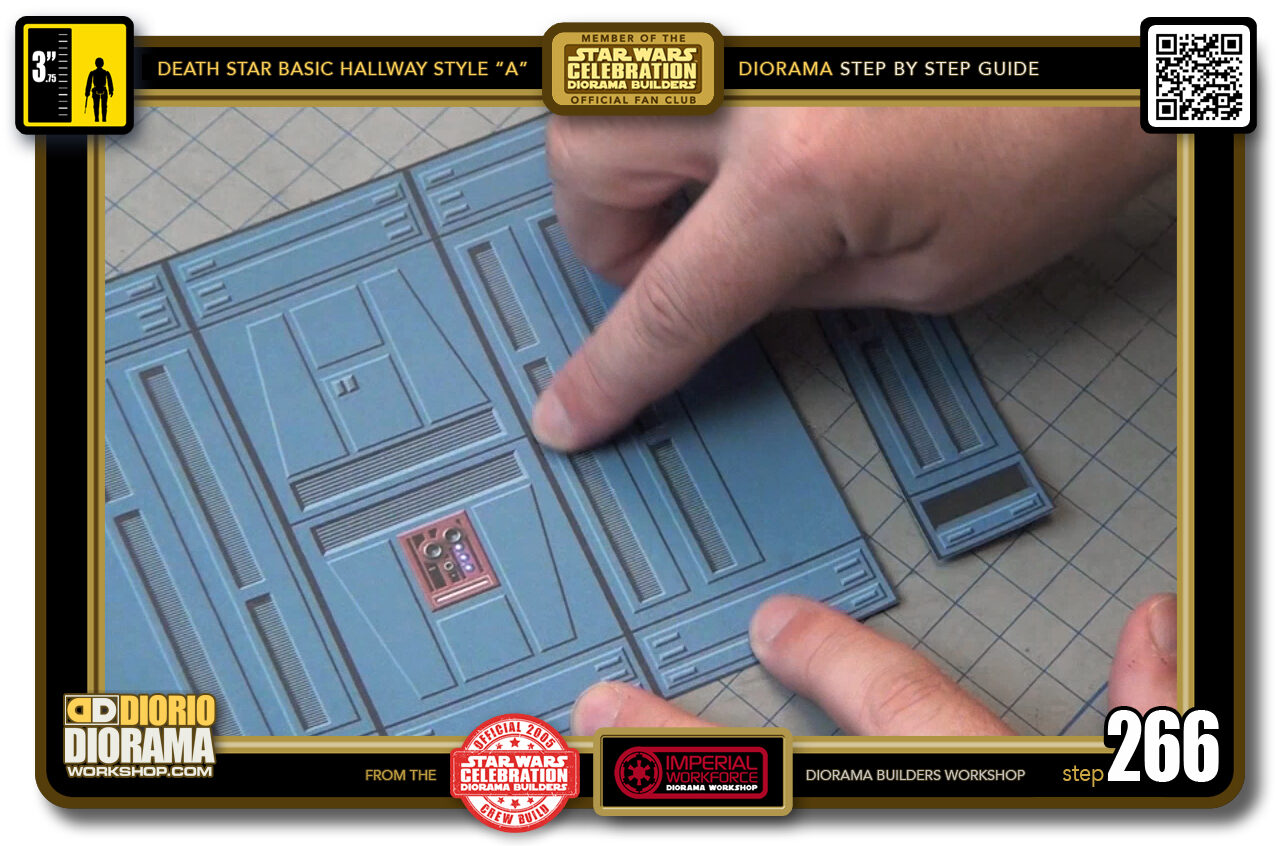
- STEP 266 > Since the half panel needs to go between these 2 I need to slice right in the middle of this line.
-
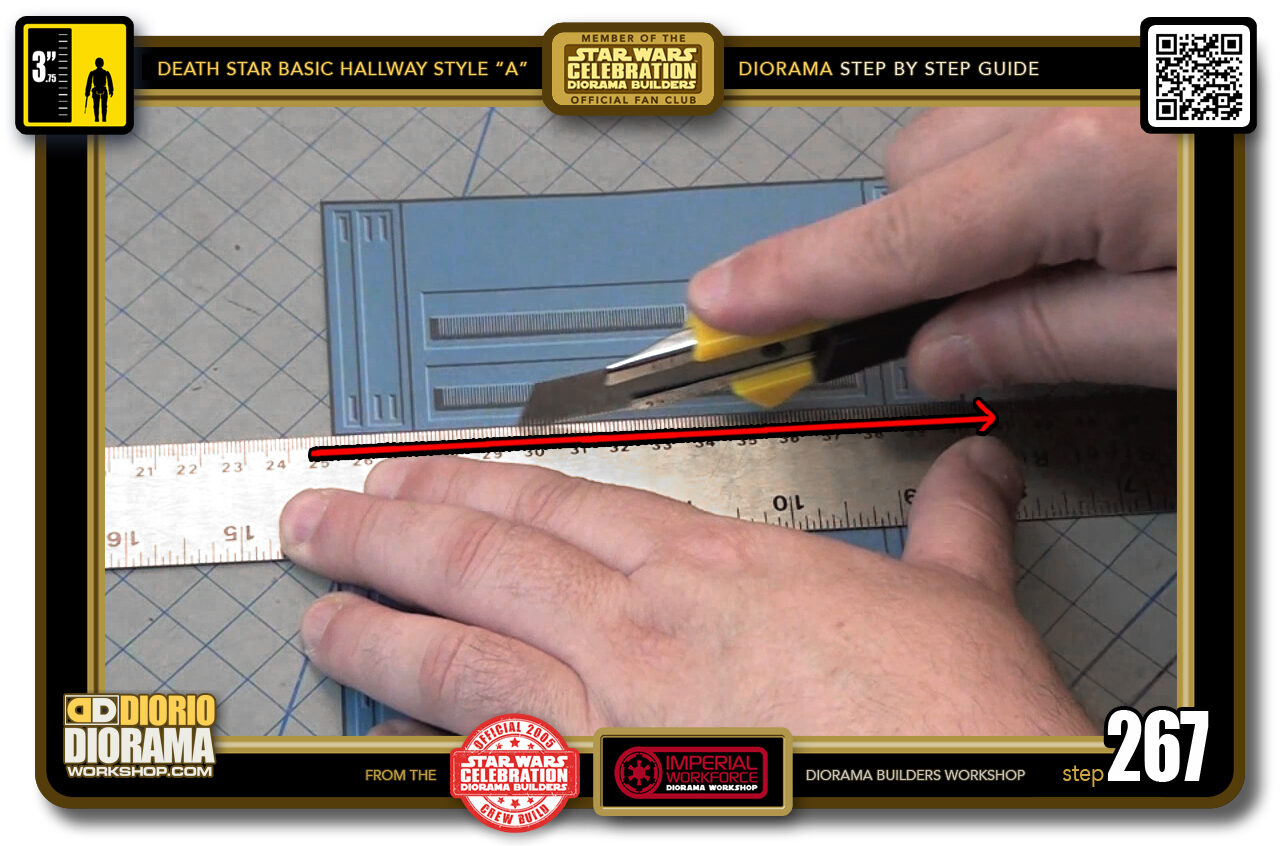
- STEP 267 > Align your ruler , this would have been easier with the red guides, and slice right down the middle.
-

- STEP 268 > I can now shift the positioning and see what they look like as they need to be attached to the rear wall.
-
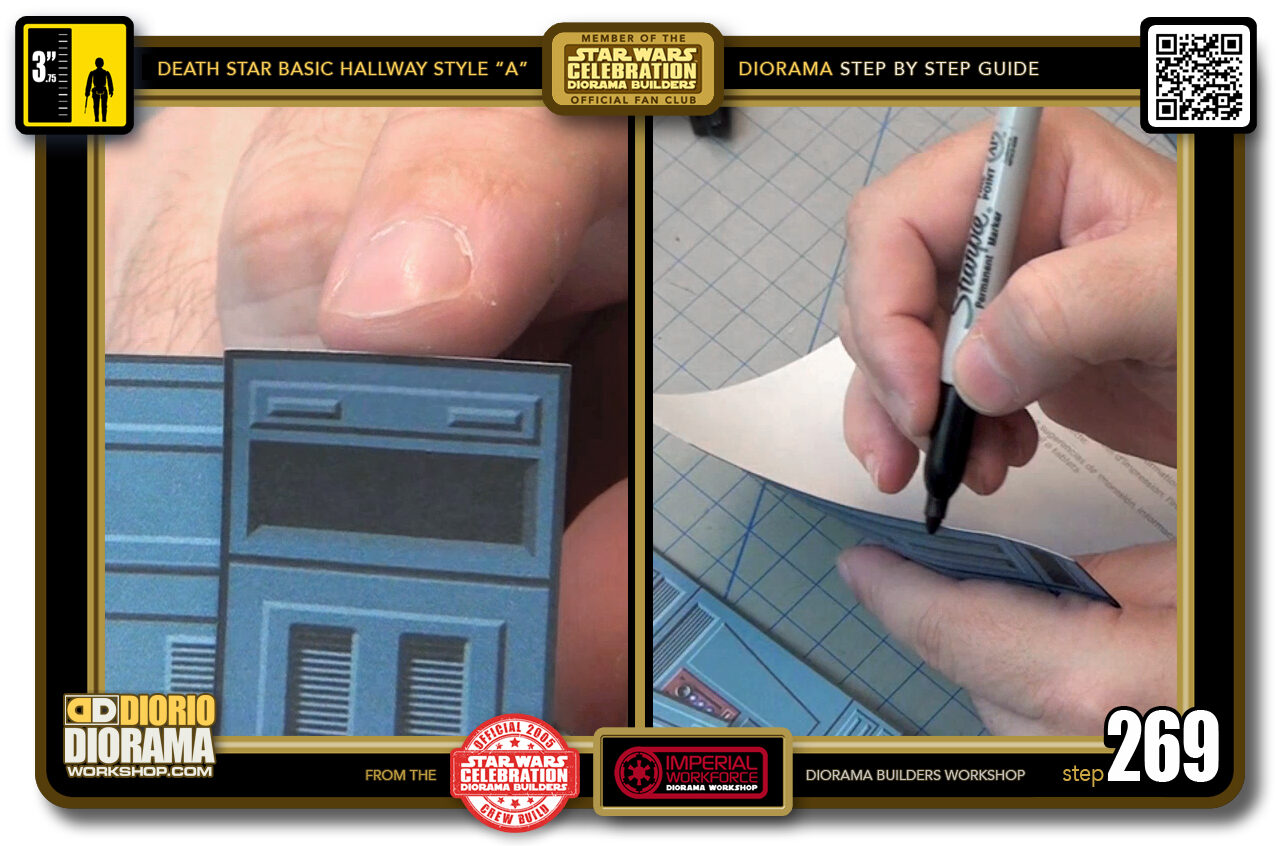
- STEP 269 > Time to draw our black sharpie colour all around the decals. If you have done other builds with decals then you know the drill by now 🙂 We want to remove the white lines around the decals caused by the thickness of the white paper (left box). You want to have the decals side to the outside, facing AWAY from the pen tip and you want the pen to be angled and apply the black with the SIDE of the pen, NOT the TIP (right box).
-

- STEP 270 > Can you see the difference it makes when you do this step. You don't HAVE to do it, but look against my T-Shirt, see how better the black edge looks compared to the white one on the left.
-
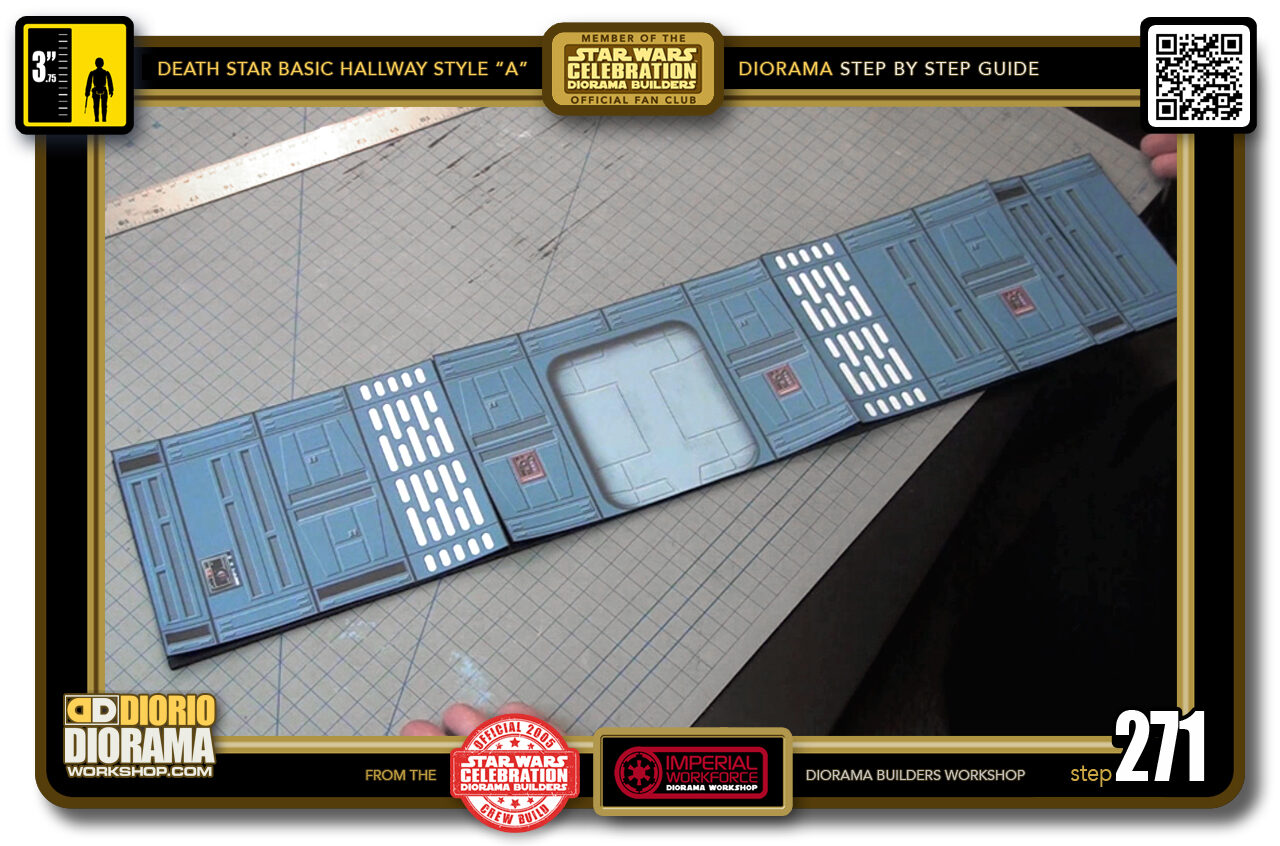
- STEP 271 > OK, we got all the black sharpie edges done, dry run shows everything fits nice and ready to glue.
-
-
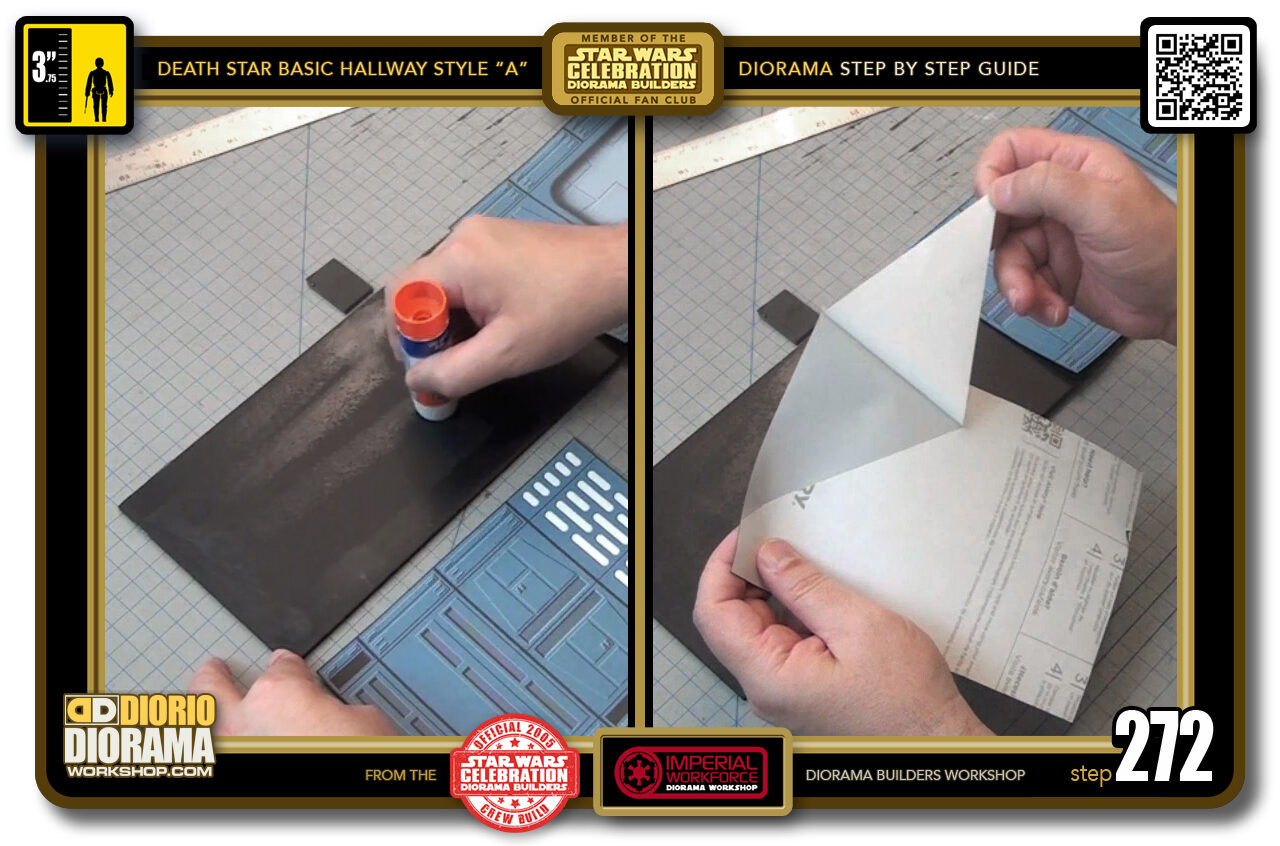
STEP 272 > Grab your glue stick and apply a generous amount to your foamcore wall (left box) Peel your decal (right box) If you don't use full size label sheets in your printer, you can apply glue stick to the back of your regular paper decal. NEVER EVER USE HOT GLUE TO APPLY DECALS !!!!
FRANK TIP : I took a small scrap of foamcore to place at the top of the wall to indicate where the decal ends and help me not put glue stick past areas I don't need to for the moment.
-

- STEP 273 > Carefully align the decal skin with the bottom of your wall. Make sure it is flush with the bottom and aligned properly with the bottom left corner.
-
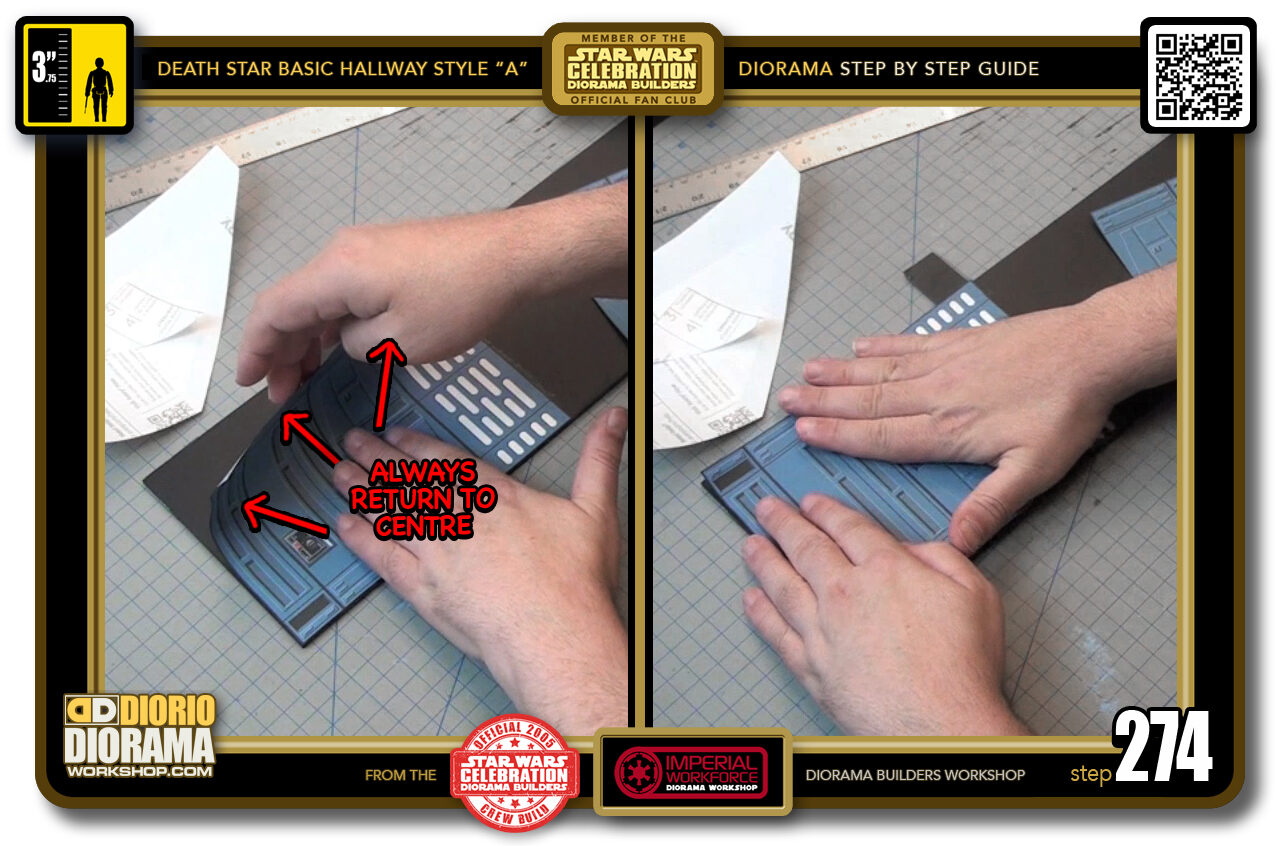
- STEP 274 > When you are happy with the position and alignment, we will do like we did with the tracing paper but because the wall is only 15 cm high, we can use our hand instead of a scrap of foamcore. The IMPORTANT TRICK is to ALWAYS RETURN TO THE CENTRE. (left box) Centre then out, back to centre, out in another direction, back to centre etc... This will prevent air from getting trapped and making bumpy bubbles and folds. When you have full contact and no evidence of bubbles, you can use your entire hand to apply more even pressure all over the decal to make sure it has full contact with the wall surface (right box).
-
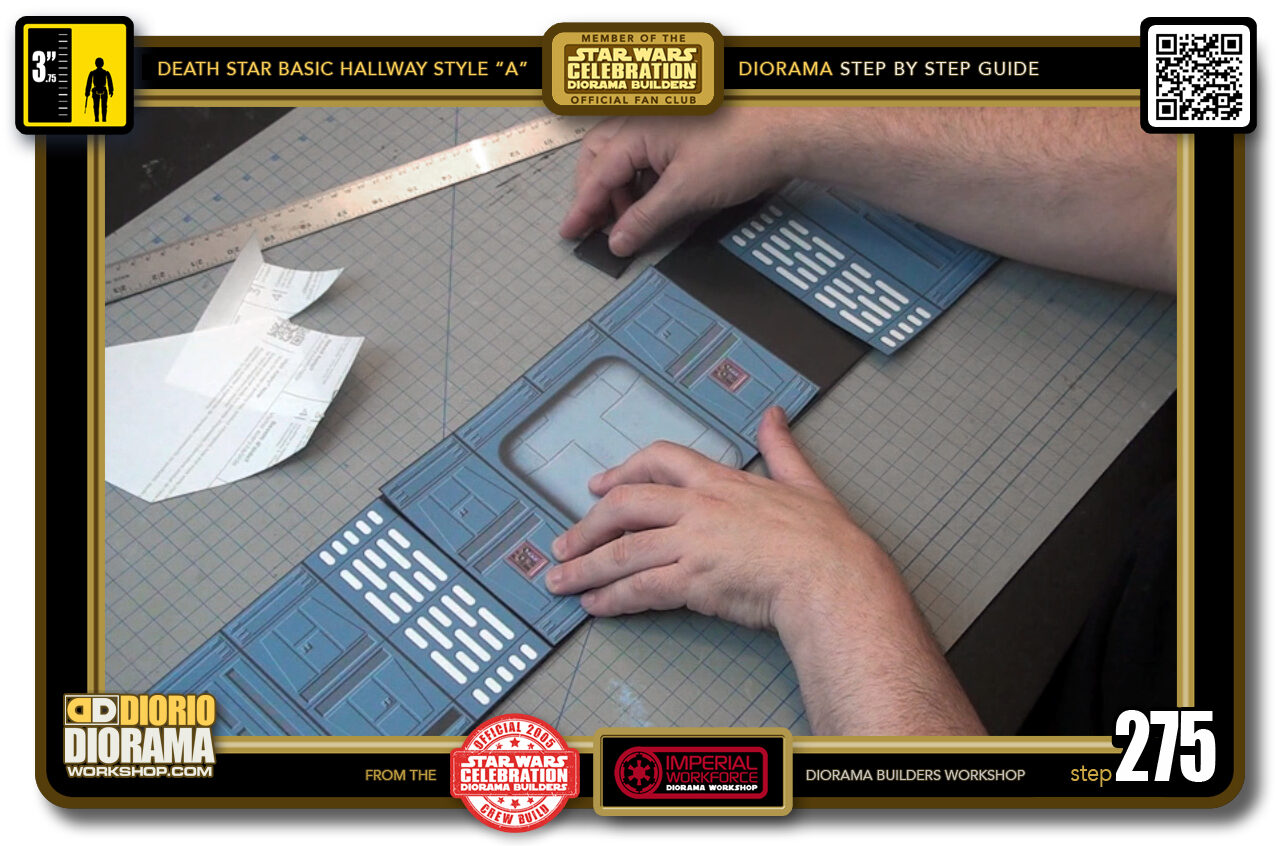
- STEP 275 > We can move onto decal sheet number 2. Do a dry run so you can place your little scrap top guide to know where your glue should stop.
-
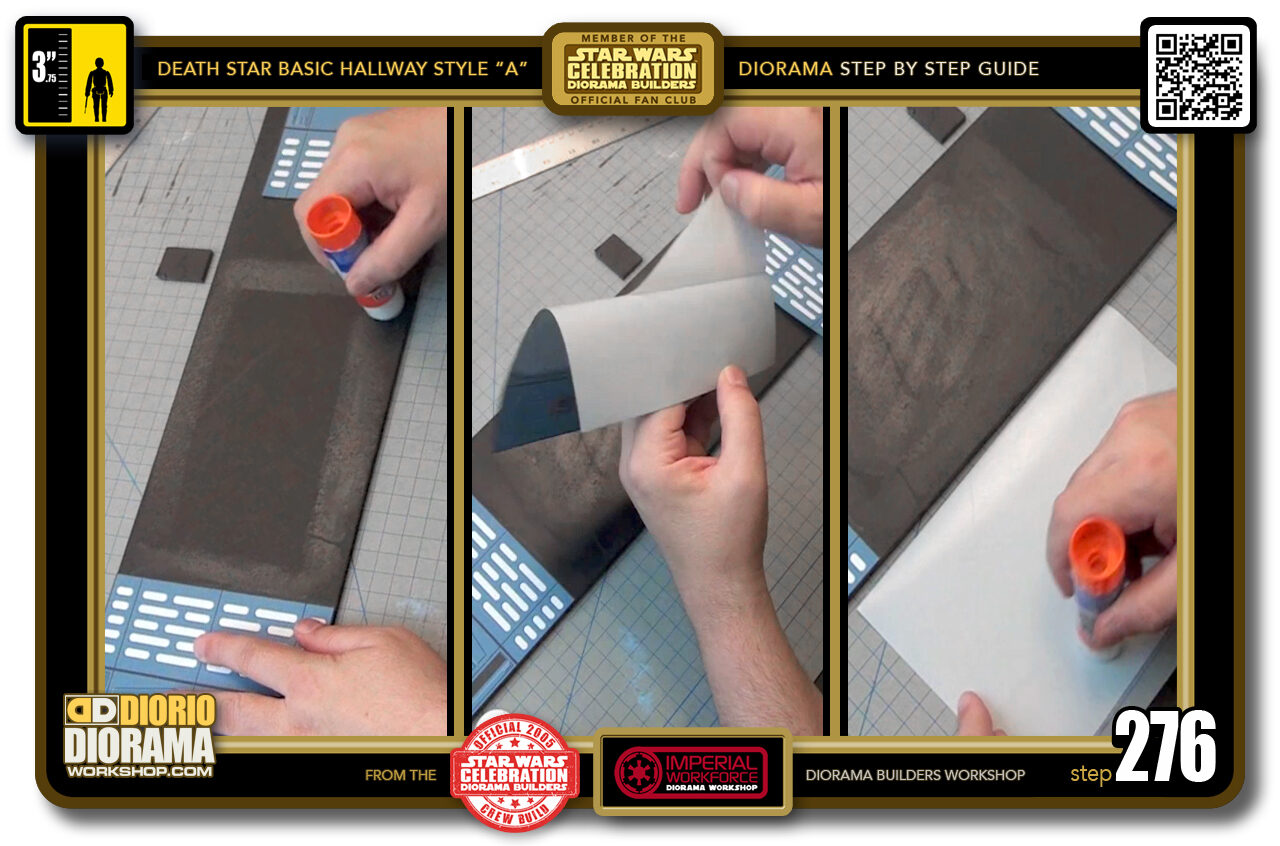
- STEP 276 > Apply your glue stick in the zone of your decal sheet (left box) NEVER USE HOT GLUE !!! Peel your decal (centre box) and then apply glue stick to the rear of your decal - yes, even if you used decal sheets (right box). Why you ask ? I discovered that when you have glue stick on both surfaces, it makes it more slippery, allowing you more manipulation options when trying to fit 2 decals side by side. Without it, if placed wrong, it is much harder to peel off and reposition.
-
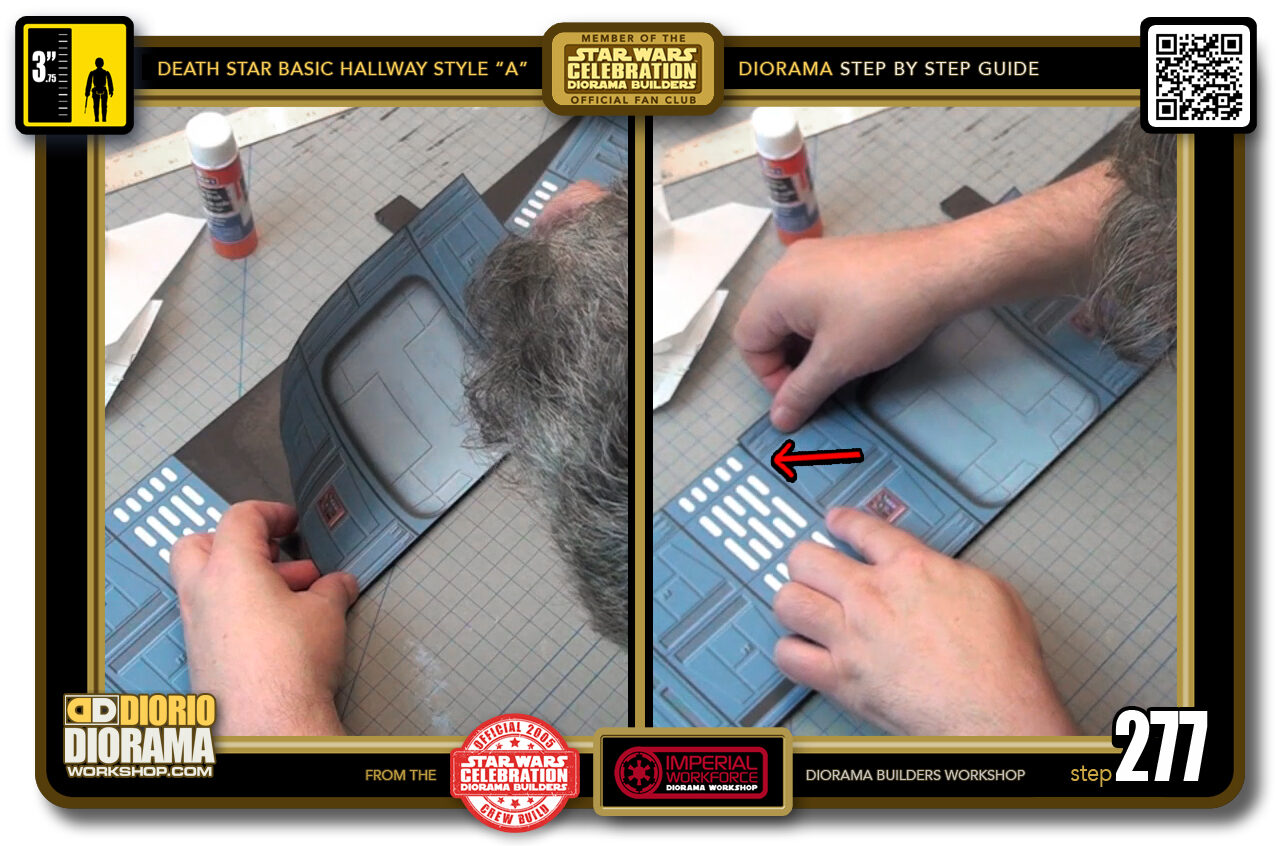
- STEP 277 > Ready for placement... align flush with the bottom of the wall and have it close to the right bottom corner of the first decal as possible (left box). Lower the left top corner only, try to not press against the right side just yet. We want to match up the tops of your panels (red arrow in the right box).
-
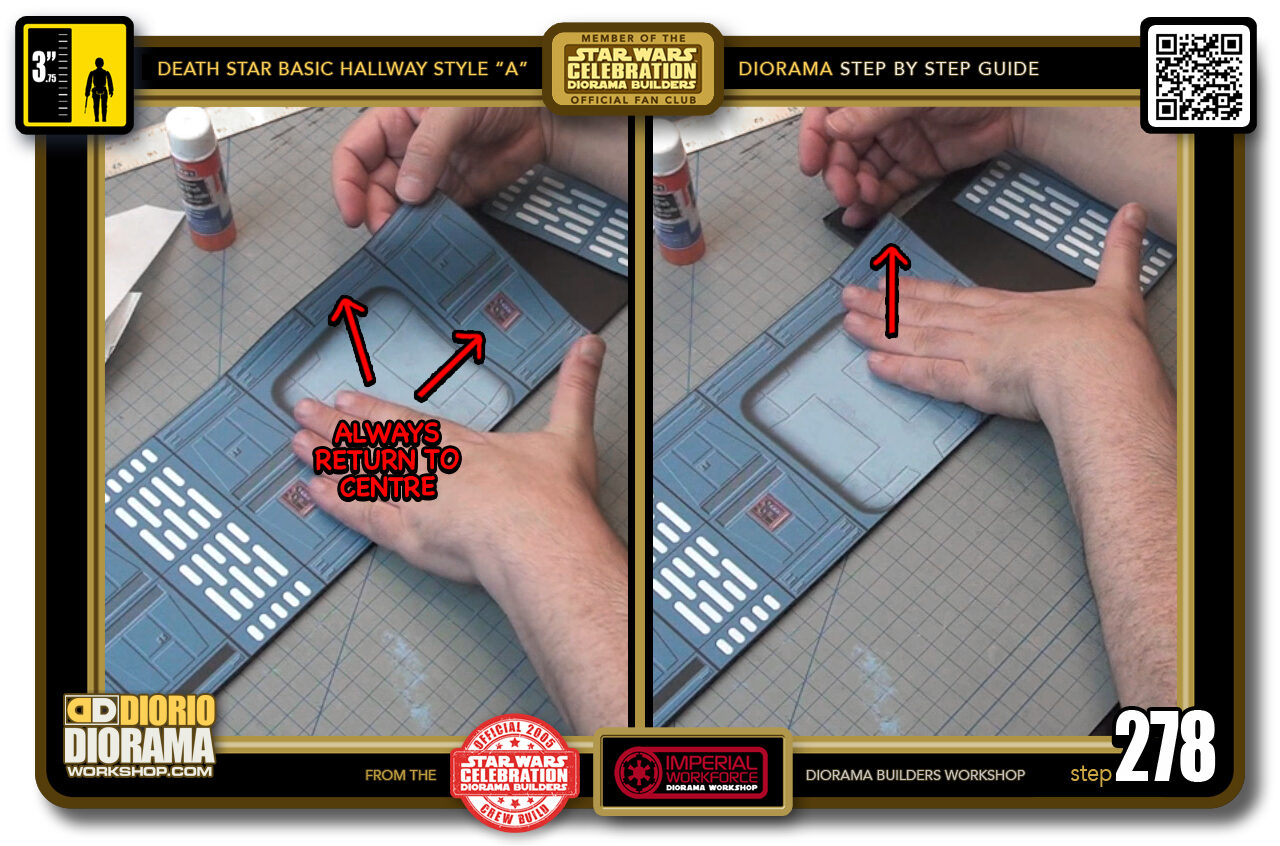
- STEP 278 > When that matches up, go to the centre and move your hand towards one of the outer edges, return to centre and move outwards again in another direction. (left box). Continue in this way until you reach the very end of the decal and press it onto the foamcore floor (right box).
-
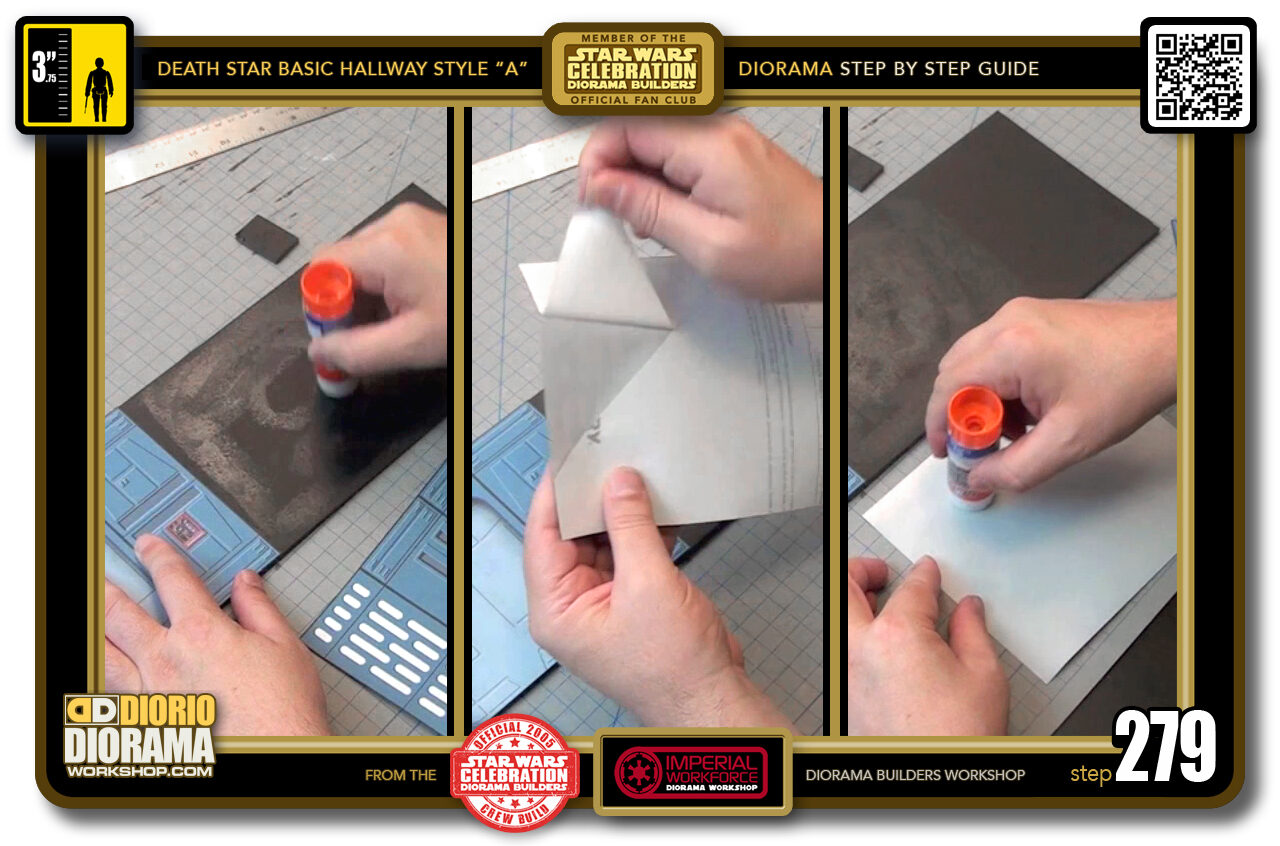
- STEP 279 > Time for decal 3. By this time you know how it works. Gluestick, peel, gluestick on the back of the decal.
-
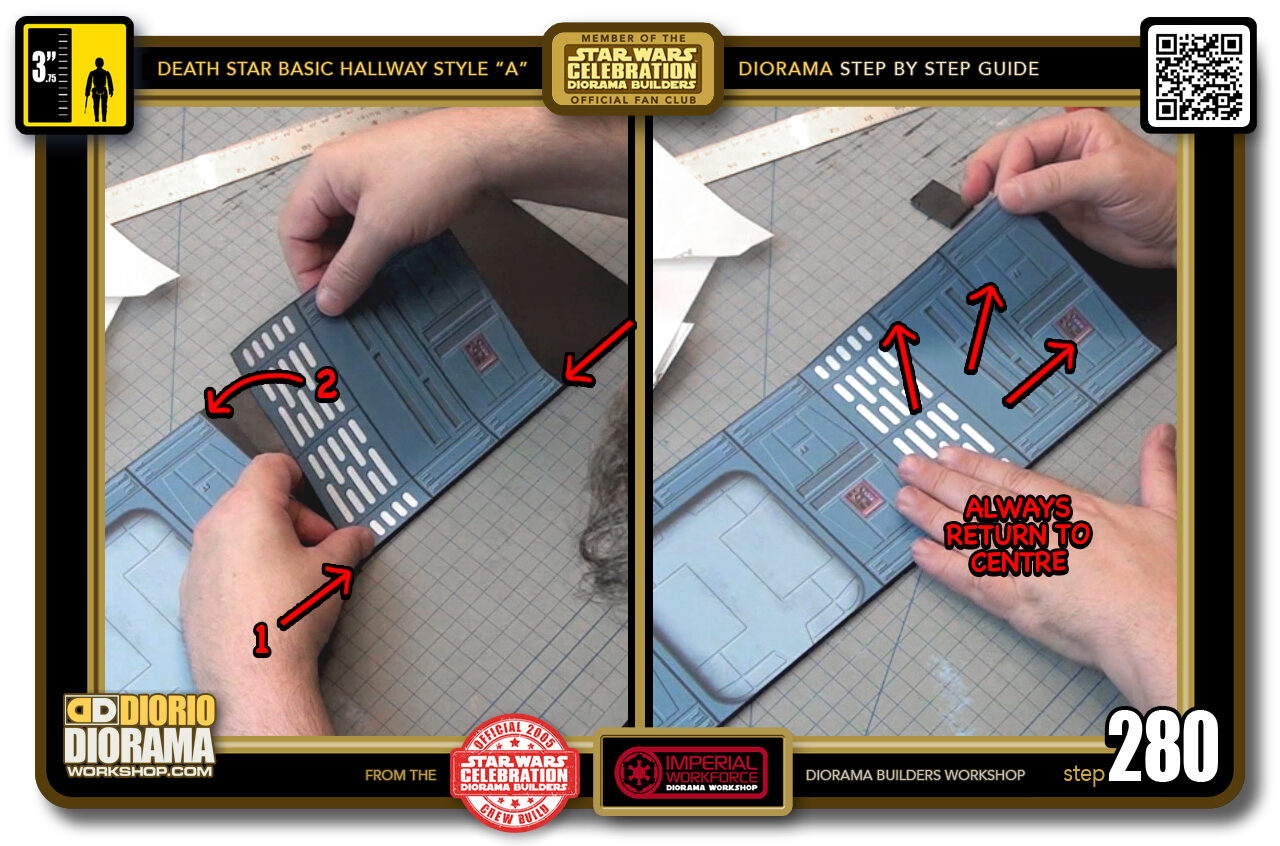
- STEP 280 > Align your bottom corners to be flush with the floor edge. Gently lower the left top downwards and align with the decals top details (left box). When you see it aligns, let the left side touch the foamcore surface keeping the right side raised. Now hand to the centre and press down and outwards, return to the centre, press down and outwards (right box) continue this until the entire decal makes contact with the wall surface.

.
Did you already build this Diorama ? At home or at our Star Wars Celebration Diorama Builders workshop ? Would you like to show it in the site’s GALLERY VISITORS DIORAMAS section, YES ? That is Awesome !!! You can find out all the details on how to email me your photos on the VISITORS SUBMISSIONS INFO page … When I get your photos, I will create your very own page just like this one. You may not realize it but work does inspire others to join in the fun of making Action Figure Dioramas.
.
NOT FOR RESALE ALL Decals, tutorials and artwork are ©FrankDiorio (dioramaworkshop.com) and offered FOR FREE to the fans – that would be you ? so you can build and display my diorama designs in your very own home. I realize I cannot control what one does with my graphics once I place them on the web, I can only ask you as one fan to another, please respect the artist and do not be that jerk who uses my designs and tutorials to build a copy of my work only to sell it on EBAY or trade/sale groups and forums. Thank You. Frank.
.
.
If you have a facebook account, why not join the Official Diorama Builders Fan Club today, simply click the logo link below.
 .
.
Catch up with fellow visitors and exchange stories, read cool interviews with the crew, exchange photos, fun surprises and grab some FAN ONLY merchandise next year at actual future conventions ?
.
©2018 Frank Diorio DioramaWorkshop.Com
.
IF YOU LIKE WHAT YOU SEE, PLEASE SHARE WITH YOUR FRIENDS
USING THE SOCIAL MEDIA BUTTONS BELOW