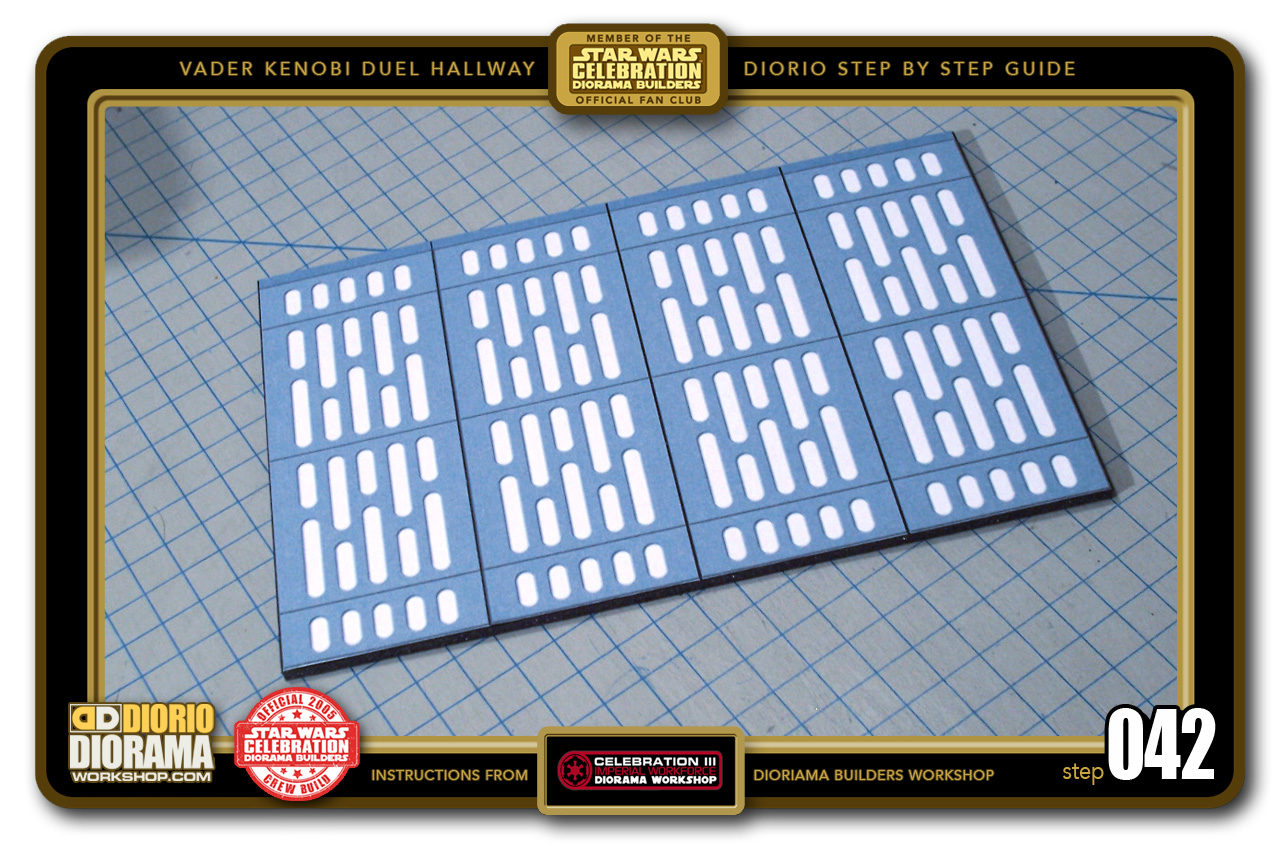
- STEP 041 > At the Star Wars Celebration Diorama Builders, fans had to cut out 4 basic Neon Panel decals but for you guys, the decal in the VADER KENOBI DUEL PDF has all 4 already side by side.
- STEP 042 > So you now only need to cut along the outer edges and apply just the one big decal to the WALL E surface.
- STEP 043 > Now in the movie, WALL E is angled 45 degrees so we need to cut, slice this off the corner of the rear left side. This will allow the WALL E neons to stick perfectly to WALL C. Carefully eye the same distance from the back that you see as the thickness, giving you a 45 degree angle. This is tricky, so a NEW blade will help you get a better result. WATCH YOUR FINGERS !!!
- STEP 044 > Sometime slicing sideways is a little easier to see that your angle is pretty much consistent all the way through. Don't worry if it's not perfectly straight, it will be hidden in the back of the diorama.
- STEP 045 > Now put some hot glue along the bottom edge and carefully align and attach the neon WALL E to the floor making sure the regular corner edge leans against the corner edge of WALL C and that your 45 degree cut corner lines up with the floor cut (red arrow)
- STEP 046 > You can better see how the cut gives us a nicer clean finish vs a angled corner poking out which would prevent you from placing more Death Star sections against this one.
- STEP 047 > WALL F you don't really see unless you look into the diorama from the other side, so we can't just leave it black right? 🙂 Measure and cut out a 12cm X 15.5cm piece of black foamcore and take your WALL F decal or if you prefer another panel design, ANY 2 from the Basic Hall Panels PDF will fit here. You don't HAVE to use these exact versions for this wall if you don't want to.
- STEP 048 > Time for another 45 degree angle cut, this time on the rear left side of the WALL F piece. Take your time and slice off the corner edge as you did in Step 043.
- STEP 049 > Do a dry test run to make sure the 45 degree cut angle fits just right (red arrow) before you place a line of hot glue along the sliced off edge to attach it to the WALL D corner edge.
- STEP 050 > Your WALL F when angled should reach the straight edge of the floor. If it doesn't you can cheat and play around with it a little until you get it to place just right.
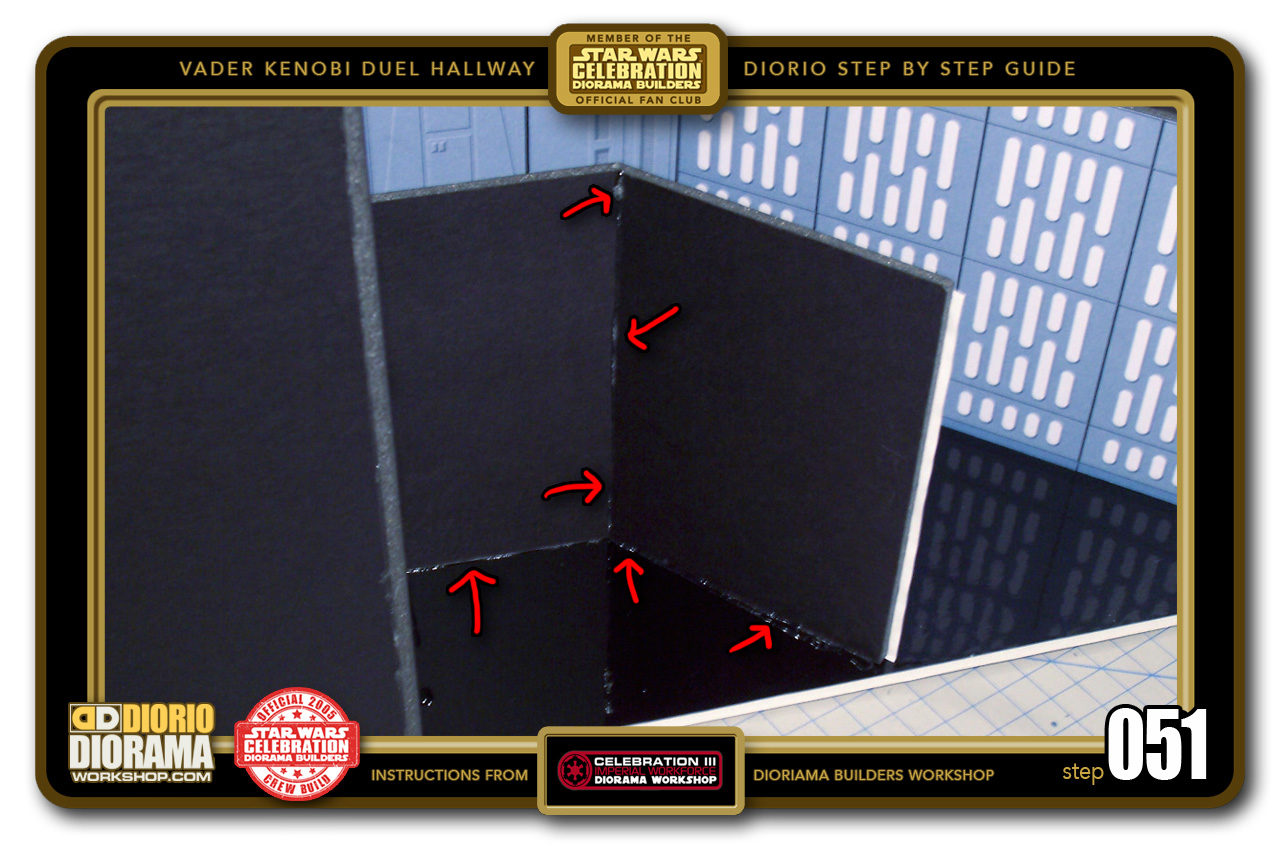
- STEP 051 > Here you can see that I could have made the WALL F piece just a little longer to fit all the decal, I will just trim this out, no one will see. 😛 Now just place some extra hot glue along the joints (red arrows) and all will be secure. Your walls are now complete. Time to do the ceiling.
- STEP 052 > Take a piece of White Foamcore this time. IT MUST BE WHITE this time for the black strips to pop out like in the movie set 🙂 Measure and cut a 32cm X 21cm rectangle.
- STEP 053 > You will need 6 Black strips for details. Measure and cut 2 strips 13cm X 3cm and 4 strips 21cm X 3cm from your BLACK foamcore. Not pictured is my TEMPLATE SPACER piece which is just an extra 13cm X 3cm strip.
- STEP 054 > Start with one of the smaller strips and align it to any corner edge of the ceiling piece. Use the Hot Glue Gun to secure it in place.
- STEP 055 > Place your SPACER STRIP - DO NOT GLUE THIS ONE - alongside the first and take the other small strip, put some hot glue on it and align and place it next to the spacer. Wait a few seconds for the hot glue to cool off.
- STEP 056 > You can now slide out the spacer strip.
- STEP 057 > Which gives you this effect for the ceiling.
- STEP 058 > Remove the spacer and place it next to the 2nd small strip this time. Now take a long strip, put some hot glue on it and align it with the spacer strip and press it to the ceiling piece. The long strip should reach both ends of the ceiling perfectly.
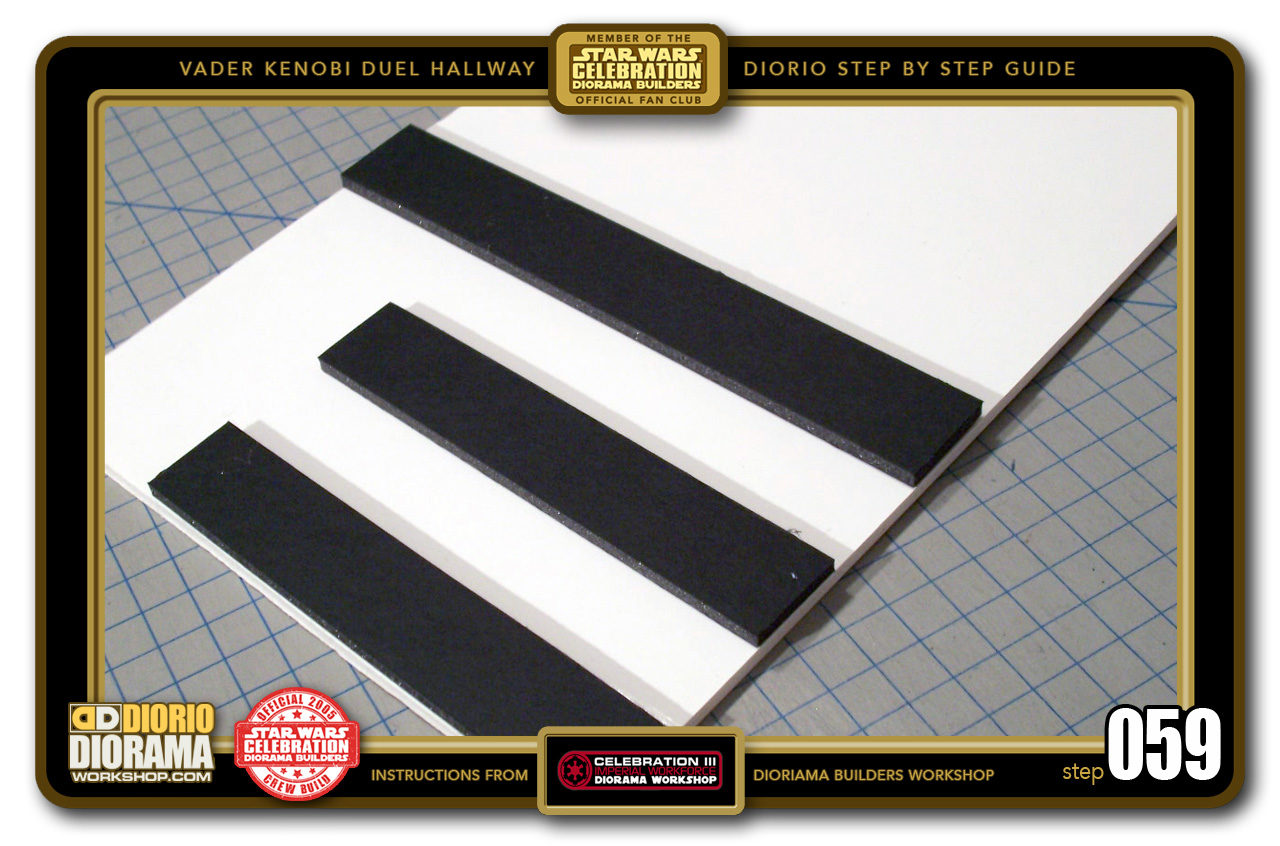
- STEP 059 > Once the spacer is removed your ceiling should look like this now. Continue this process with the remaining 3 long strips until the entire ceiling is covered.
- STEP 060 > When you are done you have a nice bar code ? hamburglar suit ? piano keys ? - LOL.

.
Did you already build this Diorama ? At home or at our Star Wars Celebration Diorama Builders workshop ? Would you like to show it in the site’s GALLERY VISITORS DIORAMAS section, YES ? That is Awesome !!! You can find out all the details on how to email me your photos on the VISITORS SUBMISSIONS INFO page … When I get your photos, I will create your very own page just like this one. You may not realize it but work does inspire others to join in the fun of making Action Figure Dioramas.
.
NOT FOR RESALE ALL Decals, tutorials and artwork are ©FrankDiorio (dioramaworkshop.com) and offered FOR FREE to the fans – that would be you ? so you can build and display my diorama designs in your very own home. I realize I cannot control what one does with my graphics once I place them on the web, I can only ask you as one fan to another, please respect the artist and do not be that jerk who uses my designs and tutorials to build a copy of my work only to sell it on EBAY or trade/sale groups and forums. Thank You. Frank.
.
.
If you have a facebook account, why not join the Official Diorama Builders Fan Club today, simply click the logo link below.
 .
.
Catch up with fellow visitors and exchange stories, read cool interviews with the crew, exchange photos, fun surprises and grab some FAN ONLY merchandise next year at actual future conventions ?
.
©2018 Frank Diorio DioramaWorkshop.Com
.
IF YOU LIKE WHAT YOU SEE, PLEASE SHARE WITH YOUR FRIENDS
USING THE SOCIAL MEDIA BUTTONS BELOW


