


-

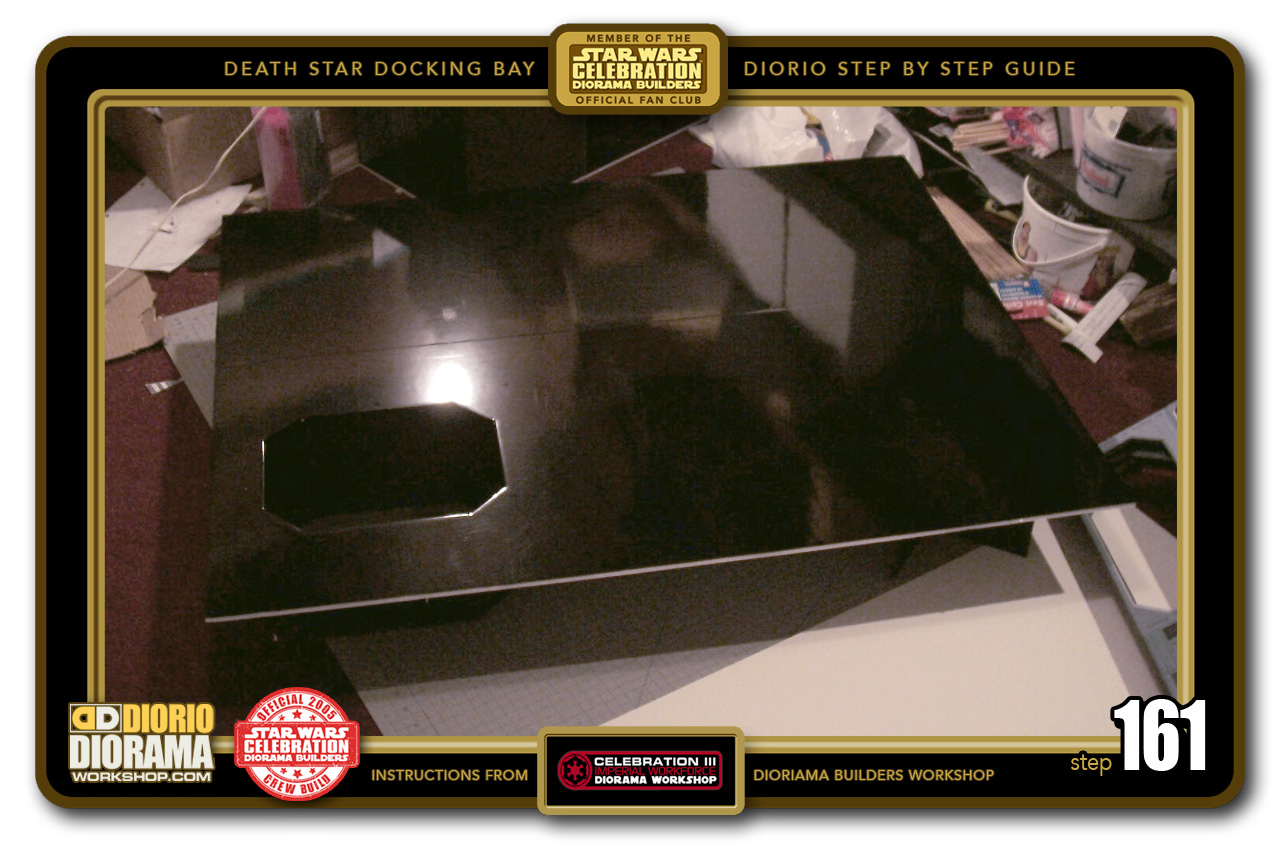
- STEP 161 > Flip it again and we now have what looks like the movie set floor don't you think ? Only thing left is to put gloss on the bottom of the elevator shaft.
-
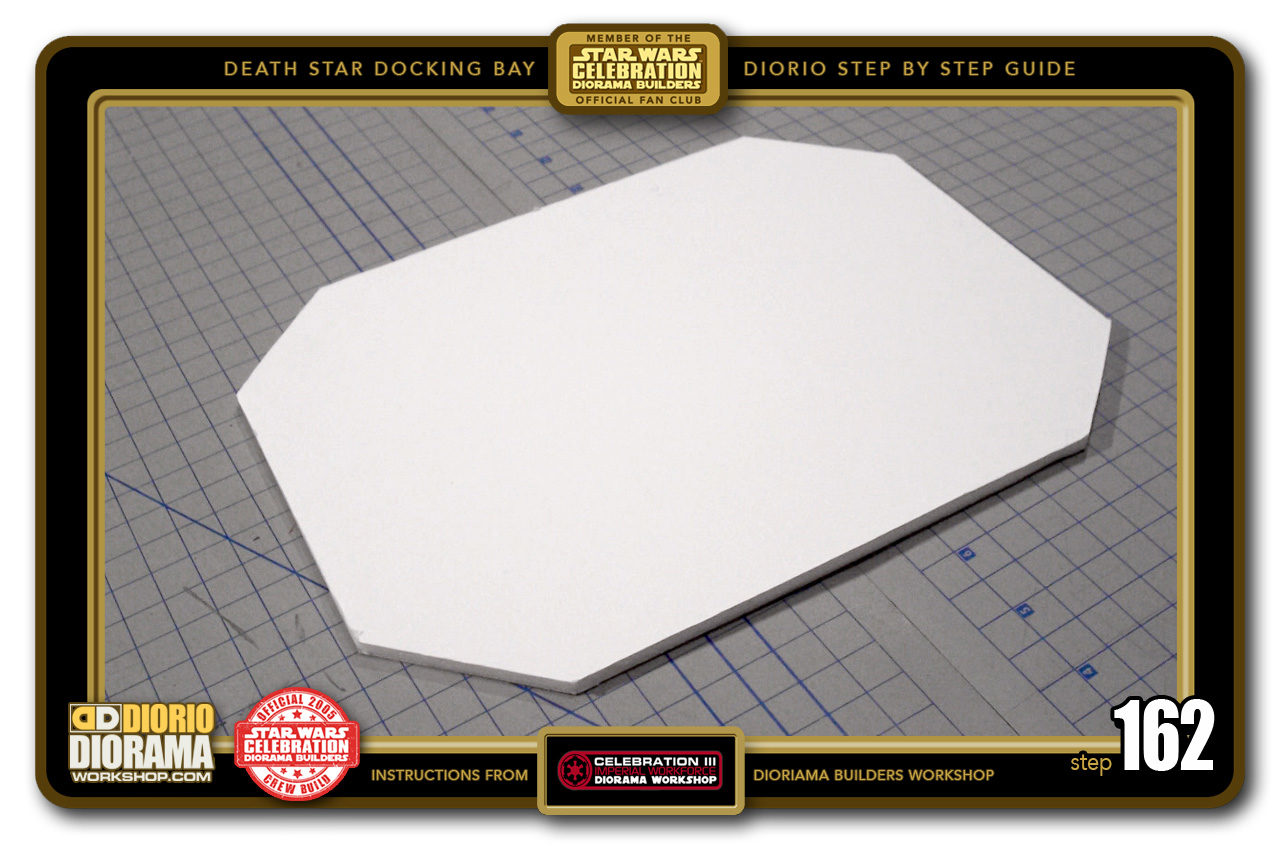
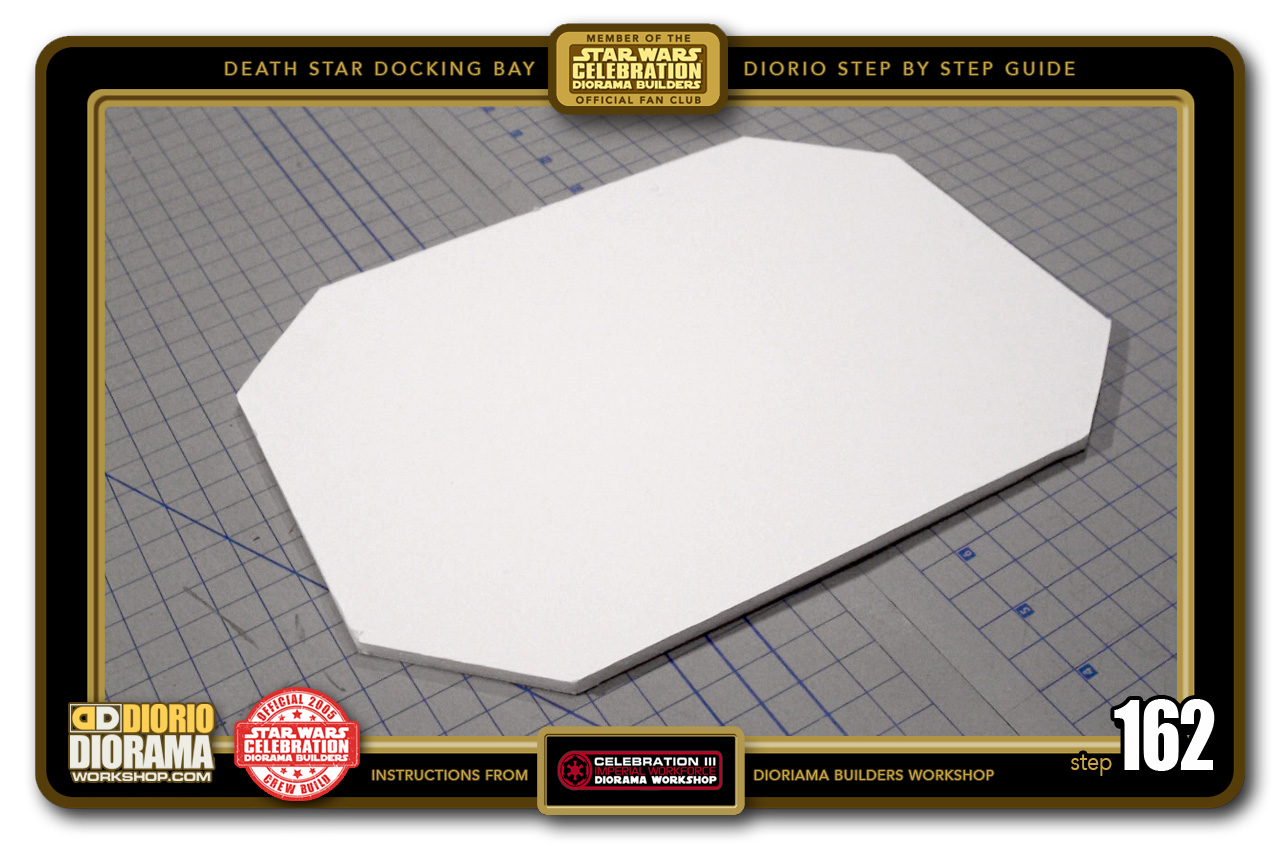
- STEP 162 > To do this easily, grab that Elevator Floor piece you cut out earlier in Step 148.
-
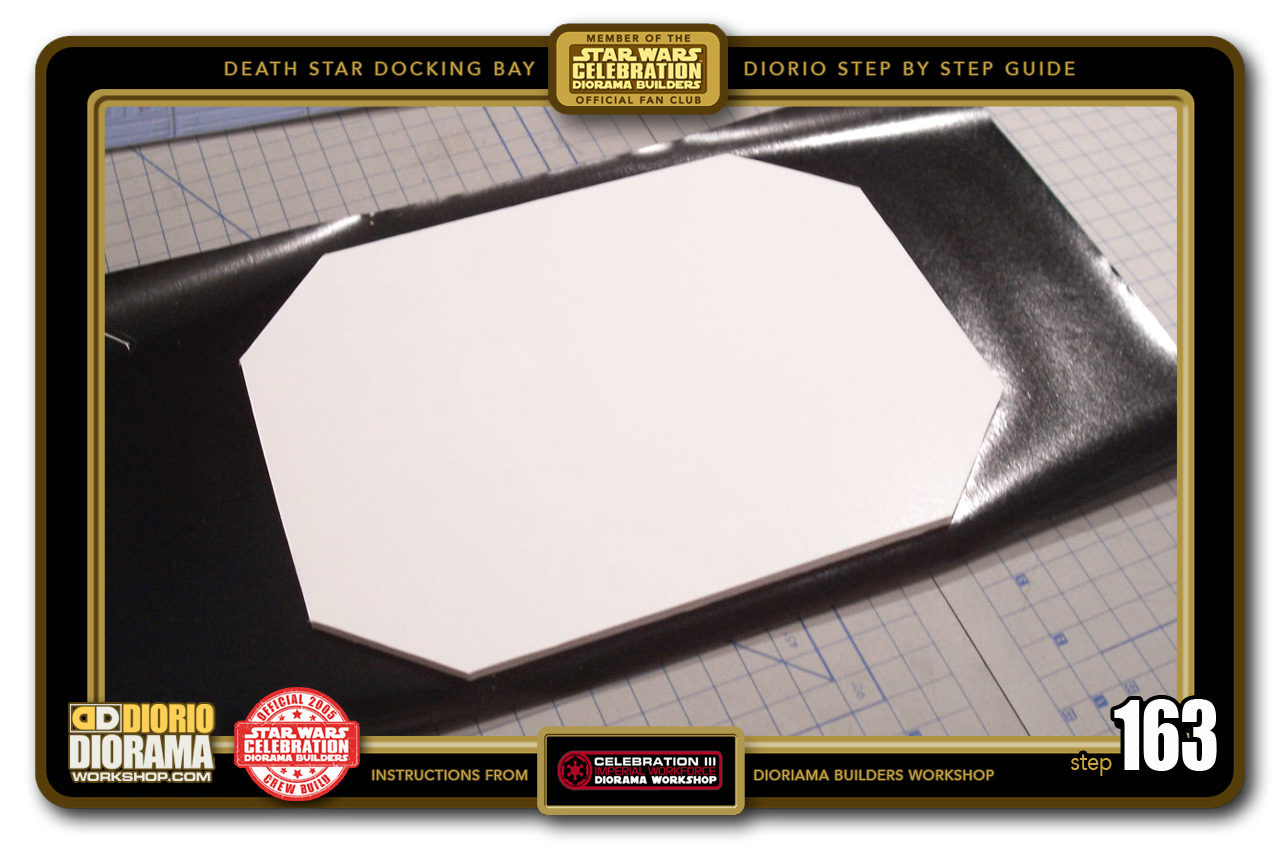
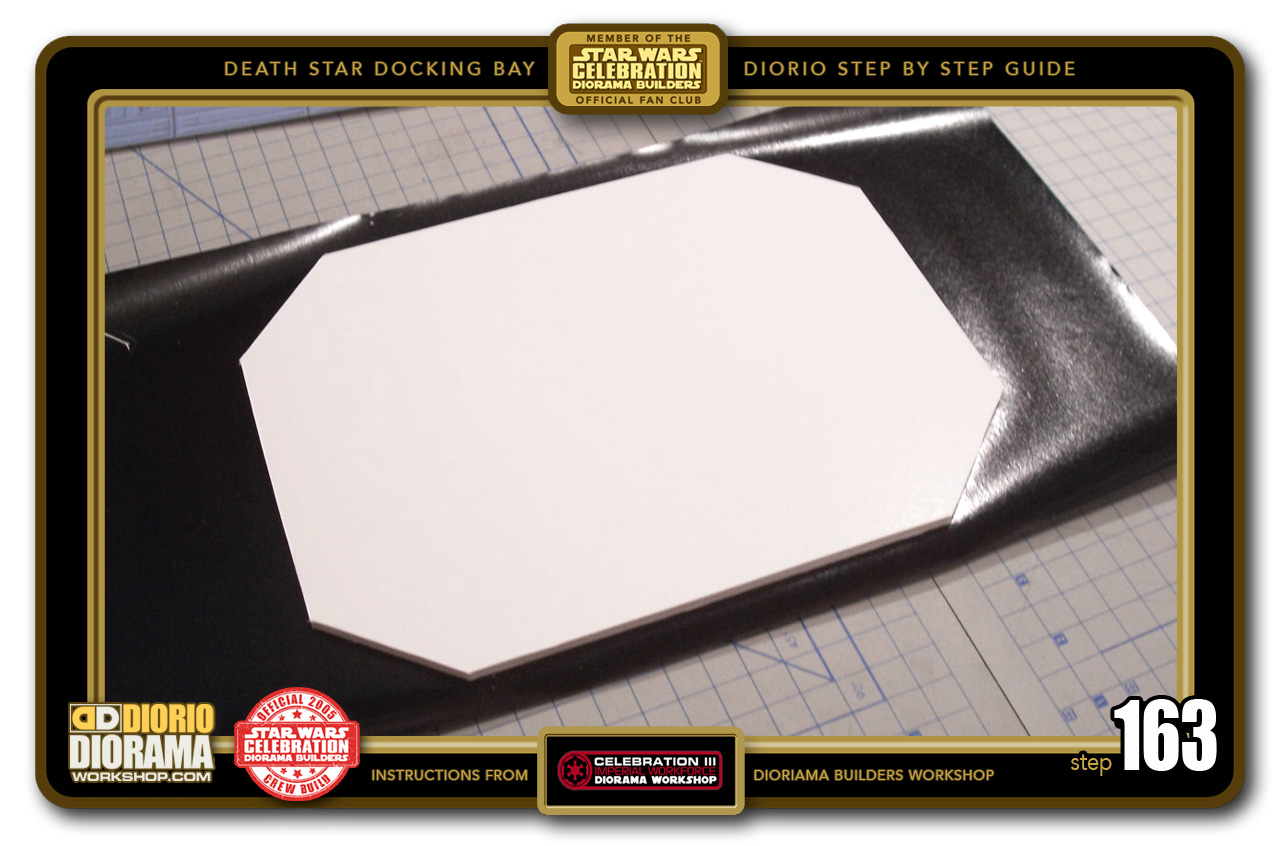
- STEP 163 > Measure and cut a piece of DC FIX vinyl that is slightly larger than your floor. Peel the vinyl and flip it sticky side up. Use your X-Acto pen or knife to go along every side to trim all the surrounding excess.
-

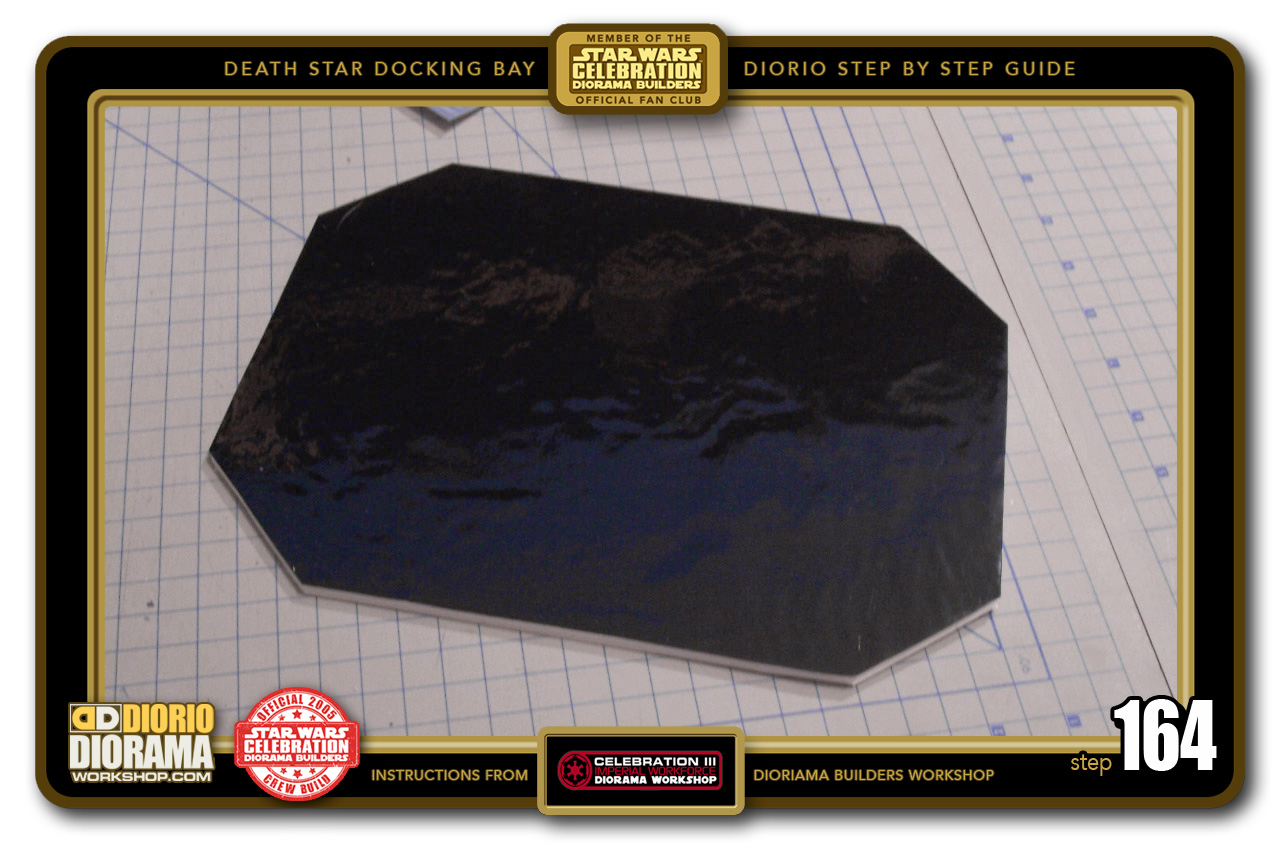
- STEP 164 > Once you flip your piece 180 face up, it should look like this. If you see some air bubbles, you can move your fingers side to side to make it smoother.
-

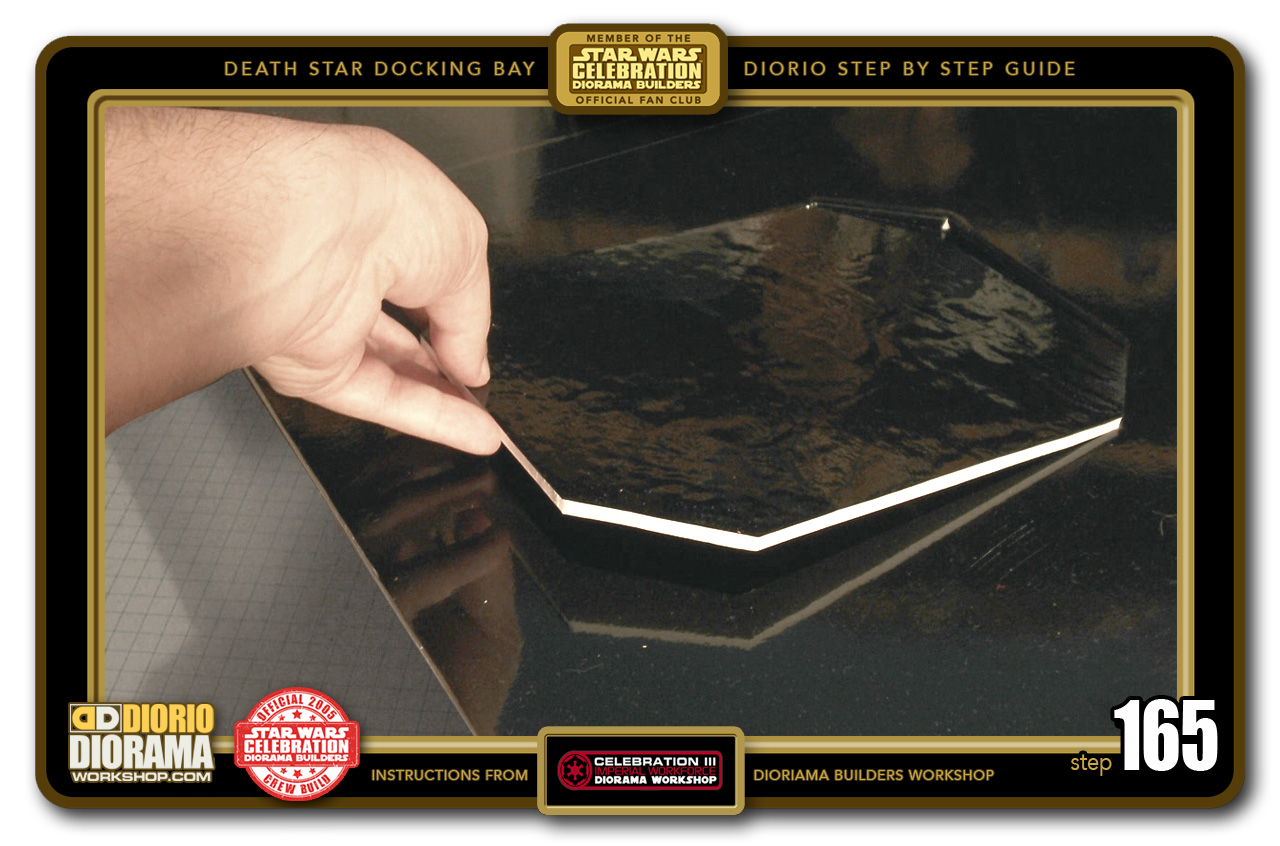
- STEP 165 > To put the floor back in it's hole, Angle your floor glossy side up and slide it into the Elevator Shaft till it reaches the rear wall and then lower the front part to bring it level. There will be an air pocket that will make it a little tricky to press down.
-
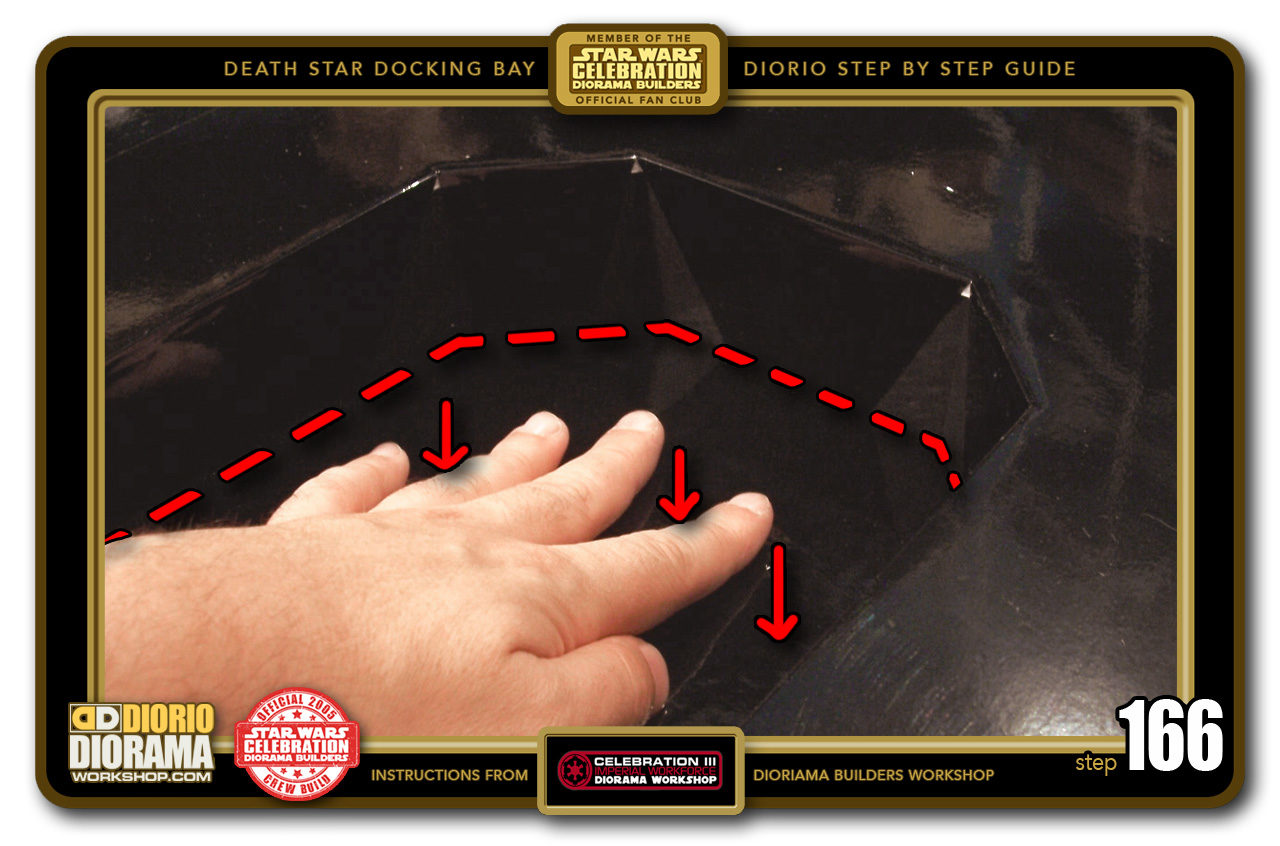
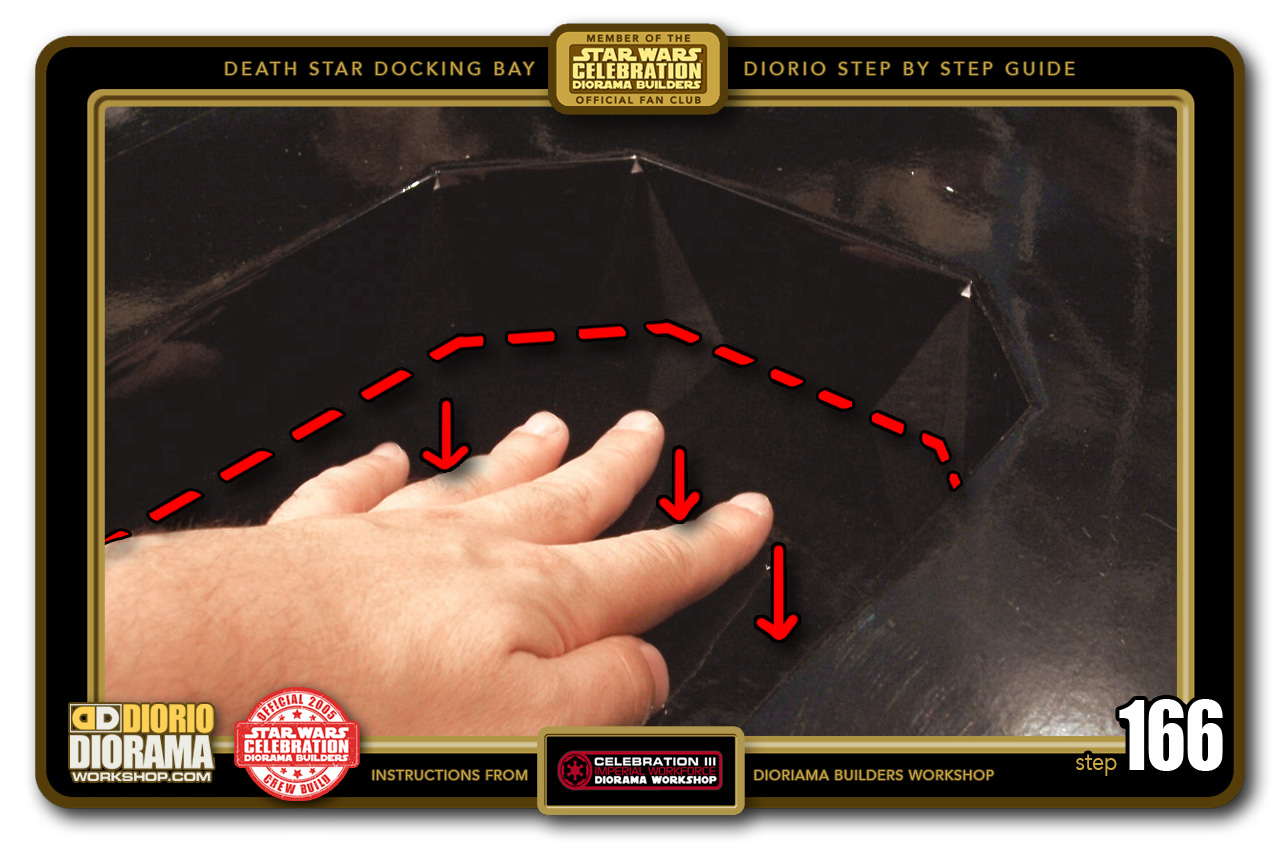
- STEP 166 > Slowly press down evenly till you reach the floor. You may have to wiggle it as it goes down to remove the trapped air underneath.
-
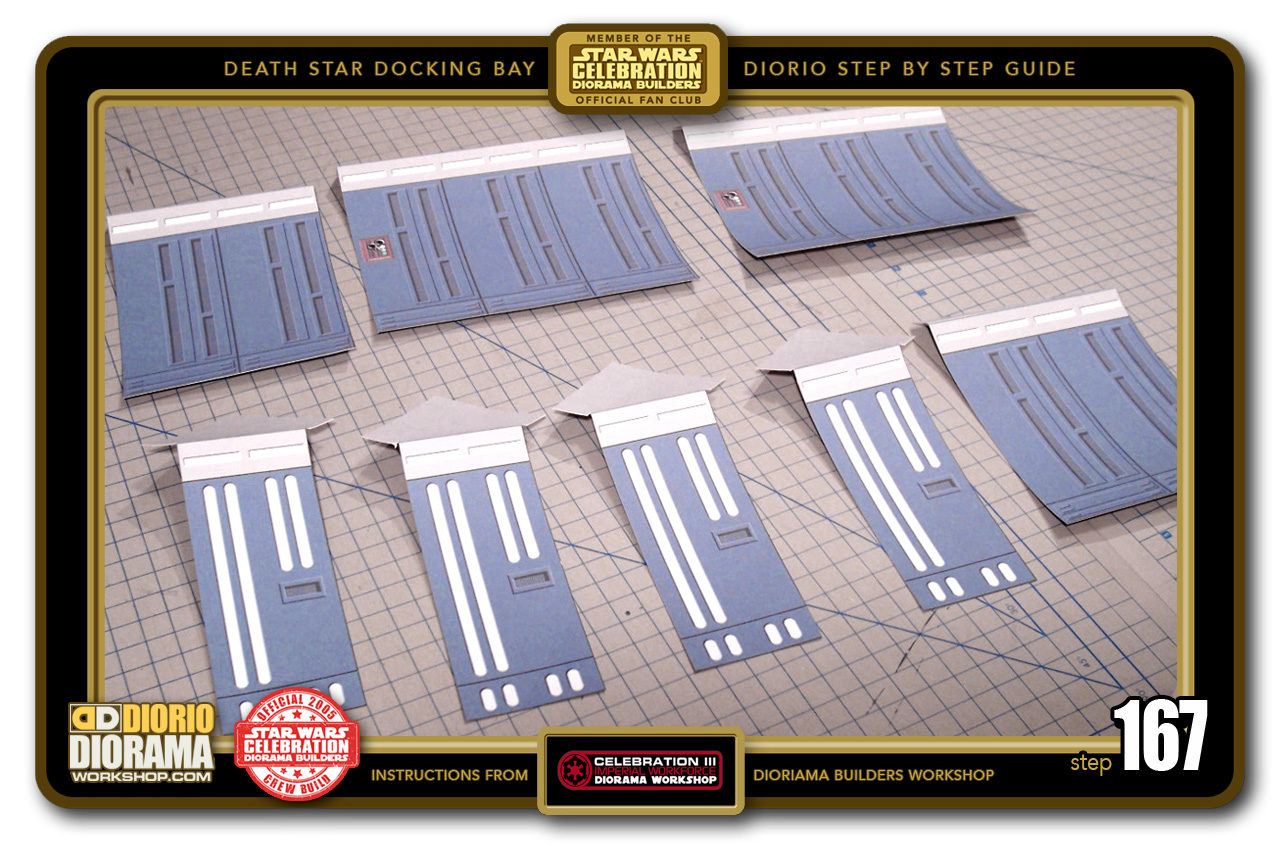
- STEP 167 > Time to grab your elevator shaft decals. After you print, cut out all the pieces until they all look like this.

-
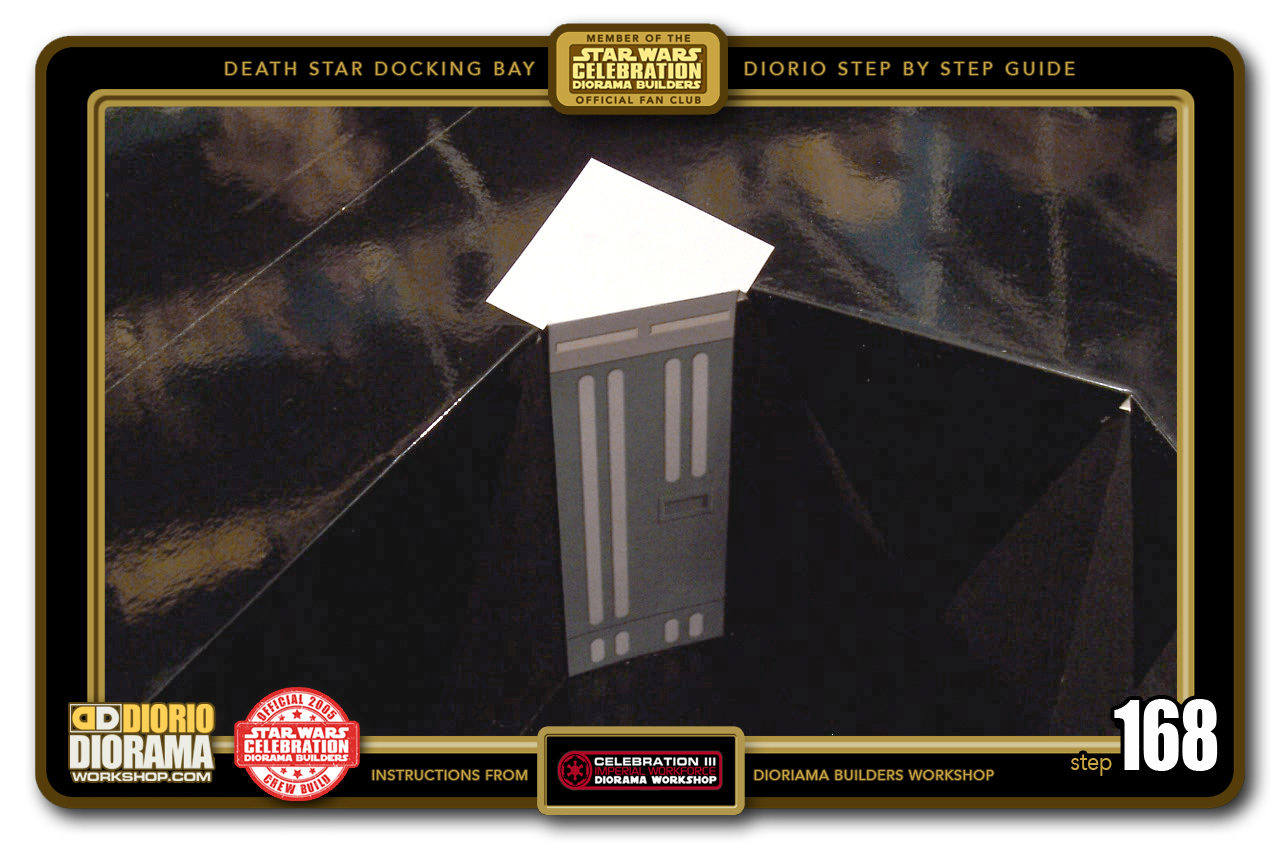
- STEP 168 > I print my decals on full size label sheets that peel back and attach perfectly. If you used regular paper, you can use Glue sticks to place the decals. DO NOT USE HOT GLUE. Start with a first corner. Align the TOP of the wall pattern with the floor line, then once that is smoothed out, SLOWLY BEND the TOP SQUARE towards the floor and press flat. Press the shaft body from top to bottom to remove any folds or air bubbles.

-
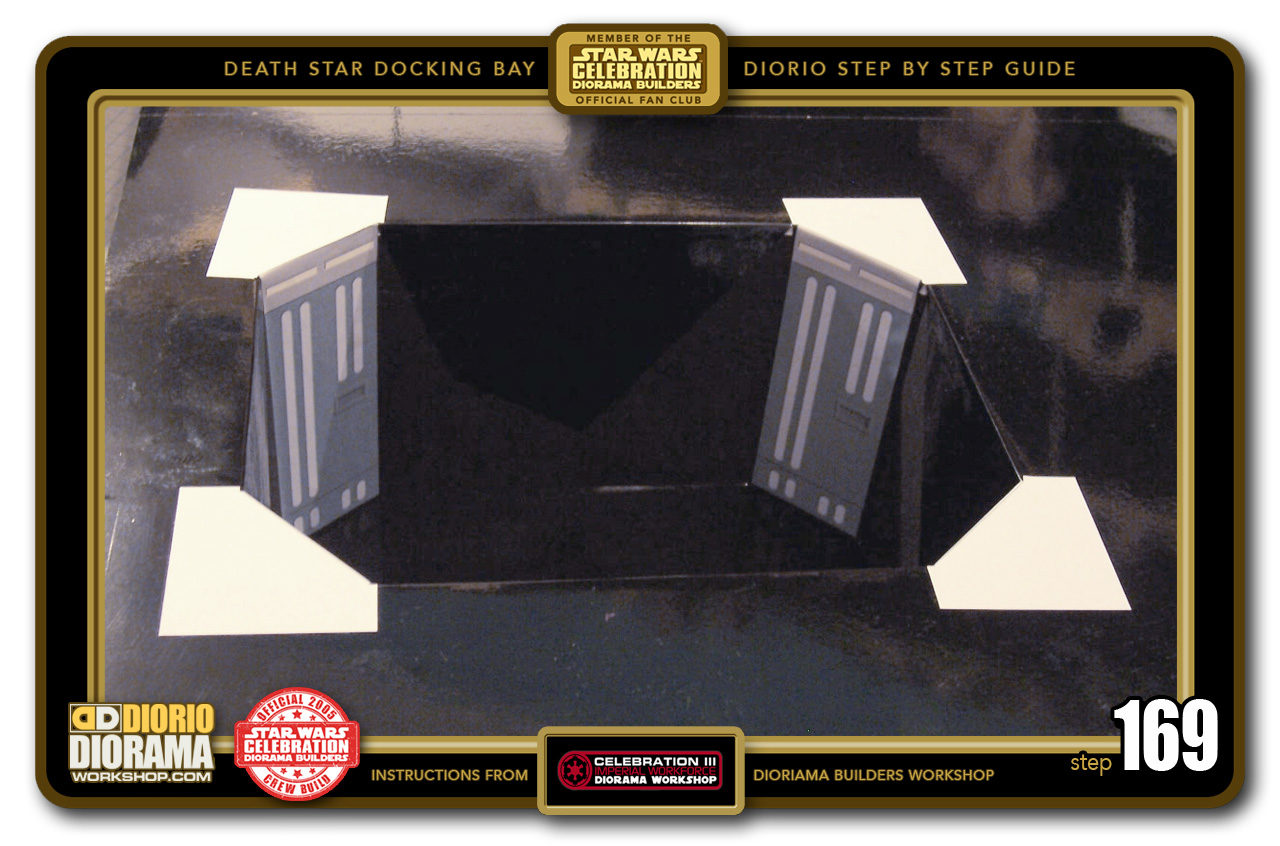
- STEP 169 > Do the 4 corner decals first. It will be easier to align the front, back and sides later.

-
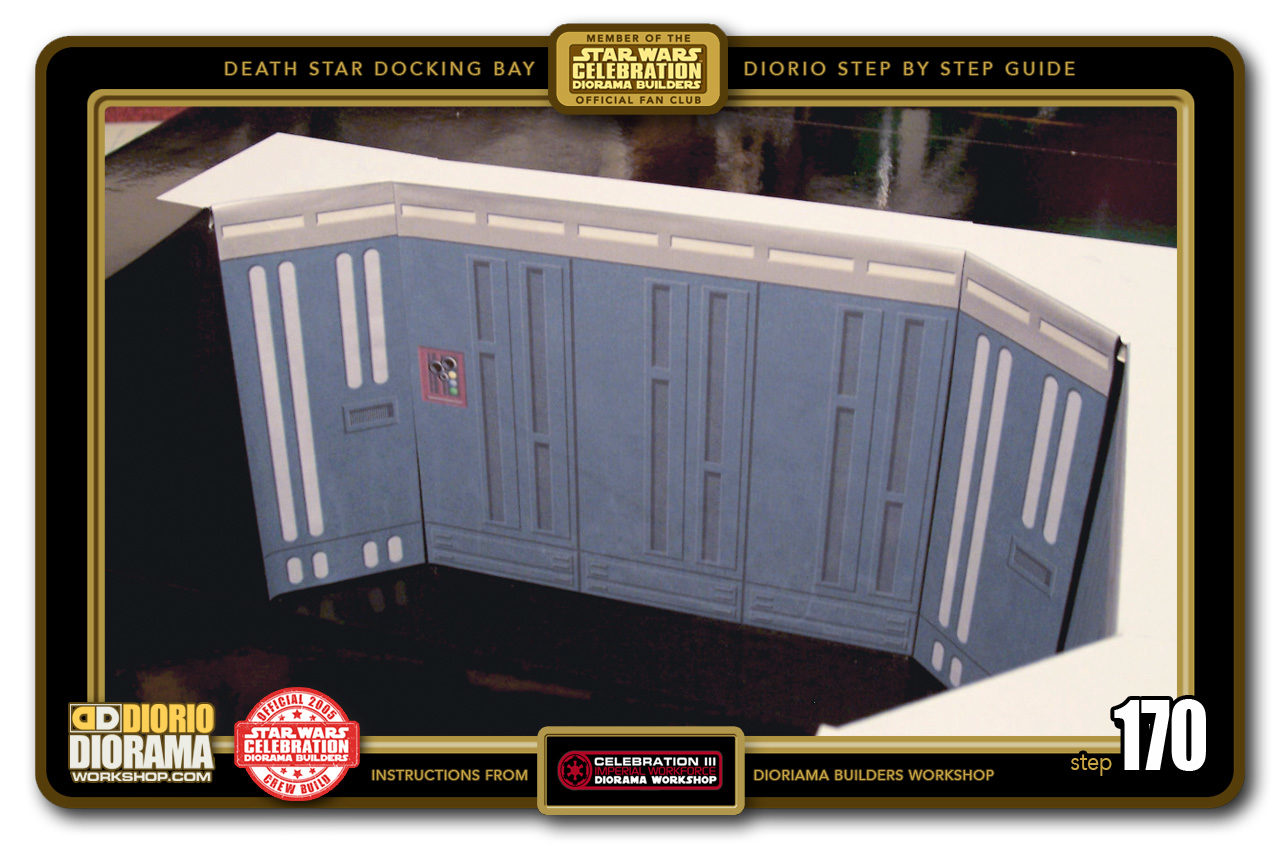
- STEP 170 > Now I peeled back the side wall decals, align it carefully without making contact with the wall. When you are happy with it's position, press with your thumbs in the center, swipe center towrds the left, back to center swipe towards the right. Keep sweeping your fingers until it is completely glued to the foamcore and free of folds and air bubbles.

-

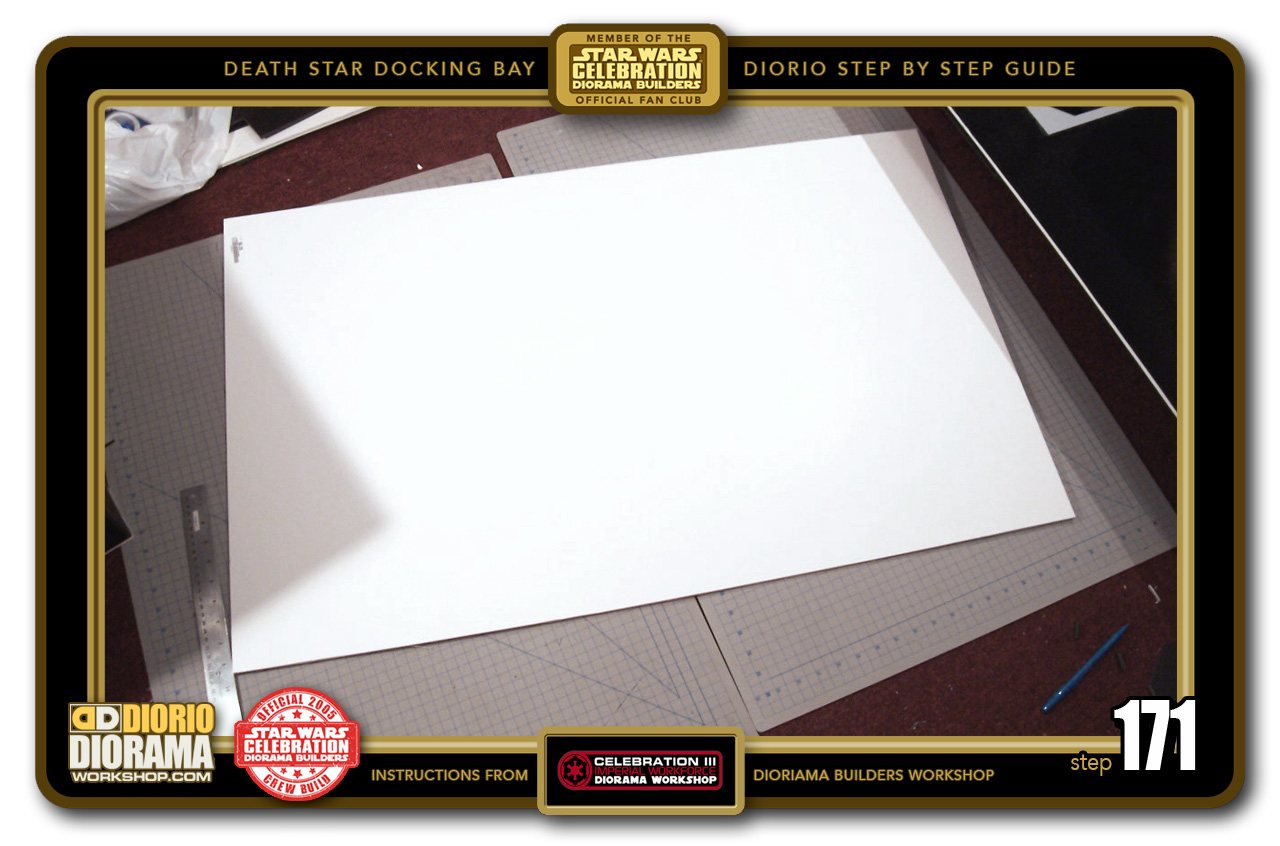
- STEP 171 > The docking bay is bigger than 1 sheet of 30X40 foamcore so it's time to make the right side. This is fairly easy as there is no elevator shaft thus, no hole to make. Just a simple sheet that matches the first.
-
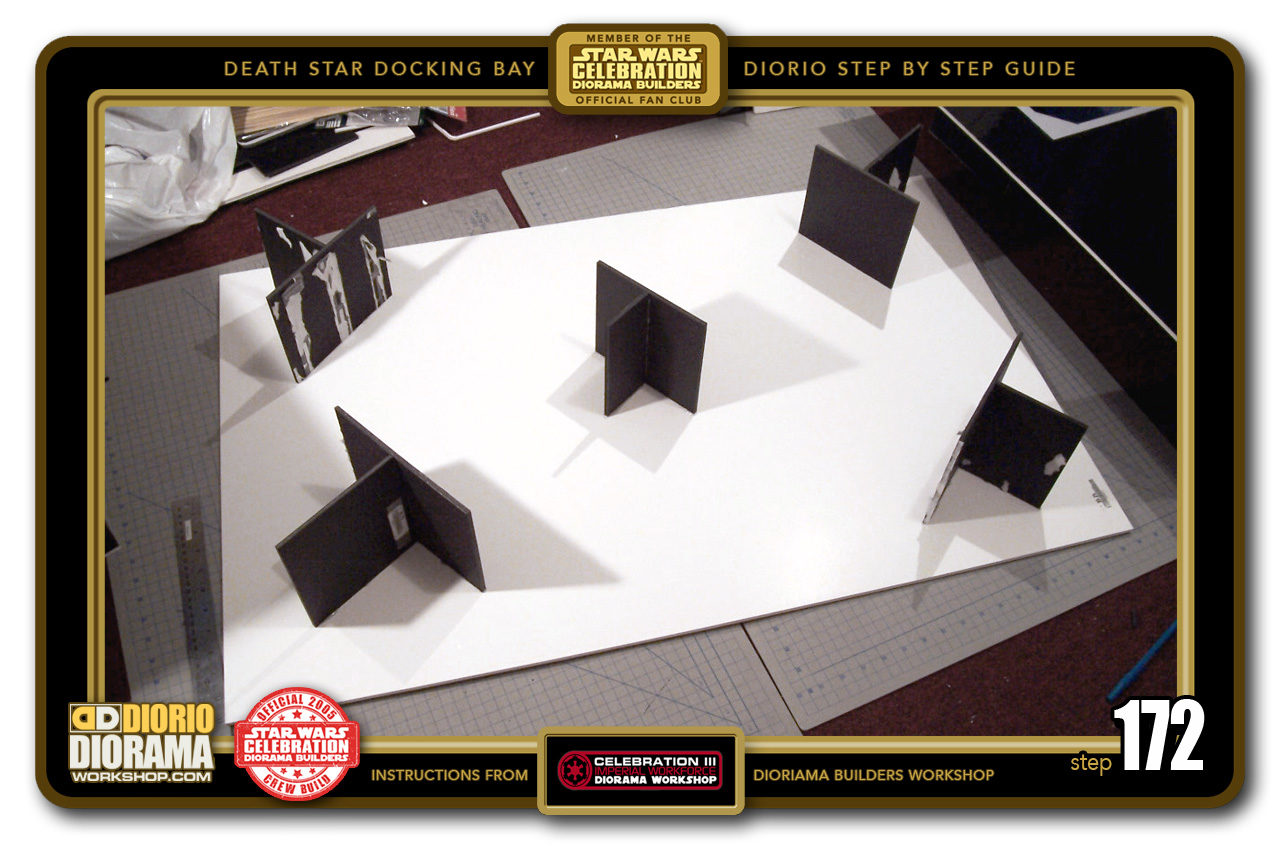
- STEP 172 > Time to raise this floor as you did in Steps 149 to 152 with the Elevator floor. Repeat those instructions until you match this photo. Flip 180 and apply your DC FIX Vinyl flooring.

-

- STEP 173 > Now you can place the 2 floor pieces side by side and see how they fit perfectly into one HUGE floor.

-

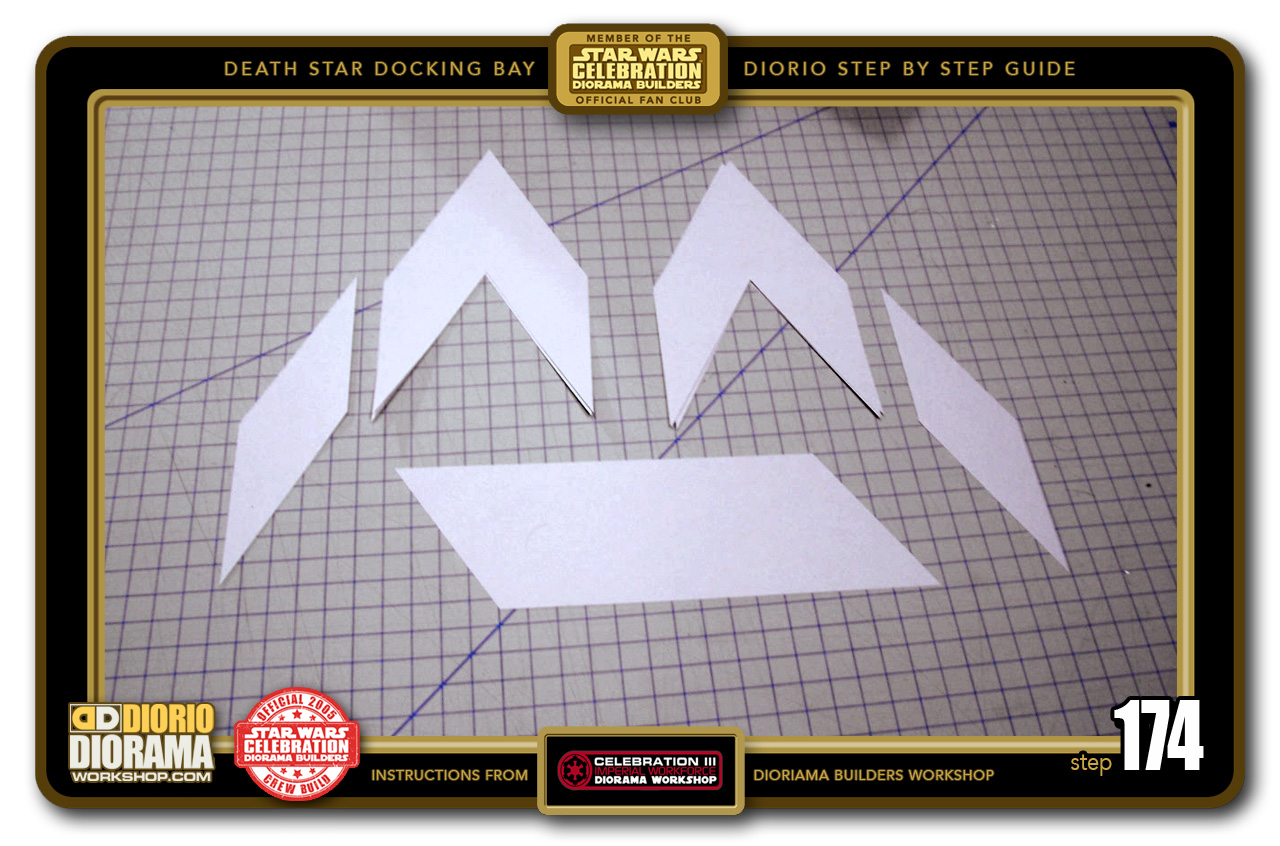
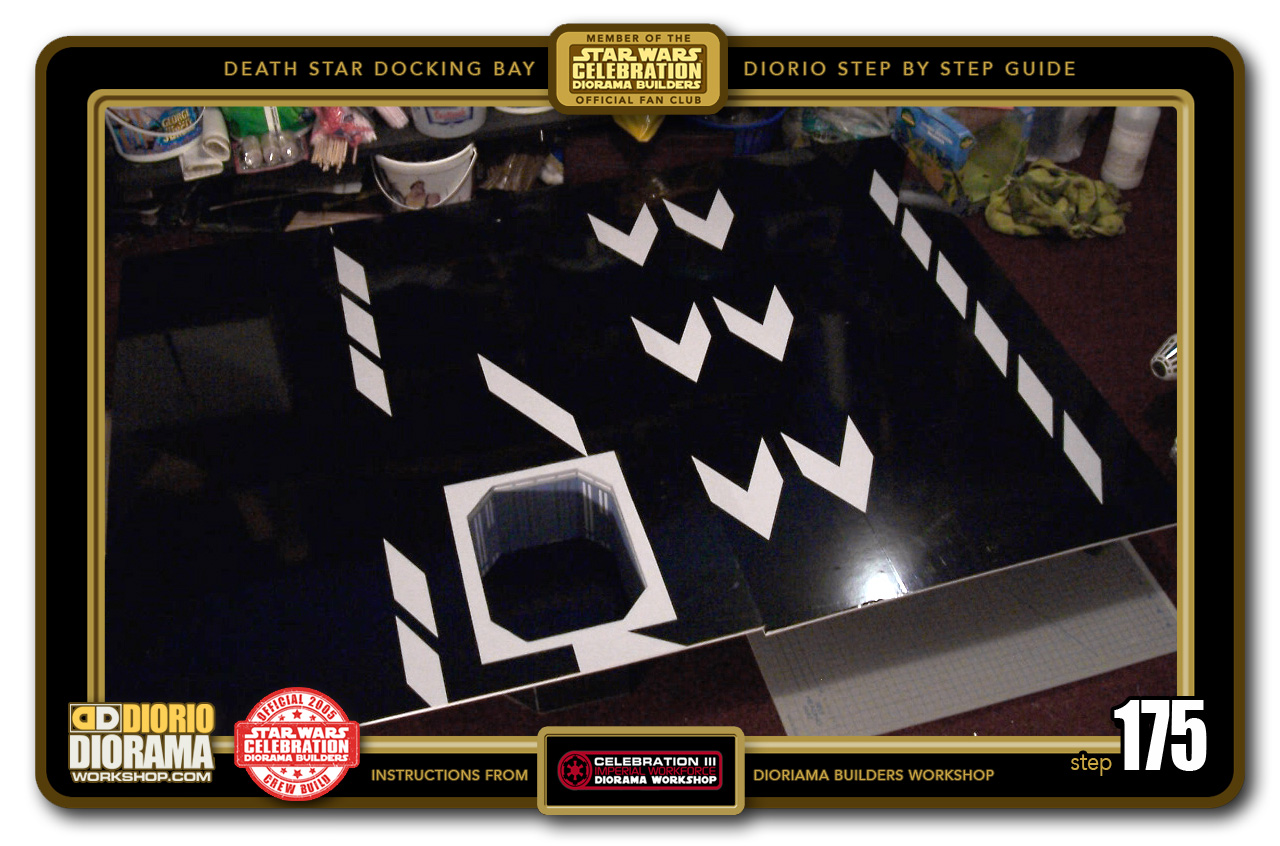
- STEP 174 > Time for some floor details like in the movie. Print and cut out your arrow decals.
-

- STEP 175 > Apply your decals to your floor like you see in this picture if you want your diorama to be exactly like the movie set.
-
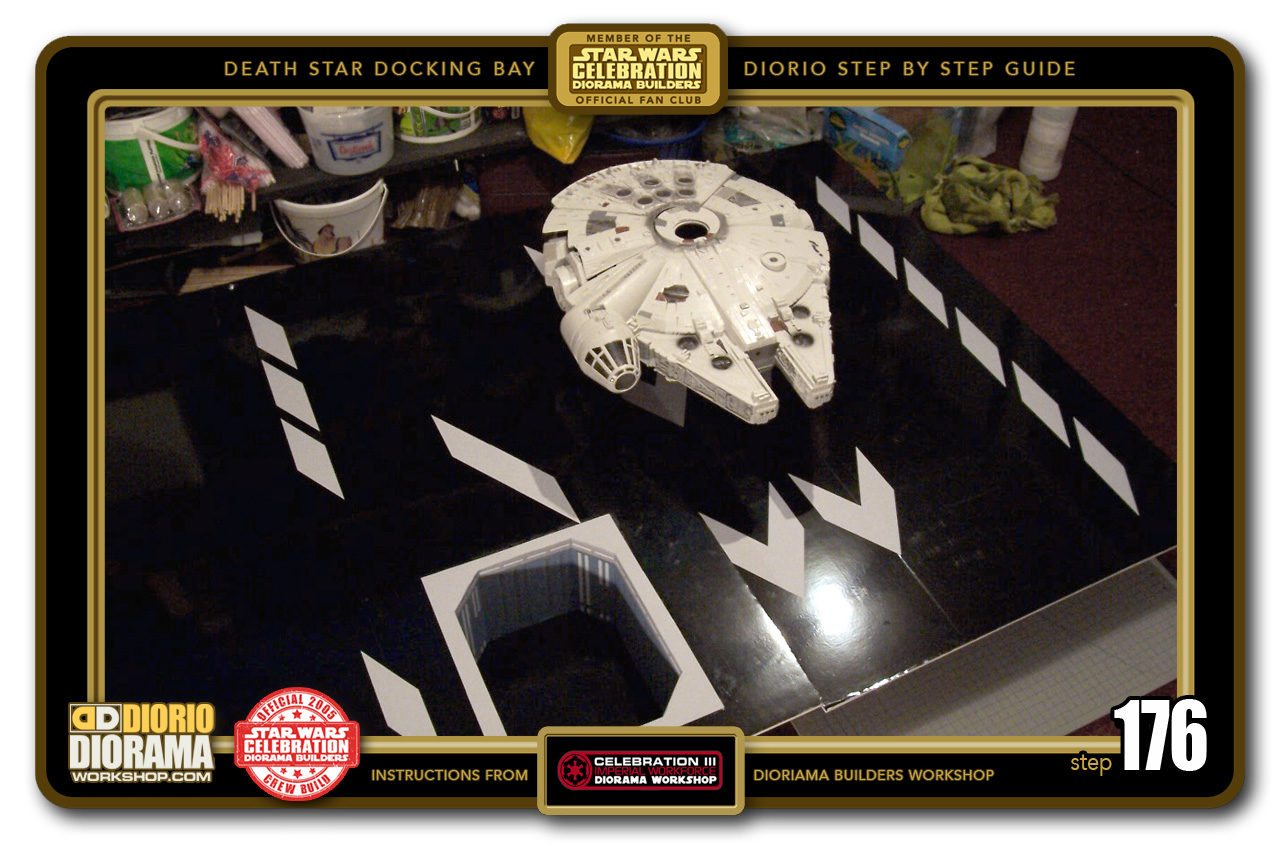
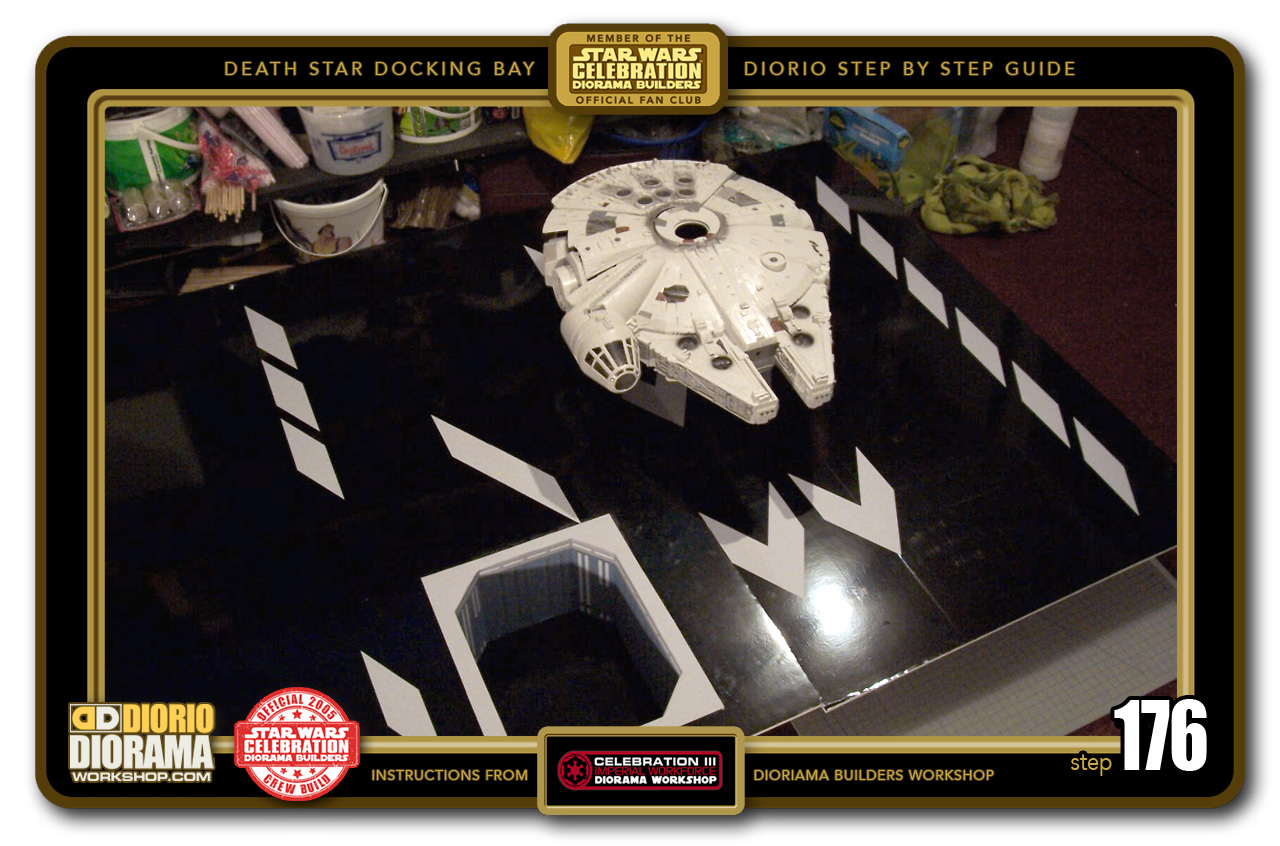
- STEP 176 > The Falcon can now rest as in the movie. Note that this is the 1995 Falcon and NOT the HUGE NEW BMF Falcon released in 2009. That falcon will elevate this Diorama even more if you have it.
-
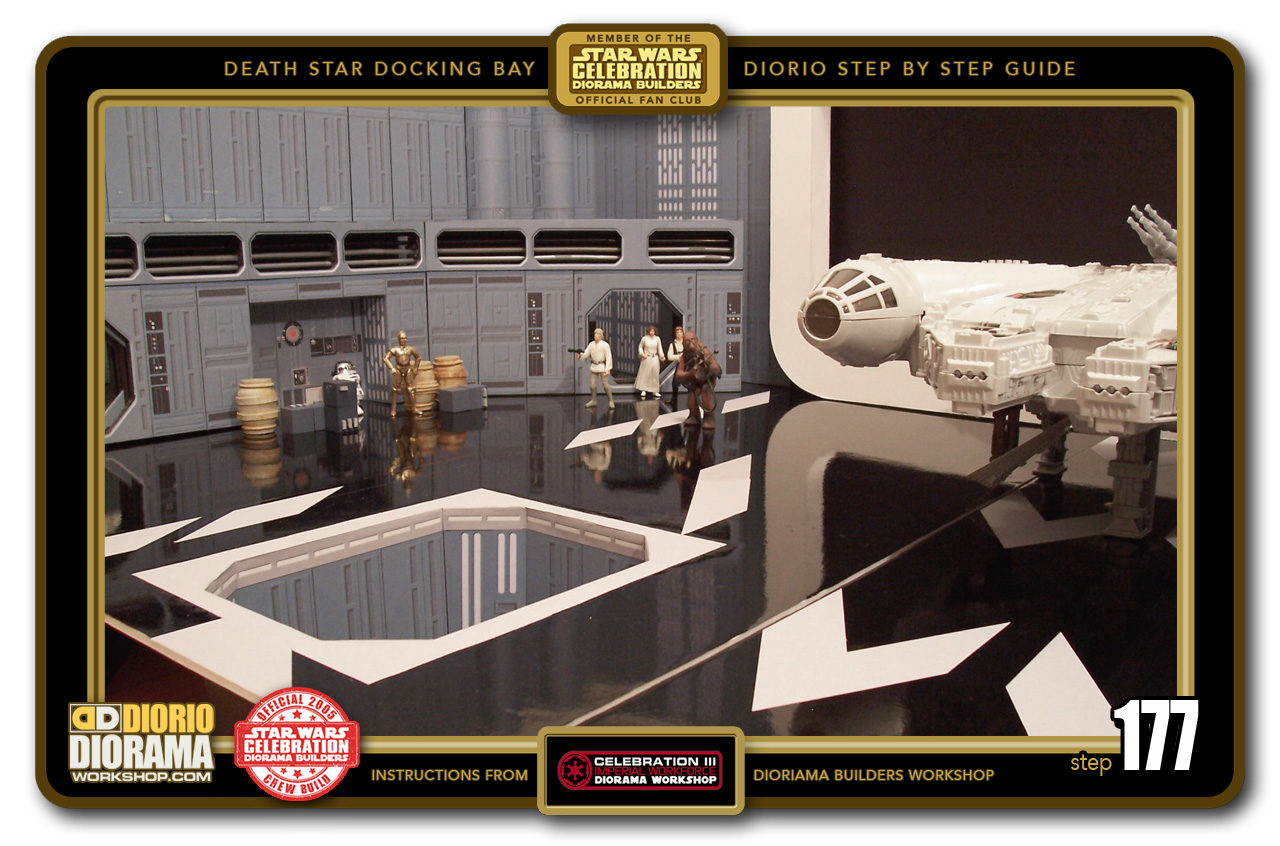
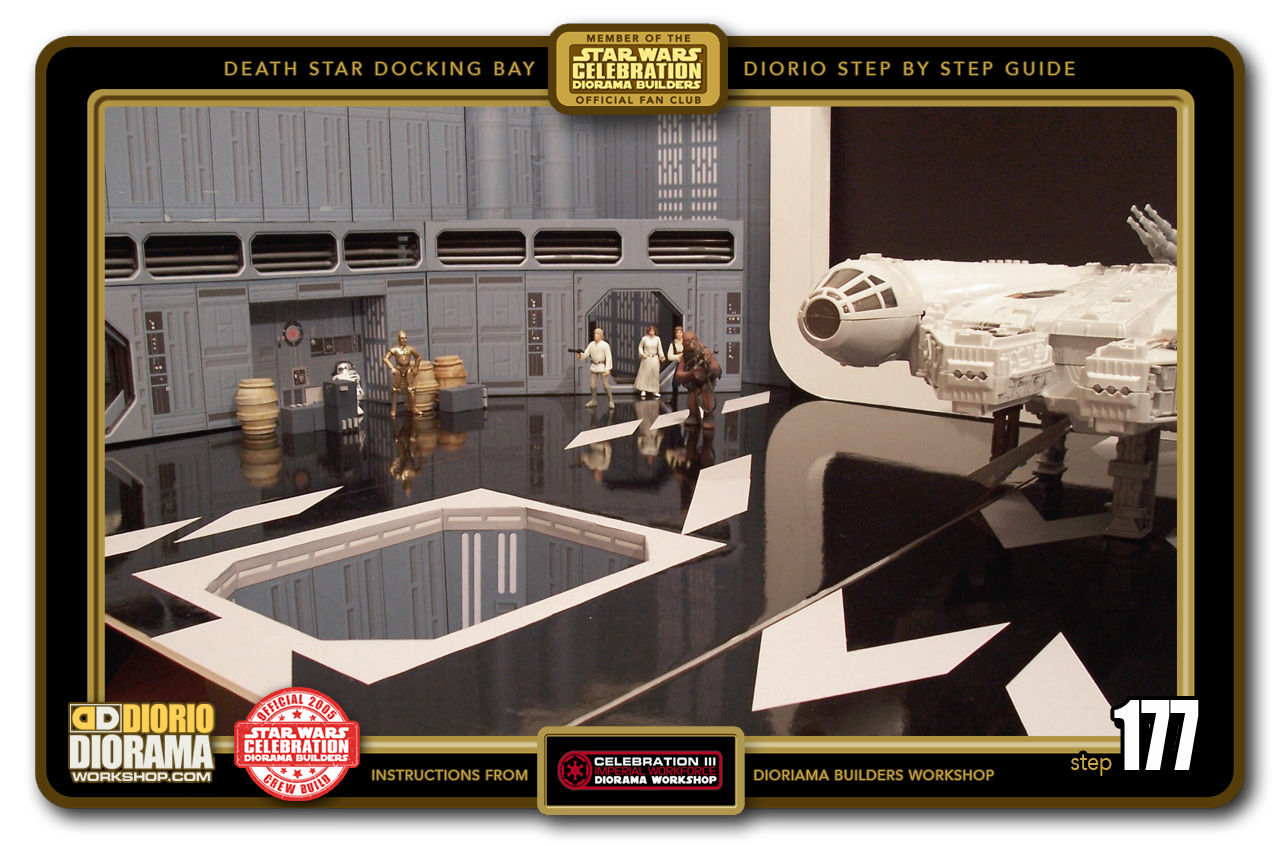
- STEP 177 > This is where we are now ... OK, I am a little ahead of myself 🙂 But you can see how it's all coming together. Now let's make those wall round wall panels.
-

- STEP 178 > IMPORTANT: Starting here, I have lost my notes for specific measurements, so I can't tell you all the exact sizes I used, but some you can figure it out with the decal sizes and references you see in the photos. So let's start with the 2 level tall small round wall details. I cut out 7 circles 6cm wide and them cut those in half.

-

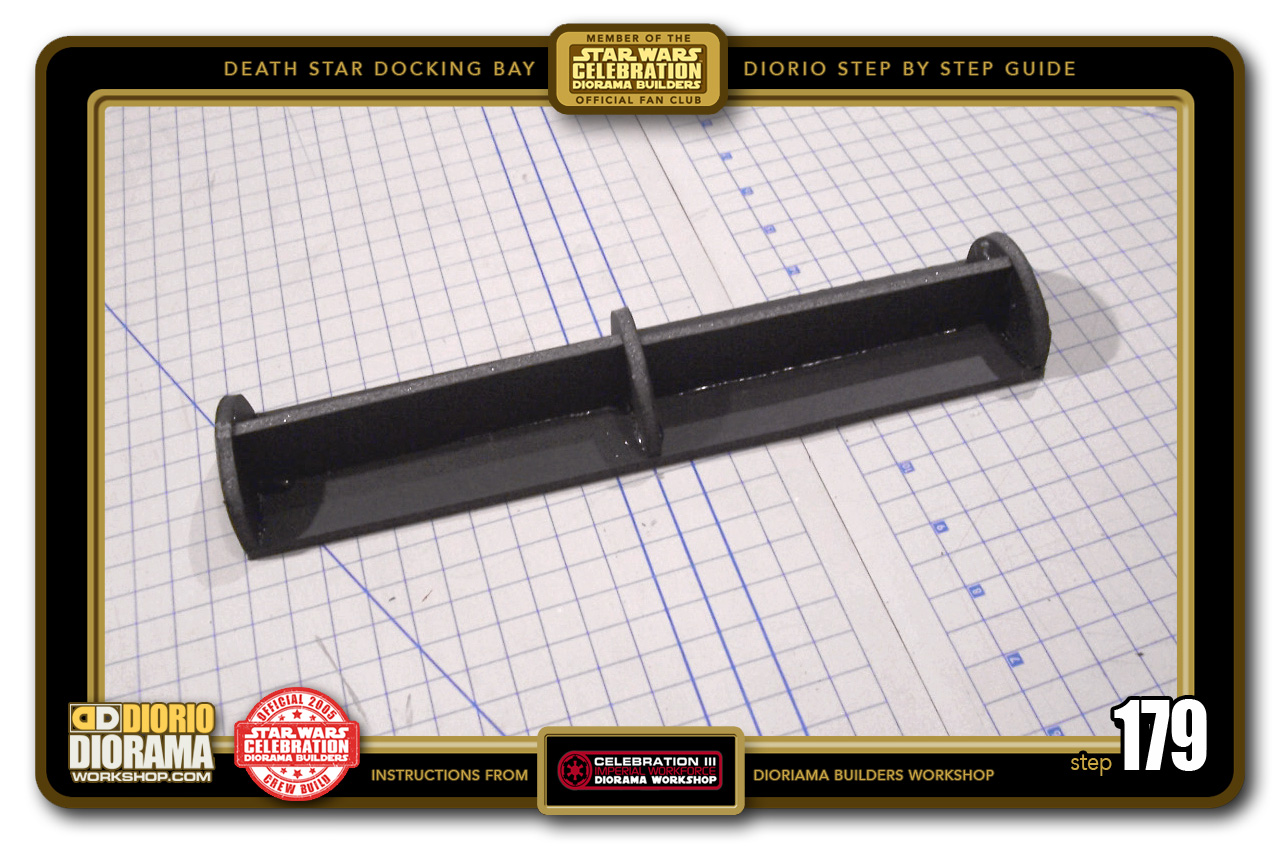
- STEP 179 > Measure and cut a 6cm wide X 28.5cm rectangle and hot glued 3 circles to the small round wall rear base, then hot glue 2 spine support rectangles in between to prevent decal collapse.
-

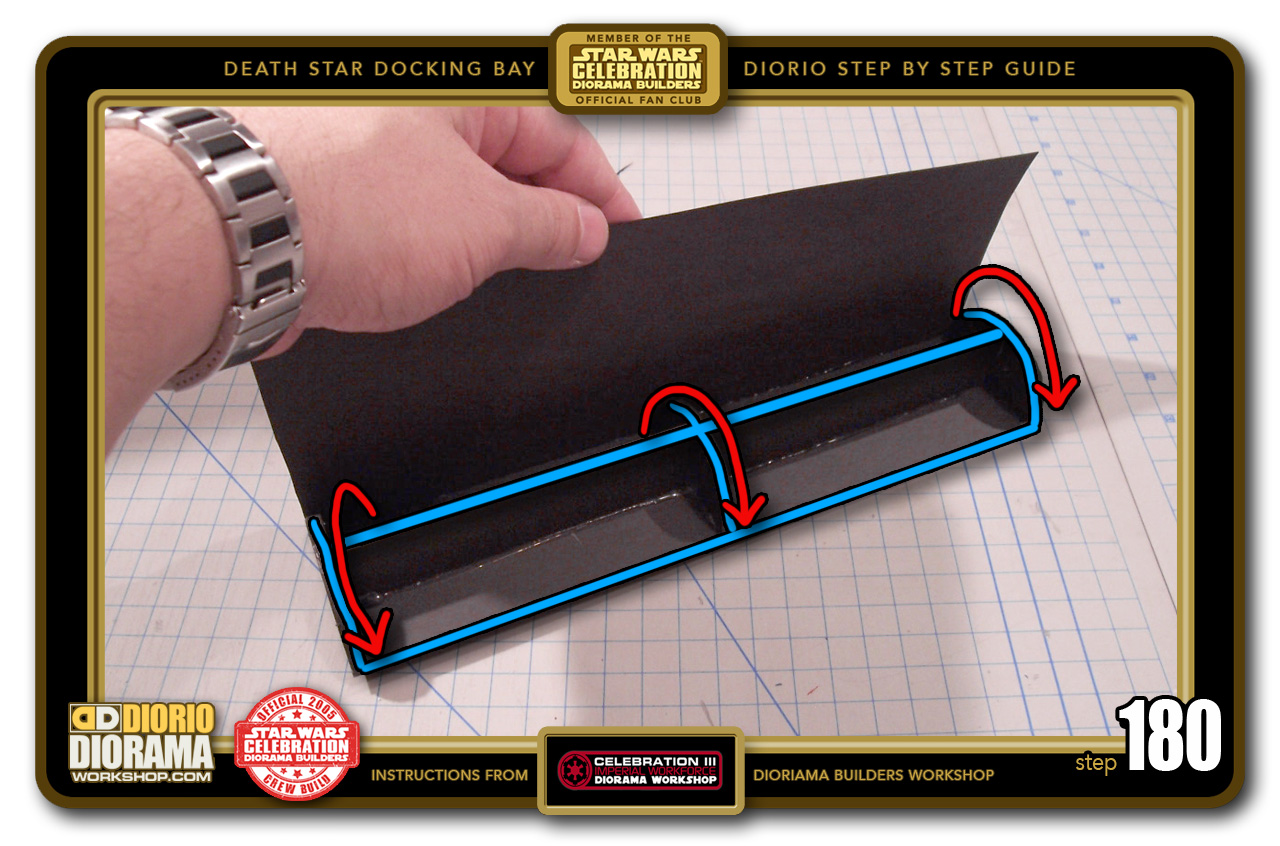
- STEP 180 > The decal prints are too fragile and flimsy to wrap on their own, so take a black poster/cardboard stock and bend it around the spines so that I can later apply the Decal without warping. Measure a piece 28.5cm tall and large enough to wrap around the half circle. It's ok if little larger, you will trim the excess at Step 183. Apply your hot glue along the blue lines to secure your cardboard in place by wrapping it around like you see with the red arrows.

.
Did you already build this Diorama ? At home or at our Star Wars Celebration Diorama Builders workshop ? Would you like to show it in the site’s GALLERY VISITORS DIORAMAS section, YES ? That is Awesome !!! You can find out all the details on how to email me your photos on the VISITORS SUBMISSIONS INFO page … When I get your photos, I will create your very own page just like this one. You may not realize it but work does inspire others to join in the fun of making Action Figure Dioramas.
.
NOT FOR RESALE ALL Decals, tutorials and artwork are ©FrankDiorio (dioramaworkshop.com) and offered FOR FREE to the fans – that would be you ? so you can build and display my diorama designs in your very own home. I realize I cannot control what one does with my graphics once I place them on the web, I can only ask you as one fan to another, please respect the artist and do not be that jerk who uses my designs and tutorials to build a copy of my work only to sell it on EBAY or trade/sale groups and forums. Thank You. Frank.
![]() Catch up with fellow visitors and exchange stories, read cool interviews with the crew, exchange photos, fun surprises and grab some FAN ONLY merchandise next year at actual future conventions ?
Catch up with fellow visitors and exchange stories, read cool interviews with the crew, exchange photos, fun surprises and grab some FAN ONLY merchandise next year at actual future conventions ?
.
©2018 Frank Diorio DioramaWorkshop.Com
.
IF YOU LIKE WHAT YOU SEE, PLEASE SHARE WITH YOUR FRIENDS
USING THE SOCIAL MEDIA BUTTONS BELOW