


-

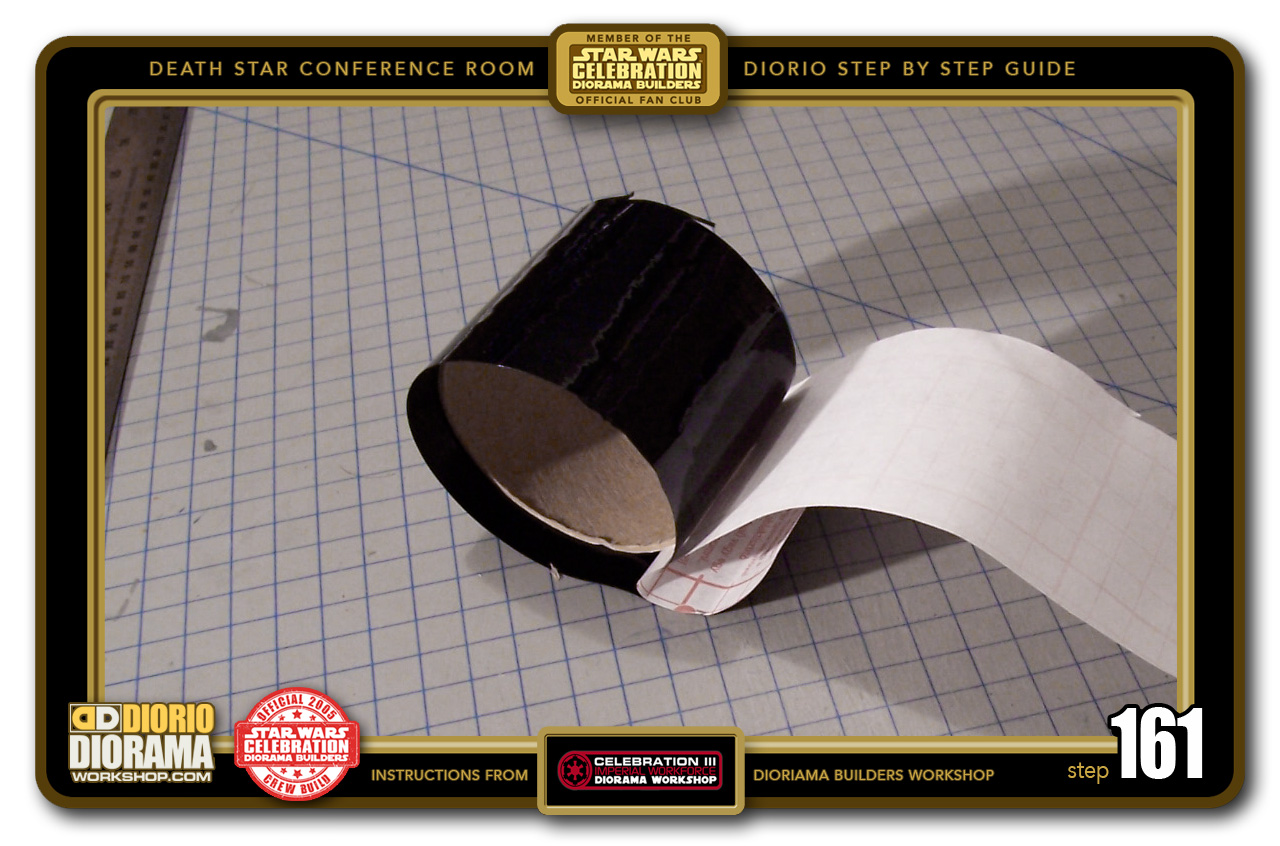
- STEP 161 > Peel the backing slowly to avoid making air bubbles. Press the Mac Tac against the tube with your fingers from the center outwards.
-
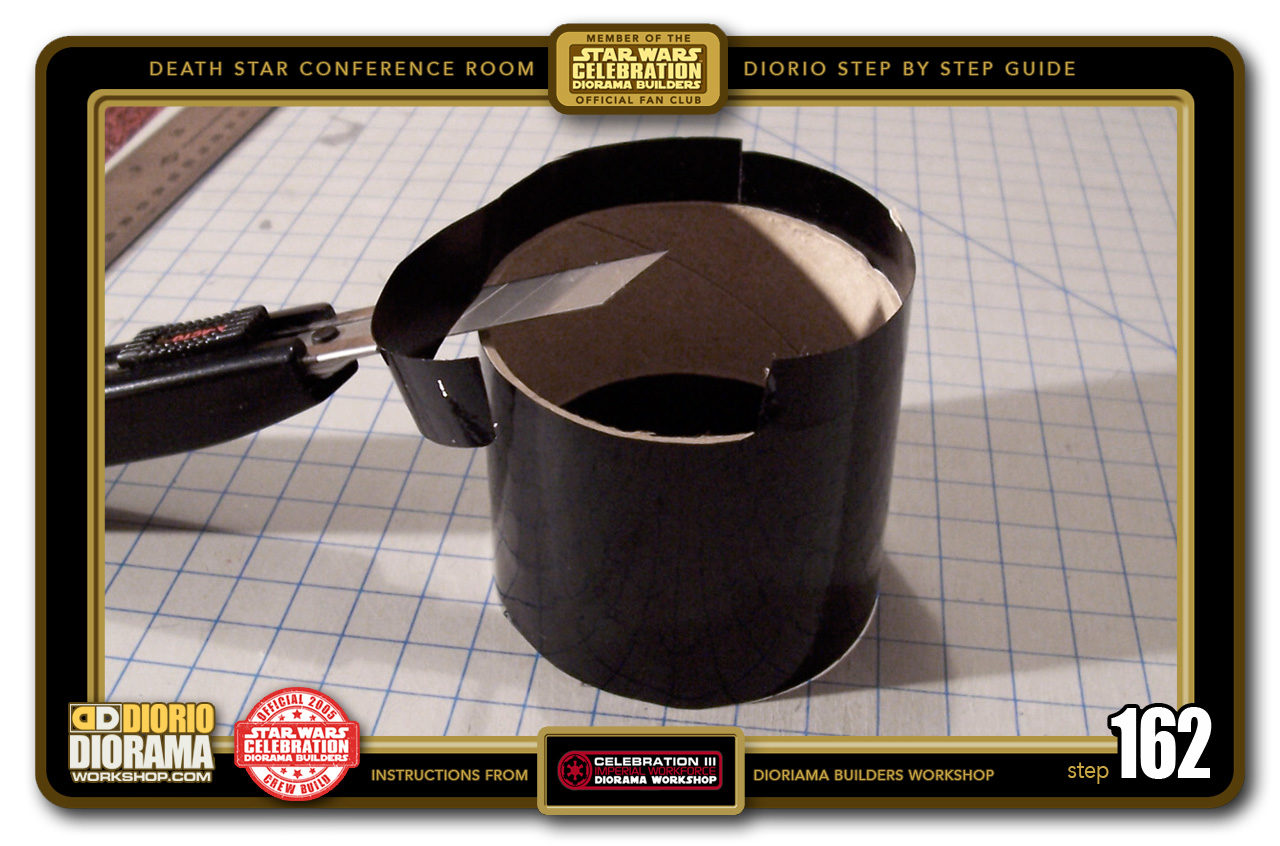
- STEP 162 > Now we just have to trim the excess Mac Tac. Use a sharp blade and rest it on the top surface of the tube. Now simply move the knife inwards as you move slowly against the tube. You should be cutting like a knife in hot butter 🙂

-

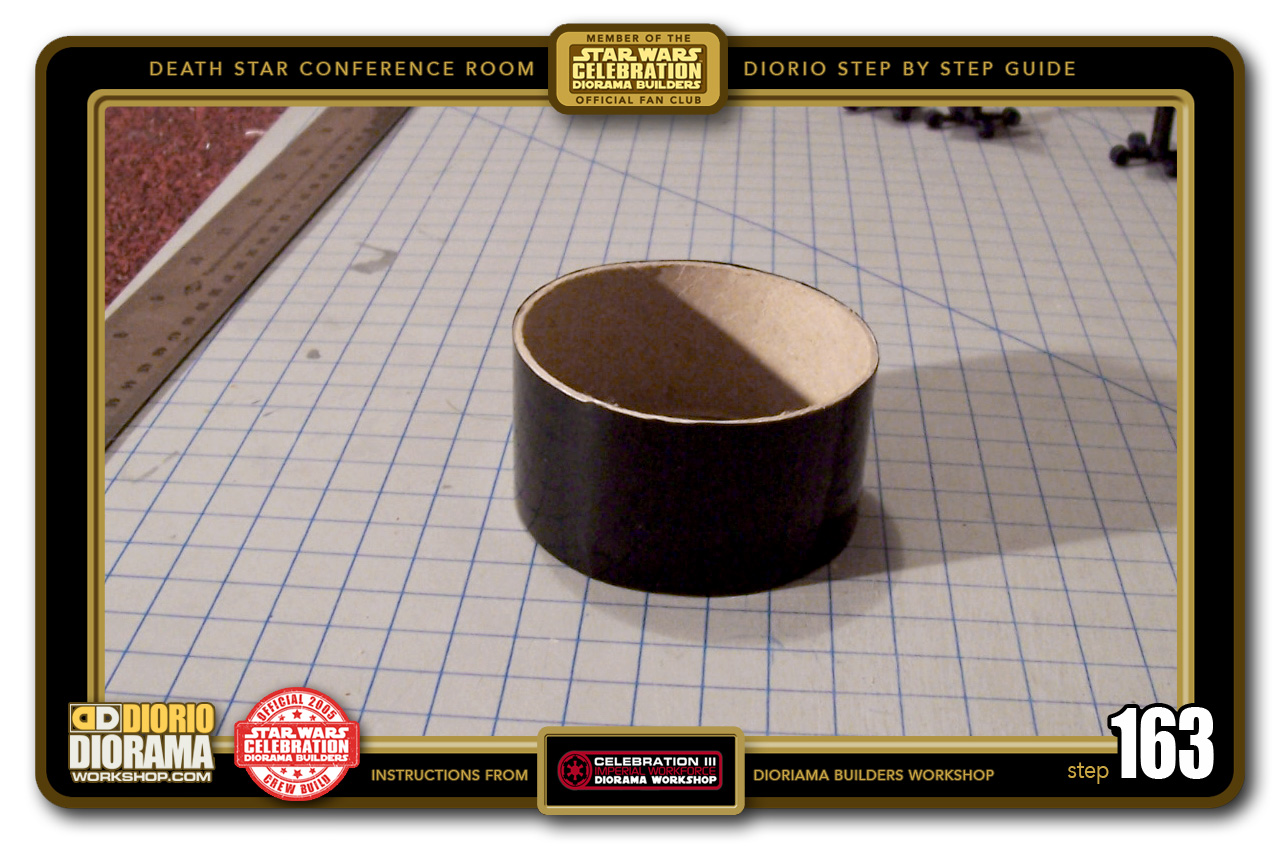
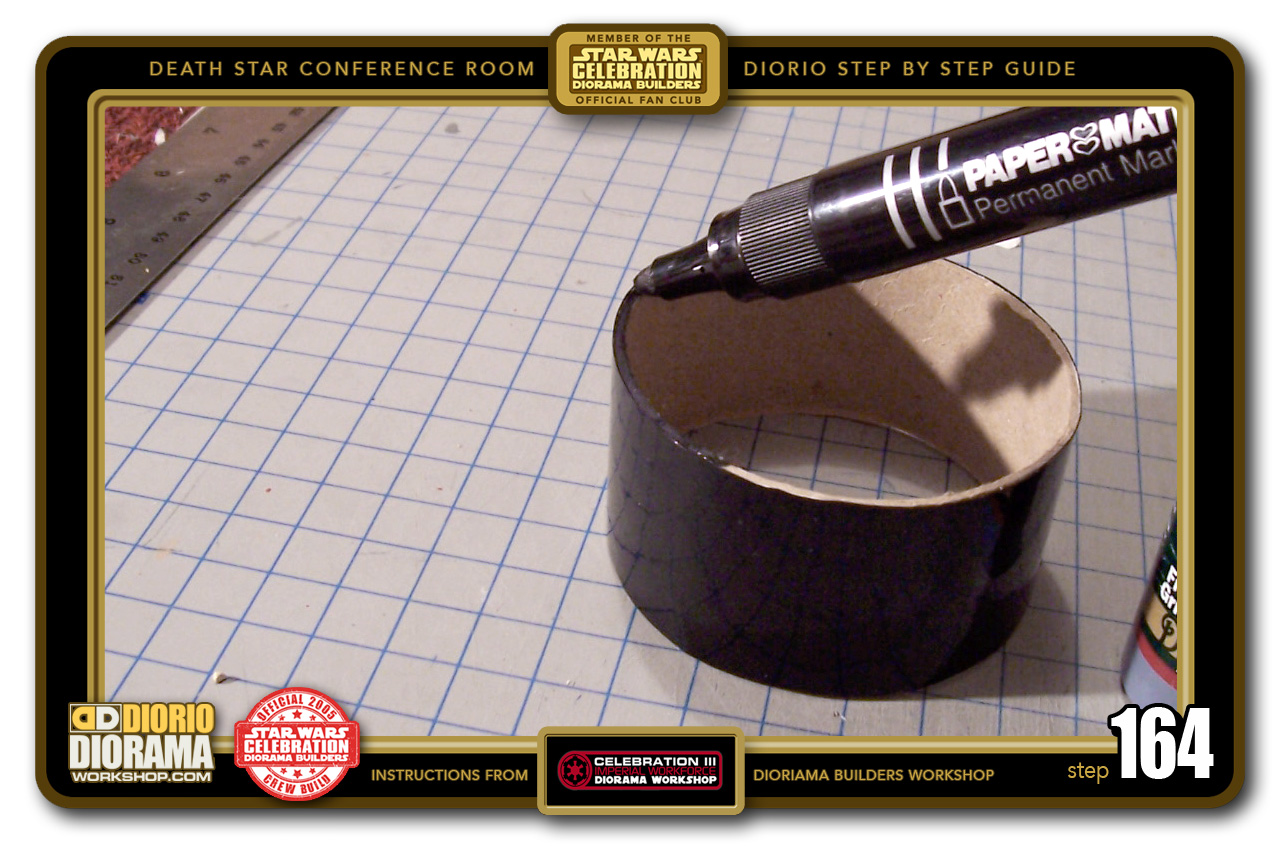
- STEP 163 > Now your table leg is almost complete. I want to make sure I don't see any ugly brown cardboard reflected on the main floor so...
-
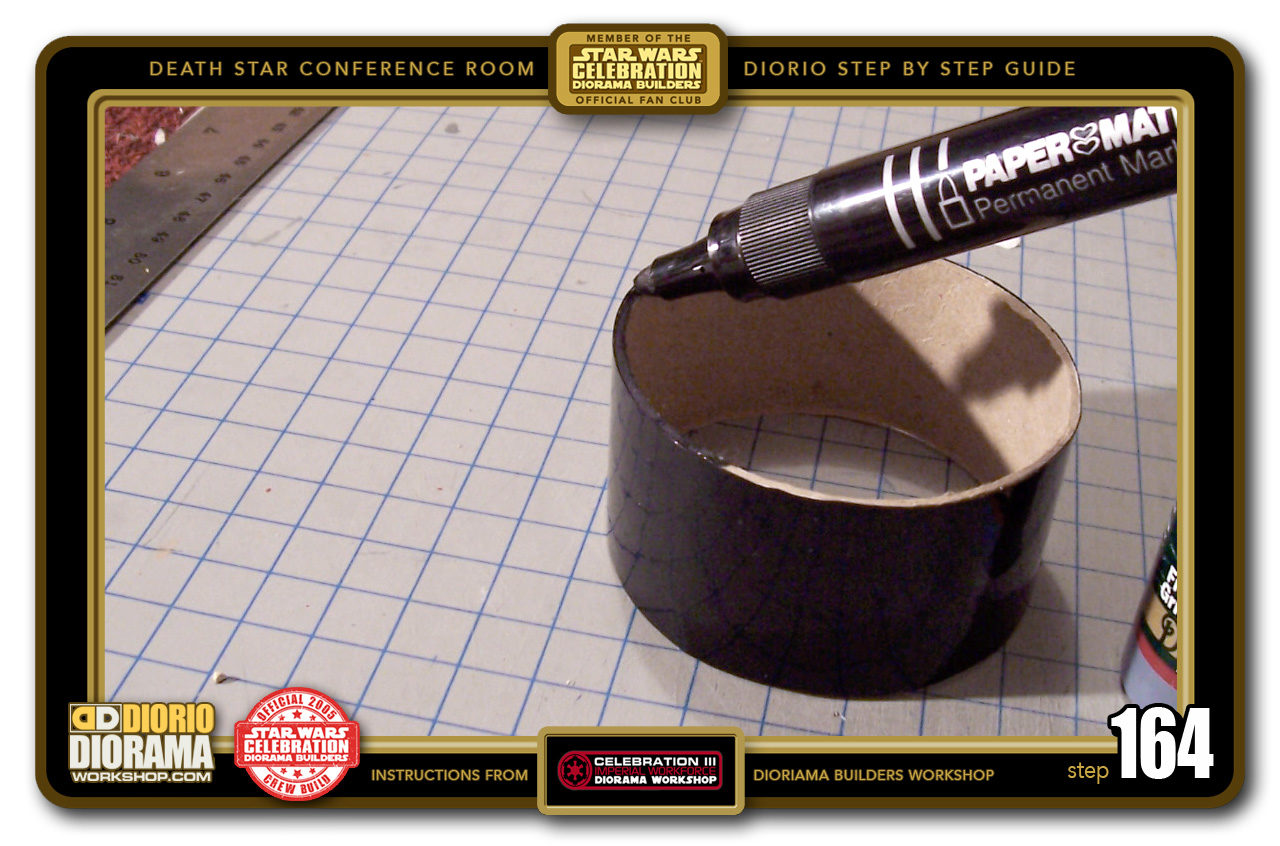
- STEP 164 > It's time for the Big Fat Black Sharpie marker trick 🙂 Simply color the edges with your Sharpie. You could paint, but this is much easier and dries instantly.
-
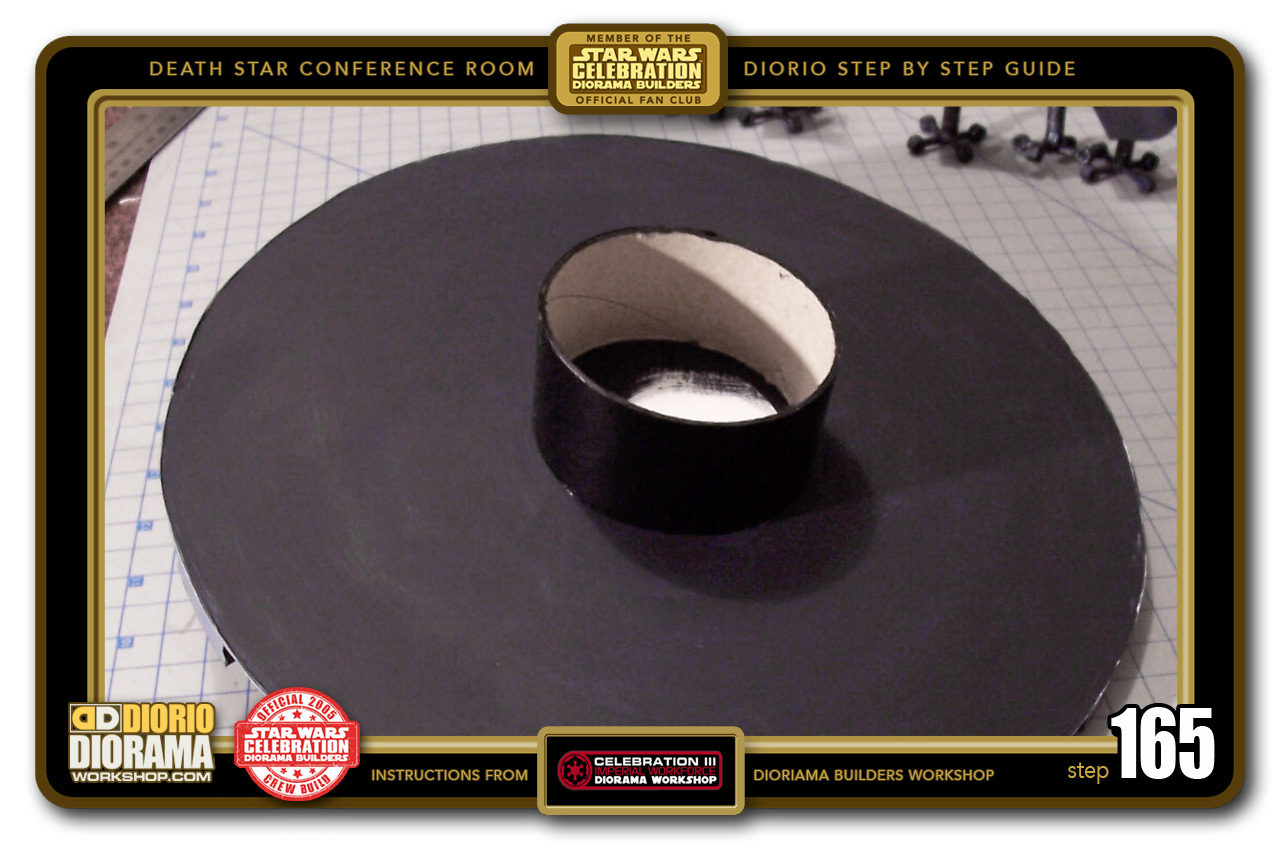
- STEP 165 > Now use the Hot Glue Gun to attach the tube to the underside of the Table. As I was doing this step, I decided to paint the foamcore a dark grey (a color I had from a previous Diorama) so that it wouldn't look all white.

-

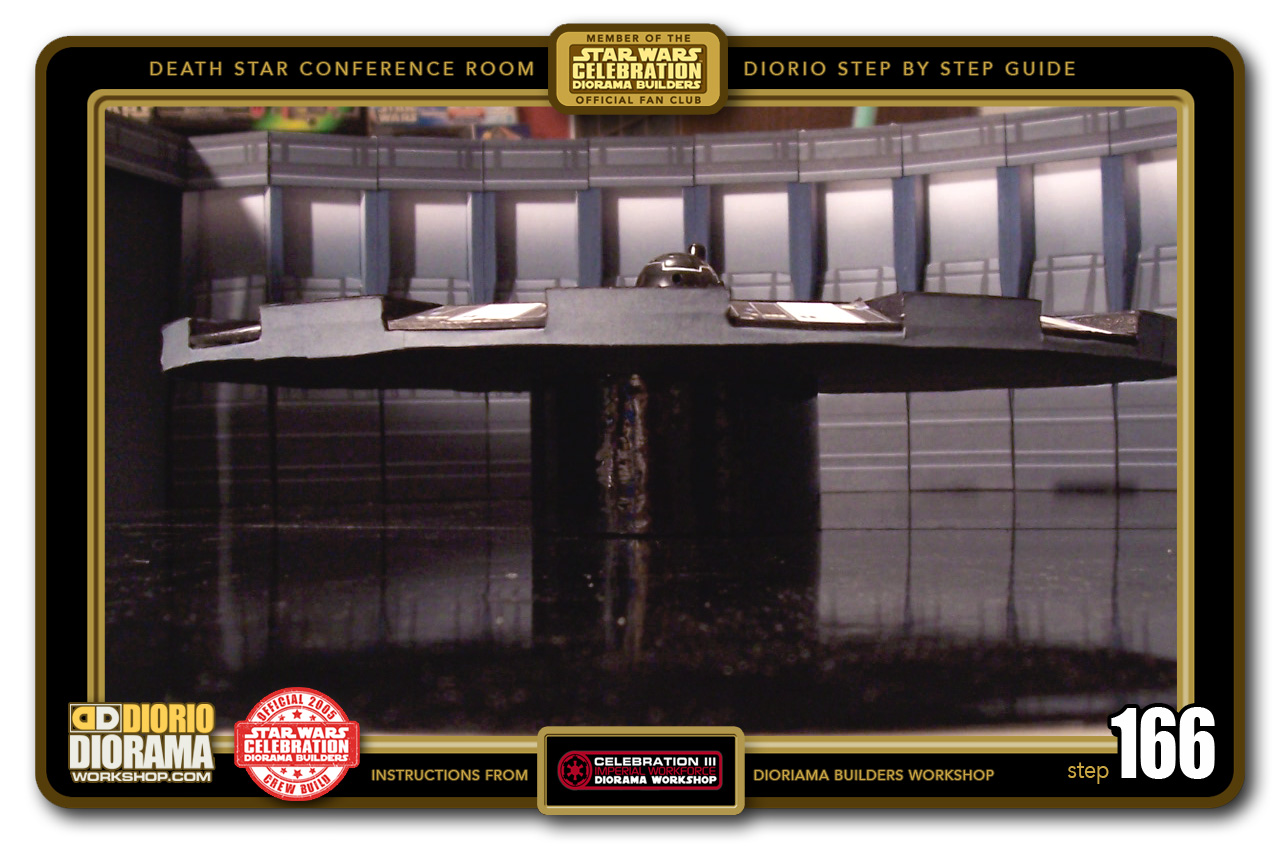
- STEP 166 > Now we can place the table in it's final resting place 🙂 No need to glue it. The weight alone will prevent it from tipping over. But if you prefer a permanent hook up, Use your Hot Glue Gun to do the trick.
-
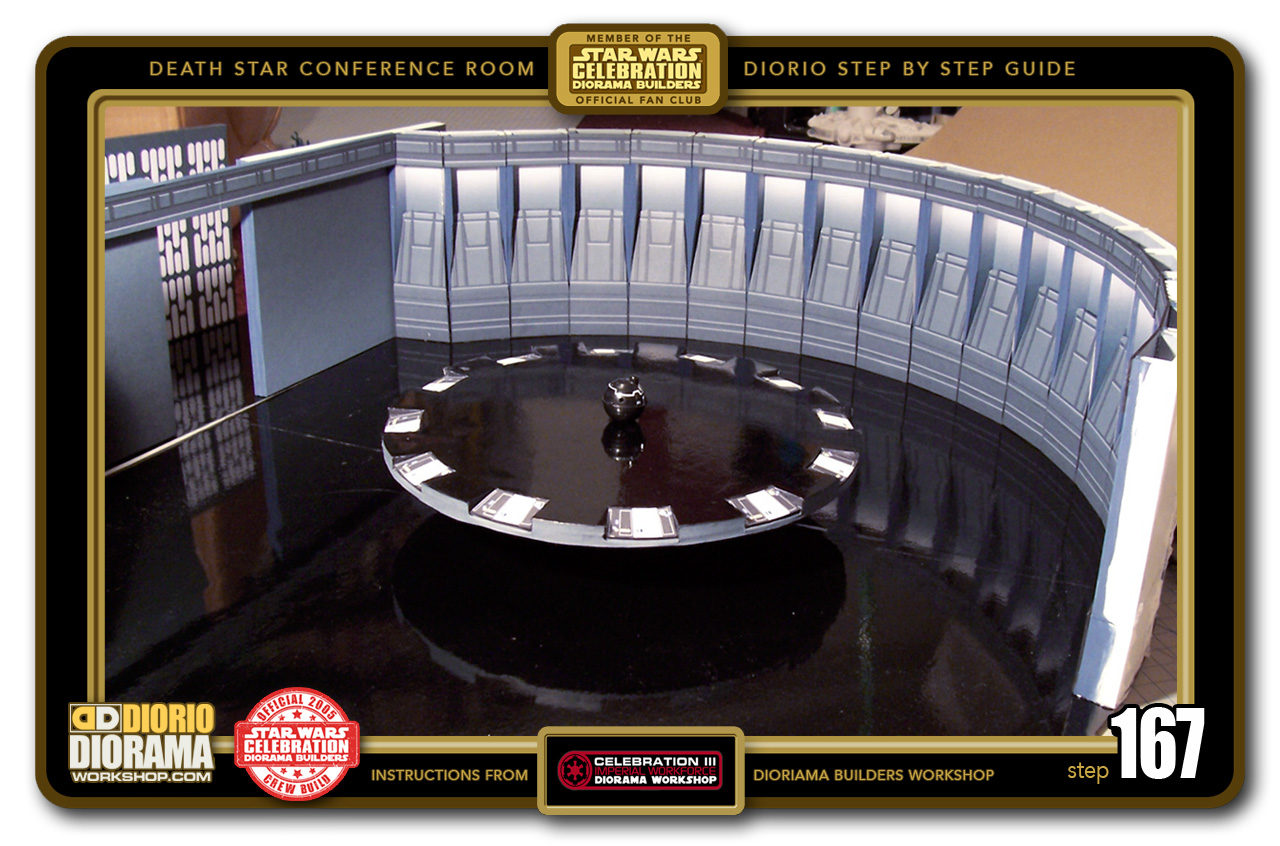
- STEP 167 > And here you can see the final table against the Conference Room Diorama. I must say I just LOVE it even without the chairs. 😀

-

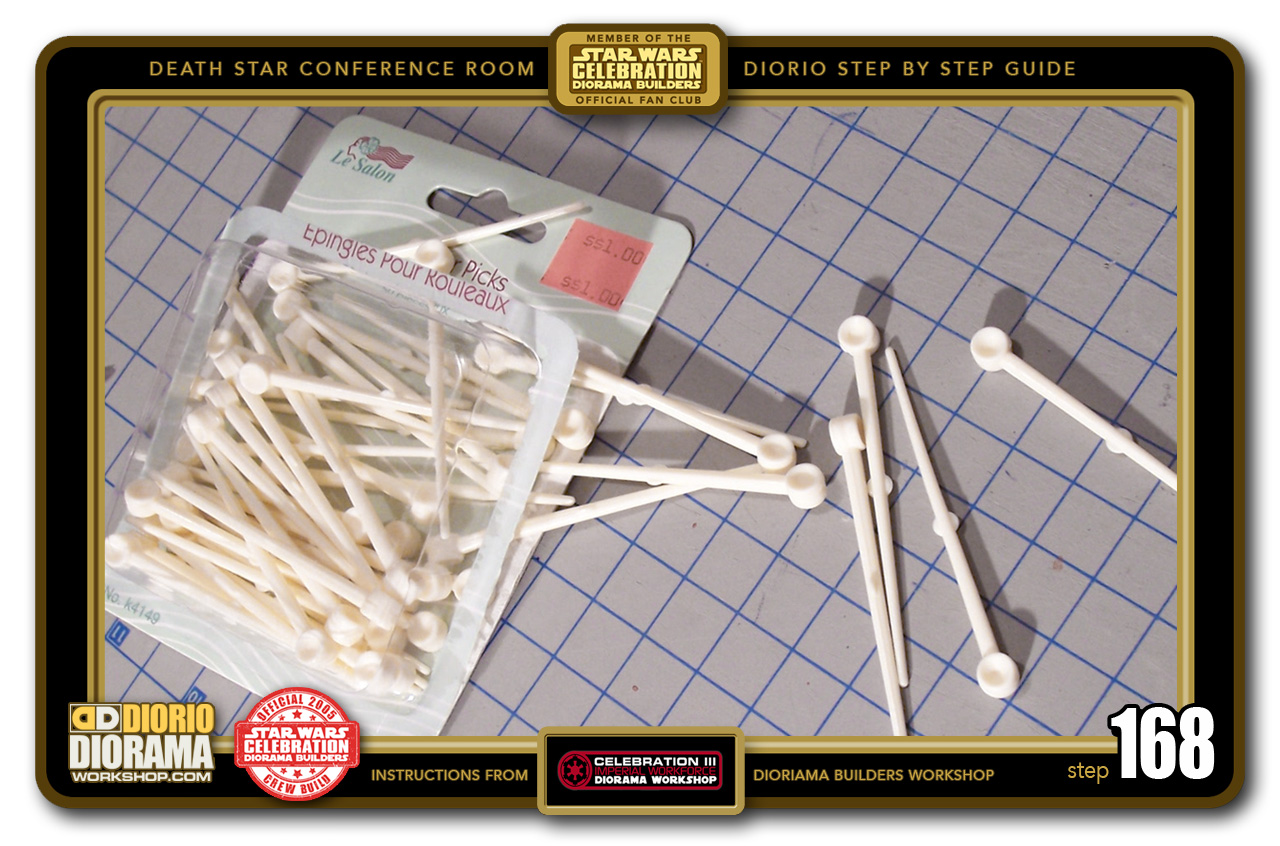
- STEP 168 > Time to make some chairs. We don't want our figures to just stand up all day long now do we? 🙂 I found these plastic Bobby Pin Hair curler pins at the dollar store. I bet you are wondering what the heck are these for? 😛
-

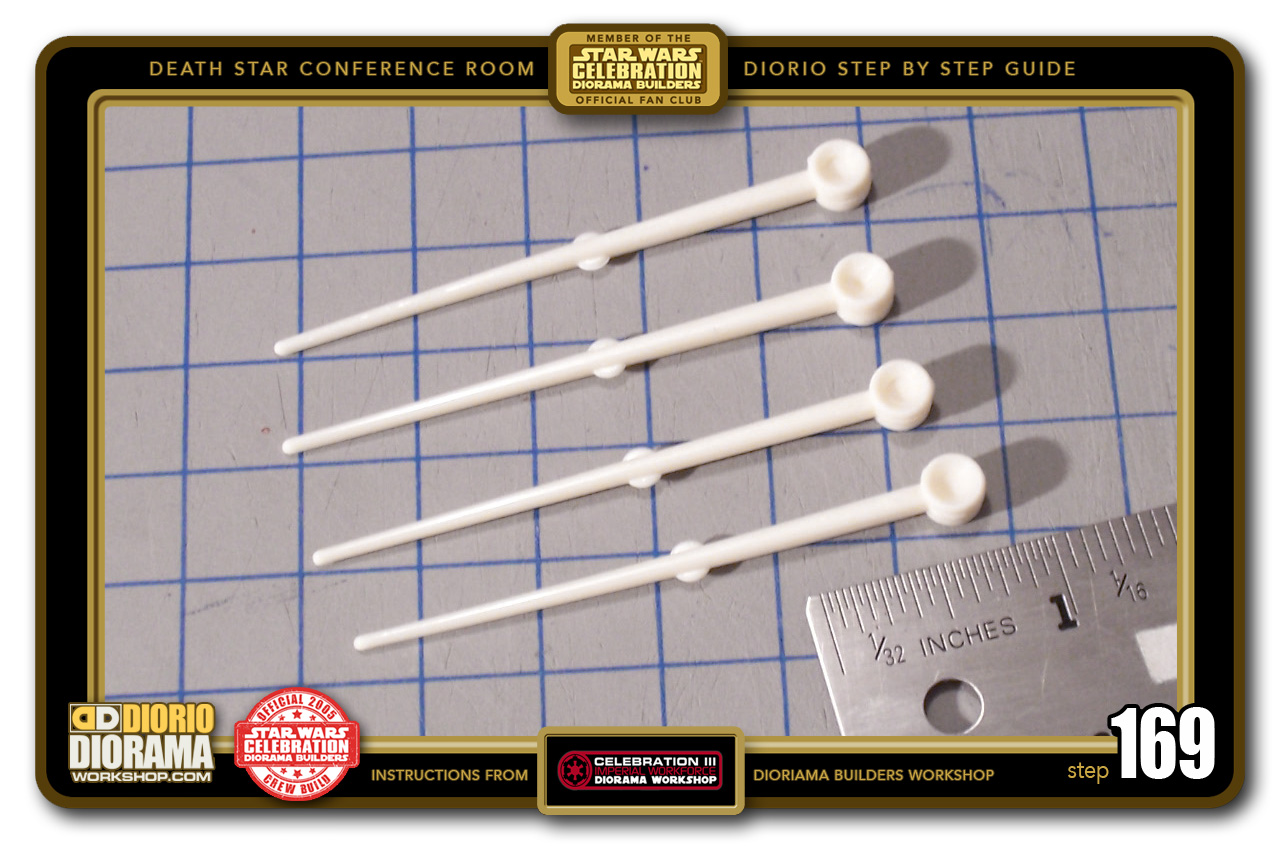
- STEP 169 > We need 4 for each chair base but only the rounded end tips 🙂
-

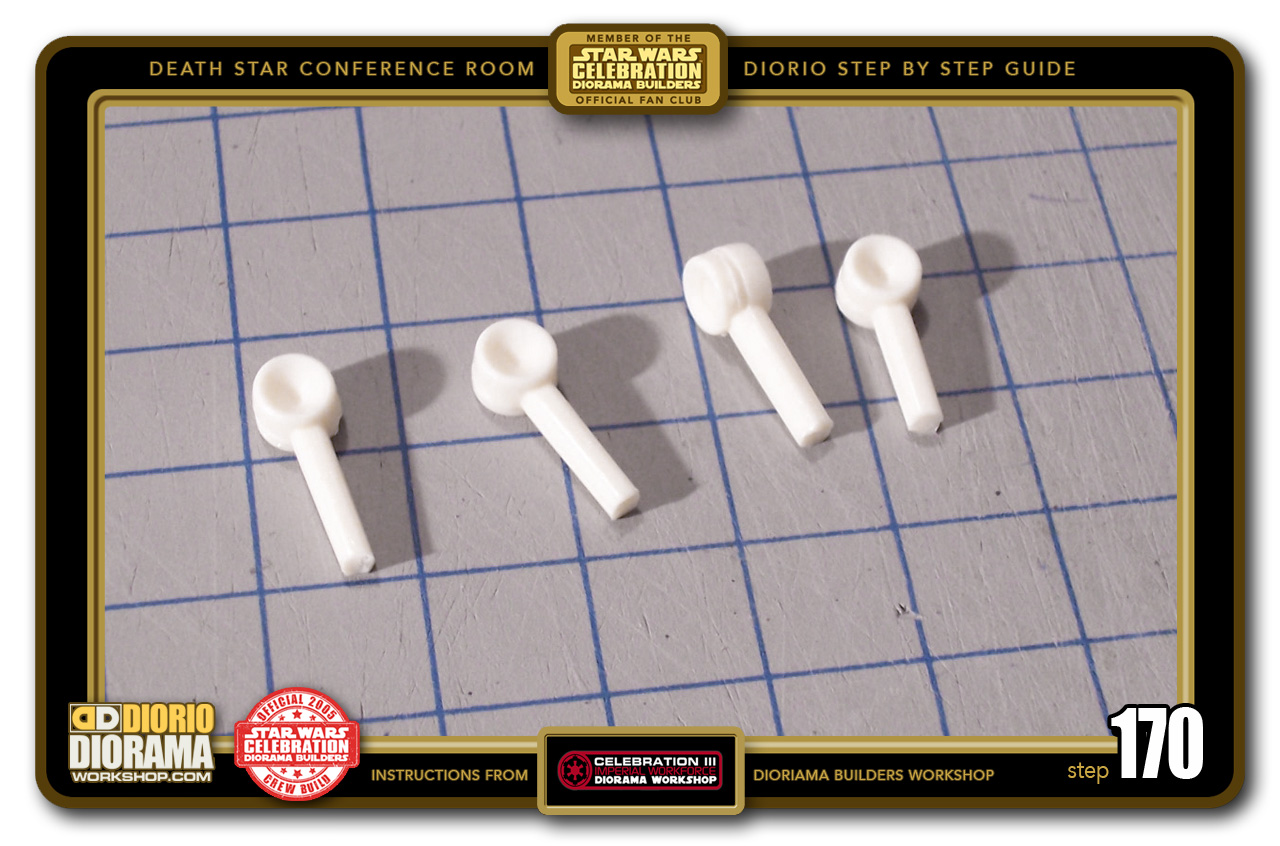
- STEP 170 > Are you still puzzled at what these will be used for ? 🙂
-

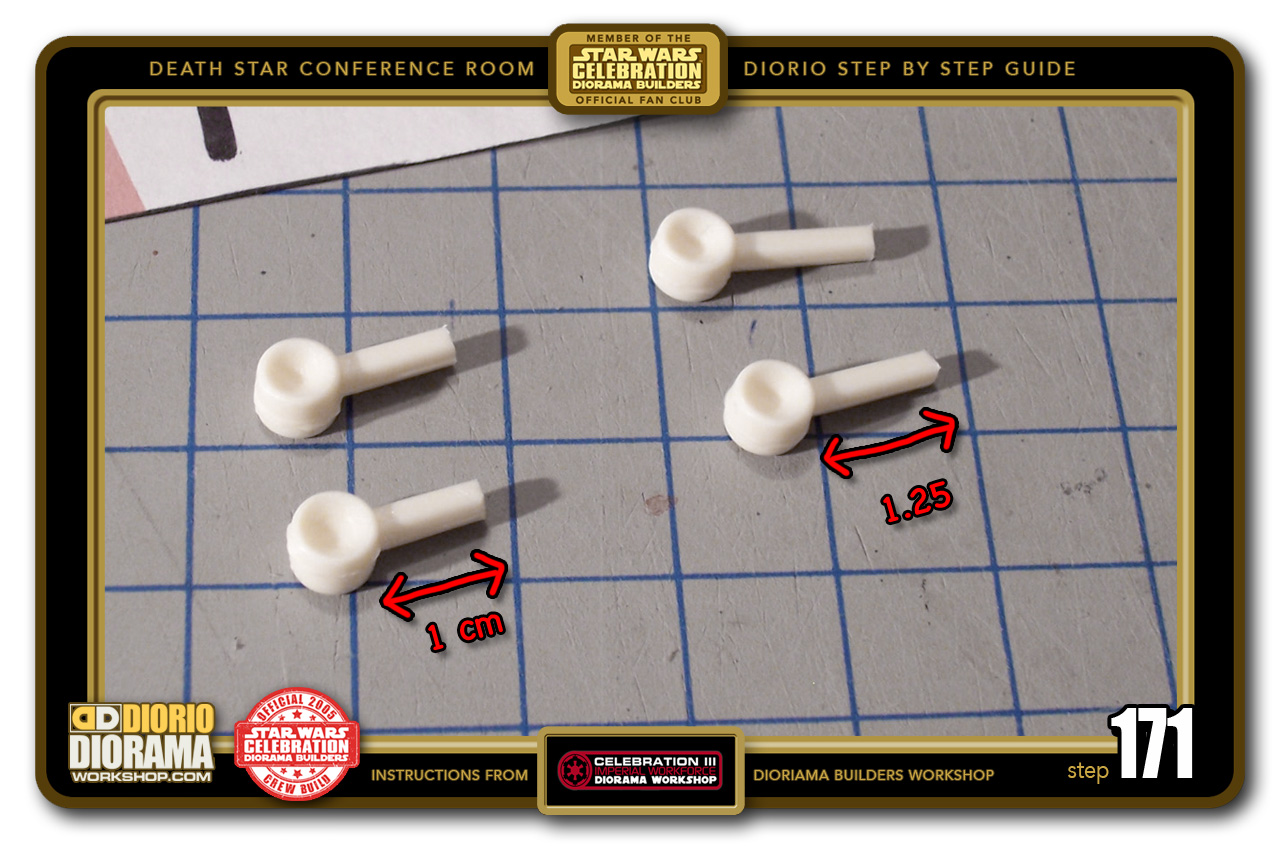
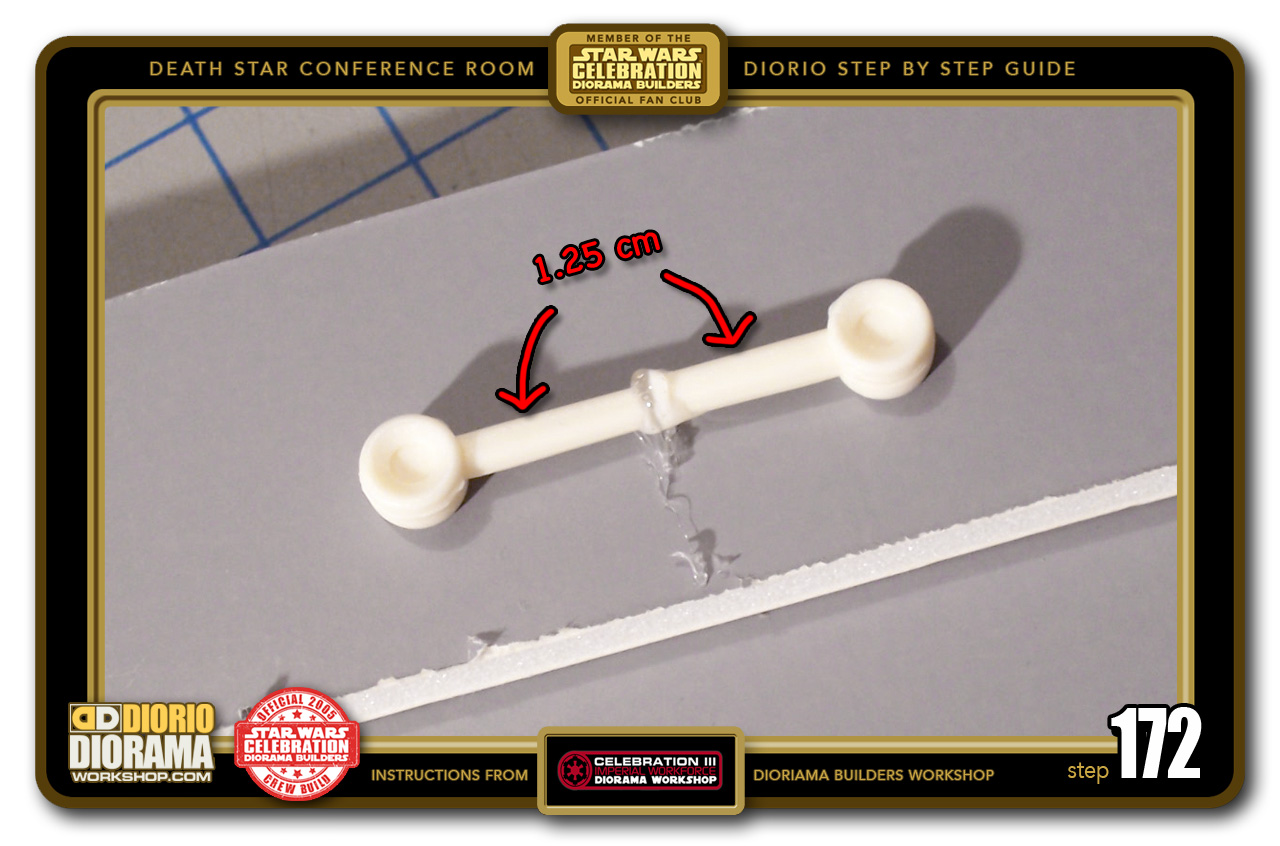
- STEP 171 > So for each chair, you will need 4 Picks. Measure from the round knob and cut 2 at 1cm and 2 more at 1.25cm. These will be your feet.
-

- STEP 172 > Use the Hot Glue Gun to dab a little on each of the 1.25cm Picks and press them together. Make sure the round knobs are aligned in the same direction. Are you starting to understand my idea yet? 🙂
-

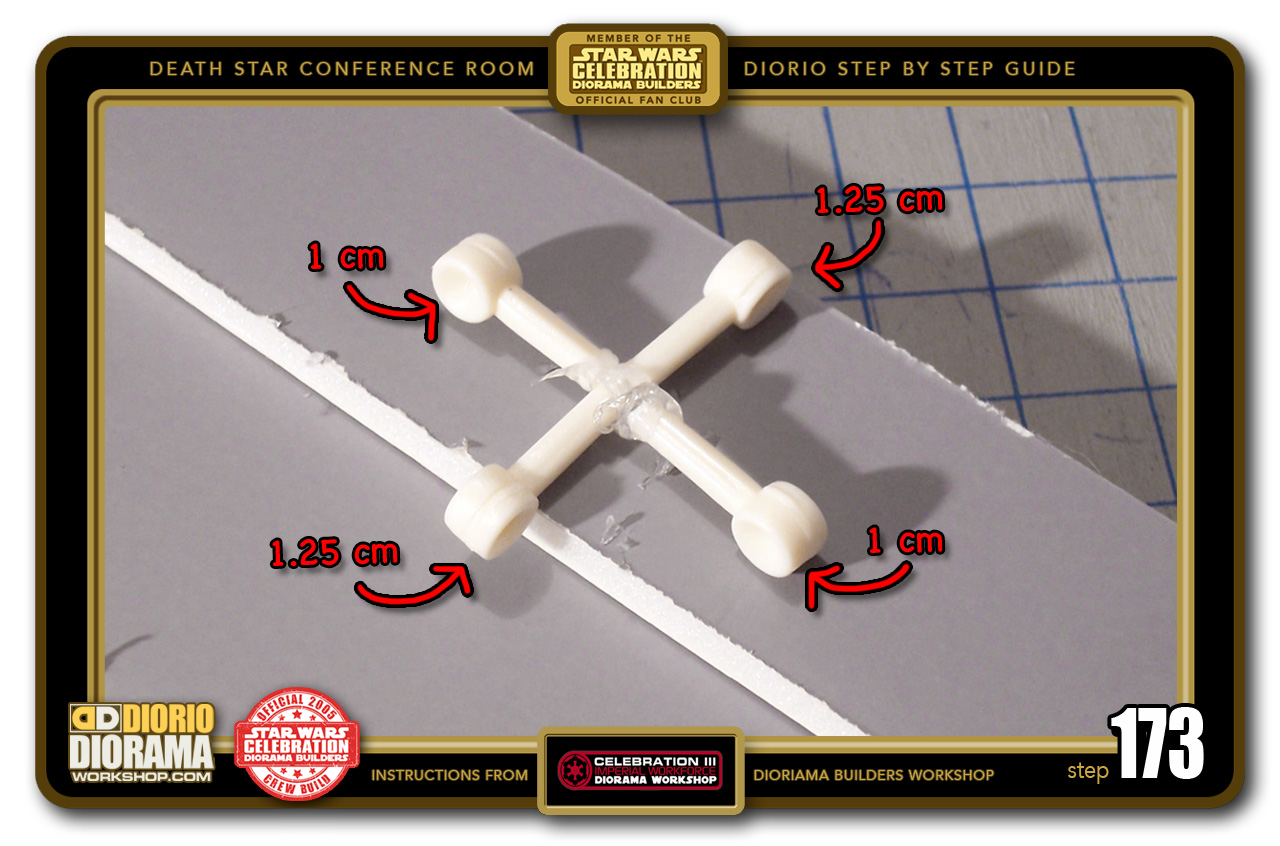
- STEP 173 > Now the 1cm picks need to be attached to each side of STEP 172. Use the Hot Glue Gun to bond each pick one at a time. When you do this make sure that the round balls face sideways. Ahhhh...Now you get it right? See how they look like little wheels?
-

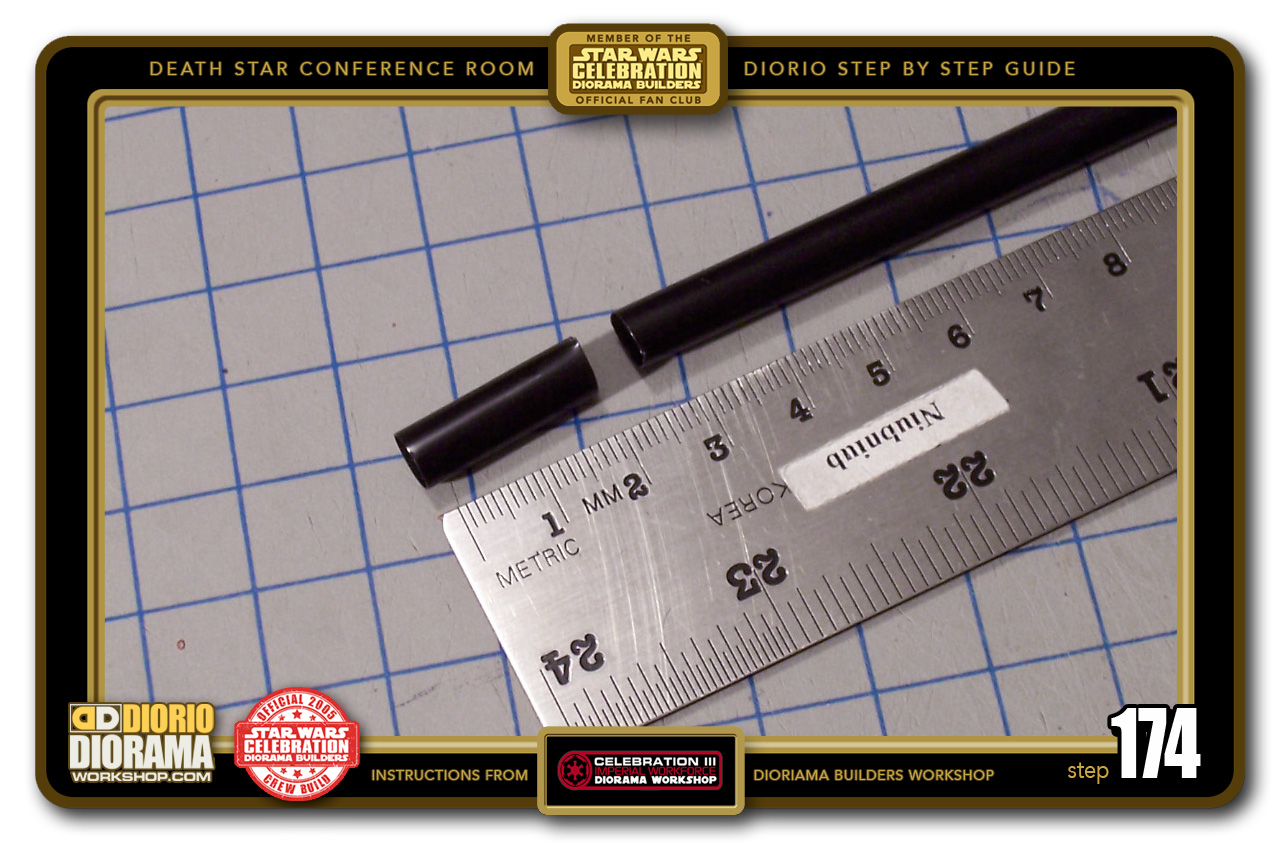
- STEP 174 > Now get a straw, I found these really cool BLACK straws at IKEA. No need to paint them. I LOVE IT !!! Cut a piece at 2cm.
-
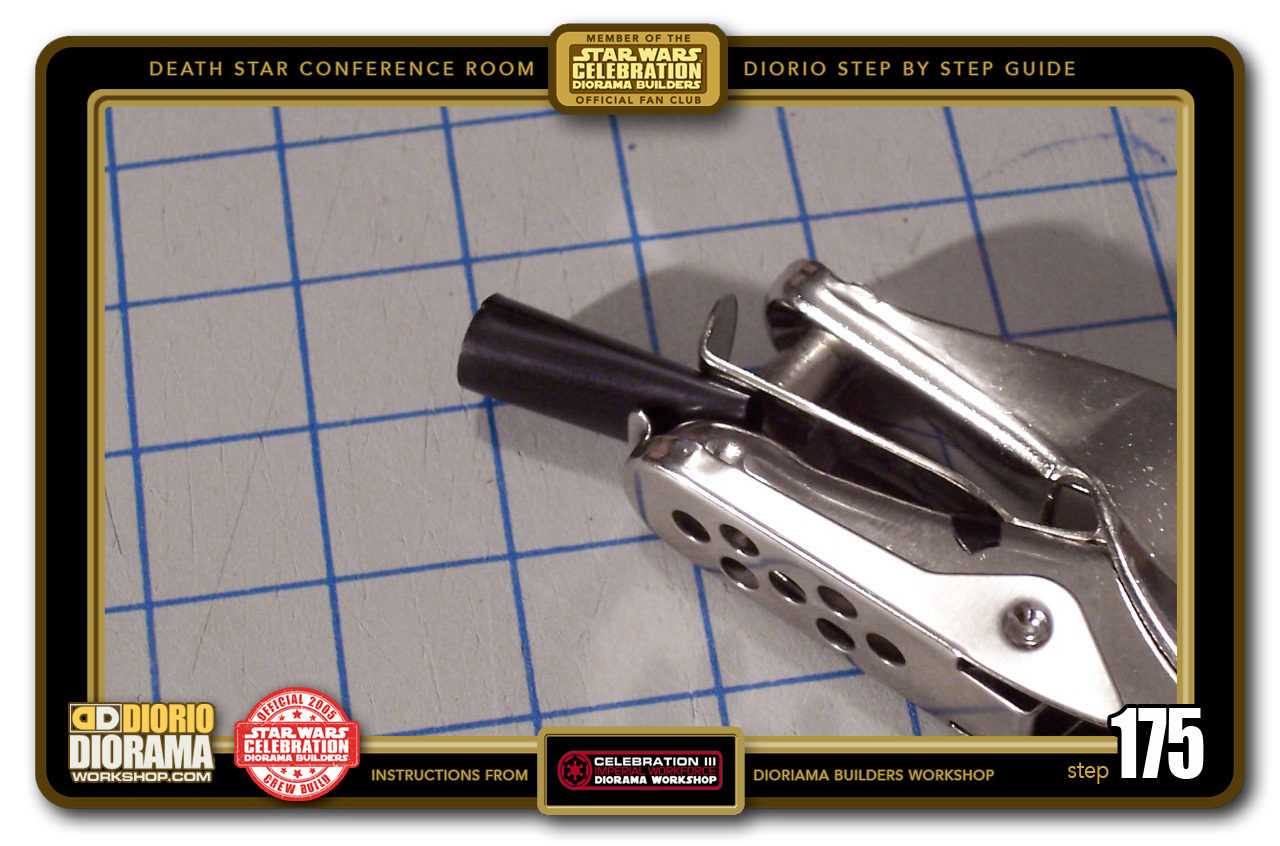
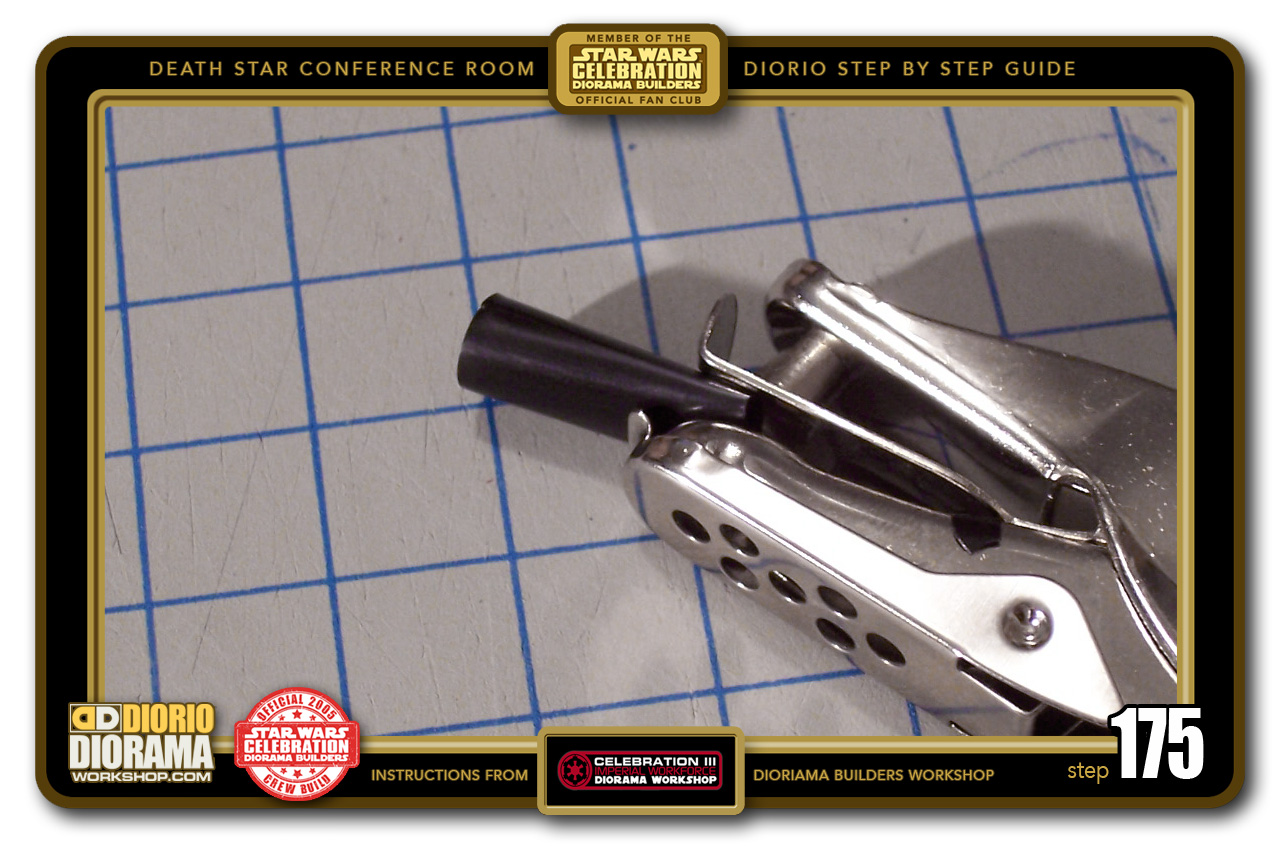
- STEP 175 > If you have a Hole Puncher this will make the straws fit better on your base, but if you don't you can skip ahead to STEP 178. What you want to do is punch a HALF HOLE.
-
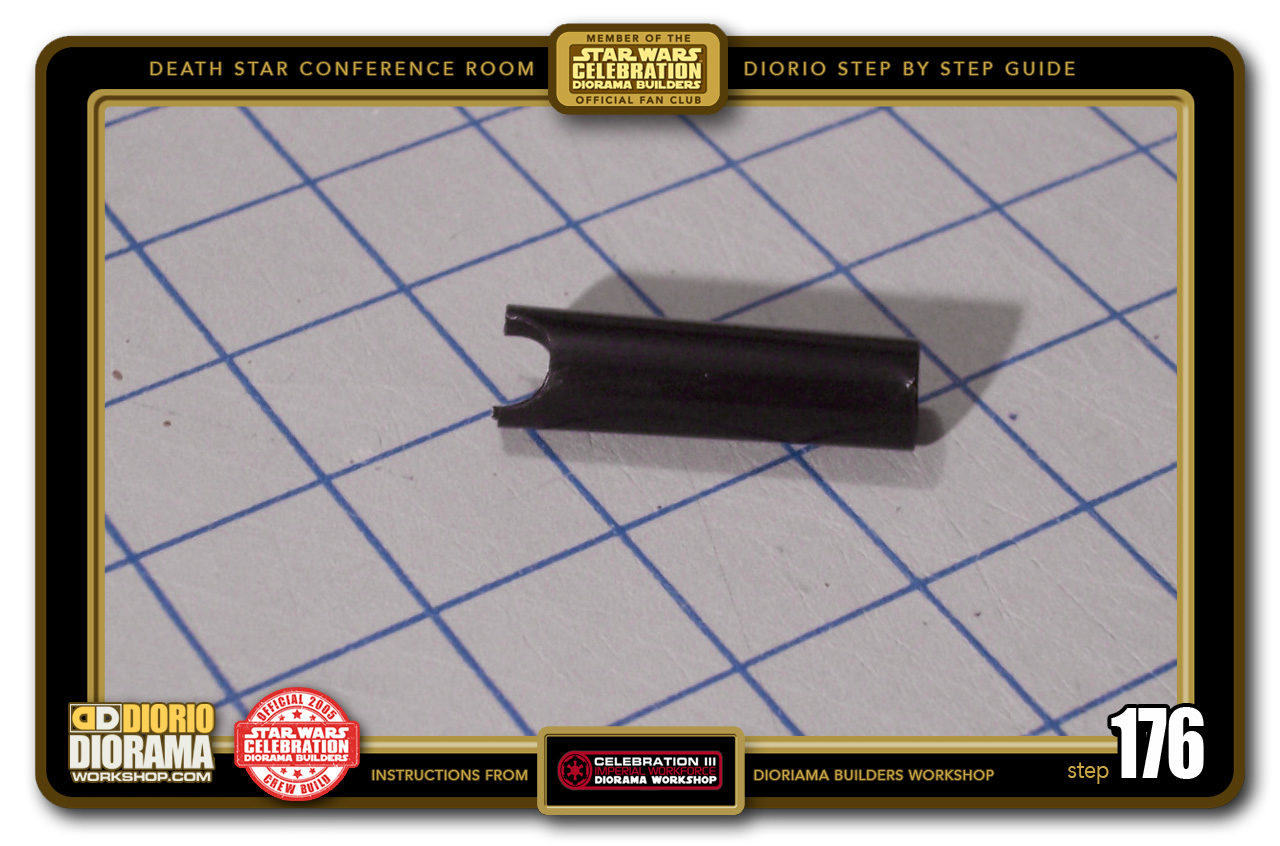
- STEP 176 > This way, your straw can wrap itself around the curves of the pins.

-

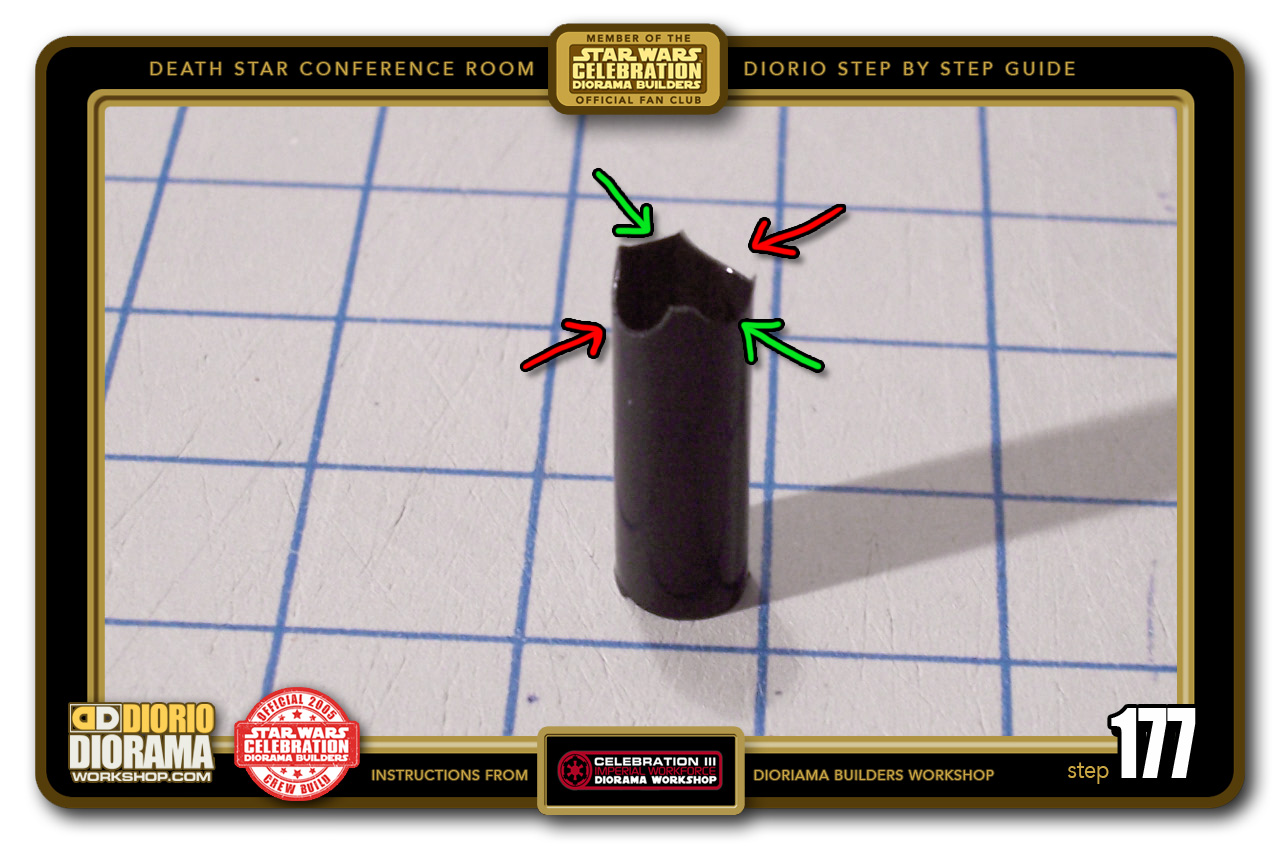
- STEP 177 > After the first half punch (red arrows), spin the straw and punch another half hole at the opposite side of the straw (green arrows) to give you these 4 gaps.
-

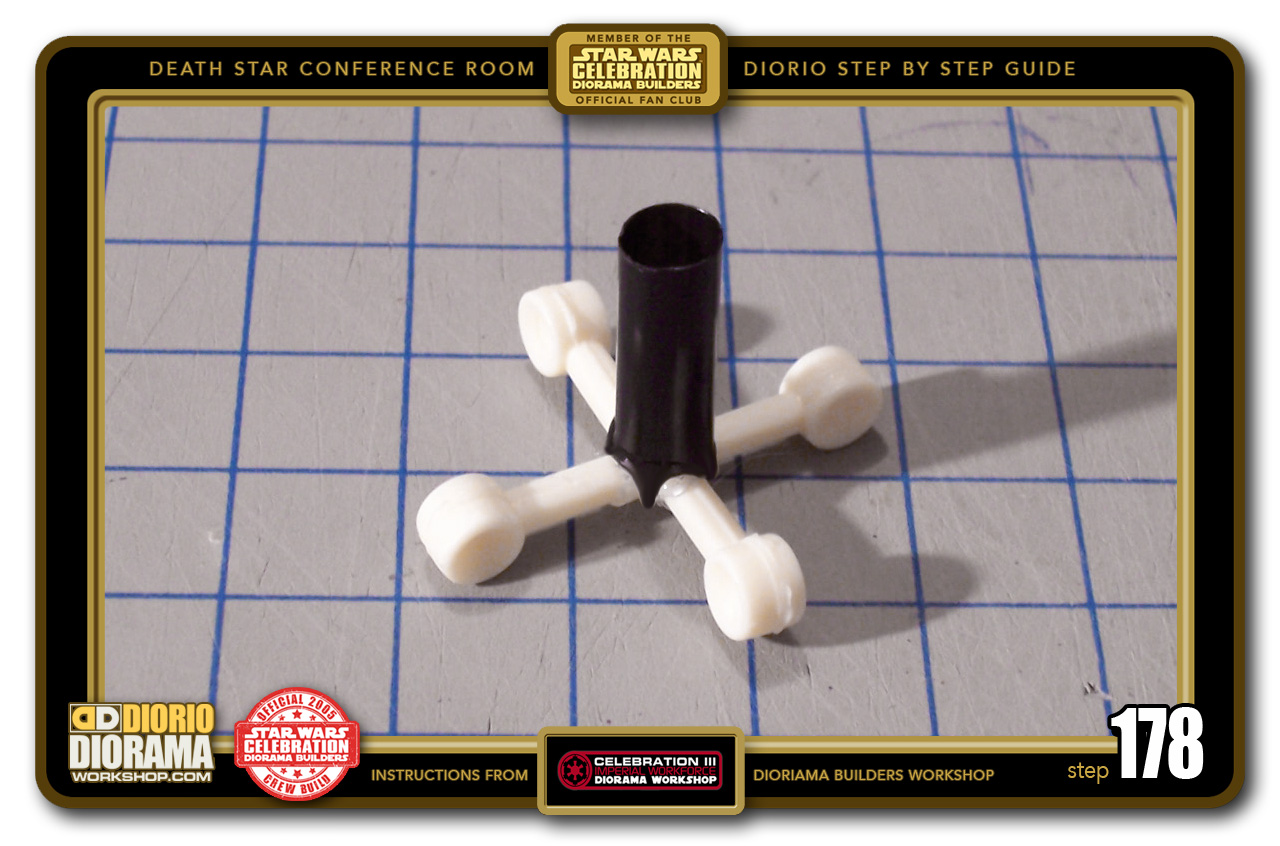
- STEP 178 > Use the Hot Glue Gun again to bond the straw to the wheel base. Keep your finger on the straw a few seconds until the glue cools down so that the straw stays straight and doesn't start to lean sideways. IMPORTANT: Put MINIMAL hot glue as the heat really makes the straw melt as it's thickness is really thin.
-

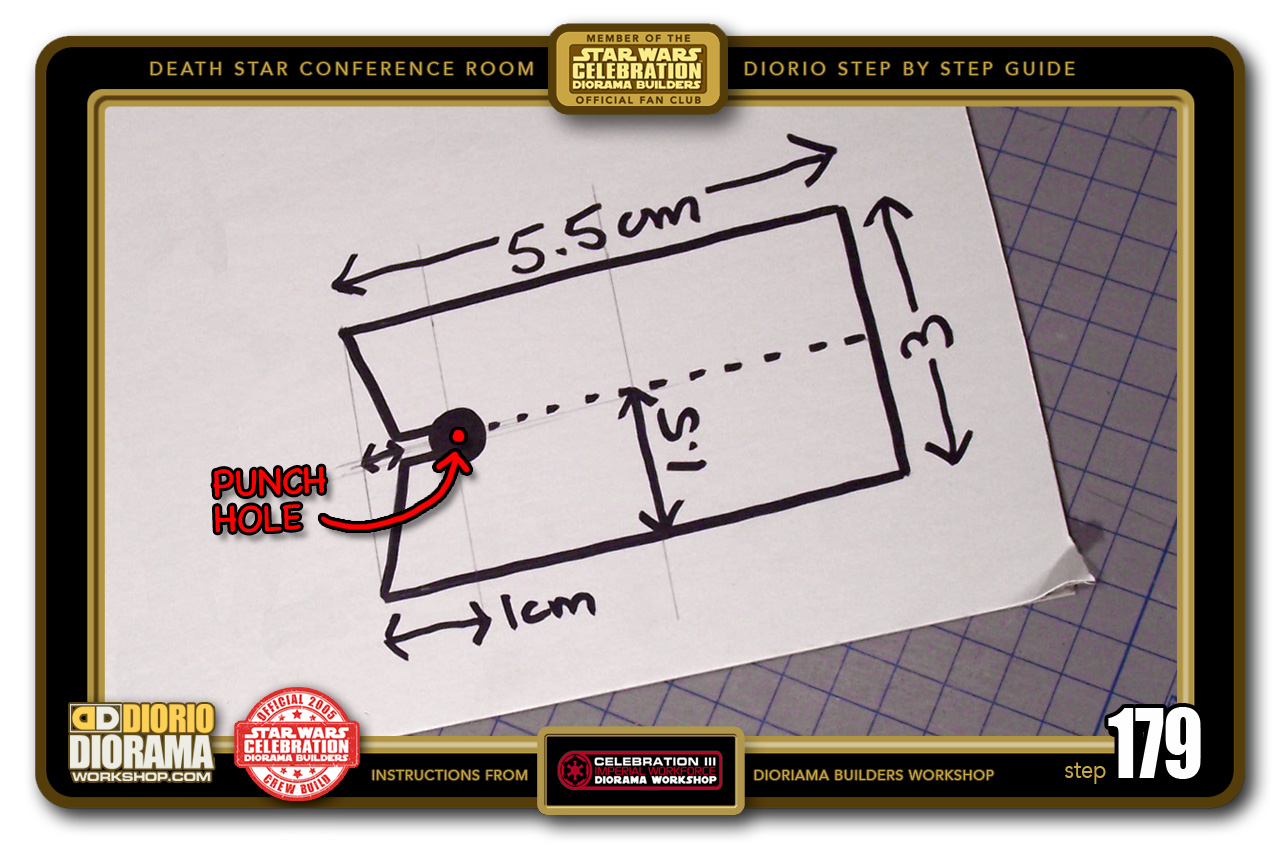
- STEP 179 > OK, now we need to make the chair itself. The movie design has some bends in it so you need a THIN carboard for this step. Not paper thin though, it won't keep the shape you want to give it. Mine was just regular Poster Board. You can find this anywhere for under $1.50.
-
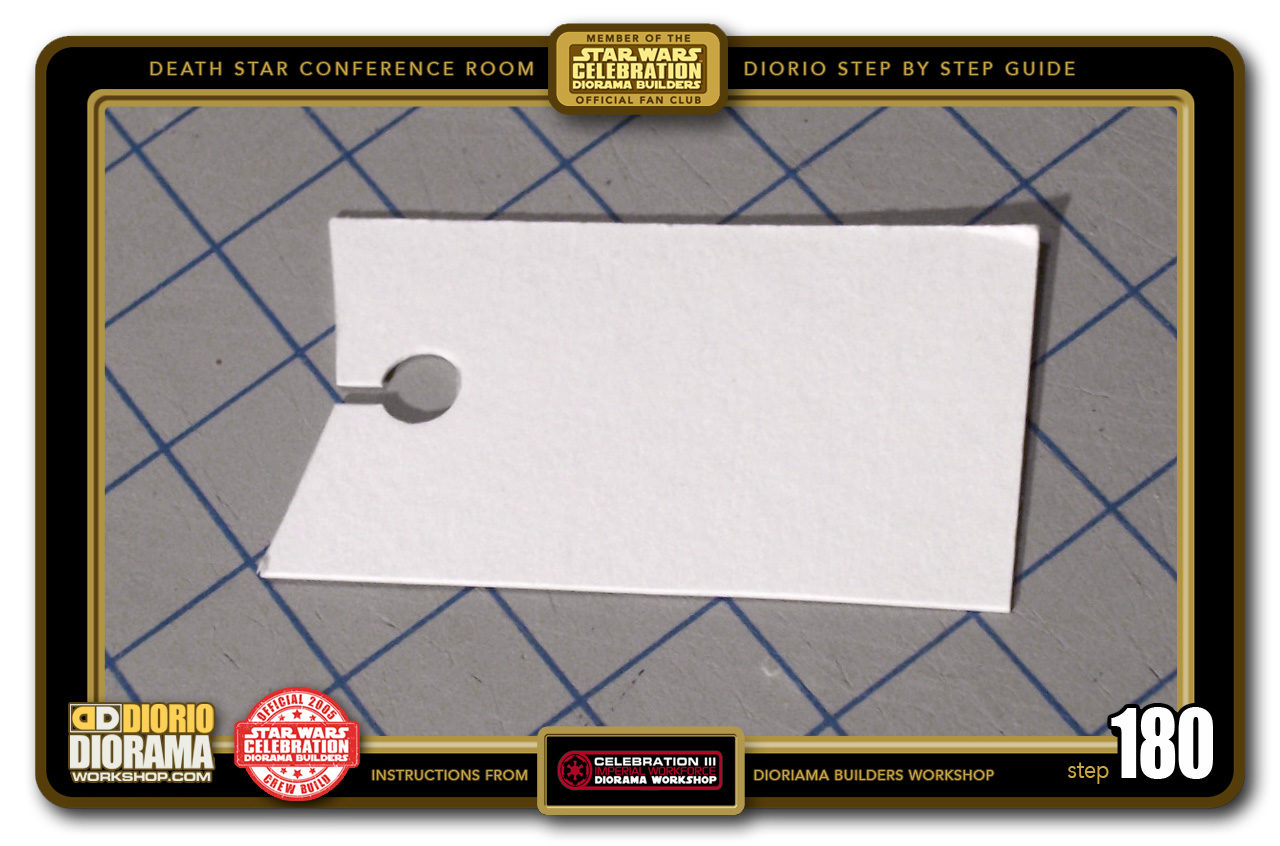
- STEP 180 > Using the measurements from the blueprints, Cut out the chair shape with your Xacto Blade. For the round hole, I used a Paper Punch. After the first is cut, you can use it as your template to trace the other chair shapes.


.
Did you already build this Diorama ? At home or at our Star Wars Celebration Diorama Builders workshop ? Would you like to show it in the site’s GALLERY VISITORS DIORAMAS section, YES ? That is Awesome !!! You can find out all the details on how to email me your photos on the VISITORS SUBMISSIONS INFO page … When I get your photos, I will create your very own page just like this one. You may not realize it but work does inspire others to join in the fun of making Action Figure Dioramas.
.
NOT FOR RESALE ALL Decals, tutorials and artwork are ©FrankDiorio (dioramaworkshop.com) and offered FOR FREE to the fans – that would be you ? so you can build and display my diorama designs in your very own home. I realize I cannot control what one does with my graphics once I place them on the web, I can only ask you as one fan to another, please respect the artist and do not be that jerk who uses my designs and tutorials to build a copy of my work only to sell it on EBAY or trade/sale groups and forums. Thank You. Frank.
.
.
If you have a facebook account, why not join the Official Diorama Builders Fan Club today, simply click the logo link below.
 .
.
Catch up with fellow visitors and exchange stories, read cool interviews with the crew, exchange photos, fun surprises and grab some FAN ONLY merchandise next year at actual future conventions ?
.
©2018 Frank Diorio DioramaWorkshop.Com
.
IF YOU LIKE WHAT YOU SEE, PLEASE SHARE WITH YOUR FRIENDS
USING THE SOCIAL MEDIA BUTTONS BELOW