


-
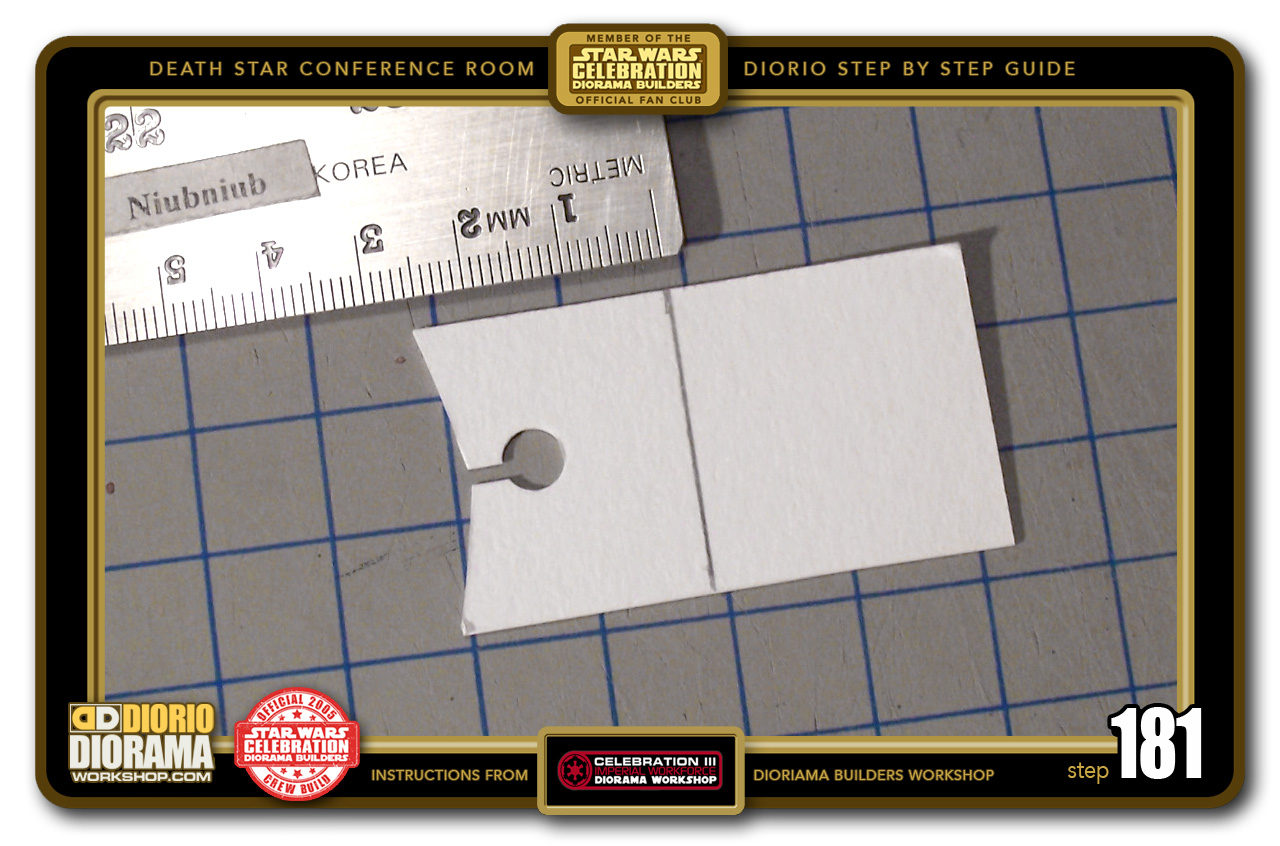
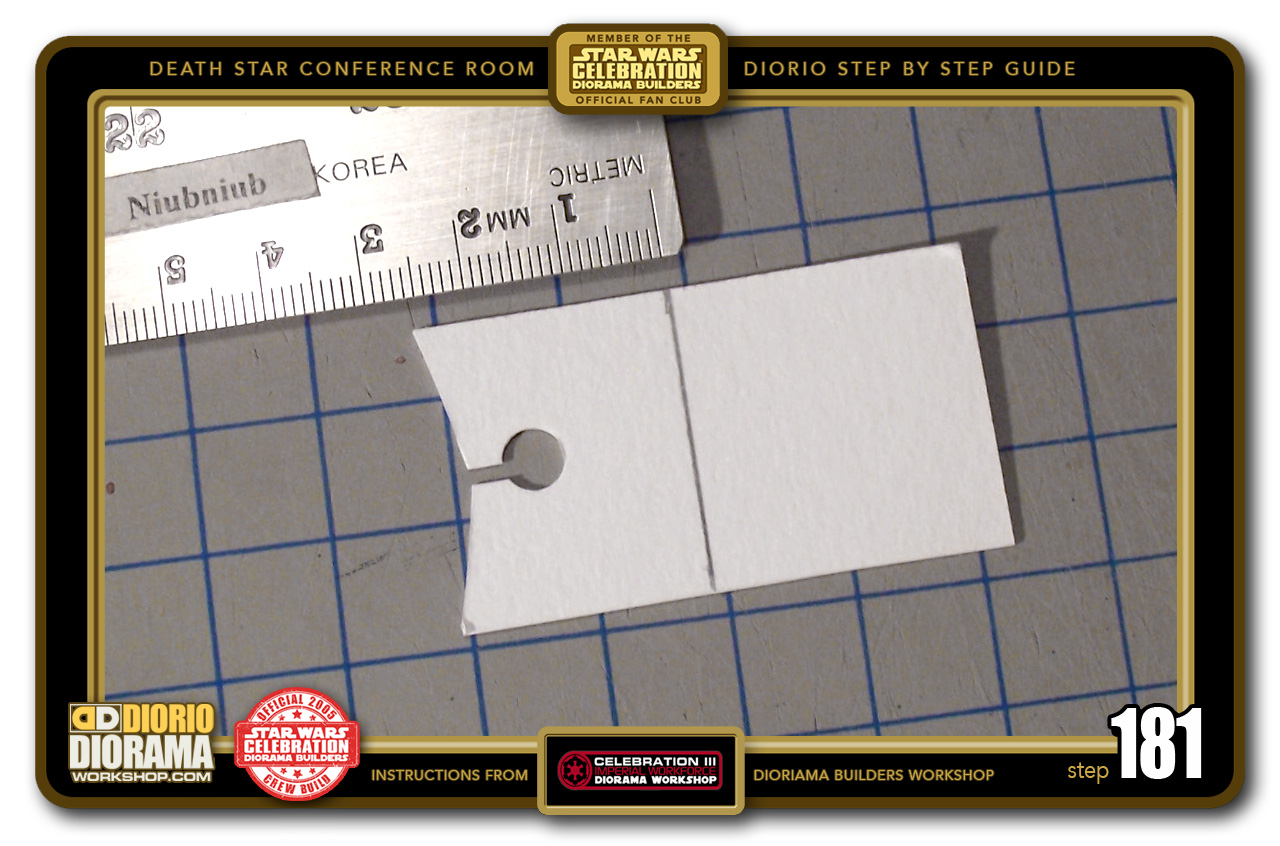
- STEP 181 > Now I measured 2.5cm from the top of the chair (the pointy end is the top). This is your bending mark for the chairs seat.
-
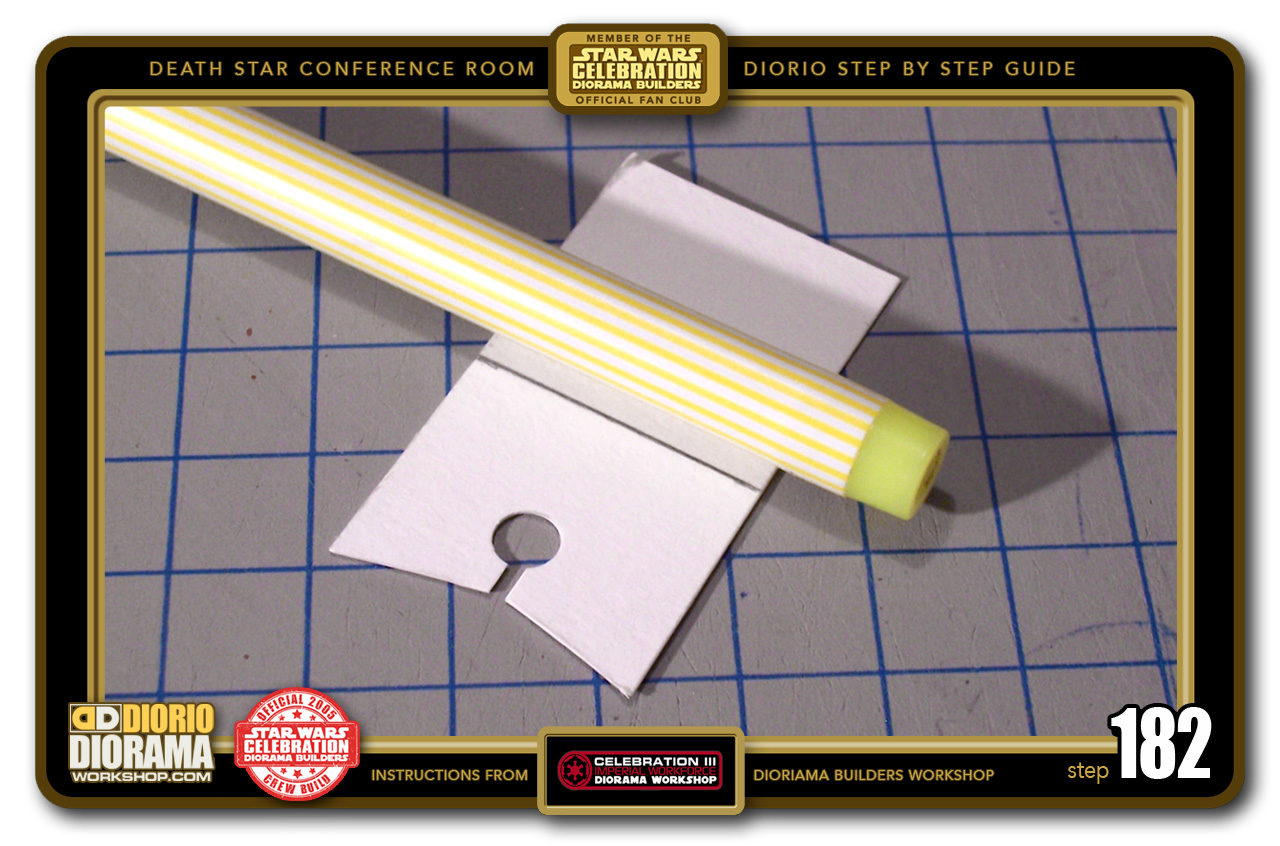
- STEP 182 > Take a marker (a pencil will work also) and place it aligned with the pencil mark.

-
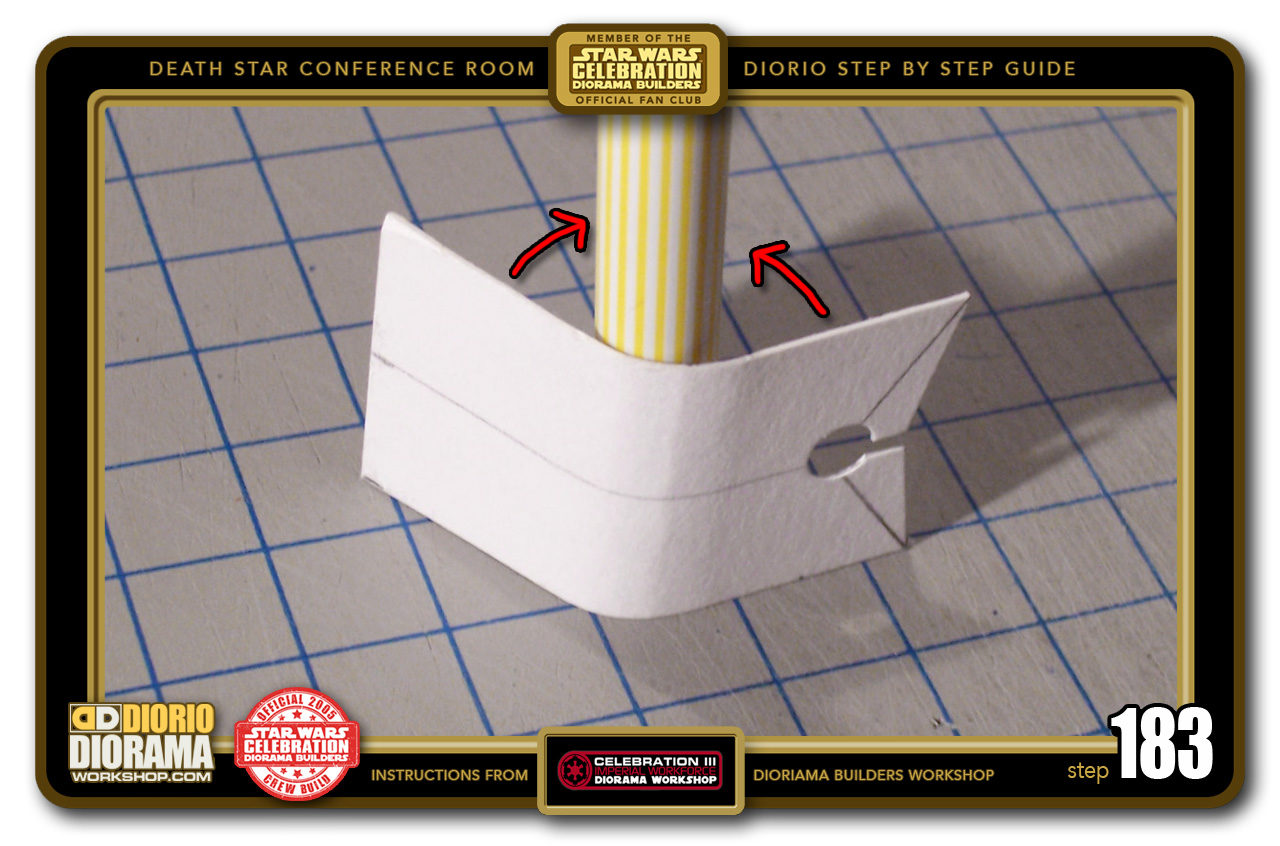
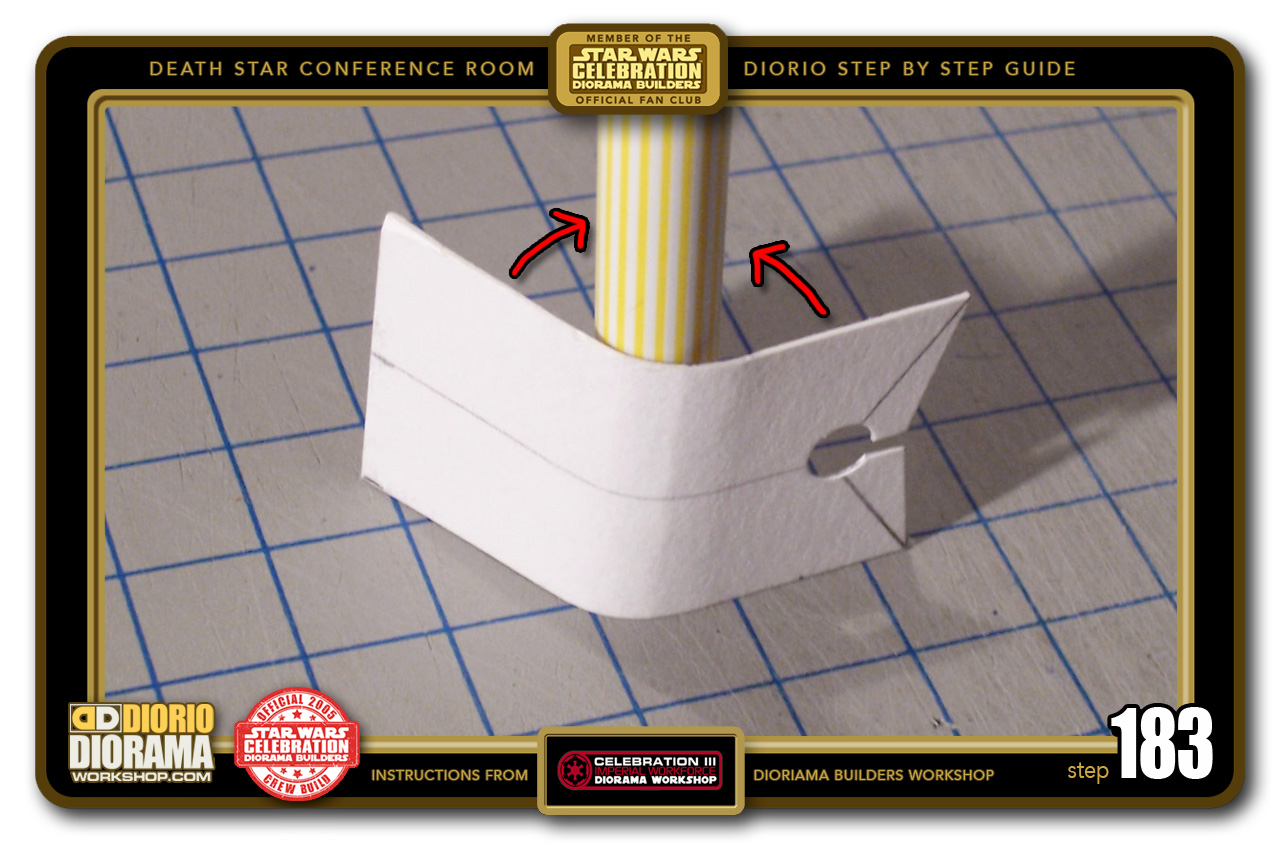
- STEP 183 > Now gently BEND the cardboard inwards like if you were going to wrap it around the pen. Don't be afraid to go too far, you want the cardboard to remember the shape. So more is better. DON'T bend it too FAST though, this could cause ugly creases in the cardboard.
-
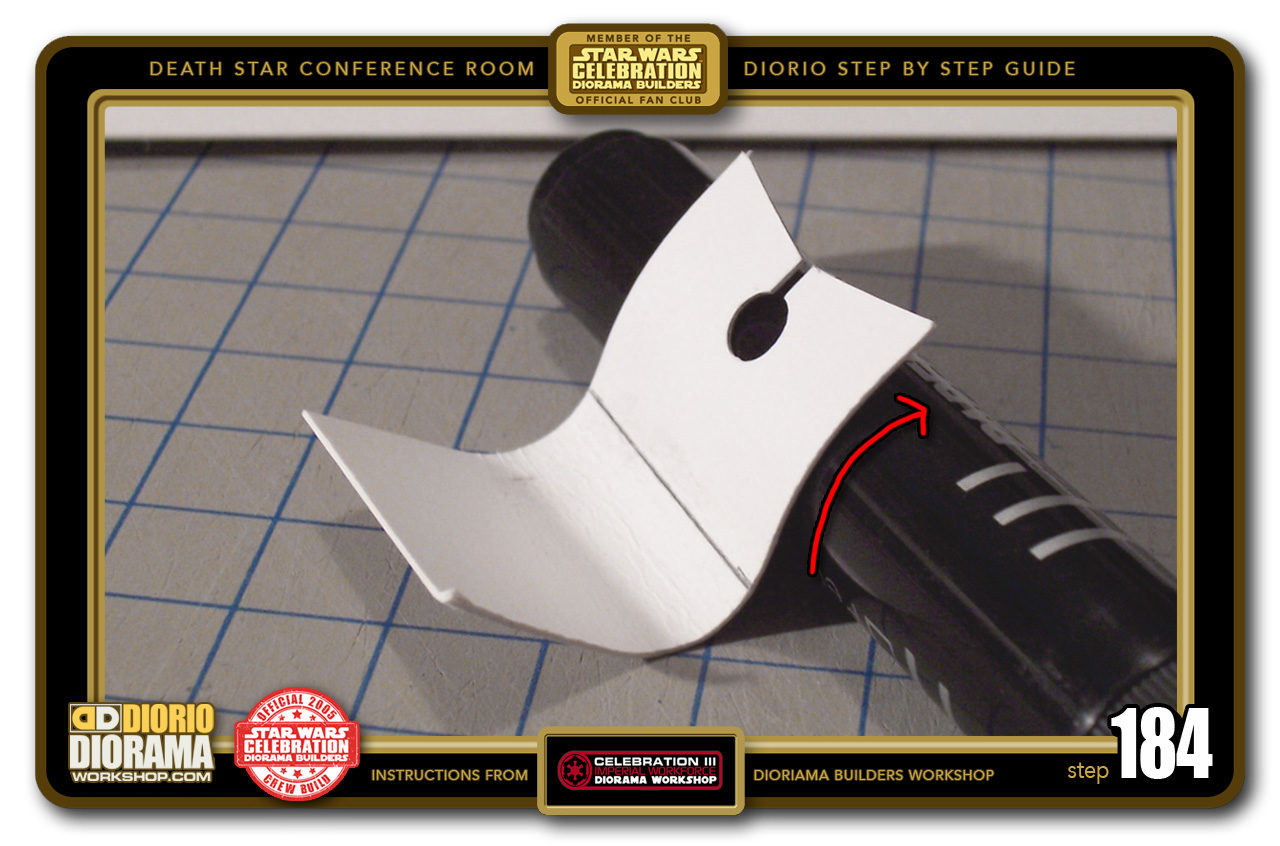
- STEP 184 > Now with an even fatter wider marker, Bend the Chair's Top half over in the opposite direction of the first bend. We want to create an "S" shape.

-

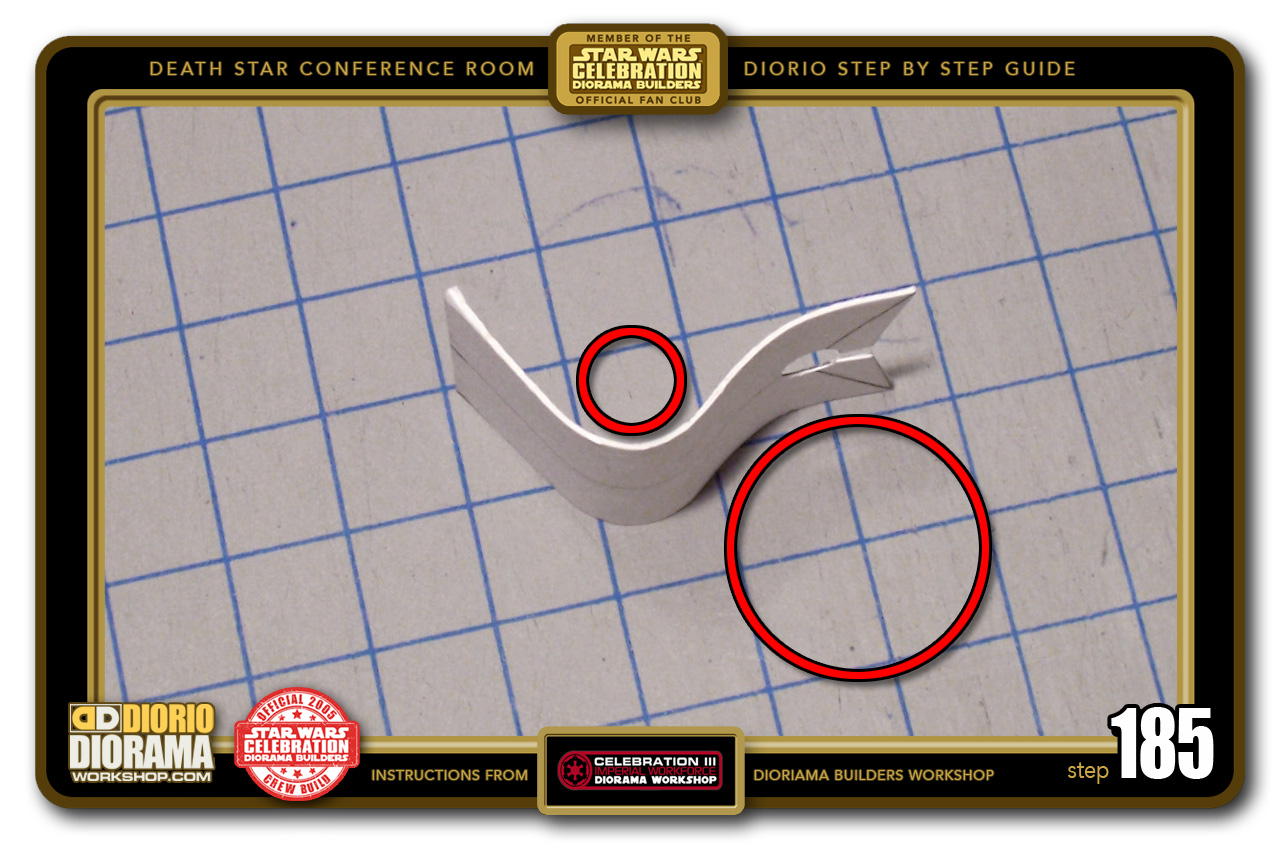
- STEP 185 > This is what the chair should look like now. the Red Circles represent where the Pens were placed to help the bends.
-
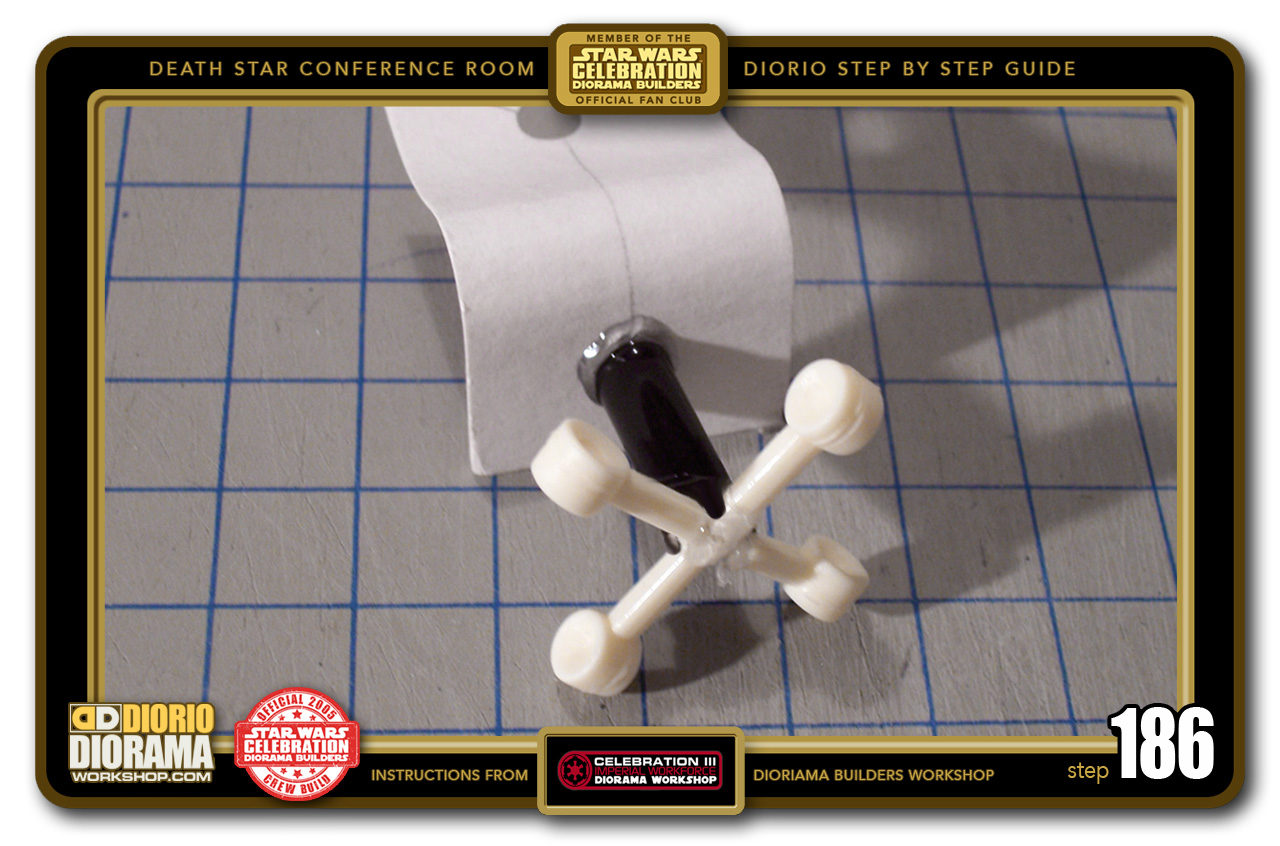
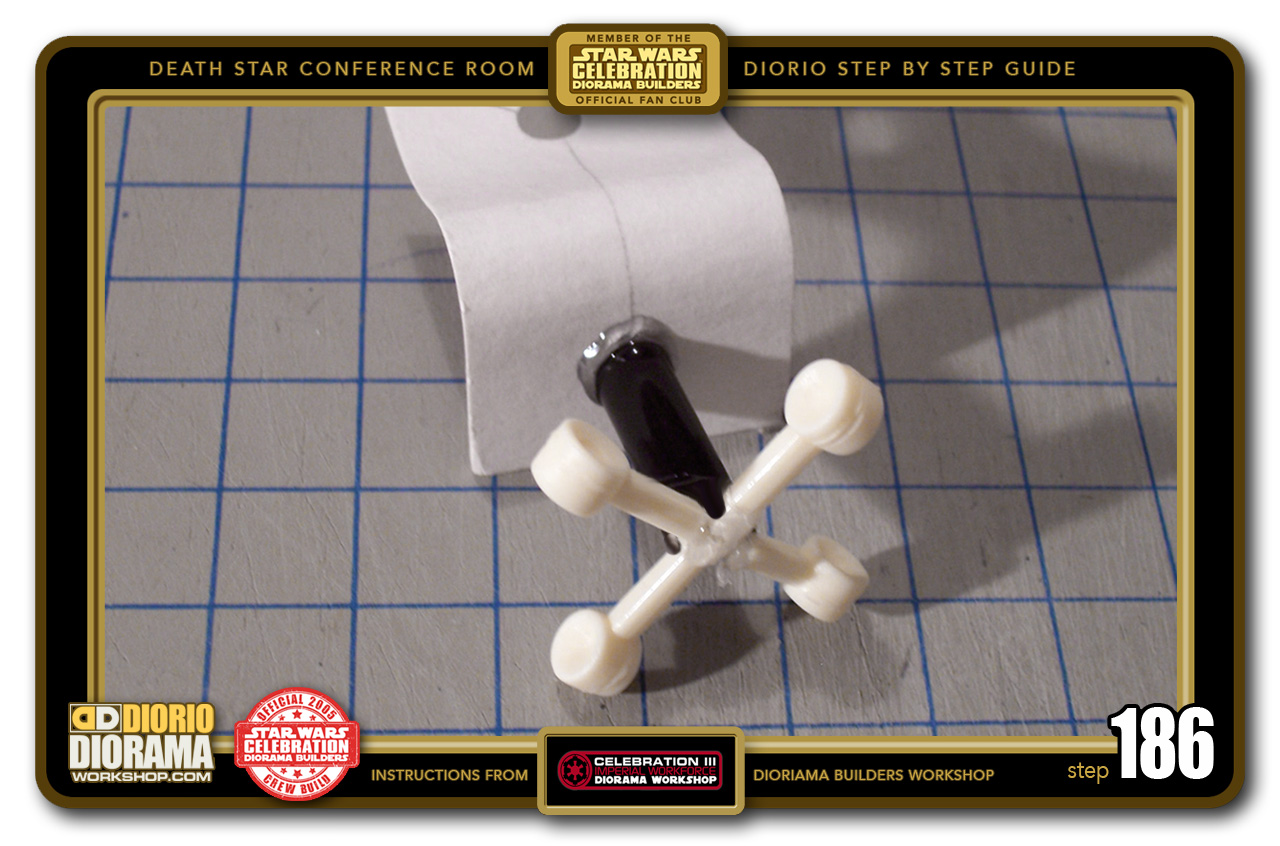
- STEP 186 > Now get out that Hot Glue Gun and put a blob on the bottom of the chair. Now take the feet and press the Straw Top into the Glue Blob. Twist the straw a little to make sure it has the maximum contact with the Hot Glue.
-

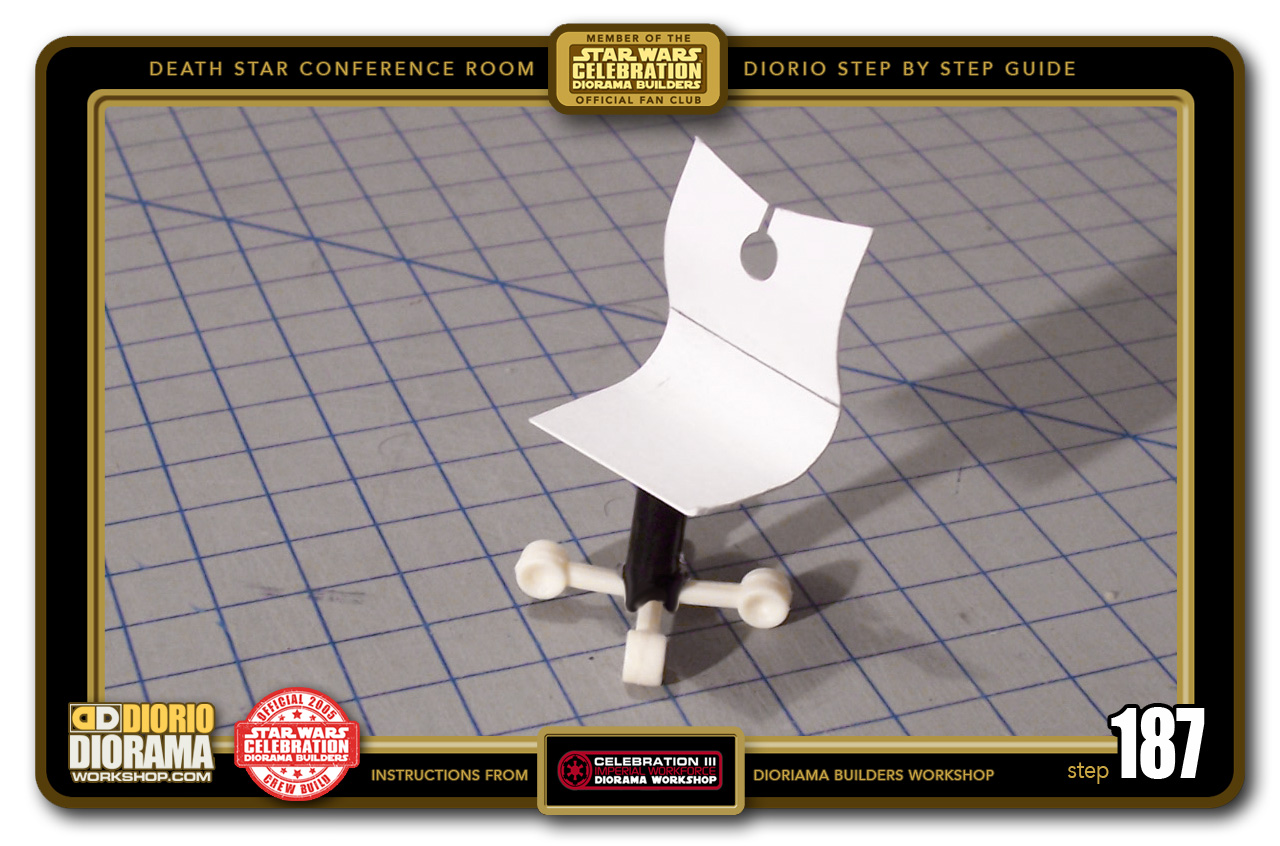
- STEP 187 > Ta-Dah...Ladies and Gentlemen may I present to you the Death Star Conference Room Chair 😀
-
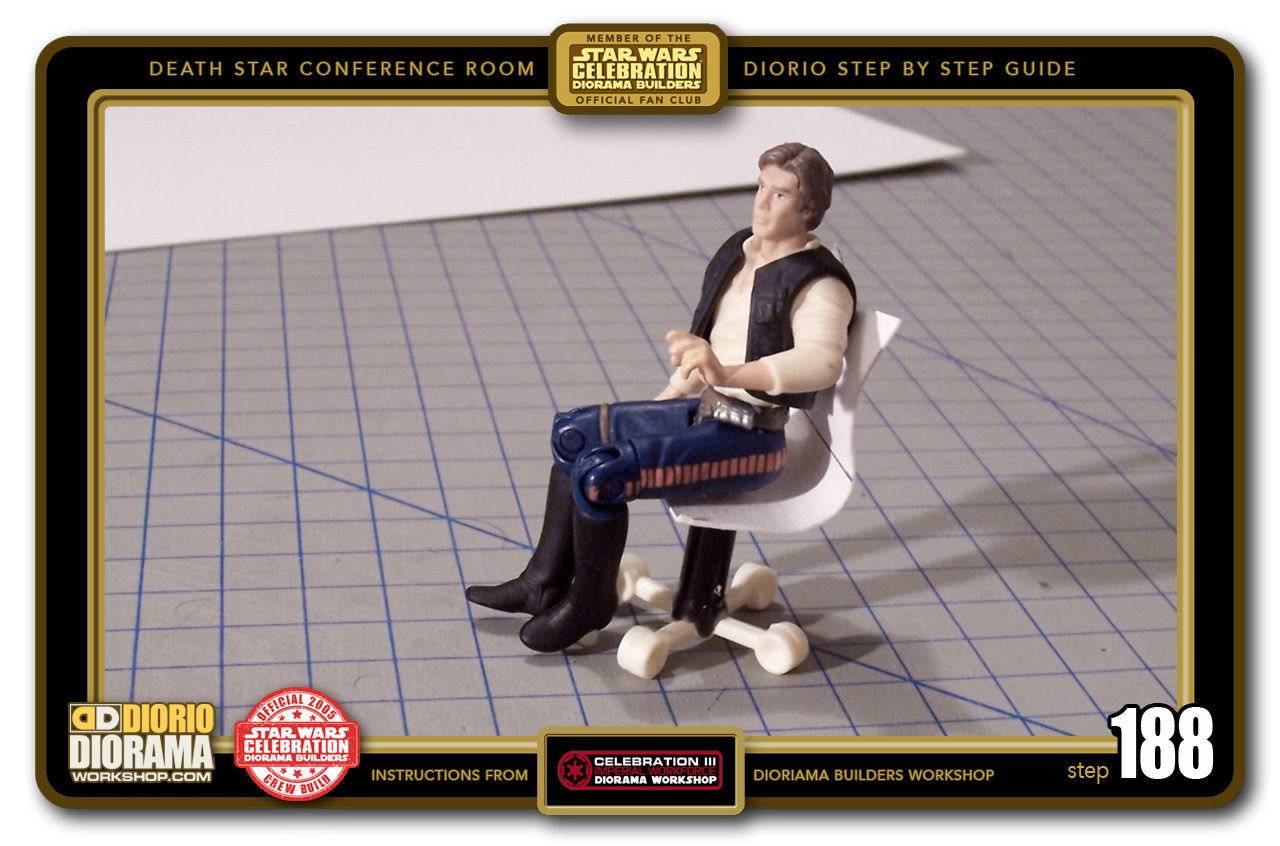
- STEP 188 > Our friend Han Solo just couldn't resist trying it out 😛 Doesn't he just look comfortable :).

-
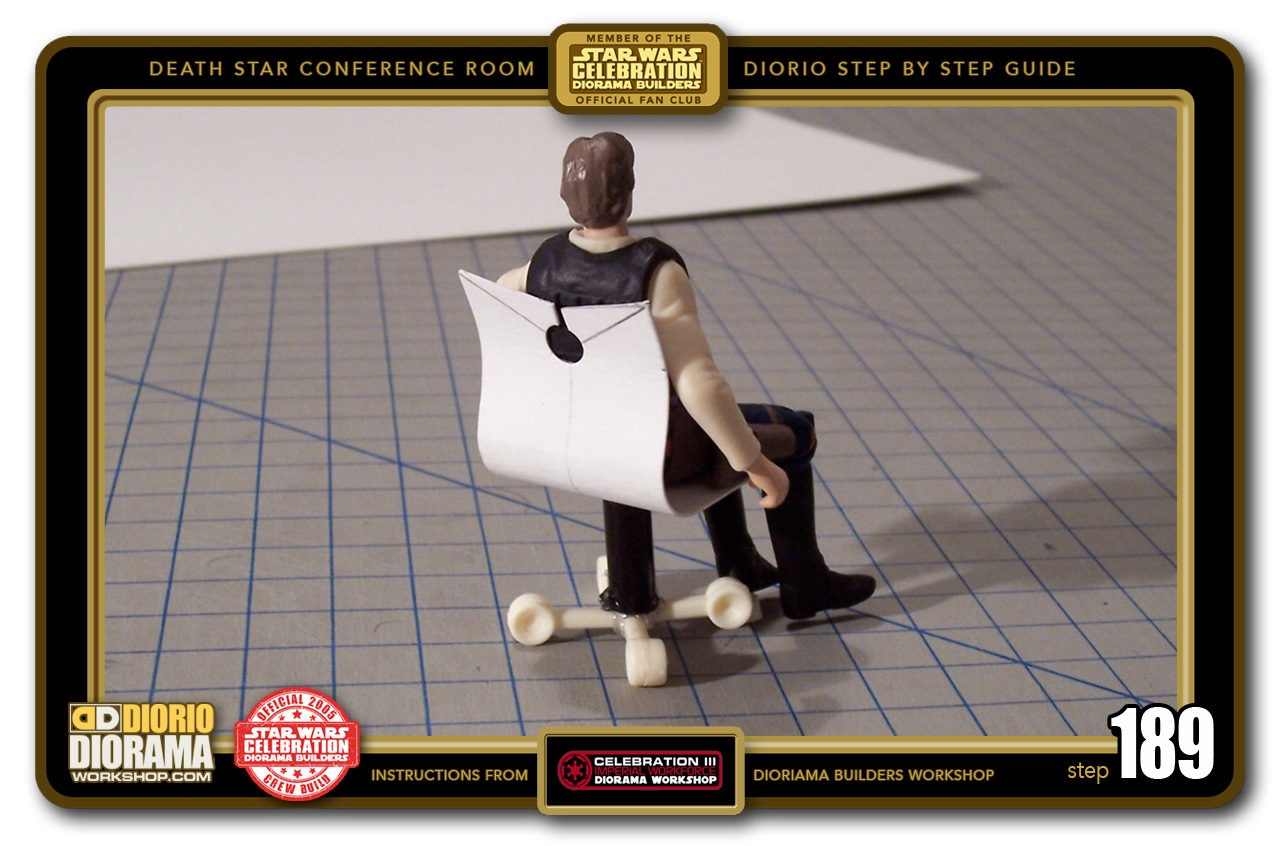
- STEP 189 > And here you can see how the back of the chair reaches the figures shoulder blades. Now all you have to do is make 10 more chairs PLUS the Grand Moff variation...

-
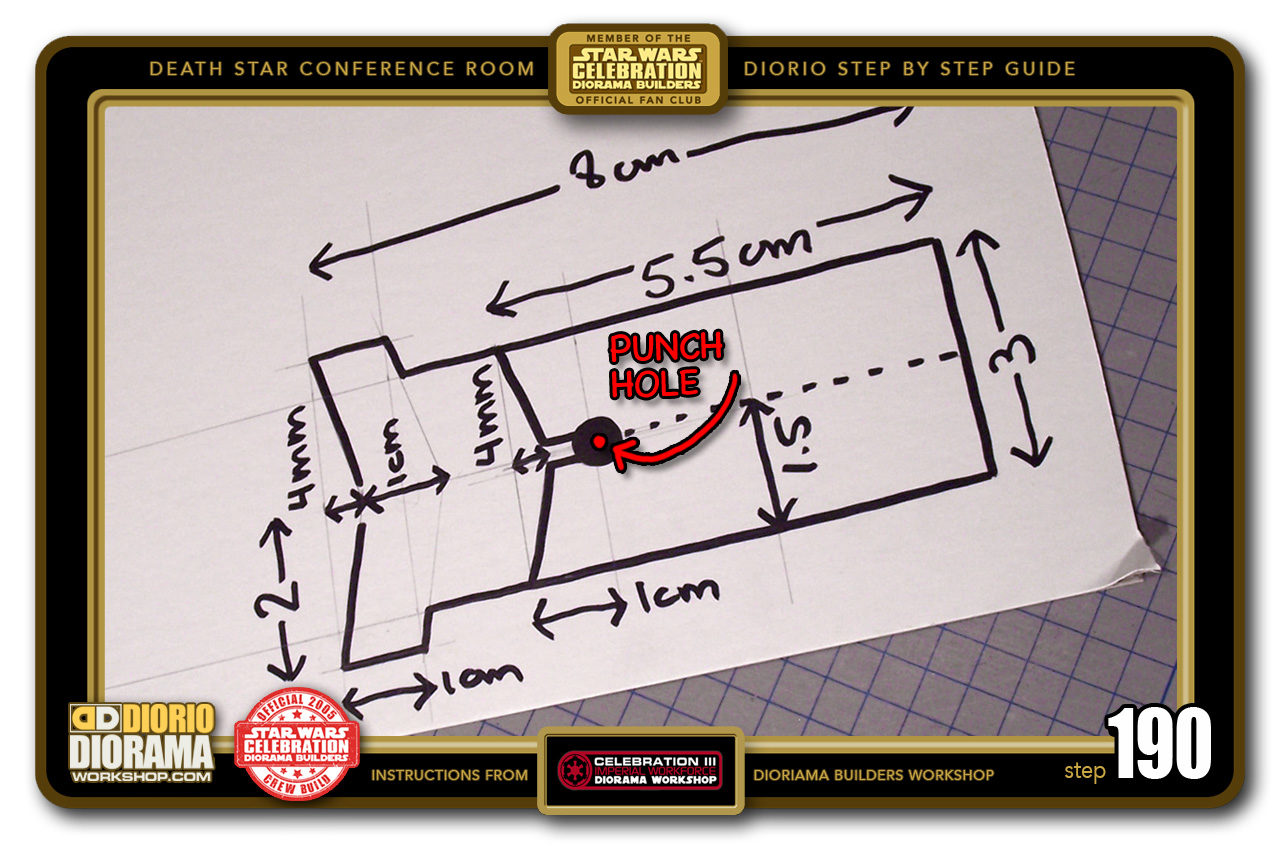
- STEP 190 > Here you can see from the blueprints, the extension measurements for Grand Moff Tarkin's chair. It is the same as the basic chairs but with an elongated top piece. The center hole (red dot) is at the same height as the main chairs.

-
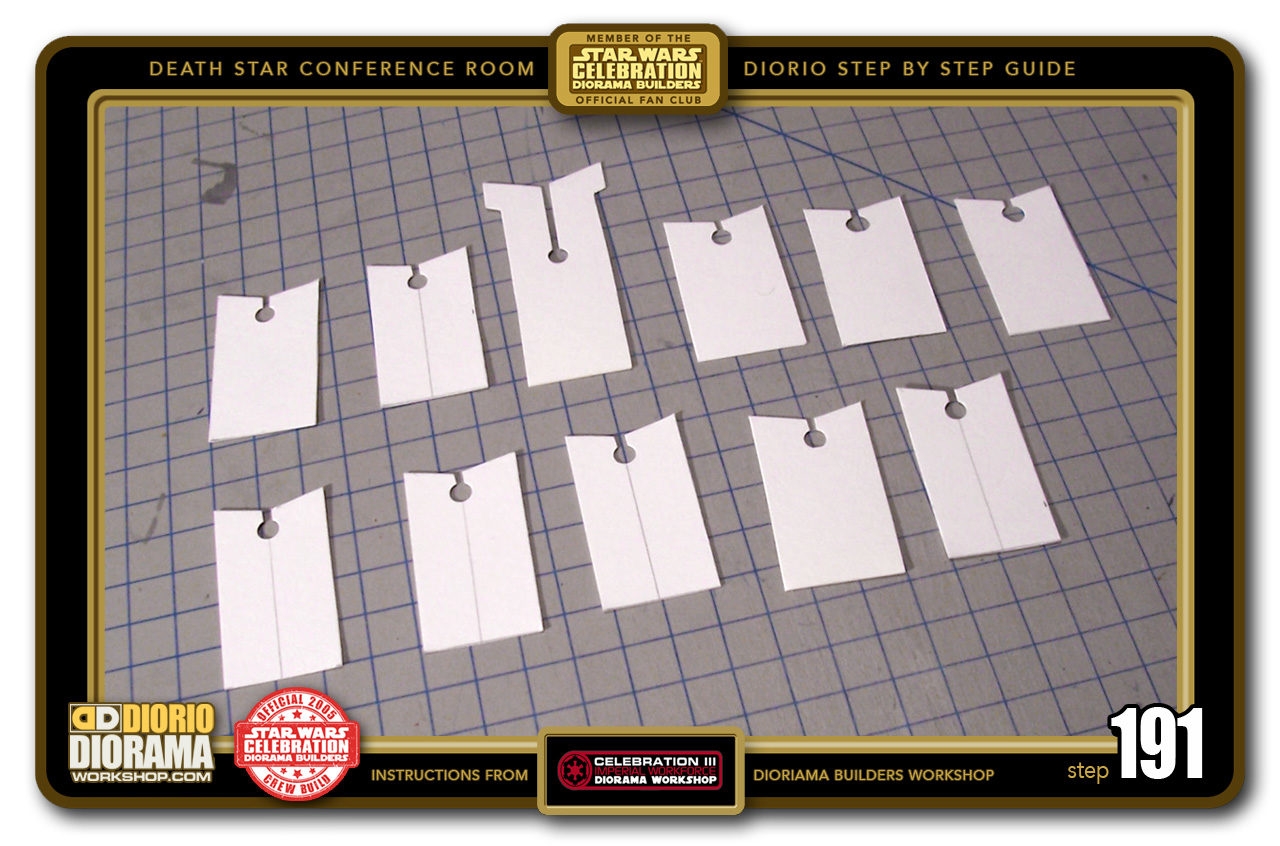
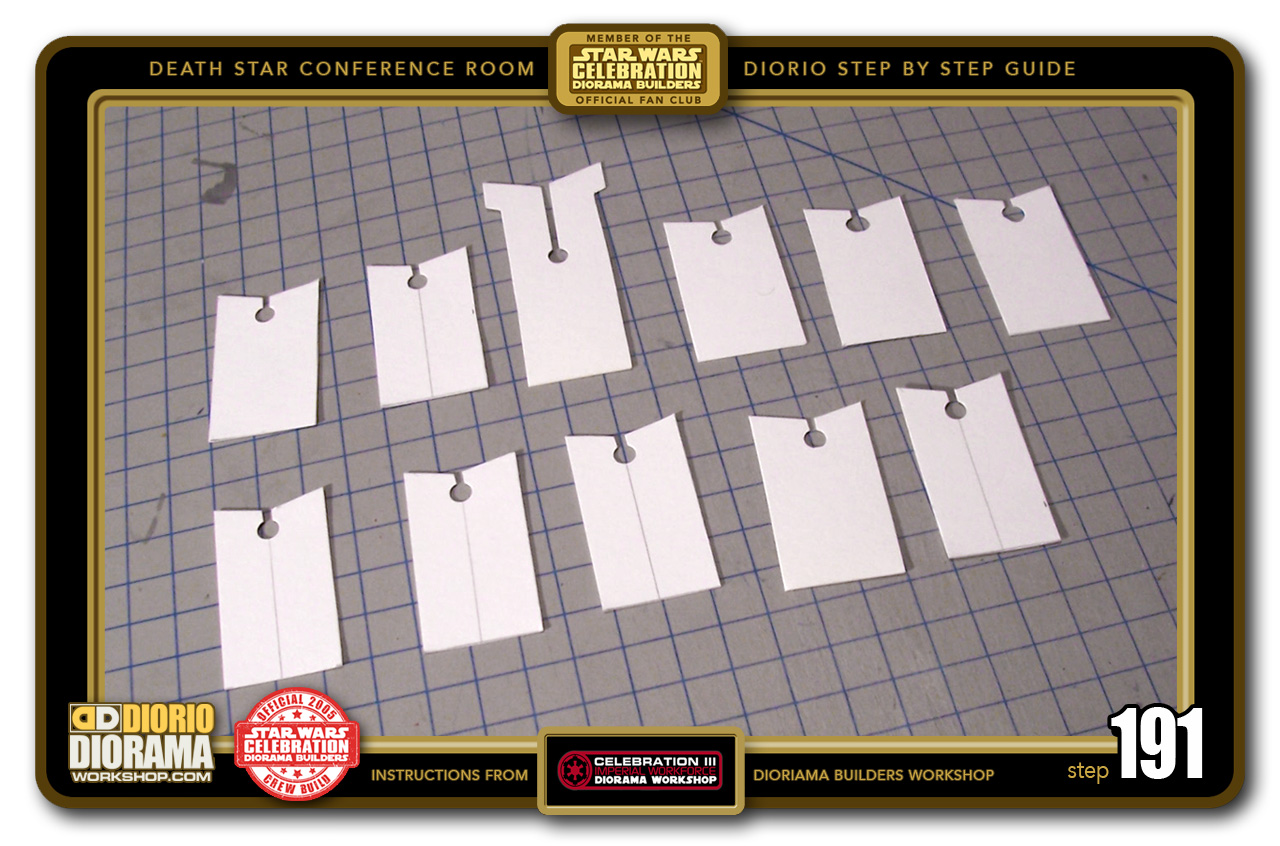
- STEP 191 > So for the remaining chairs you should have 10 REGULAR backs and 1 MOFF back.
-
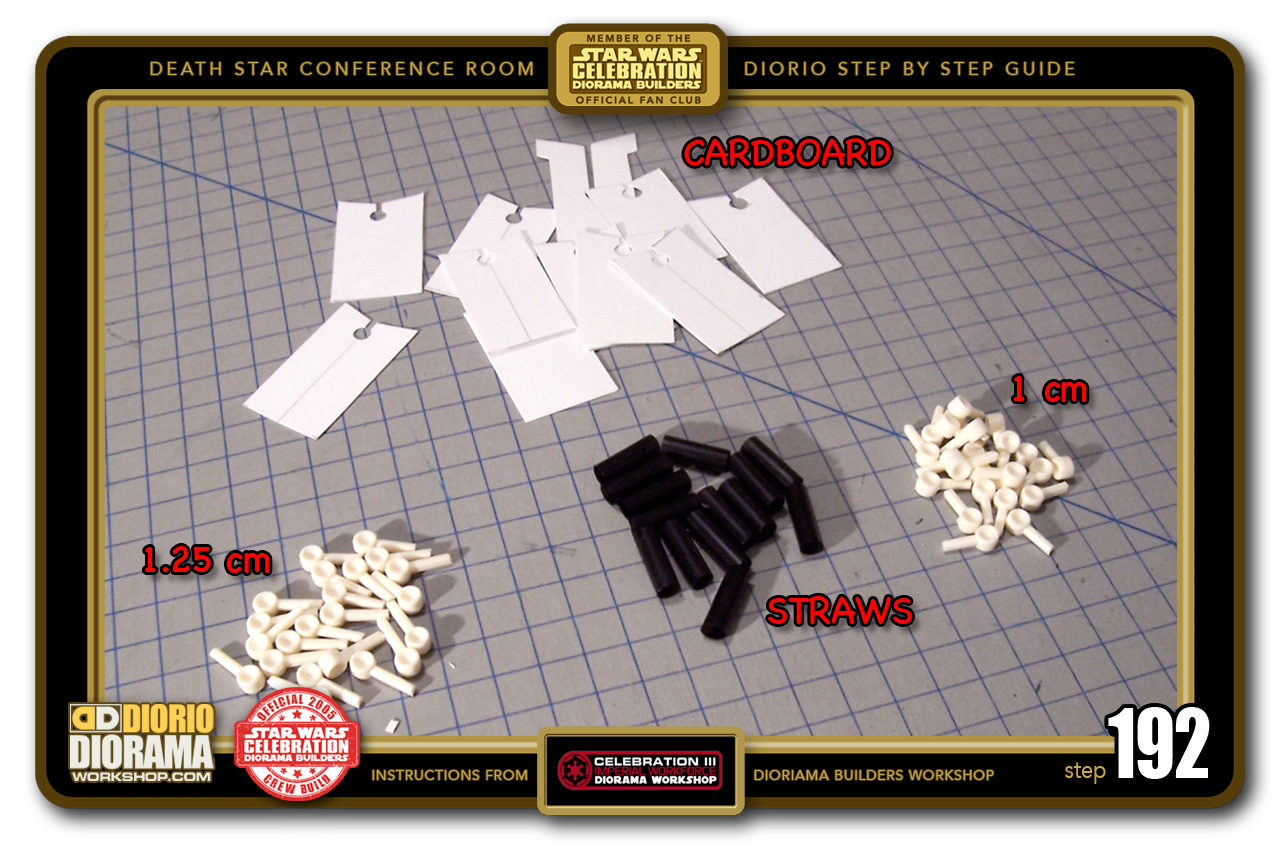
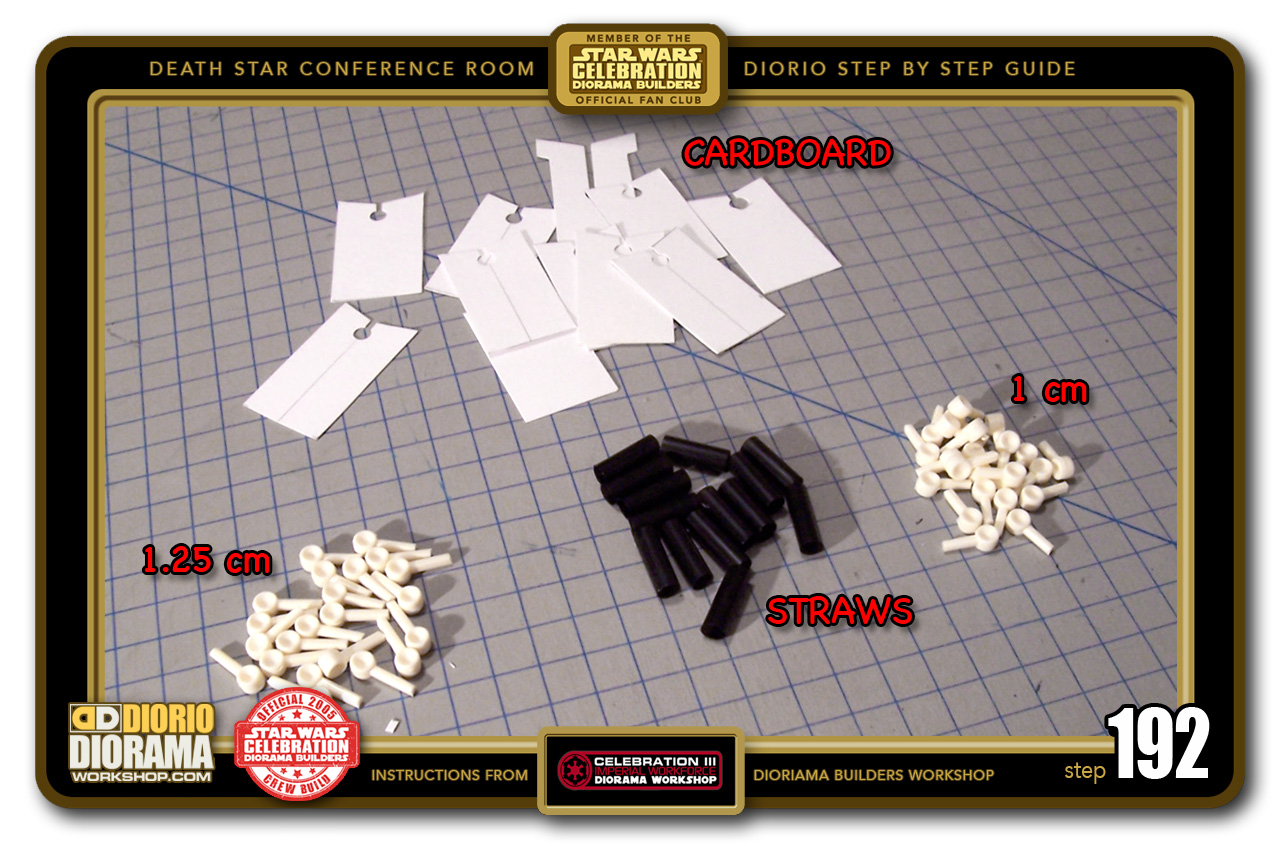
- STEP 192 > Here are all your ingrediants. Chair backs, 22X 1.25cm picks and 22X 1cm pics as well as 11 Straw pieces.
-
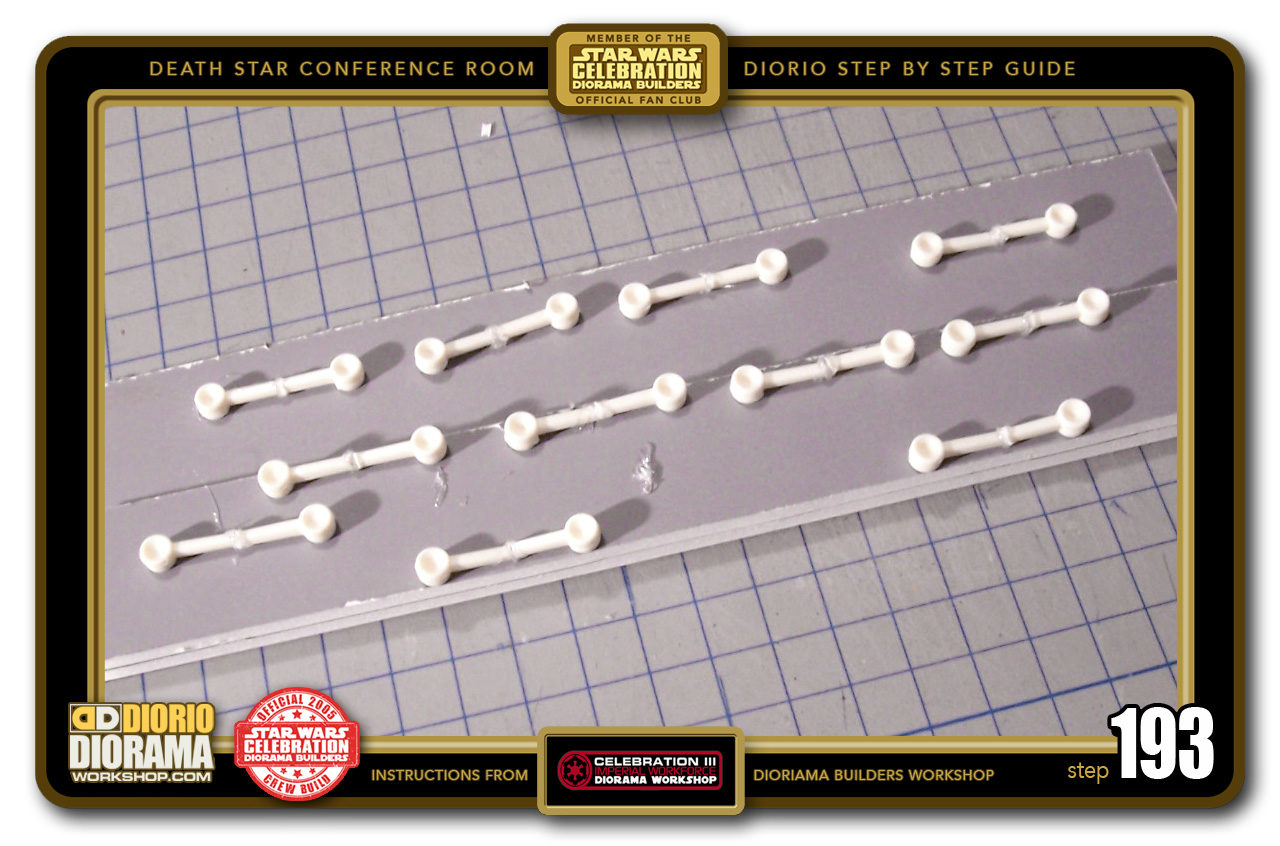
- STEP 193 > Repeat the same procedure from the first chair you made. Start with assembling the longer 1.25cm pics. Remember to keep those pegs aligned.

-
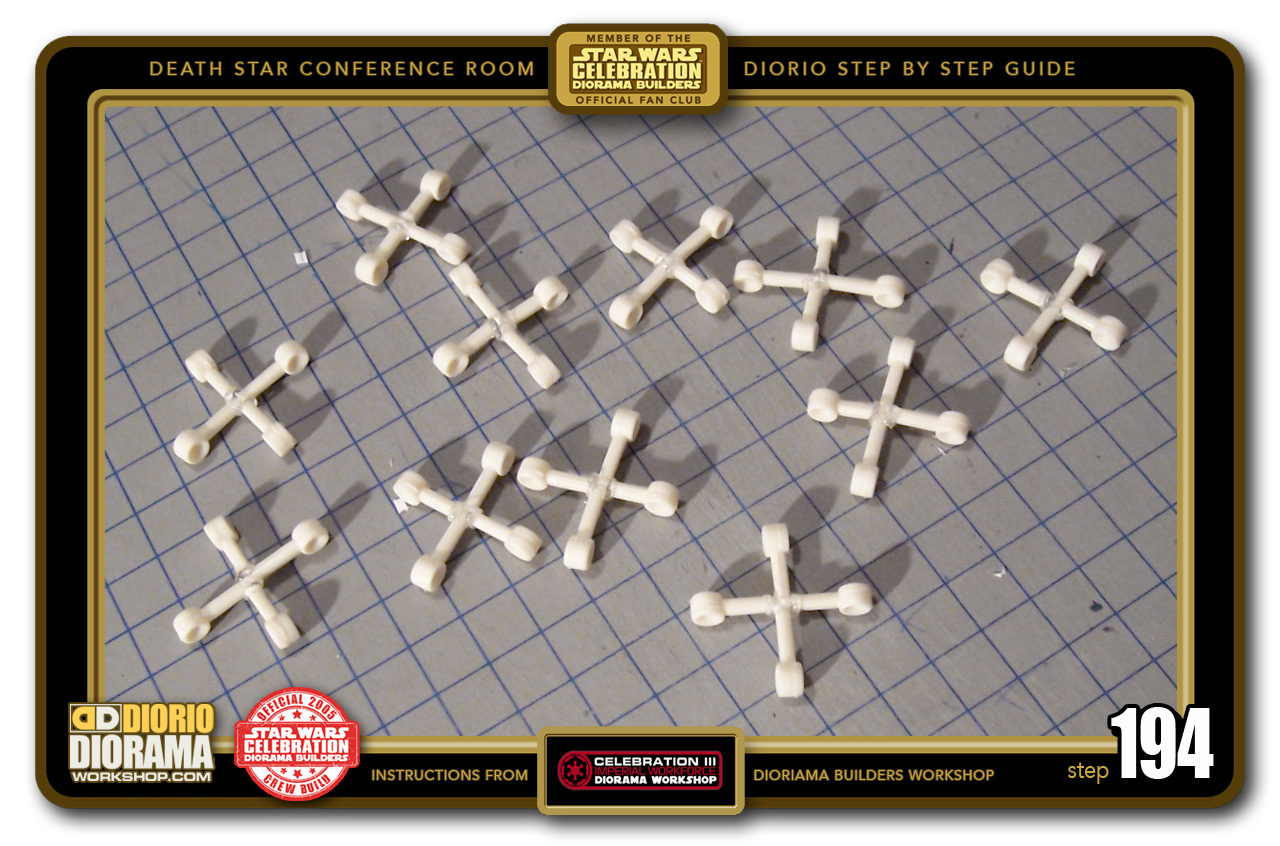
- STEP 194 > Then attach the remaining pics. Looks like Tiddly Winks doesn't it 🙂 or is it jacks? My memory isn't what it use to be LOL.

-

- STEP 195 > Now for all the Straw pieces...

-

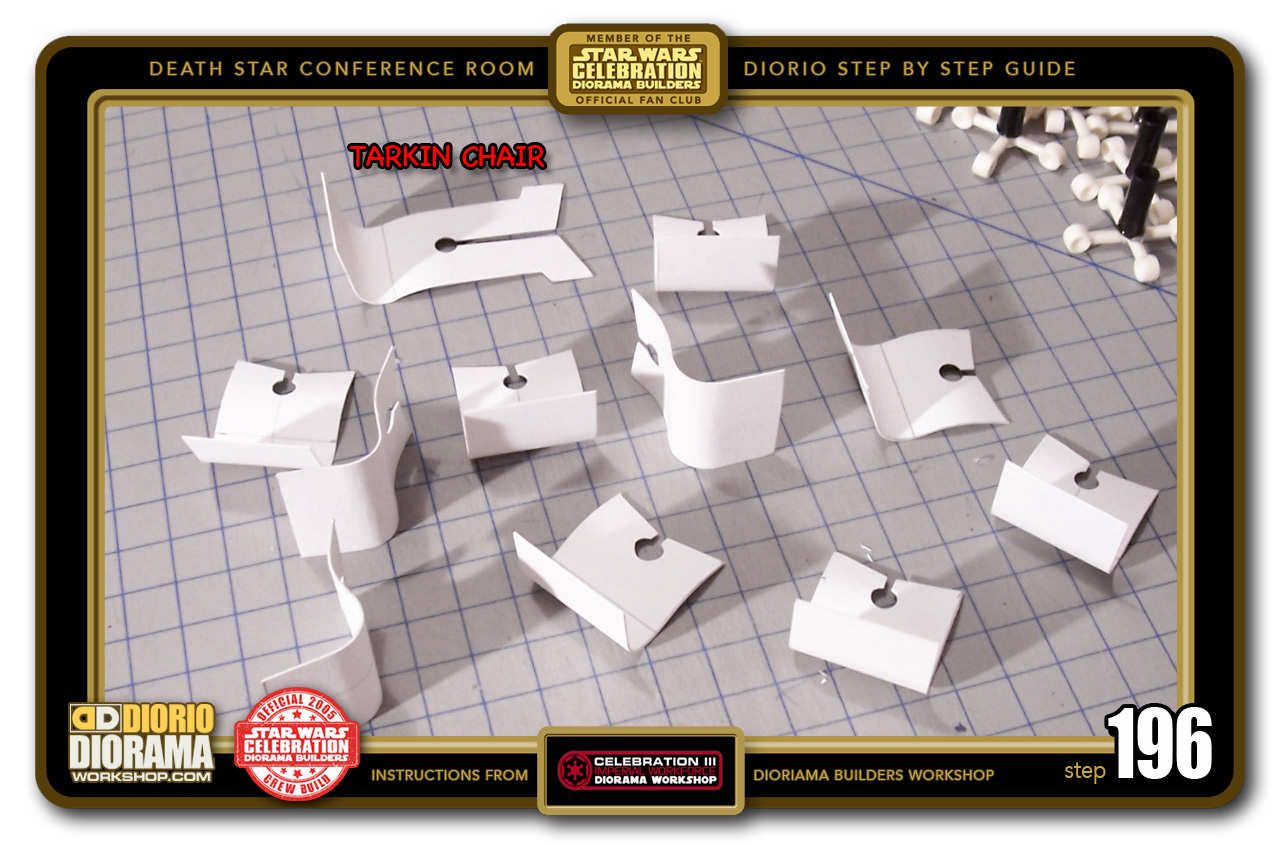
- STEP 196 > Bend those chair backs before you attach them to the chair feet. For Tarkin's back, roll the FAT marker at the SAME height as the regular chairs. You DON'T want to bend the LONG rabbit ear shape. ONLY below the punched out hole.
-
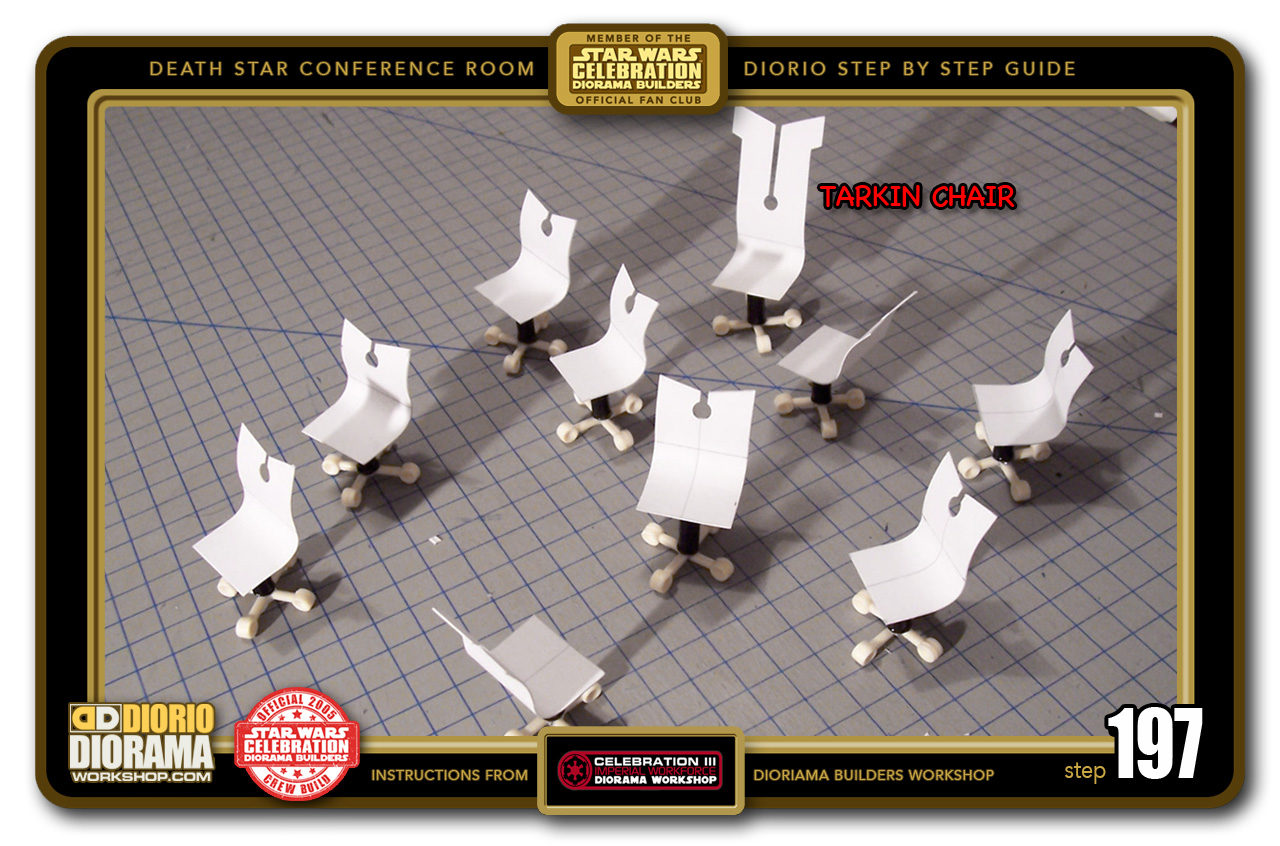
- STEP 197 > About 30 minutes later, our chairs are all assembled but still look like paper - for now.

-

- STEP 198 > Get out your paint and start brushing 🙂 I used a dark Paynes Grey. A dark color is just fine. I picked this one because I used it in a previous Diorama.

-
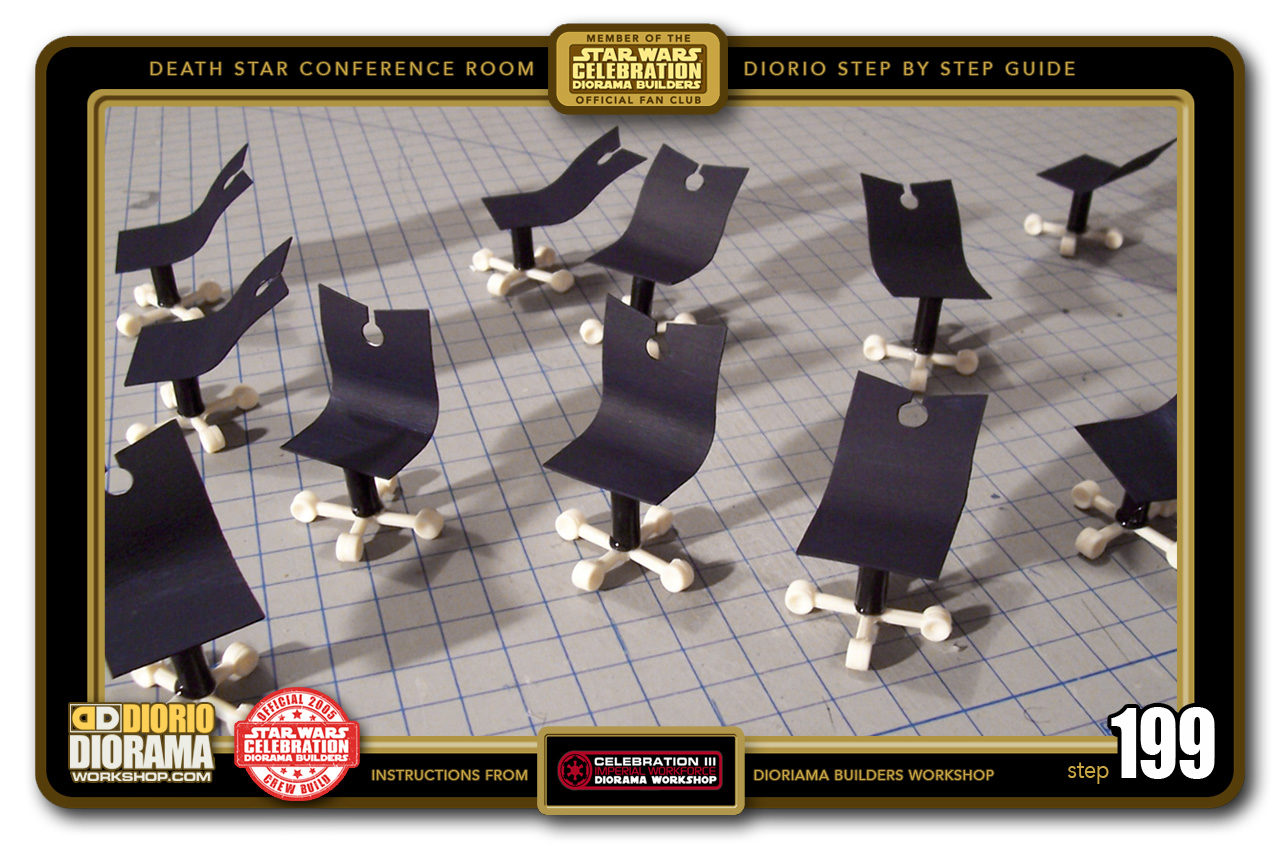
- STEP 199 > Let the Chair backs dry before tackling the Feet. If not, you will have lovely finger prints all over the chairs and Darth Vader will not be happy about that 😛

-
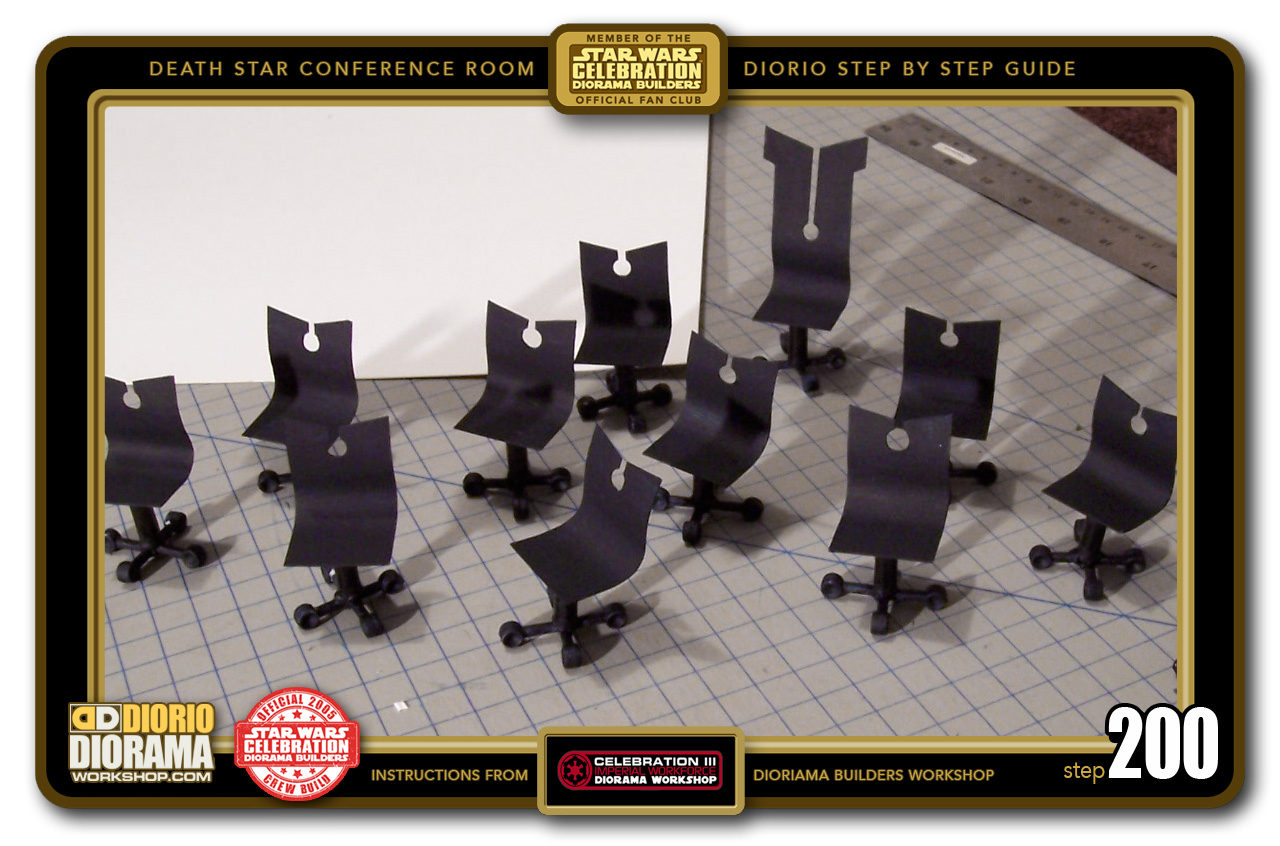
- STEP 200 > WooHooo, Chairs right out of the factory 😀 Pretty cool for some paper cardboard don't you think? LOL.


.
Did you already build this Diorama ? At home or at our Star Wars Celebration Diorama Builders workshop ? Would you like to show it in the site’s GALLERY VISITORS DIORAMAS section, YES ? That is Awesome !!! You can find out all the details on how to email me your photos on the VISITORS SUBMISSIONS INFO page … When I get your photos, I will create your very own page just like this one. You may not realize it but work does inspire others to join in the fun of making Action Figure Dioramas.
.
NOT FOR RESALE ALL Decals, tutorials and artwork are ©FrankDiorio (dioramaworkshop.com) and offered FOR FREE to the fans – that would be you ? so you can build and display my diorama designs in your very own home. I realize I cannot control what one does with my graphics once I place them on the web, I can only ask you as one fan to another, please respect the artist and do not be that jerk who uses my designs and tutorials to build a copy of my work only to sell it on EBAY or trade/sale groups and forums. Thank You. Frank.
.
.
If you have a facebook account, why not join the Official Diorama Builders Fan Club today, simply click the logo link below.
 .
.
Catch up with fellow visitors and exchange stories, read cool interviews with the crew, exchange photos, fun surprises and grab some FAN ONLY merchandise next year at actual future conventions ?
.
©2018 Frank Diorio DioramaWorkshop.Com
.
IF YOU LIKE WHAT YOU SEE, PLEASE SHARE WITH YOUR FRIENDS
USING THE SOCIAL MEDIA BUTTONS BELOW