


-

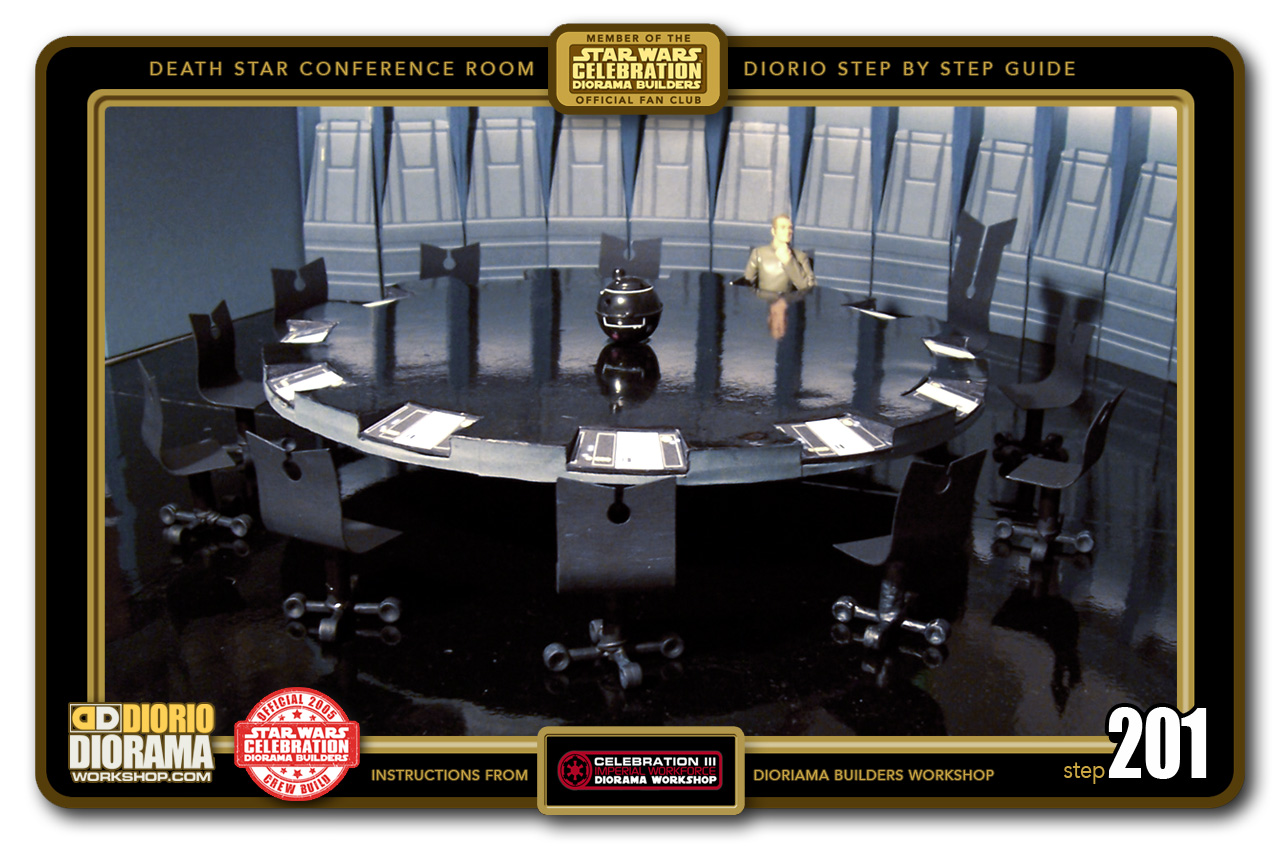
- STEP 201 > Once the feet are dry, you can place them into the Conference Room. Align them up with a Control panel.
-

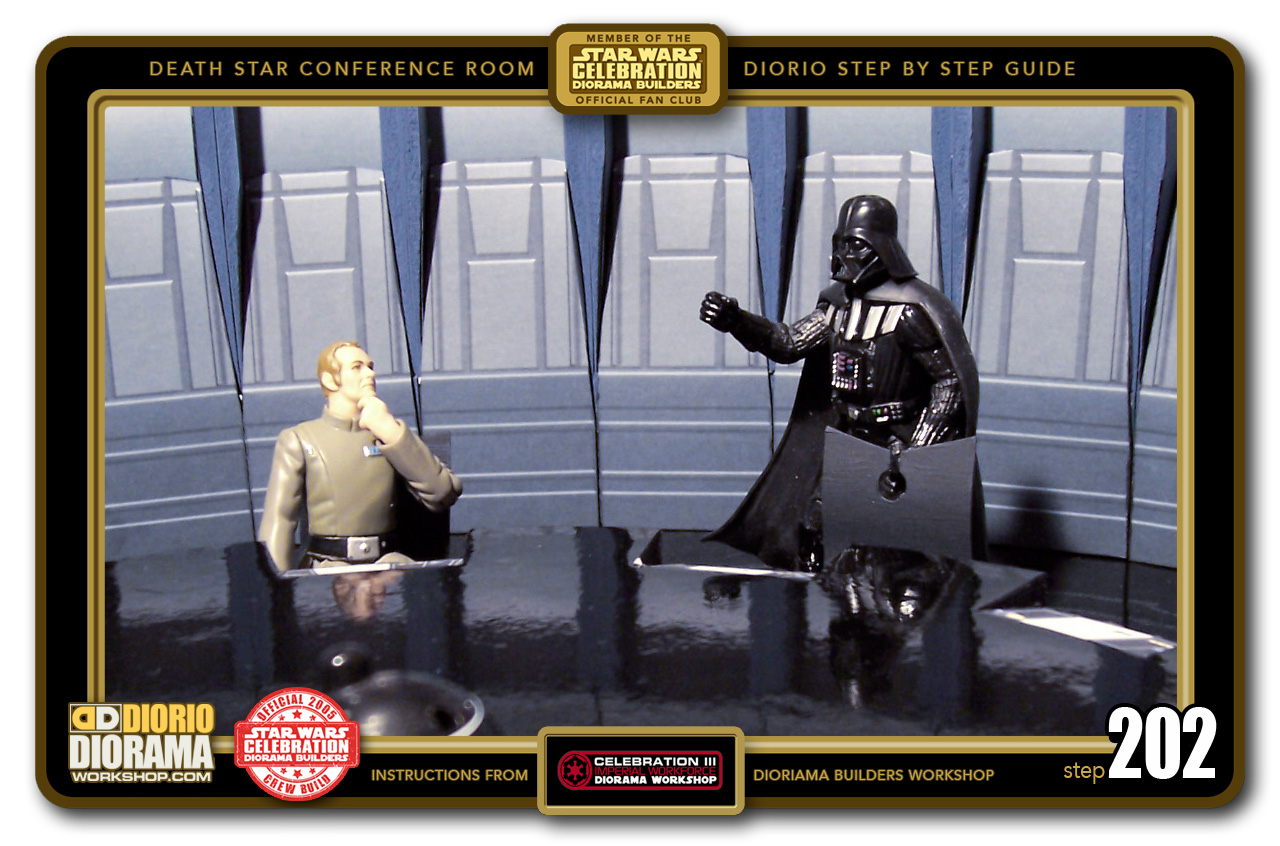
- STEP 202 > Most of you can stop here if you wish. But wait... Frank loves to make a movie accurate Diorama 😛 Can you guess the last step that's missing?
-
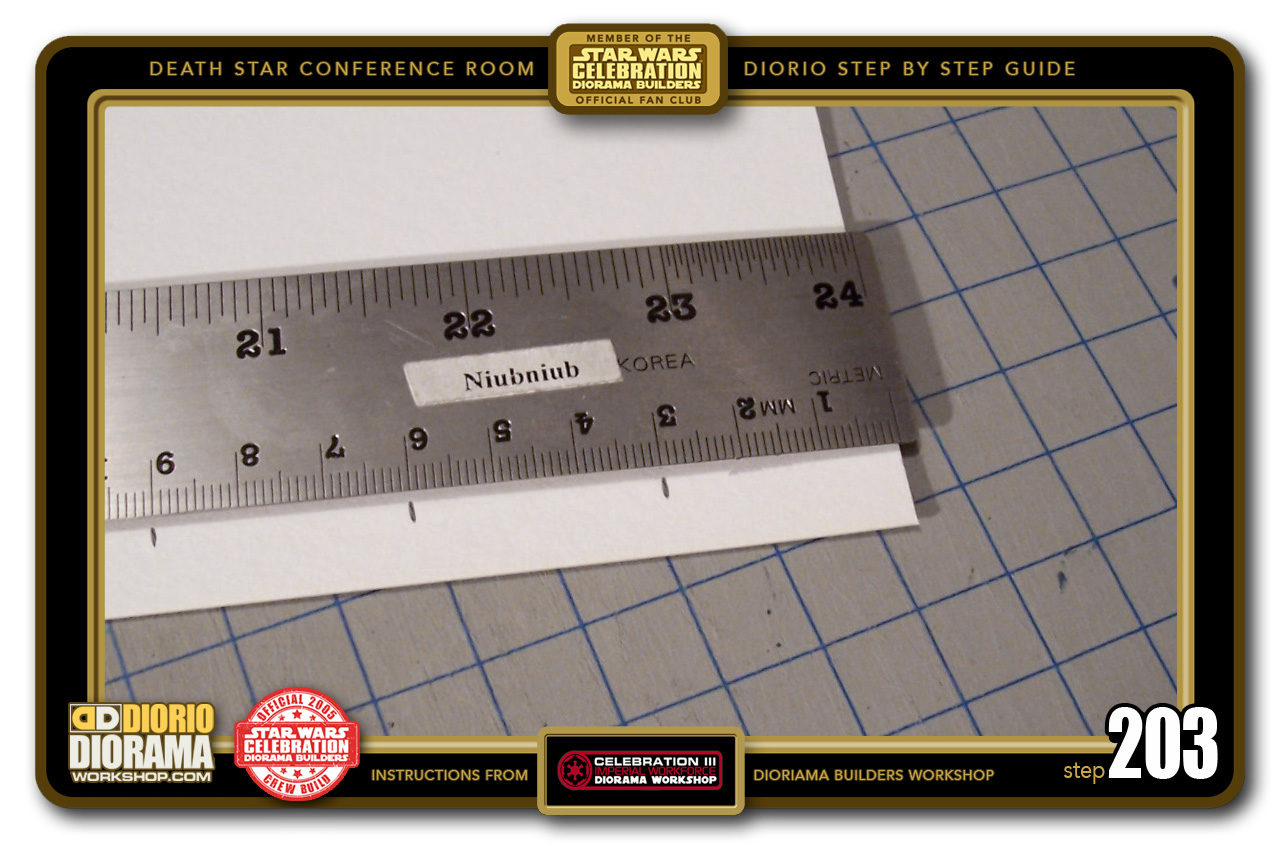
- STEP 203 > If you said Exhaust Grids and Lights you are Dean On !!! 🙂 Using the same posterboard as the chairs, measure widths of 3cm wide.

-

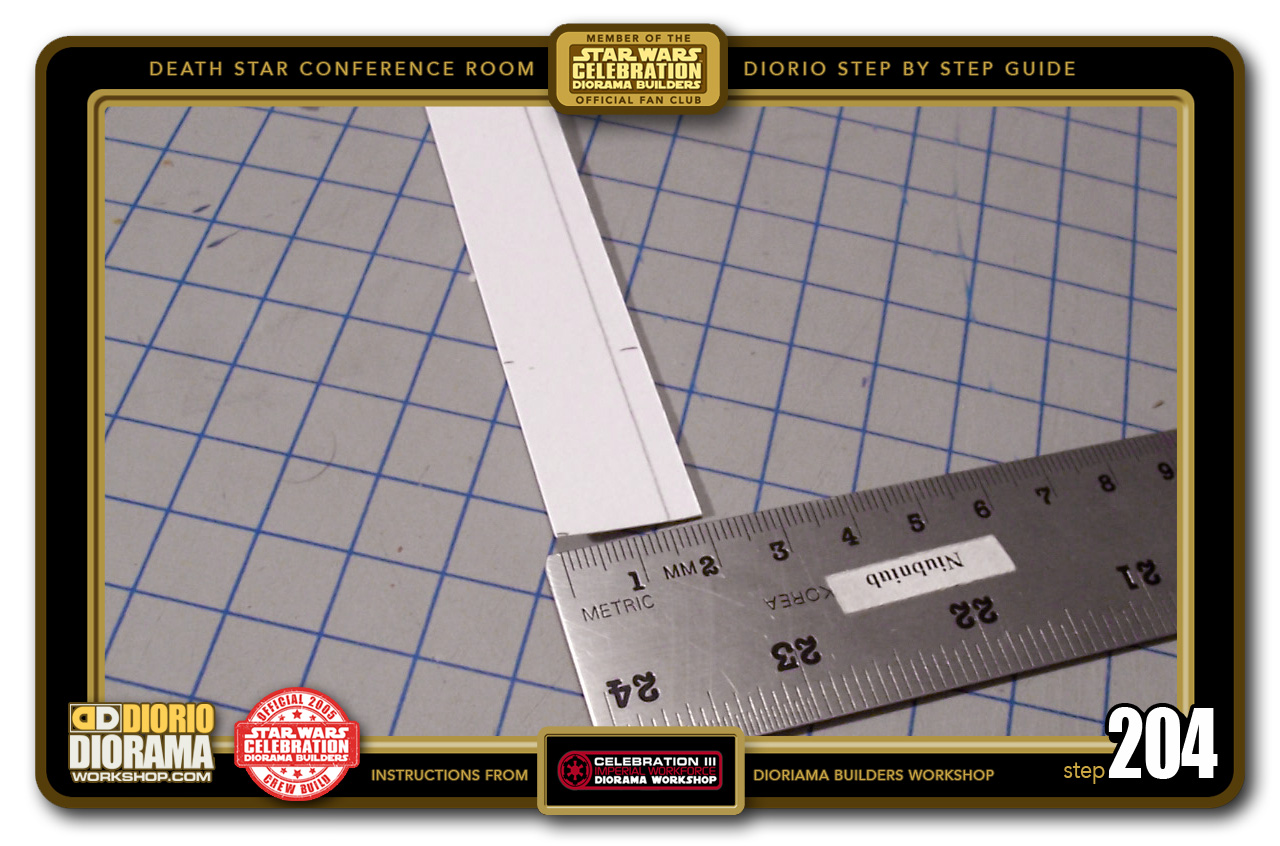
- STEP 204 > Then measure a 2cm wide and create a strip where you will make a mark at 1.75cm
-

- STEP 205 > You will need 5 identical 2cm x 3 cm poster board pieces.

-
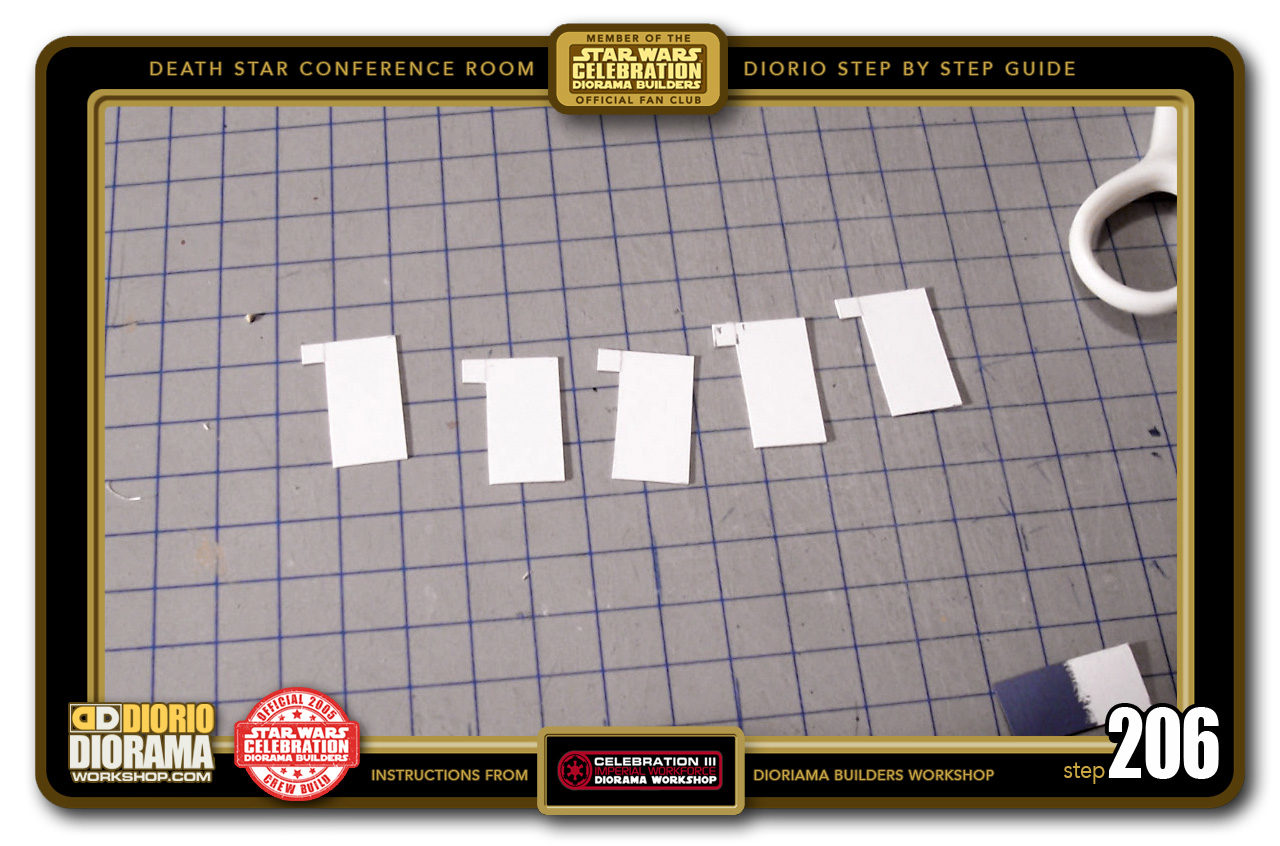
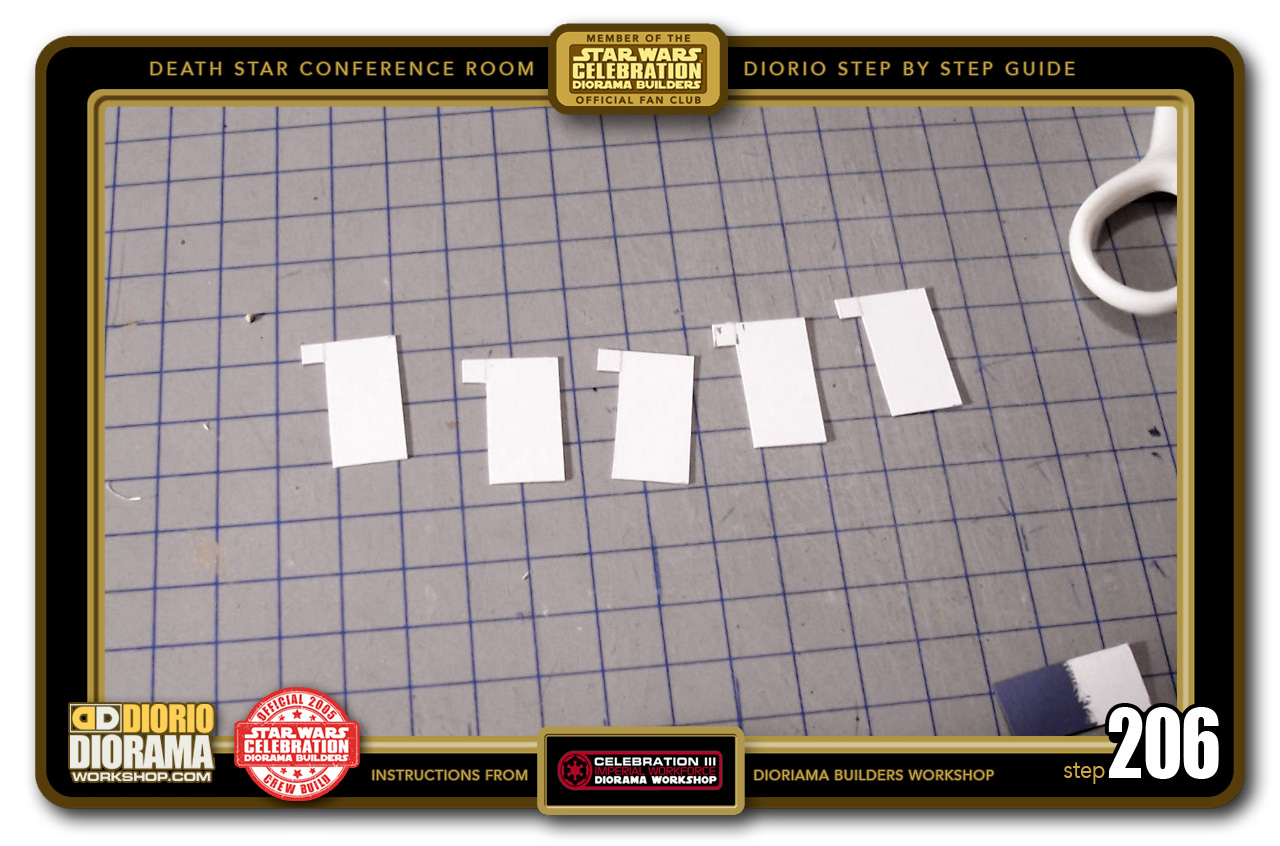
- STEP 206 > Using your X-Acto blade, cut along your 1.75cm line STOPPING AT.25cm leaving you with a tiny corner extrusion. Almost like a "L" shape.
-
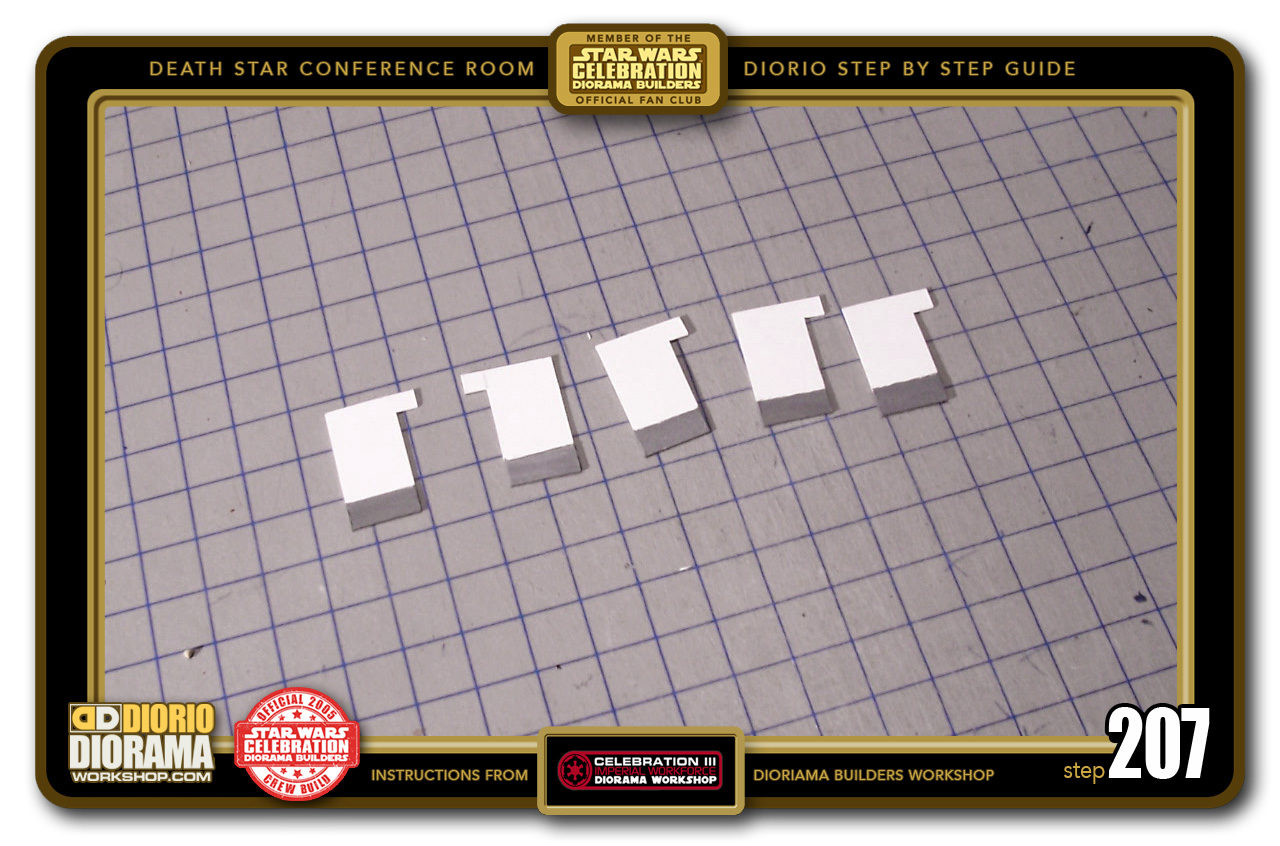
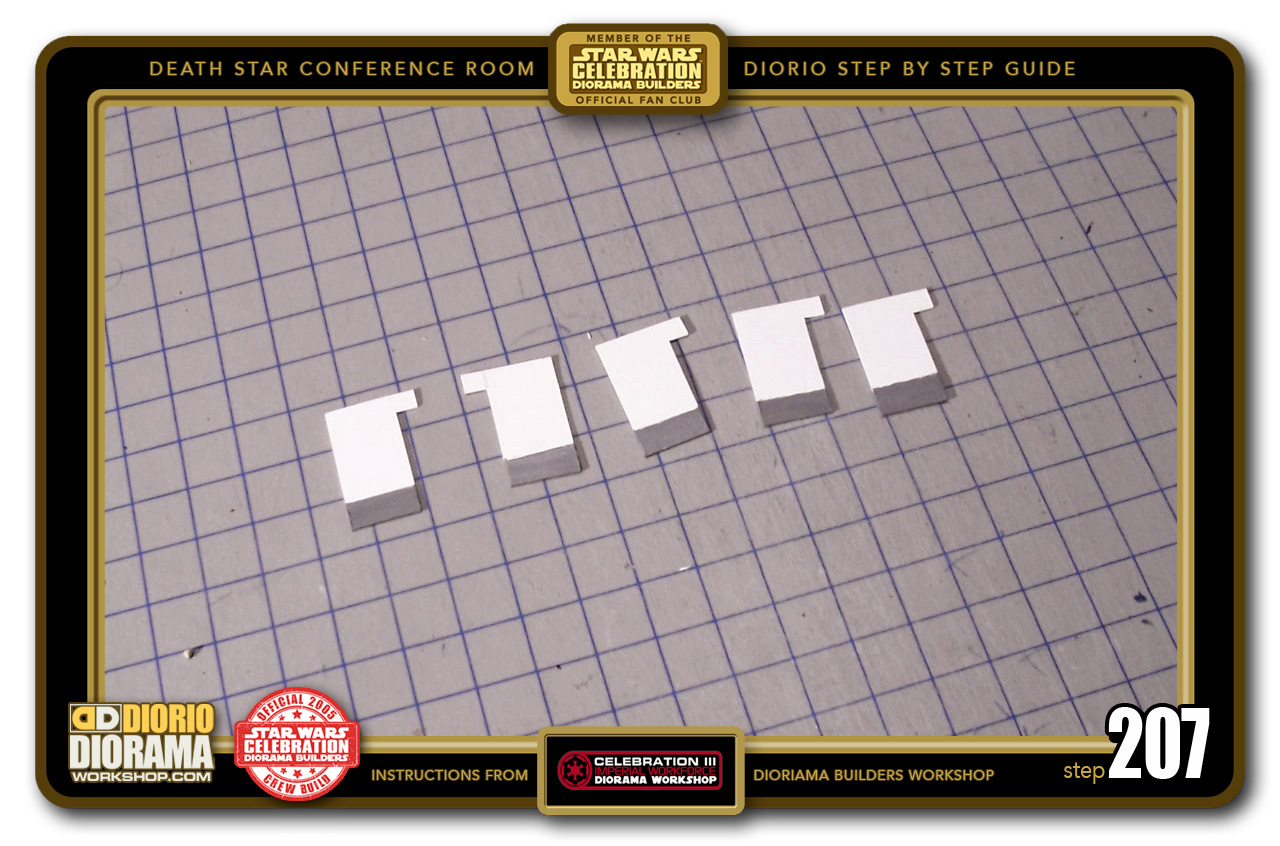
- STEP 207 > I painted the bottom tips only, but if you prefer, you can just paint the entire surface. I left mine white so that the inside part that we don't see from the front, would reflect the light better than a dark color.
-

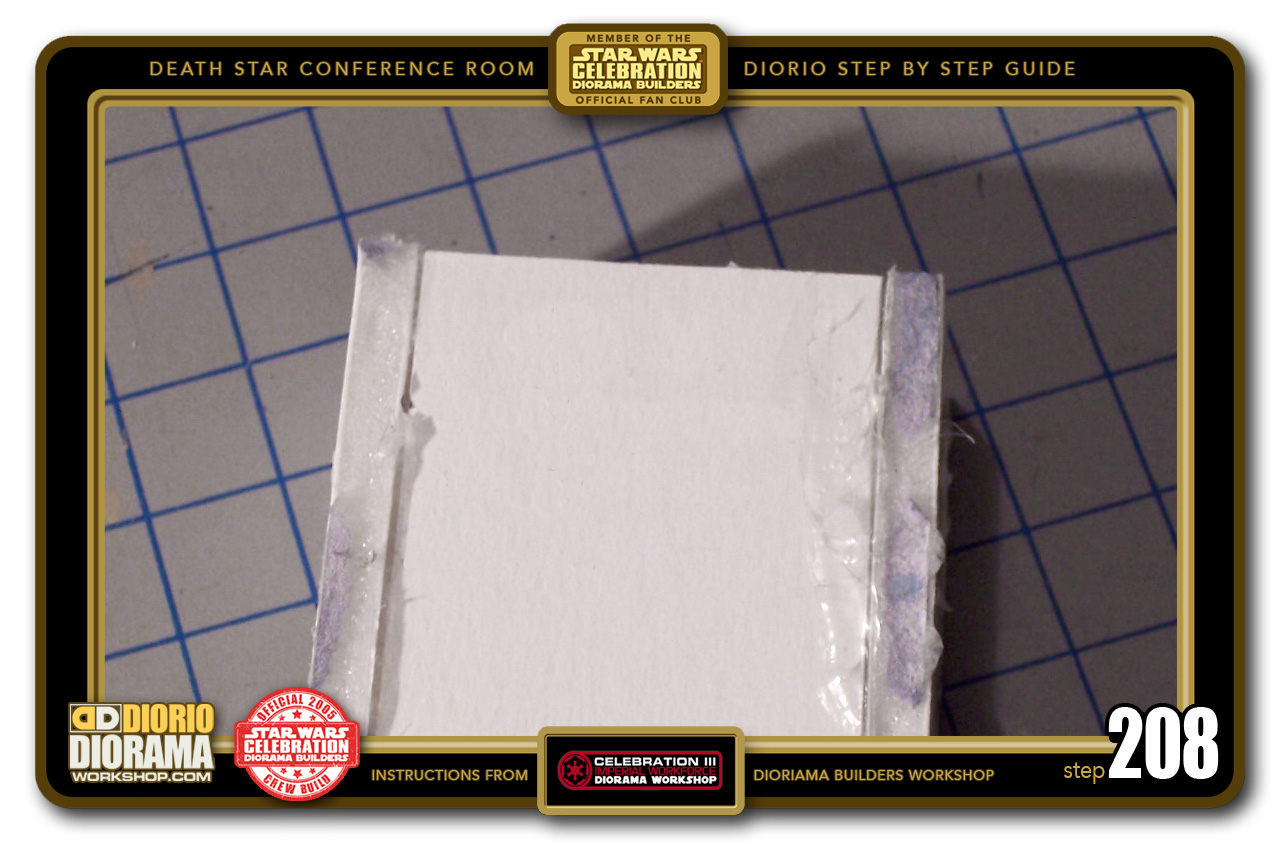
- STEP 208 > So we need to make grooves on the back of each wall unit so that the poster board pieces can be placed inside the wall top's gap.
-

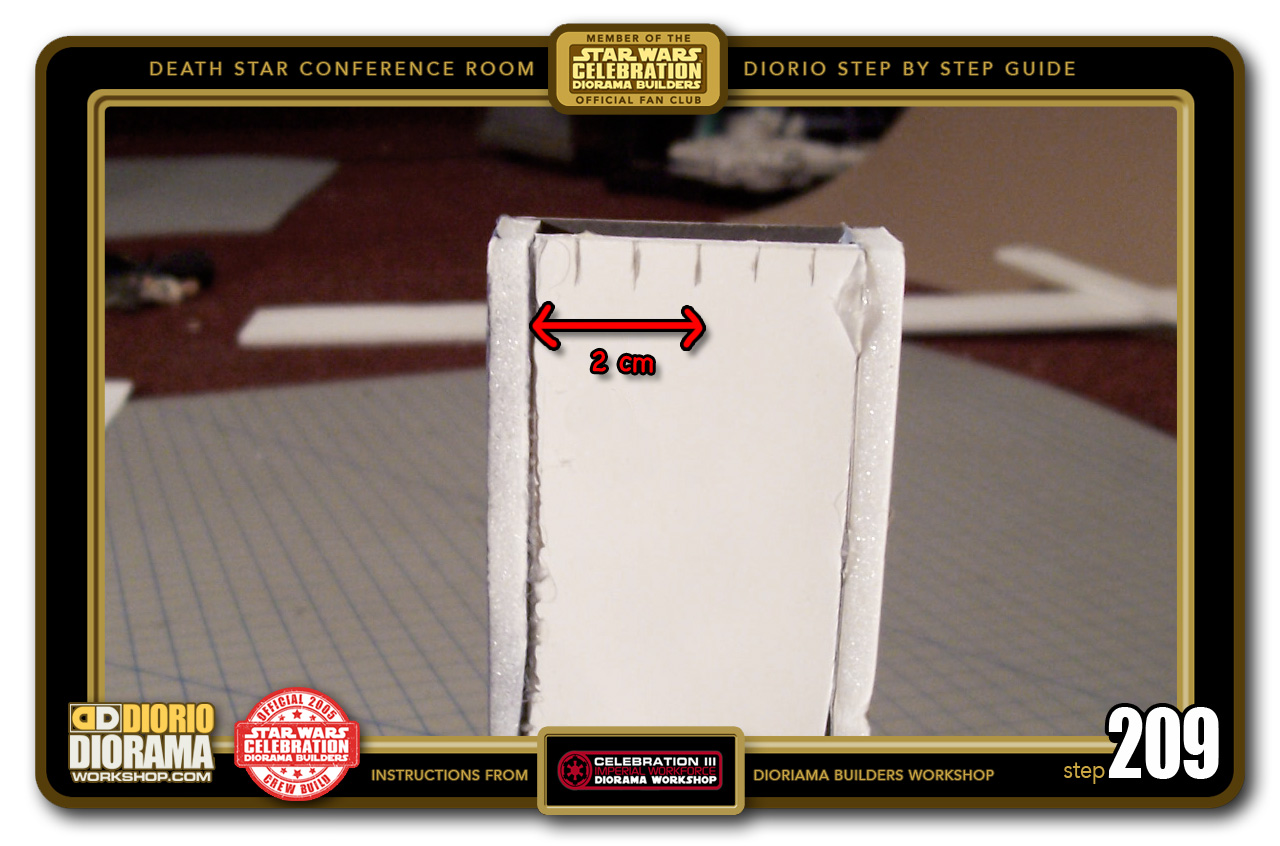
- STEP 209 > Start by marking the center at 2cm. Then you can divide that space in 3 equal portions. You can use your eye for this part, unless you want to be super precise with the ruler 🙂
-

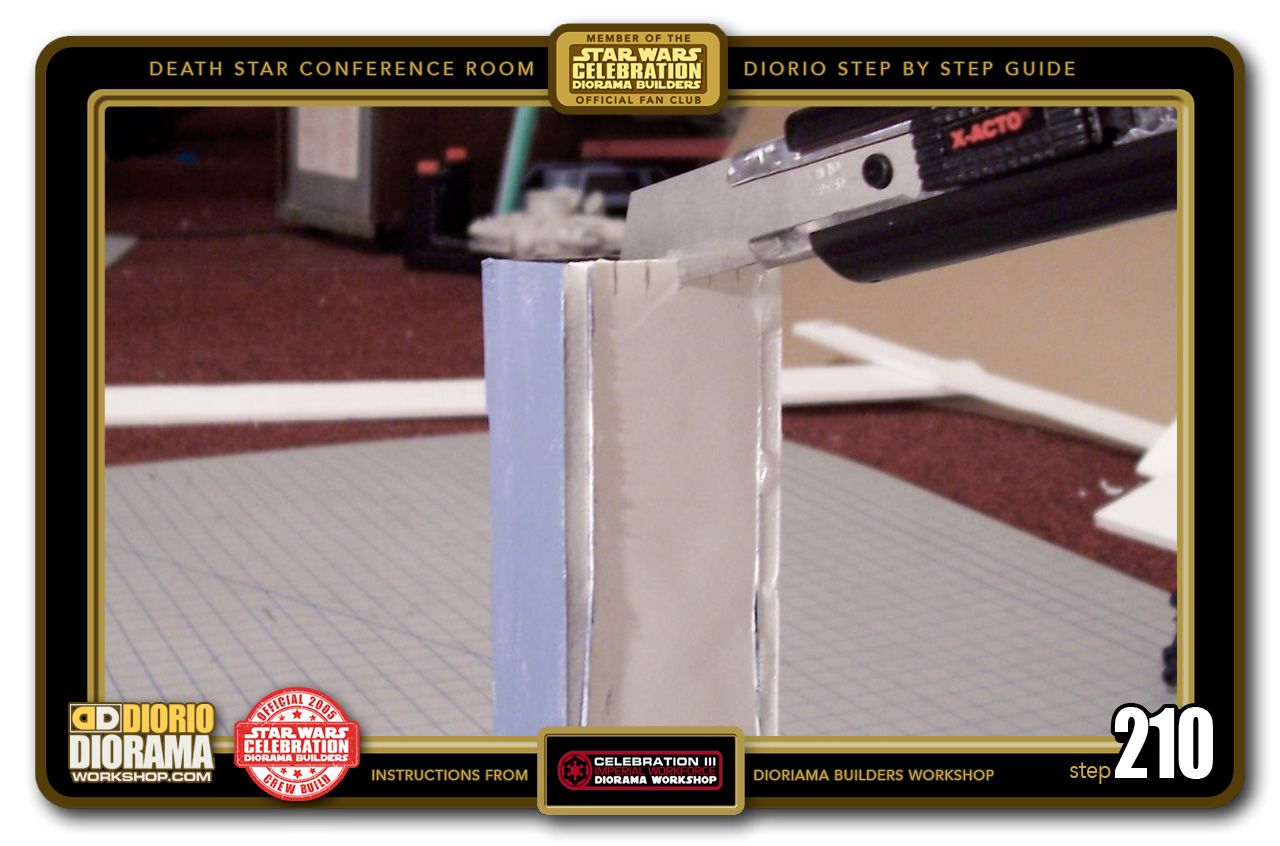
- STEP 210 > Carefully place your X-Acto blade at the top of one of the lines and start sliding down while moving the blade forward slowly and adding pressure.
-

- STEP 211 > DO NOT SLICE DEEP !!! You want to try and STOP at .25cm, the same thickness as your poster board's protruding edge.
-

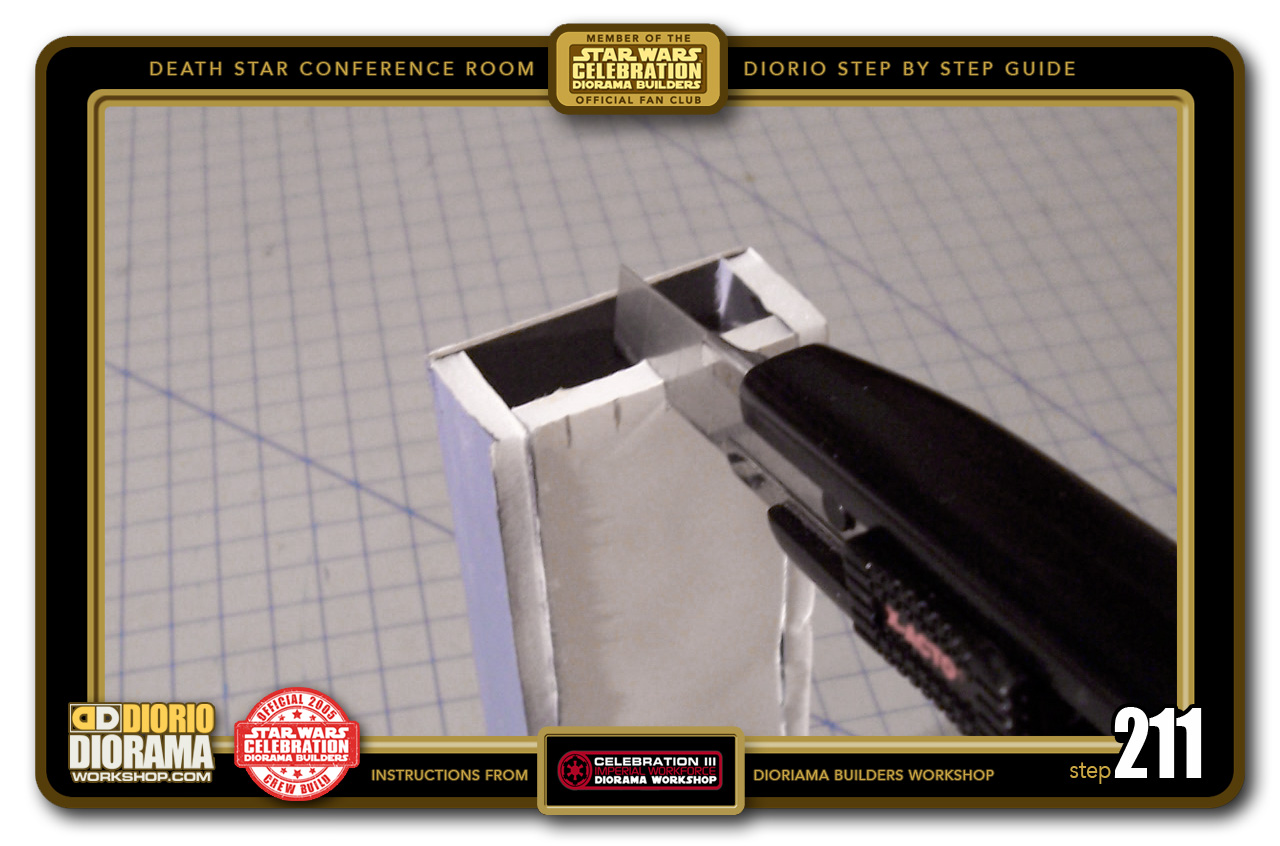
- STEP 212 > Once all your slits are sliced - say that fast 10 times LOL. Grab one of your poster board pieces and insert it into the groove. The extruding corner is the tiny area that fits into the rear wall. The pressure alone will keep it in place. no real need for hot glue here.

-
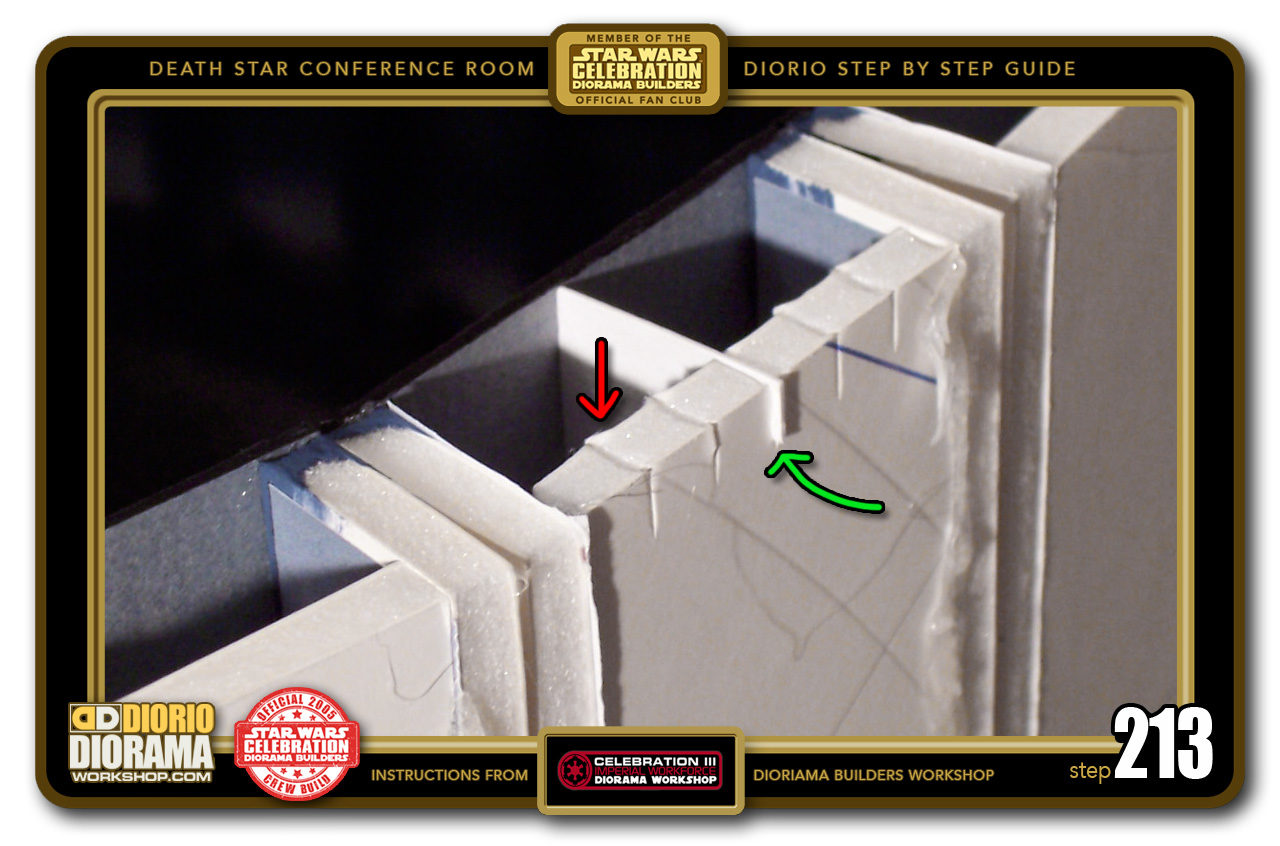
- STEP 213 > After you place your piece and align it to the slit, gently press down until the top of your poster board piece is flush with the top of the rear wall. If the piece is too large, you can trim a little until it slides down easily.

-

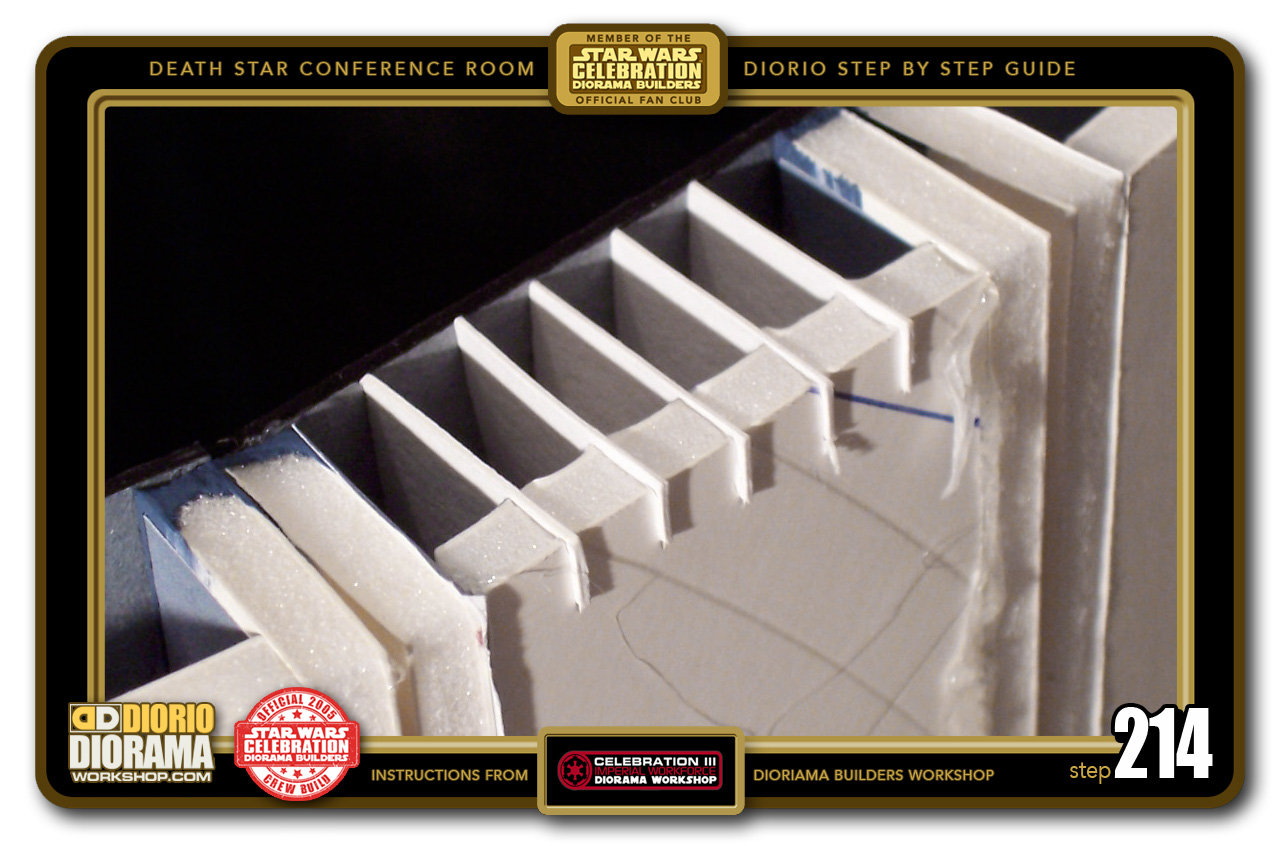
- STEP 214 > Repeat with the other 4 pieces and your ventilation grills are done.
-
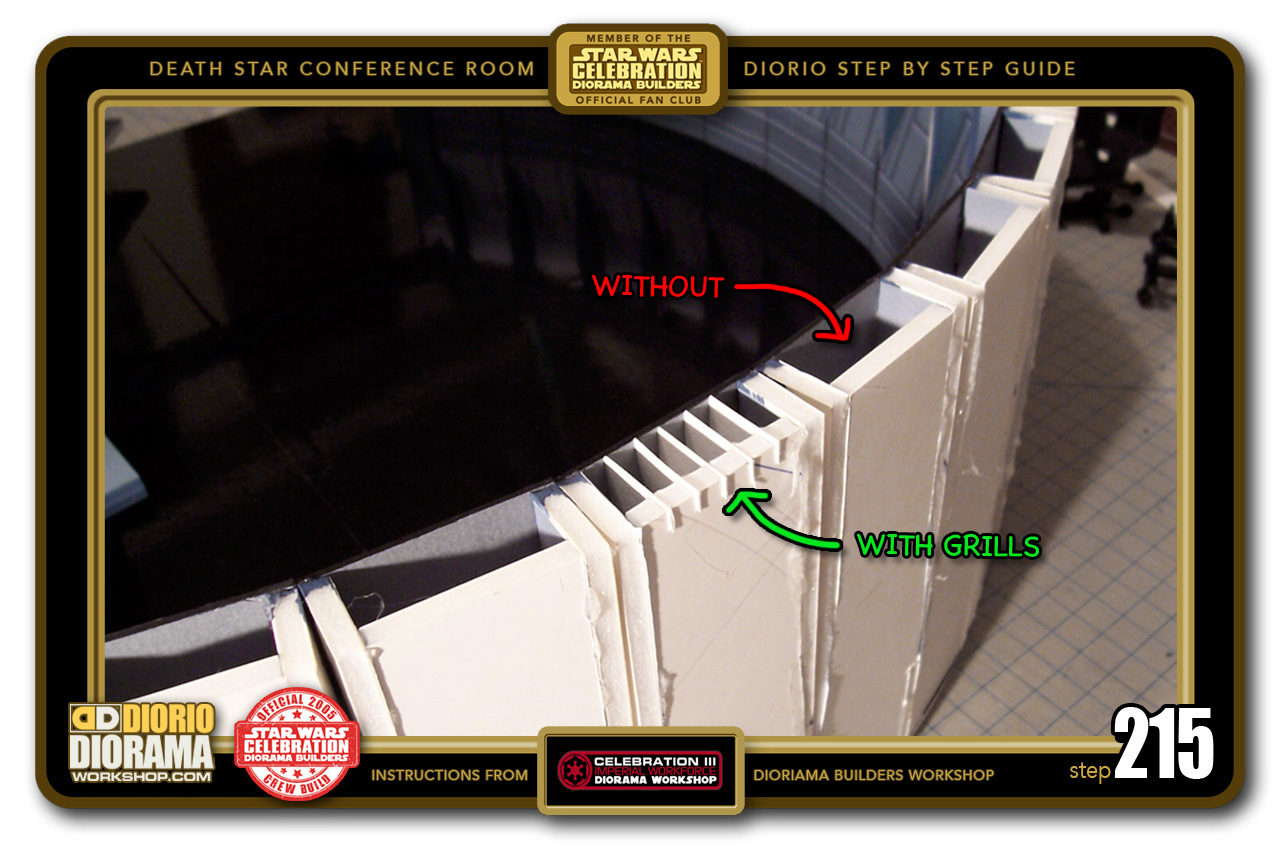
- STEP 215 > See the difference in the details from the top view ?

-
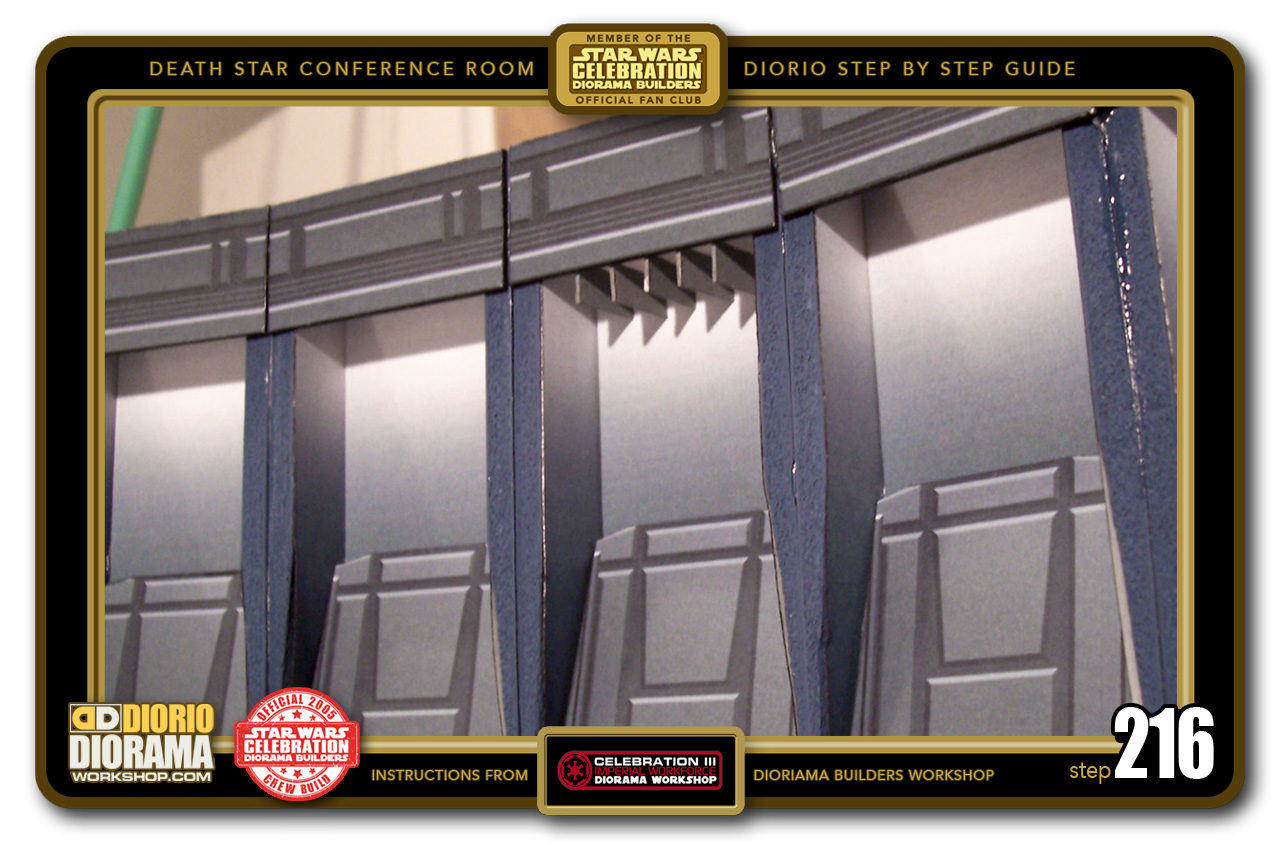
- STEP 216 > From the front it is even more evident and looks just like the movie set. Your poster board pieces should poke out .25cm.

-

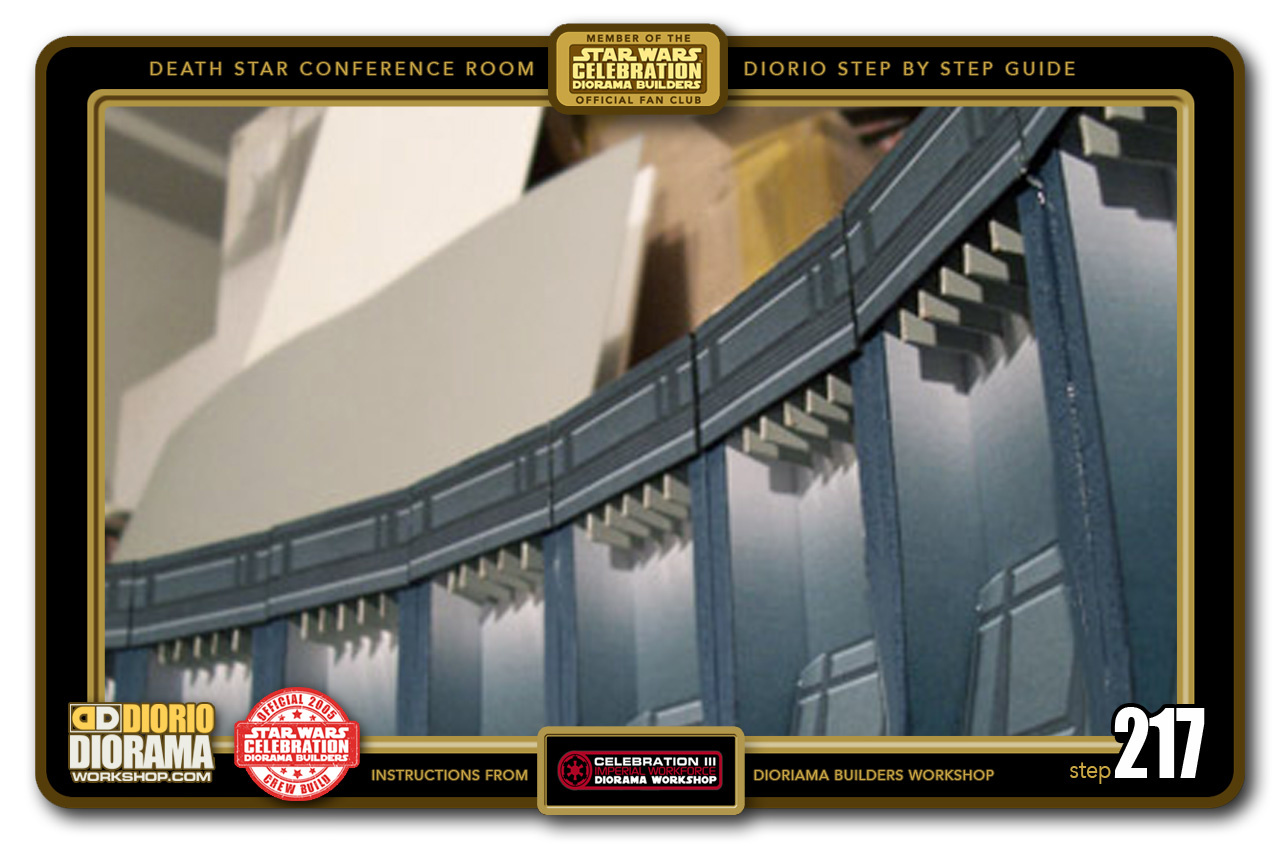
- STEP 217 > When all of your wall units have their ventilation grills set up, your diorama should now look like this.
-

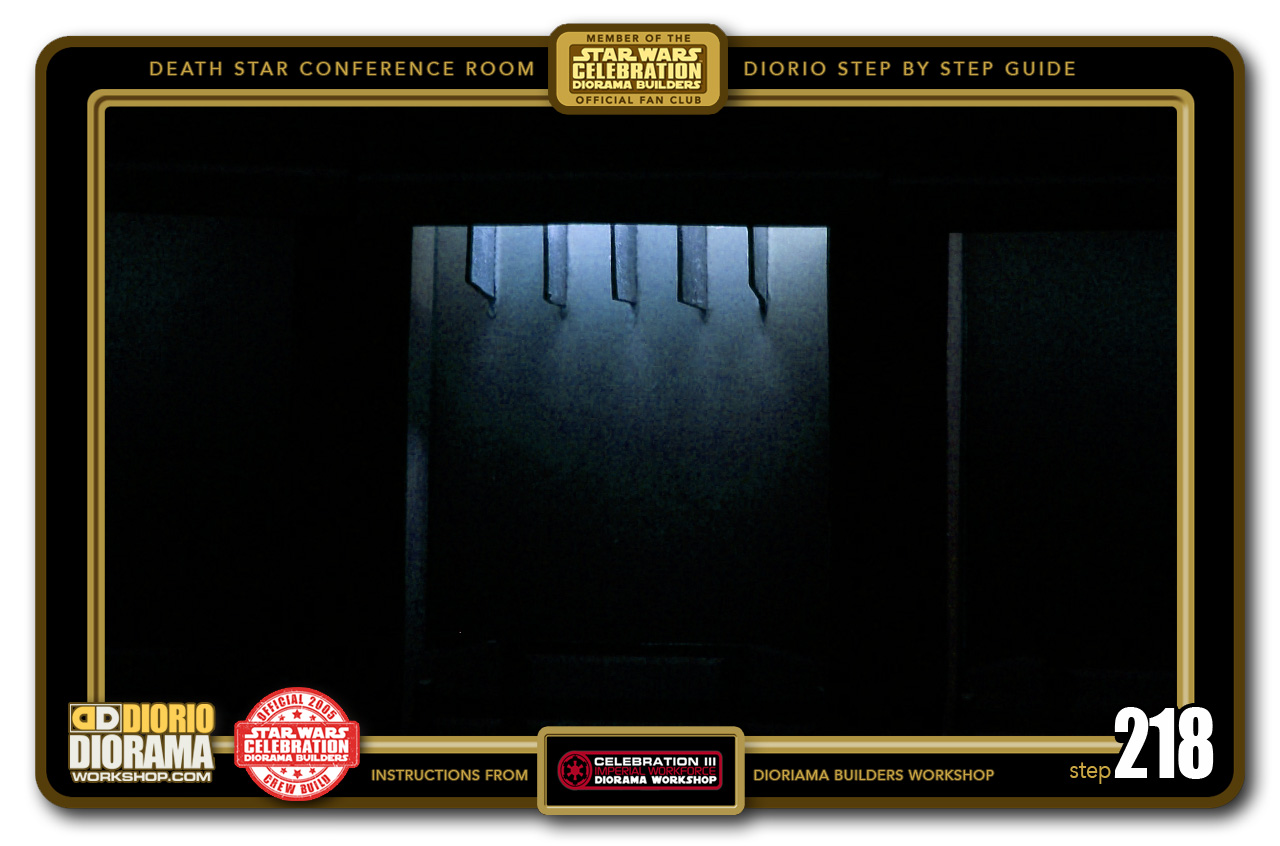
- STEP 218 > At the time I used Mini Christmas Lights but today, there are so many LED strips out there, it is easy for you to add REAL LIGHT to your diorama at this point if you wish too.
-
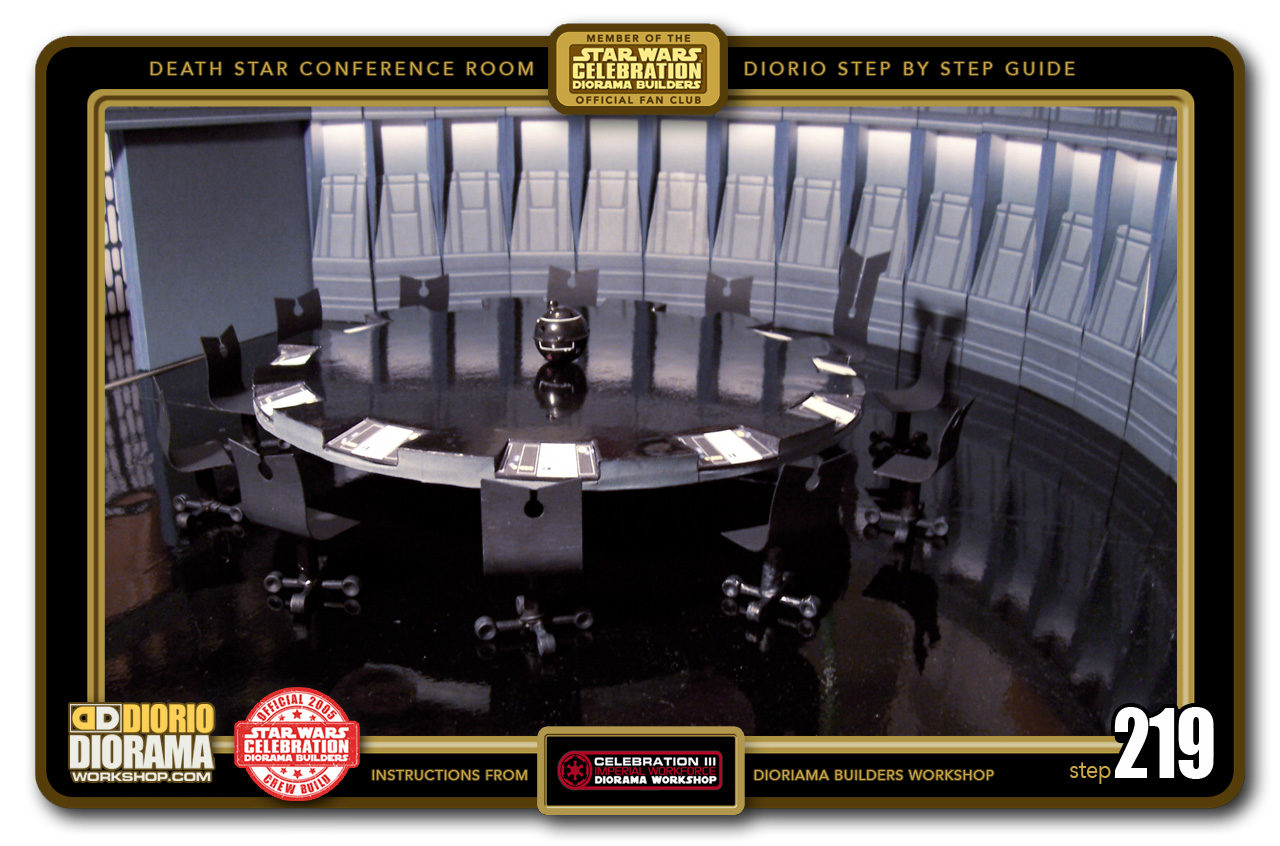
- STEP 219 > Let there be light !!! LOL. Voila, your Conference Room is now illuminated just like in the movie. Pretty cool don't you think?

-

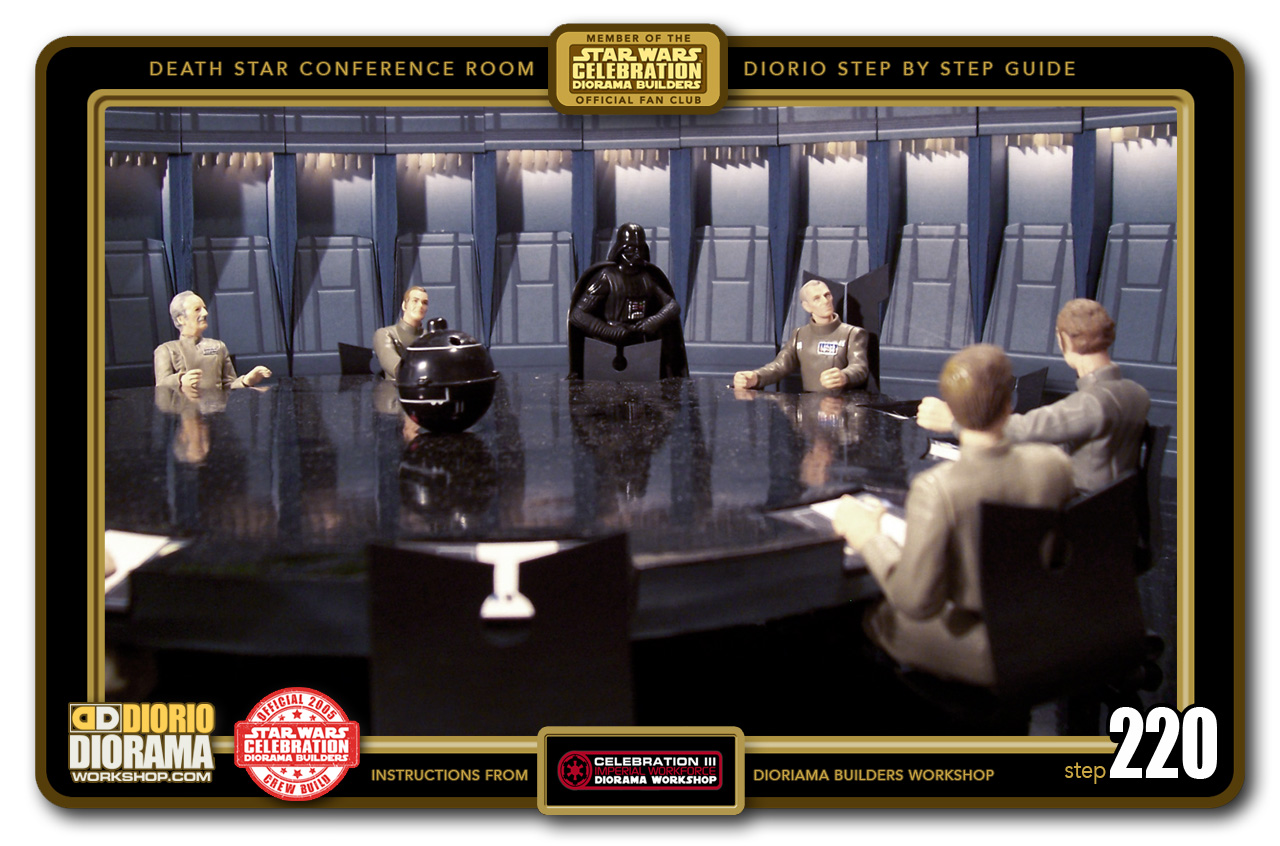
- STEP 220 > Finally, Tarkin and the others are ready to move in just in time for their meeting 🙂 I must say that for a simple room, it sure looks cool. Shows you the brilliance of the original trilogy design team. If you build this, send me your photos for the VISITOR GALLERY. DioramaWorkshop.Com@Gmail.Com

.
Did you already build this Diorama ? At home or at our Star Wars Celebration Diorama Builders workshop ? Would you like to show it in the site’s GALLERY VISITORS DIORAMAS section, YES ? That is Awesome !!! You can find out all the details on how to email me your photos on the VISITORS SUBMISSIONS INFO page … When I get your photos, I will create your very own page just like this one. You may not realize it but work does inspire others to join in the fun of making Action Figure Dioramas.
.
NOT FOR RESALE ALL Decals, tutorials and artwork are ©FrankDiorio (dioramaworkshop.com) and offered FOR FREE to the fans – that would be you ? so you can build and display my diorama designs in your very own home. I realize I cannot control what one does with my graphics once I place them on the web, I can only ask you as one fan to another, please respect the artist and do not be that jerk who uses my designs and tutorials to build a copy of my work only to sell it on EBAY or trade/sale groups and forums. Thank You. Frank.
.
.
If you have a facebook account, why not join the Official Diorama Builders Fan Club today, simply click the logo link below.
 .
.
Catch up with fellow visitors and exchange stories, read cool interviews with the crew, exchange photos, fun surprises and grab some FAN ONLY merchandise next year at actual future conventions ?
.
©2018 Frank Diorio DioramaWorkshop.Com
.
IF YOU LIKE WHAT YOU SEE, PLEASE SHARE WITH YOUR FRIENDS
USING THE SOCIAL MEDIA BUTTONS BELOW