


-
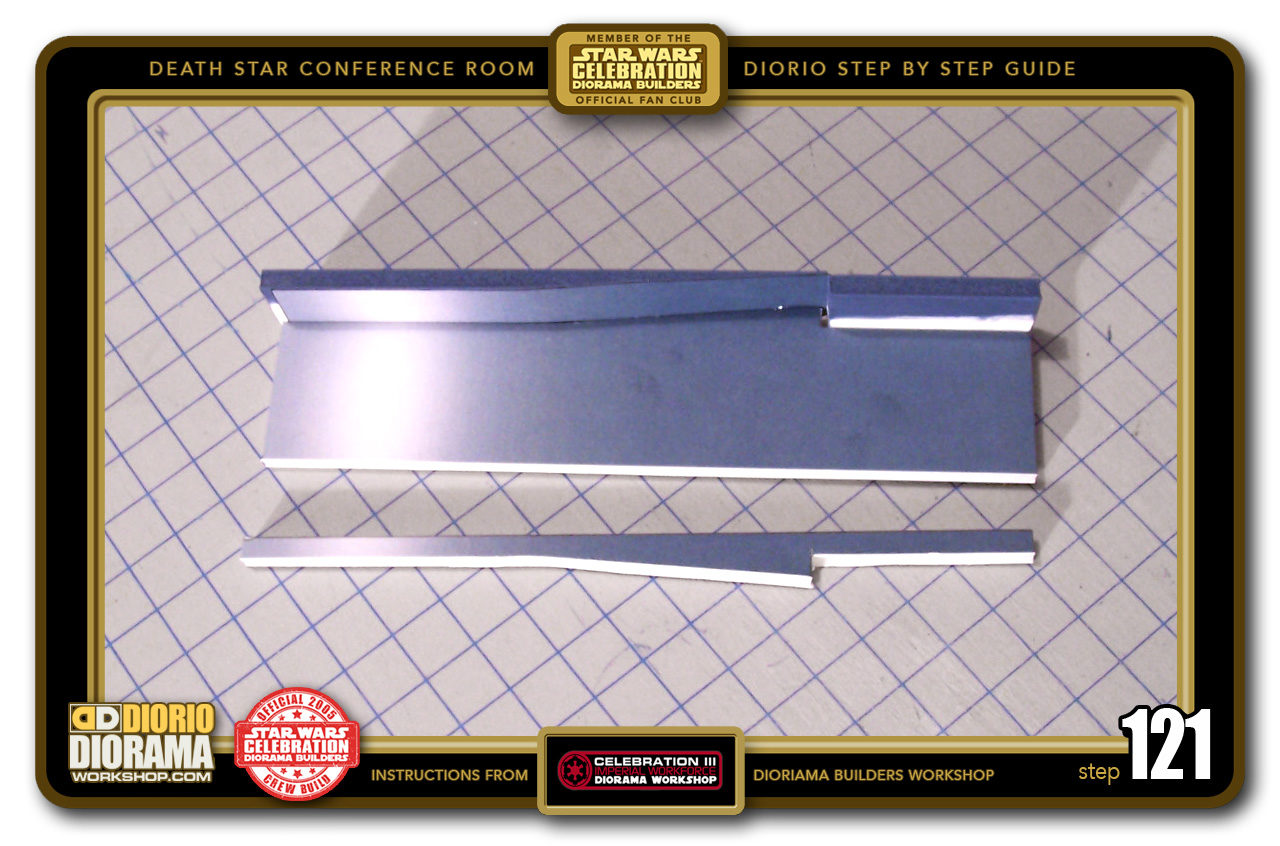
- STEP 121 > This is what your piece will look like when sliced off. You can trash this excess piece. You will not need them. ORIGINAL C3 design shown. Yours will look better 🙂

-
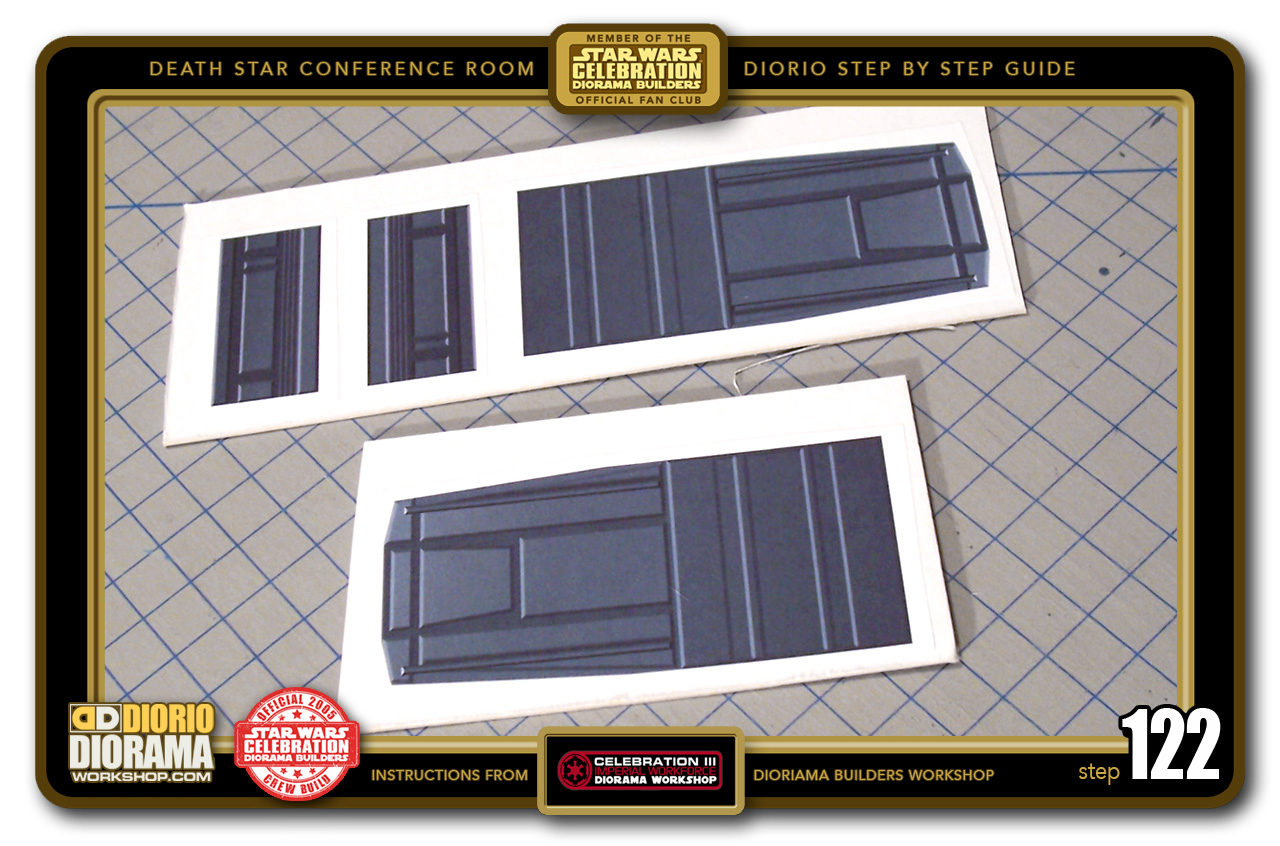
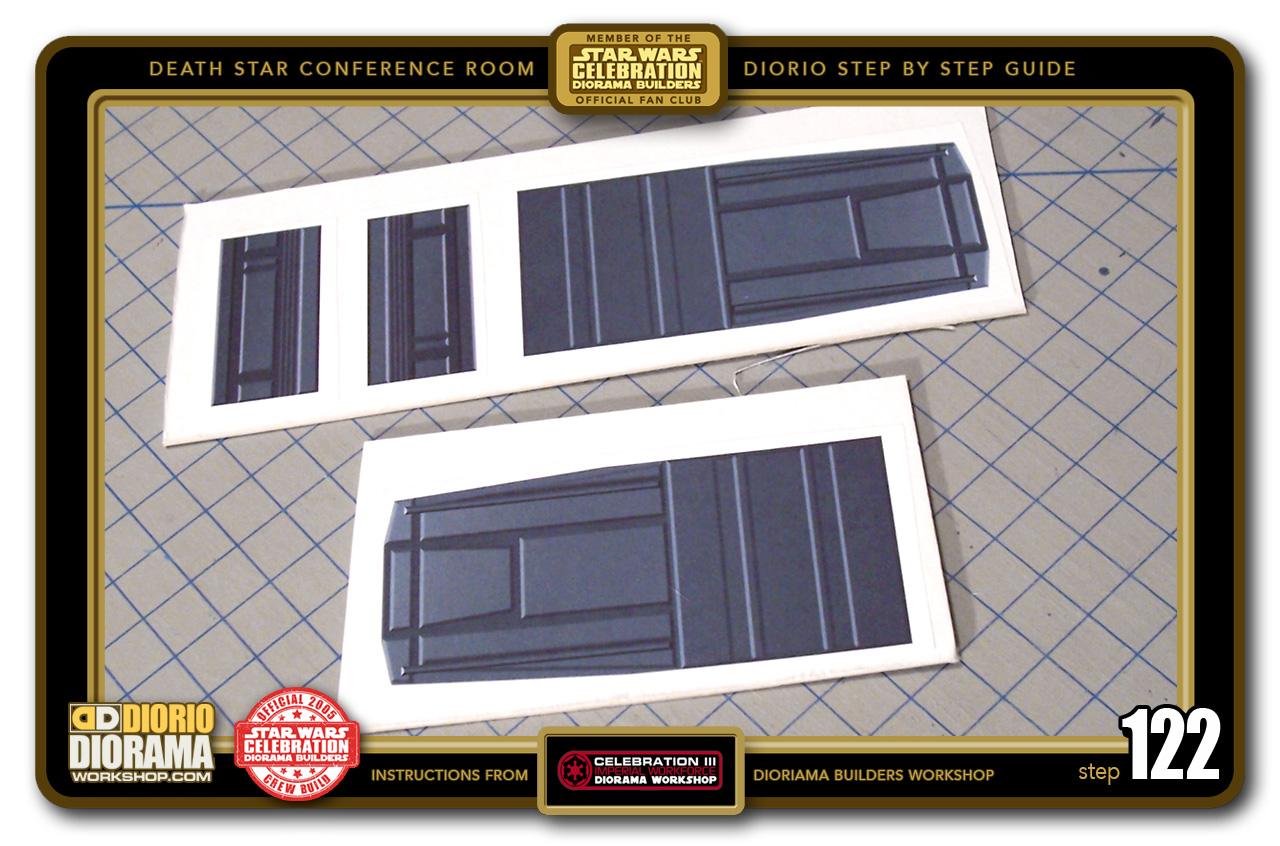
- STEP 122 > I took 2 of the Decal Prints and stuck them onto the same Cardboard (NOT FOAMCORE) I used for the NORMAL WALL Units. Carefully cut along the Decals to give you a clean cut. Don't go too fast or you might cut your finger. We DON'T want that :P. ORIGINAL C3 decals shown.
-
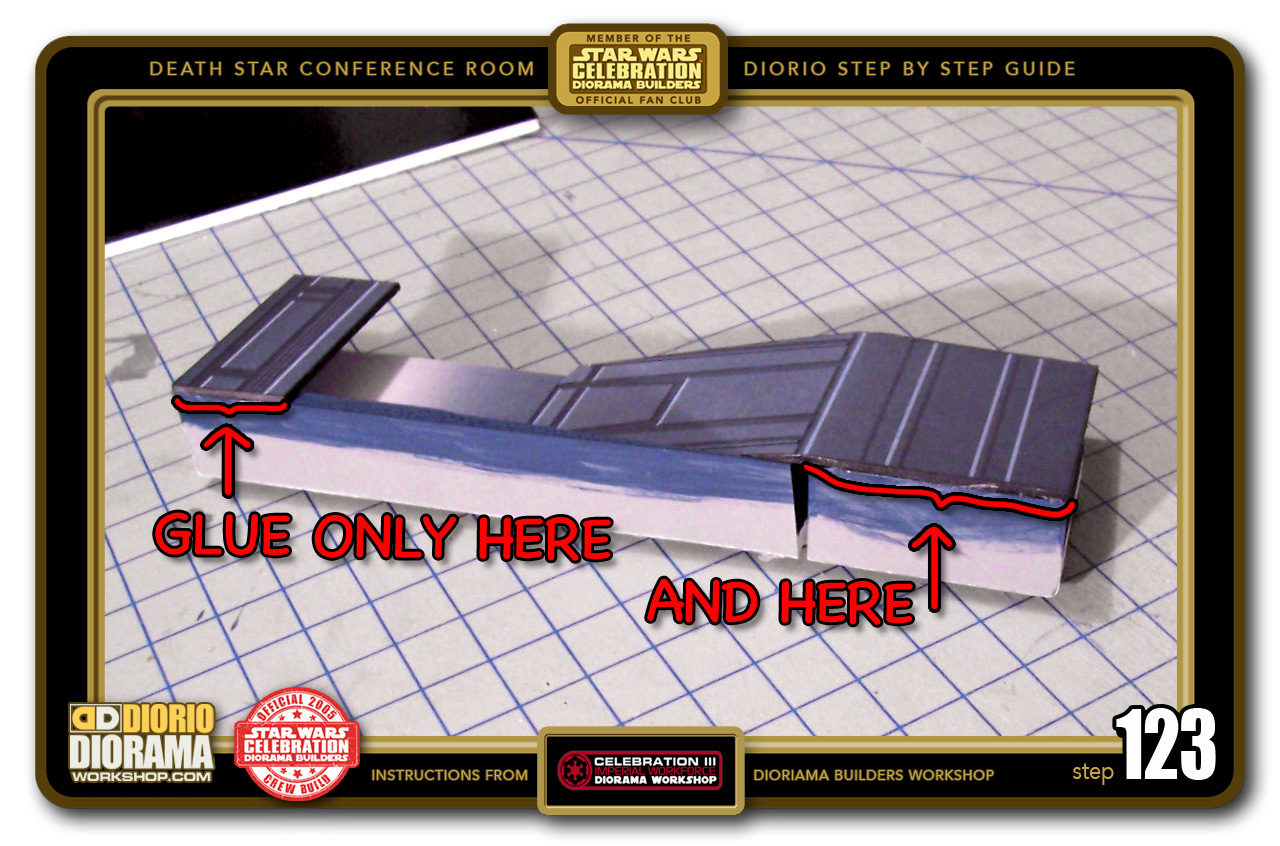
- STEP 123 > Now take your Hot Glue Gun and attach the Top and Bottom Panels to the Foamcore Side Wall. For the Front Bottom Decal Panel, ONLY glue the BOTTOM section under the fold, DO NOT PUT GLUE on the Upper section that has the fold.

-
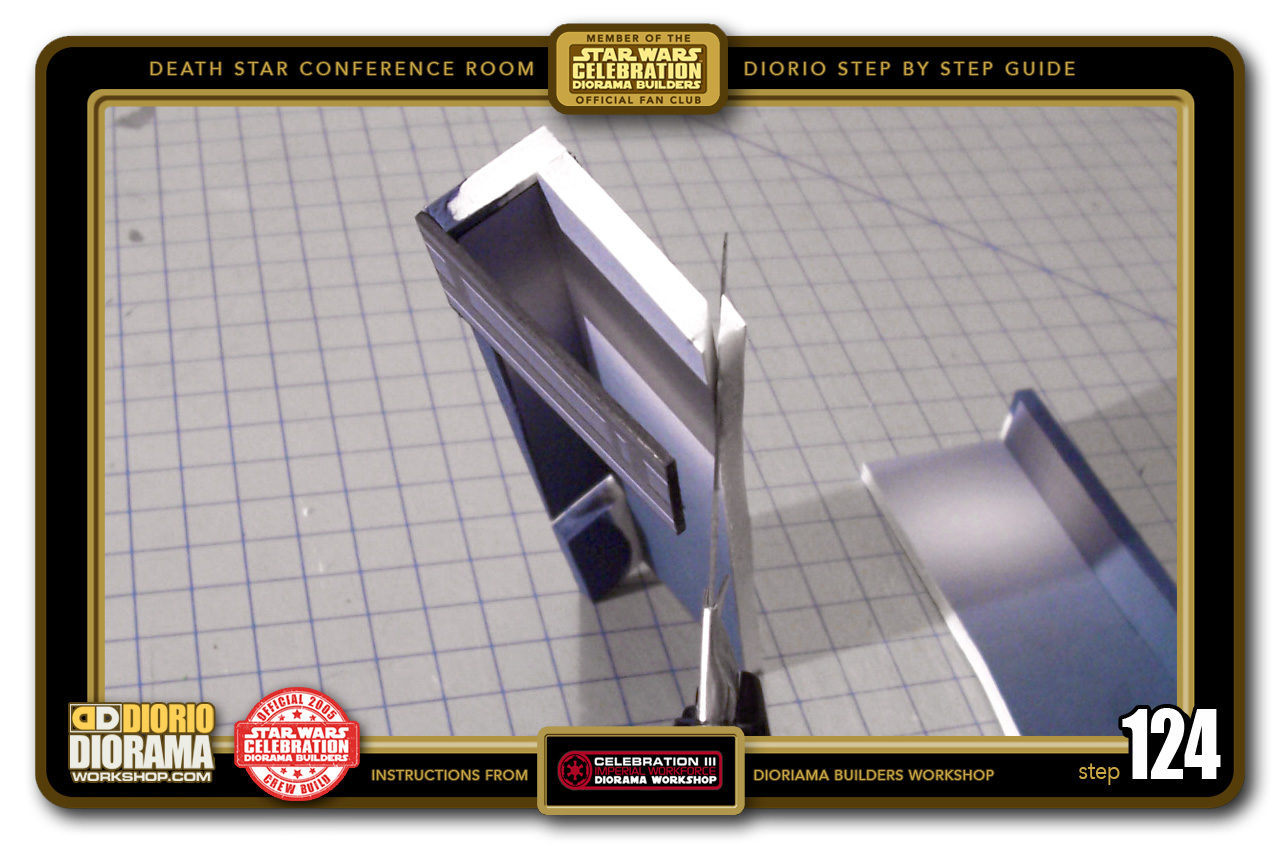
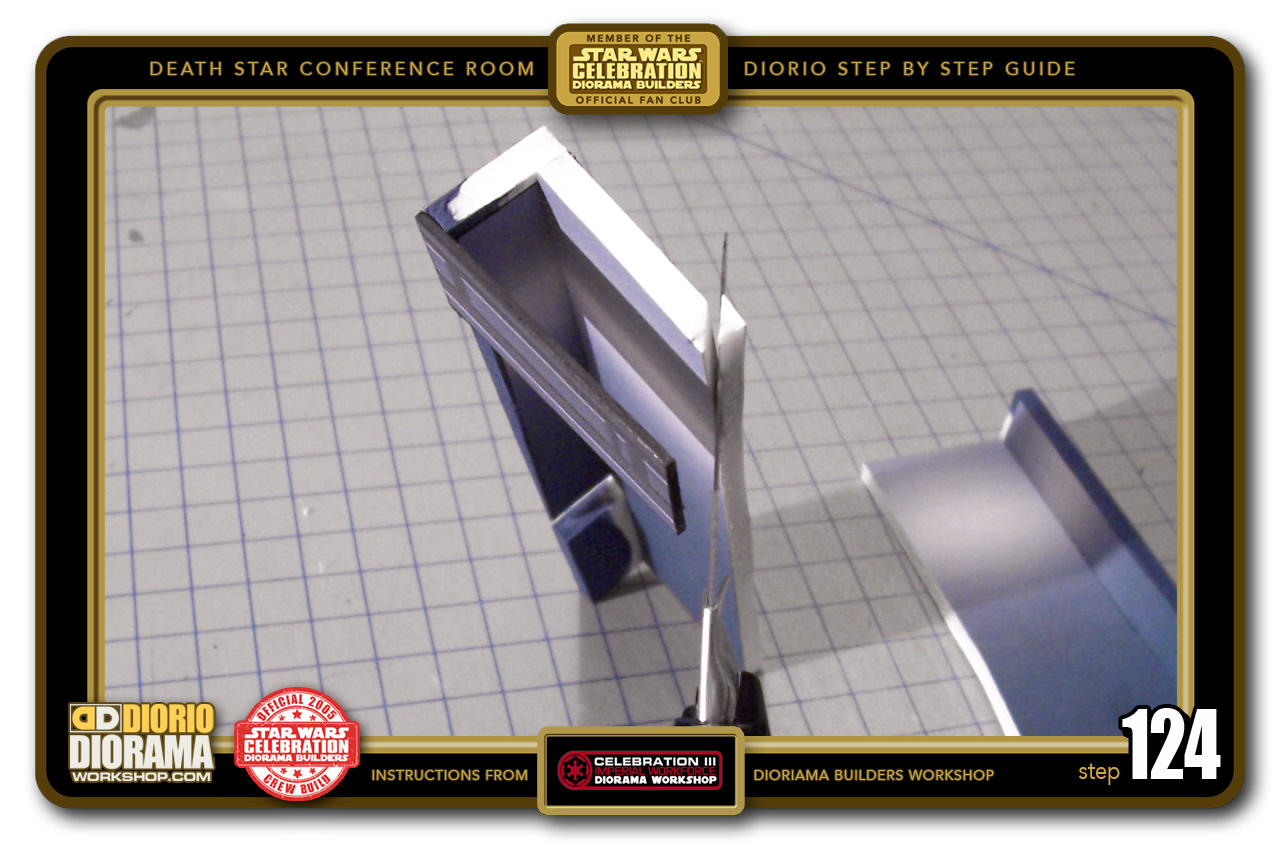
- STEP 124 > Here is the tricky part of the Corner Wall Unit. You must slice off at a 45 degree angle the corner edge of the Back Wall that does NOT have a Side Wall glued to it. So once on the Right Back Wall and once on the Left Back Wall.
-
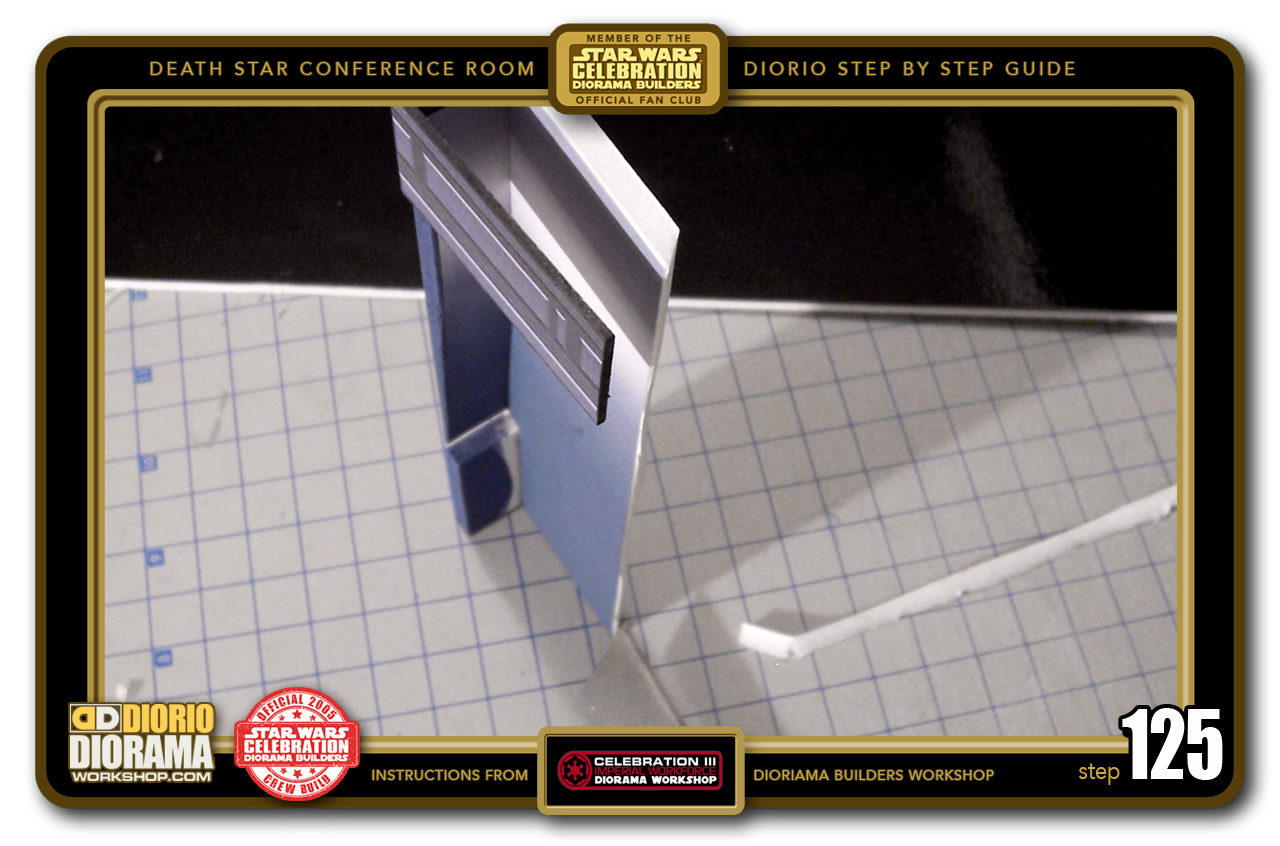
- STEP 125 > With a NEW sharp blade, you should have no problem getting a nice cut all the way down. WATCH YOUR FINGERS , take your time, be careful.

-
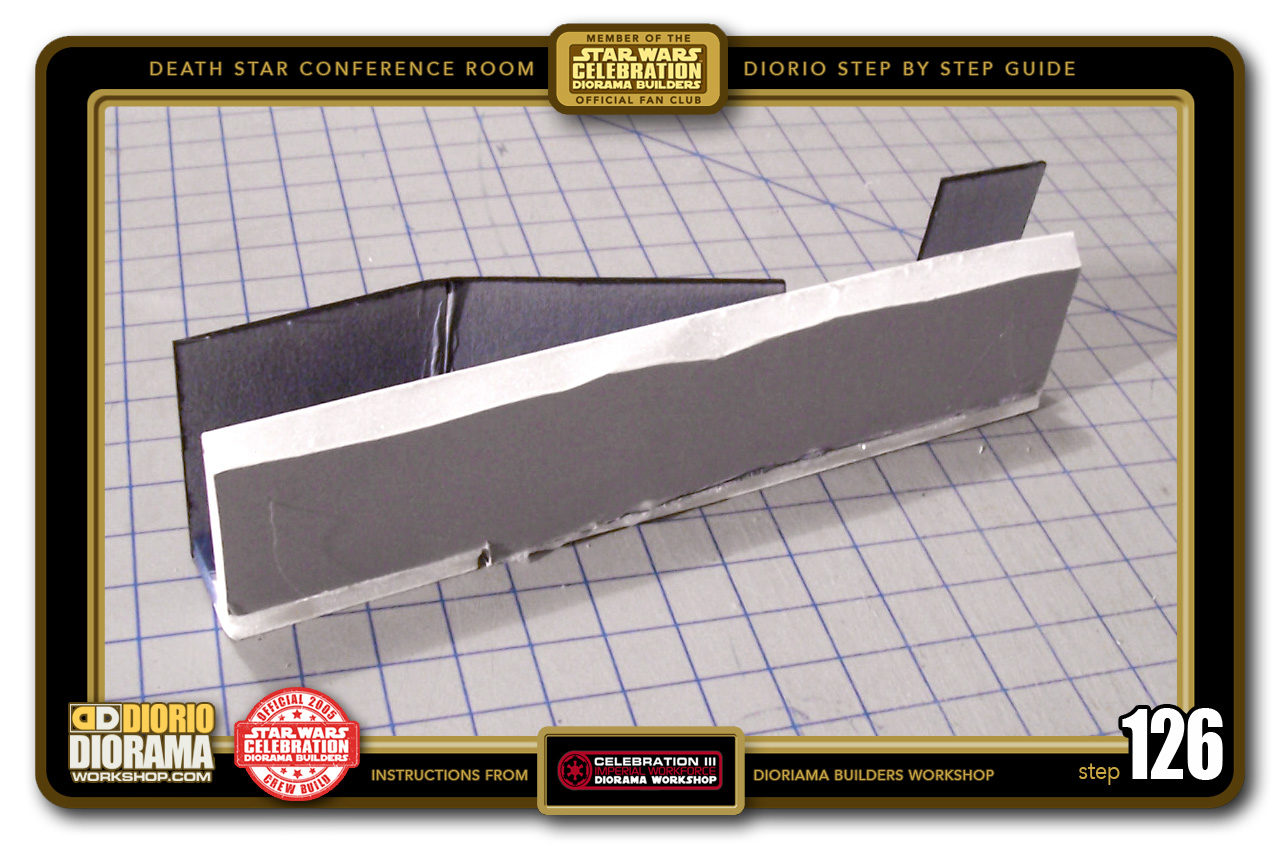
- STEP 126 > After the slice, your Corner Angled Wall should look like this from the rear. Do not worry if the cut isn't perfect as we won't see it anyway. It's just to help place it snug fit for the angled wall.

-
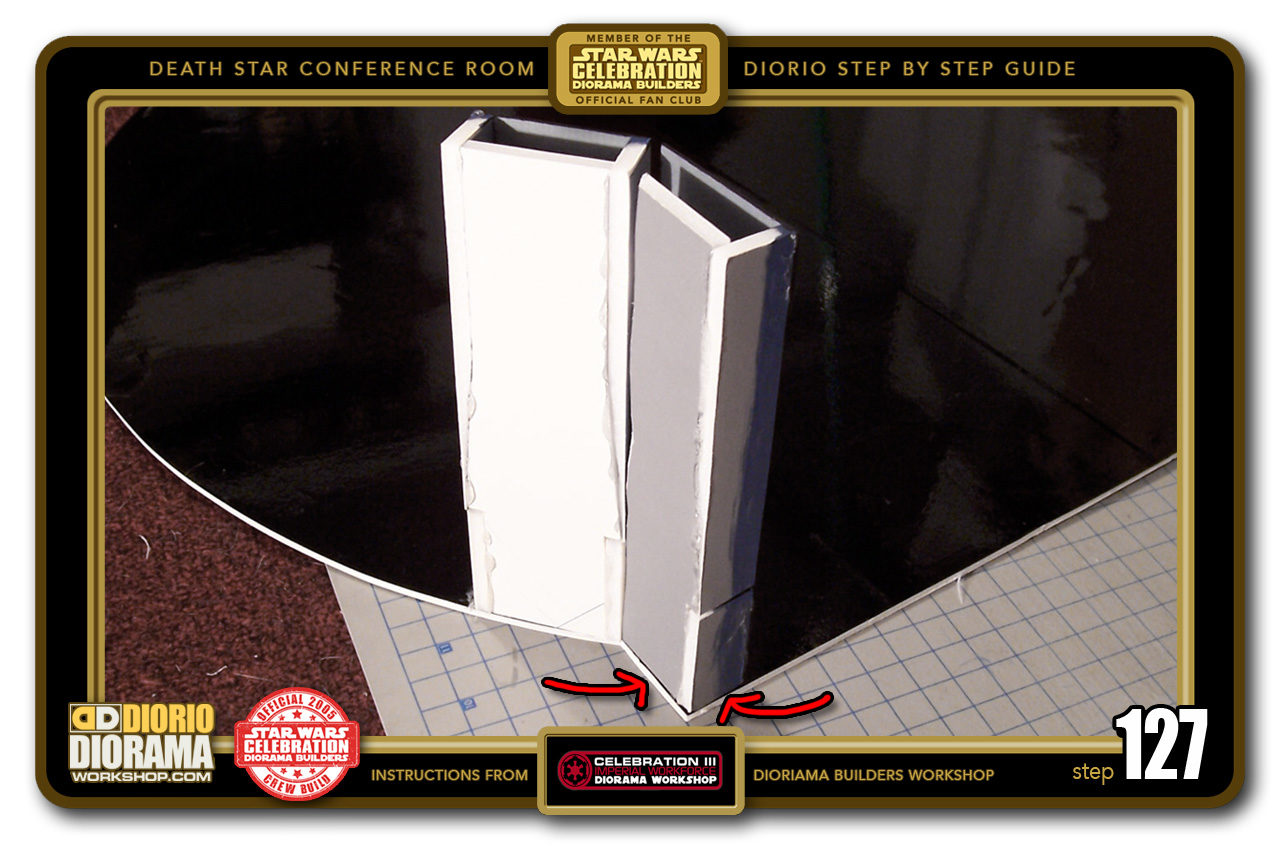
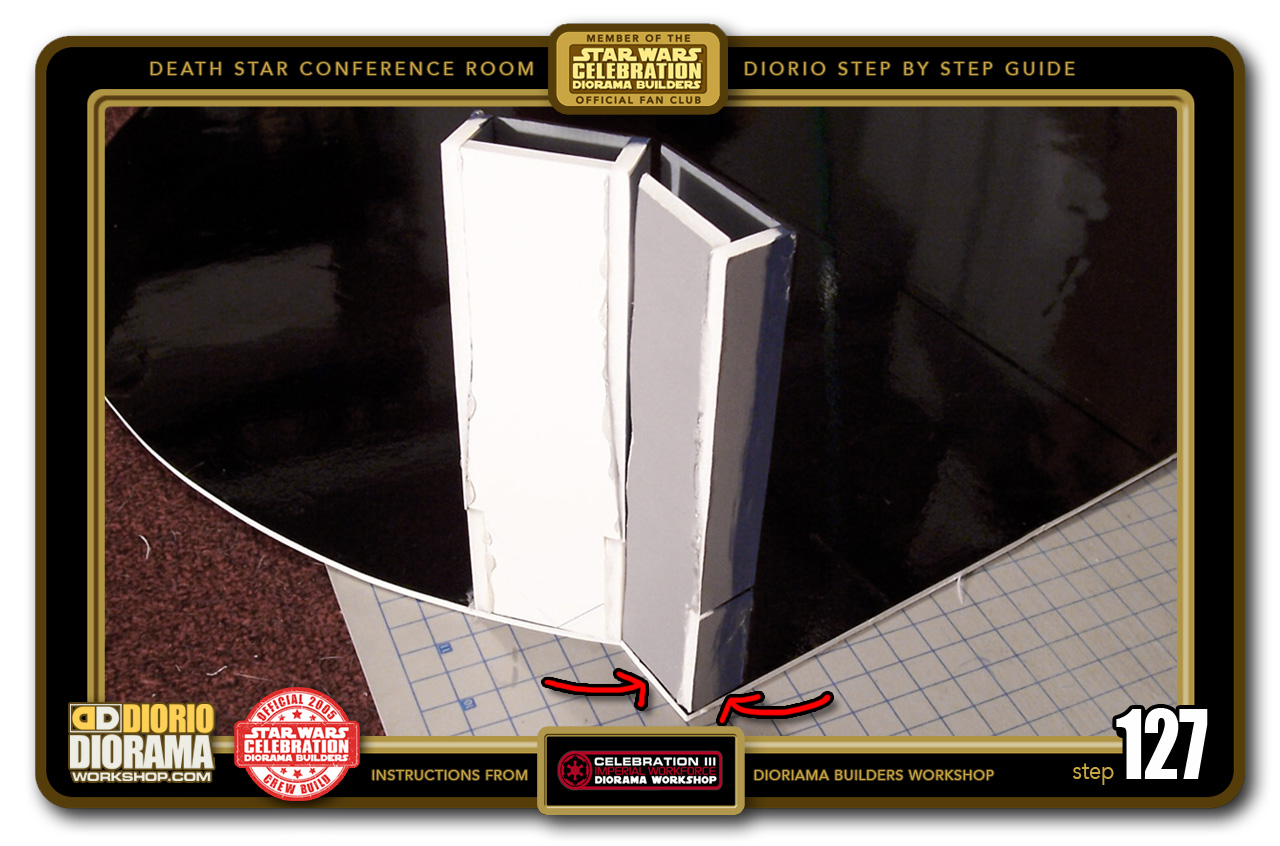
- STEP 127 > BEFORE YOU GLUE, test fit, place and align the Right Angled Corner Wall Unit along the corner of the Floor. The Wall Unit should fit perfectly as you can see with the red Arrows. You should also be able to press the Front Cardboard Panels against the other Unit to make them connect. If you have a gap, you can further slice the Back Wall to get the 2 Units closer together.
-

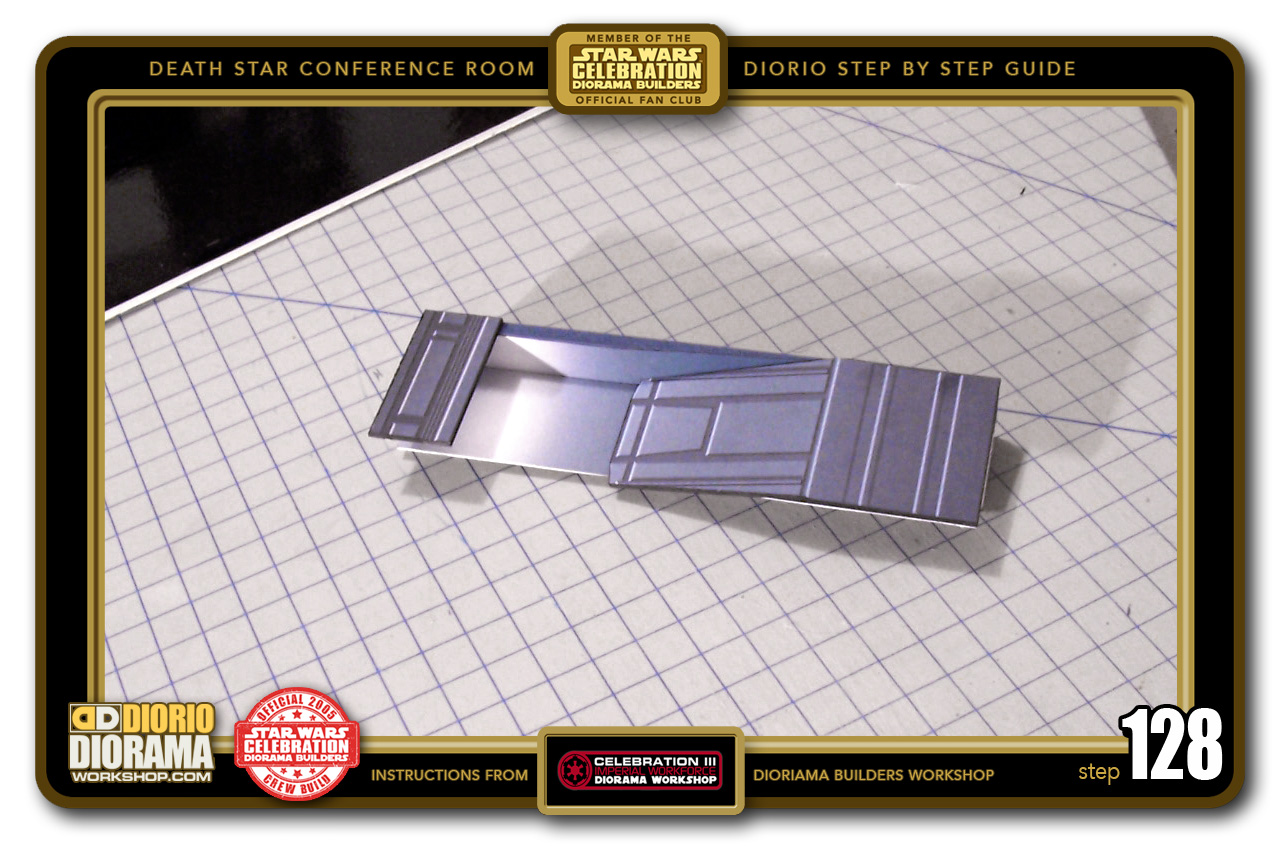
- STEP 128 > Now get out your Left Door Angled Corner Wall Unit (The one with NO LEFT side wall).
-
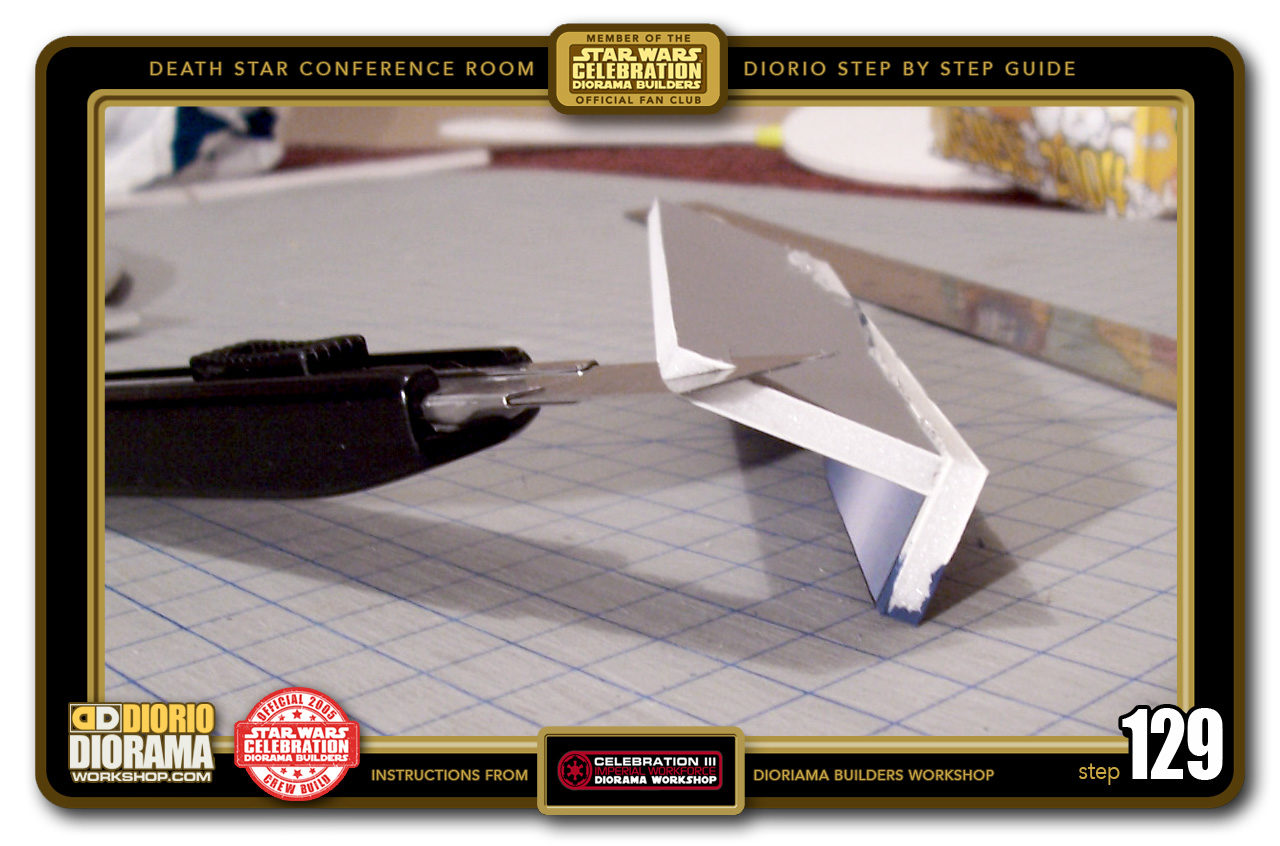
- STEP 129 > Slice off a 45 degree cut of the Back Wall. Make sure to use a NEW blade for this step. It helps give you a cleaner cut. Remember...Foamcore loves to kill Xacto blades. They dull and befome useless after 12-15 cuts.

-
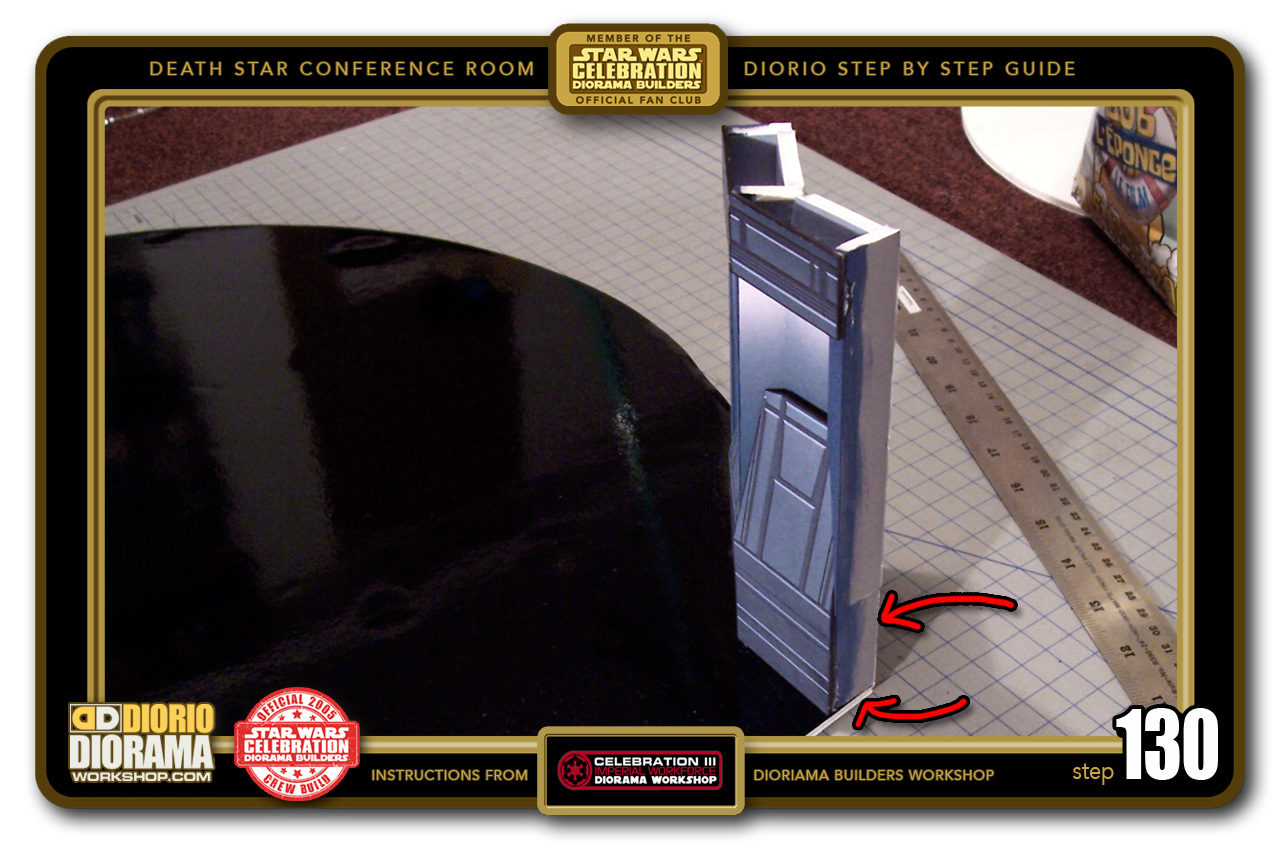
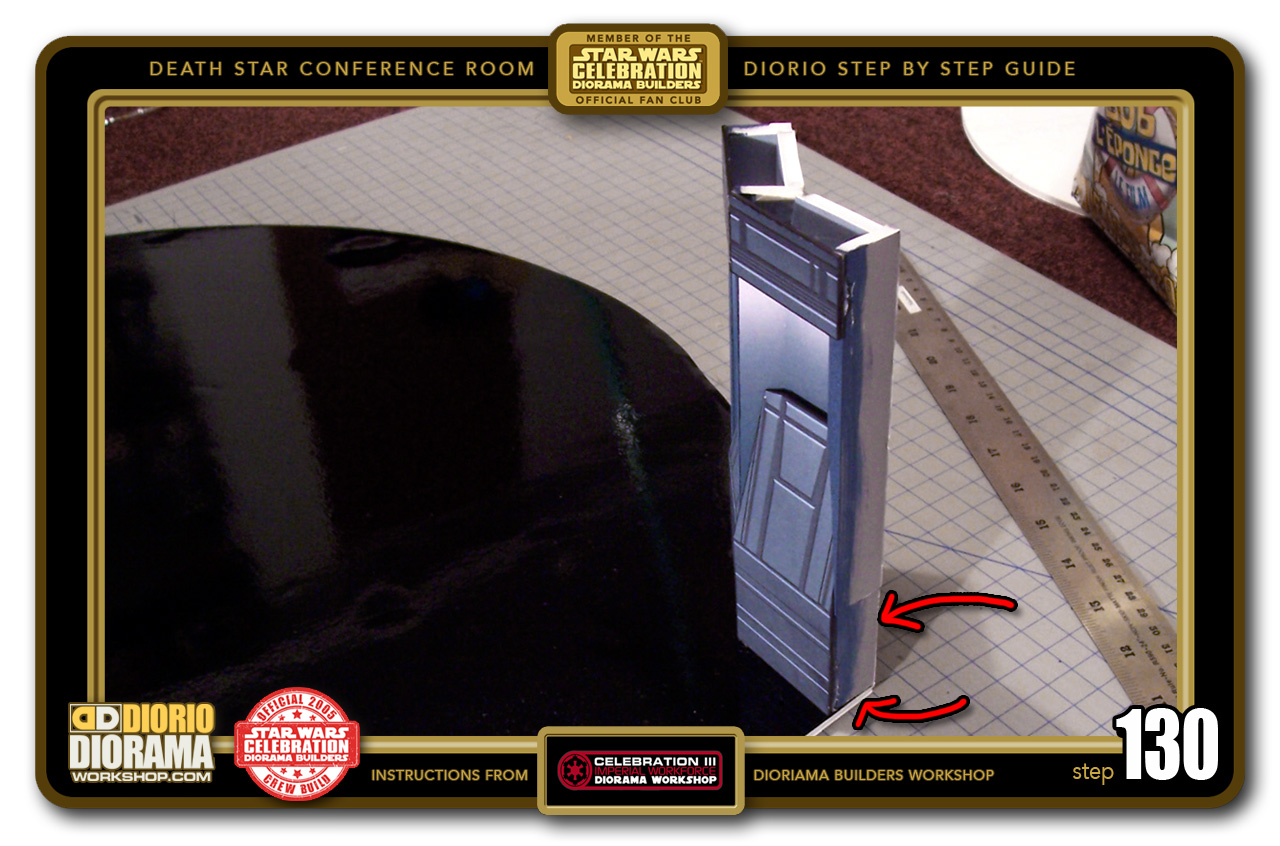
- STEP 130 > As you did with the opposite Wall Corner Unit, test fit it along the corner BEFORE using the Hot Glue to bond it in place.
-
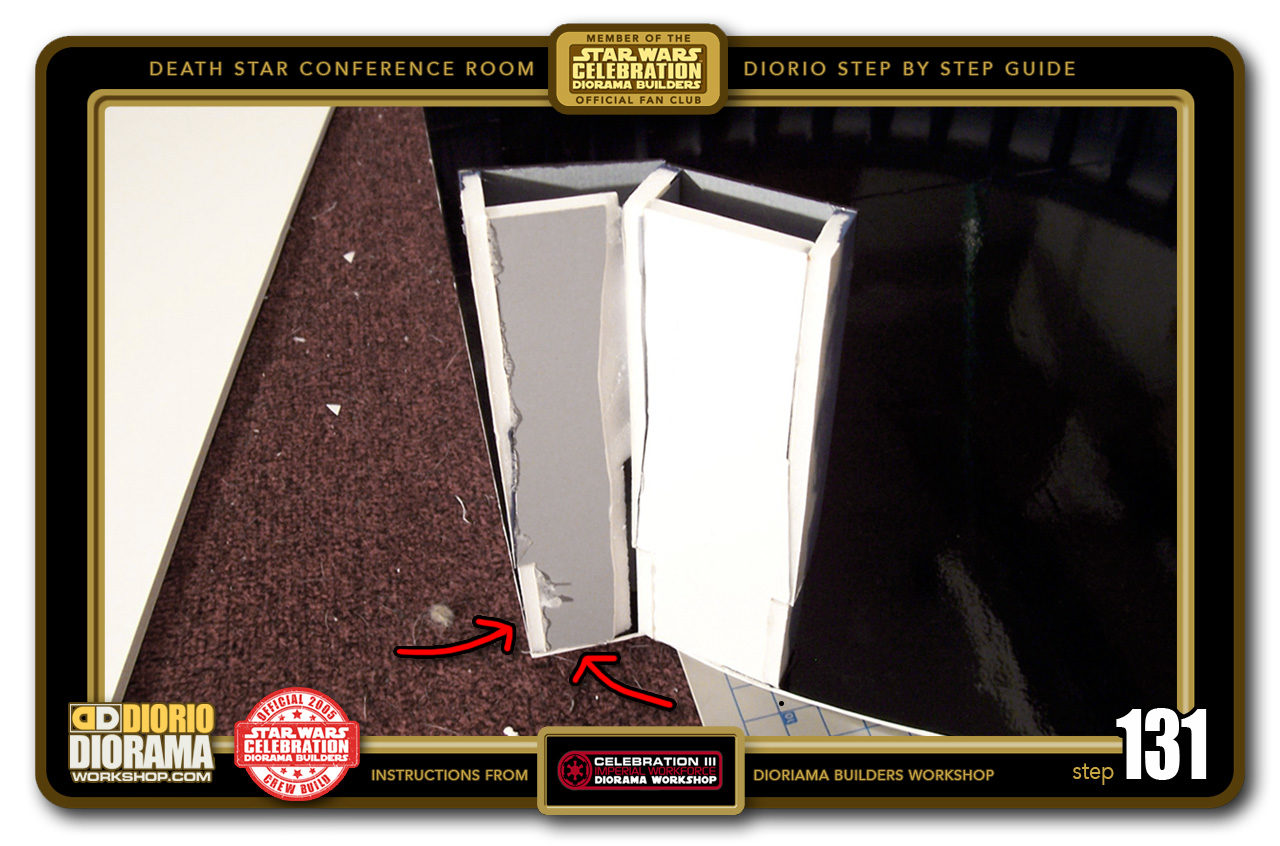
- STEP 131 > Here you can better see how the rear of the Units connect as well as how the floor aligns perfectly with the Corner Unit.

-

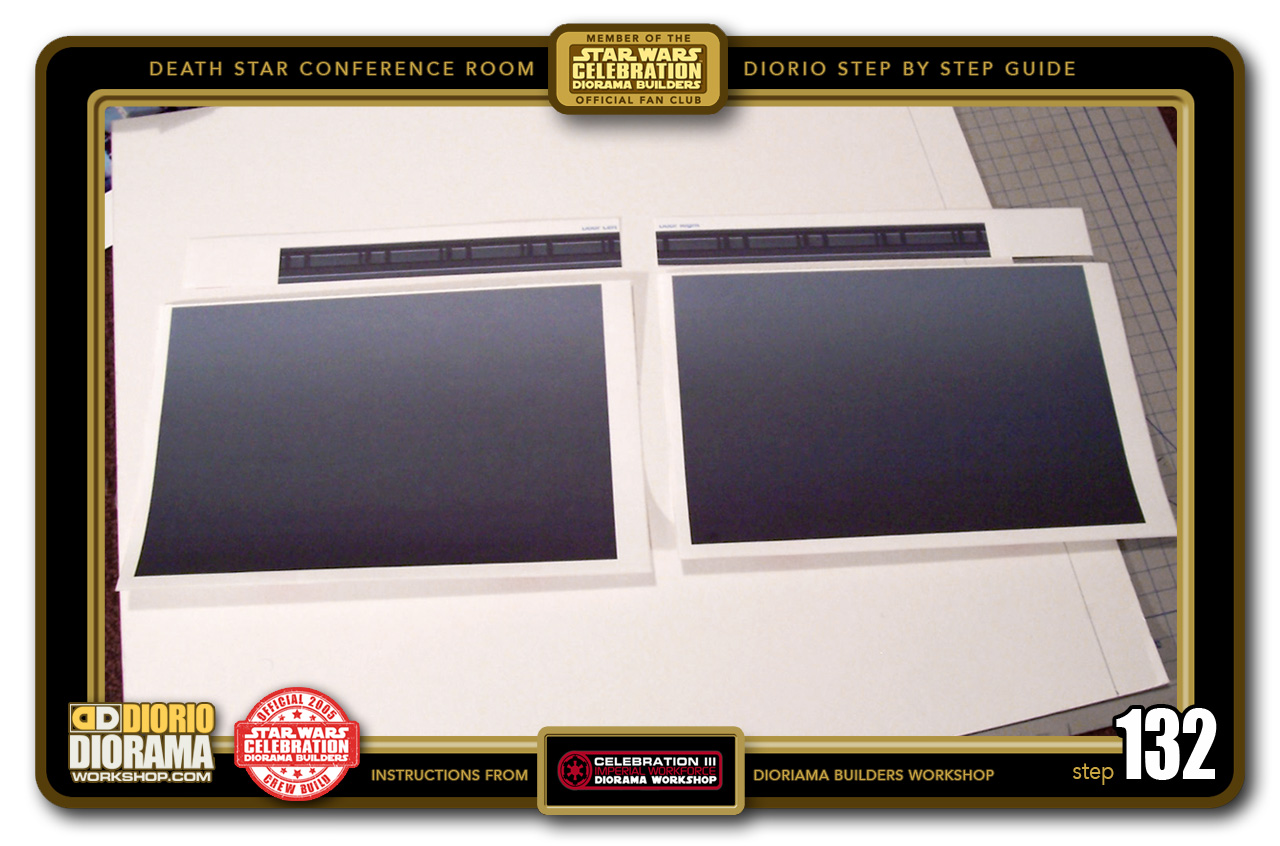
- STEP 132 > The final part of the room is the Top Panel that connects the 2 Wall Units together as well as brace supports the conference room doors. Print your decals.
-
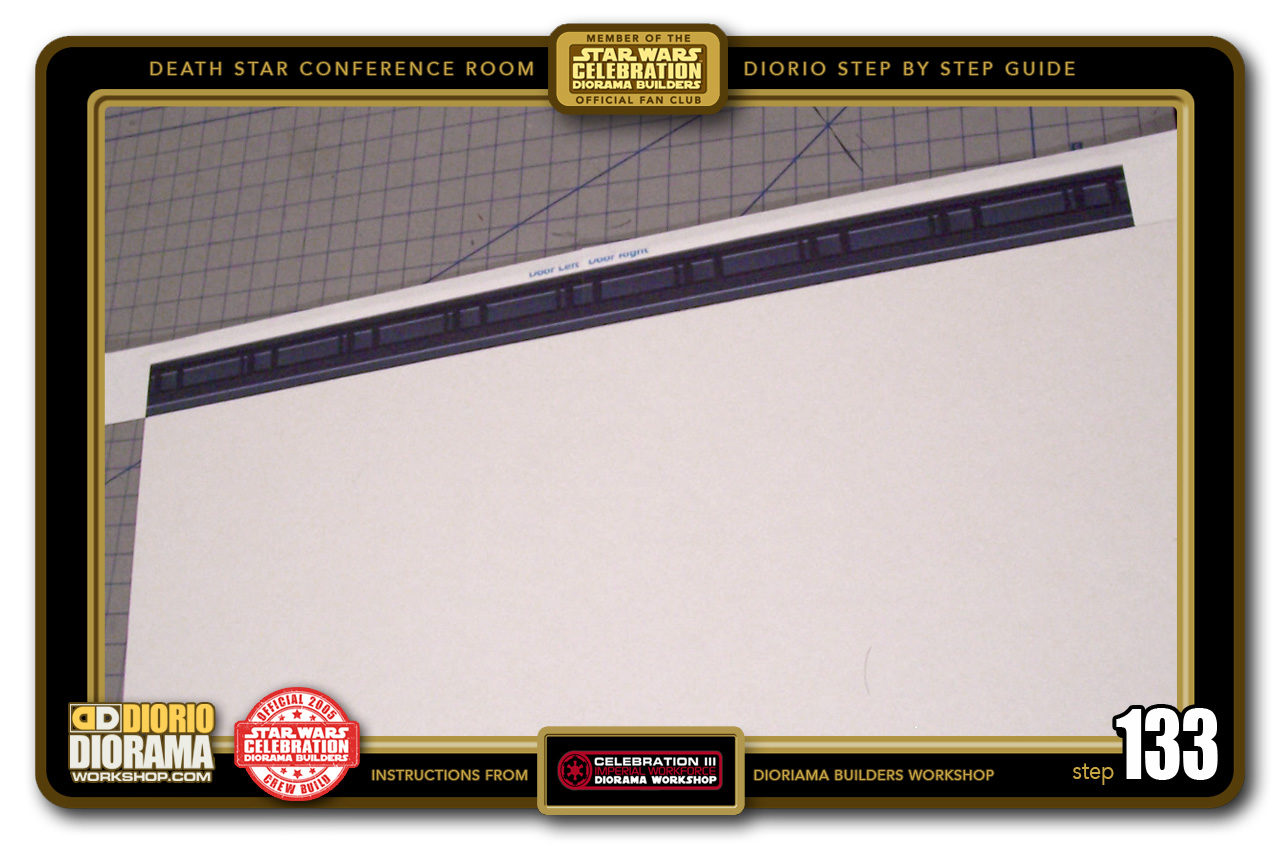
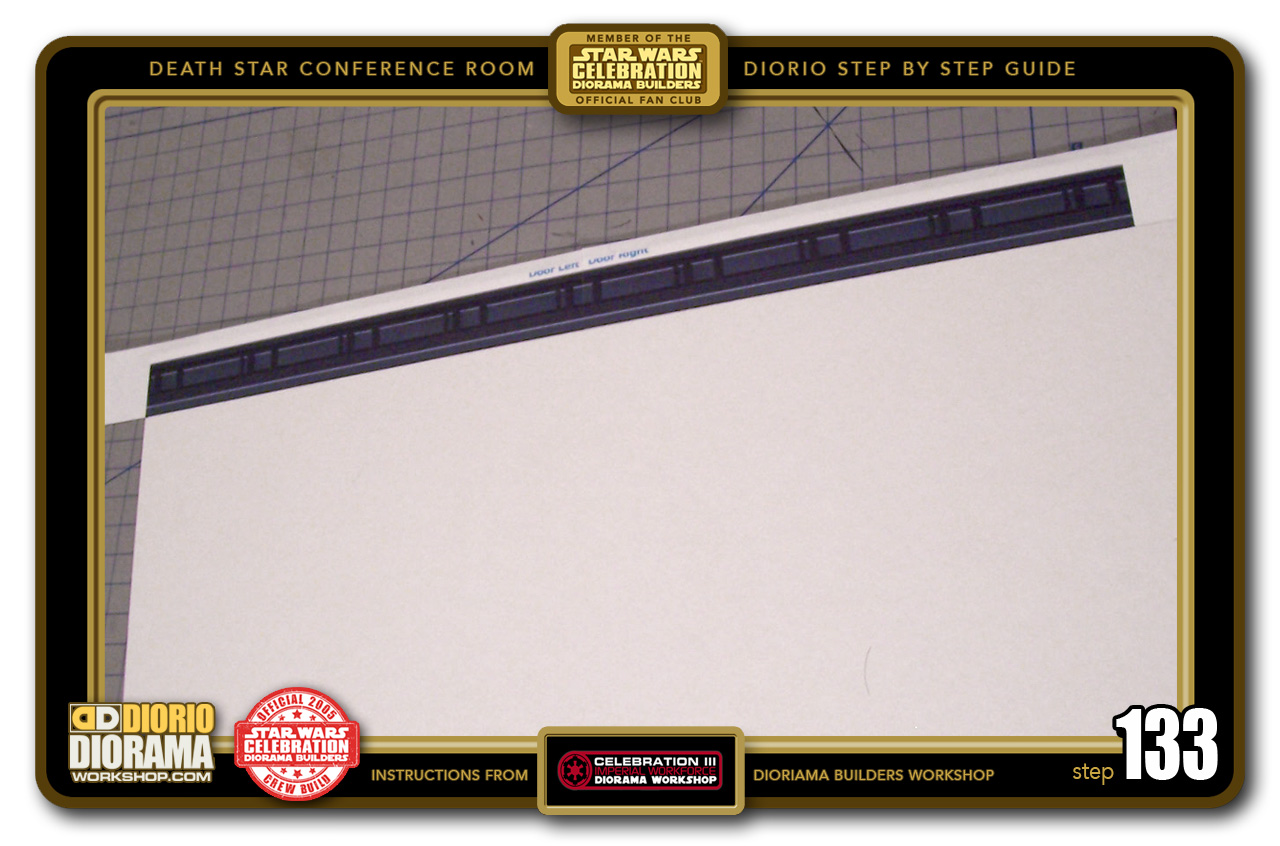
- STEP 133 > Now peel or Glue Stick your 2 top strip pieces to Cardboard. Connect the Decals to make it appear as one extra long sticker.
-
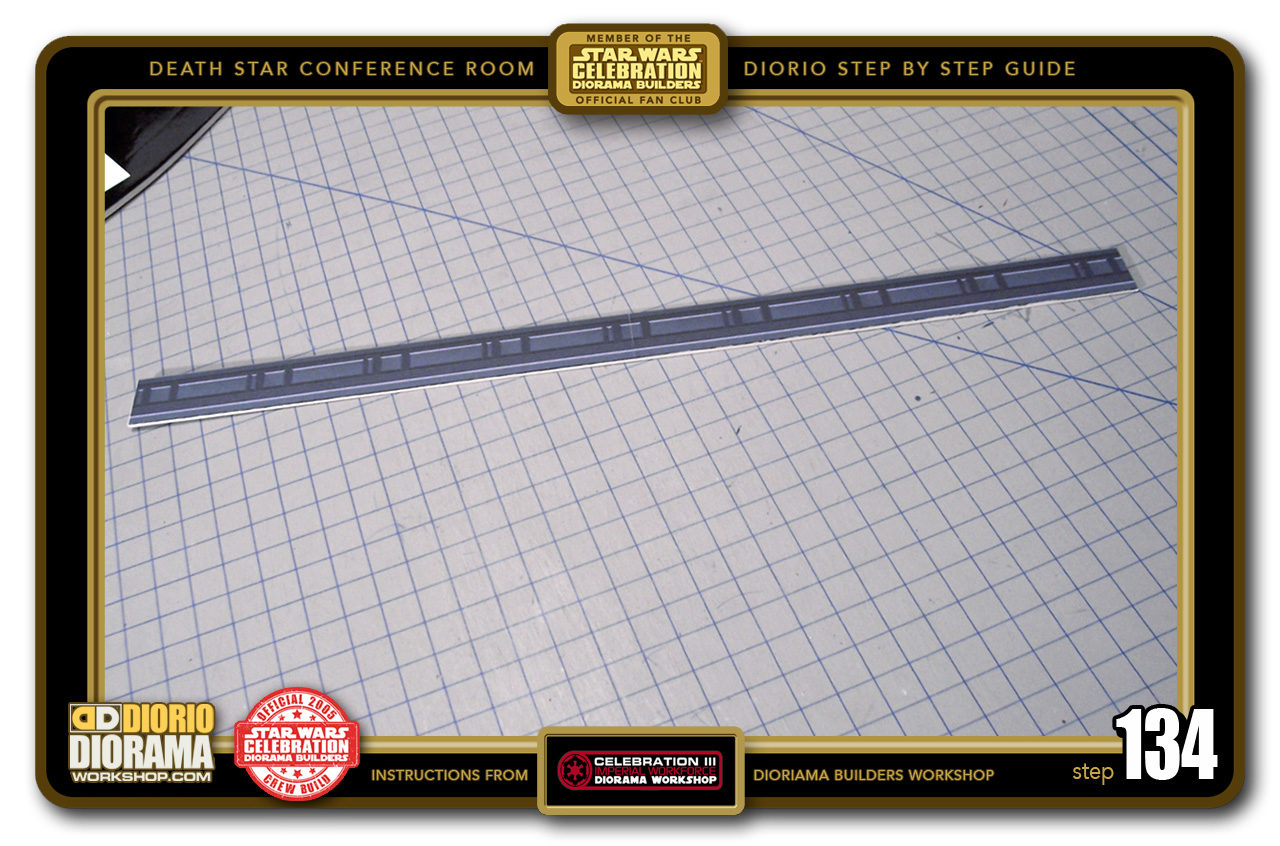
- STEP 134 > With your X-Acto blade trim all around your shape giving you what is a long strip of connecting TOP wall panels.

-

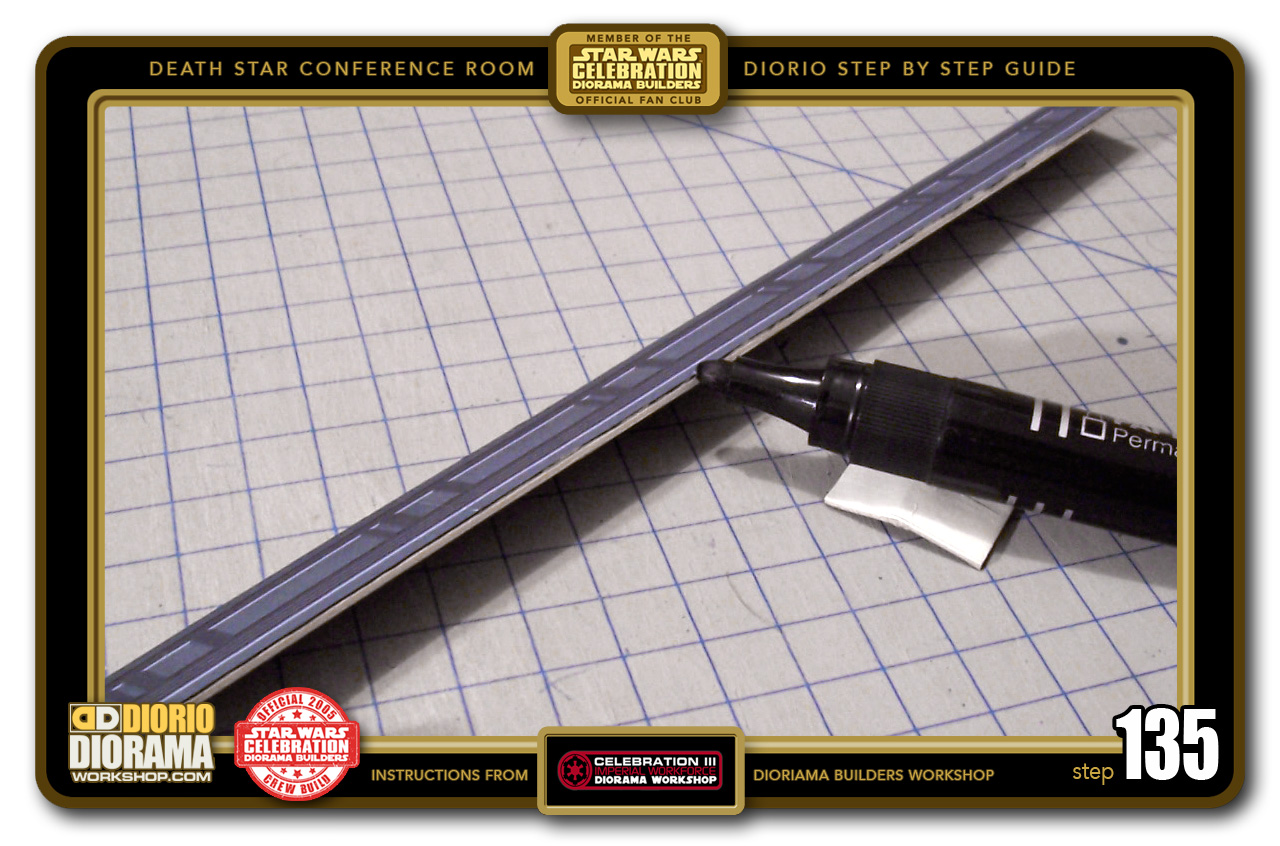
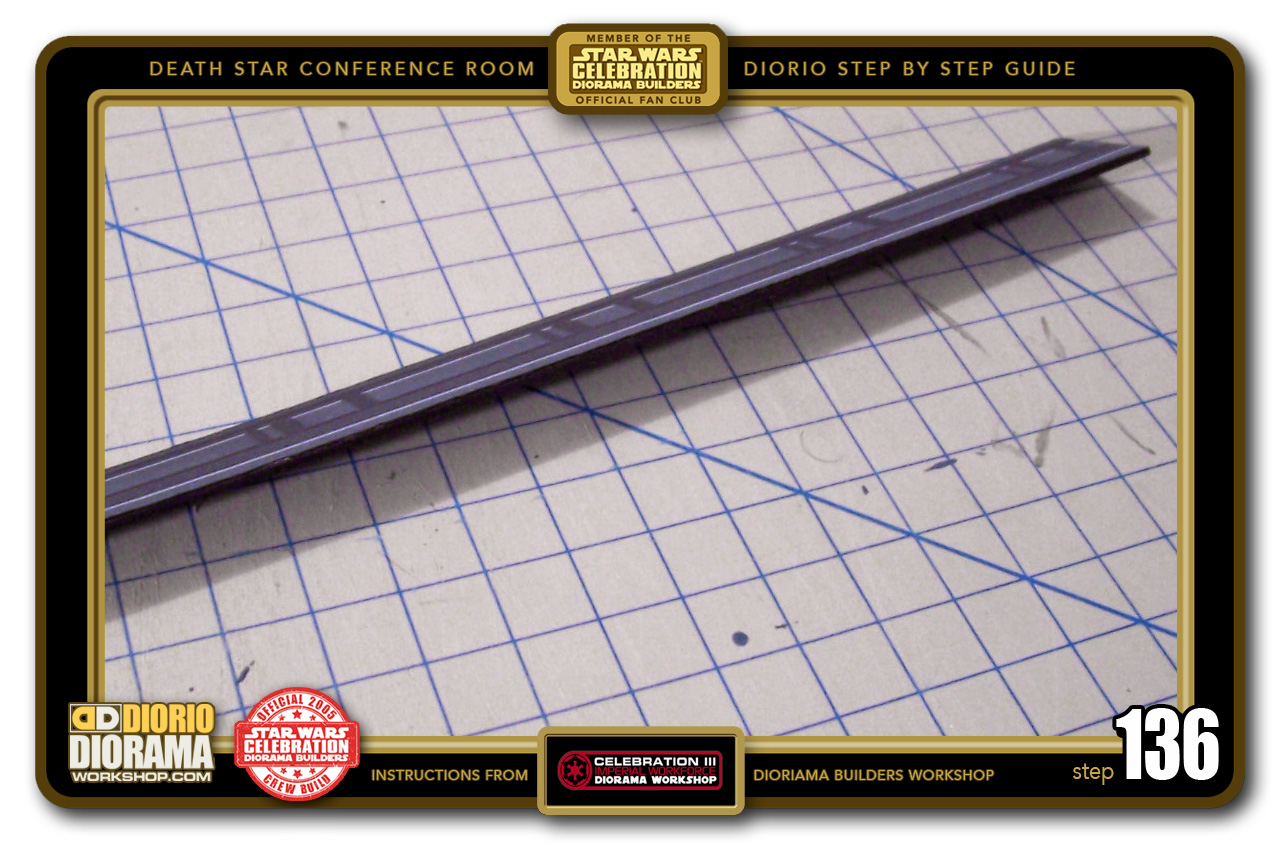
- STEP 135 > Take your black Sharpie Thick marker and color the edges to hide the ugly color of the actual cardboard surface. Go slowly, you don't want the marker to touch and make a line on the Decal itself.
-

- STEP 136 > Once you have colored all four sides of the carboard we are ready to attach it to Foamcore.
-

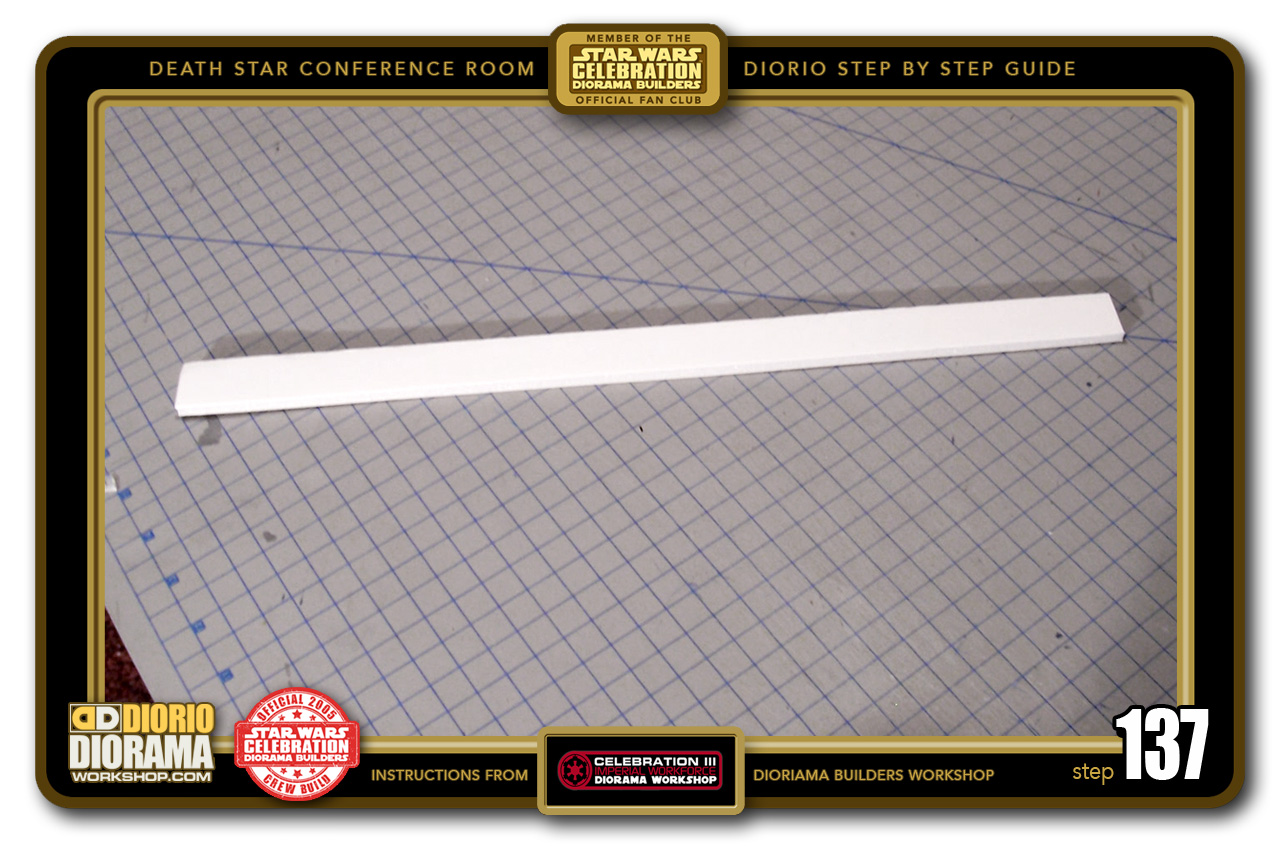
- STEP 137 > Use your Cardboard shape to trace the countour onto a piece of Foamcore and then cut cut that shape with your Xacto Blade.
-
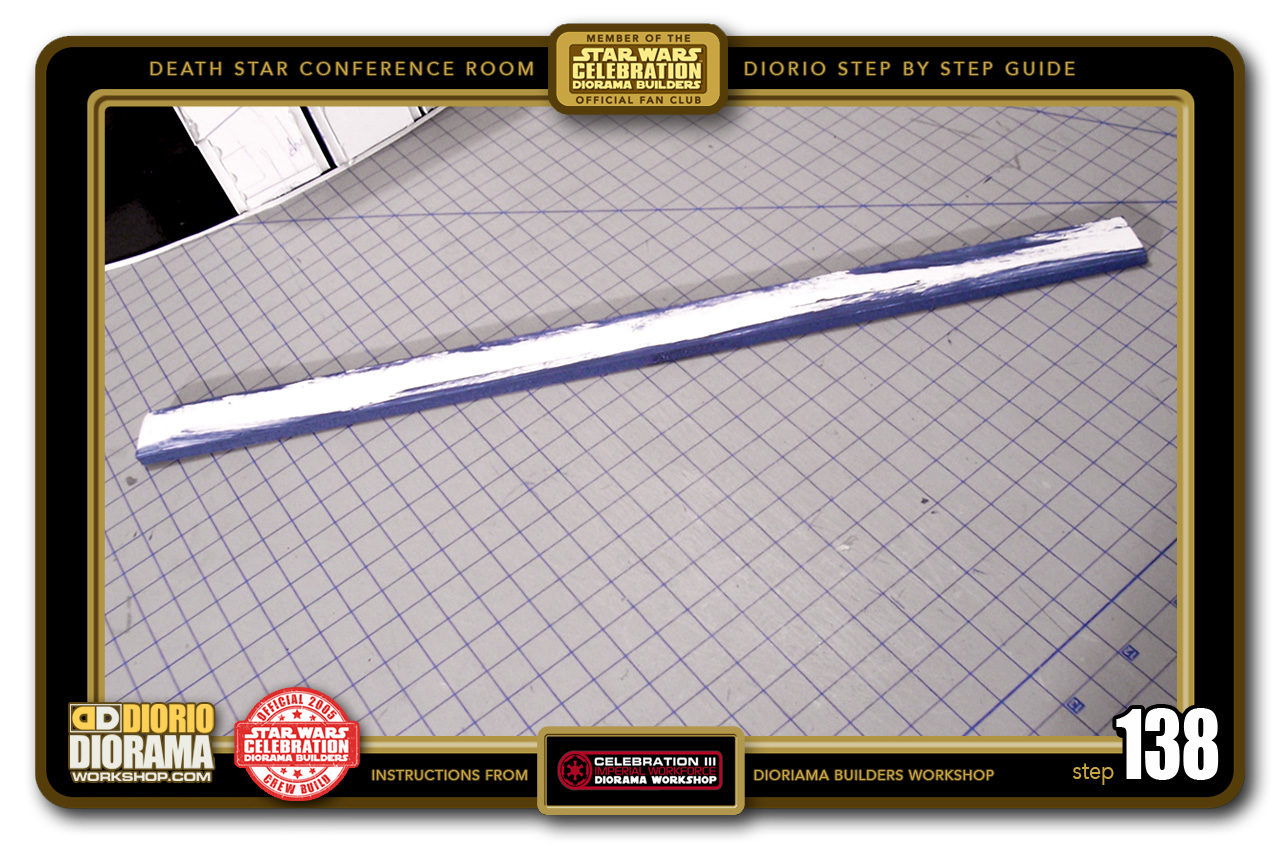
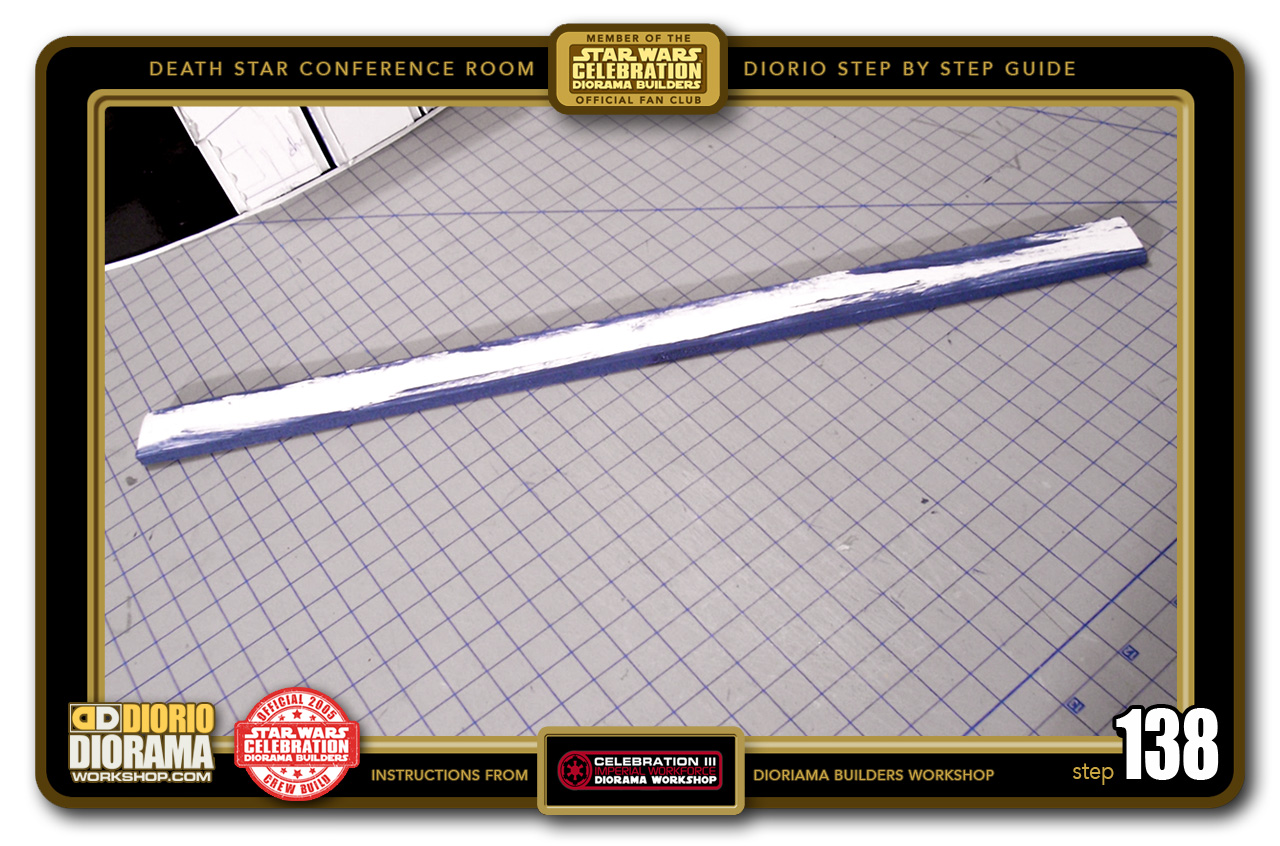
- STEP 138 > Get your paintbrush out and paint all the exposed sides of the Foamcore Strip and let dry (about 5 minutes or so with Latex paint)
-

- STEP 139 > Now take your Hot Glue Gun and attach the Cardboard Strip to the Foamcore Strip. Make sure to have the Decal on the OPPOSITE side of your Hot Glue :P. Your Top Panel Brace is now complete.

-
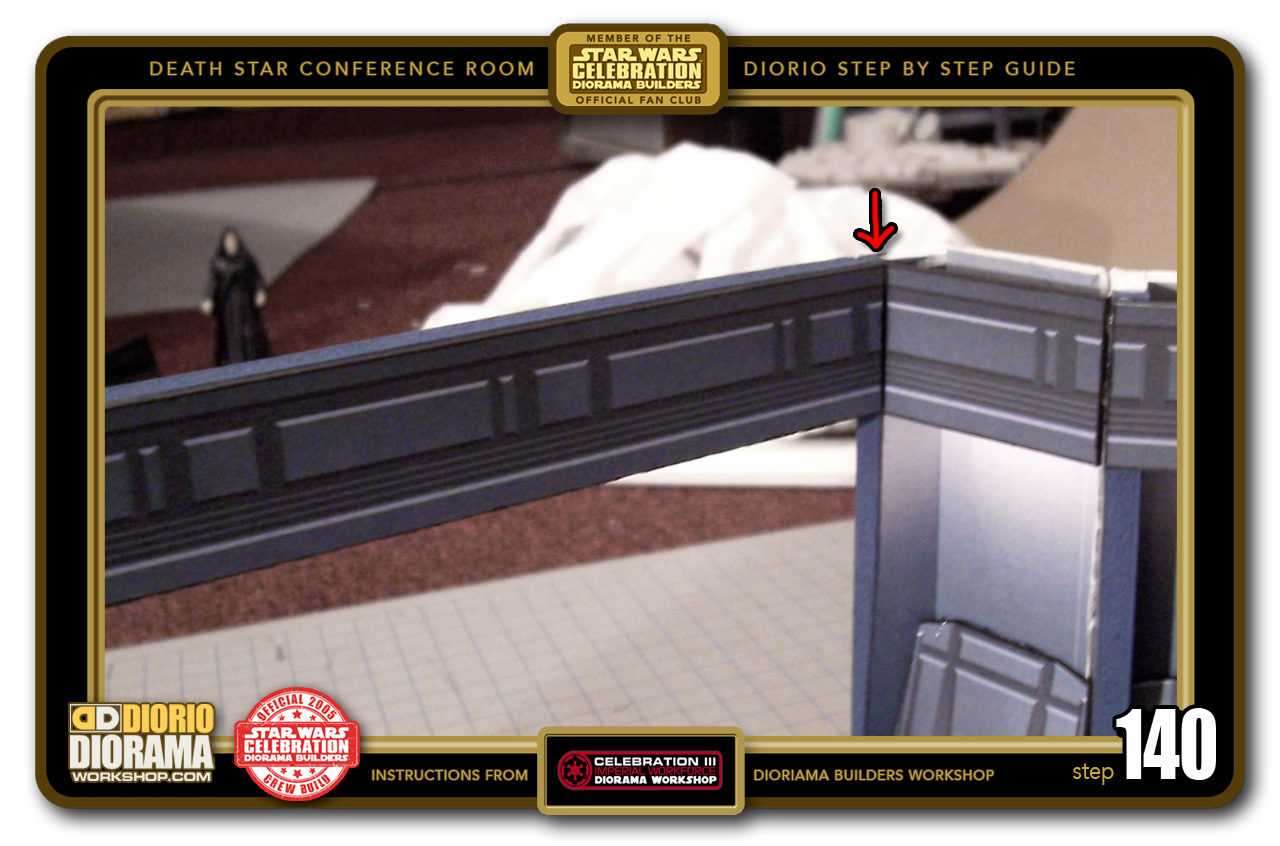
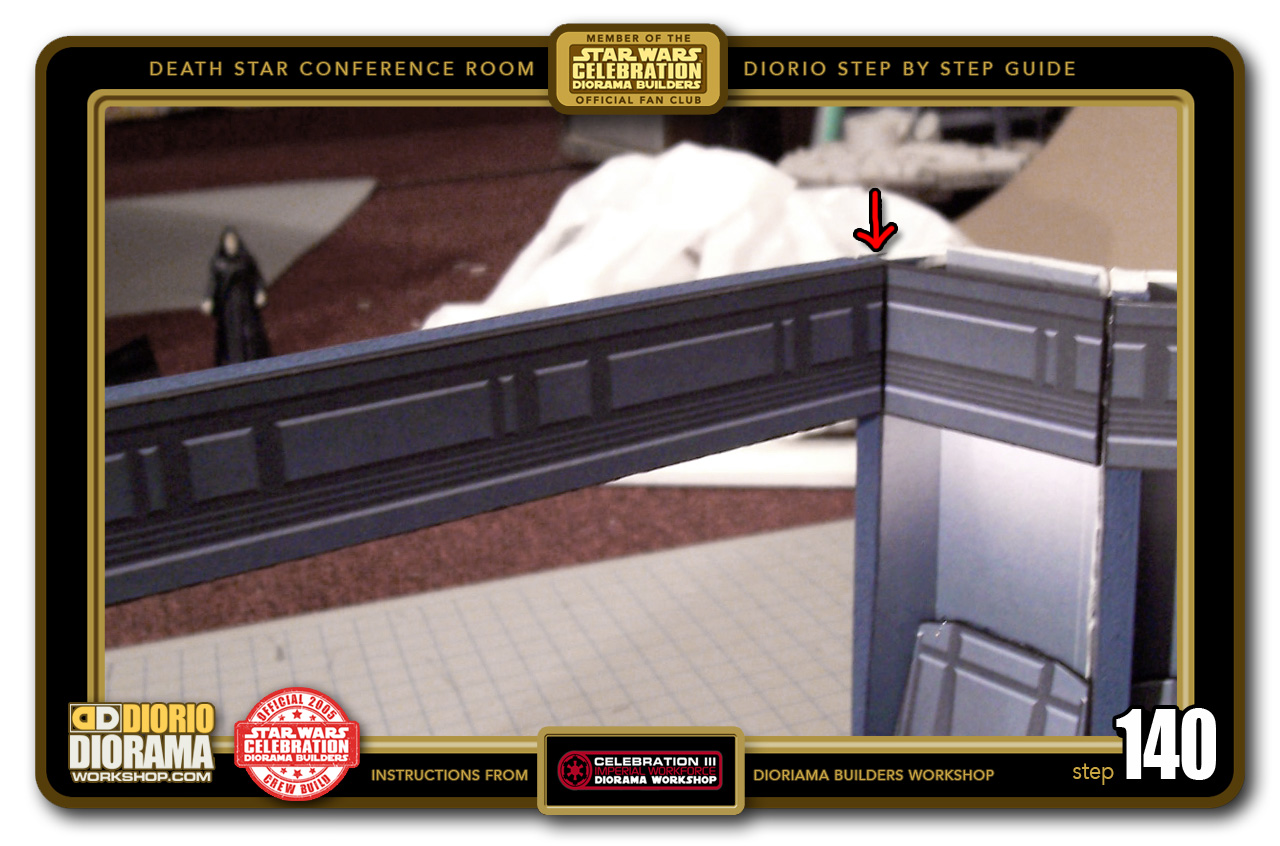
- STEP 140 > Place some Hot Glue on the RIGHT Tip of the Top Panel Strip and allign it with the Corner Wall Unit's Top Panel (See the red Arrow) and hold it into place a few seconds while the hot glue cools down.

.
Did you already build this Diorama ? At home or at our Star Wars Celebration Diorama Builders workshop ? Would you like to show it in the site’s GALLERY VISITORS DIORAMAS section, YES ? That is Awesome !!! You can find out all the details on how to email me your photos on the VISITORS SUBMISSIONS INFO page … When I get your photos, I will create your very own page just like this one. You may not realize it but work does inspire others to join in the fun of making Action Figure Dioramas.
.
NOT FOR RESALE ALL Decals, tutorials and artwork are ©FrankDiorio (dioramaworkshop.com) and offered FOR FREE to the fans – that would be you ? so you can build and display my diorama designs in your very own home. I realize I cannot control what one does with my graphics once I place them on the web, I can only ask you as one fan to another, please respect the artist and do not be that jerk who uses my designs and tutorials to build a copy of my work only to sell it on EBAY or trade/sale groups and forums. Thank You. Frank.
.
.
If you have a facebook account, why not join the Official Diorama Builders Fan Club today, simply click the logo link below.
 .
.
Catch up with fellow visitors and exchange stories, read cool interviews with the crew, exchange photos, fun surprises and grab some FAN ONLY merchandise next year at actual future conventions ?
.
©2018 Frank Diorio DioramaWorkshop.Com
.
IF YOU LIKE WHAT YOU SEE, PLEASE SHARE WITH YOUR FRIENDS
USING THE SOCIAL MEDIA BUTTONS BELOW