


-

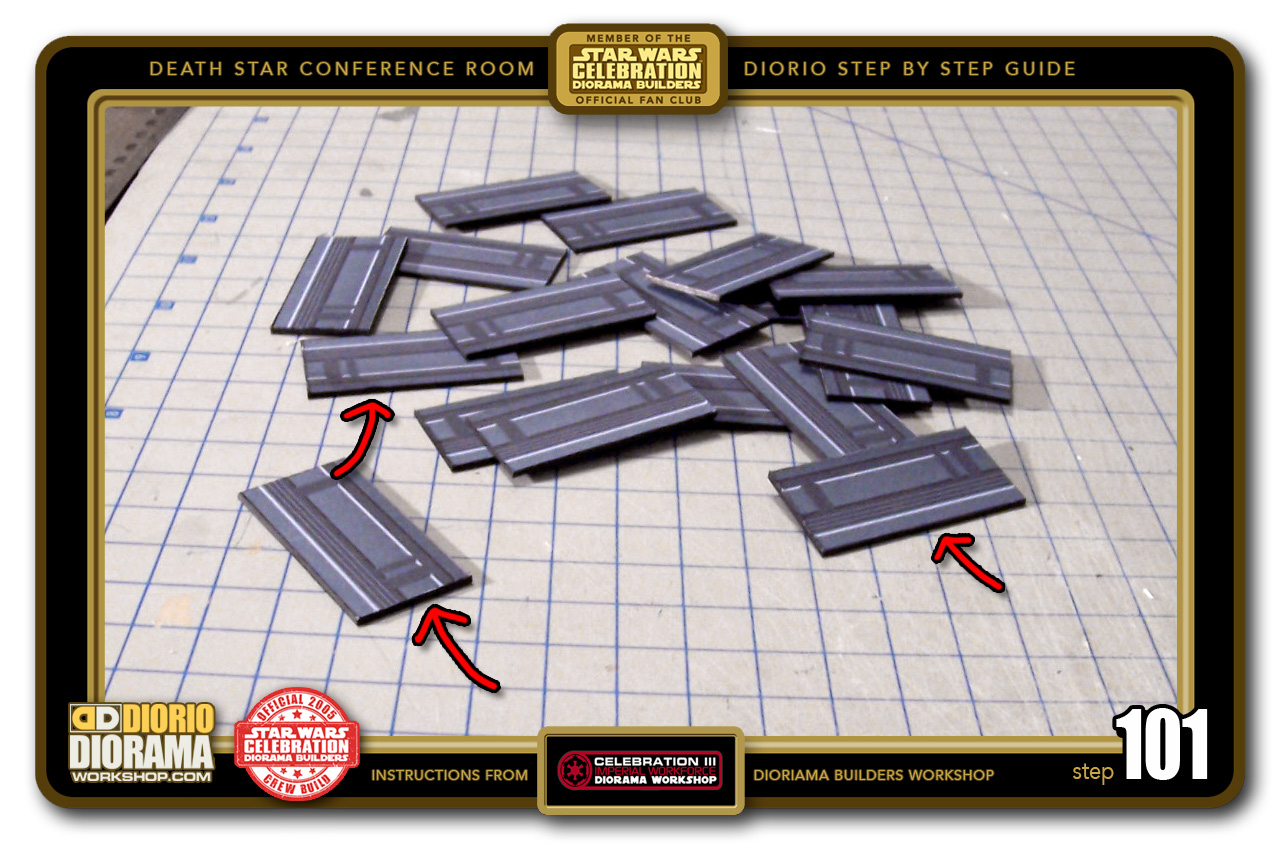
- STEP 101 > Once done, your cardboard edges will look like this...much improved don't you agree?
-

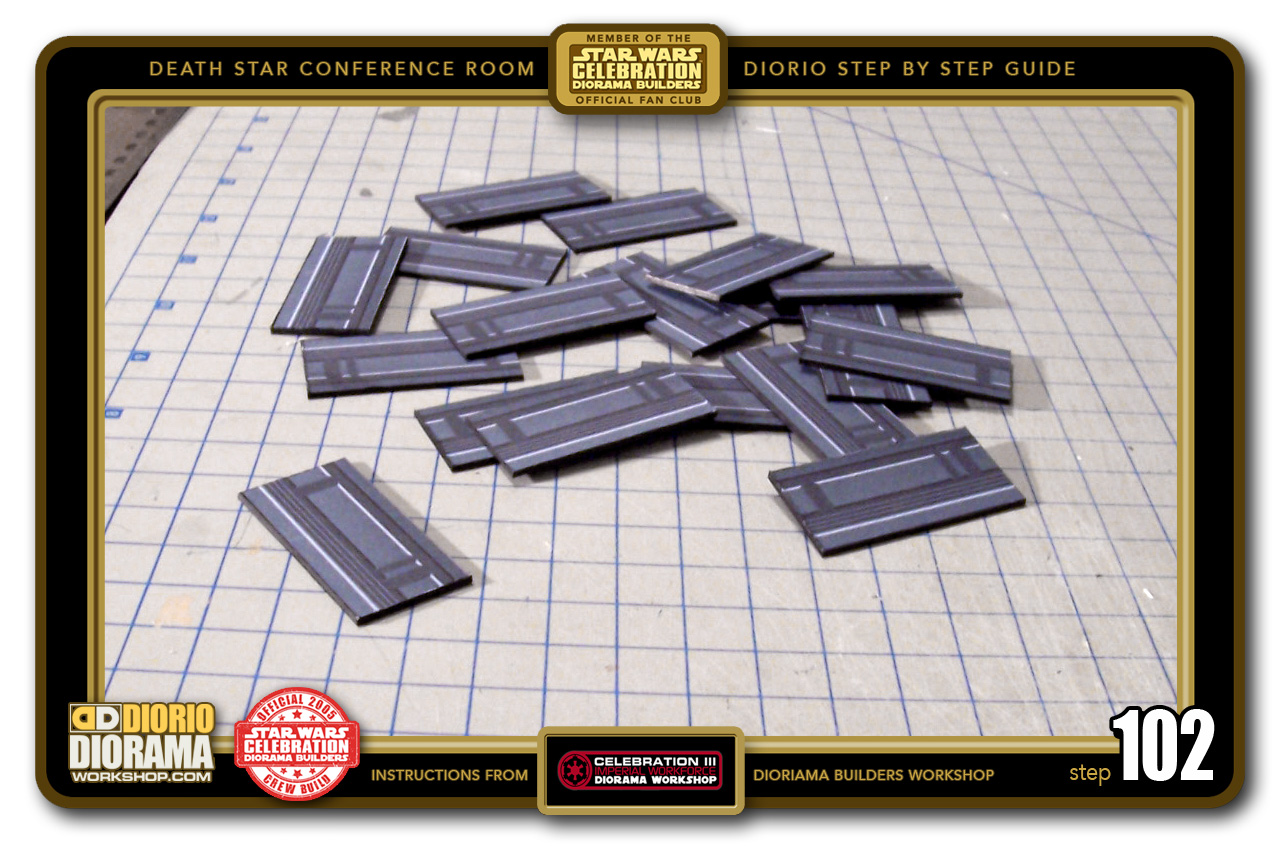
- STEP 102 > ooops, same photo without the arrows, move along, move along 🙂
-

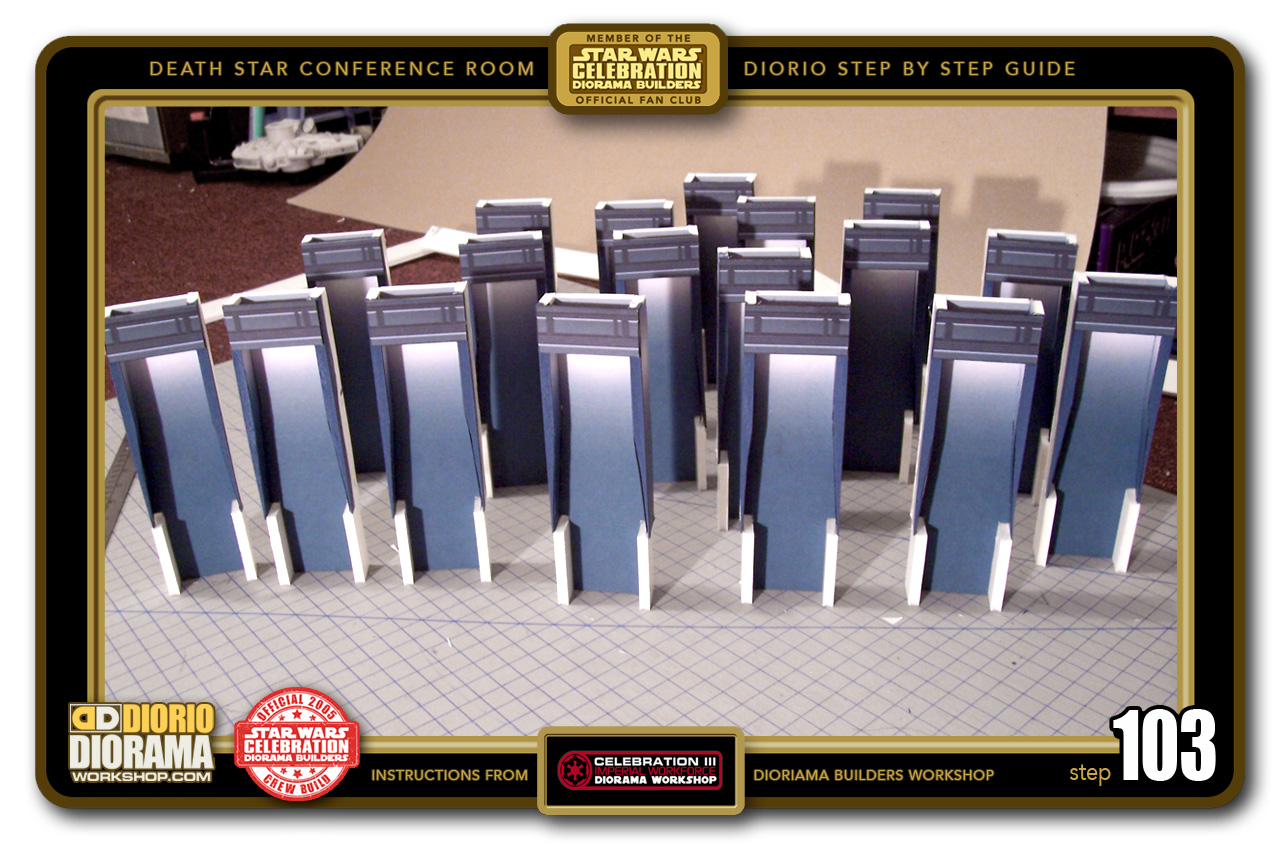
- STEP 103 > Now we can Hot Glue the Top Cardboard Wall Panels to the Main Wall Units. Make sure to align them flush with the TOP so that the ceiling will fit flat in place at the end of construction if you so wish to make one.
-
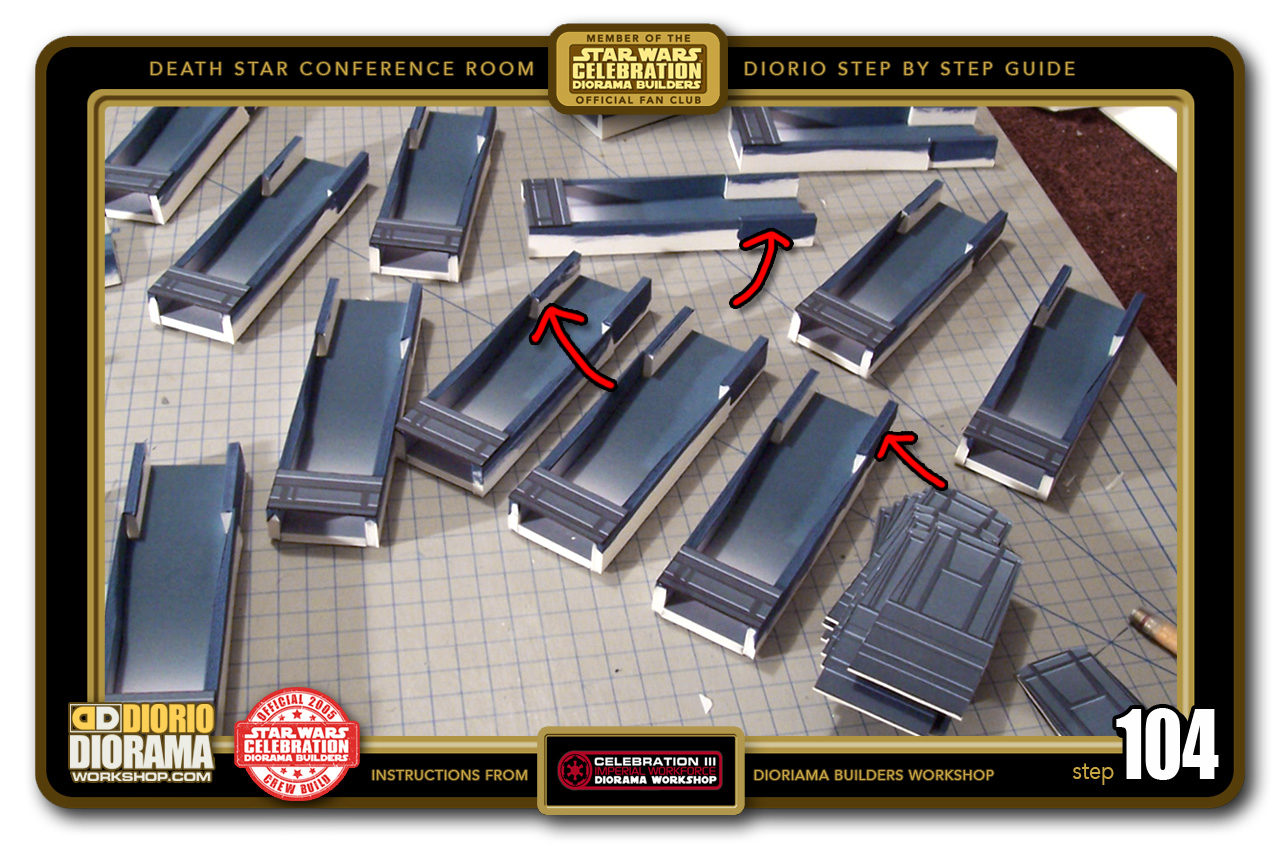
- STEP 104 > You don't really need to do this step since the Foamcore is hidden but it does give a cleaner look if some of the white Foamcore happens to peek through from the Bottom Wall Panels. Simply use your paint to color the Top and path up some of the sides.

-

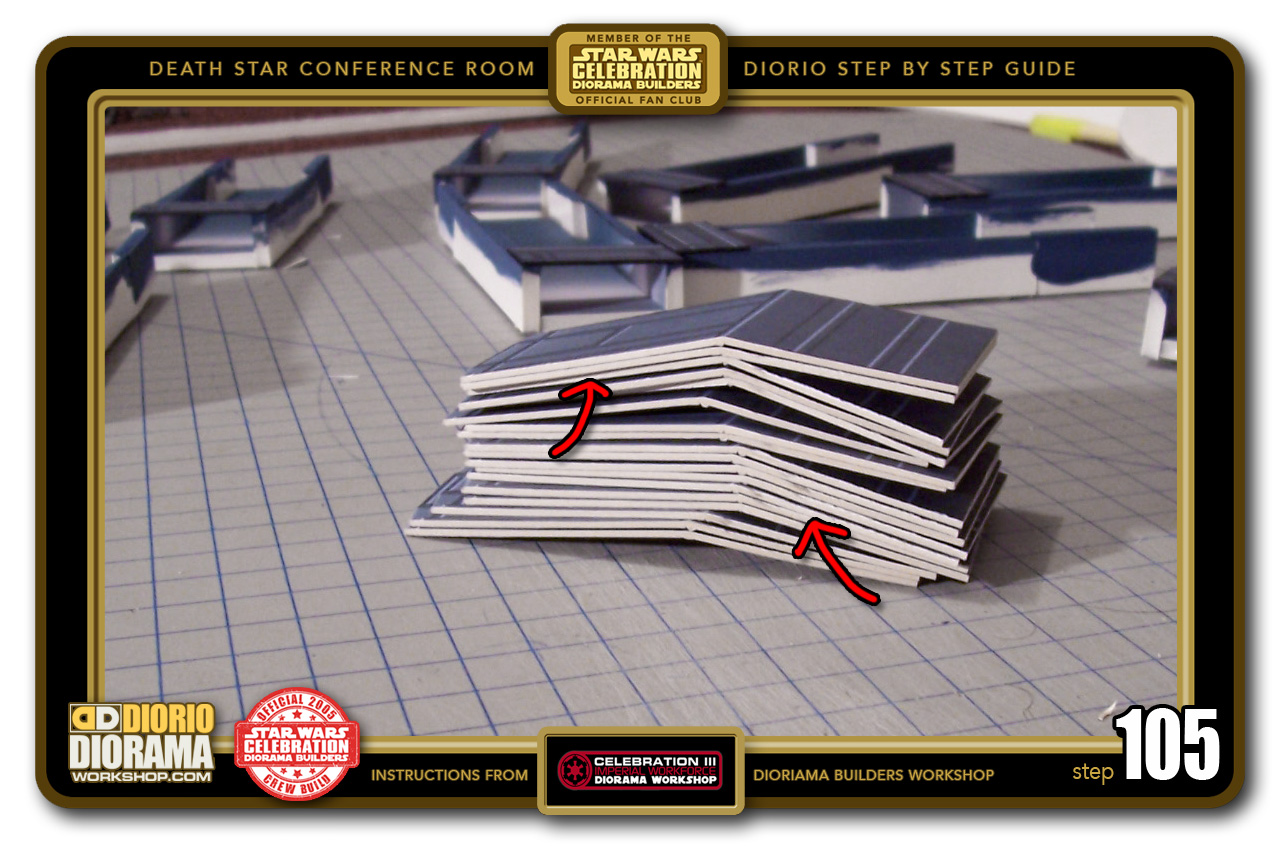
- STEP 105 > Get out your Black Sharpie Thick markers again 🙂 See all those ugly cardboard sides the red arrows are pointing to? we want to get rid of those. Simply color all the way around so that all sides are Black. ORIGINAL C3 design shown, your folded bends will be lower than these.
-

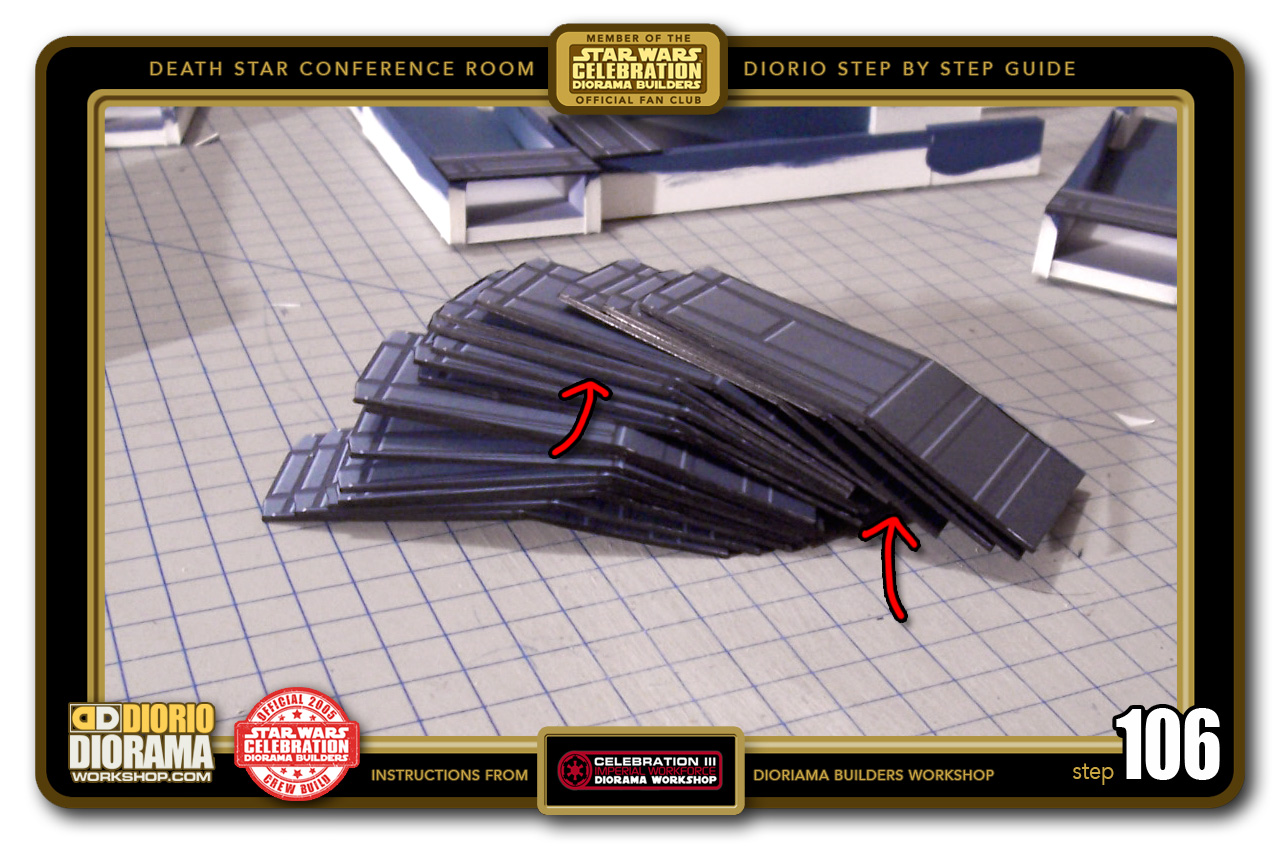
- STEP 106 > After about 30 minutes, your pile of Front Bottom Panels should look like this. Nice black edges vs cardboard beige brown.
-

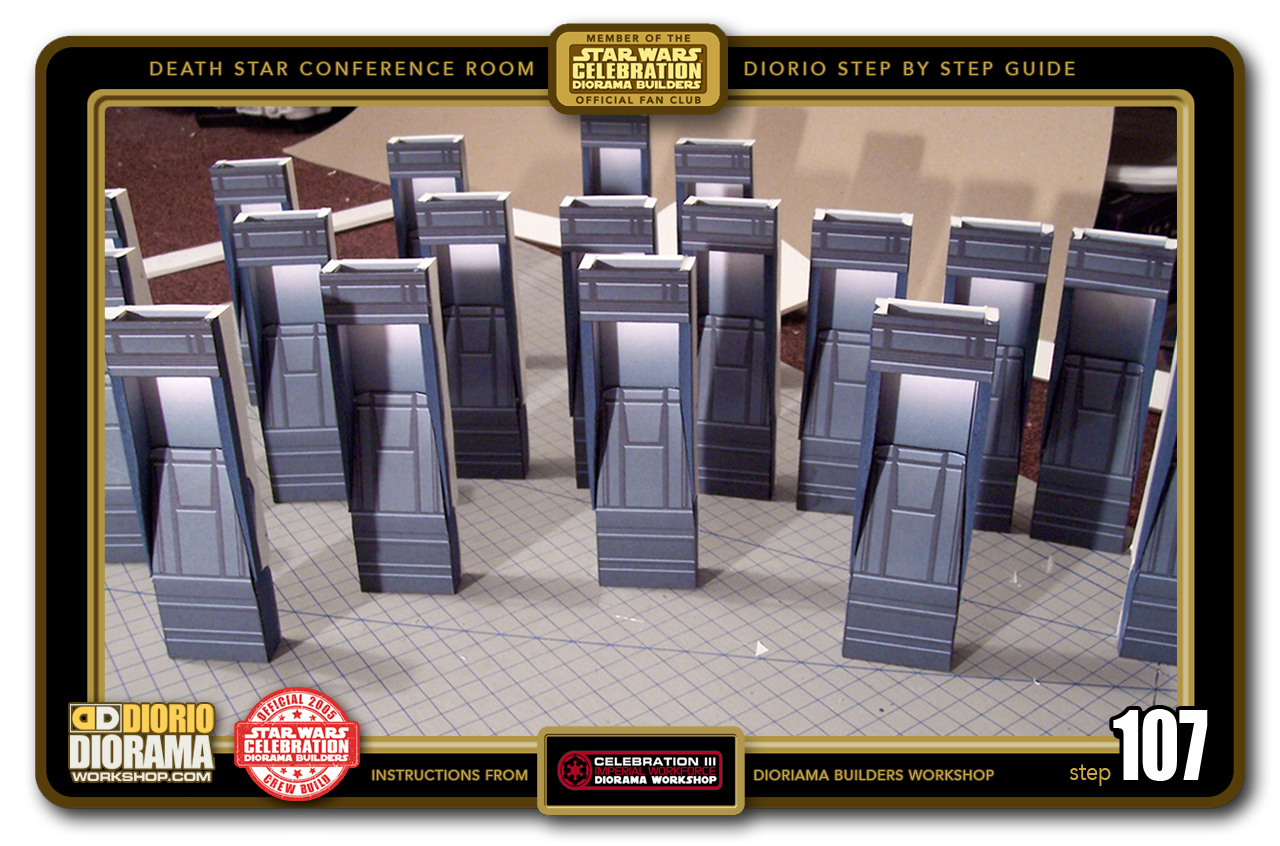
- STEP 107 > Now we are ready to hot glue the Front Bottom Panels to the Main Wall Units. Simply hot glue the 2 bottom 2.5cm foamcore side pieces and place your panel on top. Make sure to align with the bottom edge so that ALL units will be flush with the floor. And there we have it. Our wall Units are complete. Whoohoo 🙂 Well almost 😛
-

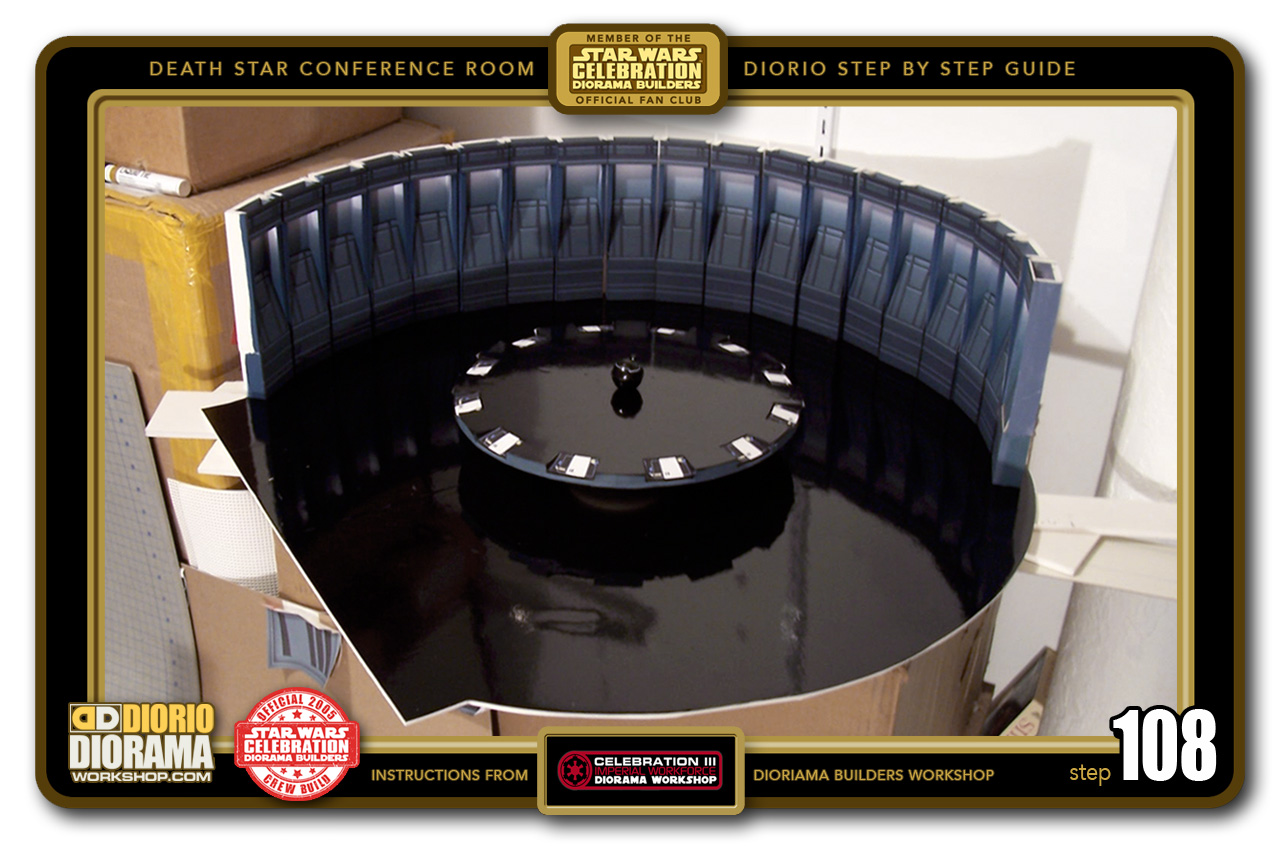
- STEP 108 > And here we have a wide view of the completed Wall Panels placed temporary on the Conference Room floor. Later, when glued in place, you won't see gaps between the units. Oh and we haven't even placed the Miniature Christmas Lights in yet. Already the Photoshop Decals give us a cheated light source just as I planed 🙂
-

- STEP 109 > In a close up view the effect is even more Movie Like, don't you think? 😀 (and this was the original C3 design. Your 2018 decals are even more movie accurate 🙂 Try and imagine once all the chairs are in place and the figures move into their new home . I think Darth Vader would be proud . LOL.

-

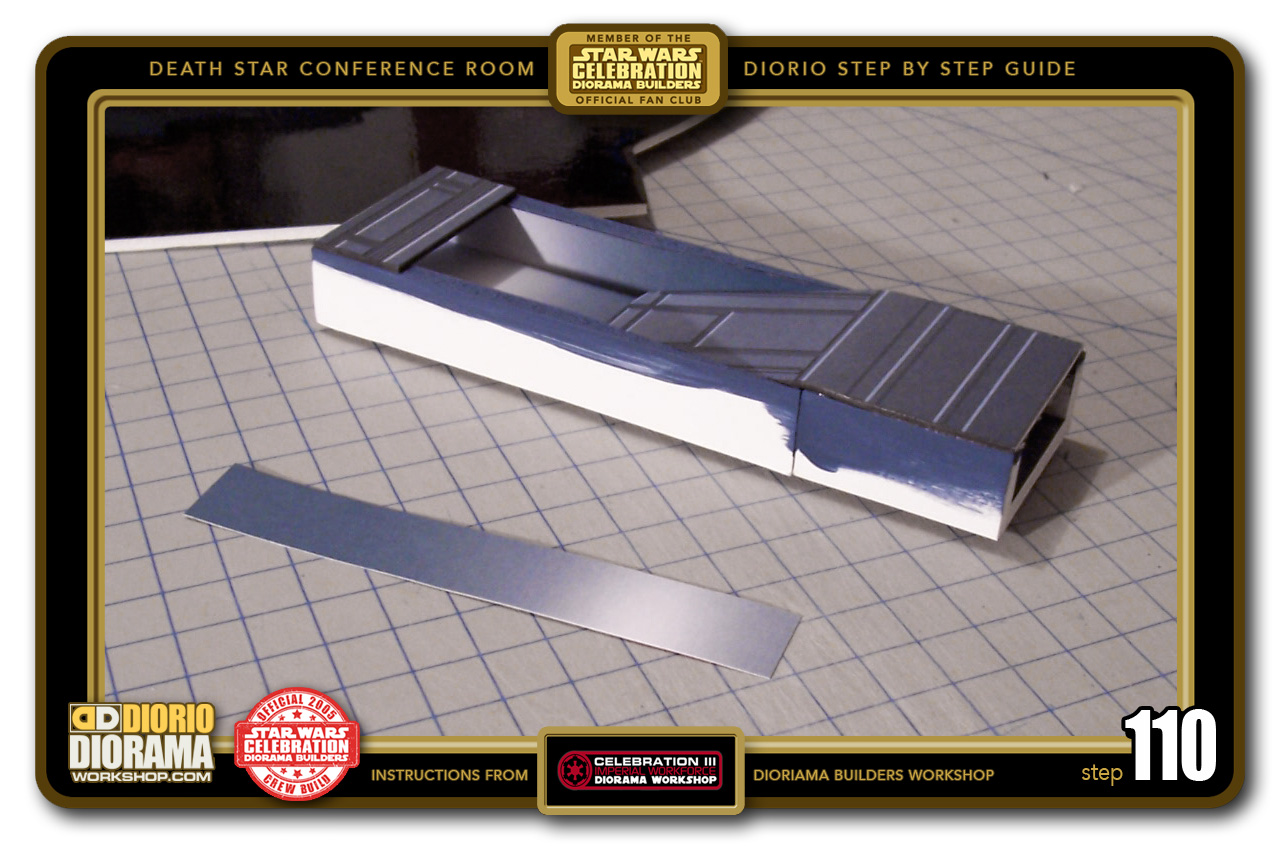
- STEP 110 > Time to make the Corner Units. For this we start with taking a Regular Wall Unit and printing out a Side Panel Decal.
-

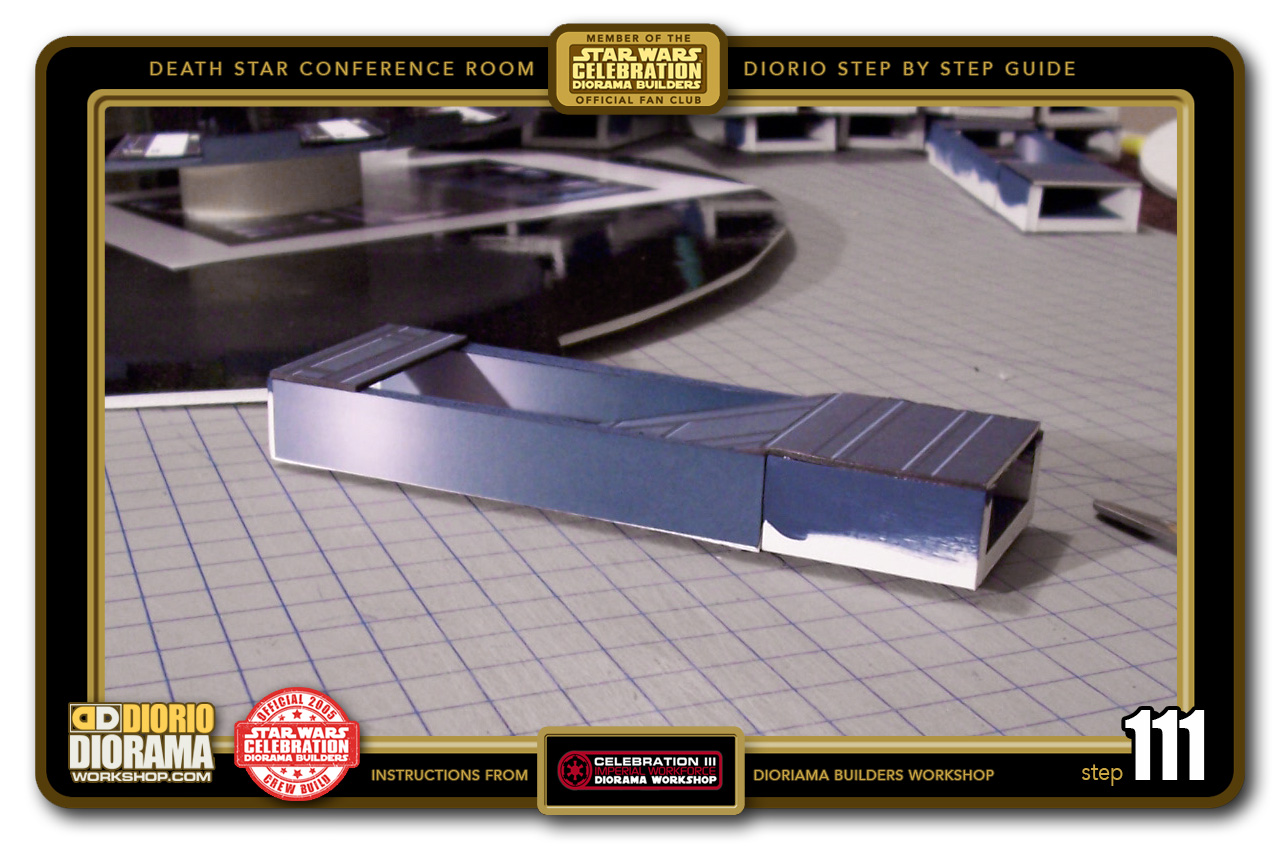
- STEP 111 > Peel the backing or use Glue Stick to place the Decal to the OUTSIDE top of the Wall Unit. For the Right Door, Attach to the OUTSIDE LEFT and for the Left Door, Attach to the OUTSIDE RIGHT.
-

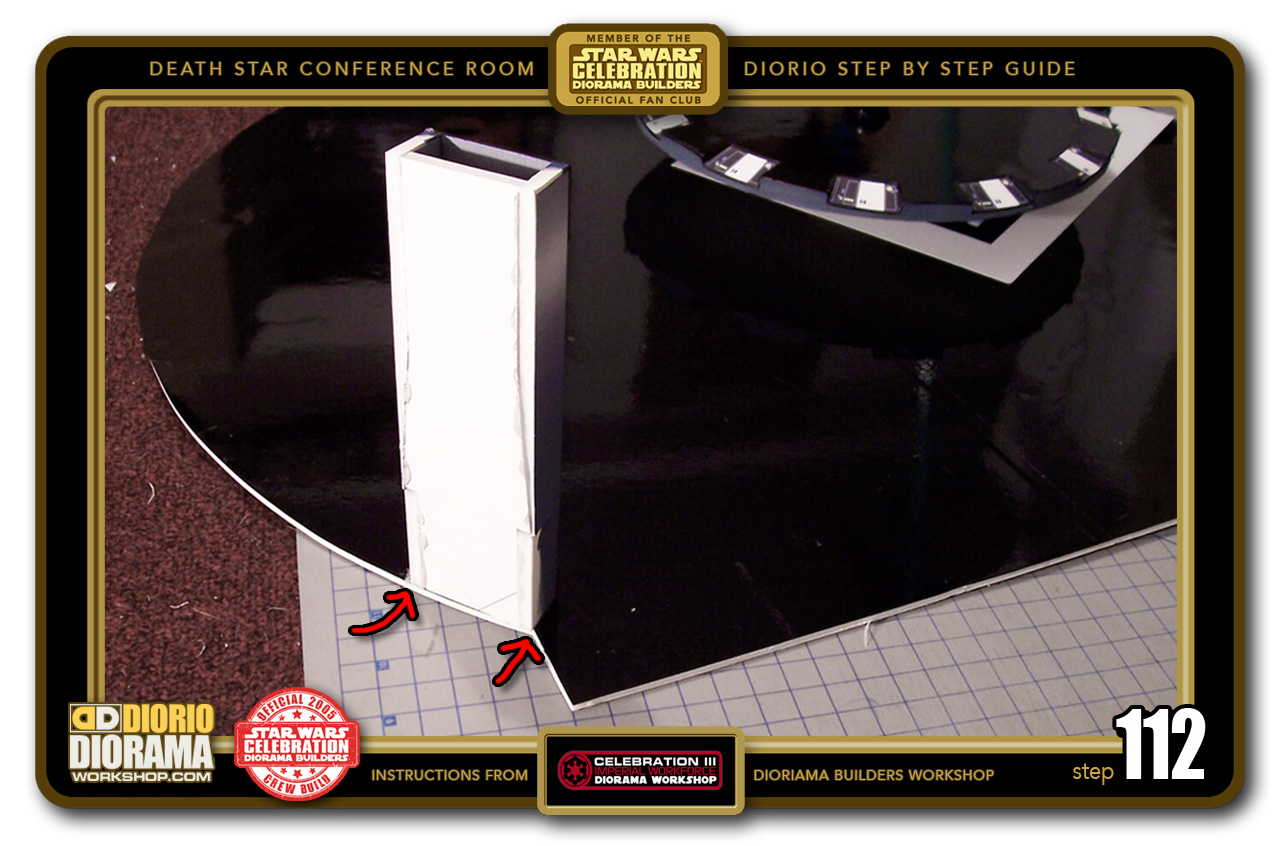
- STEP 112 > OK, Let's start with the wall unit that will be placed next to the RIGHT DOOR. Take the Wall Unit that has the Decal on the OUTSIDE LEFT. Put some Hot Glue from your Hot Glue Gun at the bottom of the Base and gently press into place. IMPORTANT: your Wall Unit must be aligned flush with the corner angle cut and follows flush with the main cut of the circular floor.
-
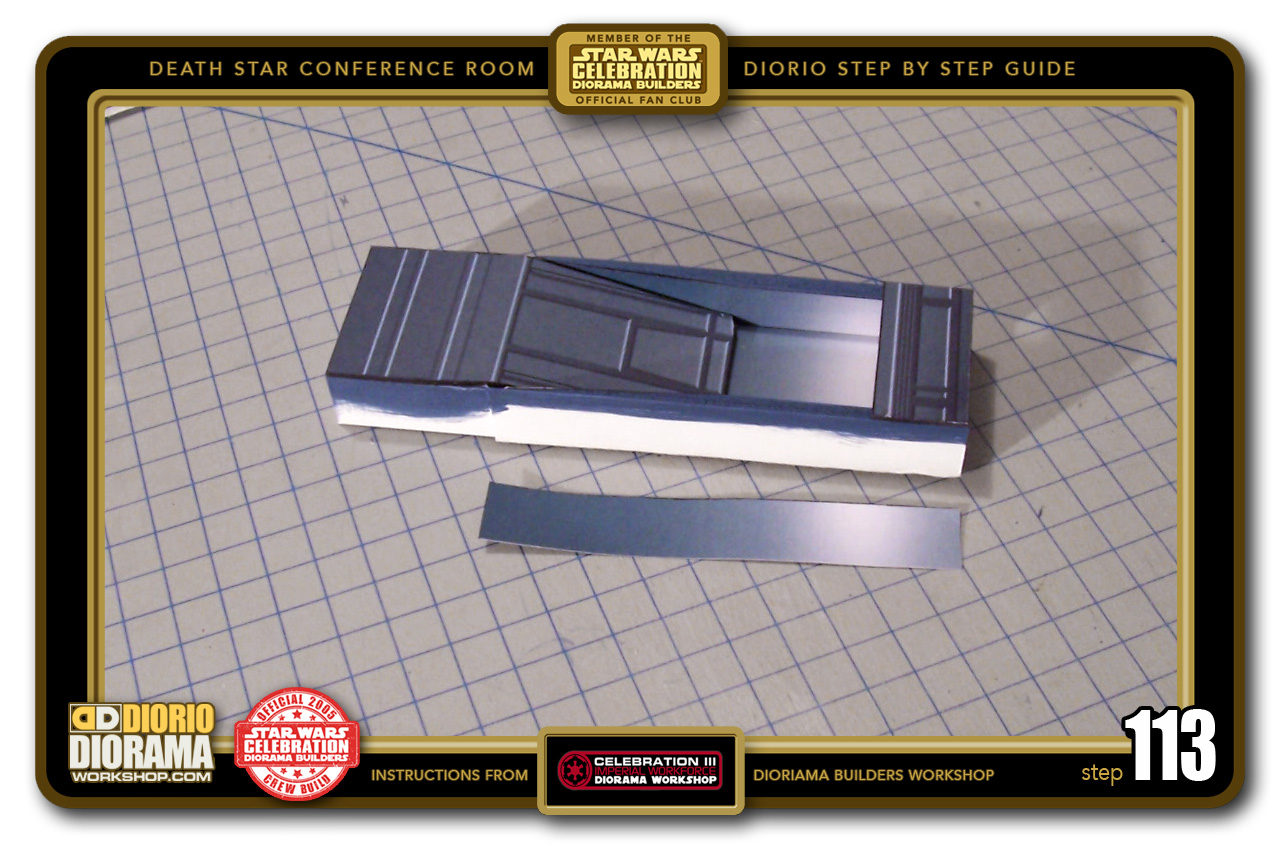
- STEP 113 > For the opposite side you must apply your Decal to the OUTSIDE RIGHT side of the Wall unit.

-

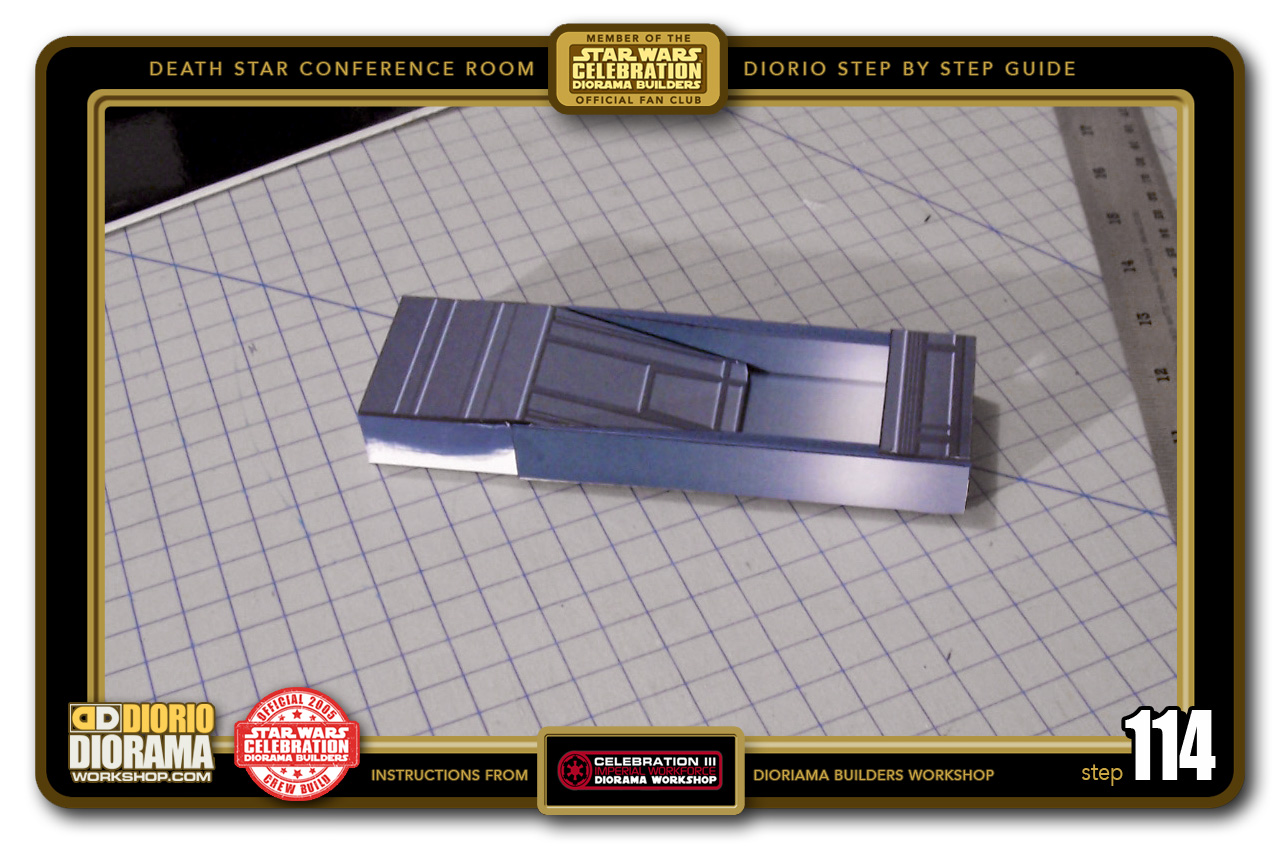
- STEP 114 > Stick it to the Top just as you did with the Right Wall Unit from STEP 111.
-

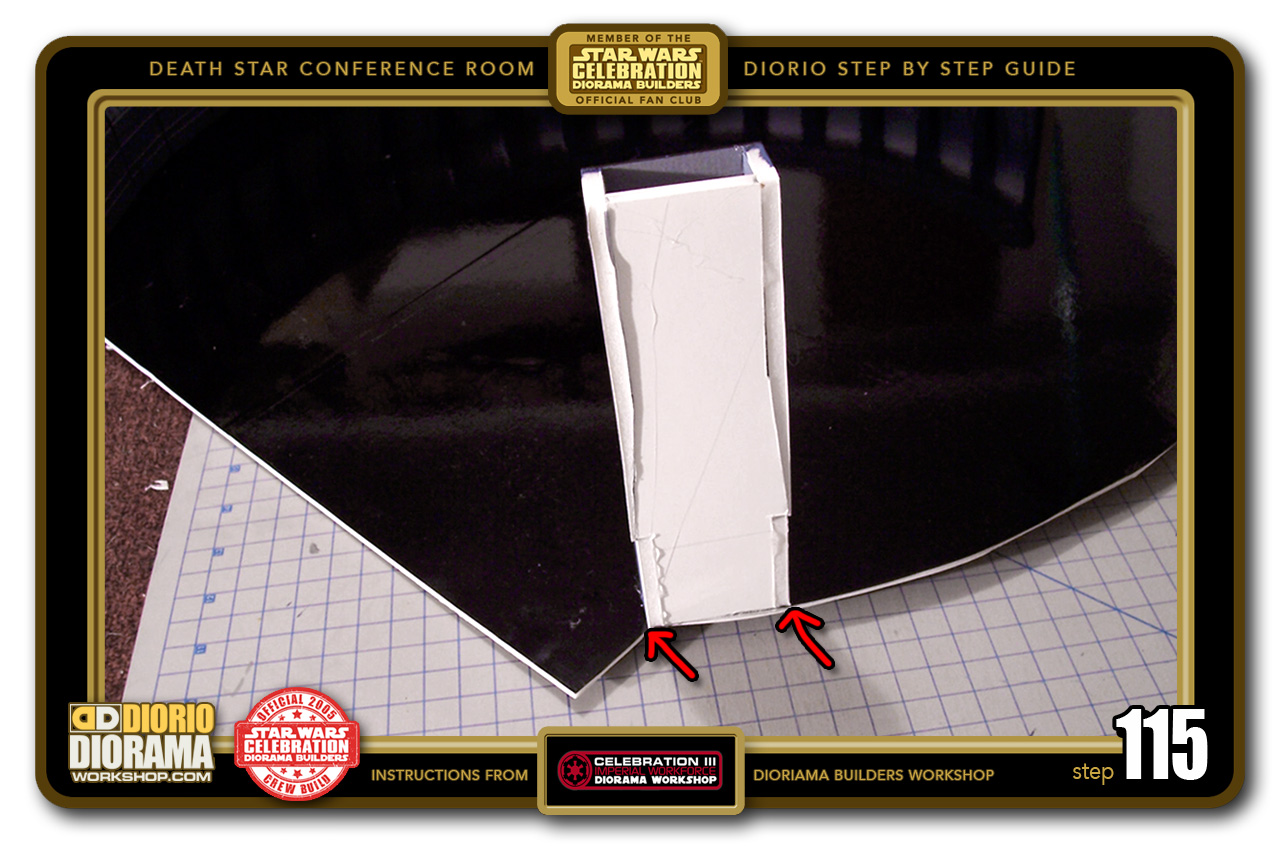
- STEP 115 > Just as you did in STEP 112, use the Hot Glue Gun to bond the LEFT DOOR Wall Unit to the Main Floor. Remember IMPORTANT: Make sure to align it with the angle corner cut and flush with the round floor edges. (red arrows).
-
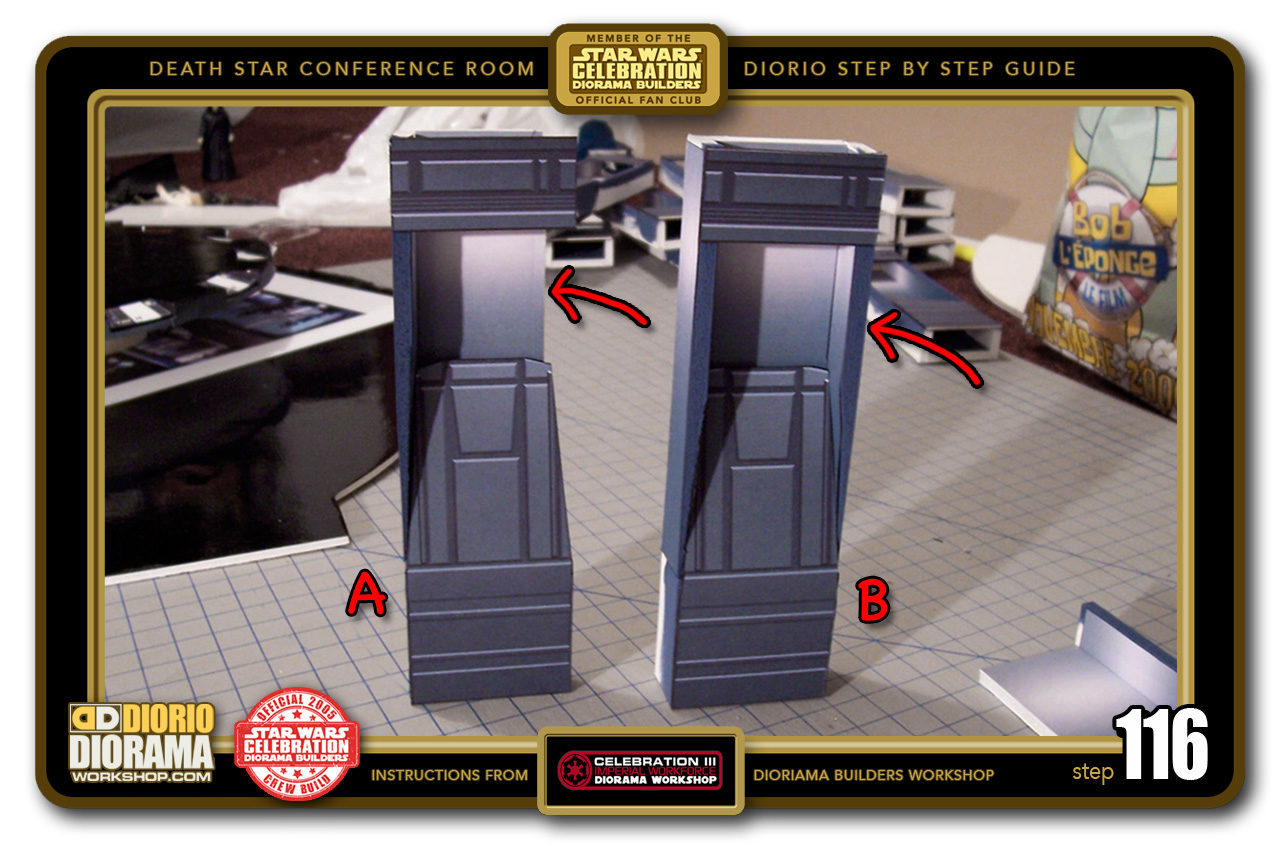
- STEP 116 > Now these are a little tricky and different then the NORMAL (B) Wall Units. What we want for the connecting ANGLED corners are only HALF UNITS (A). Look at the red arrows and you will see the missing side wall.

-

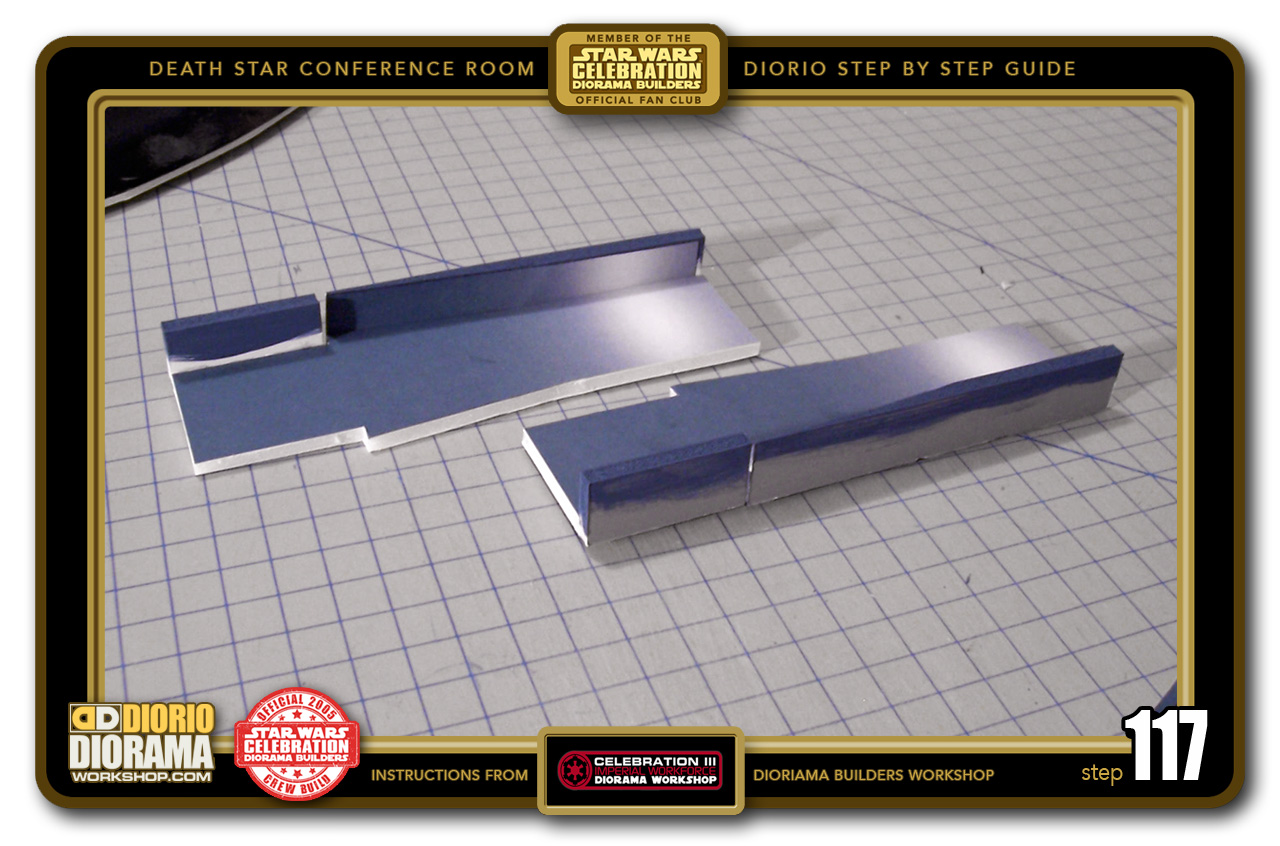
- STEP 117 > Start by assembling 2 Wall Units as you did for the regular versions with ONE important exception. DO NOT HOT GLUE/ATTACH THE OPPOSITE SIDE WALL.
-

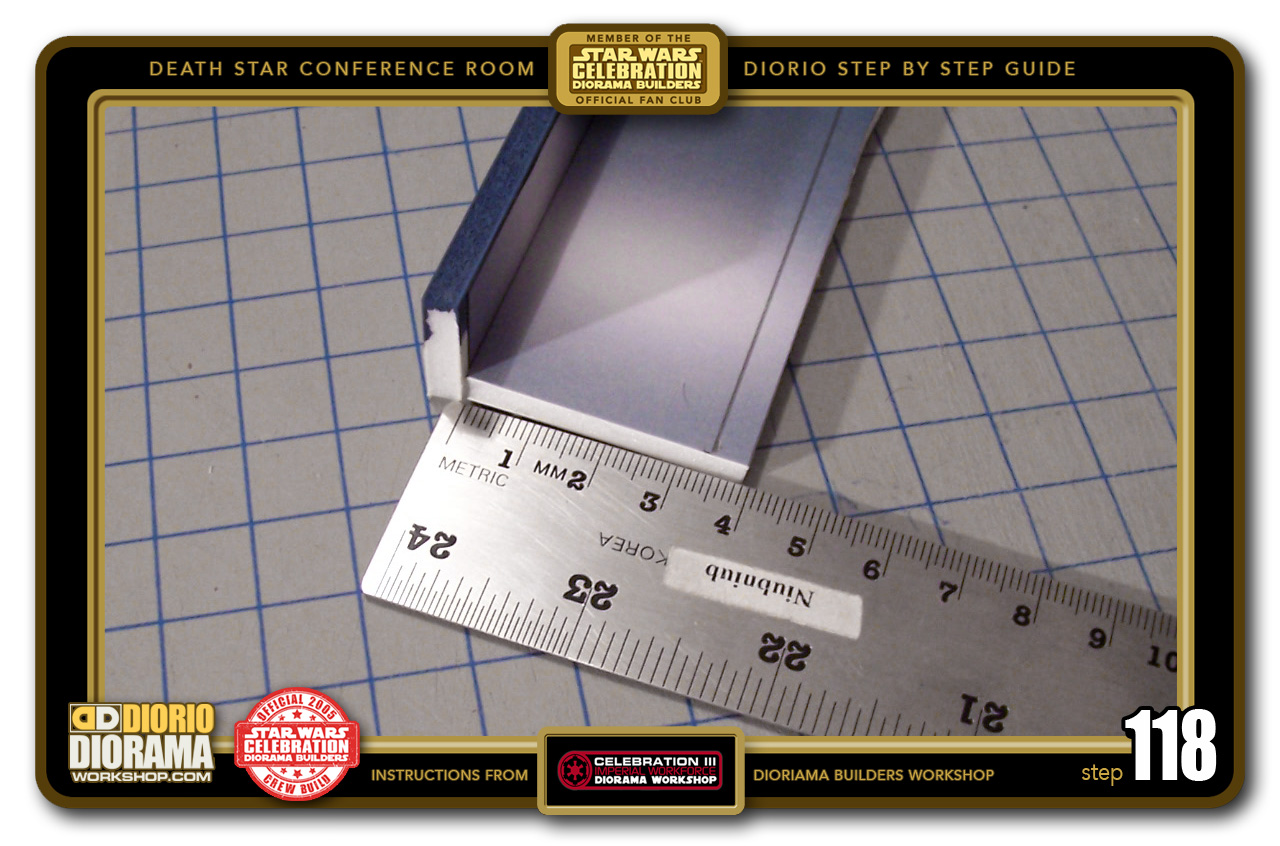
- STEP 118 > Place your ruler on the bottom of the Wall Unit and measure 3.5cm from the edge of the wall. This will be your cutting guide so that the Wall Unit will fit at a 45 degree angle with the Corner Wall Units.
-

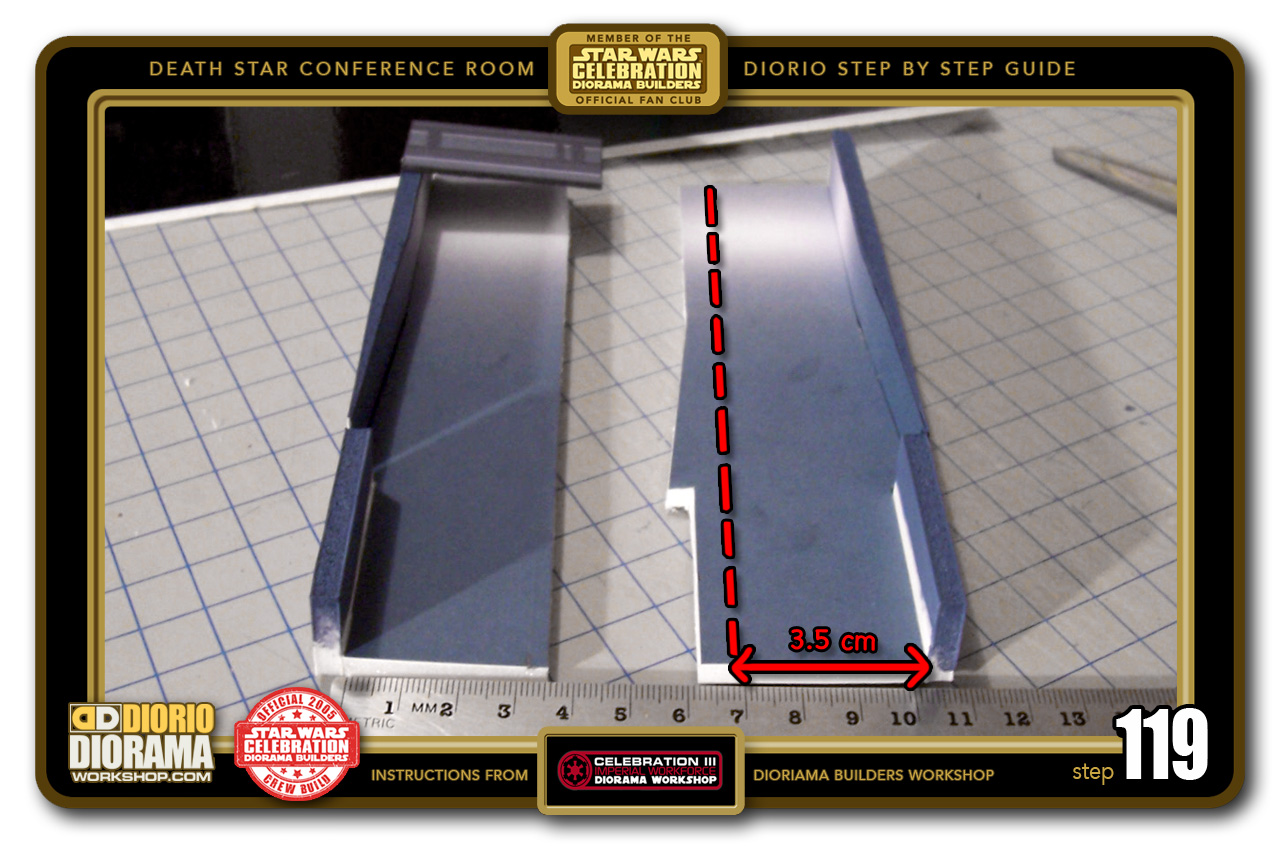
- STEP 119 > On the Left you see the result of the cut at 3.5cm. On the right you can see the dotted line (3.5cm from the Right Inner Wall) where you need to make the cut for the LEFT DOOR UNIT.
-

- STEP 120 > Here is a clearer view of the cut line from STEP 118.


.
Did you already build this Diorama ? At home or at our Star Wars Celebration Diorama Builders workshop ? Would you like to show it in the site’s GALLERY VISITORS DIORAMAS section, YES ? That is Awesome !!! You can find out all the details on how to email me your photos on the VISITORS SUBMISSIONS INFO page … When I get your photos, I will create your very own page just like this one. You may not realize it but work does inspire others to join in the fun of making Action Figure Dioramas.
.
NOT FOR RESALE ALL Decals, tutorials and artwork are ©FrankDiorio (dioramaworkshop.com) and offered FOR FREE to the fans – that would be you ? so you can build and display my diorama designs in your very own home. I realize I cannot control what one does with my graphics once I place them on the web, I can only ask you as one fan to another, please respect the artist and do not be that jerk who uses my designs and tutorials to build a copy of my work only to sell it on EBAY or trade/sale groups and forums. Thank You. Frank.
.
.
If you have a facebook account, why not join the Official Diorama Builders Fan Club today, simply click the logo link below.
 .
.
Catch up with fellow visitors and exchange stories, read cool interviews with the crew, exchange photos, fun surprises and grab some FAN ONLY merchandise next year at actual future conventions ?
.
©2018 Frank Diorio DioramaWorkshop.Com
.
IF YOU LIKE WHAT YOU SEE, PLEASE SHARE WITH YOUR FRIENDS
USING THE SOCIAL MEDIA BUTTONS BELOW