


-

- STEP 161 > You know the drill, hot glue the 4 miniature clothes pin tips.
-
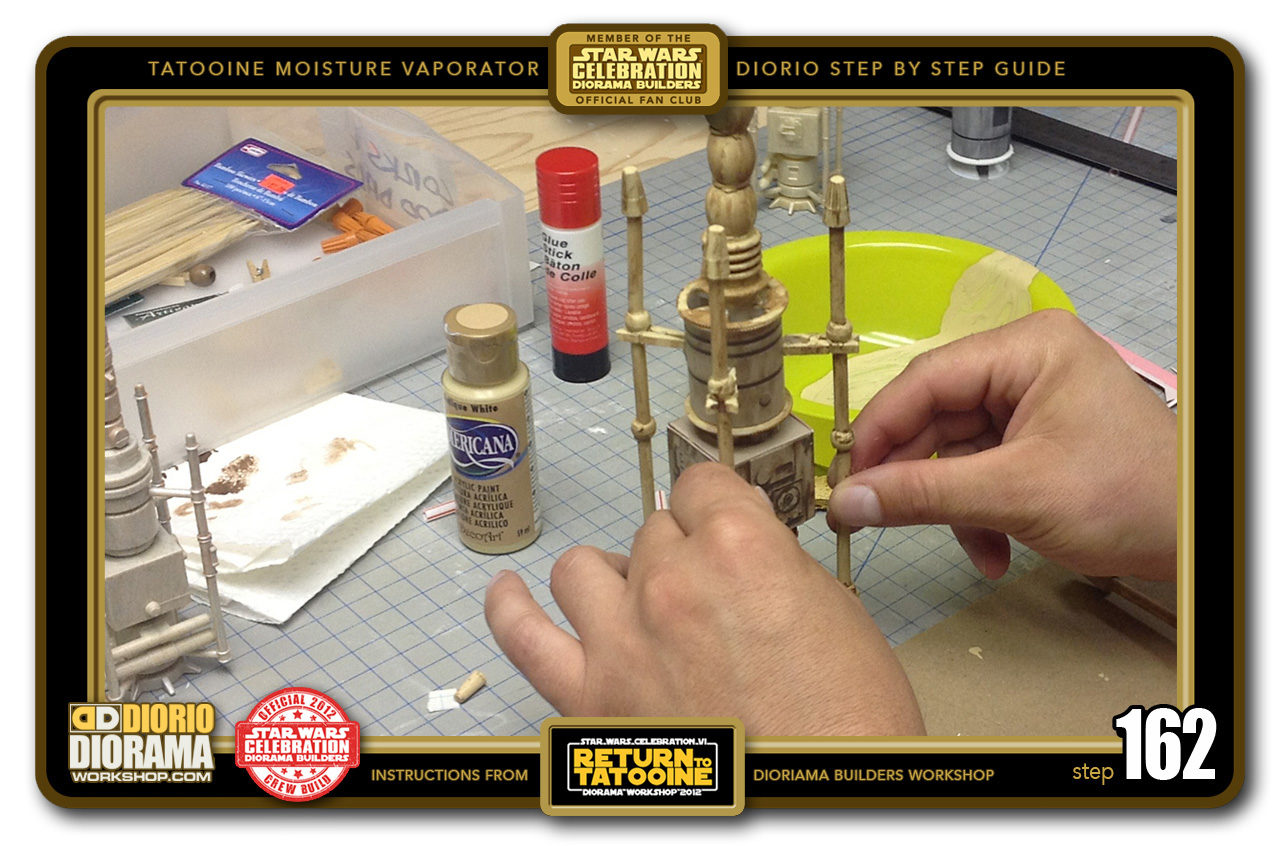
- STEP 162 > Carefully align, press and hold the pole in place for a few seconds until the hot glue cools down.
-
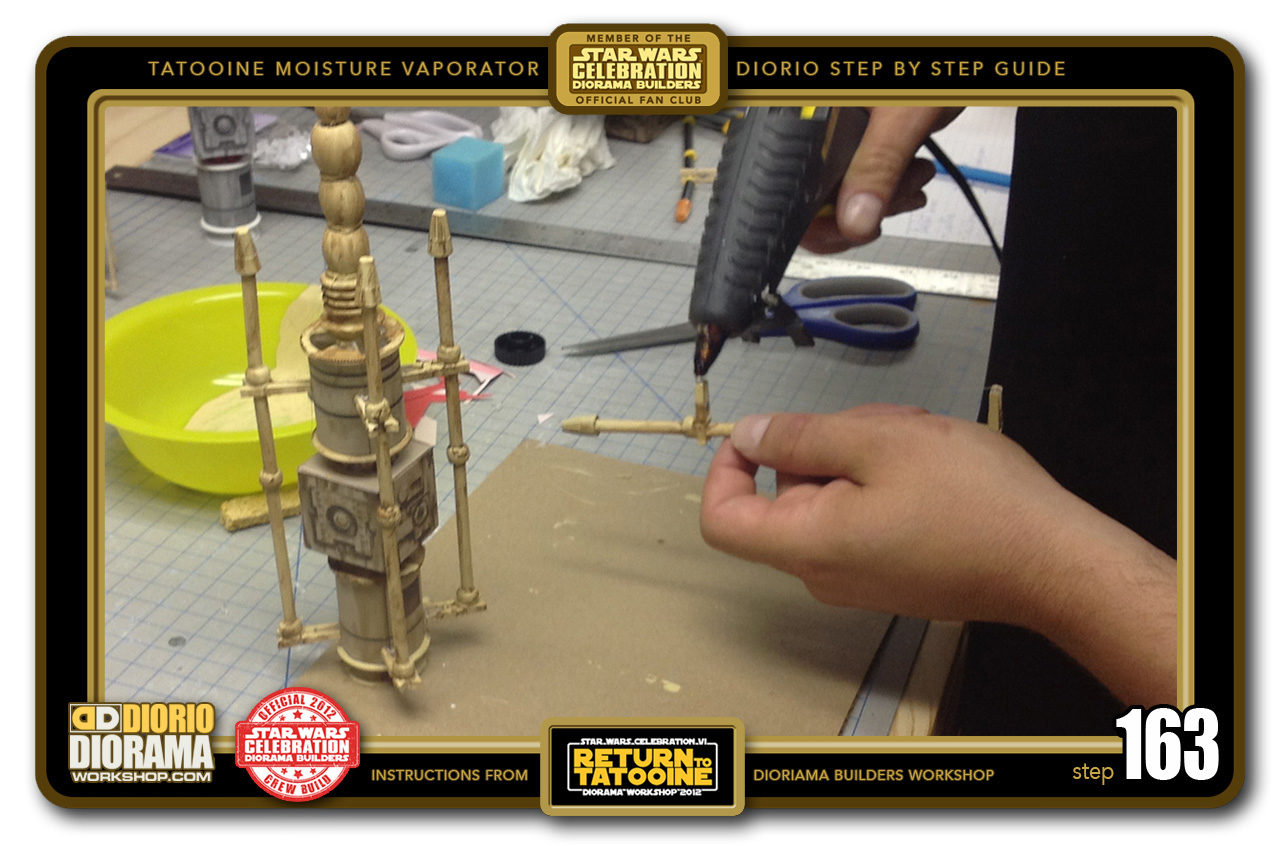
- STEP 163 > Take your last pole and put your hot glue dabs on.
-
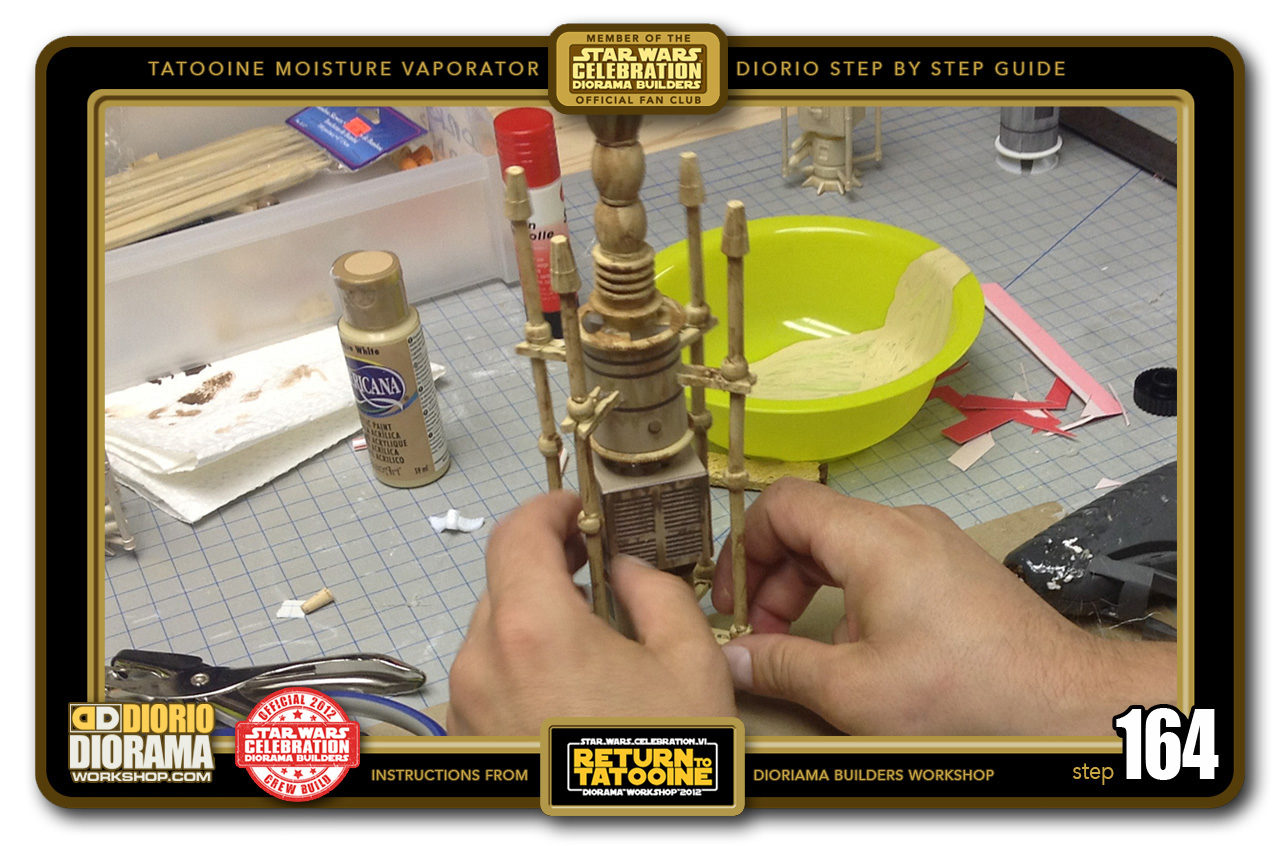
- STEP 164 > Align and press into position, hold for a few minutes until the hot glue cools down.
-
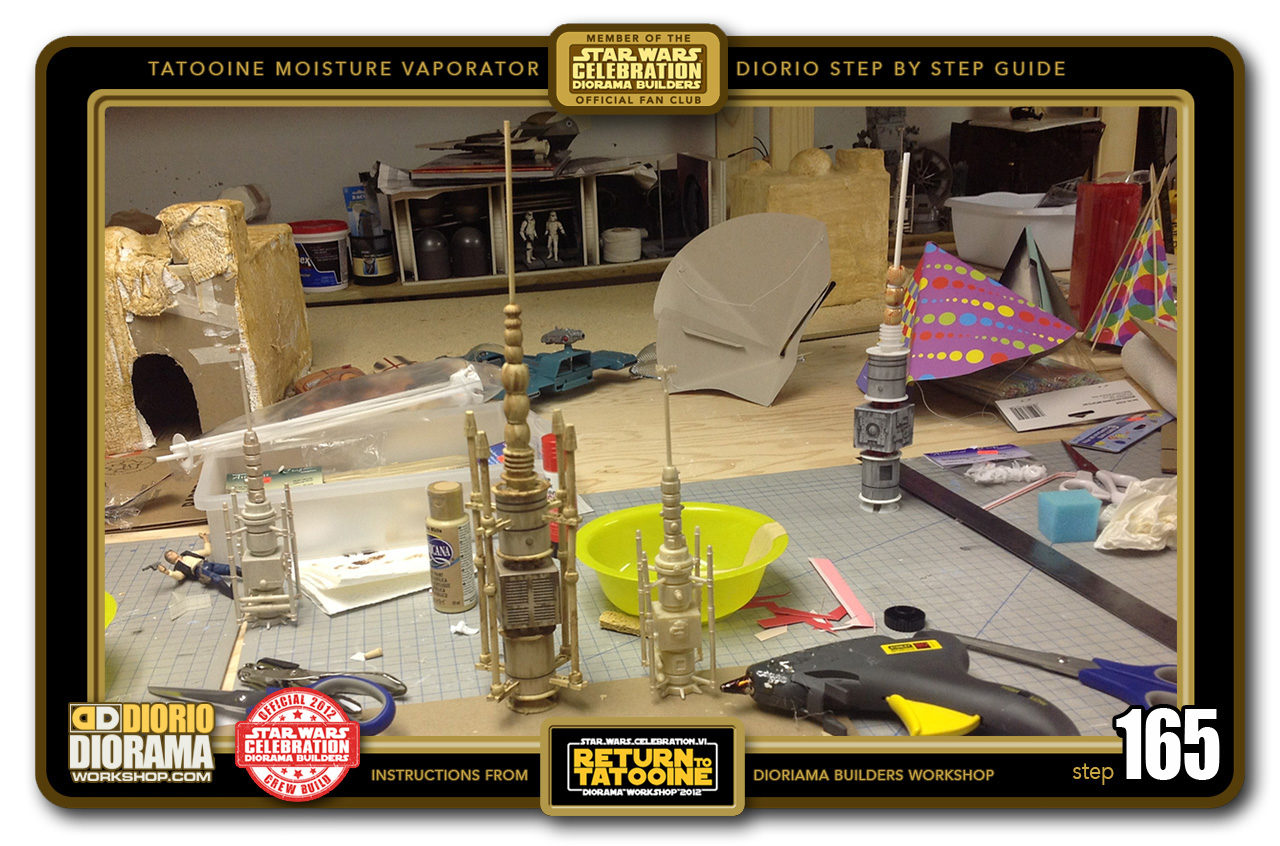
- STEP 165 > The poles are installed, we are almost done. Which do you prefer ? The one you made of the hasbro too small version 😛
-
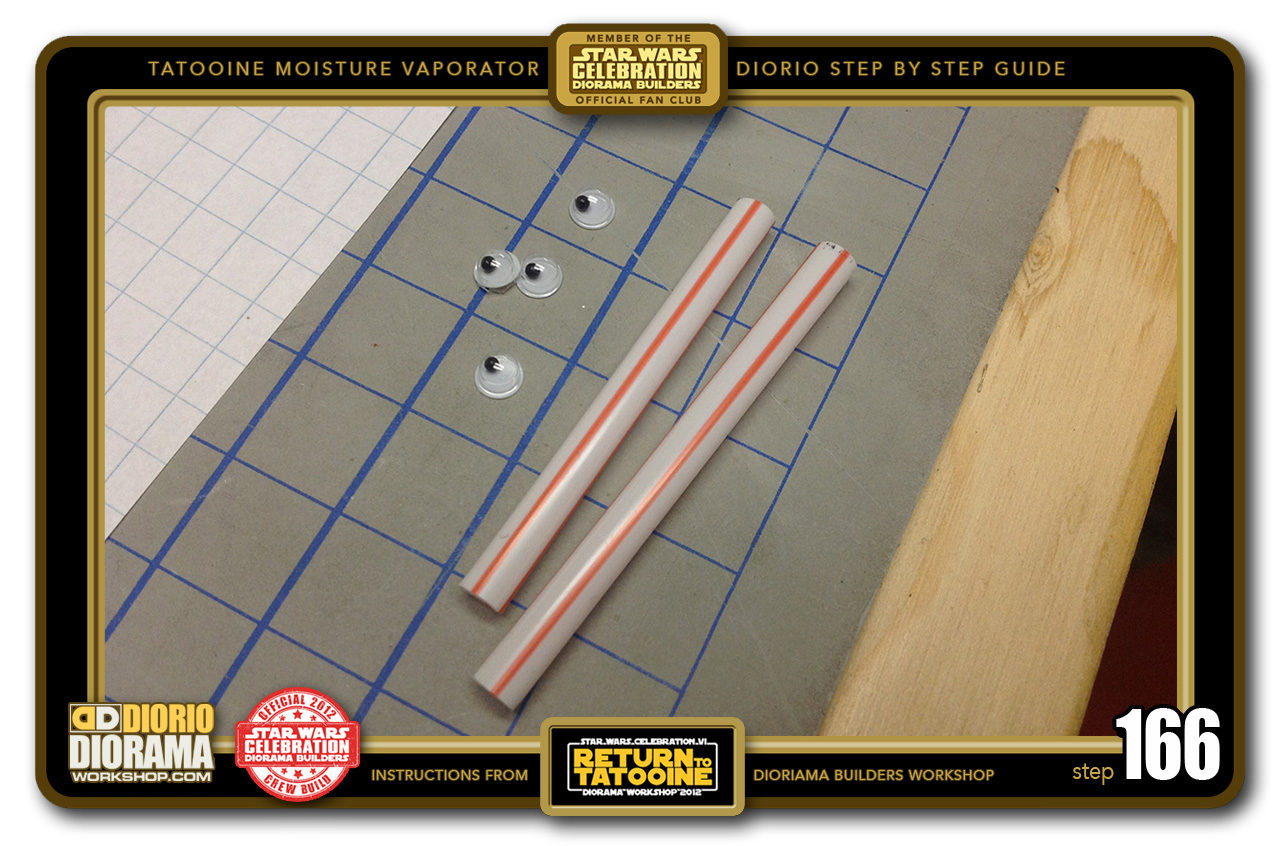
- STEP 166 > One of the last details to make this movie accurate are the 2 horizontal pipes that go in front of one of the center cube sides. Take a straw and cut them 6 cm lengths. Also need 4 mini caps. I used googly eyes 🙂
-
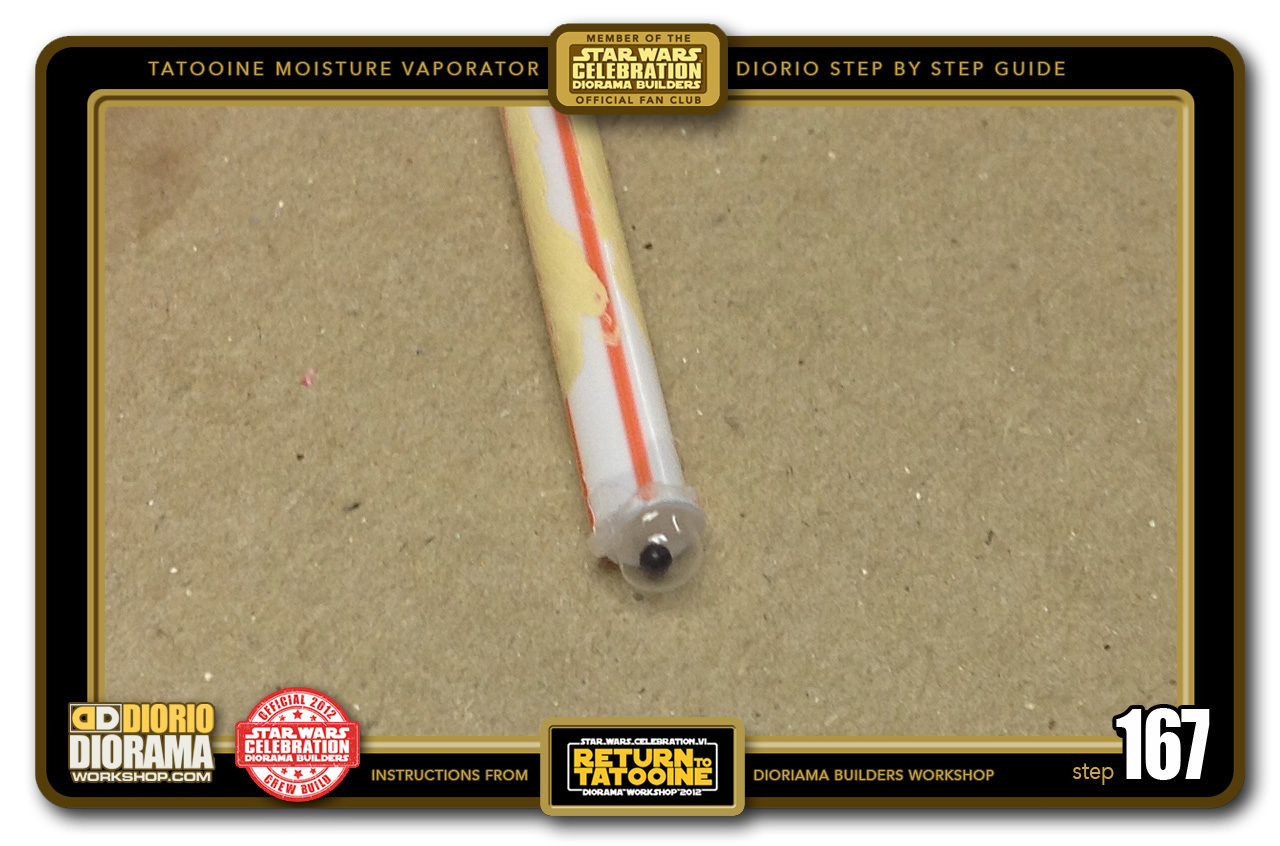
- STEP 167 > Hot glue a googly eye to the tips of your straws.
-
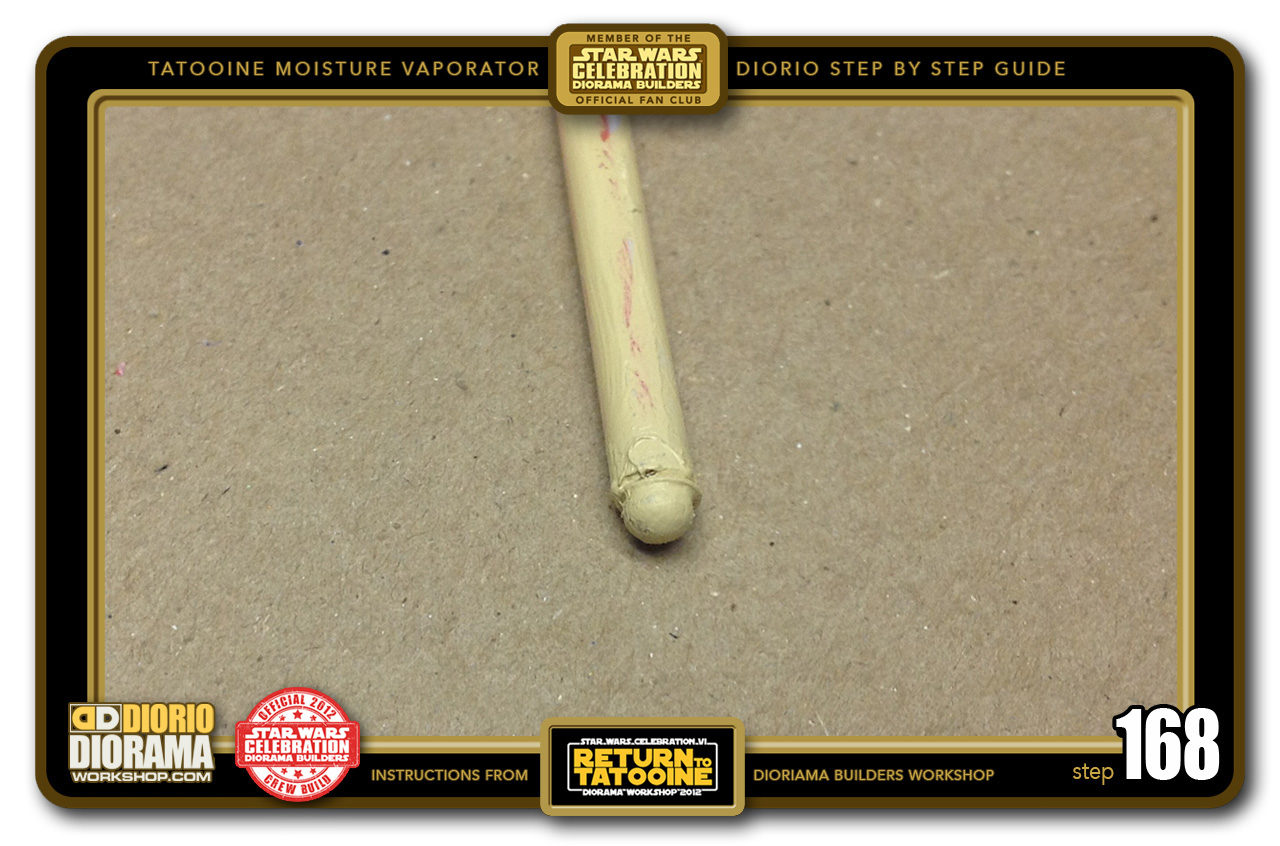
- STEP 168 > When you paint them it looks like one pipe beam. Remember tan paint first and dirty dark brown after.
-
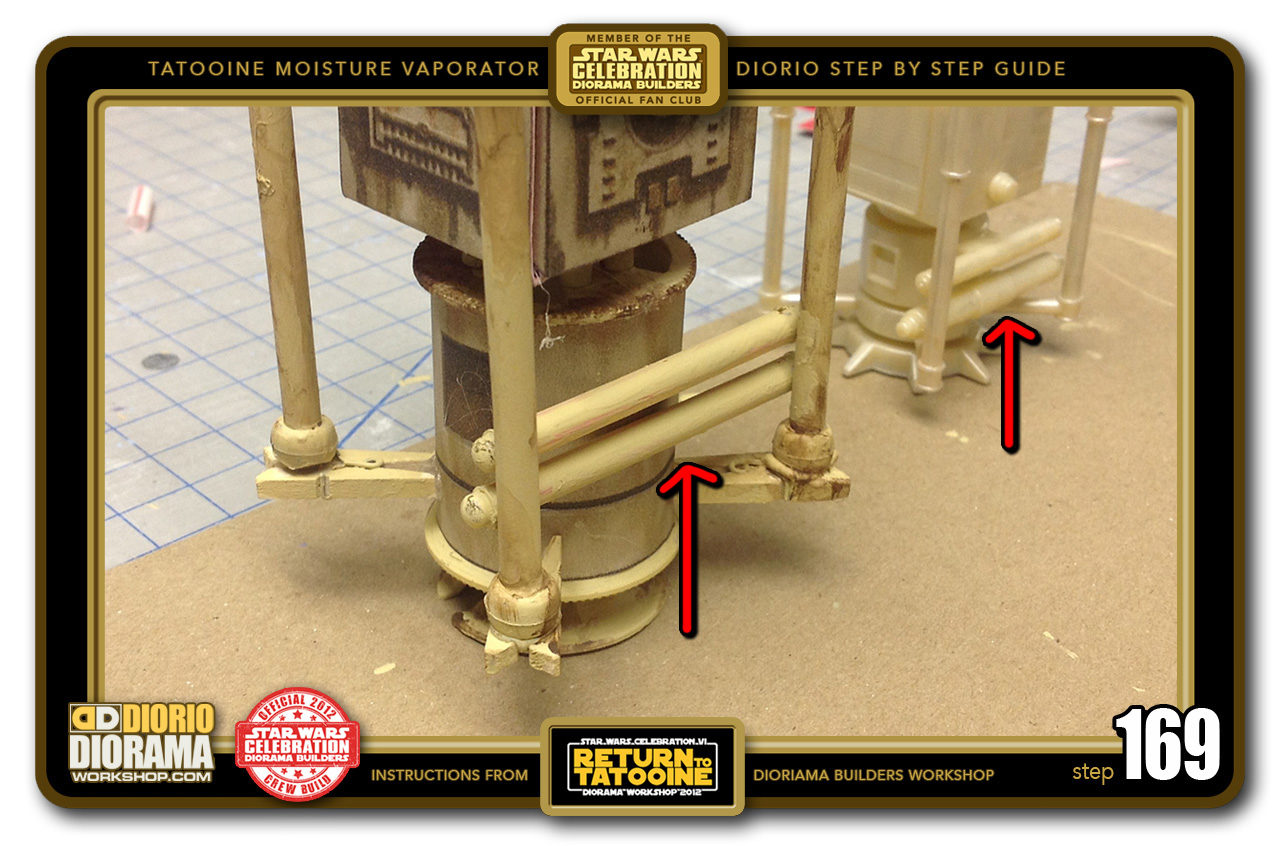
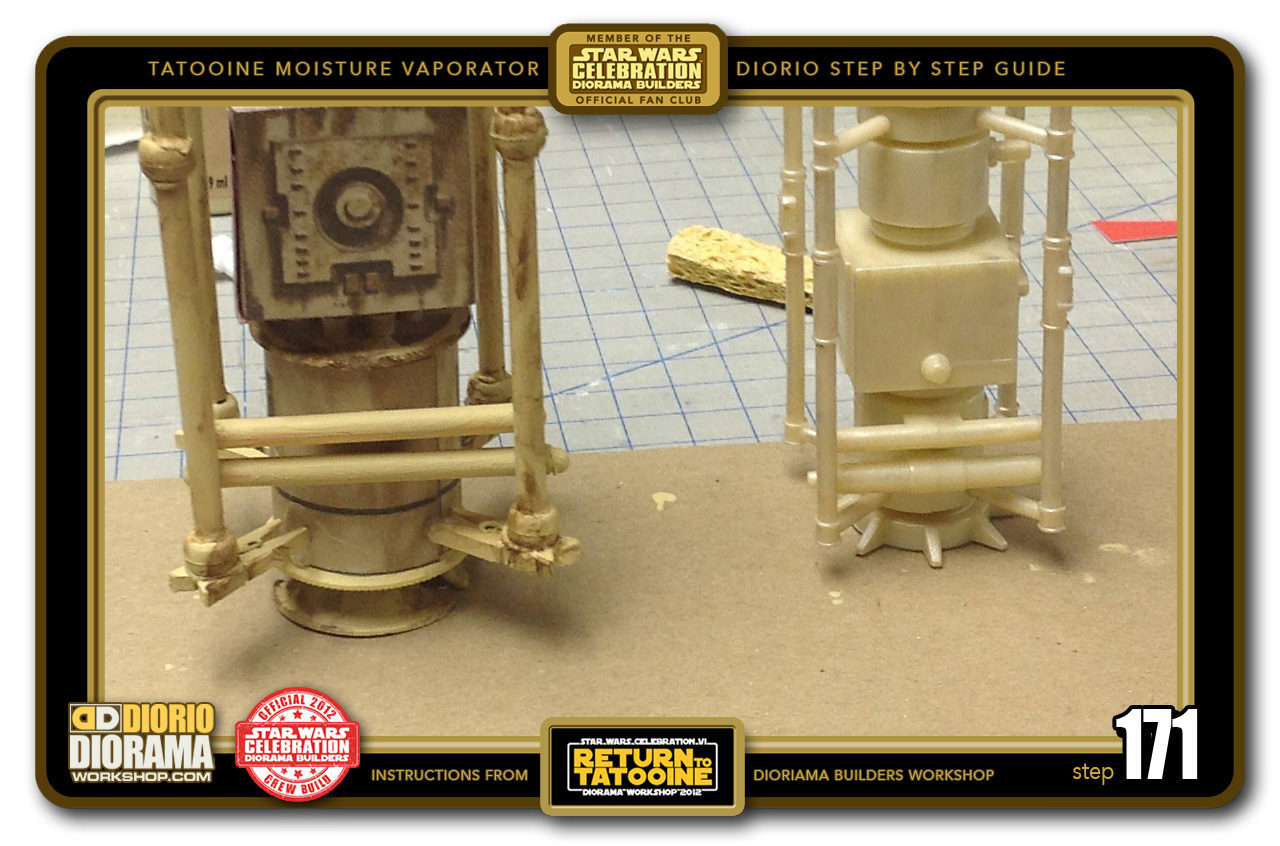
- STEP 169 > See how our pipes are placed just like the Hasbro version. These pipes don't really need hot glue to keep in place unless you really want to.
-
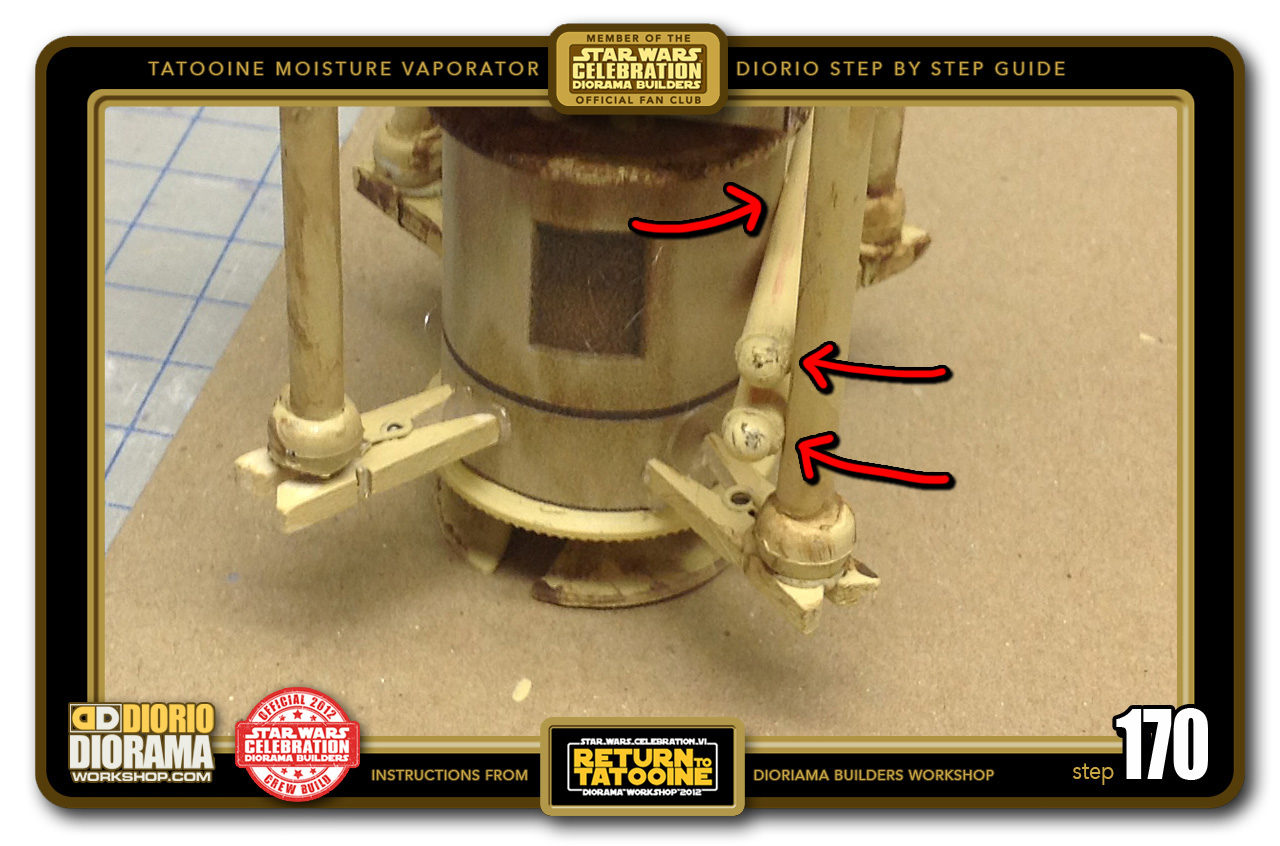
- STEP 170 > The pressure from the spool and the 2 poles keep the straw beams in place all by themselves.
-
- STEP 171 > Slide them up and down until they match the photo, just slightly off the center of the spool.
-
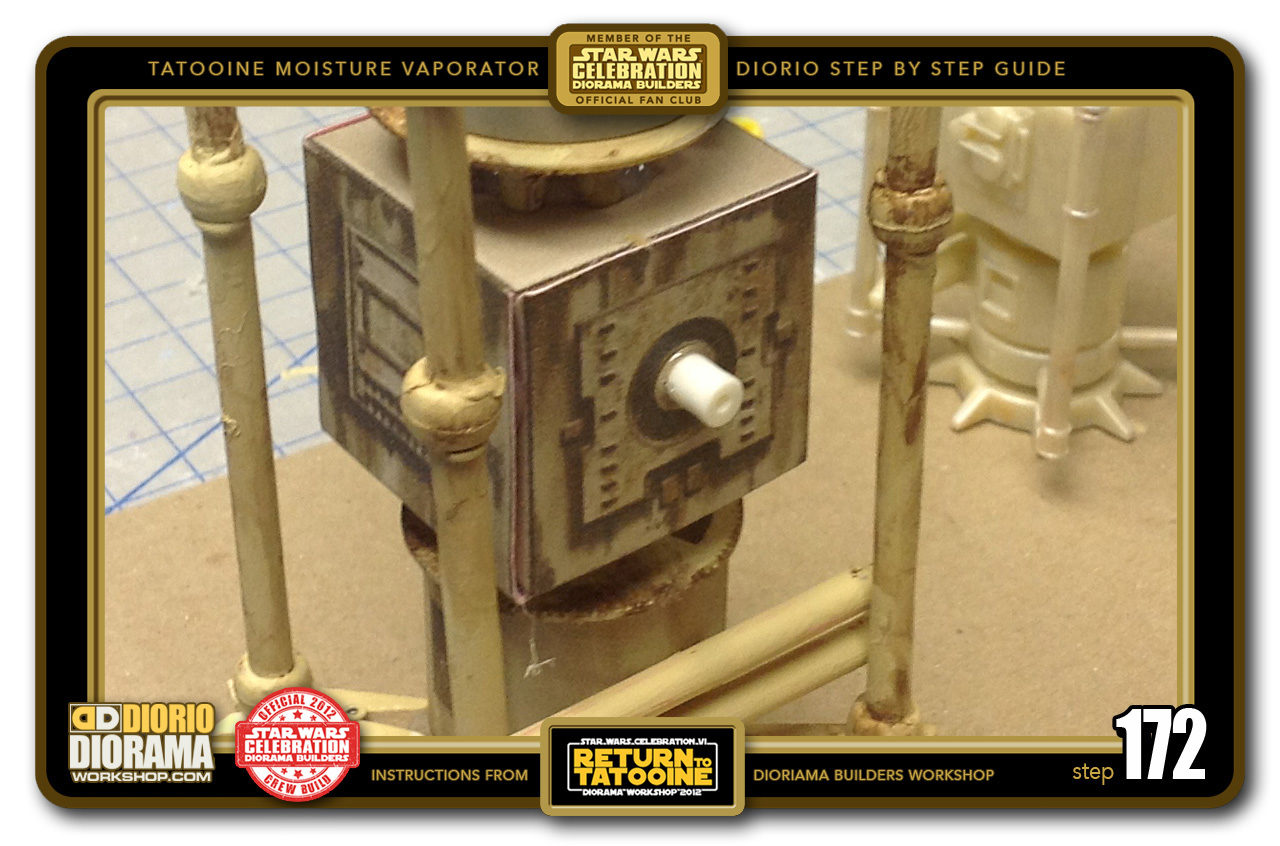
- STEP 172 > This is optional but I included extra little beads to glue onto the center cube to give it a little bit of 3D extrusion vs just flat decal. Paint it tan and dirty after.
-
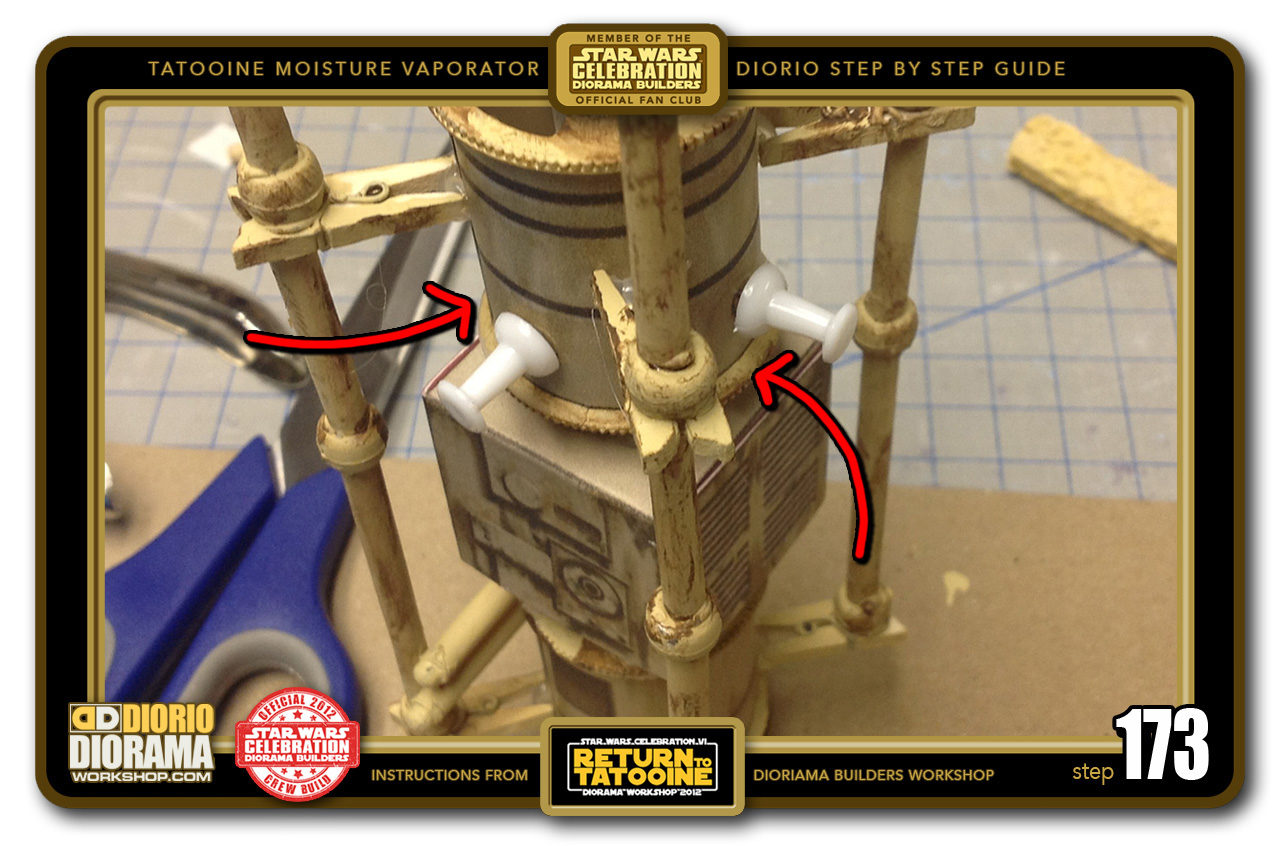
- STEP 173 > The Moisture Vaporators also have little hoses or such so I stuck 2 push pins into the top spool. Make sure to paint and dirty any extras you glue or press on.
-
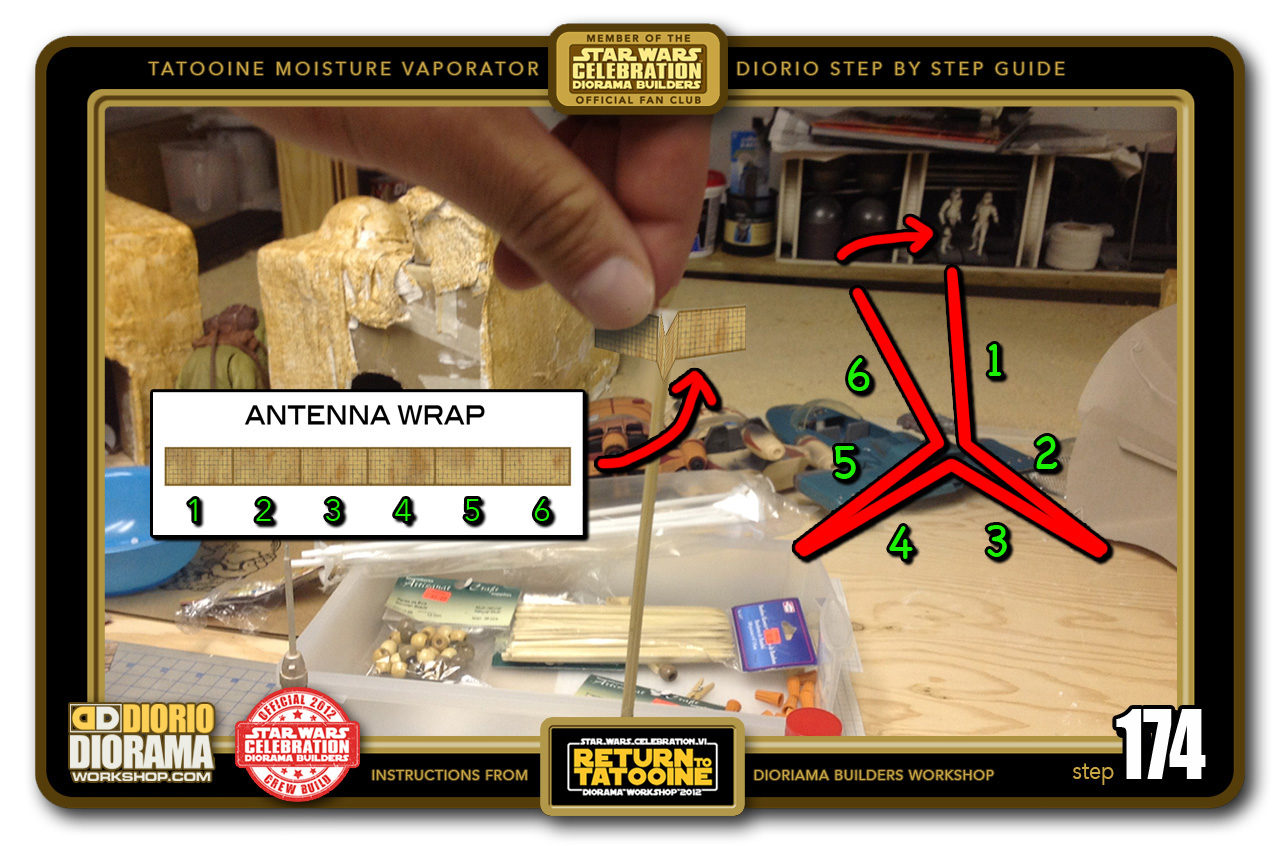
- STEP 174 > Last is the antennae weather vane. Cut the shape from your decal print and fold it onto itself to form a 3 point vane. Put gluestick on the back, fold and press each 2 edges together with your fingers to make the 2 paper thickness look like 1. Pressing side 6 onto side 1 will seal the decal to the tip of your kebob stick.
-
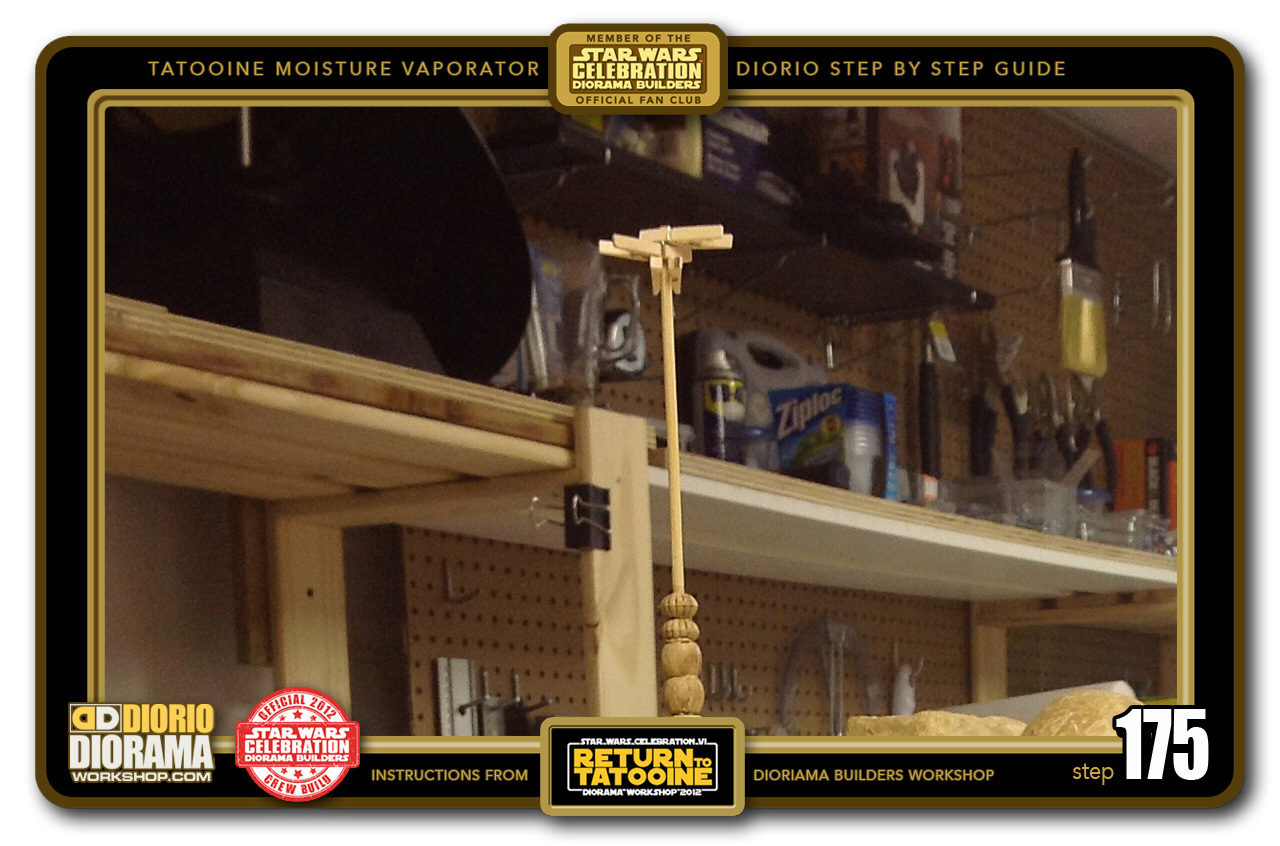
- STEP 175 > if you prefer a 3D look, you can hot glue 3 miniature clothes pins to the tip of the antennae as well.
-
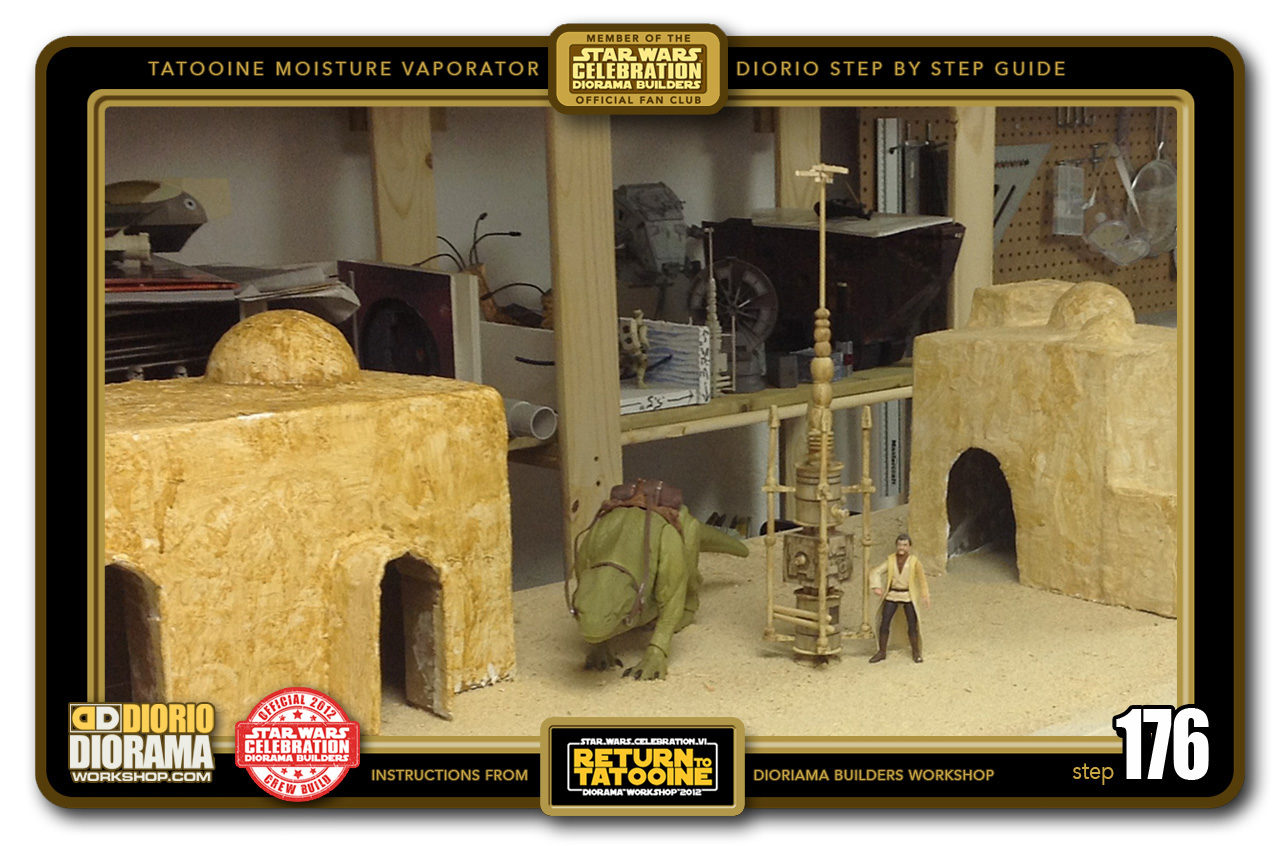
- STEP 176 > There you have it, you have a really cool hand made Moisture Vaporator, just like the fans built in Orlando 2012, at our Star Wars Celebration VI Diorama Builders workshop.
-
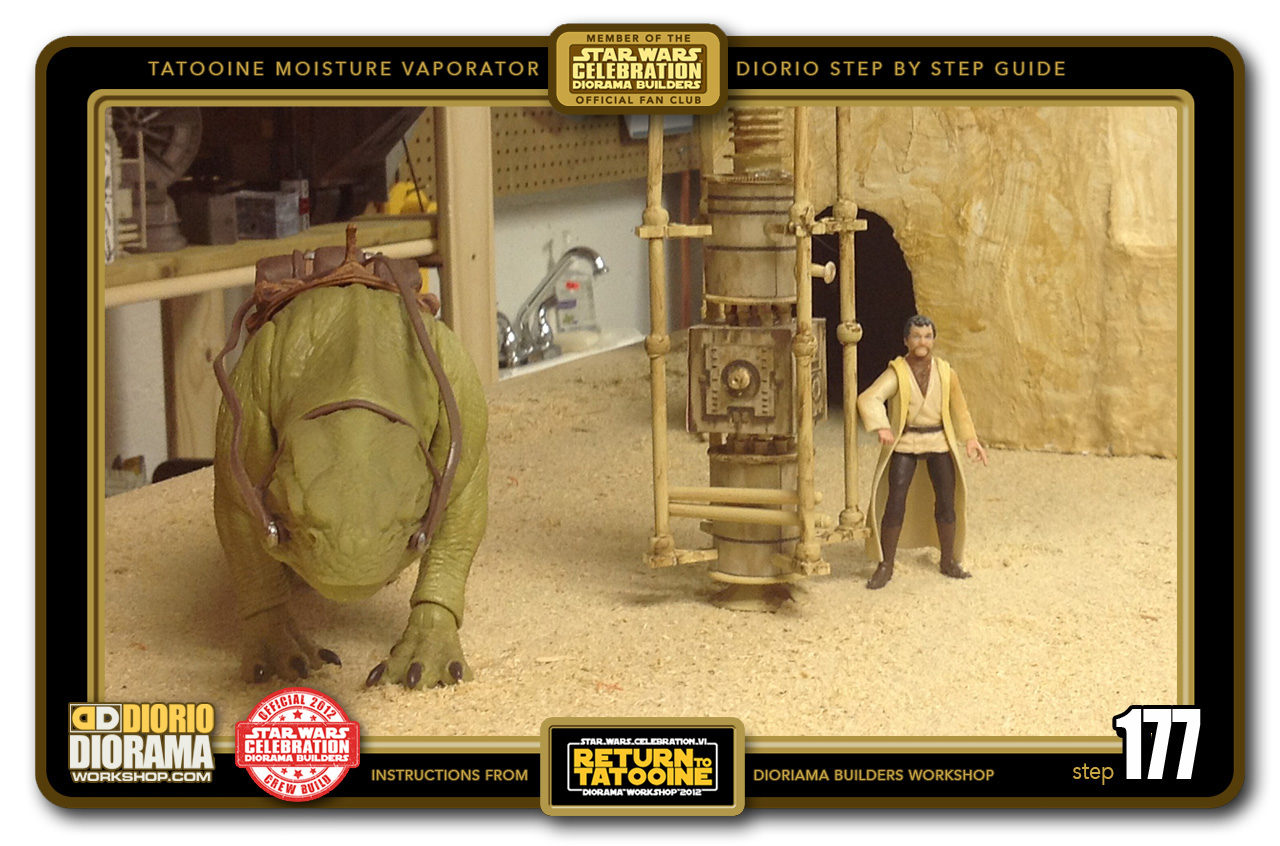
- STEP 177 > All you need now is some sand, sawdust, some buildings, action figures to dress it all up like in the movie and your diorama turns into a movie set :).

.
Did you already build this Diorama ? At home or at our Star Wars Celebration Diorama Builders workshop ? Would you like to show it in the site’s GALLERY VISITORS DIORAMAS section, YES ? That is Awesome !!! You can find out all the details on how to email me your photos on the VISITORS SUBMISSIONS INFO page … When I get your photos, I will create your very own page just like this one. You may not realize it but work does inspire others to join in the fun of making Action Figure Dioramas.
.
NOT FOR RESALE ALL Decals, tutorials and artwork are ©FrankDiorio (dioramaworkshop.com) and offered FOR FREE to the fans – that would be you ? so you can build and display my diorama designs in your very own home. I realize I cannot control what one does with my graphics once I place them on the web, I can only ask you as one fan to another, please respect the artist and do not be that jerk who uses my designs and tutorials to build a copy of my work only to sell it on EBAY or trade/sale groups and forums. Thank You. Frank.
![]() Catch up with fellow visitors and exchange stories, read cool interviews with the crew, exchange photos, fun surprises and grab some FAN ONLY merchandise next year at actual future conventions ?
Catch up with fellow visitors and exchange stories, read cool interviews with the crew, exchange photos, fun surprises and grab some FAN ONLY merchandise next year at actual future conventions ?
.
©2018 Frank Diorio DioramaWorkshop.Com
.
IF YOU LIKE WHAT YOU SEE, PLEASE SHARE WITH YOUR FRIENDS
USING THE SOCIAL MEDIA BUTTONS BELOW