


-
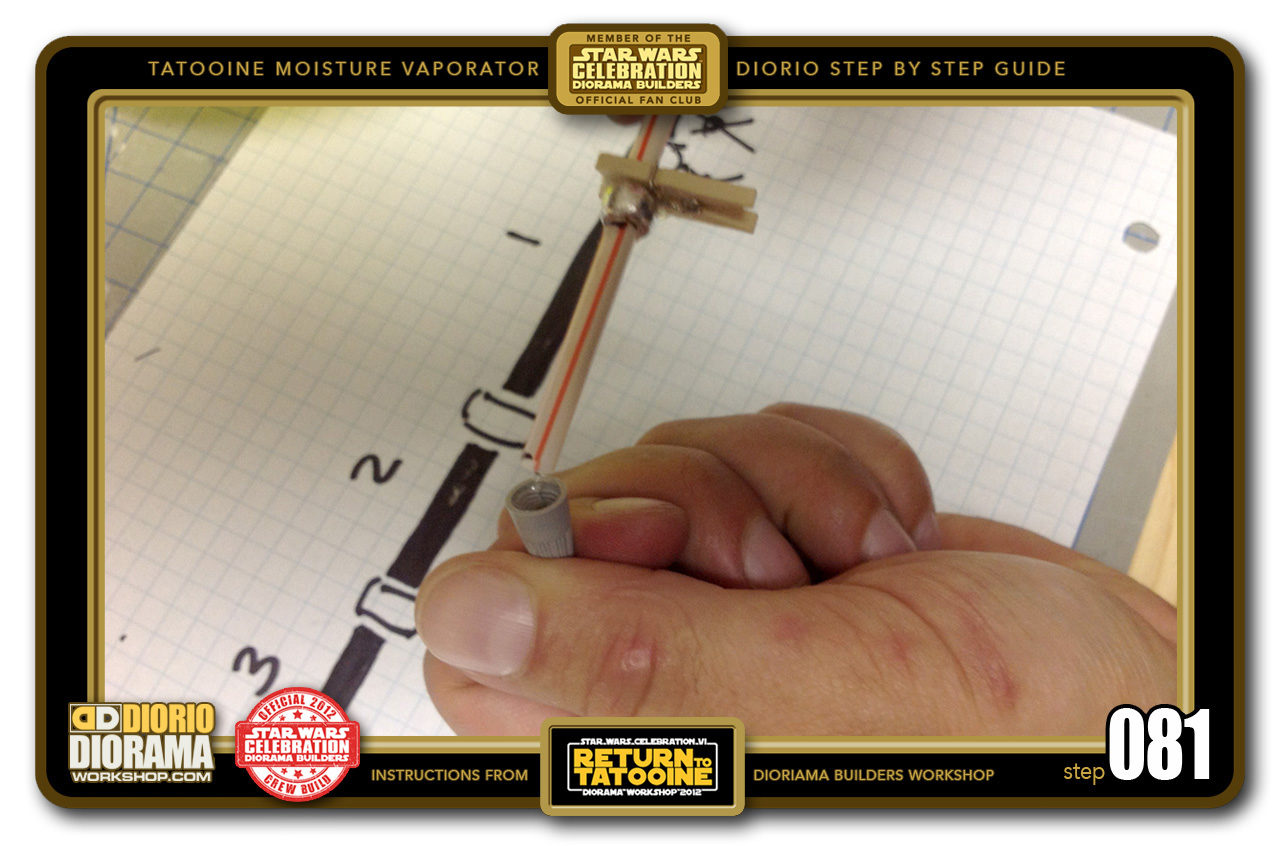
- STEP 081 > Grab your pole and insert the top straw into the marette cap.
-
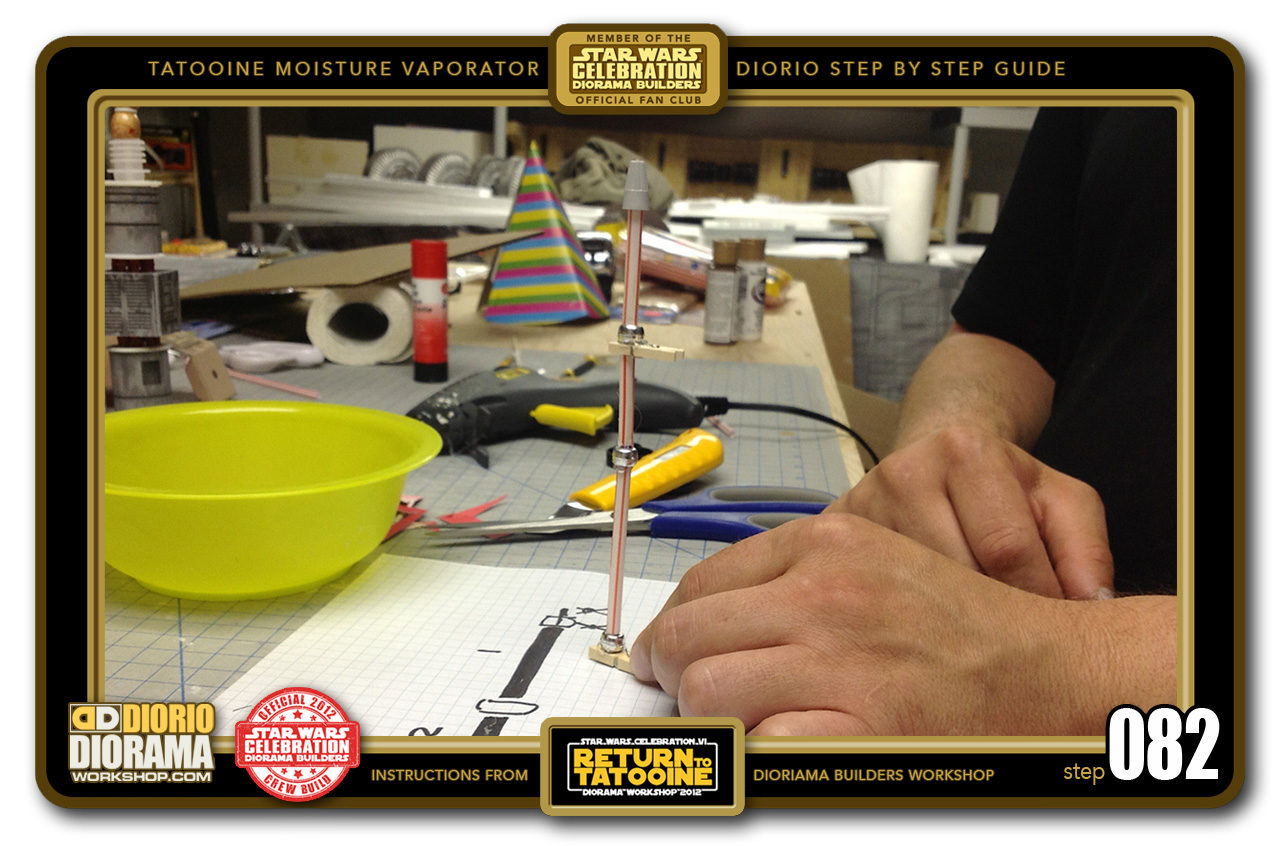
- STEP 082 > Your corner pole is now complete, the assembly that is 🙂 we still have to paint it later.
-
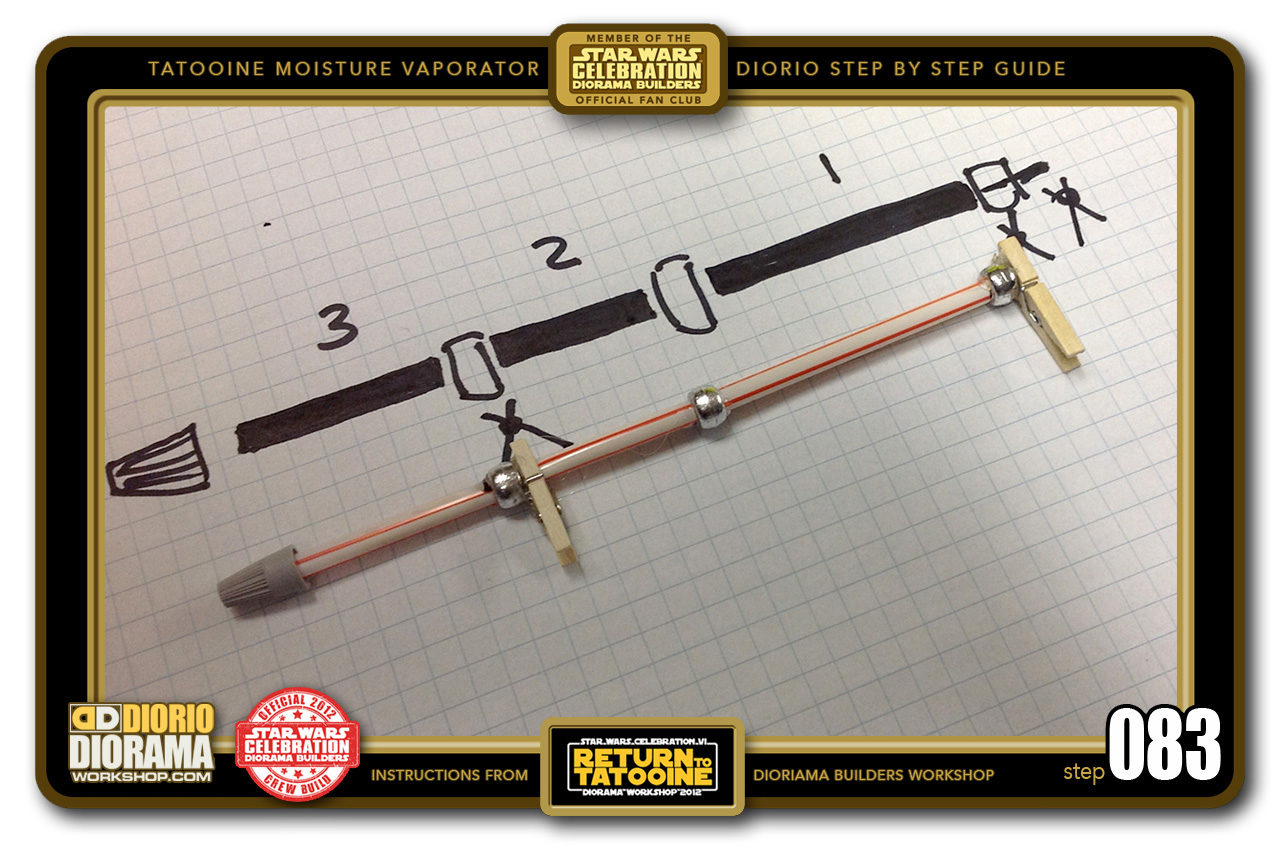
- STEP 083 > If you look at the final assembly on top of the template you can see how it all fits perfectly together.
-
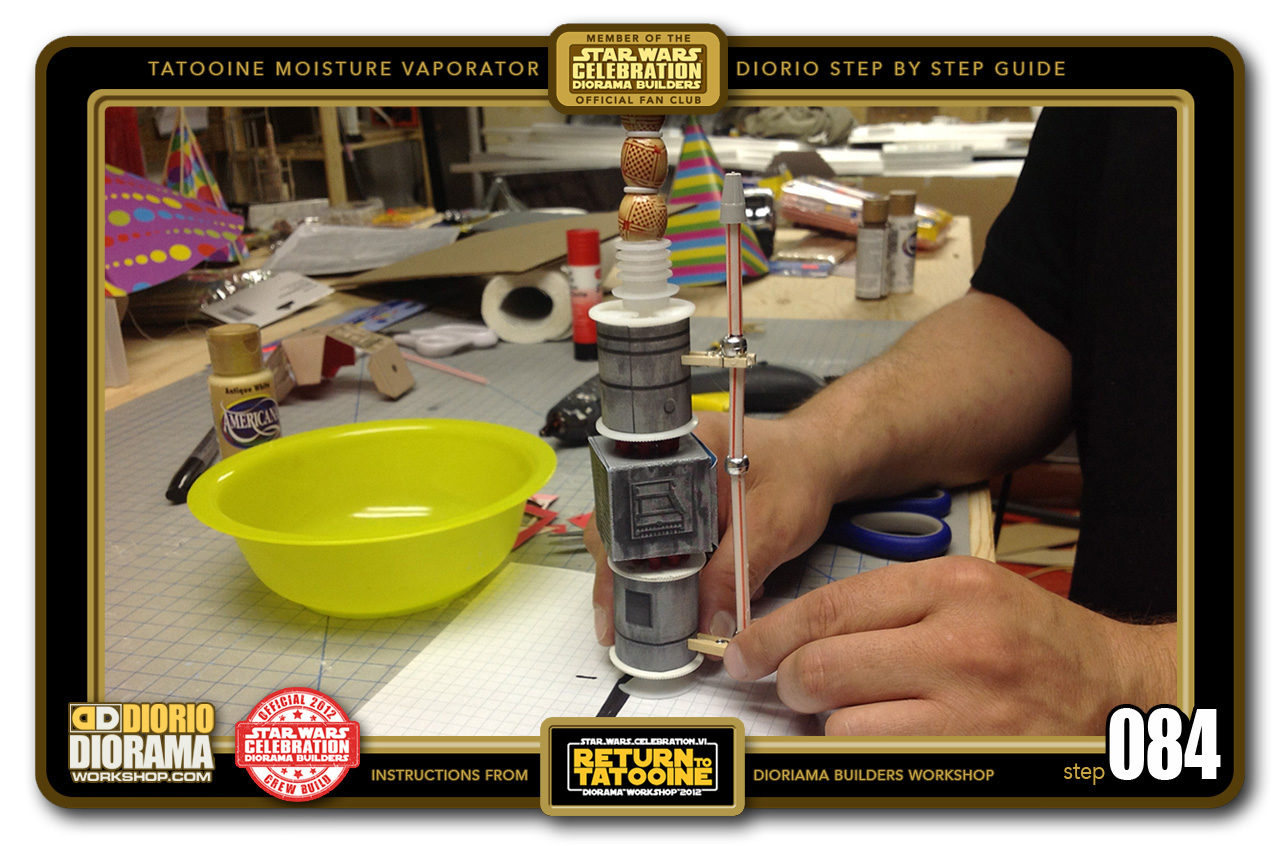
- STEP 084 > Here is a preview of how your pole will attach to the moisture vaporator. You can see here my prototype I buit to figure out the proper scale and measurements.
-
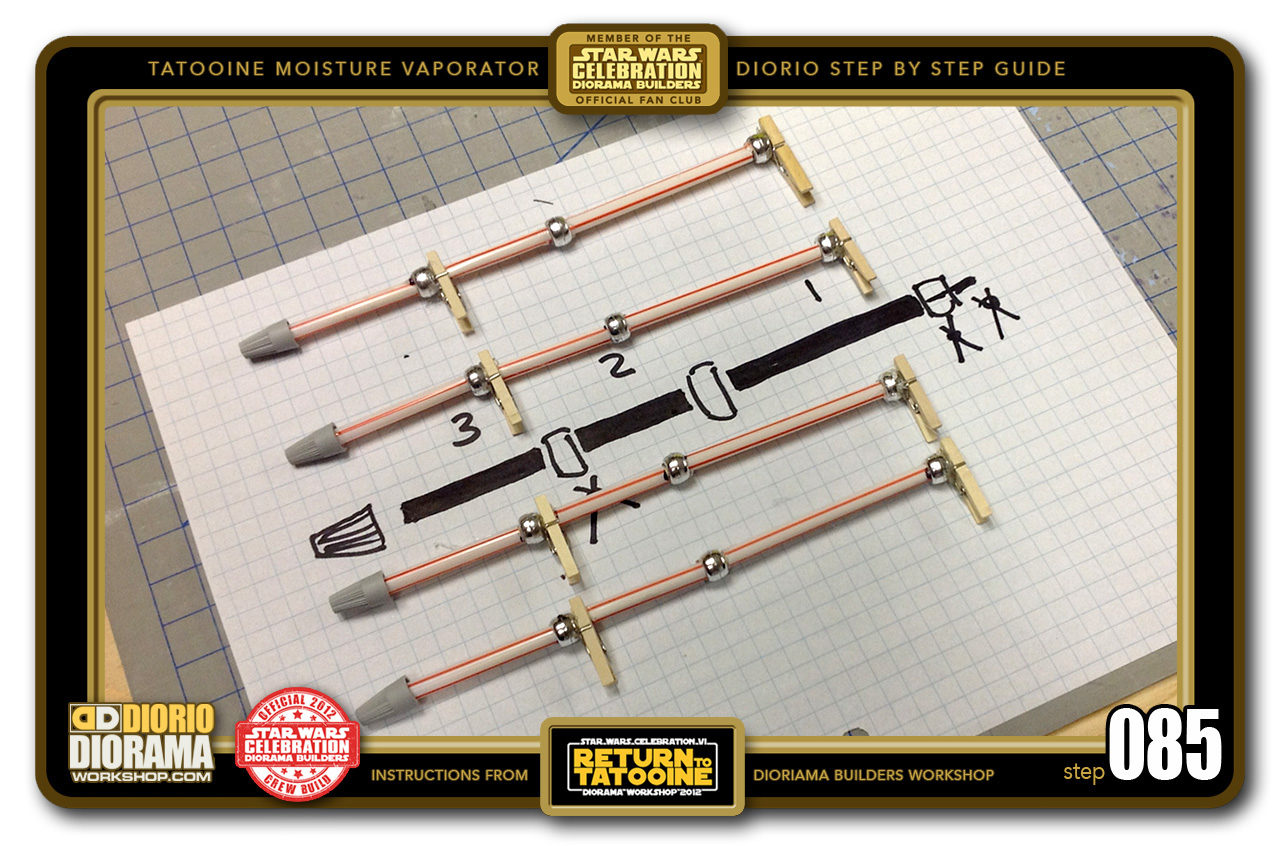
- STEP 085 > Repeat the your pole construction steps 3 more times until you have assembled 4 of them.
-

- STEP 086 > Where we are so far, spool with beads stack, spool with straw and 4 poles.
-
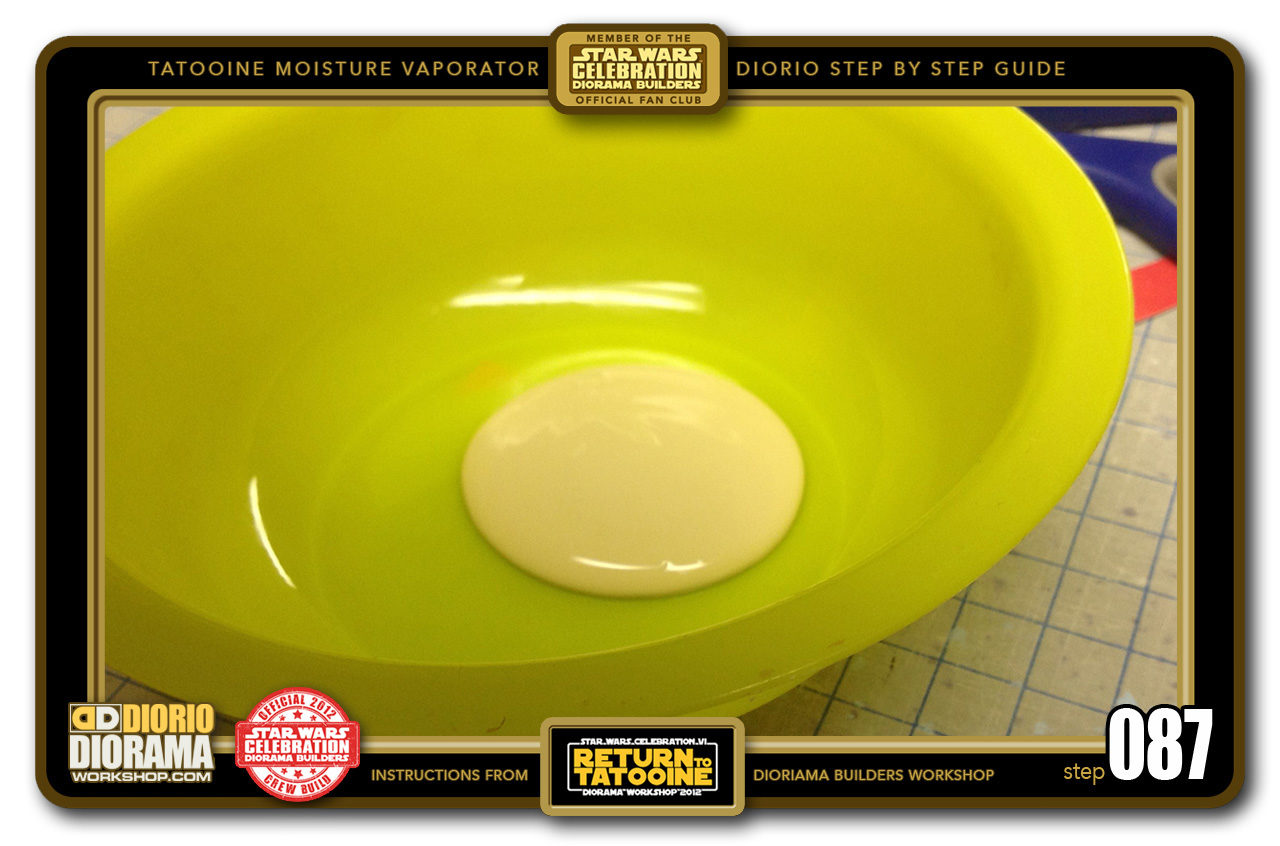
- STEP 087 > Time to paint. Get some tan color latex paint. I bought mine at the dollar store for 2$.
-
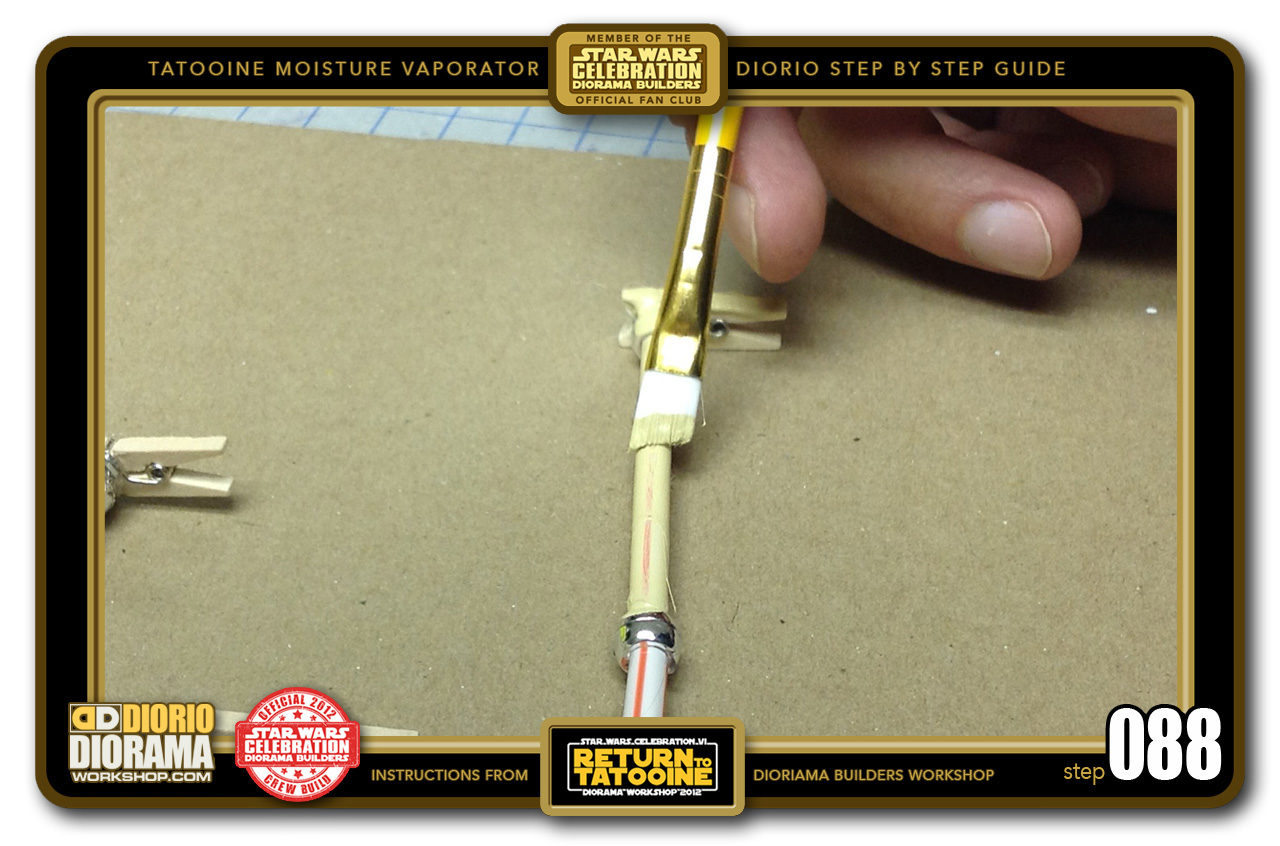
- STEP 088 > With a small brush, paint the entire surface of your poles.
-
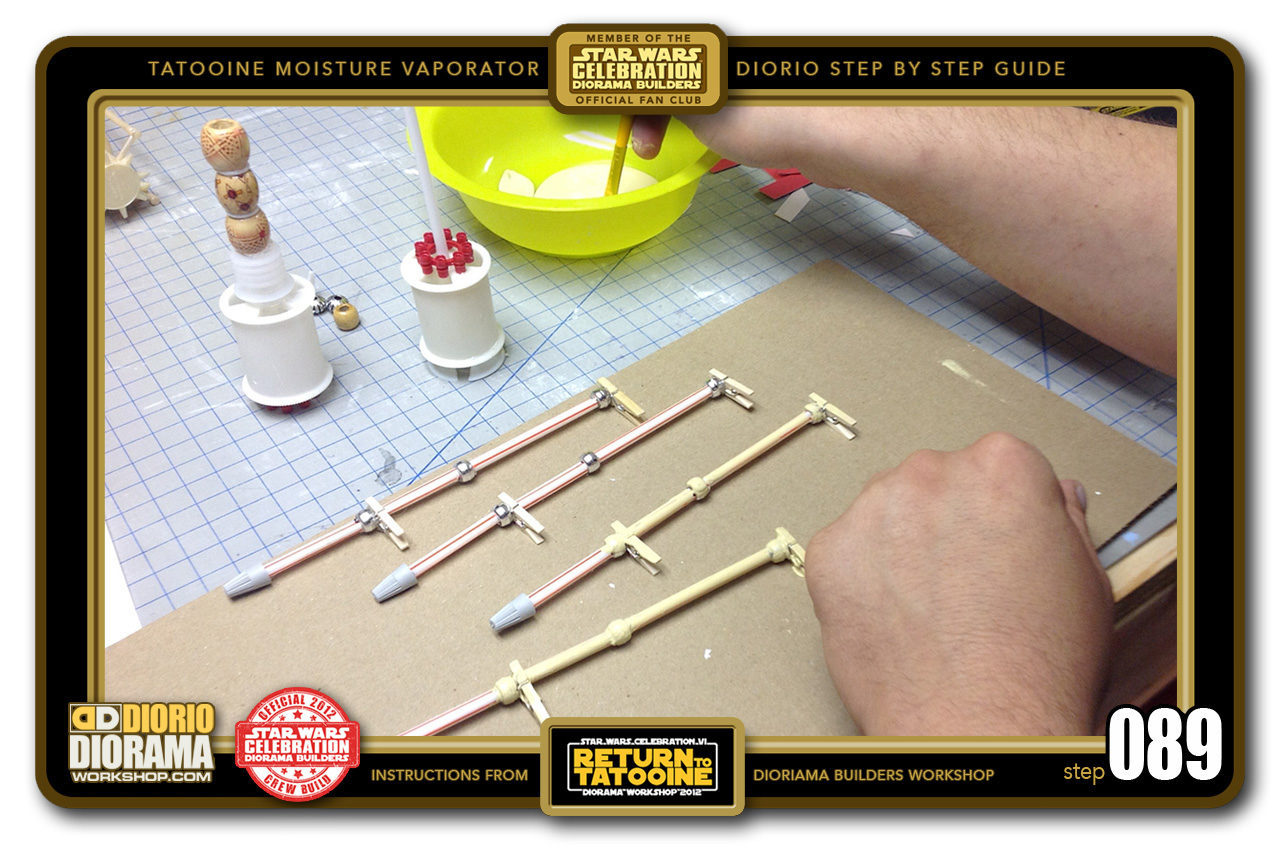
- STEP 089 > You may need to apply more than 1 coat to cover the straws and beads original colors.
-
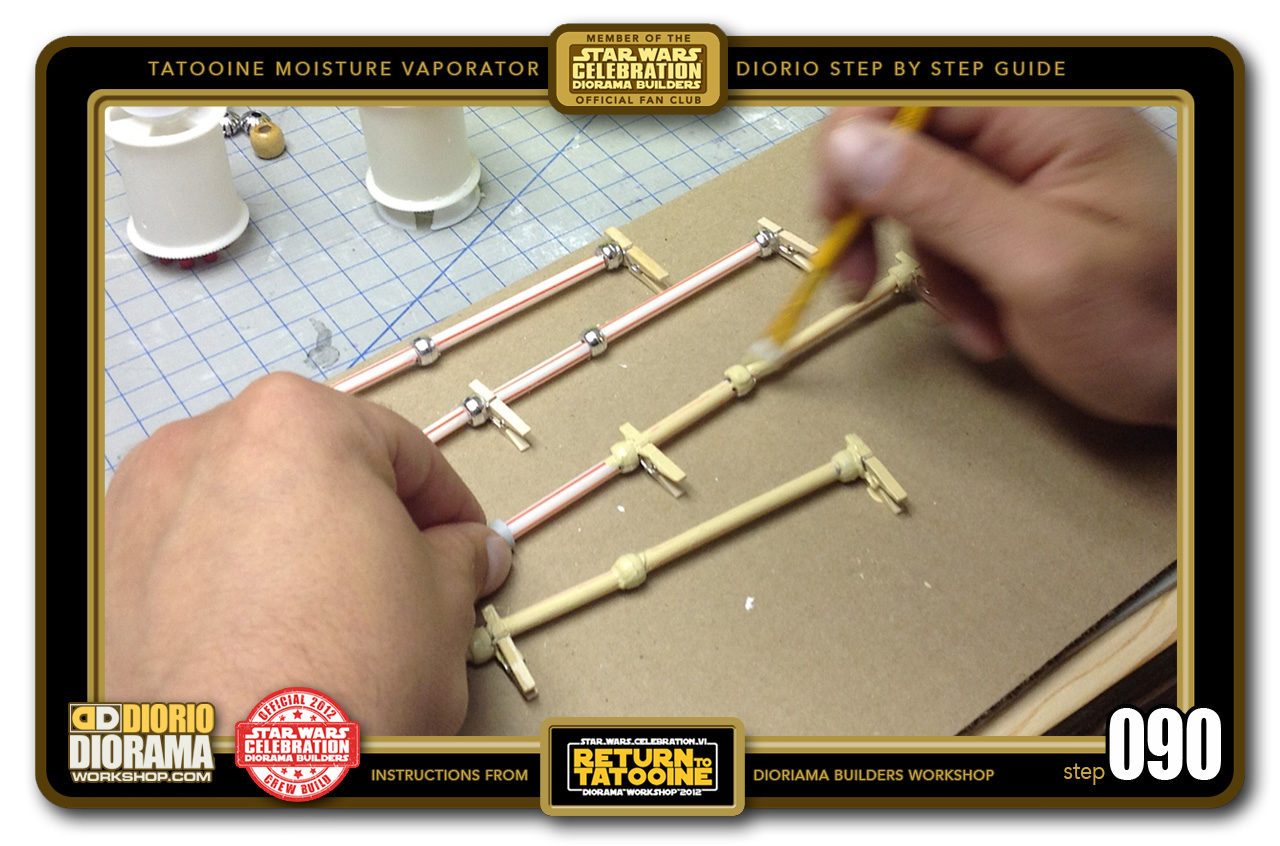
- STEP 090 > After you complete 1 continue with the other 3 until all 4 poles are painted.
-
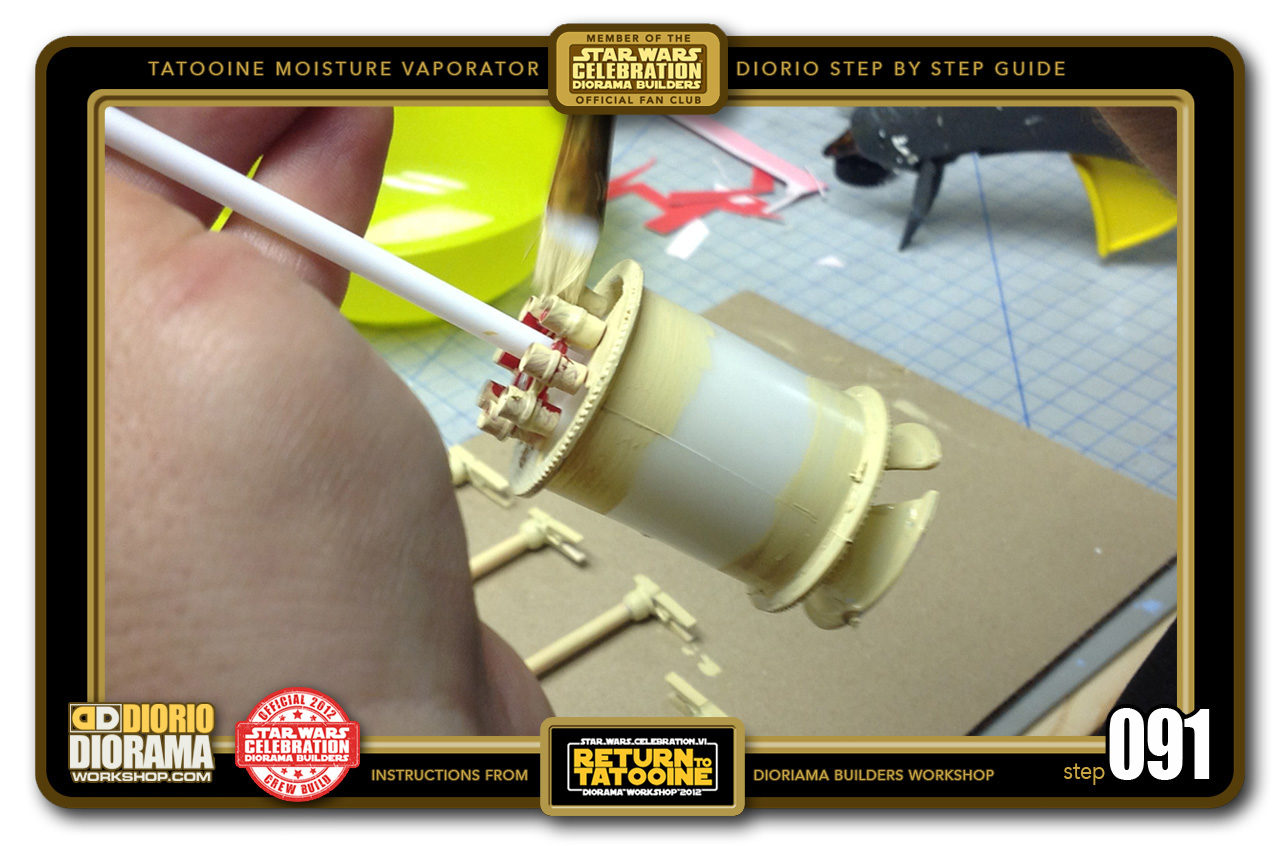
- STEP 091 > Grab your bottom spool and start painting the caps, spool and base. You can pait the entire spool if you want but you really only need the ends as the center will be wrapped with your decals.
-

- STEP 092 > Time to paint your top spool and the beads stack.
-

- STEP 093 > Grab a hole punch and align it to the dot on your cube decal.
-
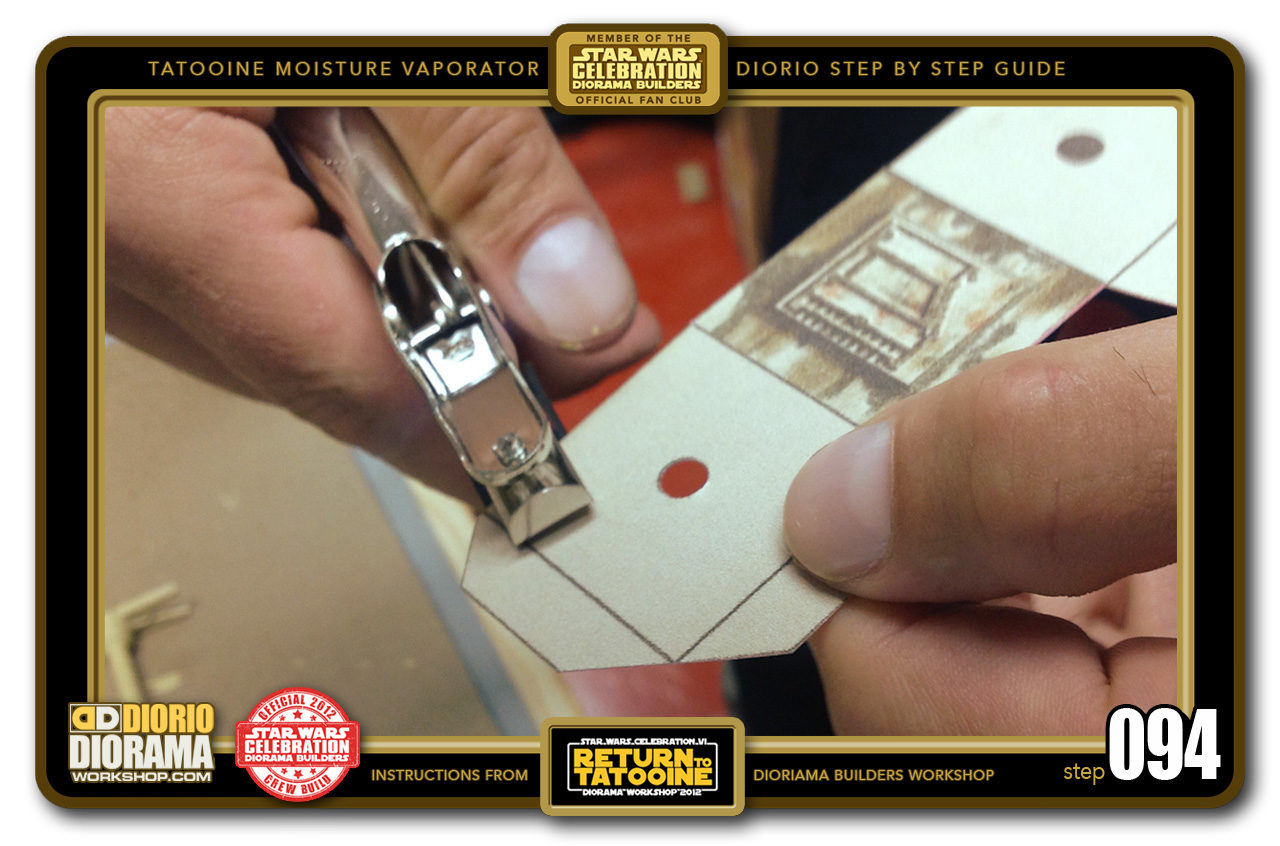
- STEP 094 > You now have a nice hole to pass your straw through later. If you don't have a hole puncher, you can poke the hole with a sharp pencil.
-
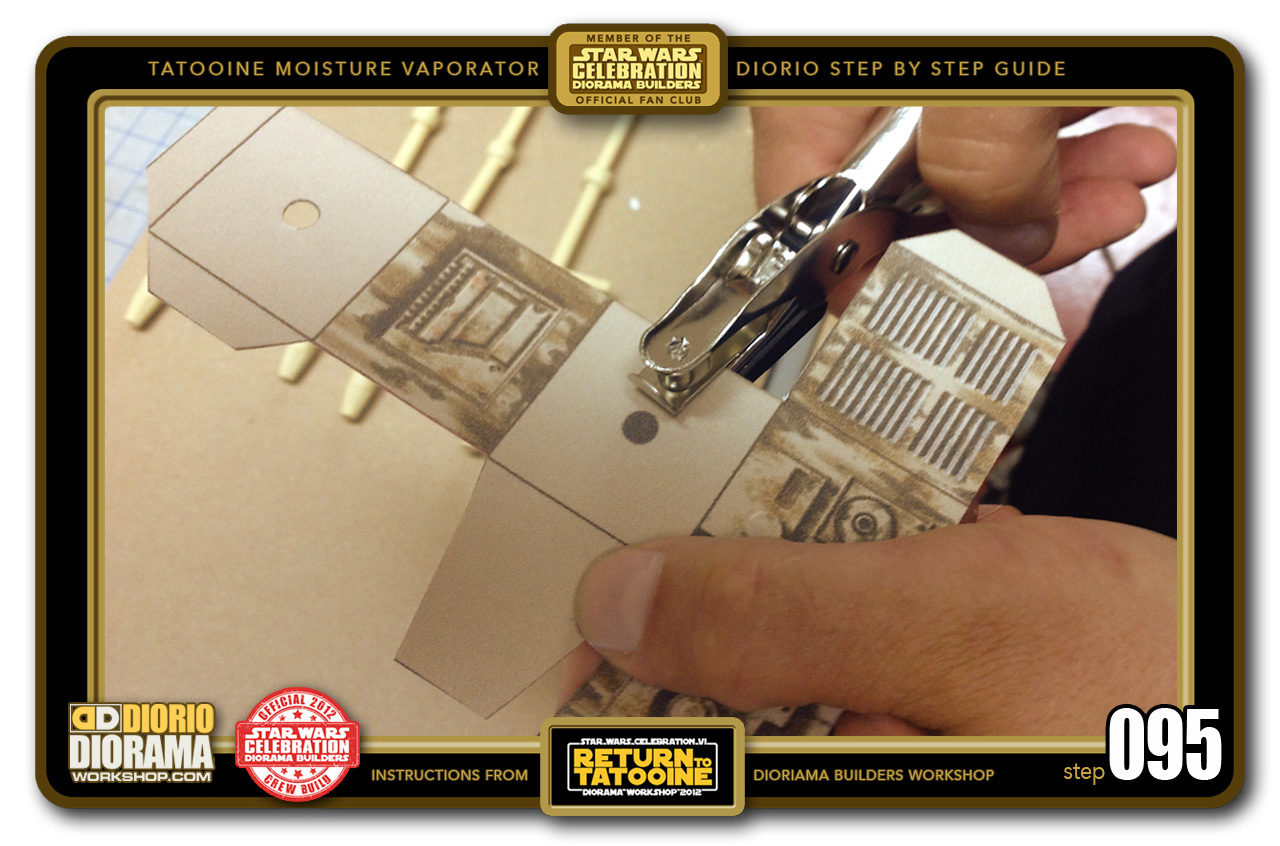
- STEP 095 > Time to punch hole #2. Put your decal aside for now.
-
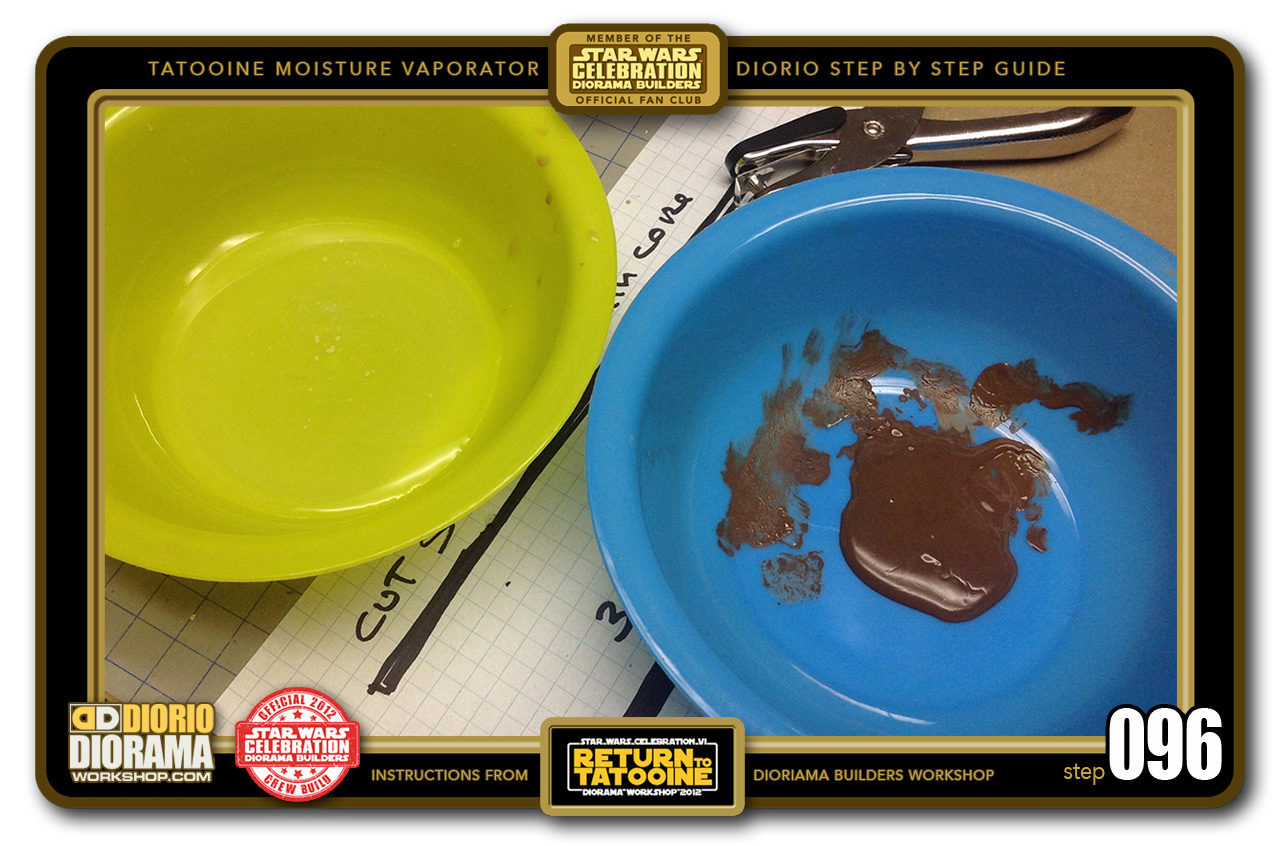
- STEP 096 > Time to make it look dirty 🙂 Put some dark brown latex paint in a small dish and some water in a seperate dish.
-
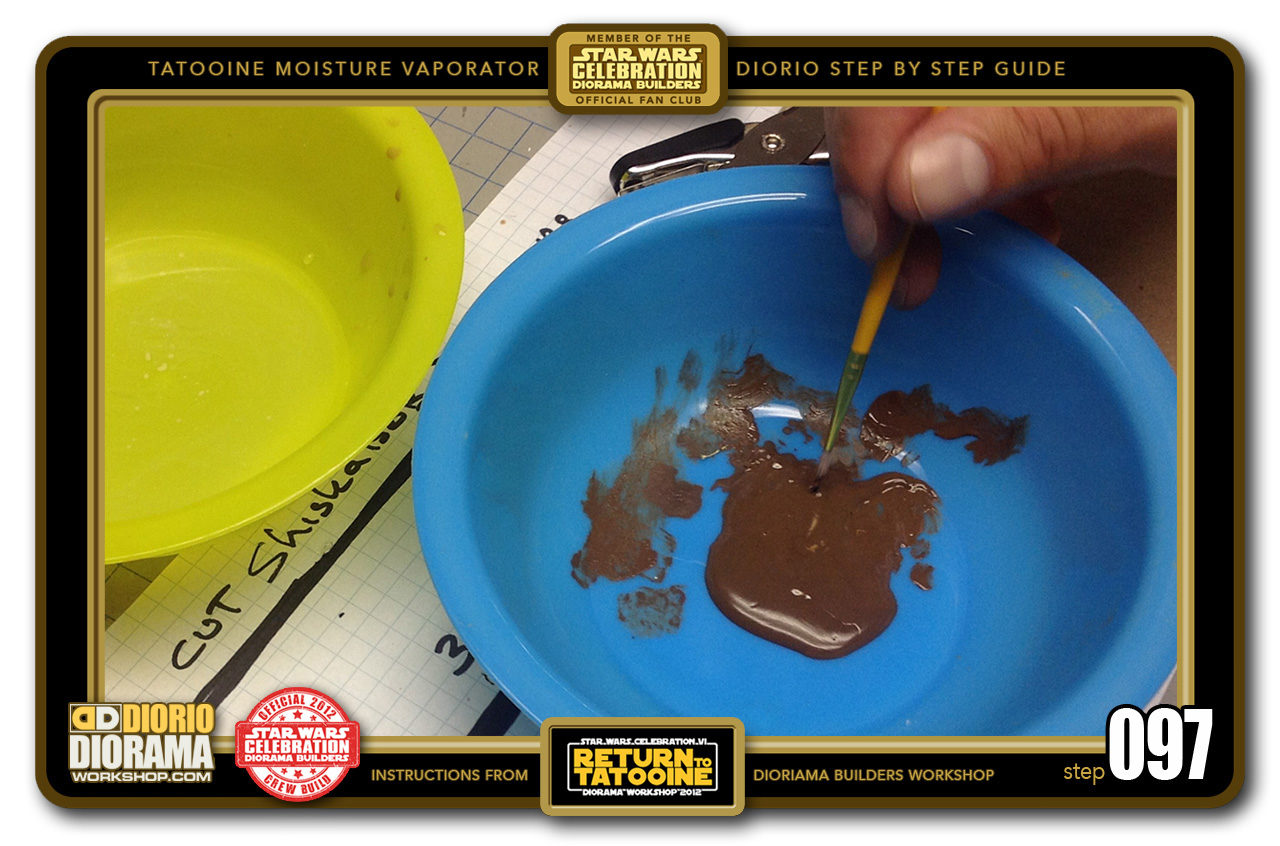
- STEP 097 > Dip your brush in the water first and then in the dark brown paint. just enough to get it wet, not a huge blob.
-
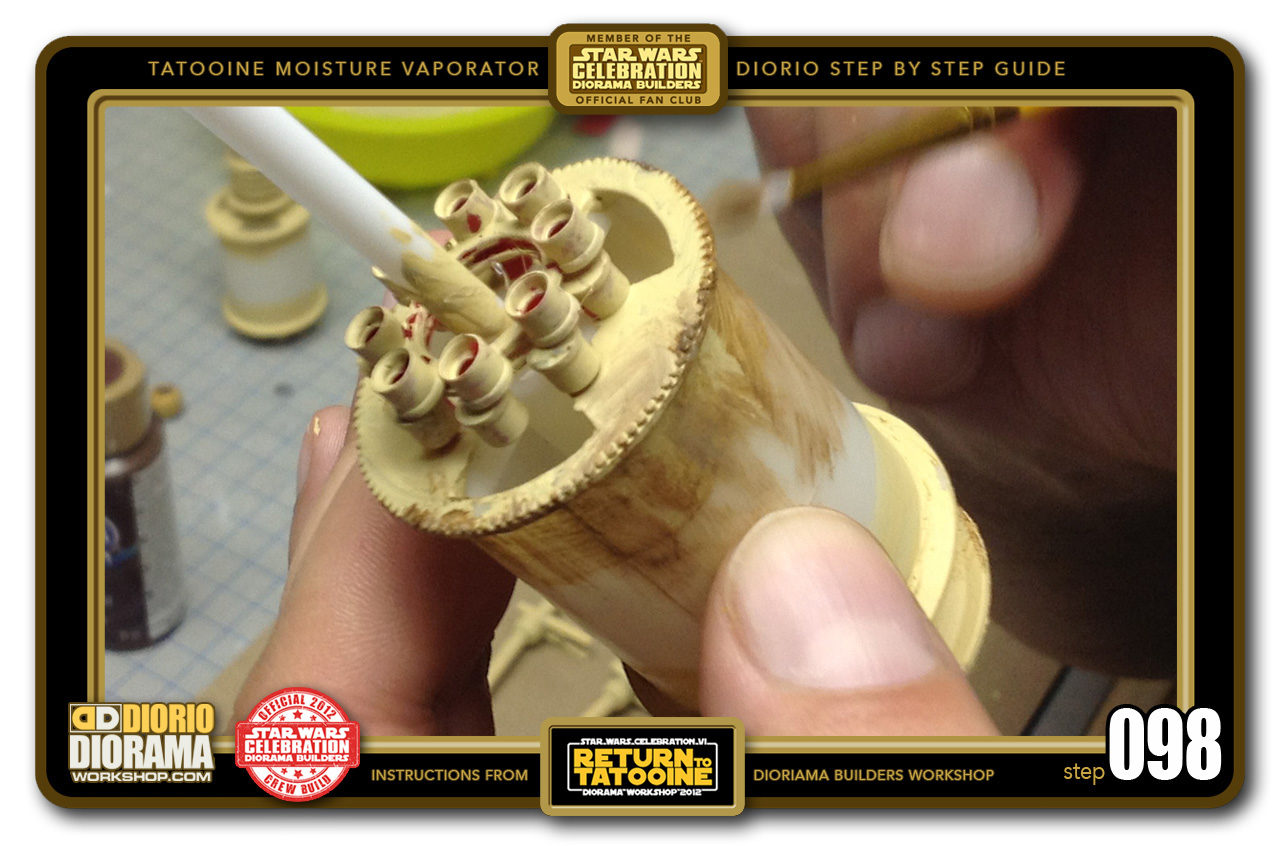
- STEP 098 > Start at the bottom spool. This is where your imagination comes into play. Not all 2 moisture vaporators will look the same.
-
- STEP 099 > Keep brushing the dark brown around edges and cracks and corners where you think the dirt would get accumulated from the sandstorms 🙂
-
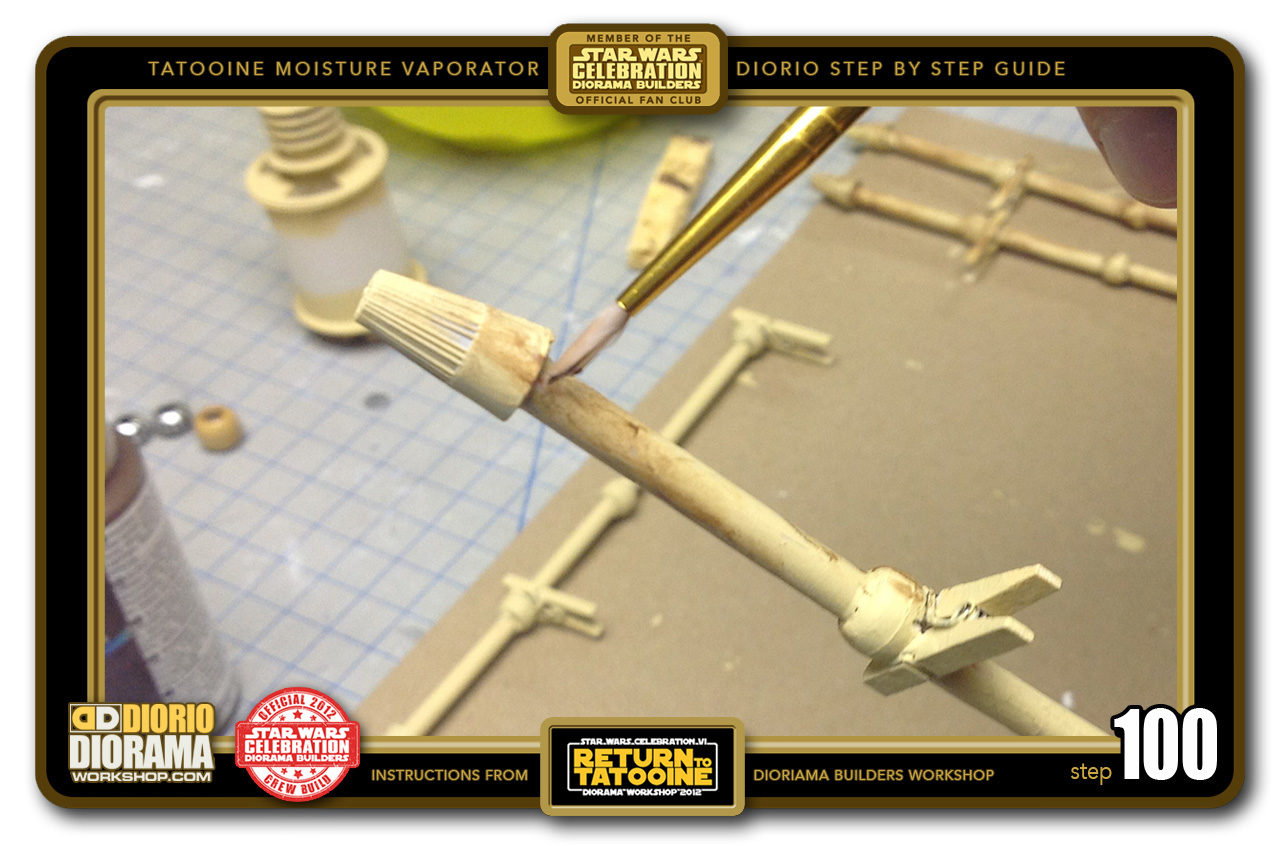
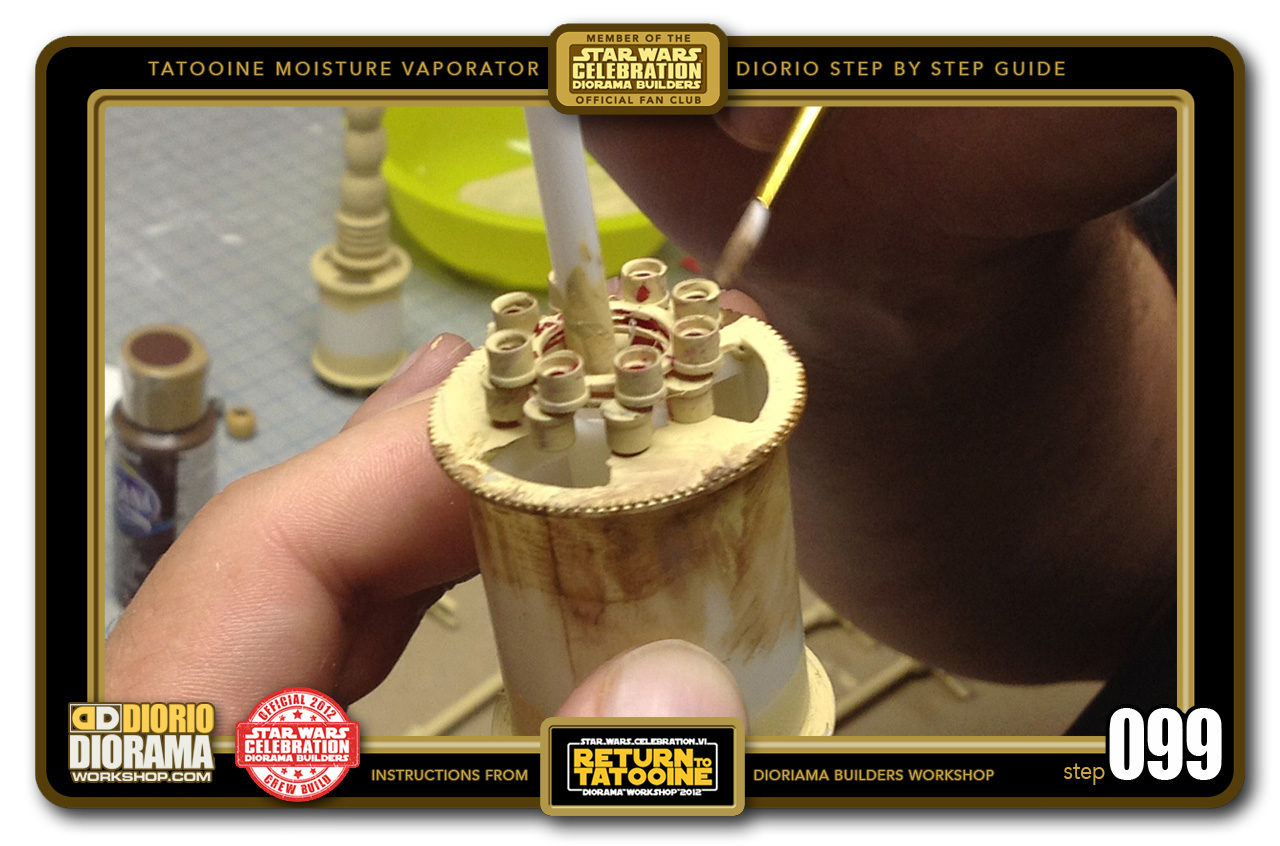
- STEP 100 > Don't forget some dirt on the marette end caps.

.
Did you already build this Diorama ? At home or at our Star Wars Celebration Diorama Builders workshop ? Would you like to show it in the site’s GALLERY VISITORS DIORAMAS section, YES ? That is Awesome !!! You can find out all the details on how to email me your photos on the VISITORS SUBMISSIONS INFO page … When I get your photos, I will create your very own page just like this one. You may not realize it but work does inspire others to join in the fun of making Action Figure Dioramas.
.
NOT FOR RESALE ALL Decals, tutorials and artwork are ©FrankDiorio (dioramaworkshop.com) and offered FOR FREE to the fans – that would be you ? so you can build and display my diorama designs in your very own home. I realize I cannot control what one does with my graphics once I place them on the web, I can only ask you as one fan to another, please respect the artist and do not be that jerk who uses my designs and tutorials to build a copy of my work only to sell it on EBAY or trade/sale groups and forums. Thank You. Frank.
![]() Catch up with fellow visitors and exchange stories, read cool interviews with the crew, exchange photos, fun surprises and grab some FAN ONLY merchandise next year at actual future conventions ?
Catch up with fellow visitors and exchange stories, read cool interviews with the crew, exchange photos, fun surprises and grab some FAN ONLY merchandise next year at actual future conventions ?
.
©2018 Frank Diorio DioramaWorkshop.Com
.
IF YOU LIKE WHAT YOU SEE, PLEASE SHARE WITH YOUR FRIENDS
USING THE SOCIAL MEDIA BUTTONS BELOW