


-
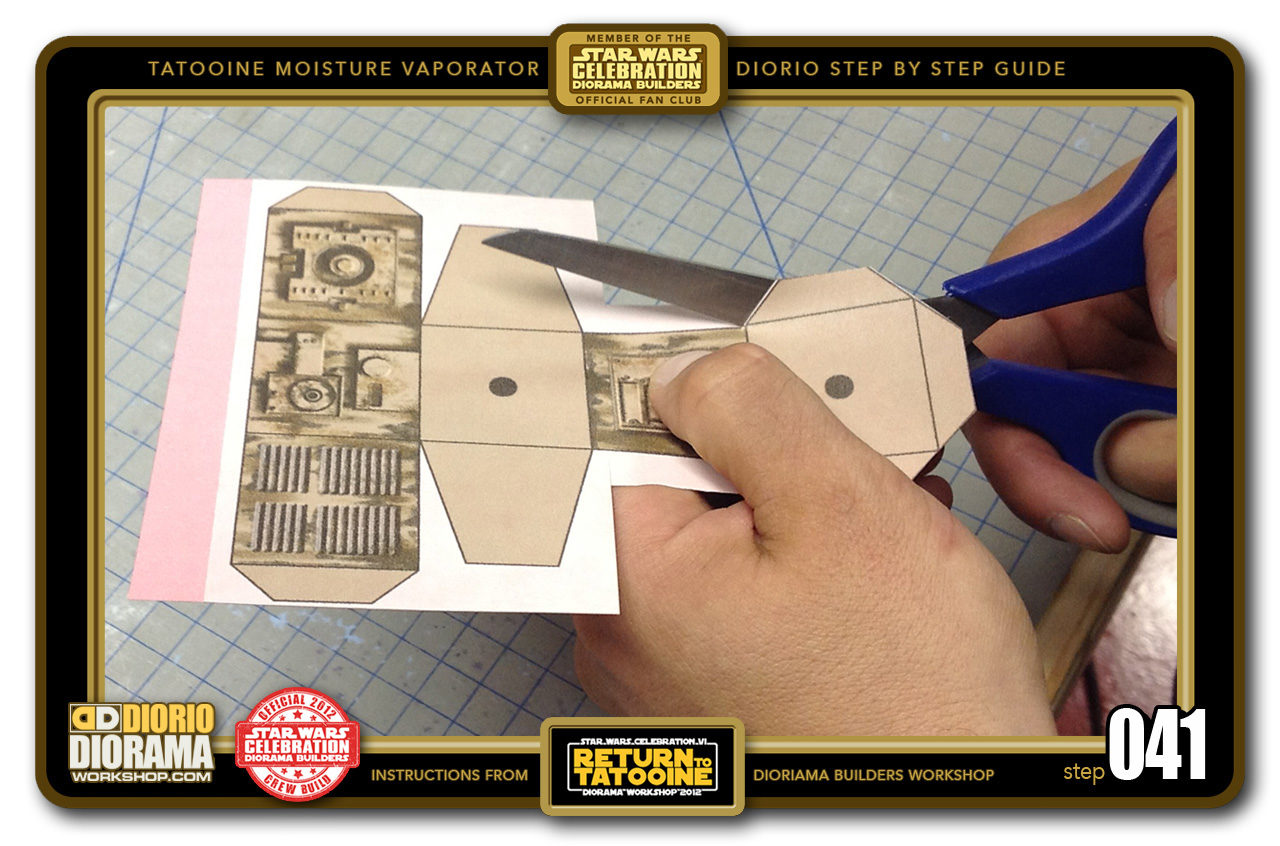
- STEP 041 > Take some scissors (you can also use a Xacto knife if you prefer) and cut along all the outside edges.
-
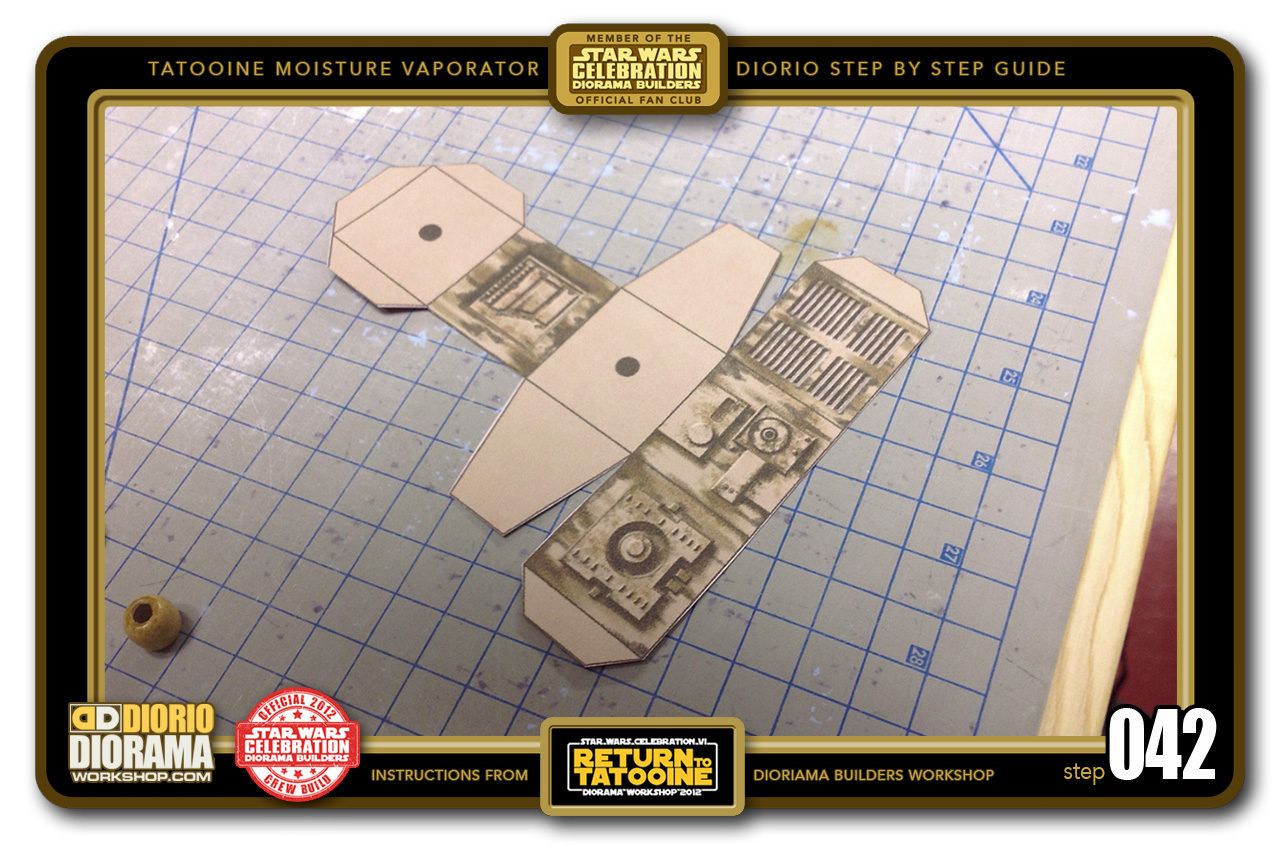
- STEP 042 > Once the cube decal is all cut it should look like this.
-
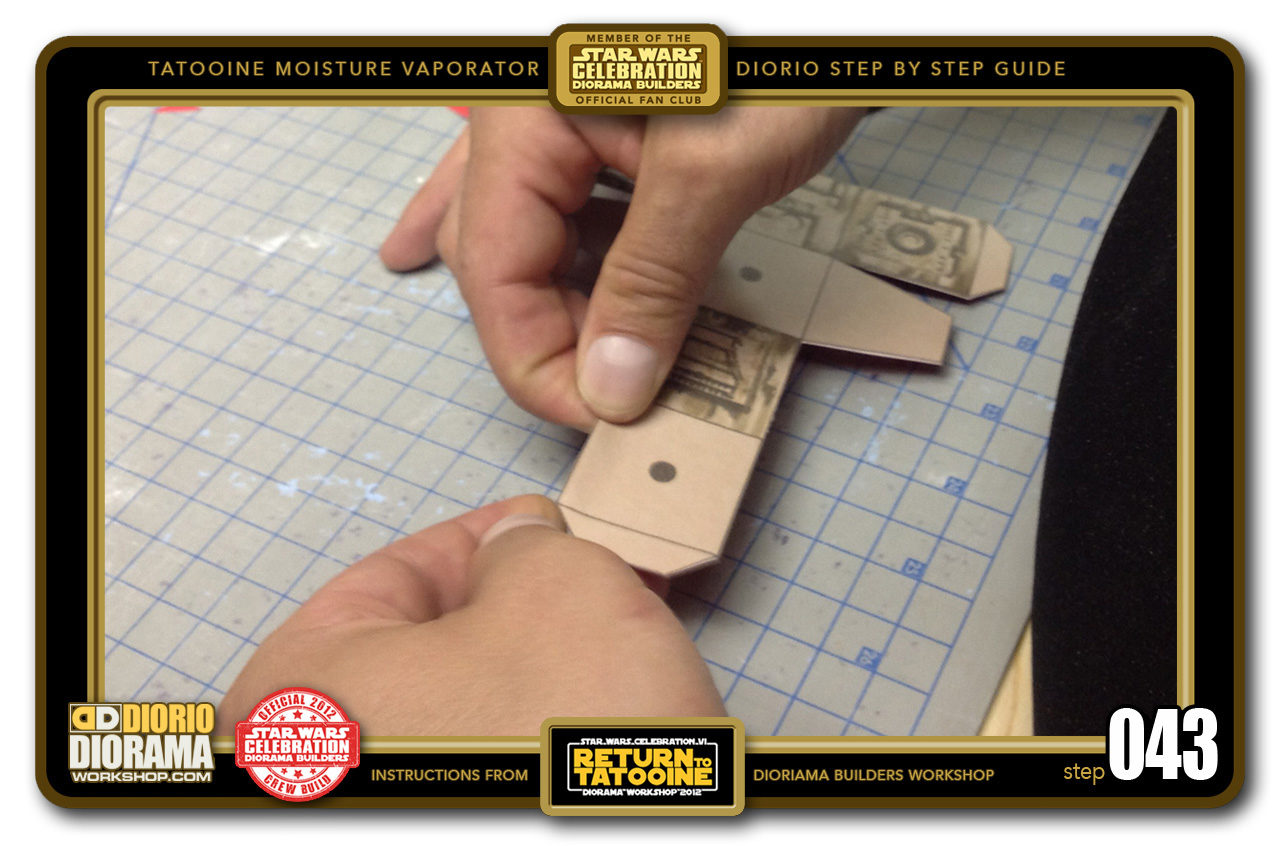
- STEP 043 > Now it's time to fold all the lines so that you can turn this flat surface into your center cube.
-
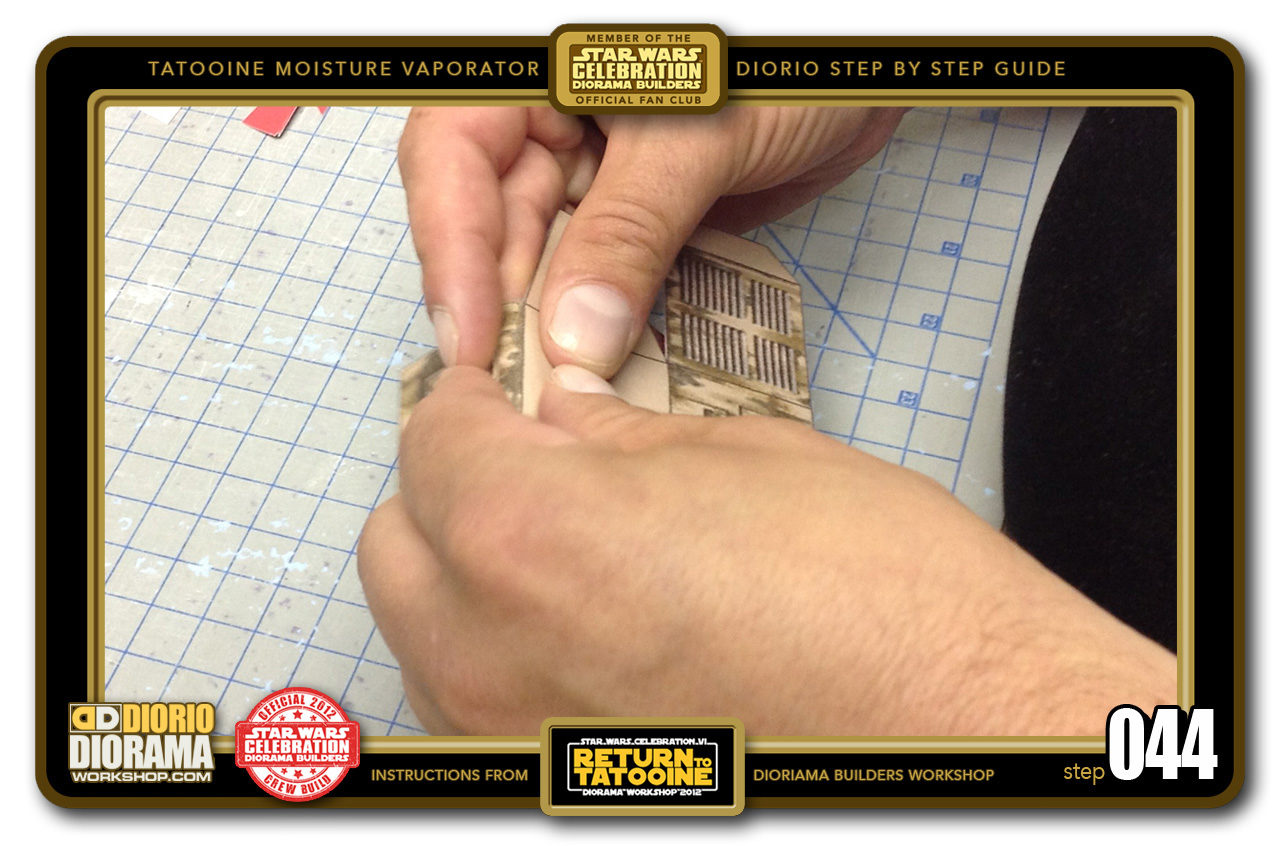
- STEP 044 > Carefully fold along the lines bending towards the bottom.
-
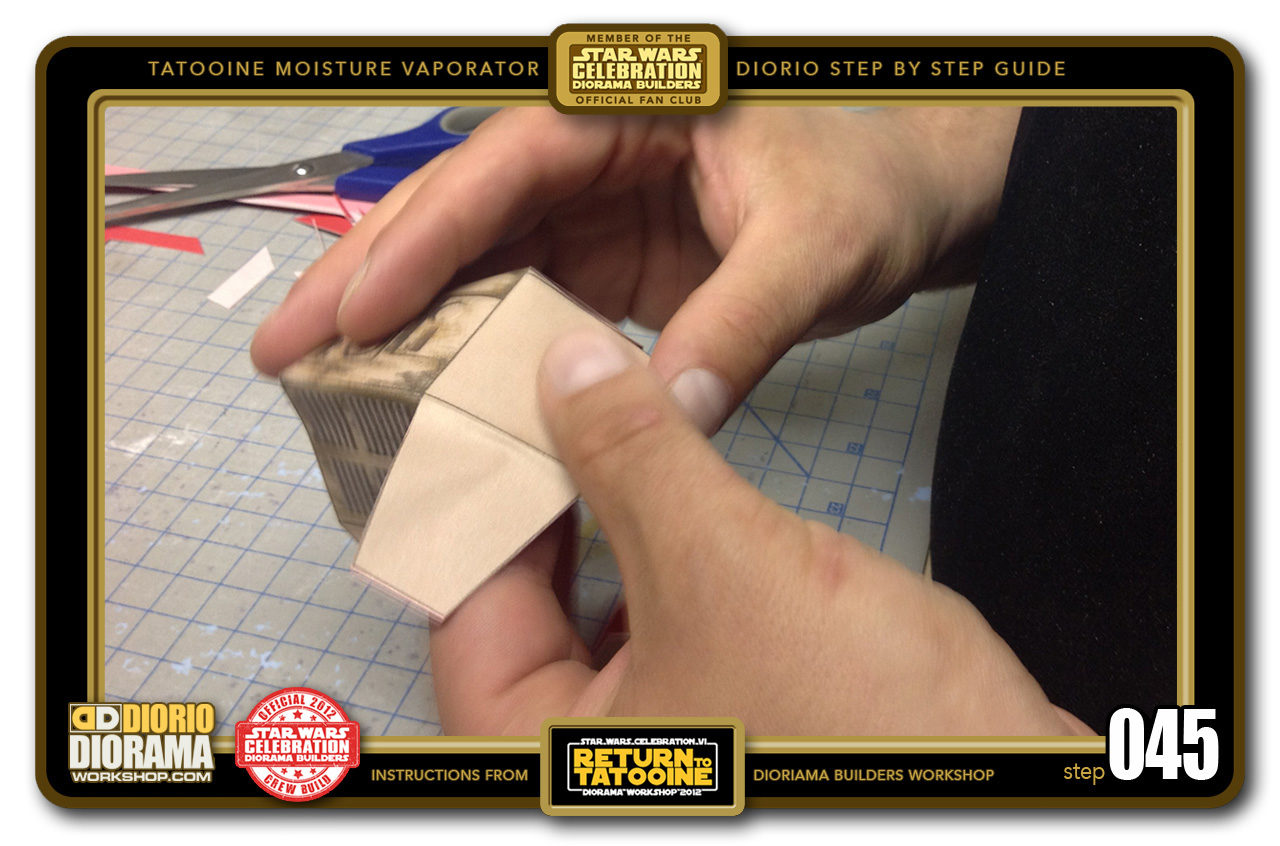
- STEP 045 > Once you start folding you will quickly understand how each side will connect together later.
-
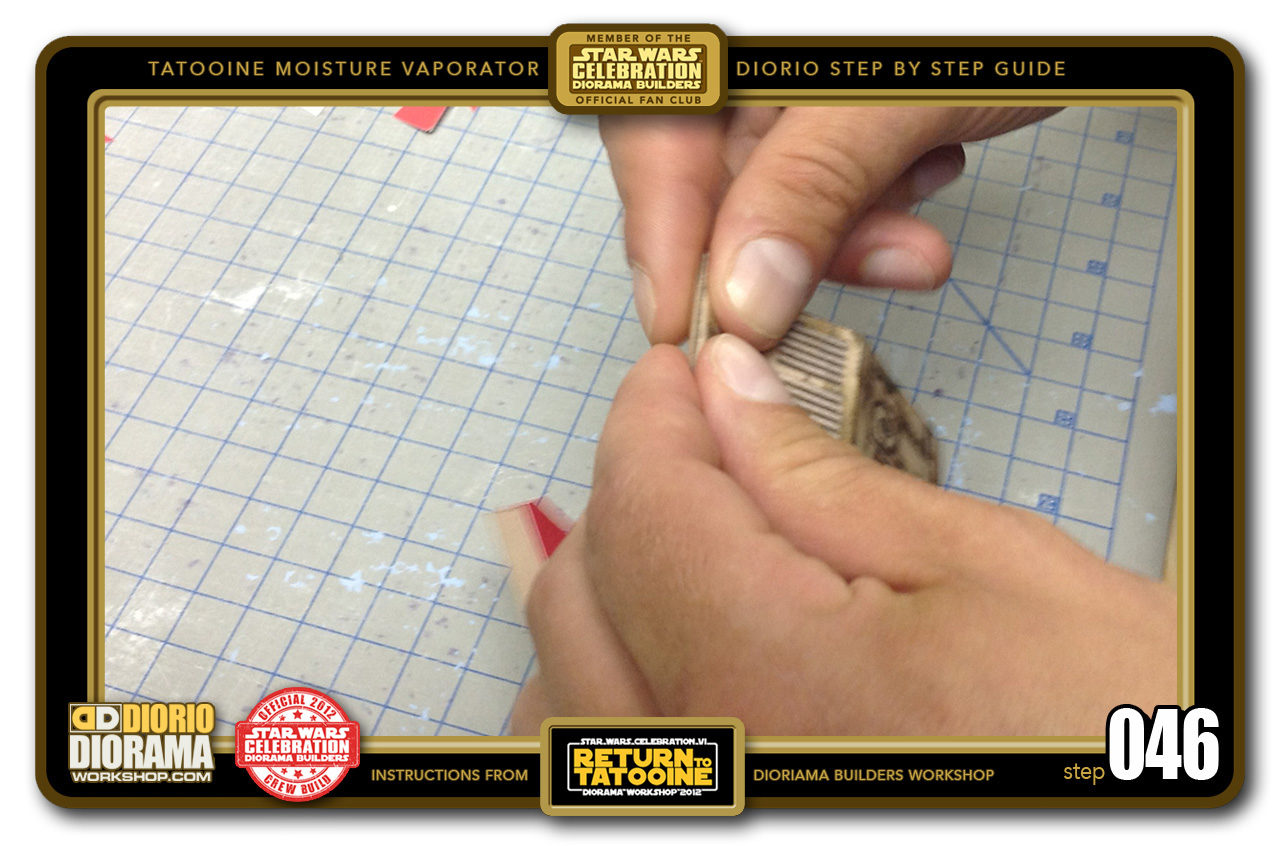
- STEP 046 > keep folding all flaps.
-
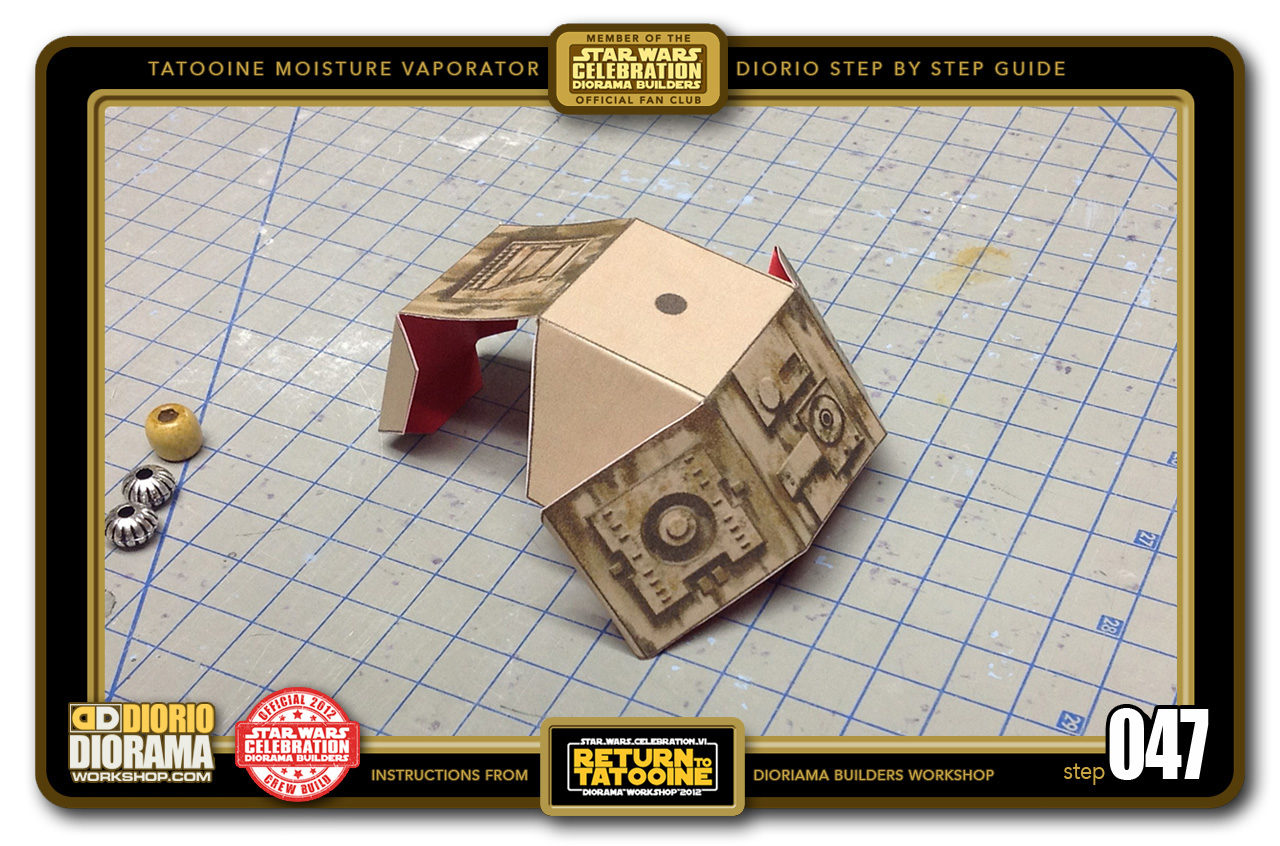
- STEP 047 > When you are done, your flat decal should now curl up like this. Go to step 093 if you want to punch the holes out at this time.
-
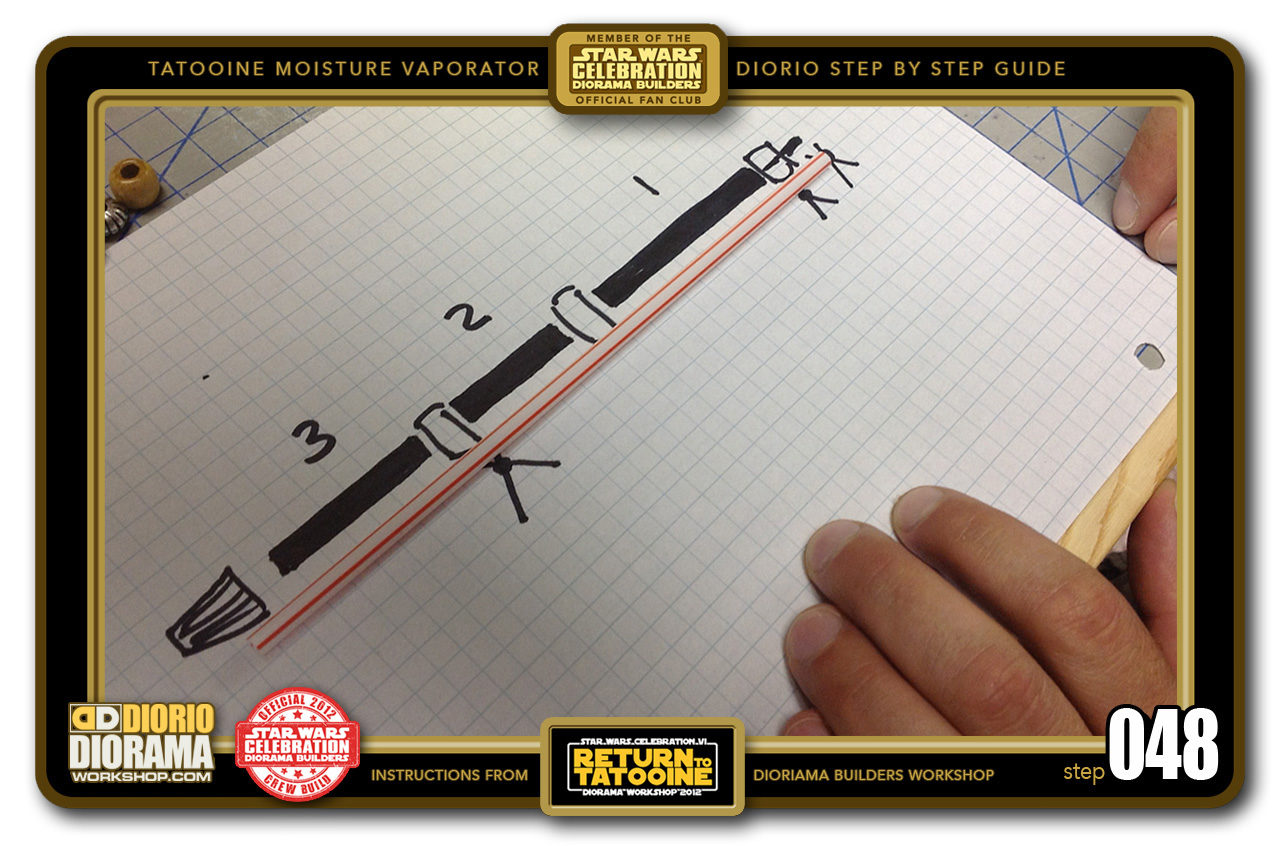
- STEP 048 > The Moisture Vaporator has 4 posts that align with the center cube corners. To start, grab a straw and place it on your Free Blueprint template (available in the Tutorial Star Wars menu)
-
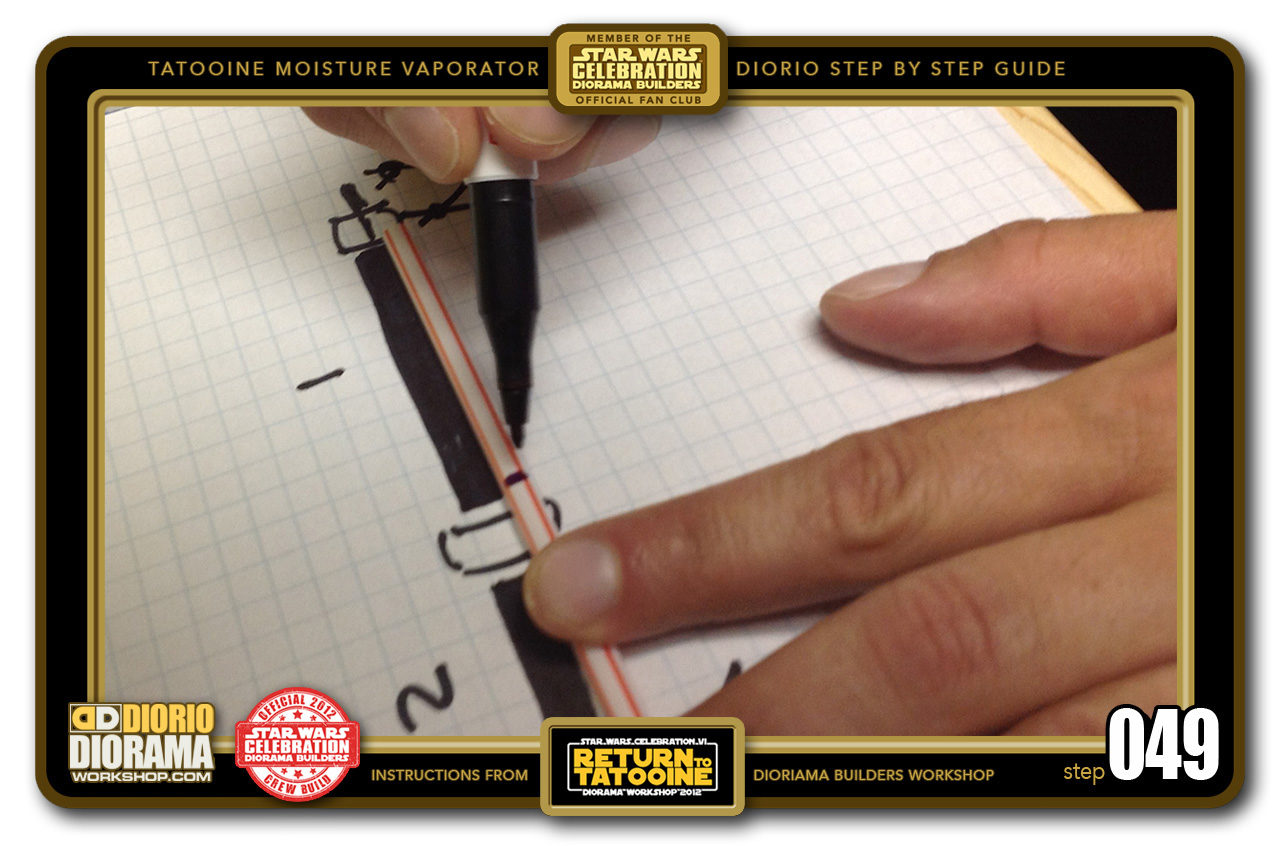
- STEP 049 > We want to find our cutting lines, so align the straw with the end of the #1 black template thick black line and using a sharpie, draw a line on your straw where the thick black template #1 line ends.
-
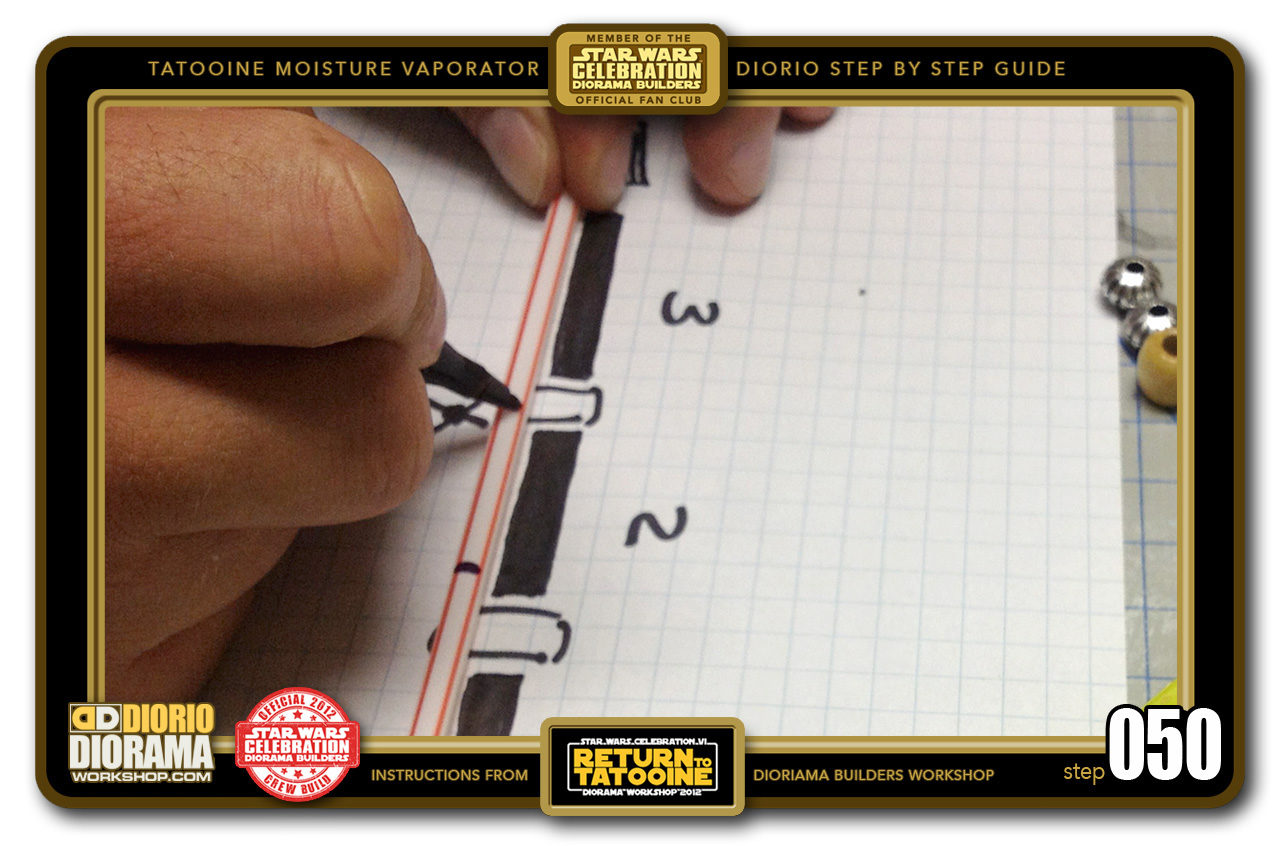
- STEP 050 > Slide your straw so that the line you just drew aligns with the end of the template thick black line #2. Now grab your sharpie and draw a line on your straw where the #2 thick black template line ends.
-
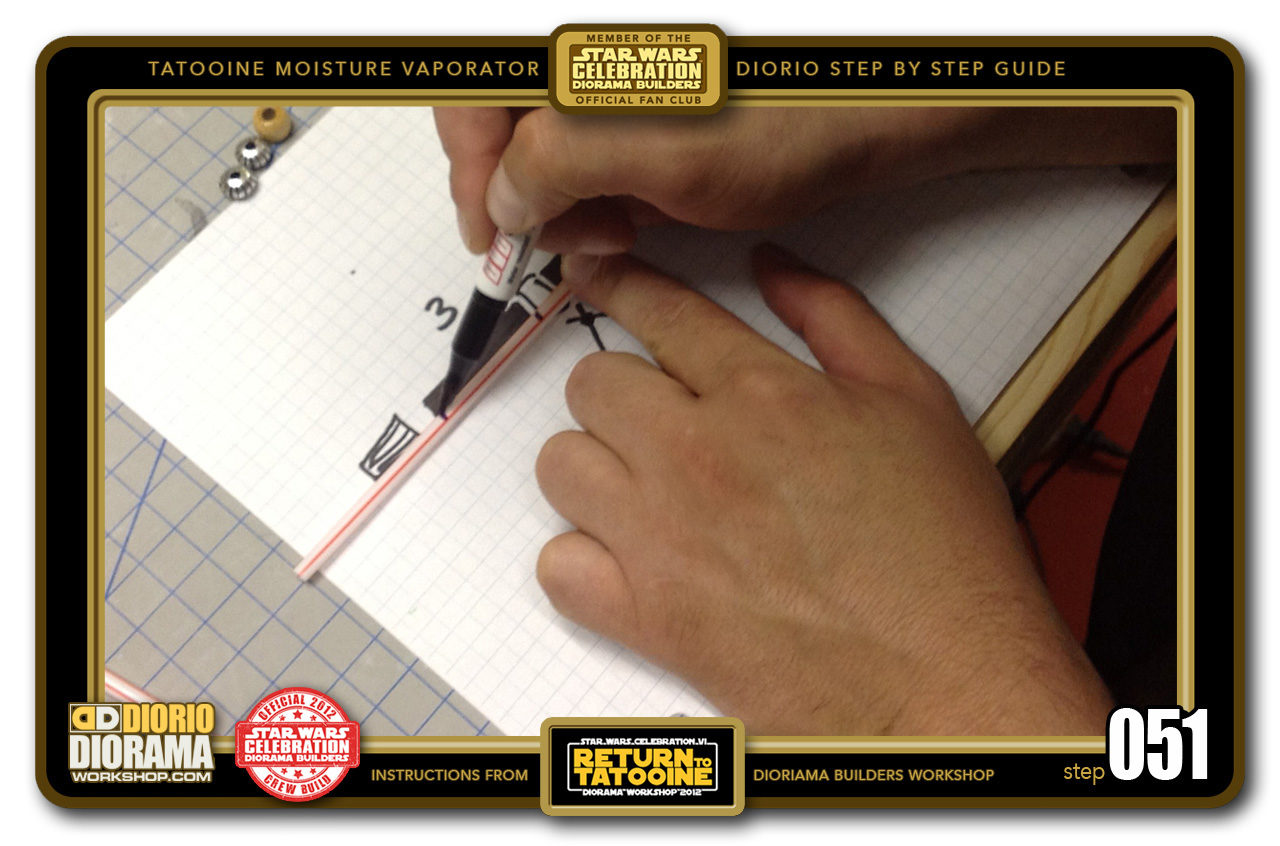
- STEP 051 > Slide your straw again so that your 2nd mark lines up with the end of the template's thick black line #3 and with your Sharpie, draw a line on your straw where the #3 thick black template line ends.
-
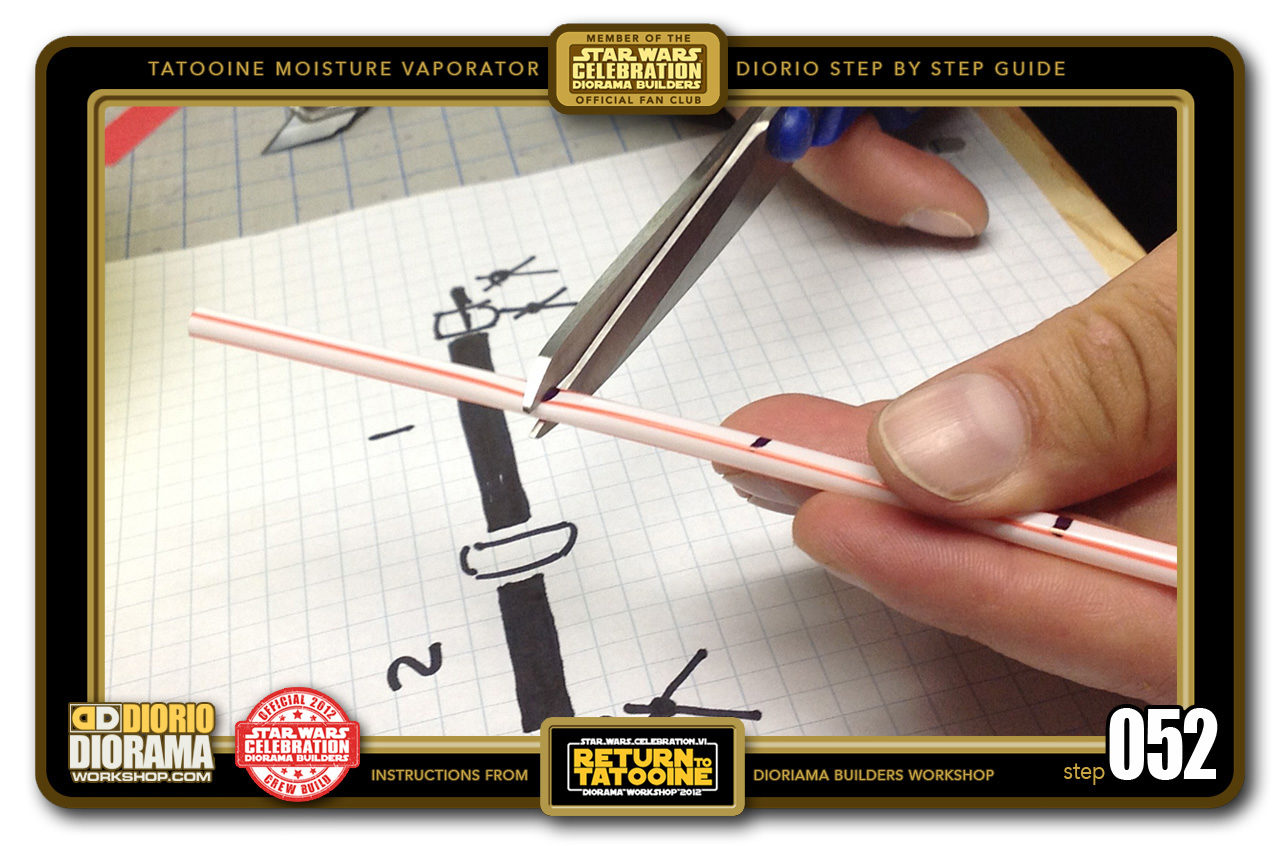
- STEP 052 > Take some scissors and cut along your first line.
-
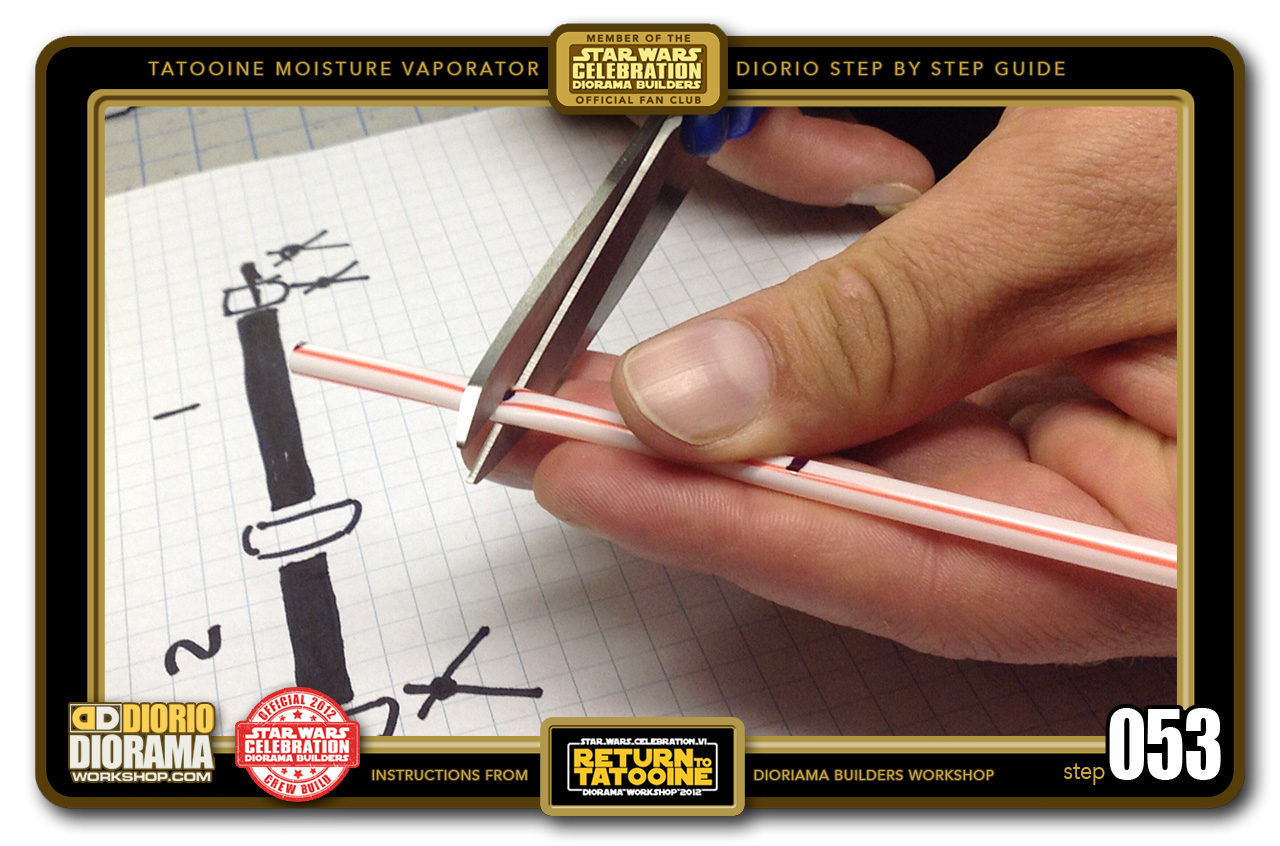
- STEP 053 > Then your second...
-
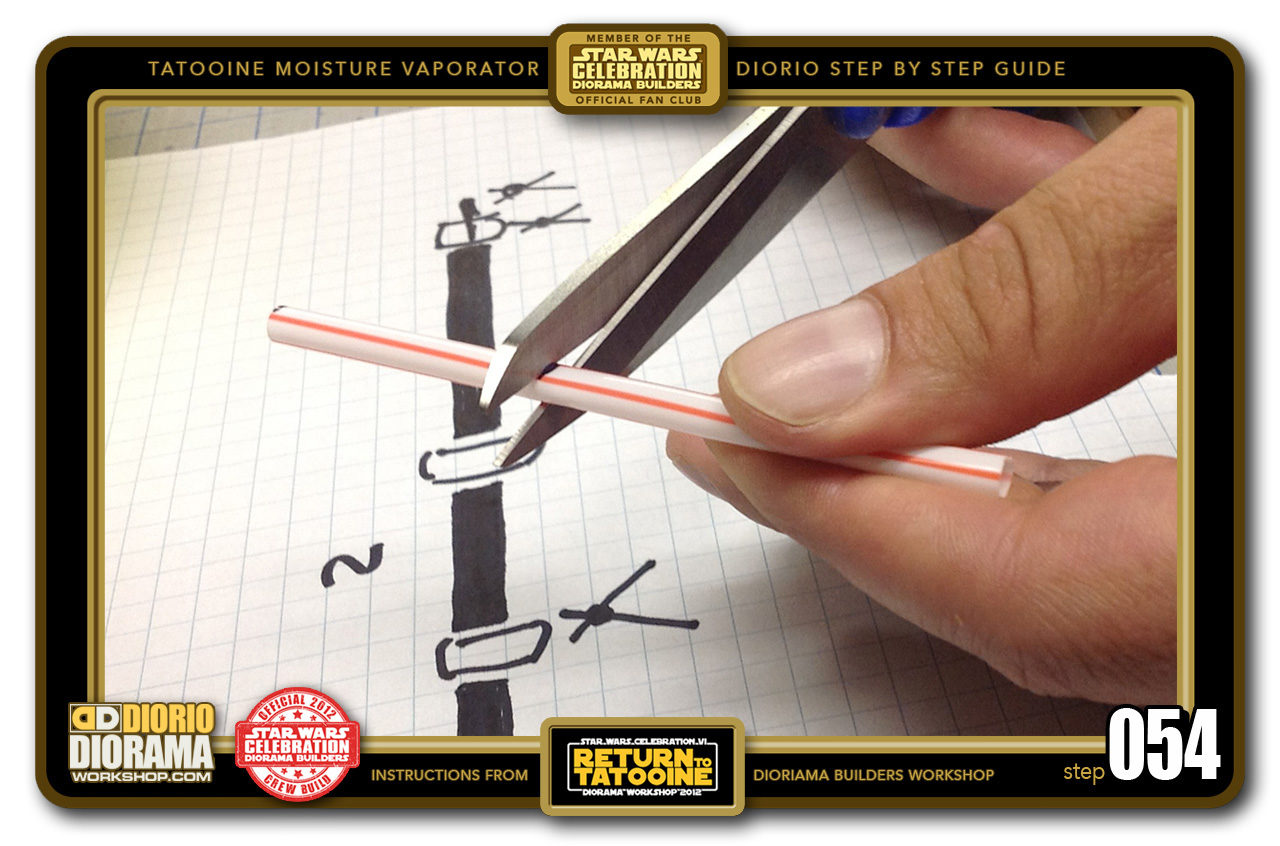
- STEP 054 > and your 3rd guide line
-
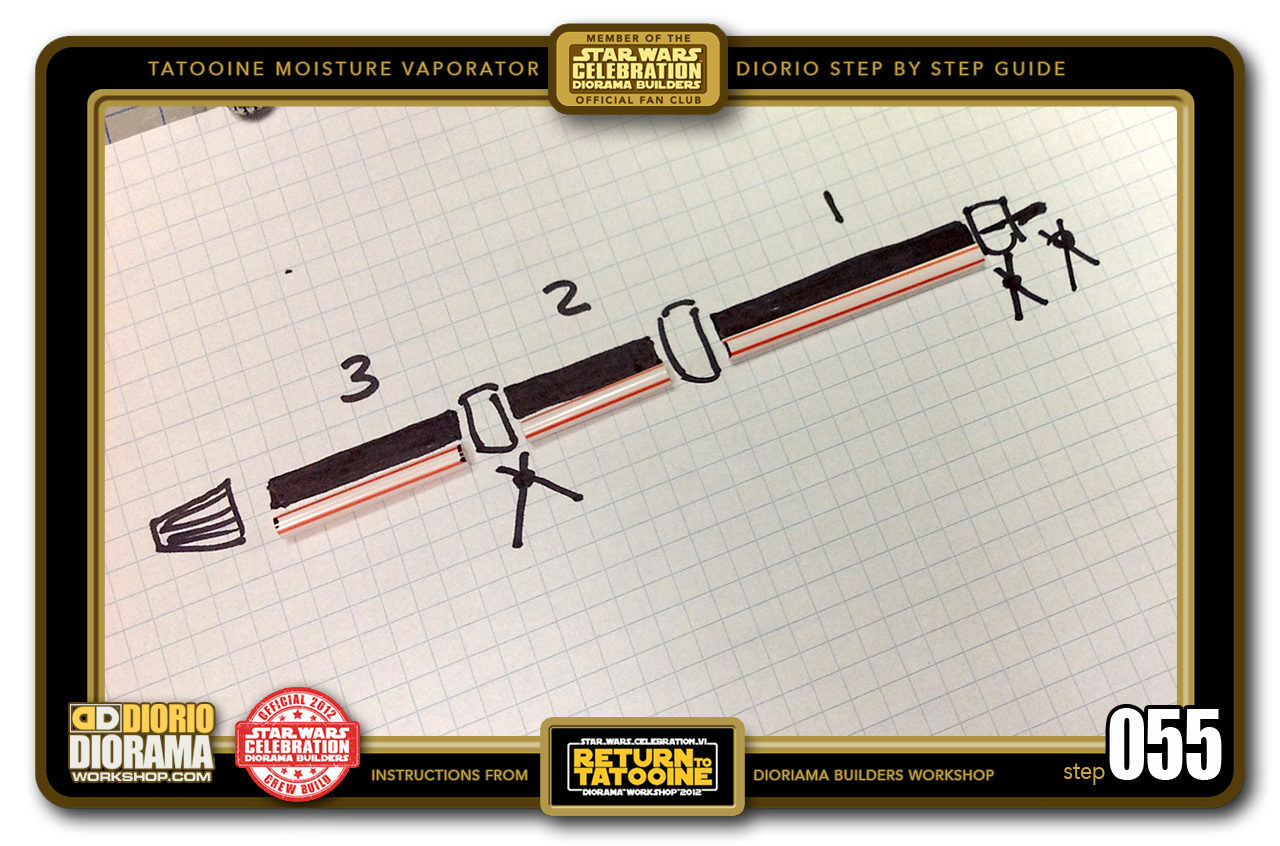
- STEP 055 > Your straw now cut, if you place the pieces on the template again, you will see how they all align and the exact same length as the 3 thick black lines.
-
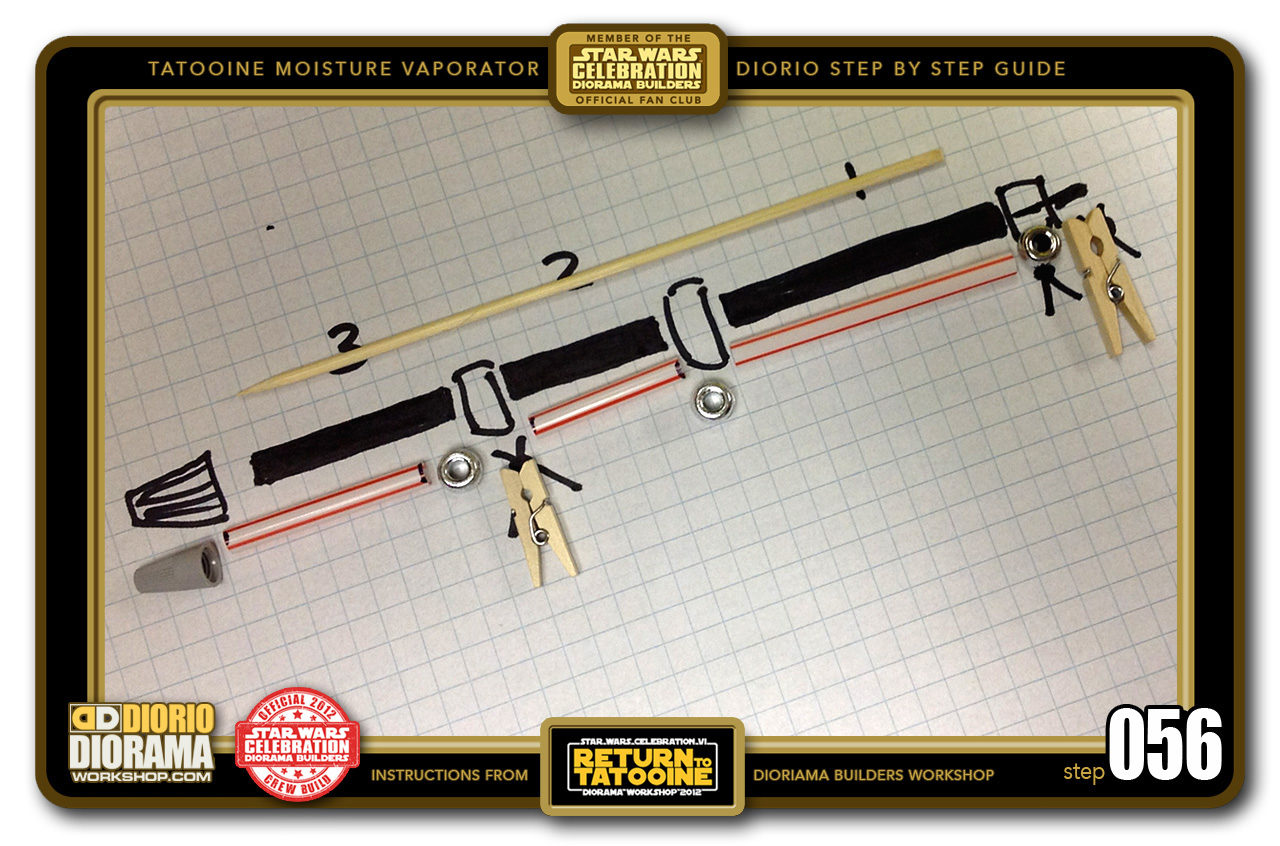
- STEP 056 > By the way you probably noticed this already, but your printed template is nicer looking then my temporary prototype seen in the photos 😛 In between the straws will go the small silver beads and where you see the X will be miniature clothes pins. The top end cap is a mini marette (that you place over electrical wires) The support is a kebob skewer that is cut to size of the template.
-
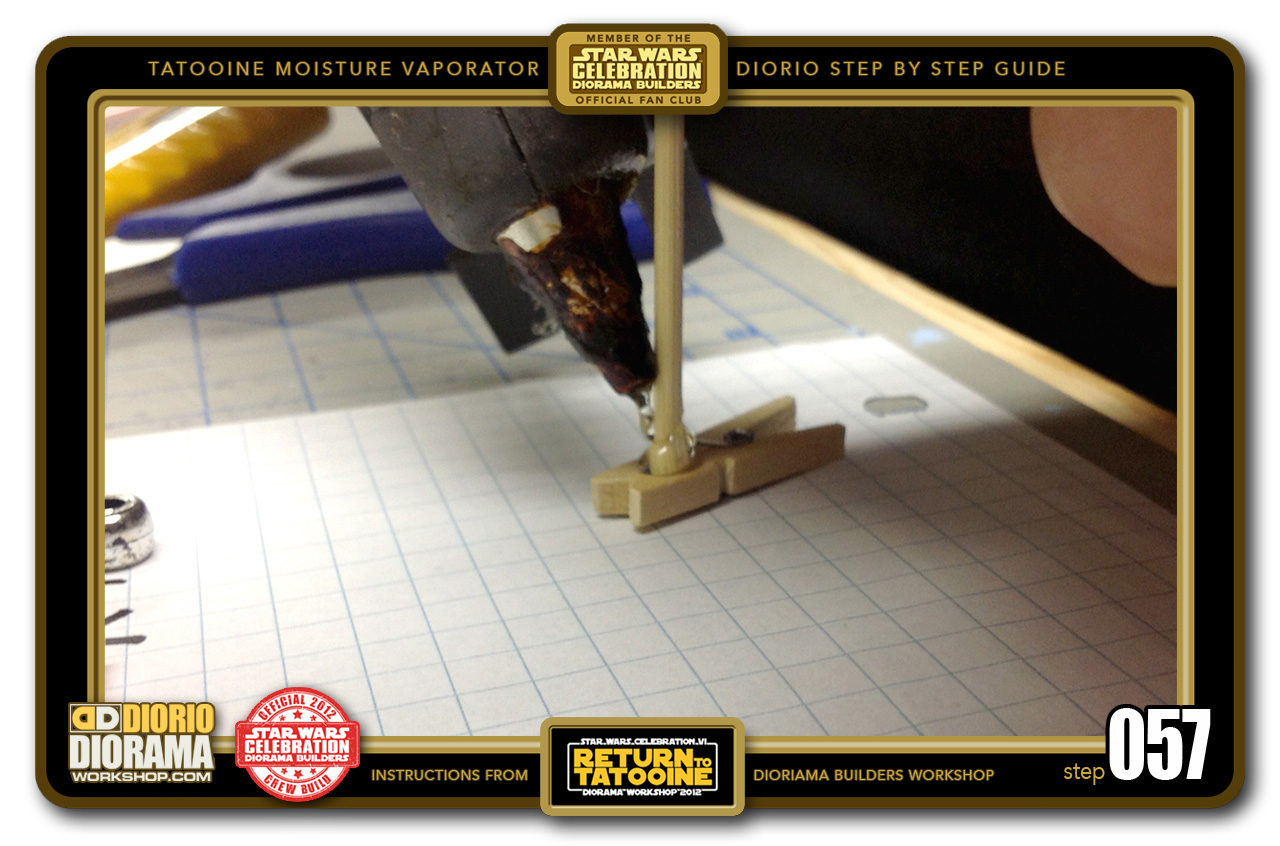
- STEP 057 > To start, place the non pointy end of your kebob stick on the table surface, pinch a miniature clothes pin at the bottom and put some hot glue around the kebob stick and clothes pin meet.
-
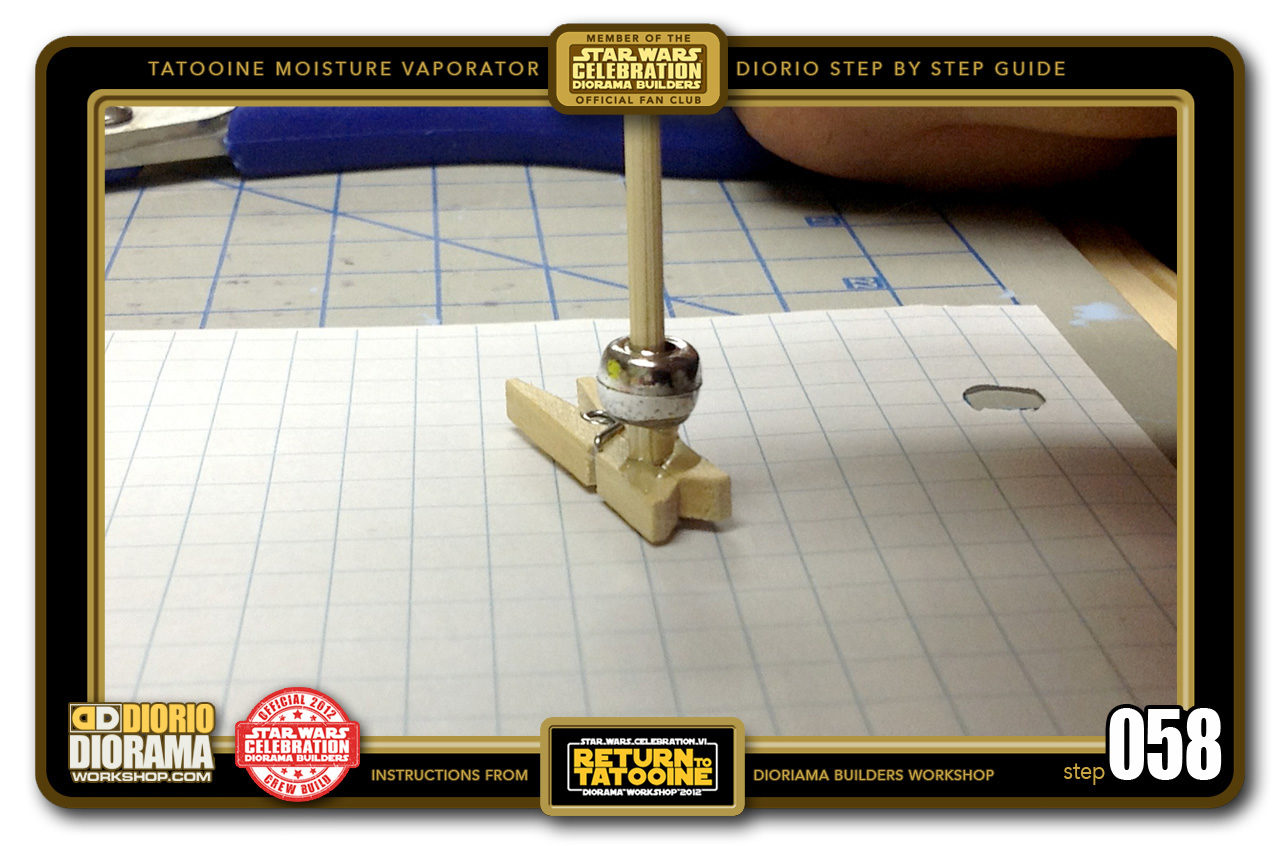
- STEP 058 > Take a small silver bead (if you can't find this exact same bead you can use any other that is close to same size) and slide it down the kebob stick.
-
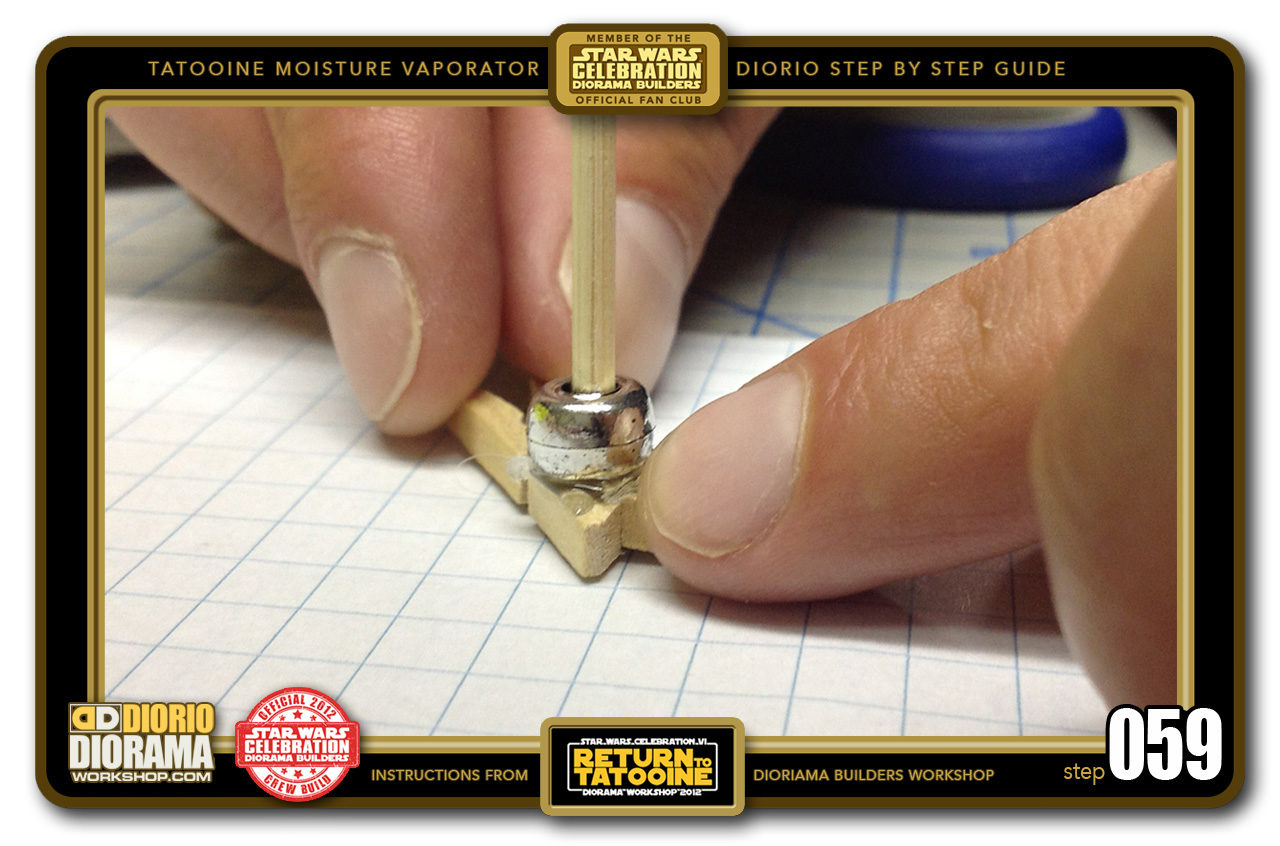
- STEP 059 > Now slide it all the way down, pressing it against the miniature clothes pin. This will smoosh the hot glue and bond all 3 items together.
-
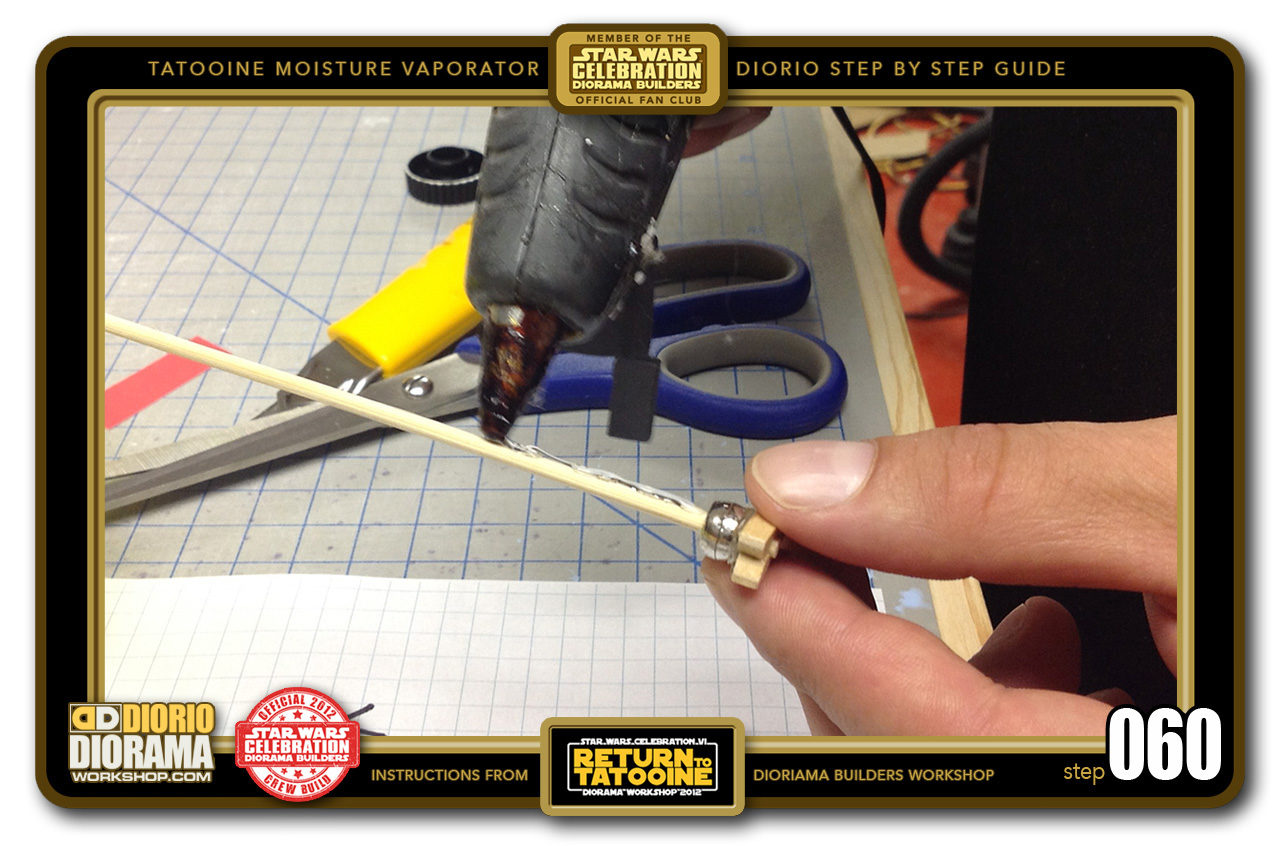
- STEP 060 > Put a line of hot glue onto the kebob stick about the same length as your Straw #1.

.
Did you already build this Diorama ? At home or at our Star Wars Celebration Diorama Builders workshop ? Would you like to show it in the site’s GALLERY VISITORS DIORAMAS section, YES ? That is Awesome !!! You can find out all the details on how to email me your photos on the VISITORS SUBMISSIONS INFO page … When I get your photos, I will create your very own page just like this one. You may not realize it but work does inspire others to join in the fun of making Action Figure Dioramas.
.
NOT FOR RESALE ALL Decals, tutorials and artwork are ©FrankDiorio (dioramaworkshop.com) and offered FOR FREE to the fans – that would be you ? so you can build and display my diorama designs in your very own home. I realize I cannot control what one does with my graphics once I place them on the web, I can only ask you as one fan to another, please respect the artist and do not be that jerk who uses my designs and tutorials to build a copy of my work only to sell it on EBAY or trade/sale groups and forums. Thank You. Frank.
![]() Catch up with fellow visitors and exchange stories, read cool interviews with the crew, exchange photos, fun surprises and grab some FAN ONLY merchandise next year at actual future conventions ?
Catch up with fellow visitors and exchange stories, read cool interviews with the crew, exchange photos, fun surprises and grab some FAN ONLY merchandise next year at actual future conventions ?
.
©2018 Frank Diorio DioramaWorkshop.Com
.
IF YOU LIKE WHAT YOU SEE, PLEASE SHARE WITH YOUR FRIENDS
USING THE SOCIAL MEDIA BUTTONS BELOW