


-
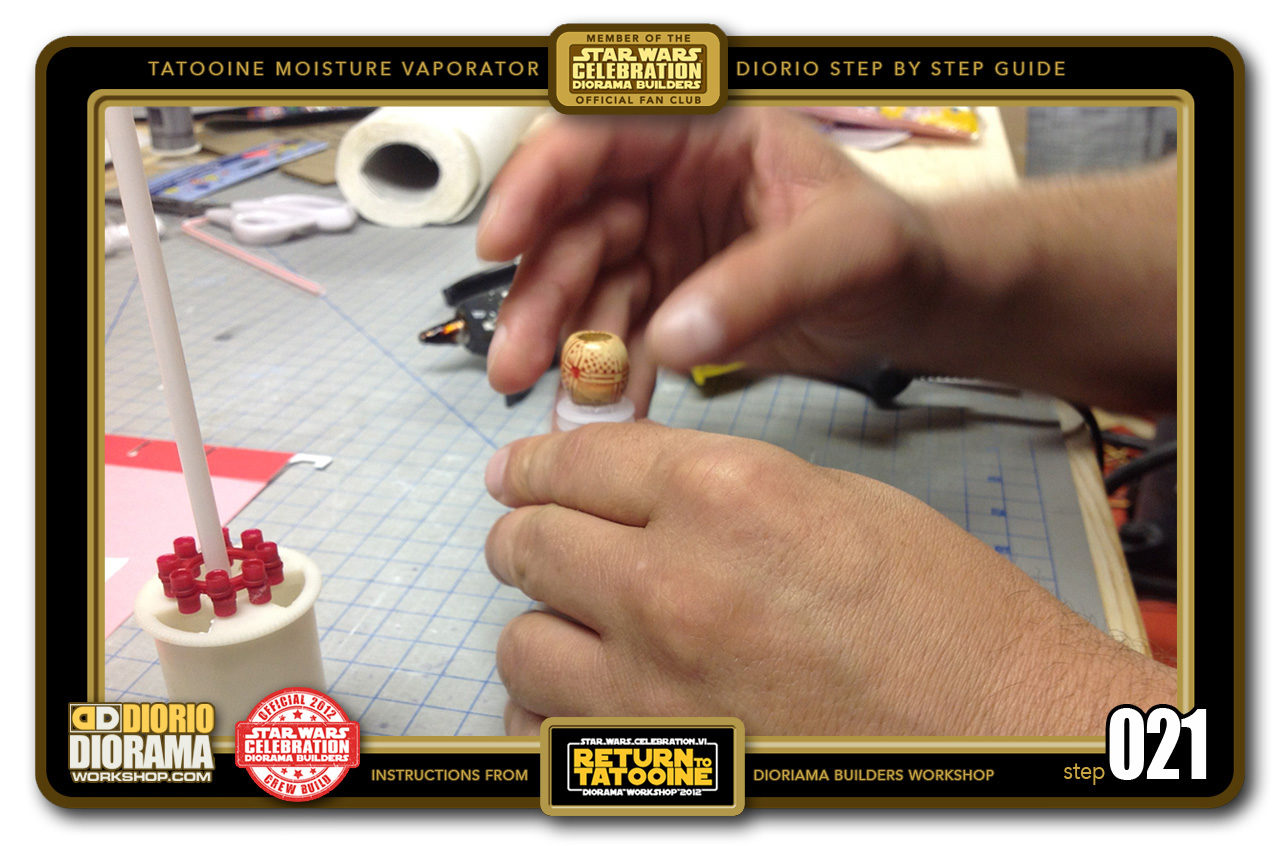
- STEP 021 > Place the bead on top of the rings. Wiggle it a little until it is perfectly aligned with the center. IMPORTANT: Look straight down like you see in Step 026 to make sure you are not obstructing the passage for your straw later.
-
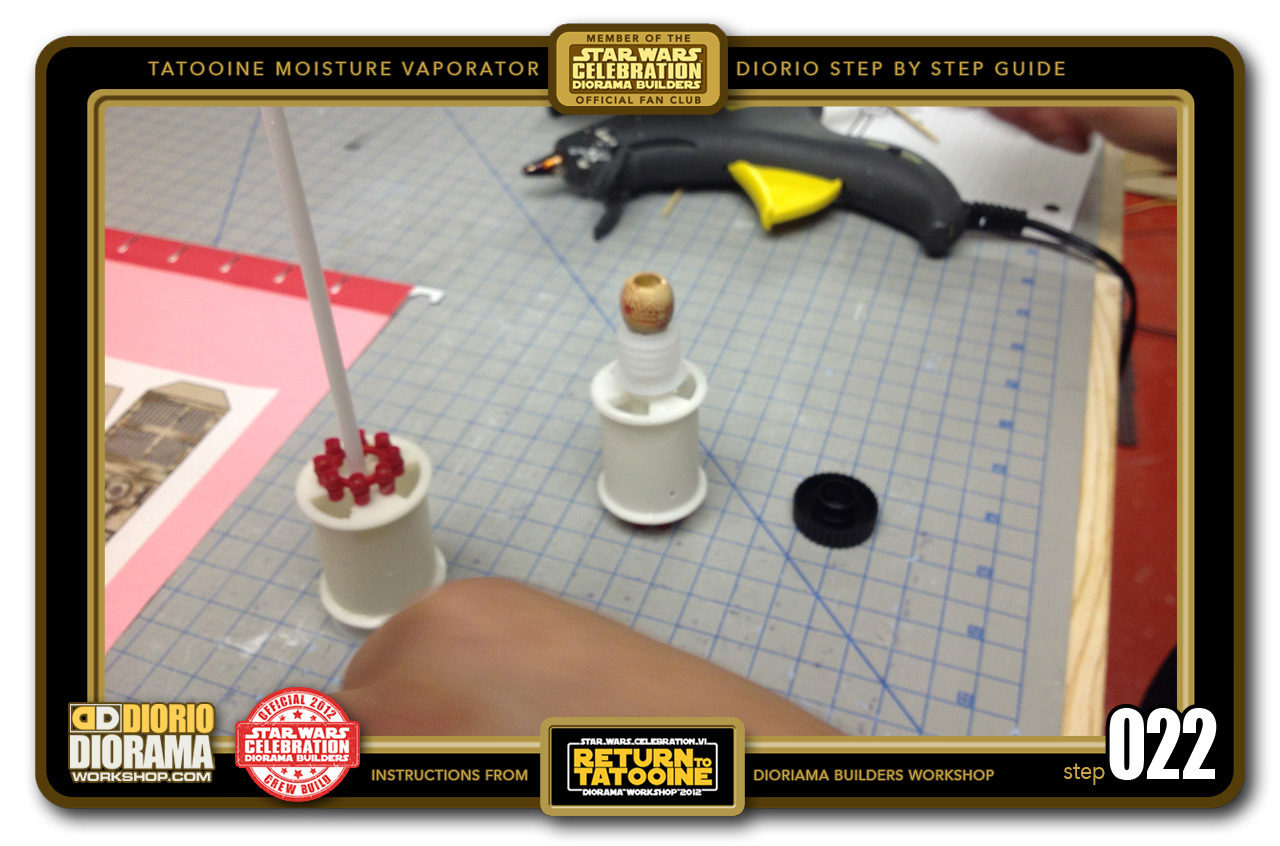
- STEP 022 > Let the hot glue harden for a few seconds to make sure you don't slide the beads as you progress.
-
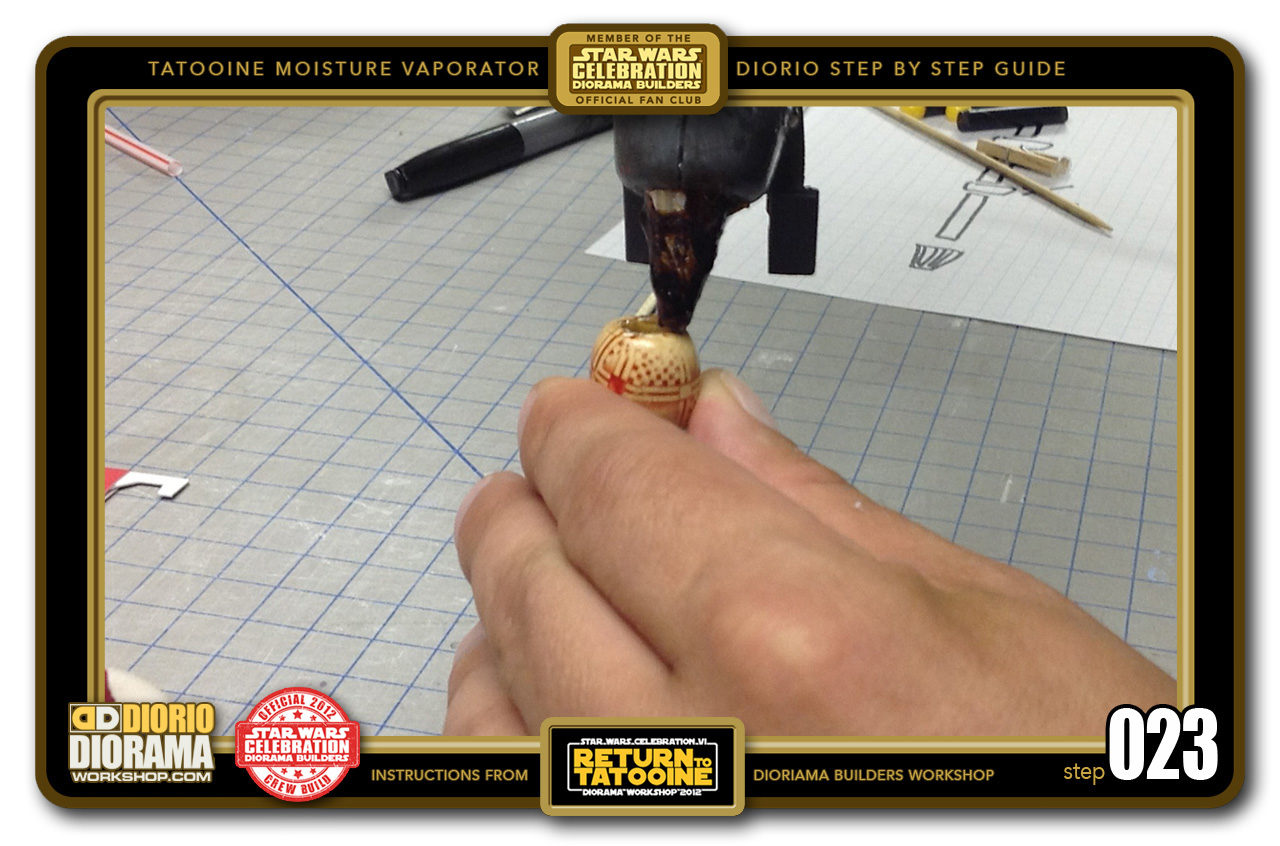
- STEP 023 > Put a little bit of hot glue on top of the big bead.
-
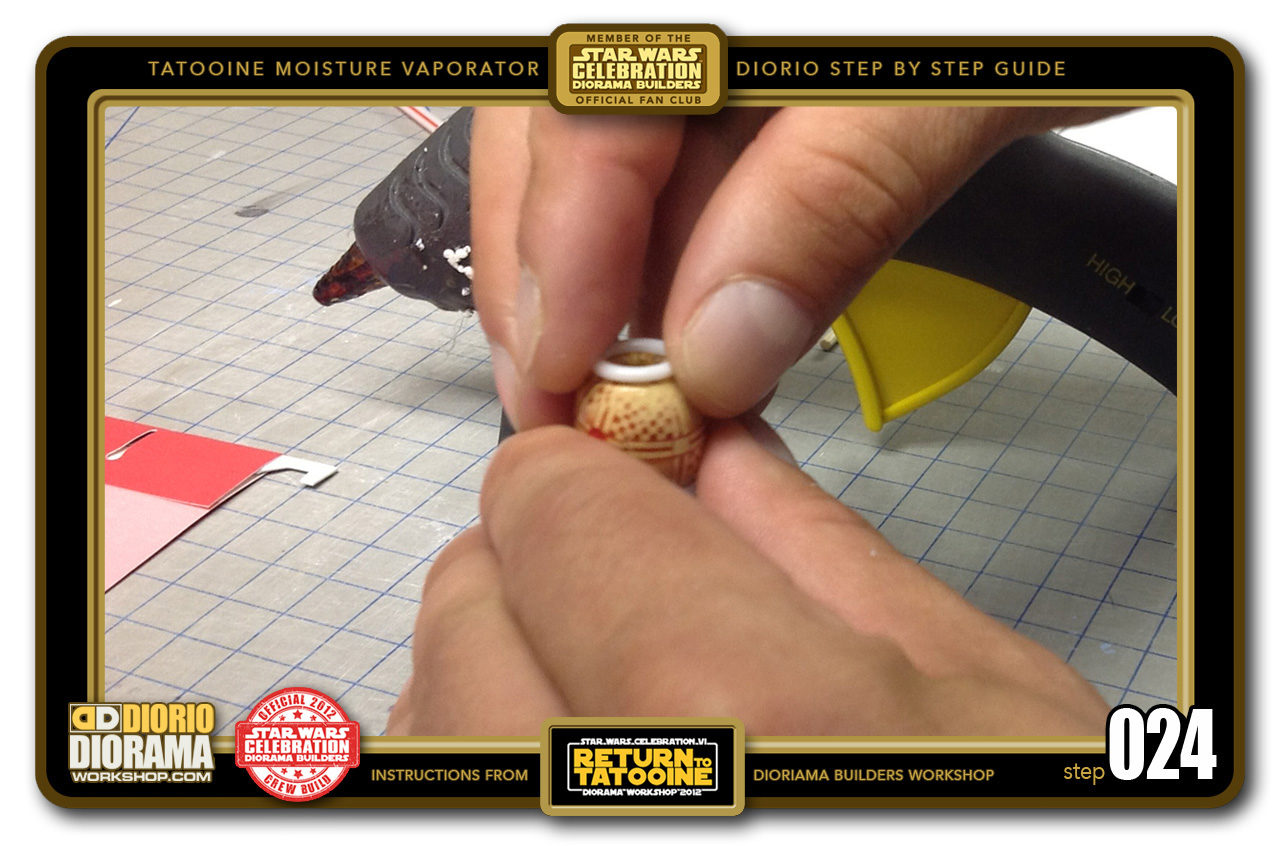
- STEP 024 > Grab a small white ring (if you can't find these in your dollar store, get something that is close to size) and place it on top making sure to keep that perfect allignment.
-
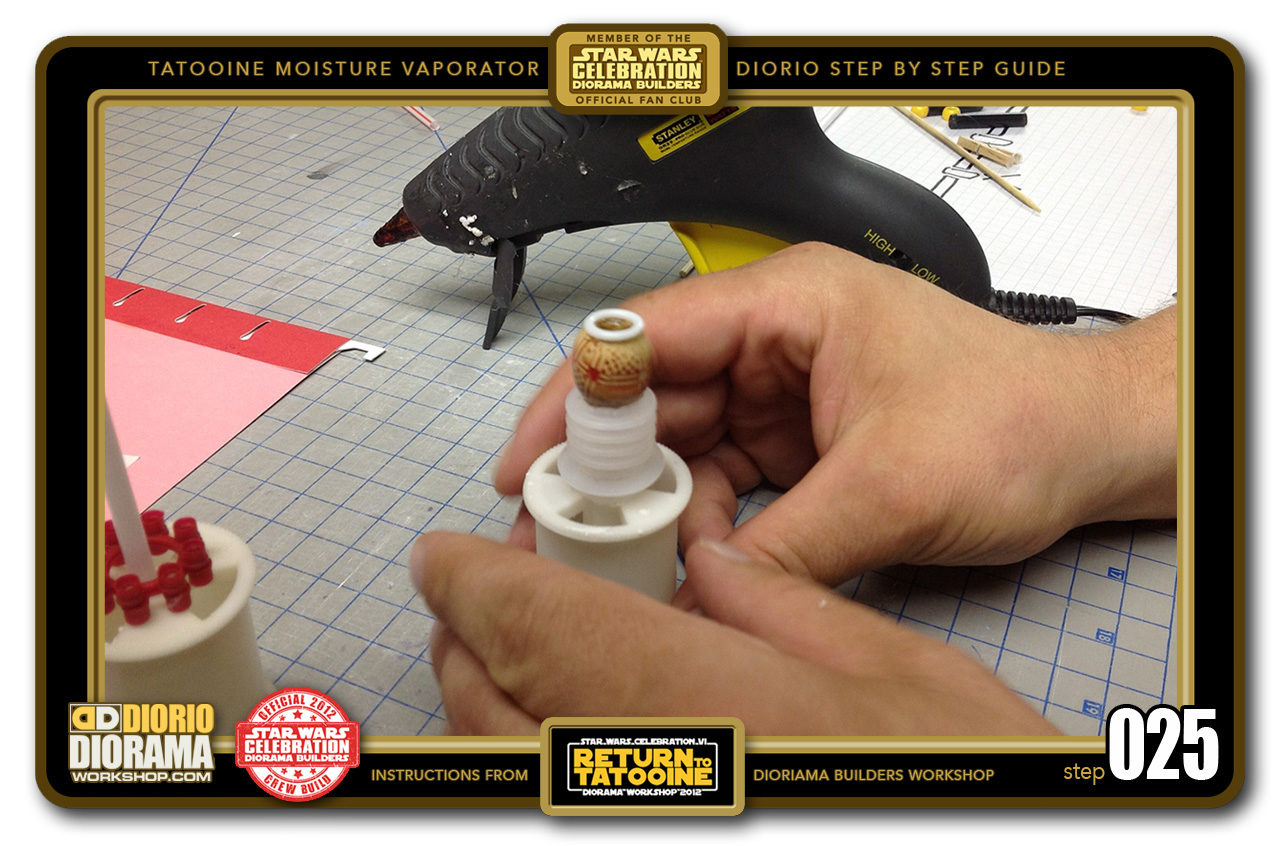
- STEP 025 > You see how we are stacking the items to give a sculpted texture look. We can now continue the stacks by repeating the previous steps.
-
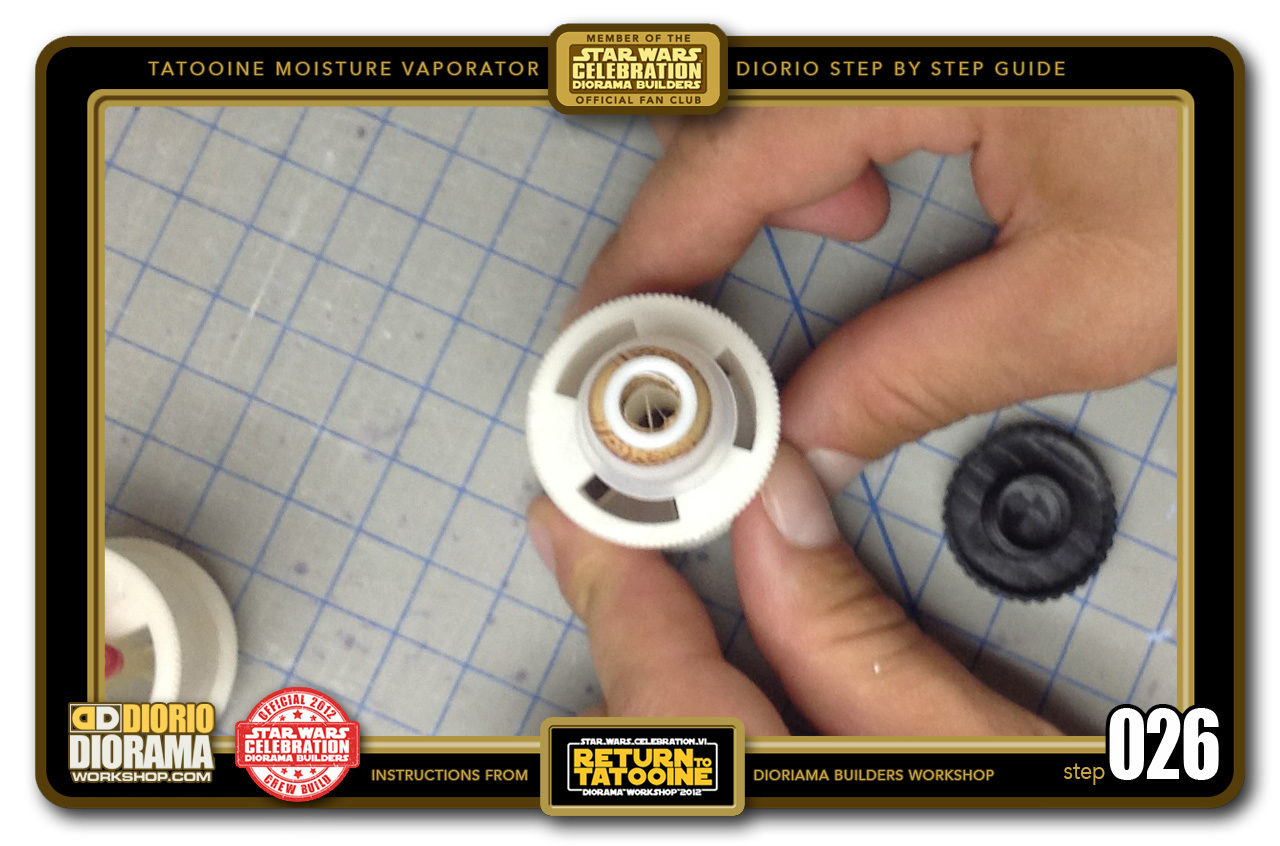
- STEP 026 > The MOST IMPORTANT part of stacking is to make sure you are ALWAYS perfectly centered when you look down. You want to be certain that when yu slide the straw later, you won't have any levels that block it from sliding all the way in.
-
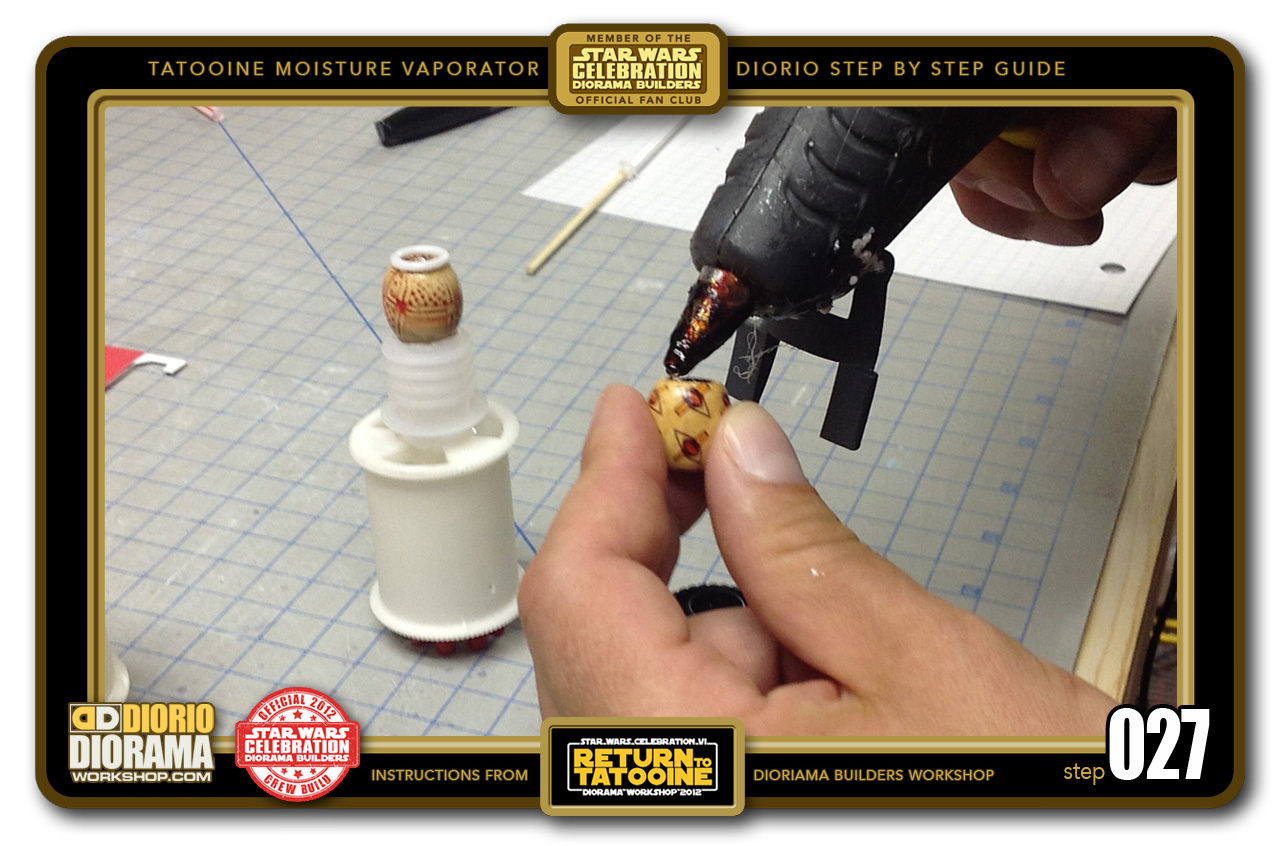
- STEP 027 > Let's continue stacking... Grab the 2nd big bead and put hot glue around the inside edges.
-
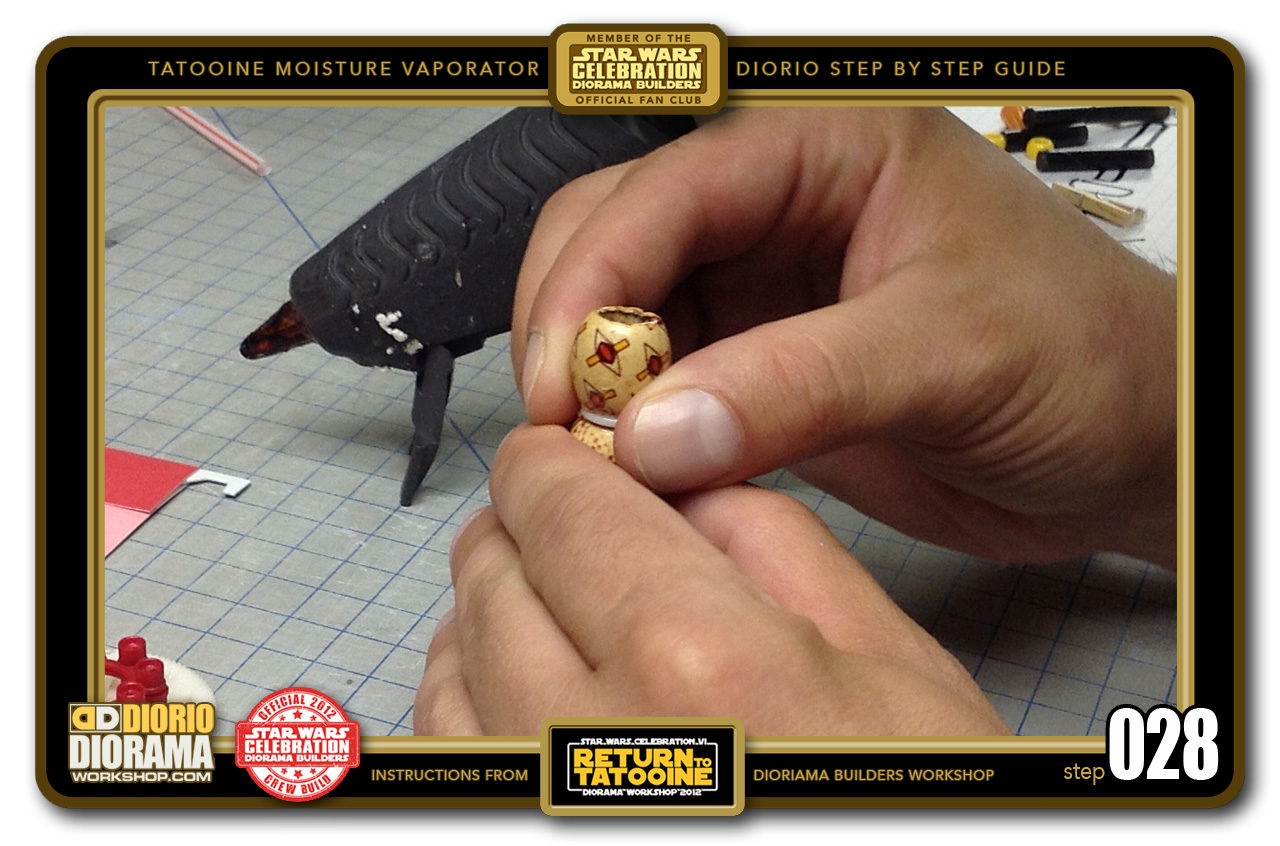
- STEP 028 > Carefully place it on top of the white ring. Keep the allignment and let the glue harden.
-
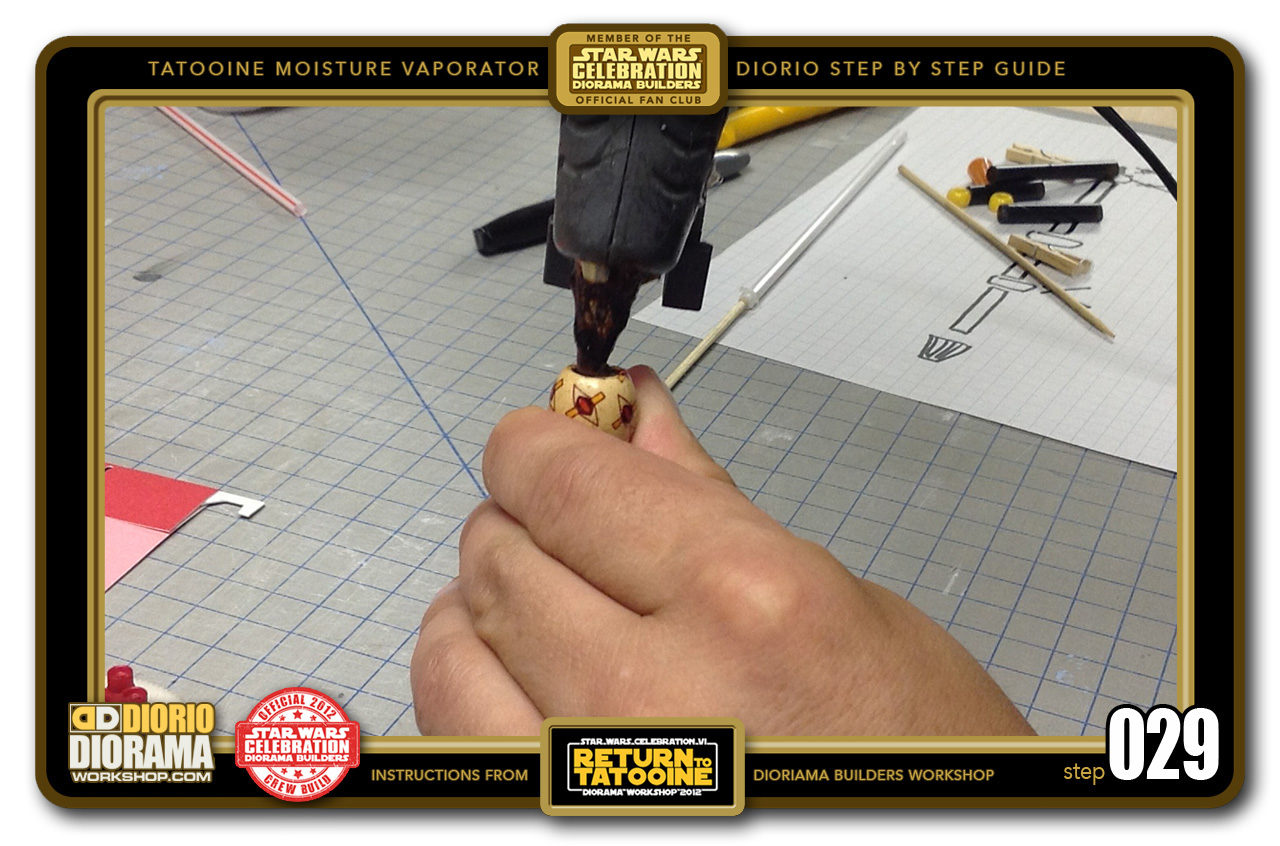
- STEP 029 > Hot glue again on the inner edges of the 2nd big bead.
-
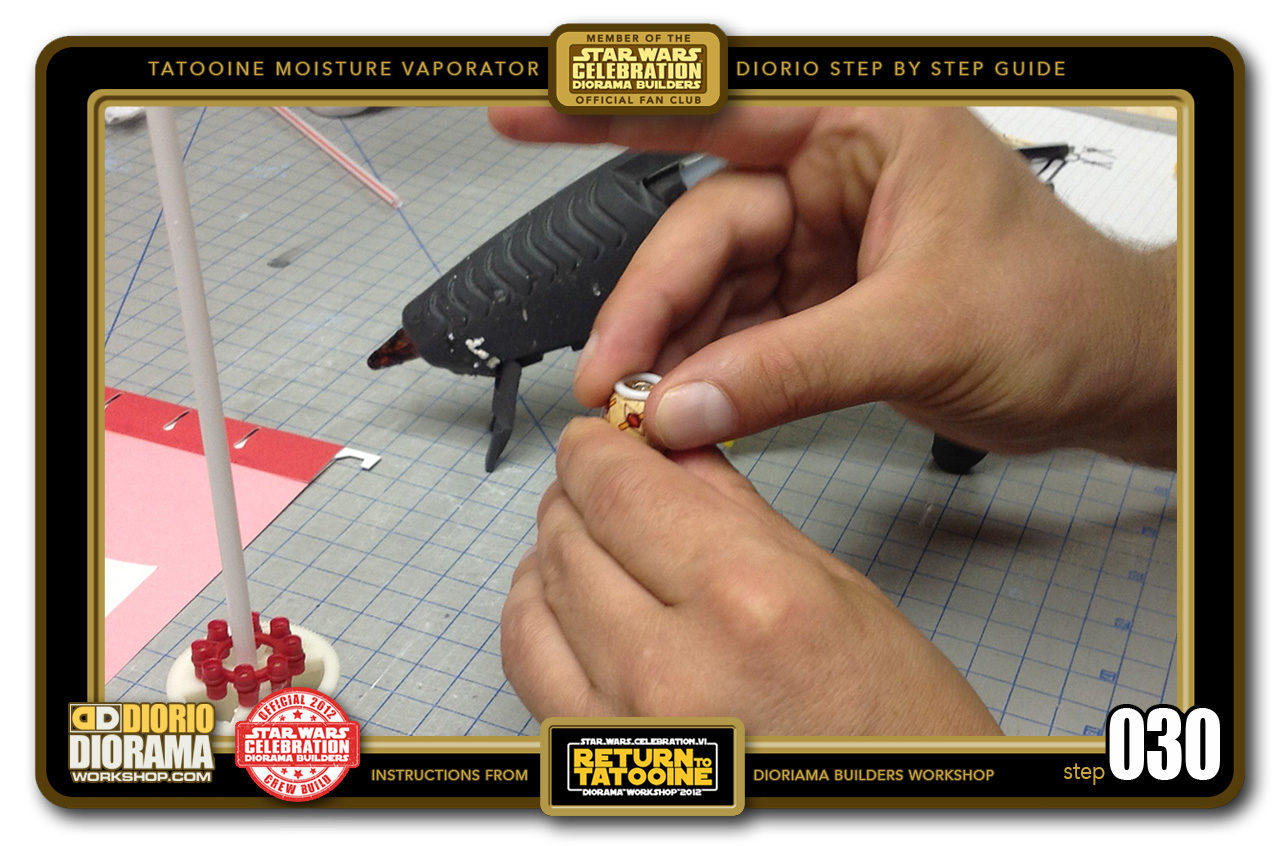
- STEP 030 > Grab another white ring and carefully place it on top making sure to keep that center alignment.
-
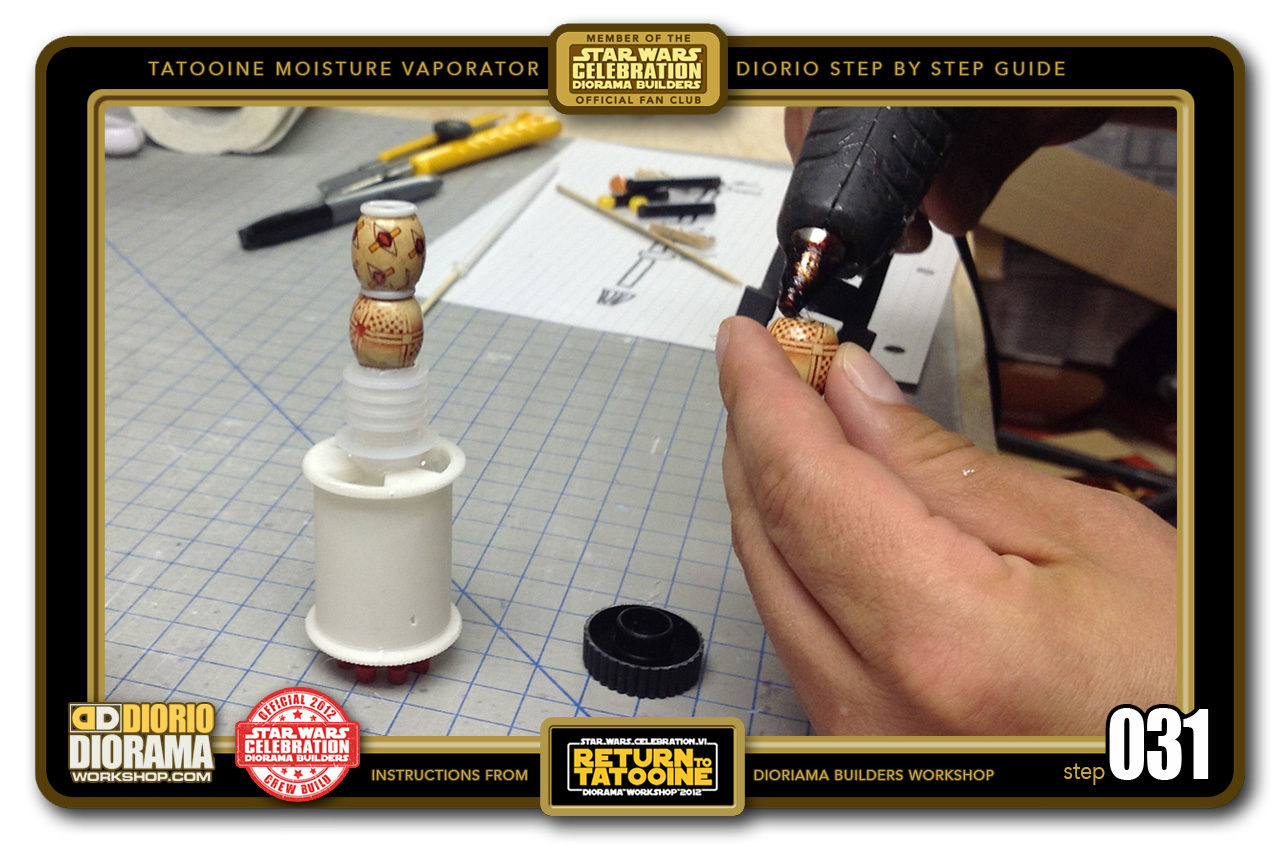
- STEP 031 > Grab the last big bead and place hot glue along the inner edges.
-
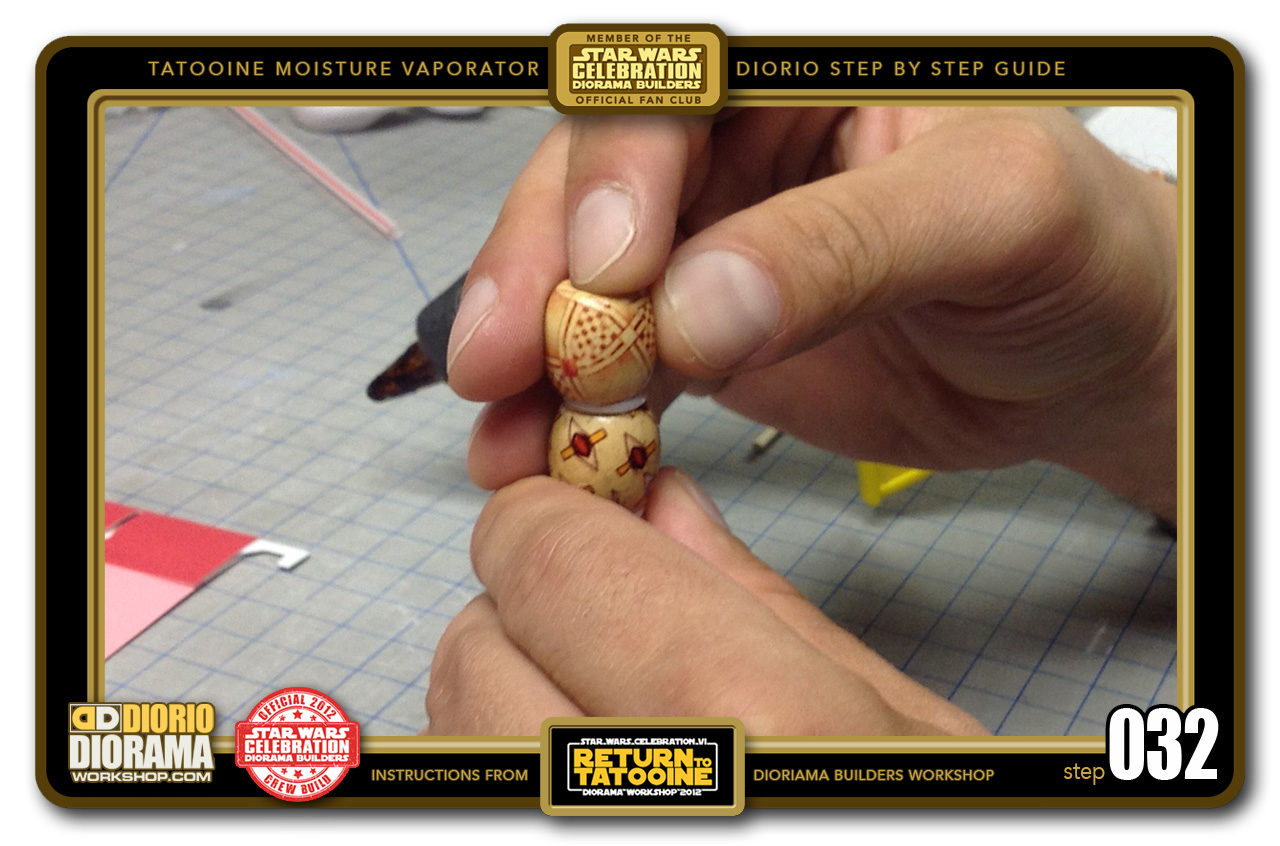
- STEP 032 > Place it on top of white ring #2 wiggle it a little if it is not perfectly aligned.
-
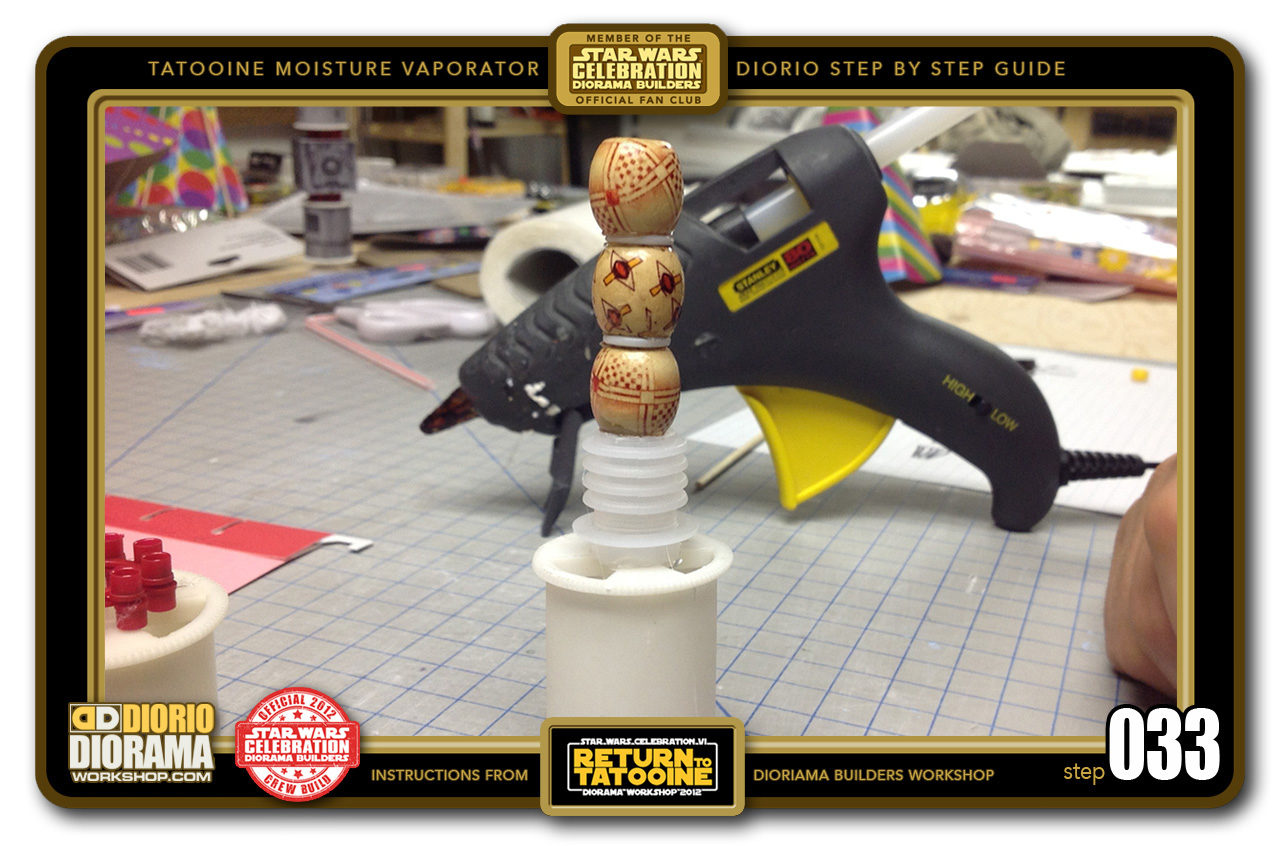
- STEP 033 > Your stacks should look like this now.
-
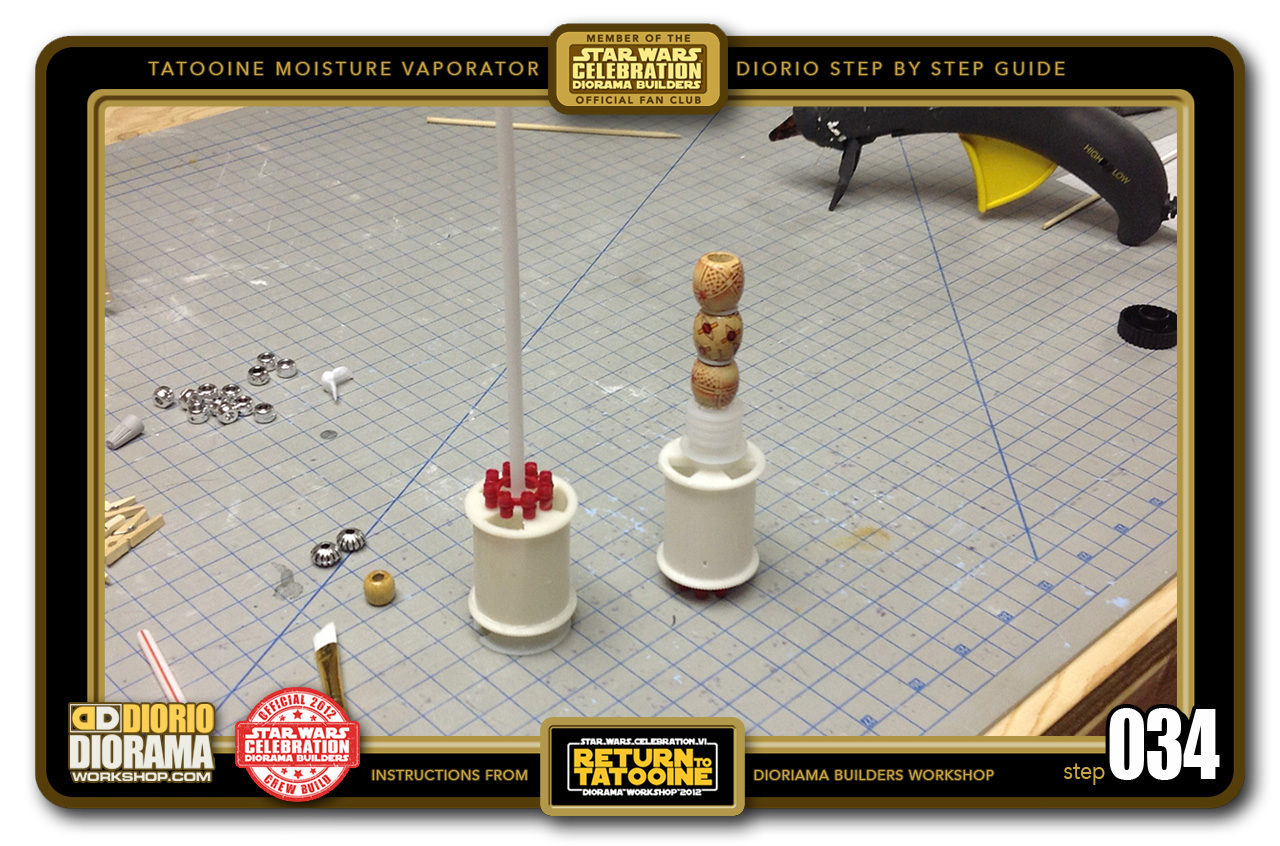
- STEP 034 > You now have the bottom spool (attached to the straw base) and the top spool with the stack of beads. Time for the center cube.
-
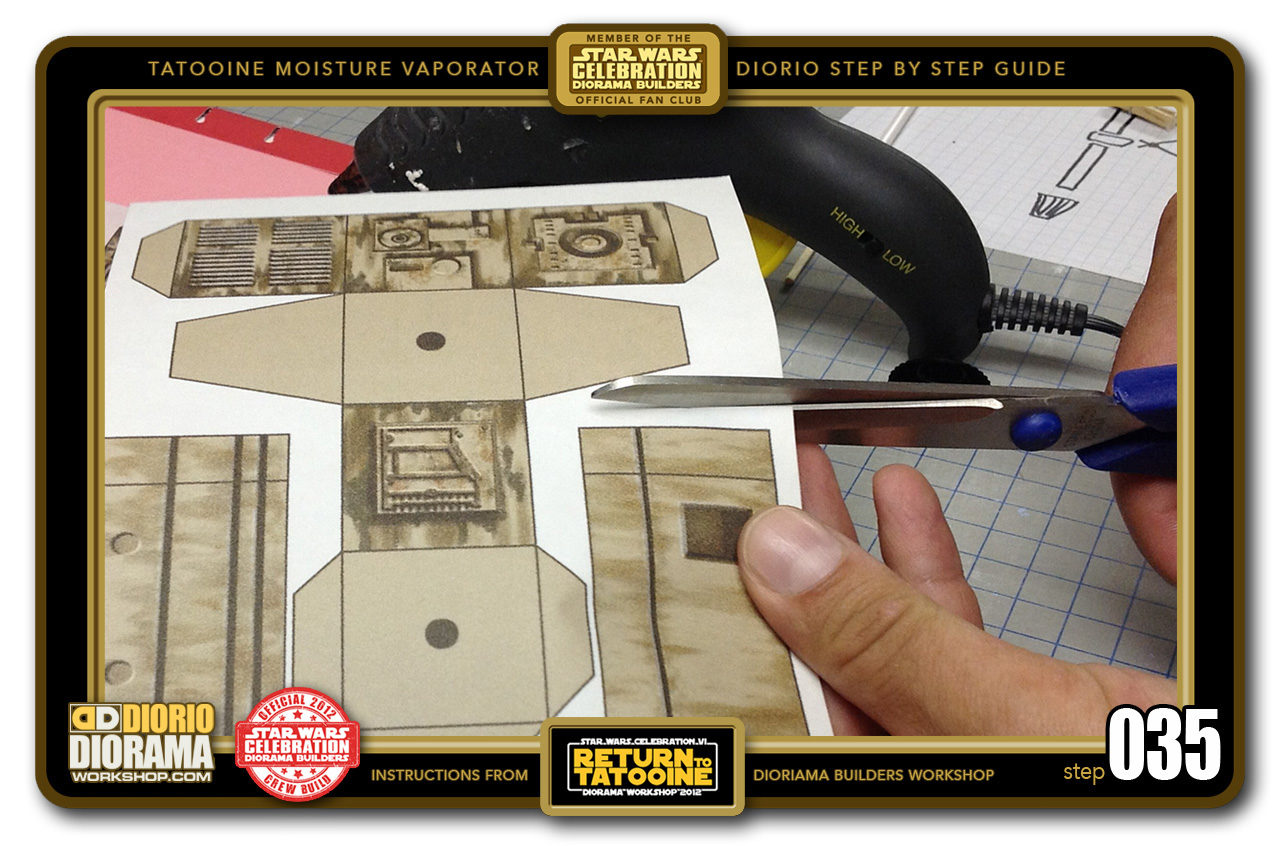
- STEP 035 > Print your Free Moisture Vaporator Decal (available in the tutorial star wars menu) and cut loosely around the shapes. Your sheet will not be the exact same as this was a prototype print that I used.
-
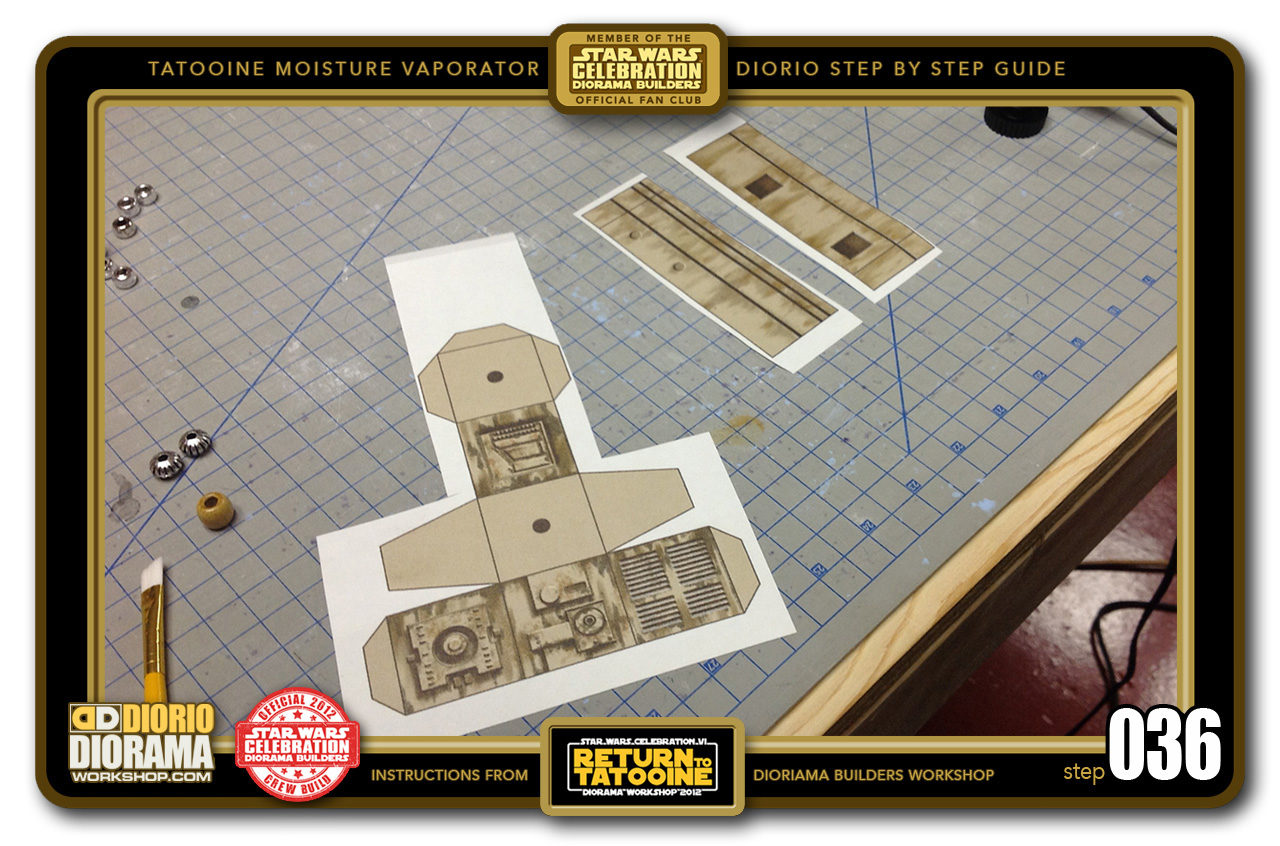
- STEP 036 > The important thing to note is that the cube is the ONLY decal to be glued to a cardboard (to make it sturdy enough to fold) the others just wrap around the spools as is.
-
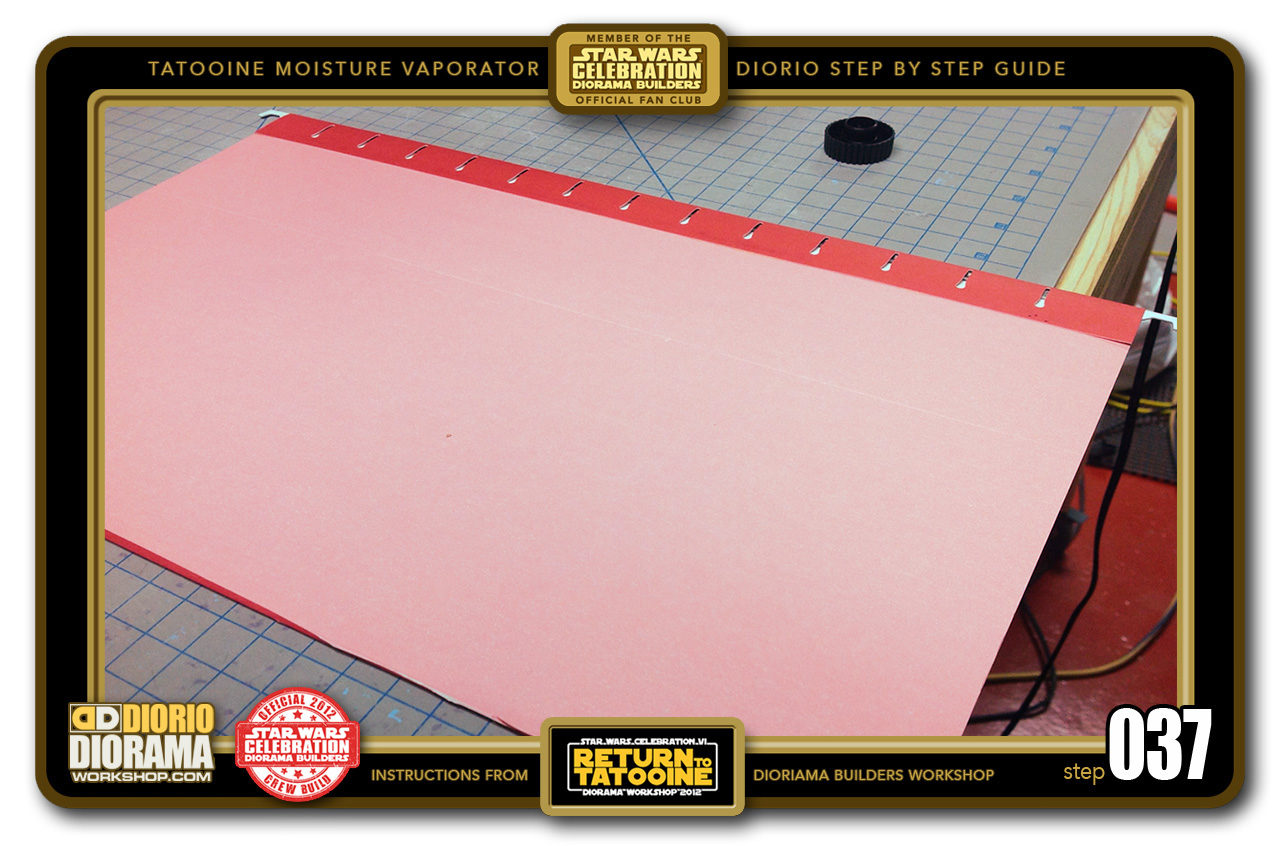
- STEP 037 > I used the cardboard from a file folder as it is thick enough to support the cube but not too thick to prevent folding the shape properly.
-
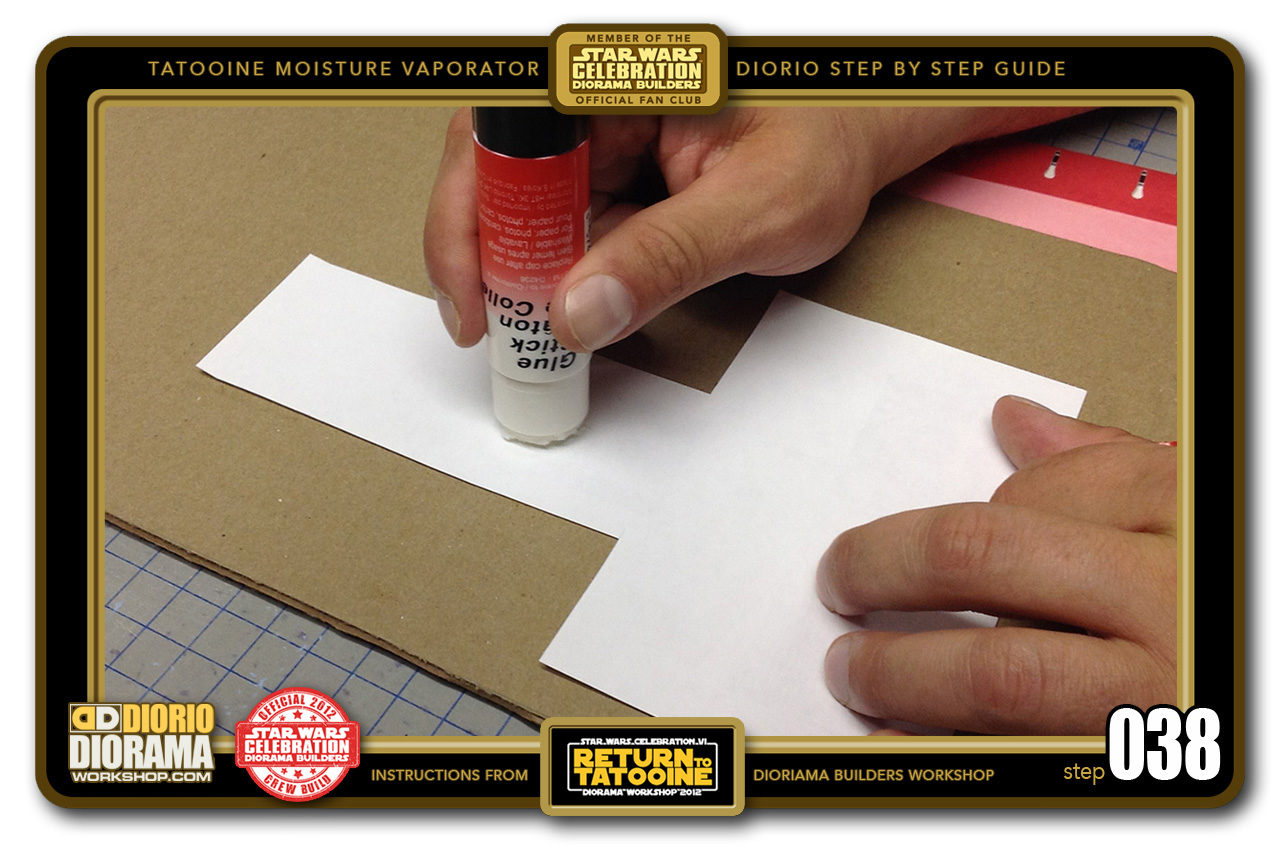
- STEP 038 > Take a glue stick, and apply it to the back of your cube decal. Make sure to cover all edges. I use a scrap carboard to lay the paper on to protect the table from getting glue when your stick goes outside the paper edges. (If you use a full size label sheet you don't need to glue, just peel the back to stick)
-
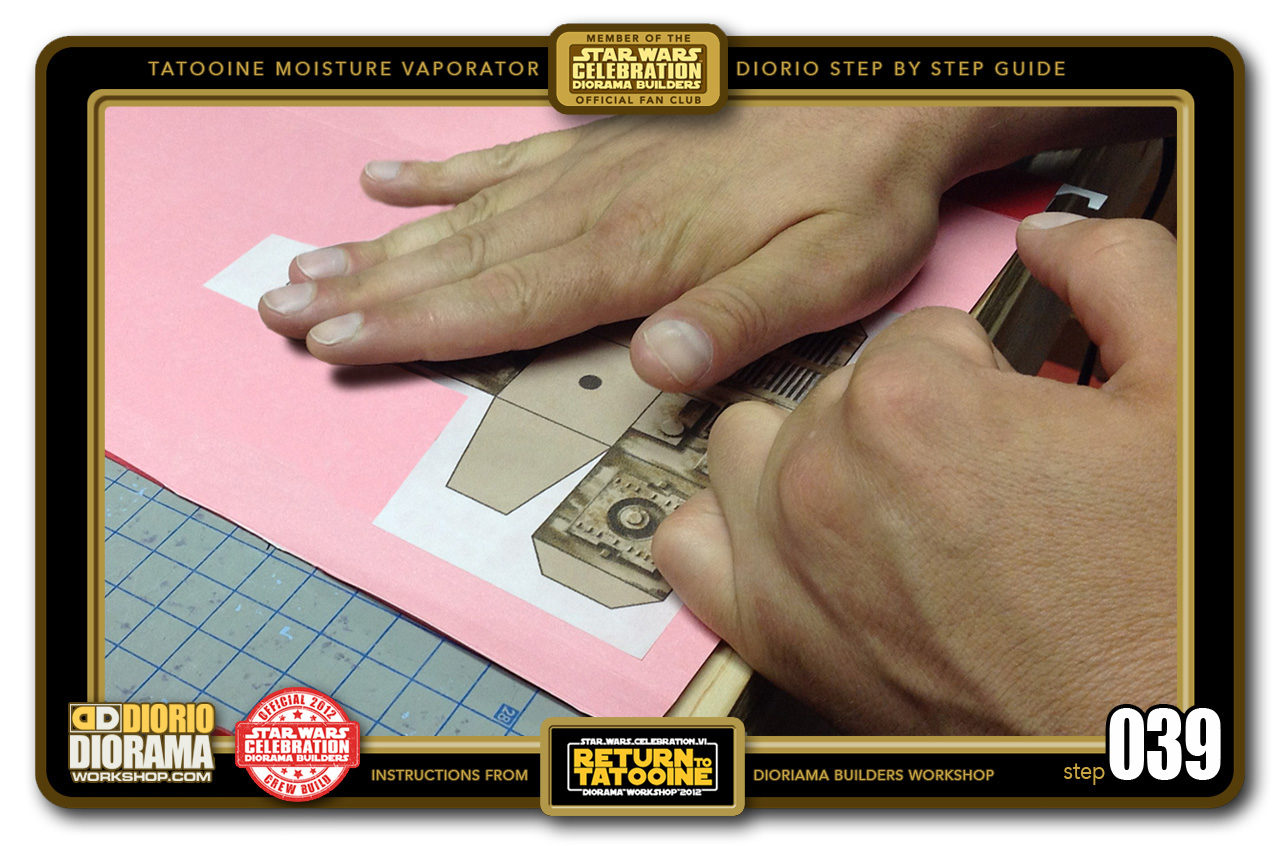
- STEP 039 > Place the decal on your file folder or other thin cardboard and use your hand to press it tight and remove any bubbles or wrinkles.
-
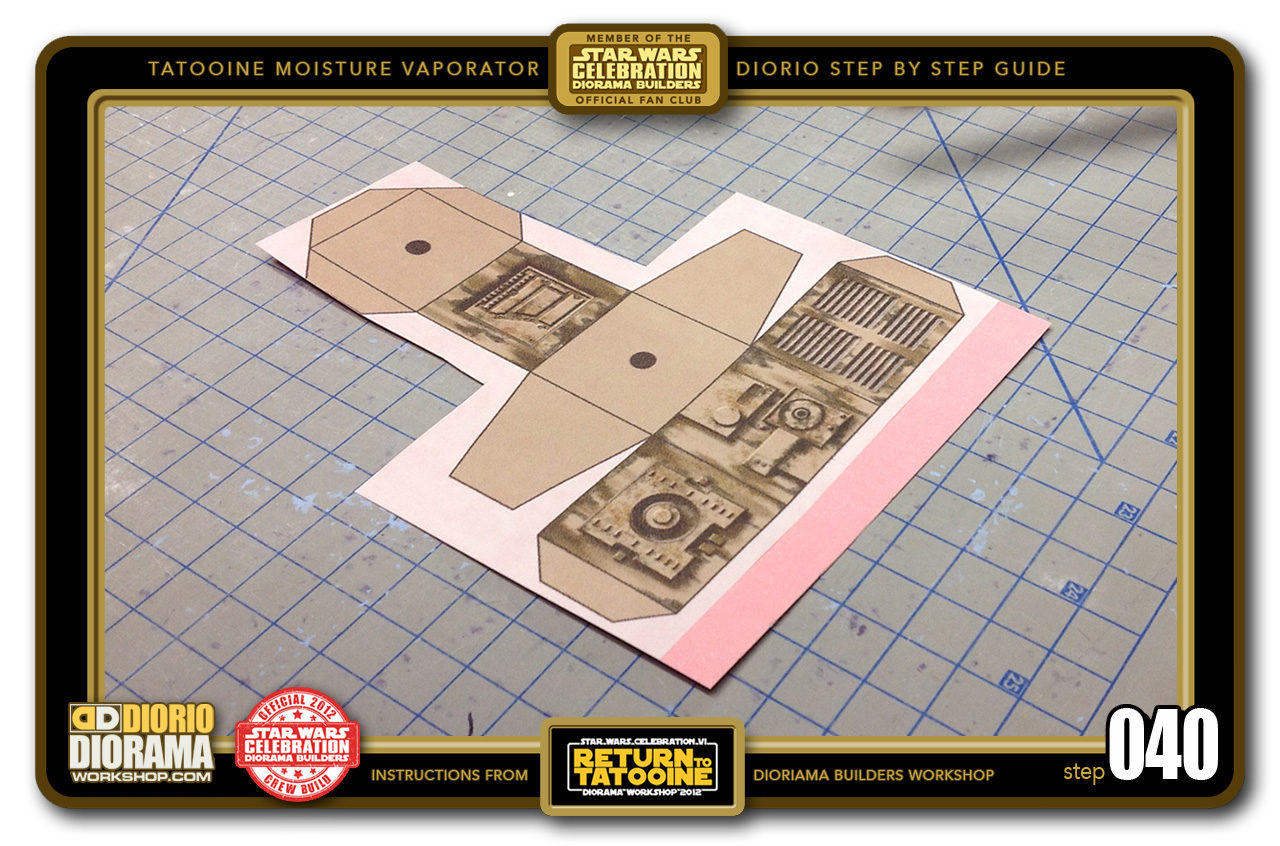
- STEP 040 > Once the glue dries, do a rough cut of the shape so you can manipulate it easier during the precise cutting.

.
Did you already build this Diorama ? At home or at our Star Wars Celebration Diorama Builders workshop ? Would you like to show it in the site’s GALLERY VISITORS DIORAMAS section, YES ? That is Awesome !!! You can find out all the details on how to email me your photos on the VISITORS SUBMISSIONS INFO page … When I get your photos, I will create your very own page just like this one. You may not realize it but work does inspire others to join in the fun of making Action Figure Dioramas.
.
NOT FOR RESALE ALL Decals, tutorials and artwork are ©FrankDiorio (dioramaworkshop.com) and offered FOR FREE to the fans – that would be you ? so you can build and display my diorama designs in your very own home. I realize I cannot control what one does with my graphics once I place them on the web, I can only ask you as one fan to another, please respect the artist and do not be that jerk who uses my designs and tutorials to build a copy of my work only to sell it on EBAY or trade/sale groups and forums. Thank You. Frank.
![]() Catch up with fellow visitors and exchange stories, read cool interviews with the crew, exchange photos, fun surprises and grab some FAN ONLY merchandise next year at actual future conventions ?
Catch up with fellow visitors and exchange stories, read cool interviews with the crew, exchange photos, fun surprises and grab some FAN ONLY merchandise next year at actual future conventions ?
.
©2018 Frank Diorio DioramaWorkshop.Com
.
IF YOU LIKE WHAT YOU SEE, PLEASE SHARE WITH YOUR FRIENDS
USING THE SOCIAL MEDIA BUTTONS BELOW