


-
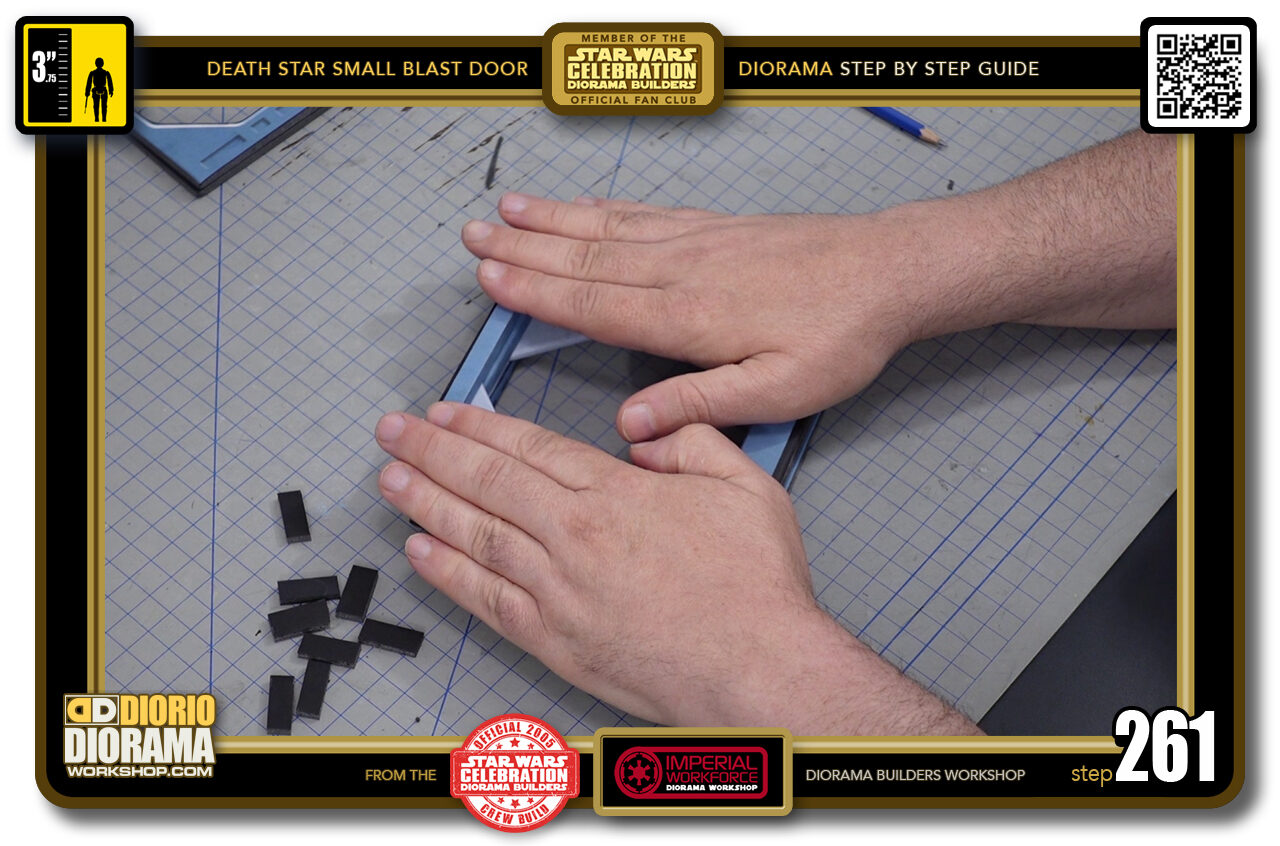
- STEP 261 > Press down for a few seconds until the hot glue starts to cool down.
-
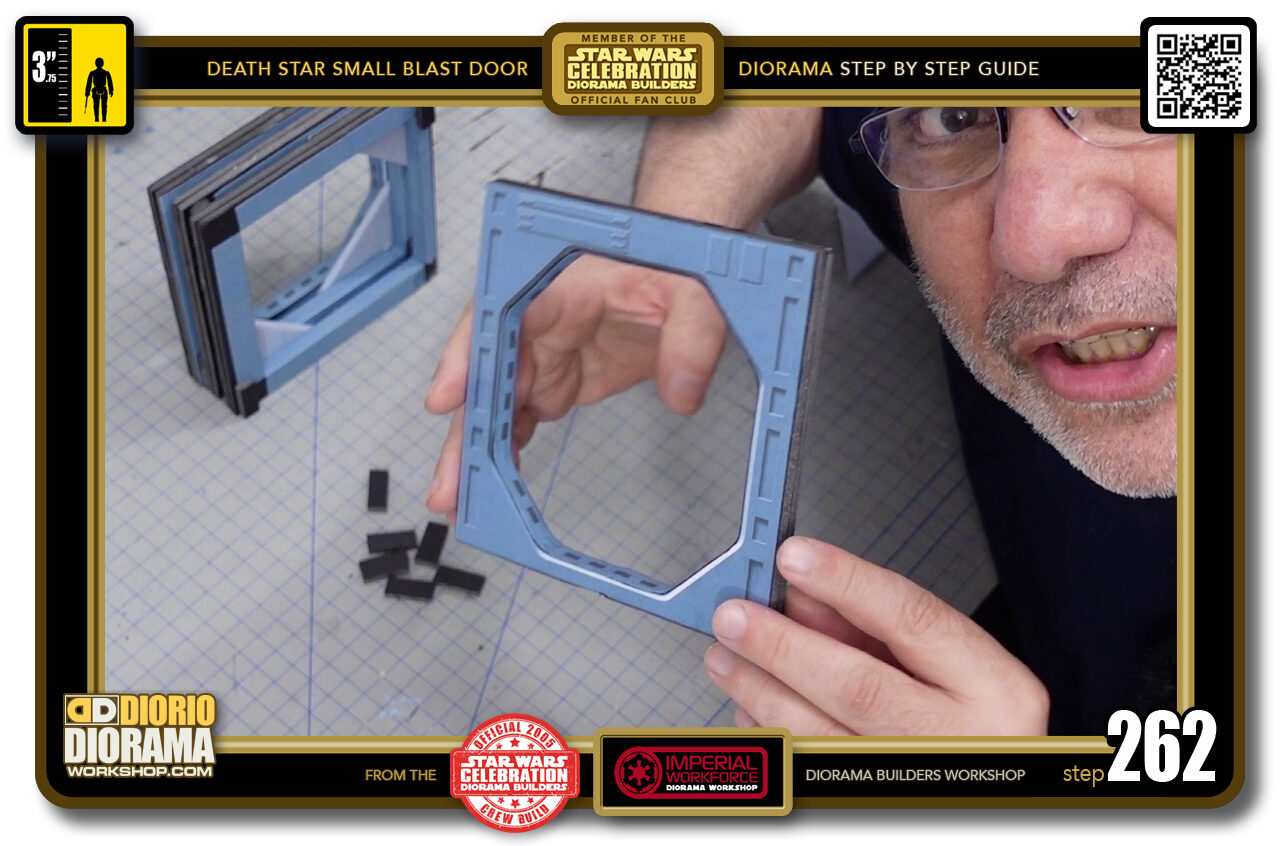
- STEP 262 > Now for the LAST FRAME it is VERY IMPORTANT you place the remaining 2 doritos and spacer onto it directly. Only after these are secured that we attach the entire back frame to the rest of the body.
-
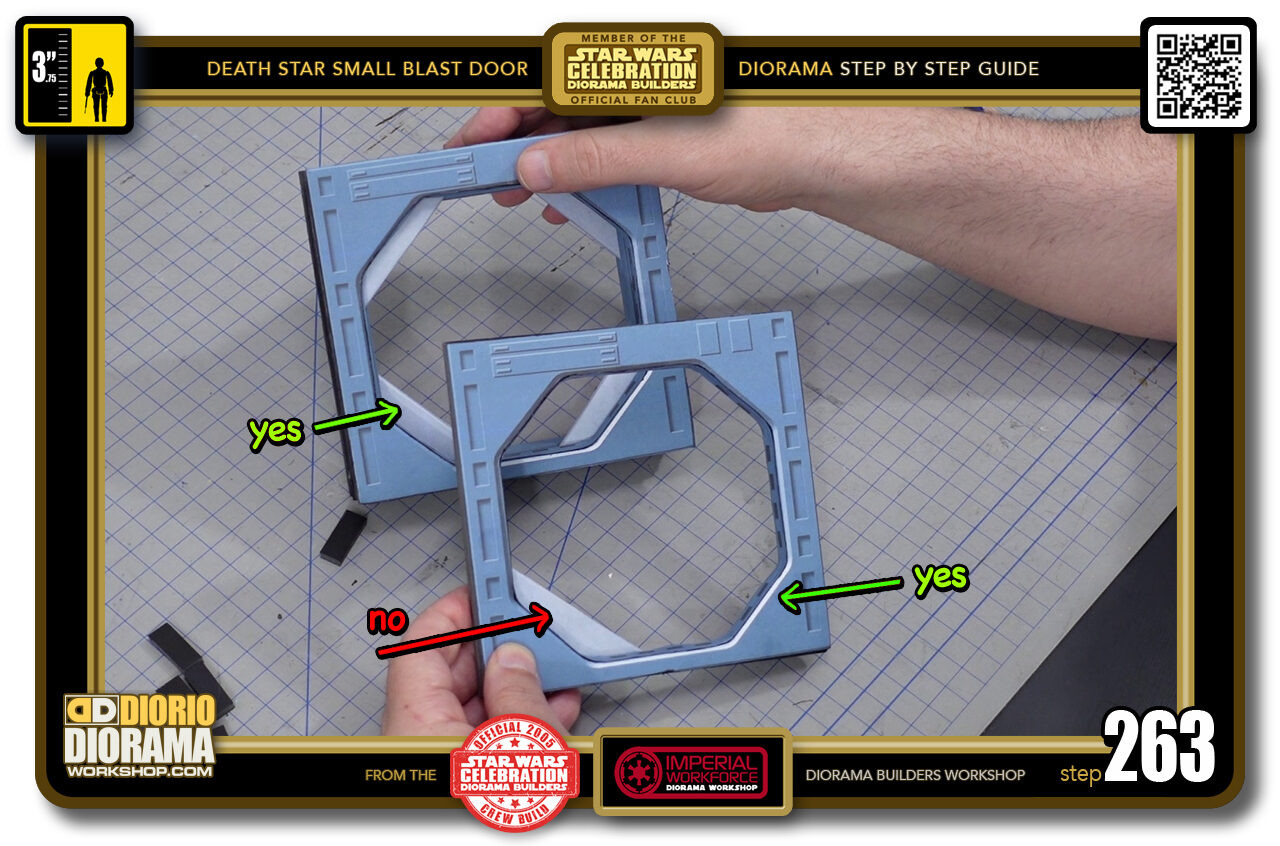
- STEP 263 > MOST IMPORTANT IS THE FINAL ALIGNMENT of your DORITO CORNERS. When you hold both your front frame and rear frame side by side, your first instinct would be to place the corners identical. this is NOT THE CASE !!! You want them placed OPPOSITE where the green YES points to.
-
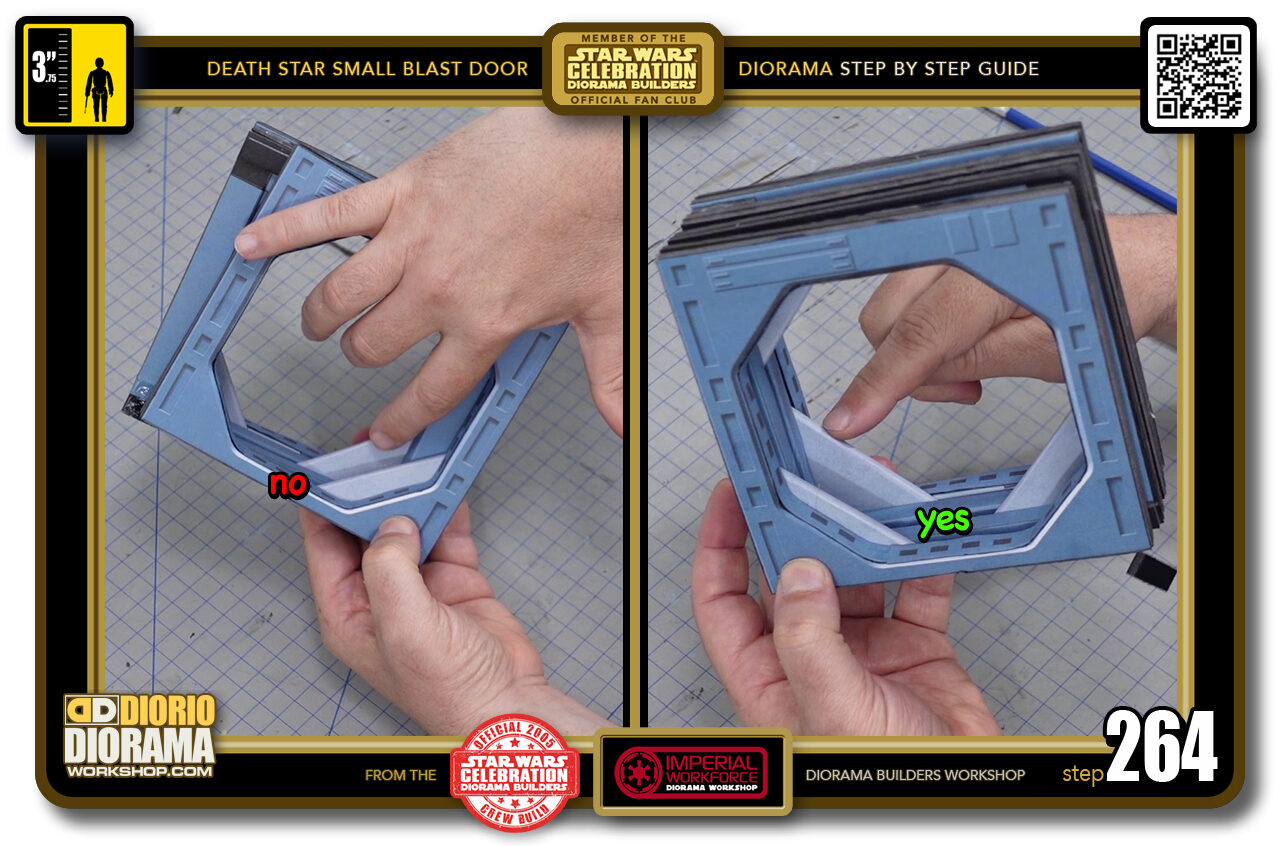
- STEP 264 > If you glued them the same, when you would flip your 3 layered frame facing correctly (away from you) and place your back frame onto layer 3, the centre dorito corners would match up which is NOT GOOD. You want a gap between yourdorito layers. meaning you want layer 1 and 3 to match up and have the middle door, layer 2 be on the opposite corner.
-
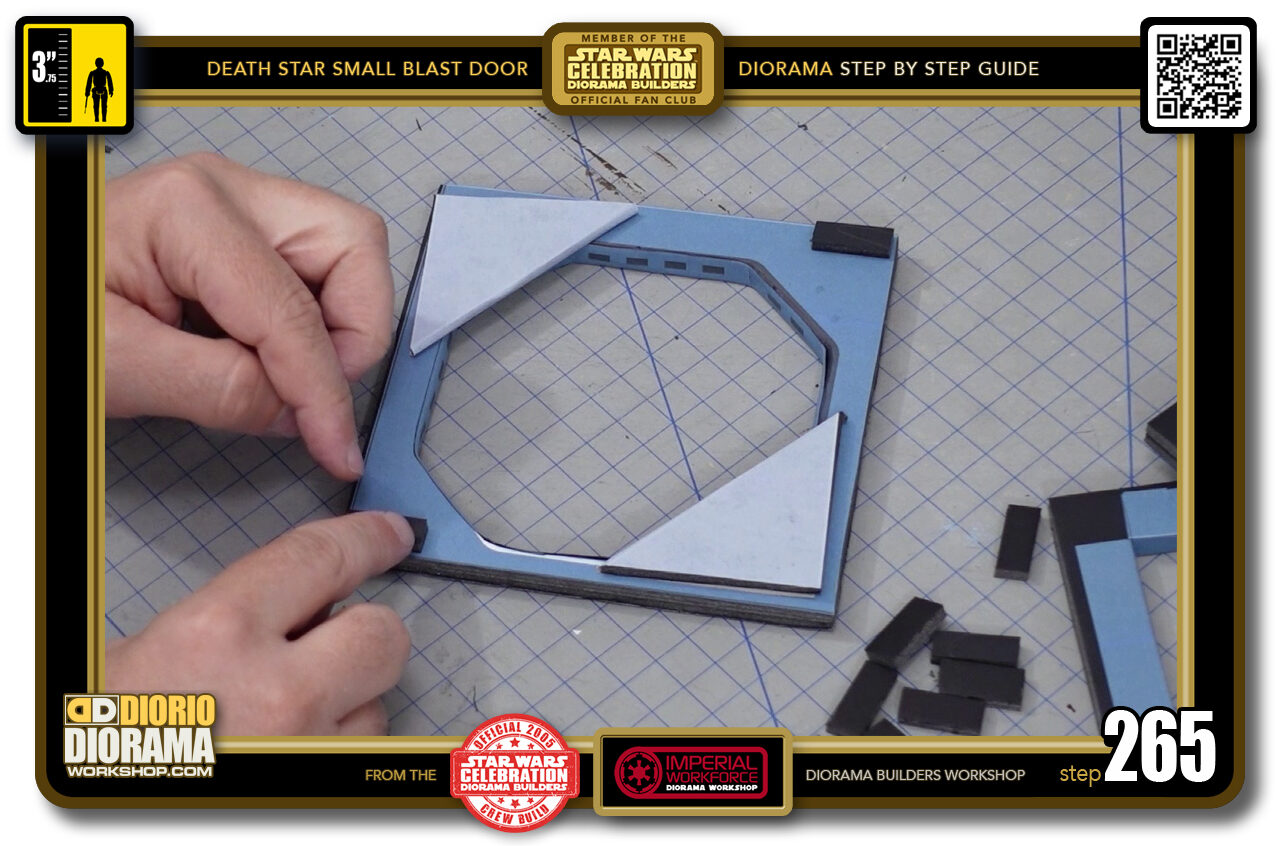
- STEP 265 > This is the PROPER PLACEMENT of your remaining doritos and spacers. Remove the spacers, put your hot glue and put back the spacers so you don't get confused. It's hapened to me with the large doors 🙂 Once cooled off, you can remove one of the corners and glue them like you did the others.
-
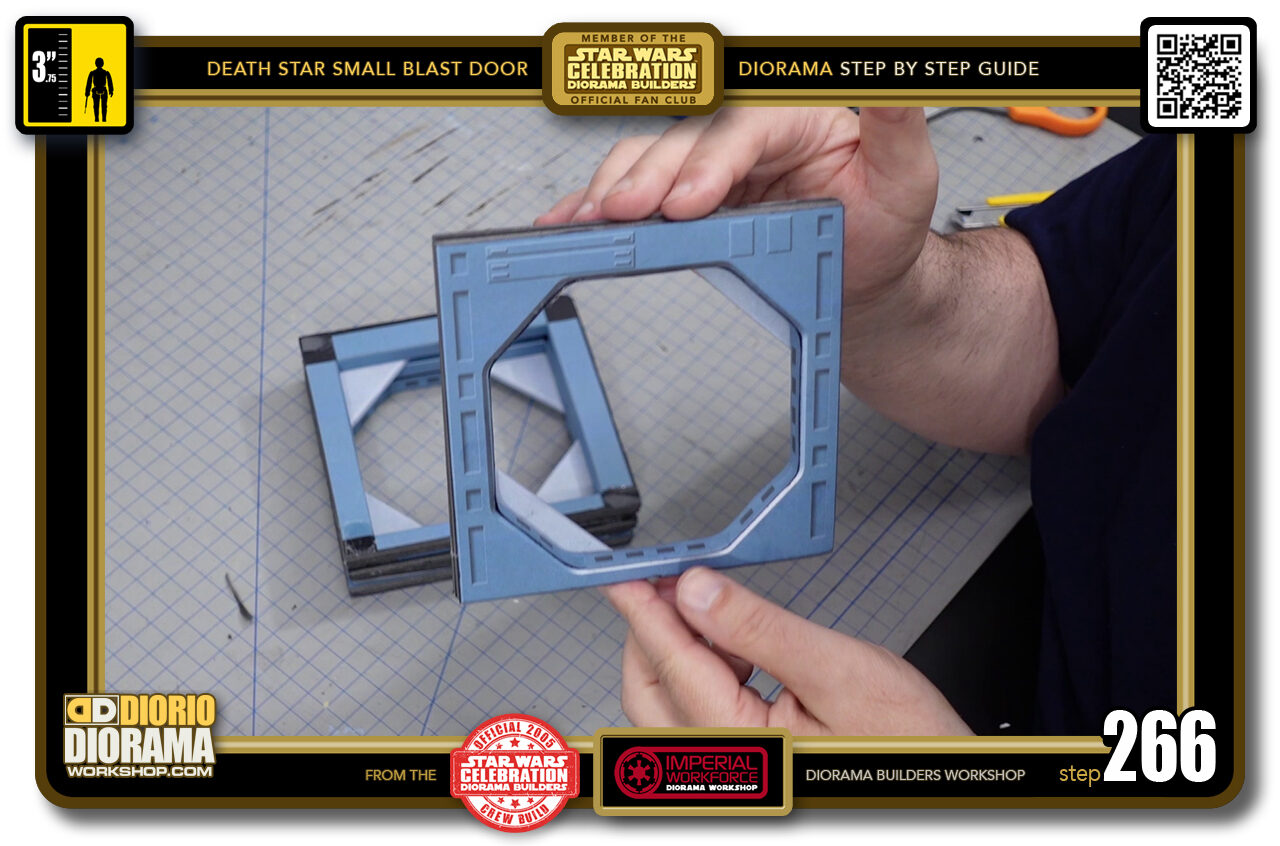
- STEP 266 > REMEMBER to MATCH THE EXTRUSIONS of the other layers. When both doritos are in place, we can move on to the LAST STEP.
-
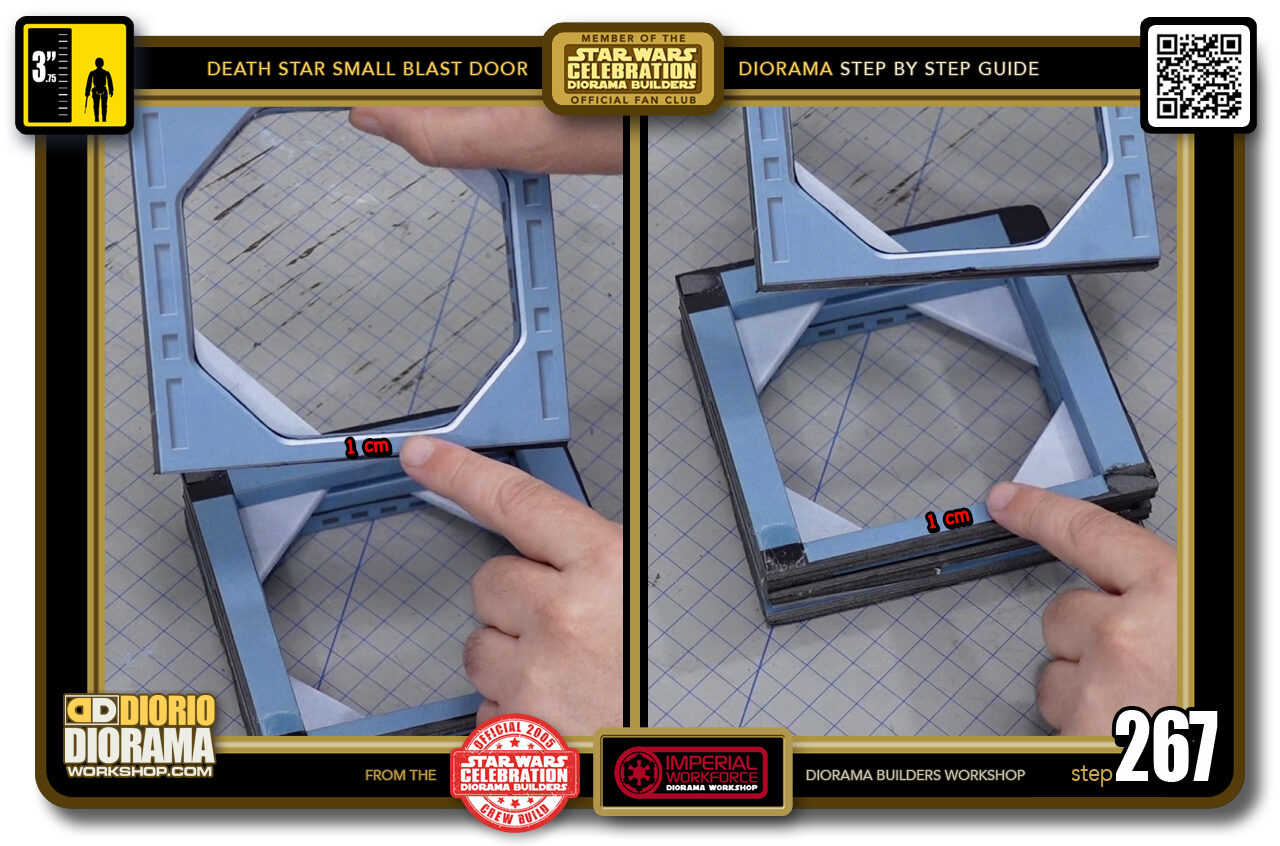
- STEP 267 > Grab your back frame and find the bottom 1cm side. You will now be placing this onto the top of the 3rd layer (2nd inner square frame)
-
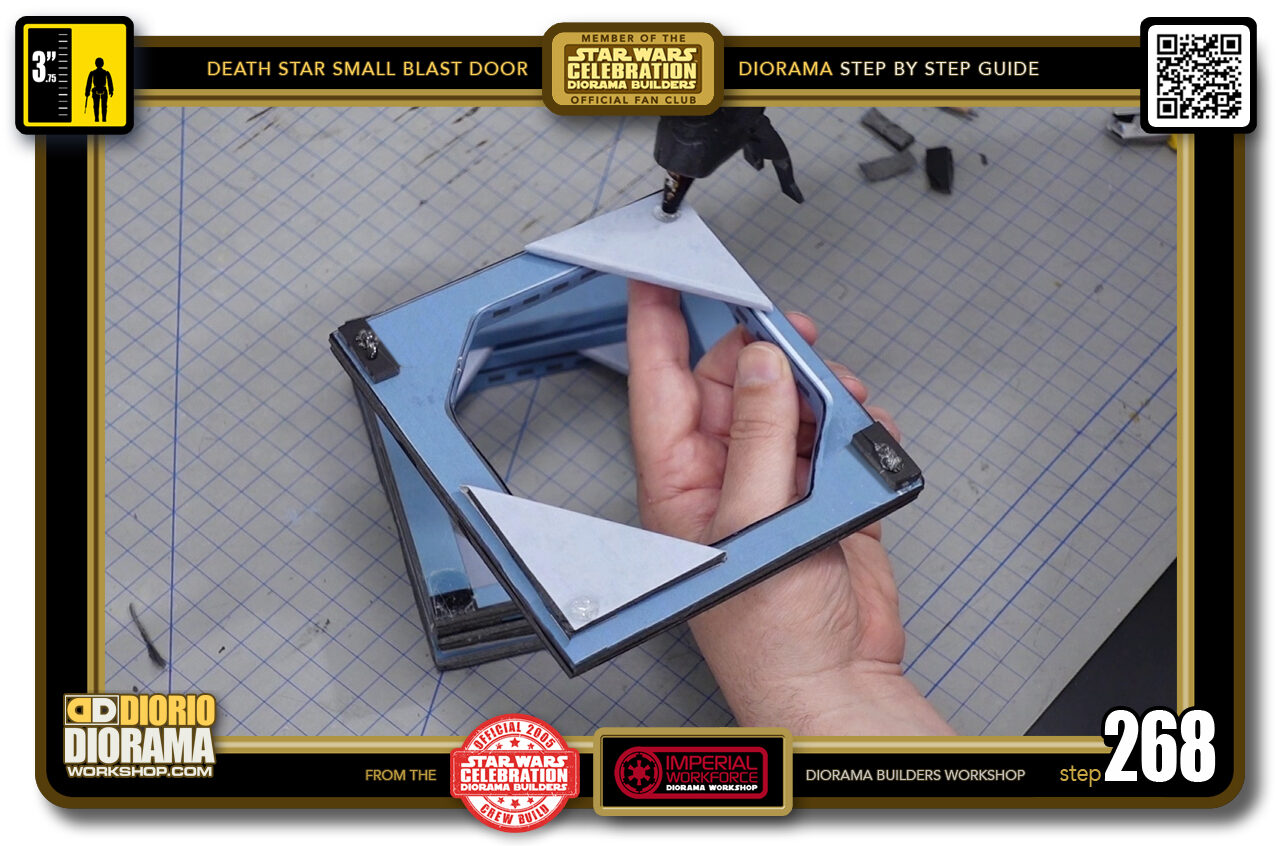
- STEP 268 > Place a small drop on each othe the corners as close to the outside edges as you can. PUT THE GLUE ON BACK FRAME !!! NOT the 3 layered build.
-
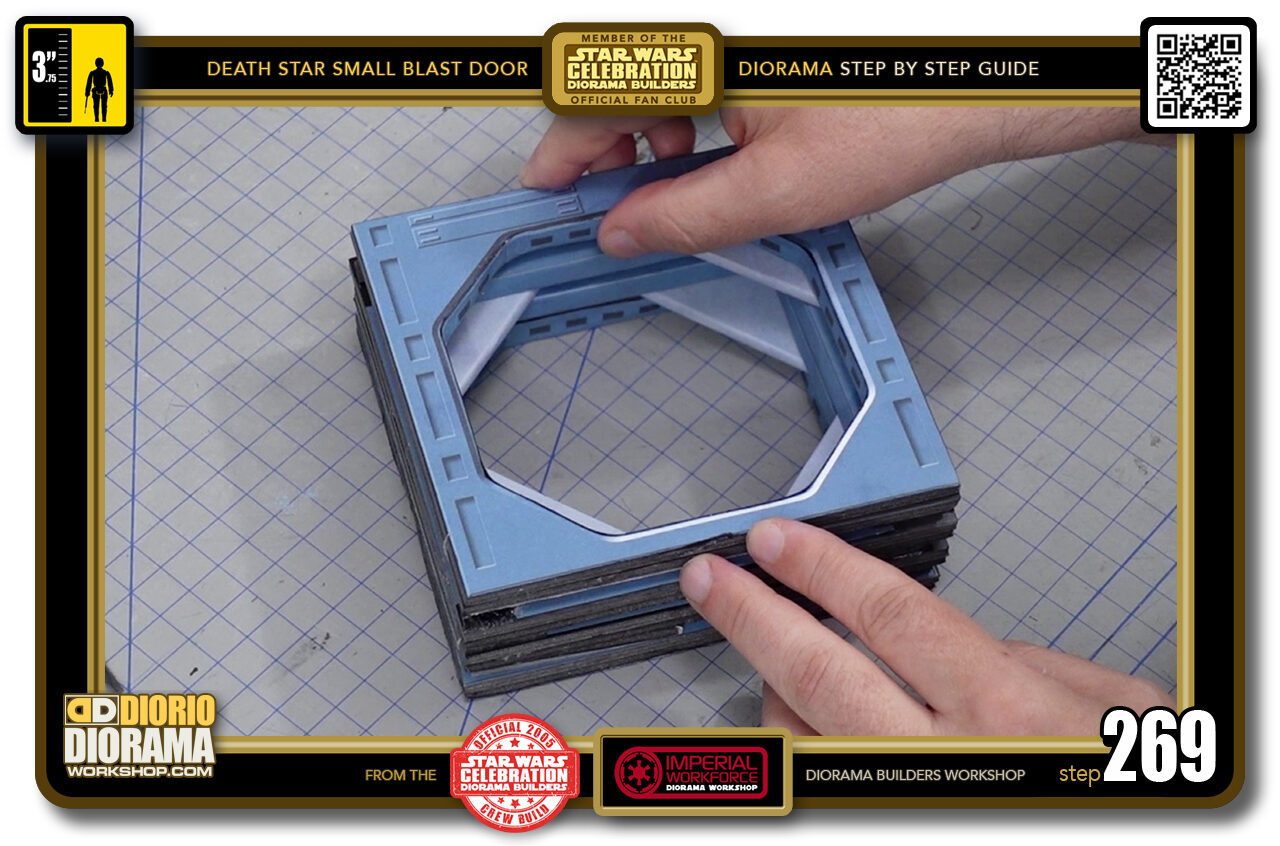
- STEP 269 > Now flip your back frame and align flush all around.
-
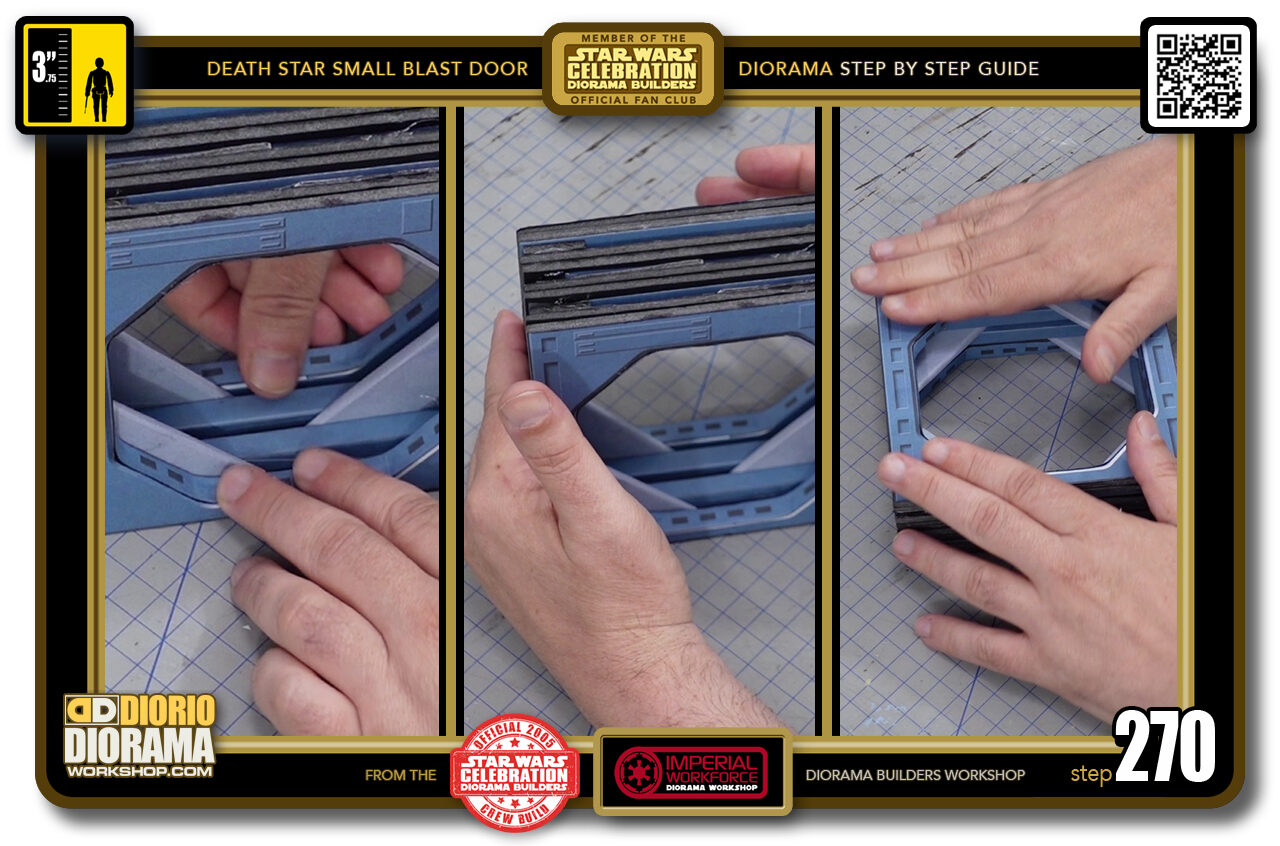
- STEP 270 > Place on your table surface and press down on the bottom to make sure the back frame fits flat with the other 3 and align the sides to get a perfect frame. Press down for few seconds until the glue cools down.
-

- STEP 271 > Now your construction is complete, Congratulations. there is however 2 more decal possibility, options if you will. If you are NOT putting a ceiling on your display, you have the option to use the top colour decal to hide the top of the frame. Simply apply it to a posterboard, which is still thin enough to not show as a extra thickness on top and at the same time make it just stronger than just the decal sheet which would show up any bumps and imperfections in the alignment of your layers.
-
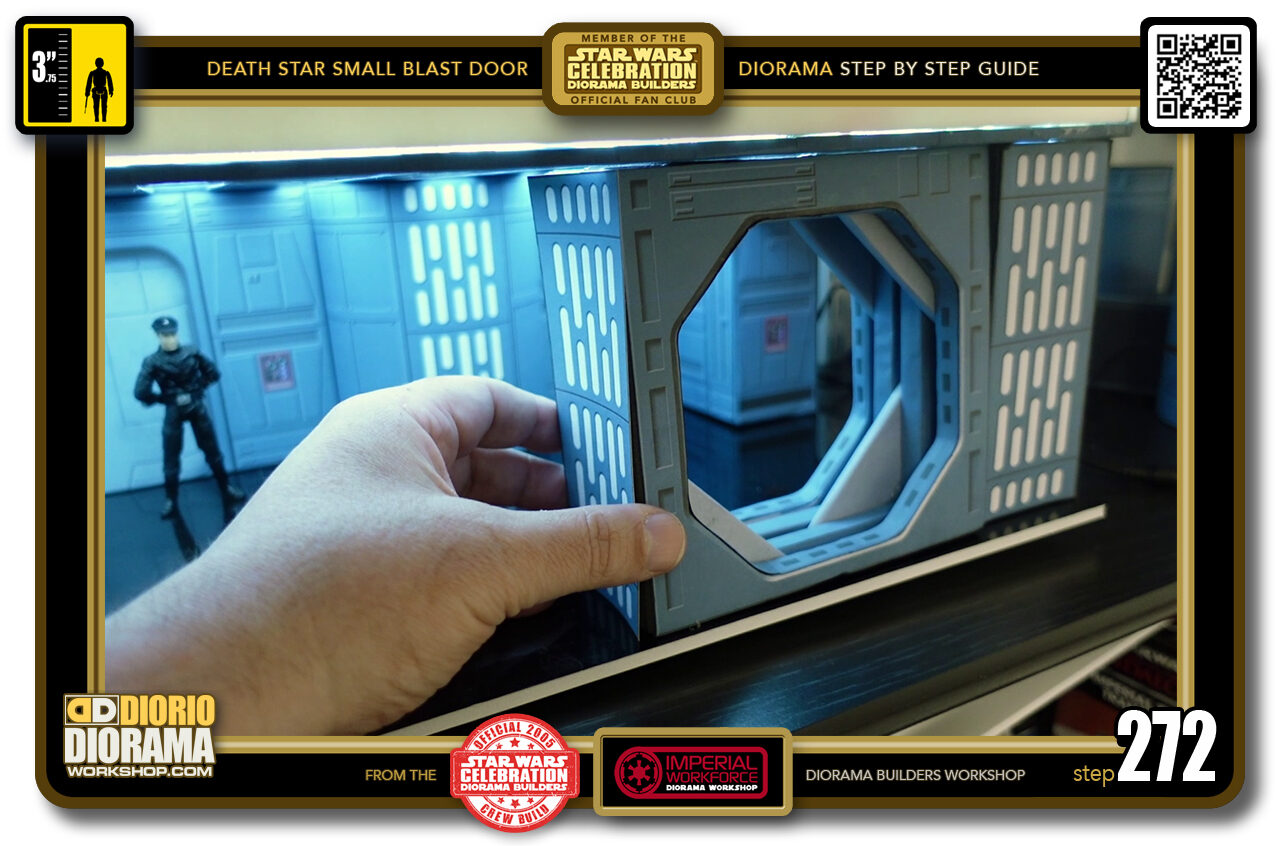
- STEP 272 > the other decal option you have is for the side. If you want to place your small blast door in a corner, you can use any of the basic door decals. I chose the neon patern, but all of them will fit. Simply mount it to a posterboard and then glue to the side.
-
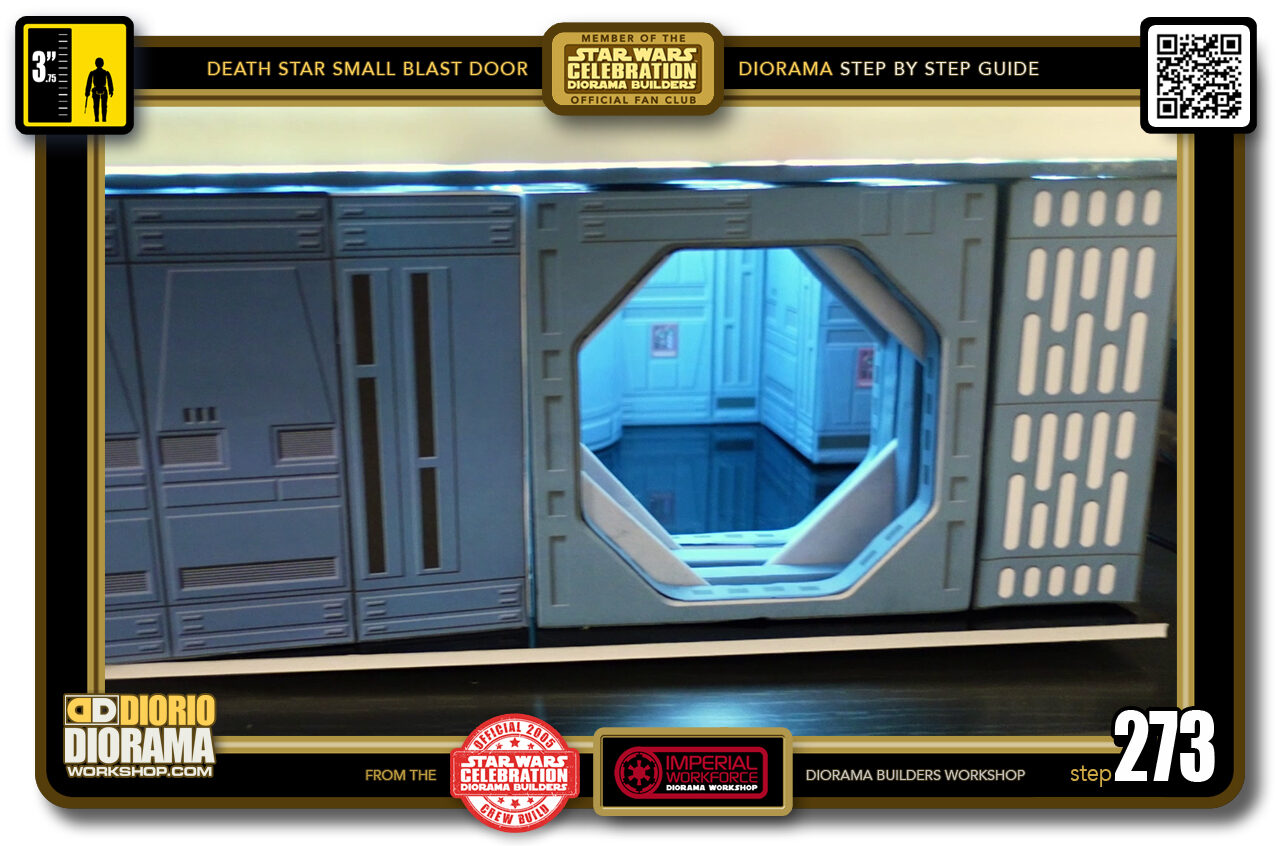
- STEP 273 > Option 3 would be to have wall panels on both sides which would allow you to not need side or and top decals. Simply build your walls with foamcore and basic decals. The peek through effect works really well. Especially when using the deluxe lit ceiling option for your hallways or room.
-
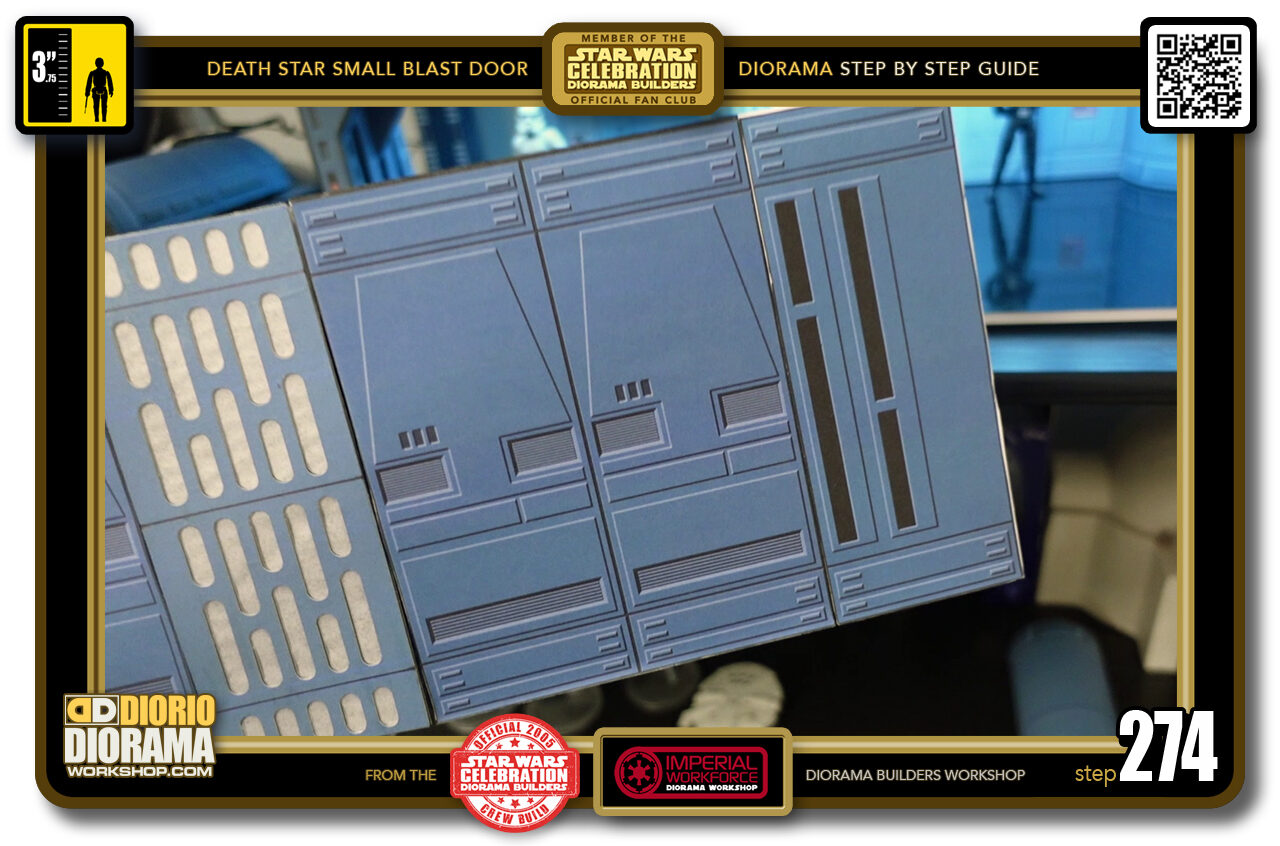
- STEP 274 > You can find all the decals for the wall builds in the tutorial speed index under BASIC WALLS or by clicking here.... https://dioramaworkshop.com/tutorials-decals-death-star-basic-hallway-2020/
-
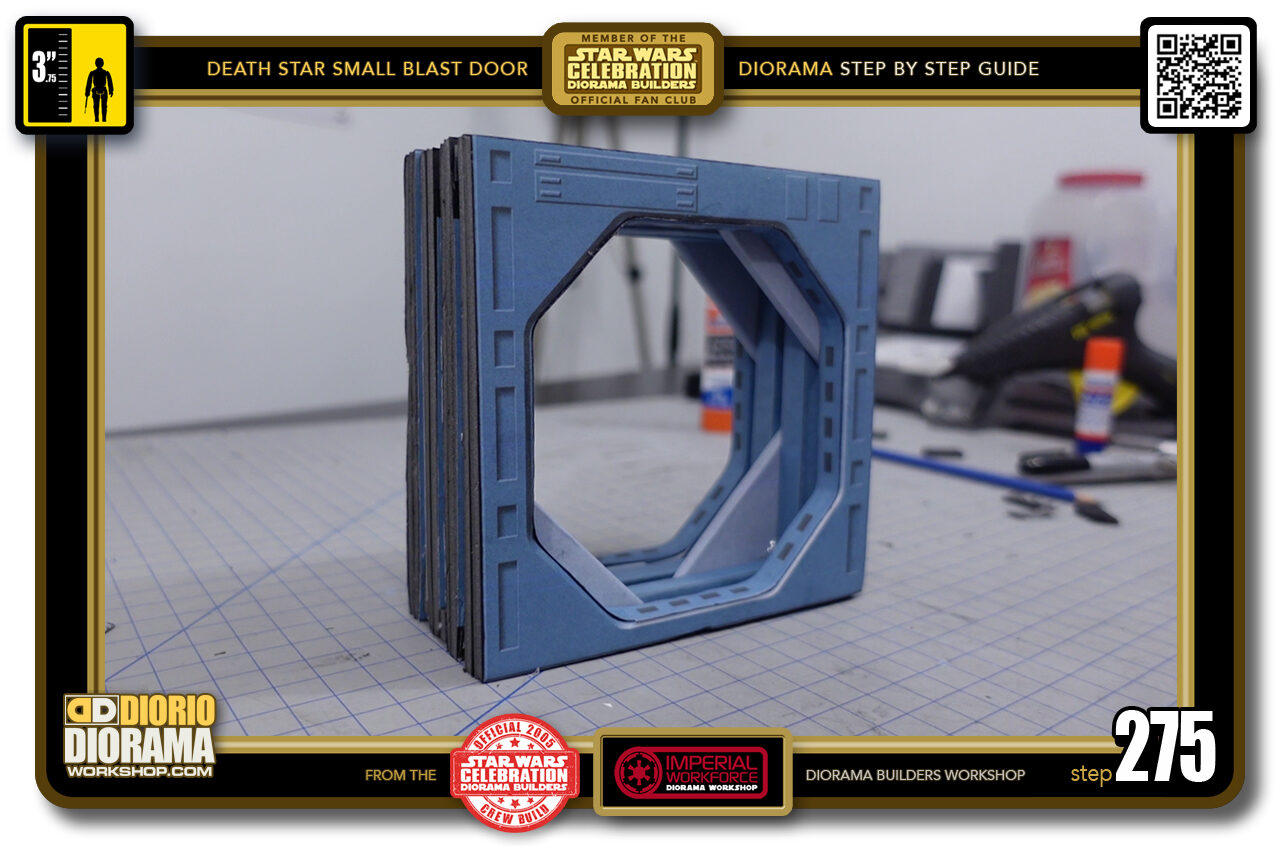
- STEP 275 > So there you go, I hope you enjoyed the build. You can make as many copies as you want to be placed in your Mega Death Star build. You can submit your own builds in the fan Visitors Gallery by clicking here... https://dioramaworkshop.com/visitors-dioramas-submission-info/

.
Did you already build this Diorama ? At home or at our Star Wars Celebration Diorama Builders workshop ? Would you like to show it in the site’s GALLERY VISITORS DIORAMAS section, YES ? That is Awesome !!! You can find out all the details on how to email me your photos on the VISITORS SUBMISSIONS INFO page … When I get your photos, I will create your very own page just like this one. You may not realize it but work does inspire others to join in the fun of making Action Figure Dioramas.
.
NOT FOR RESALE ALL Decals, tutorials and artwork are ©FrankDiorio (dioramaworkshop.com) and offered FOR FREE to the fans – that would be you ? so you can build and display my diorama designs in your very own home. I realize I cannot control what one does with my graphics once I place them on the web, I can only ask you as one fan to another, please respect the artist and do not be that jerk who uses my designs and tutorials to build a copy of my work only to sell it on EBAY or trade/sale groups and forums. Thank You. Frank.
.

.
.
If you have a facebook account, why not join the Official Diorama Builders Fan Club today, simply click the logo link below.
 .
.
Catch up with fellow visitors and exchange stories, read cool interviews with the crew, exchange photos, fun surprises and grab some FAN ONLY merchandise next year at actual future conventions ?
.
©2021 Frank Diorio DioramaWorkshop.Com
.
IF YOU LIKE WHAT YOU SEE, PLEASE SHARE WITH YOUR FRIENDS
USING THE SOCIAL MEDIA BUTTONS BELOW