


-
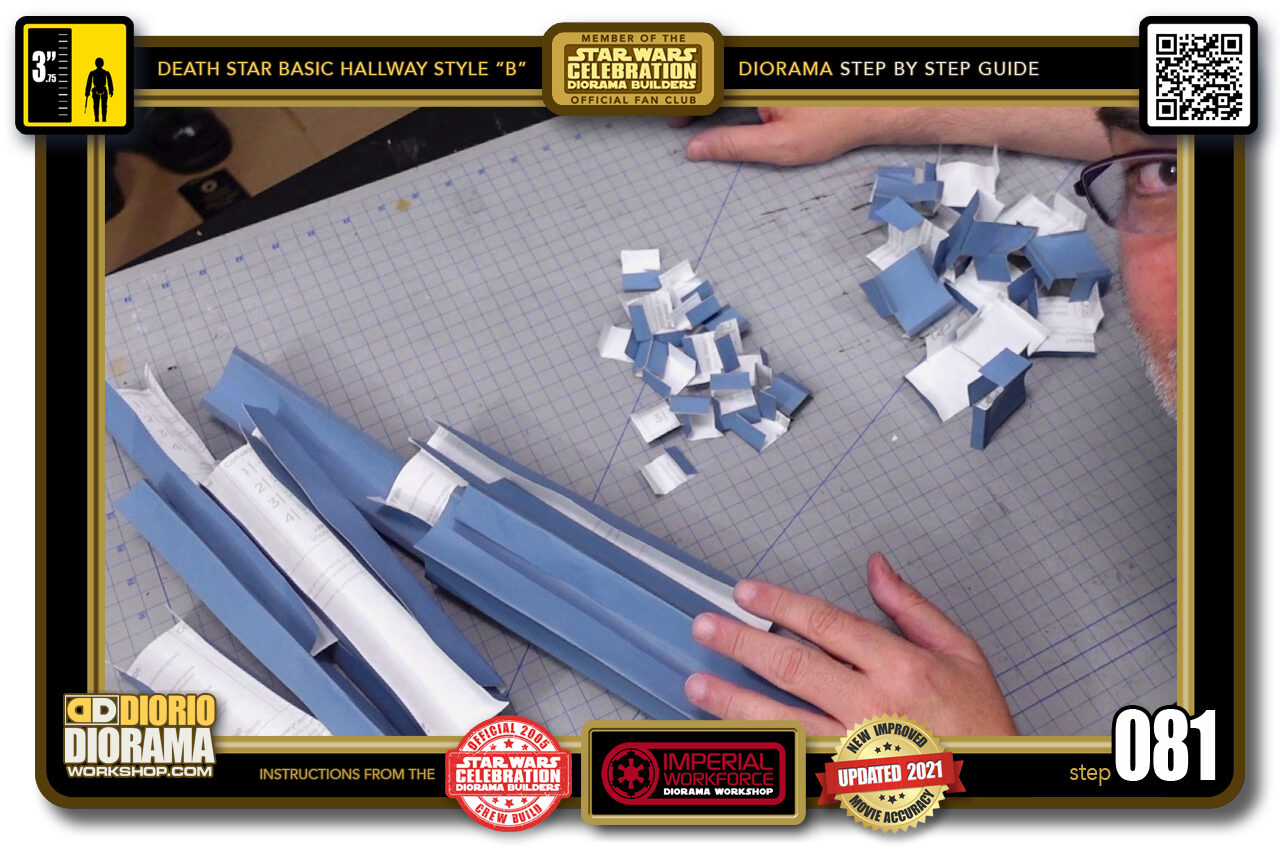
- STEP 081 > Many minutes later - LOL - all of your decals should be folded and look like this. We are ready to place them onto your ceiling grid.
-
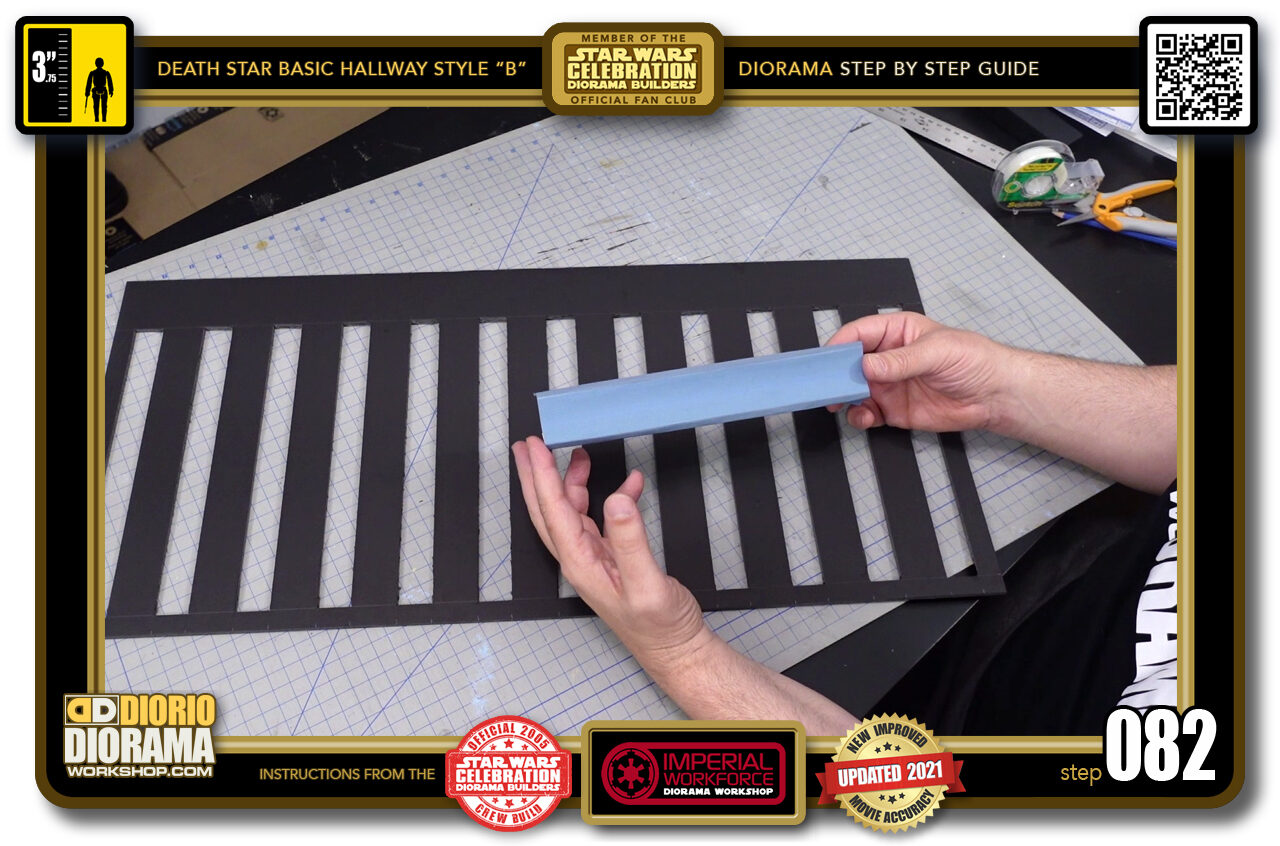
- STEP 082 > Start with a long piece.
-
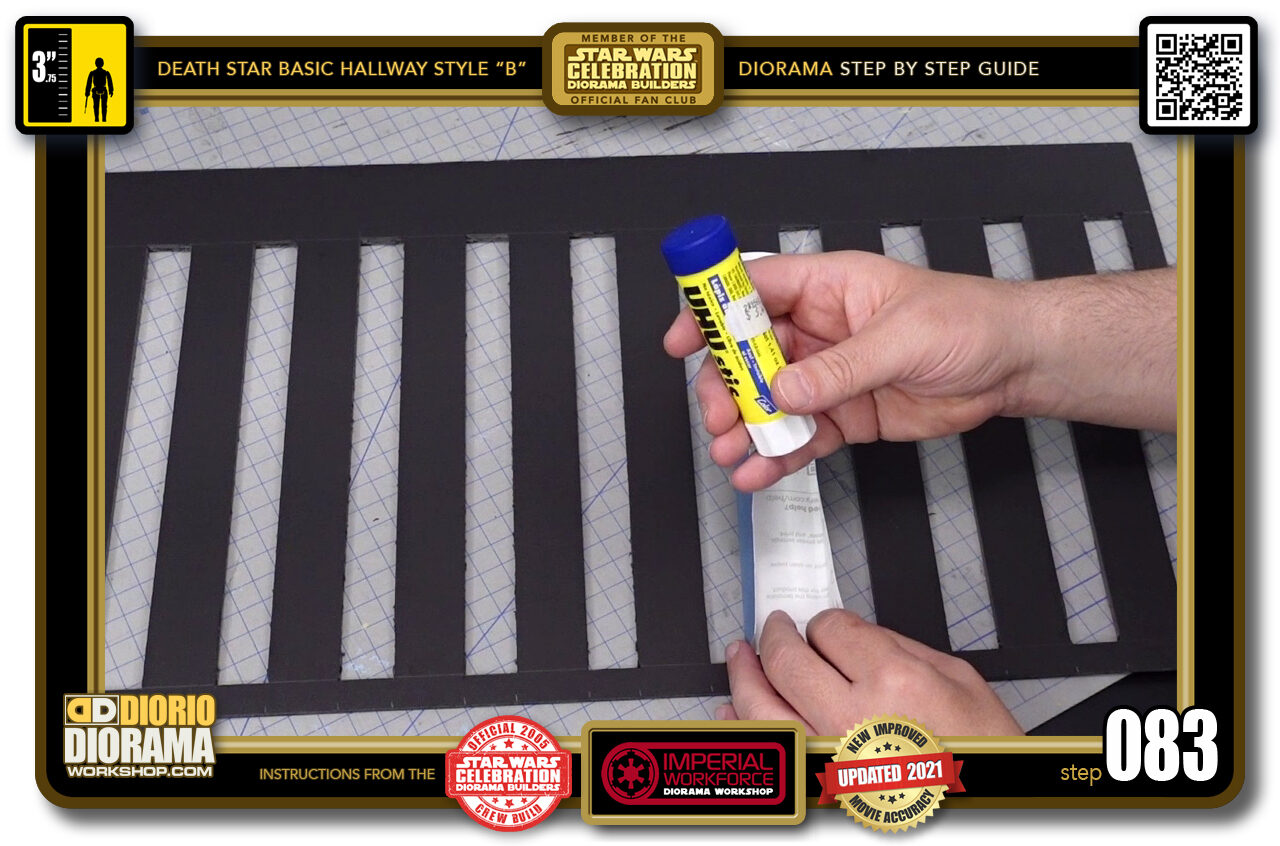
- STEP 083 > If you didn't print on full size label sheets you can use glue stick on the back of your decal and on the beam.
-
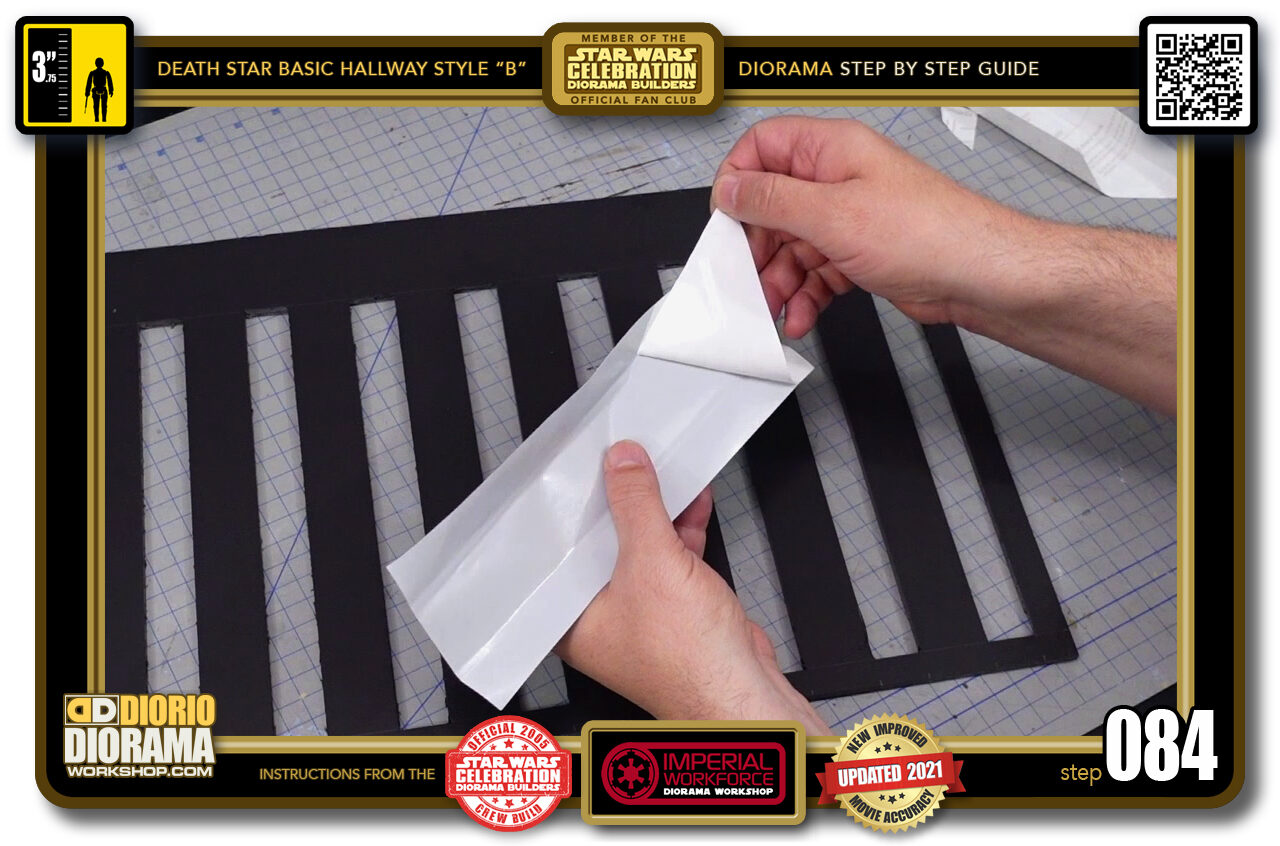
- STEP 084 > I like to print my decals on full label sheets that allow you to peel and have even amount of glue on entire surface.
-
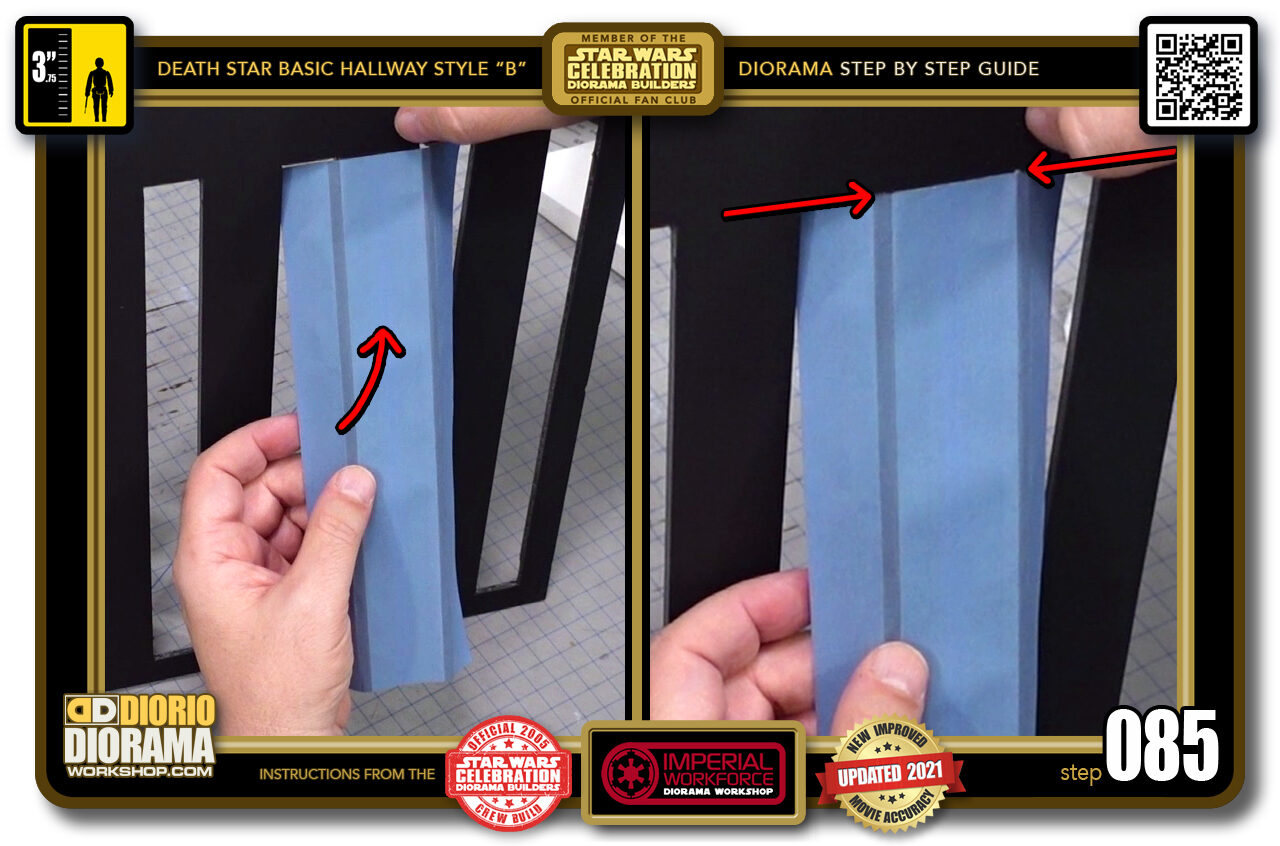
- STEP 085 > You want to place the decal over one of the beams, press it against the rear (5.5cm gap) and try to align it with your folds. The centre light blue is the exact width of your beam (Red arrows in right image) and should wrap around it perfectly.
-
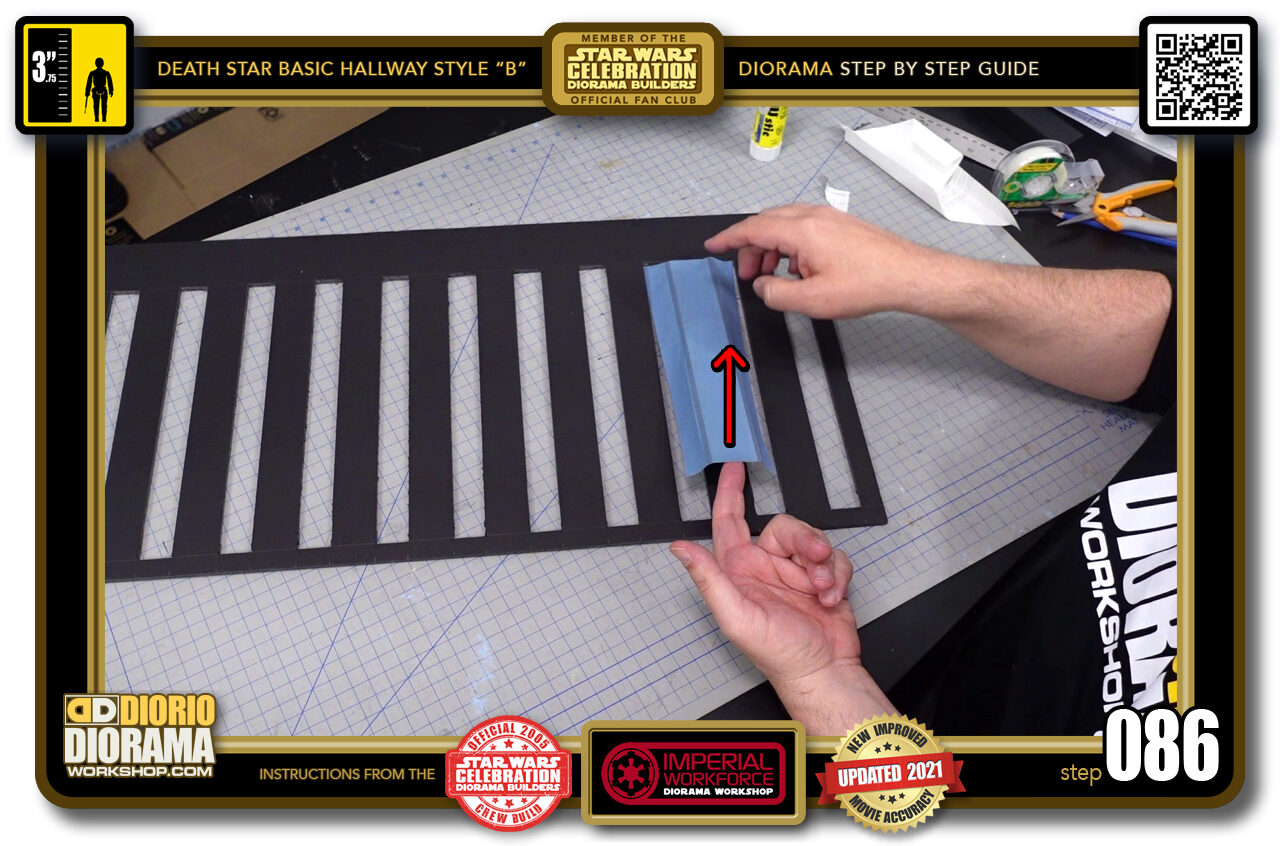
- STEP 086 > When you position the decal, press it against the top, make sure you keep the bottom raised so it doesn't attach itself to the ceiling beam just yet.
-
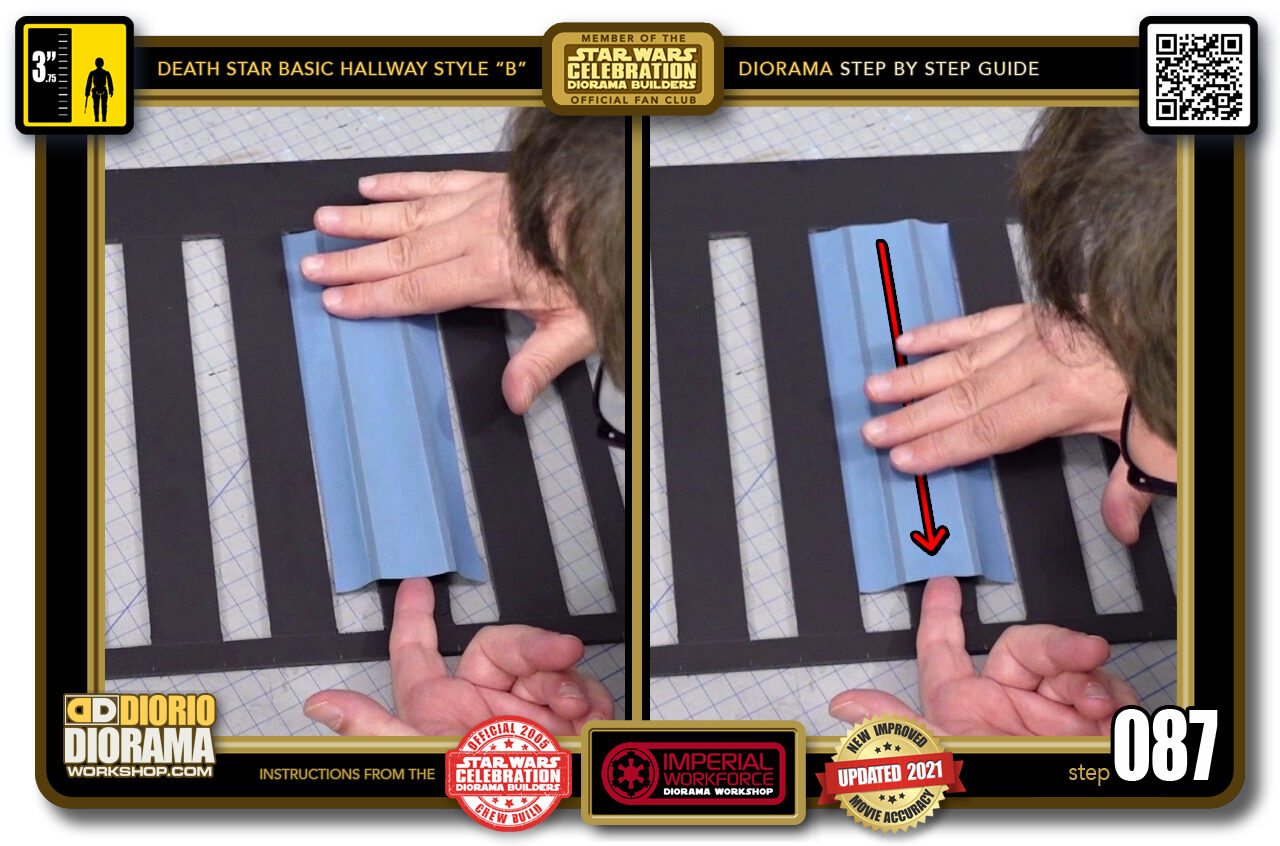
- STEP 087 > Keep light pressure at the top and start to lower the decal, moving it left and right at the bottom until you see the folds align with the beam's edges (left image) When you are happy about the positioning, press down the centre of the decal starting at the top all the way down (right image).
-
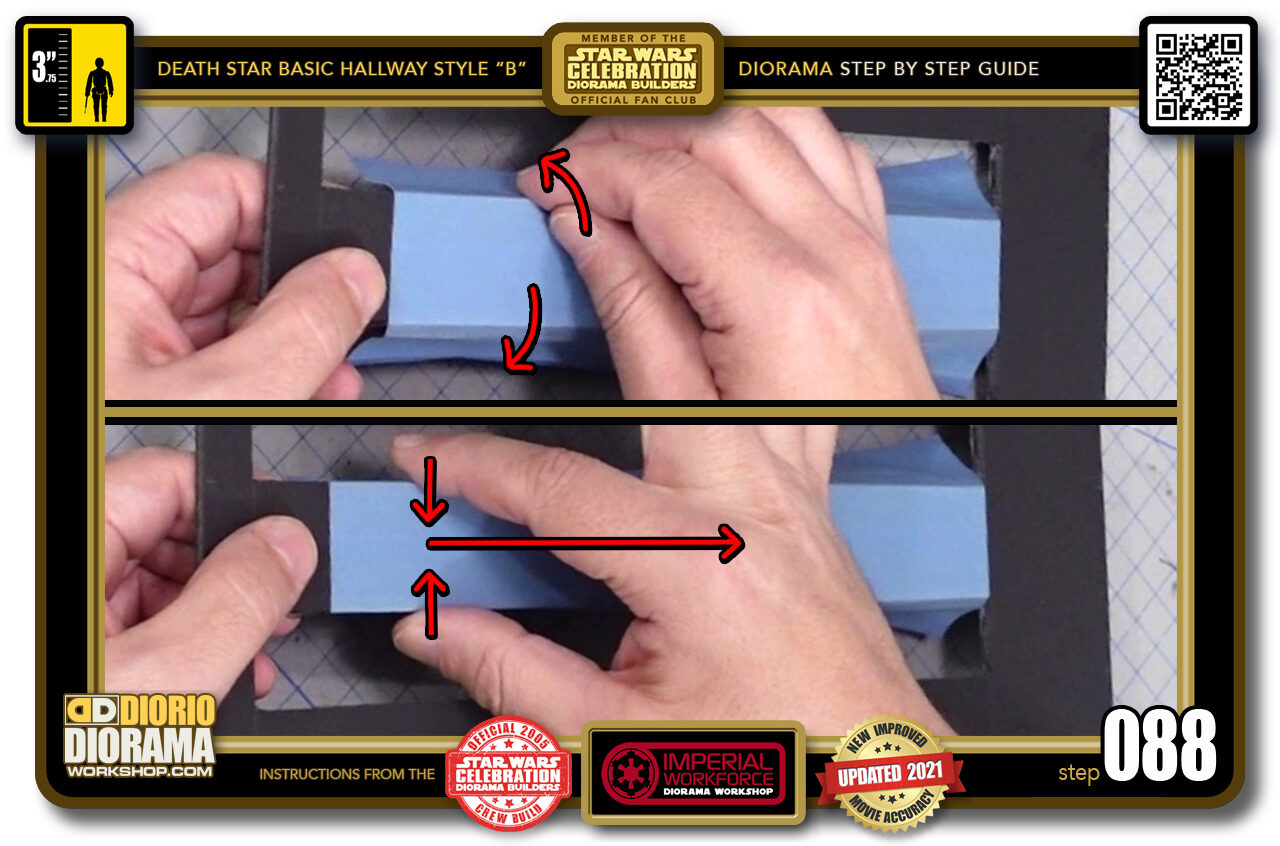
- STEP 088 > Now you can start to wrap the decal skin around the beam. Start by gently folding it over the edge while gently having it pulled towards the back to avoid air bubbles. (top image) Then you can start pinching the edges harder to create a tight fit and 90 degree angles around the beam (bottom image).
-
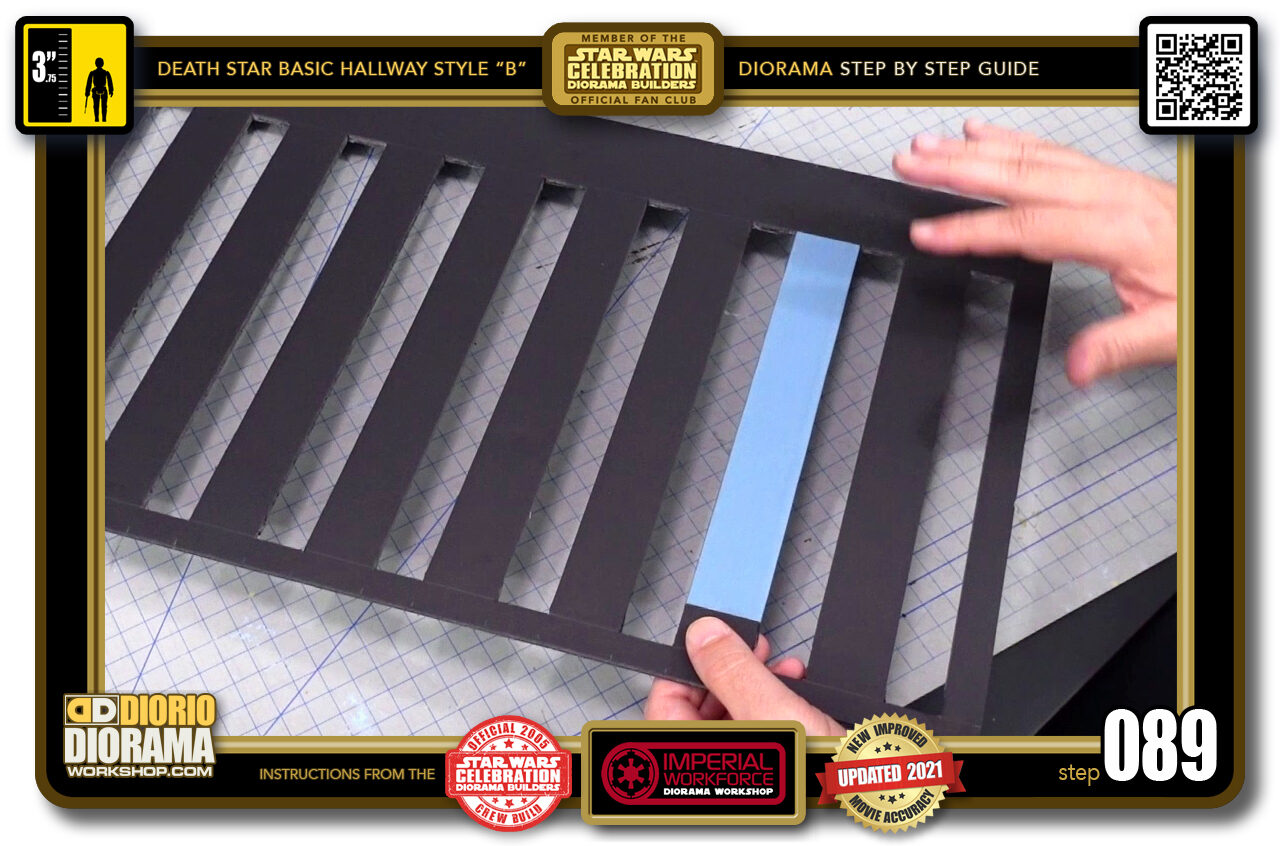
- STEP 089 > See how clean the corners are now ? The DARK folding guides are now on the sides (thickness) of the foamcore and will help add an extra illusion of shadow in your diorama.
-
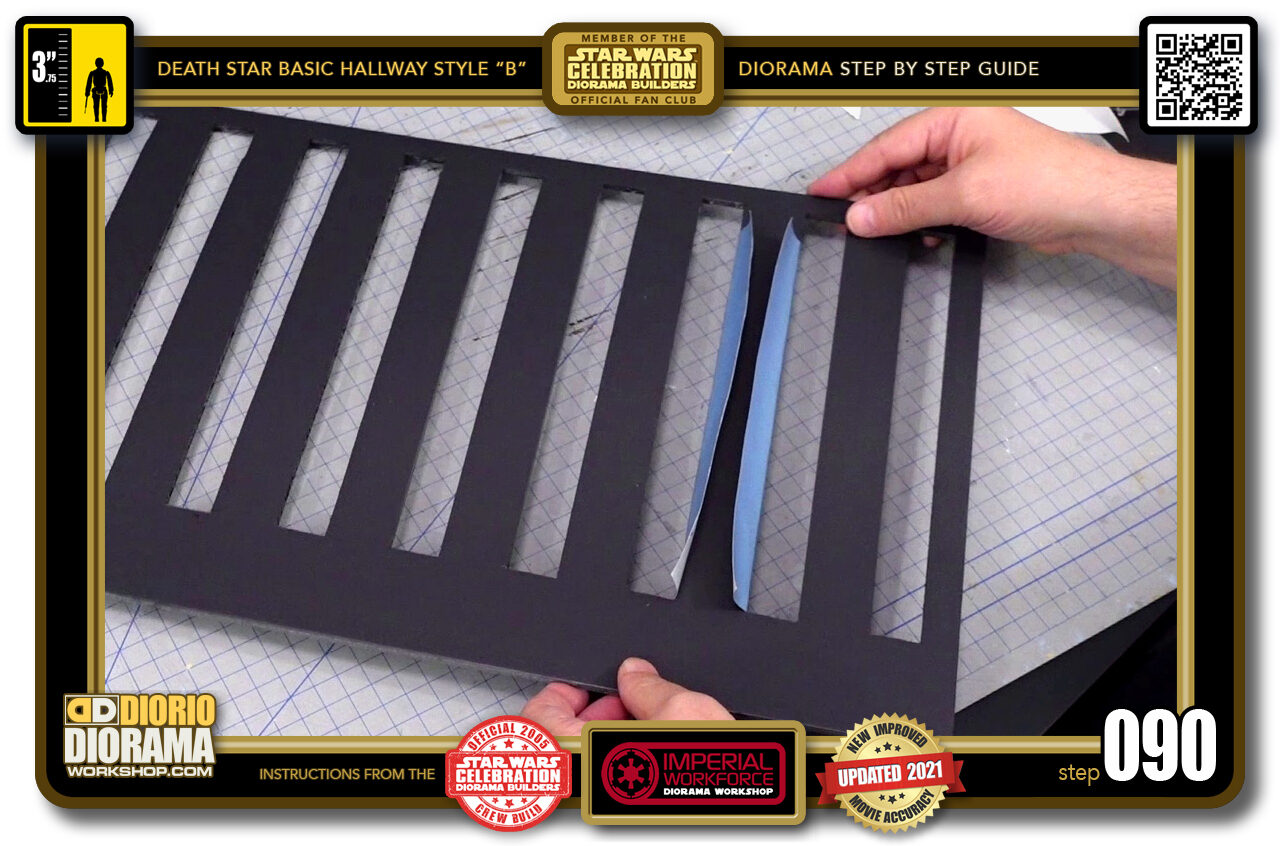
- STEP 090 > GENTLY FLIP your ceiling grid to it's under side. Remember how fragile this is now when manipulating it.
-
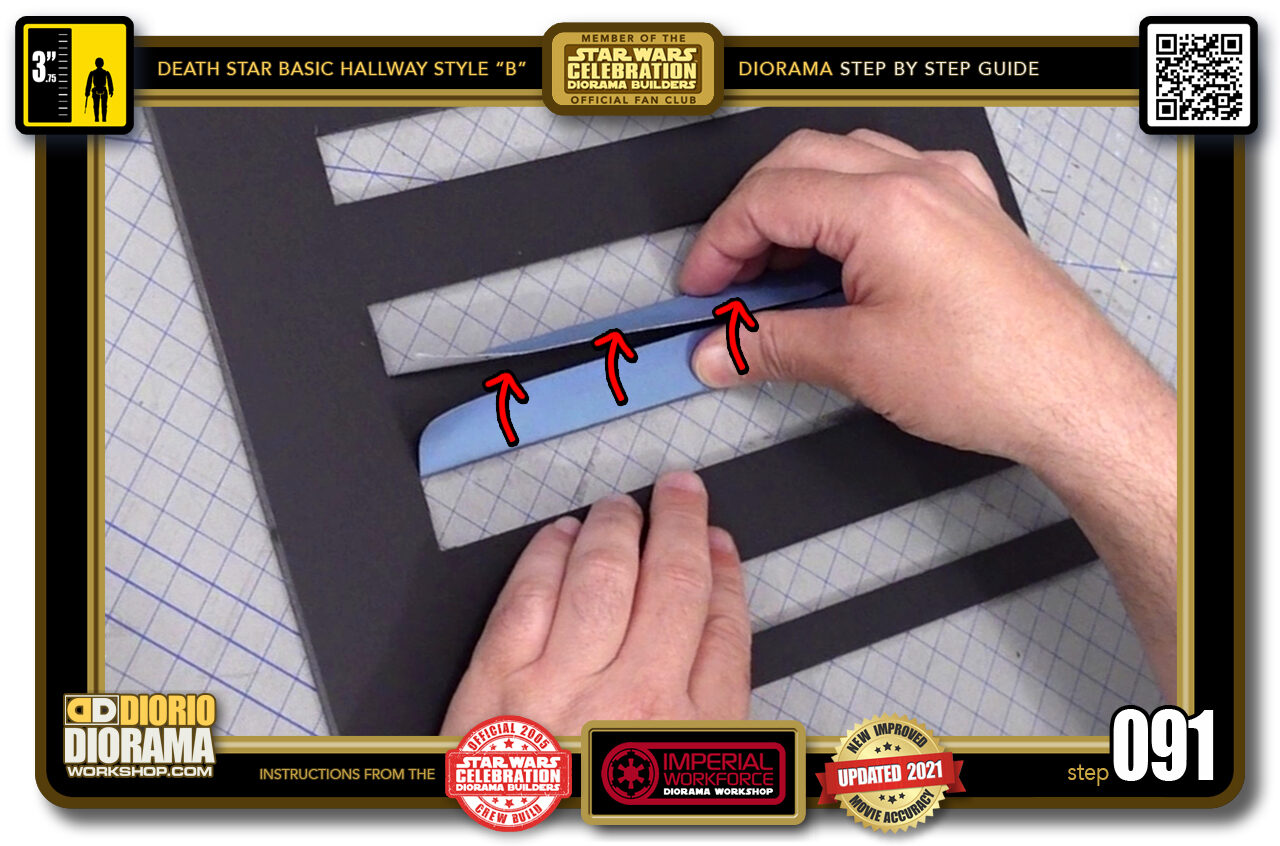
- STEP 091 > Start with one side, doesn't really matter which one, and PULL UPWARDS while bending the skin over the bottom corner edge. Always best to start at the ventre and make your way to the outsides. This helps reduce risk of air pockets, bubbles and creases in your decals.
-
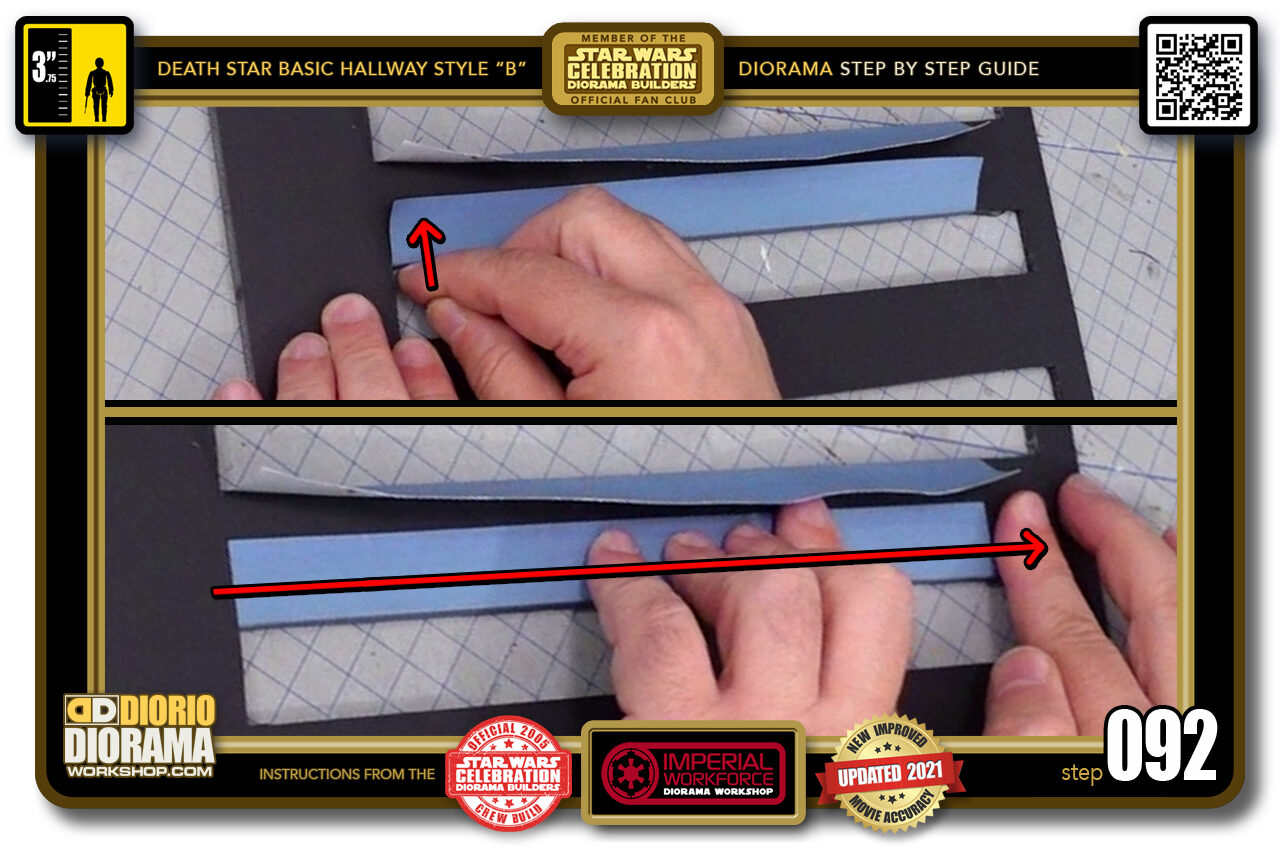
- STEP 092 > Like on the top side, after you bend it a few times and have a nice fold (top image) you can start to press the decal onto the bottom making full contact with the foamcore. Start in the cnetre and make 7-10 bend/presses instead of one long one.
-
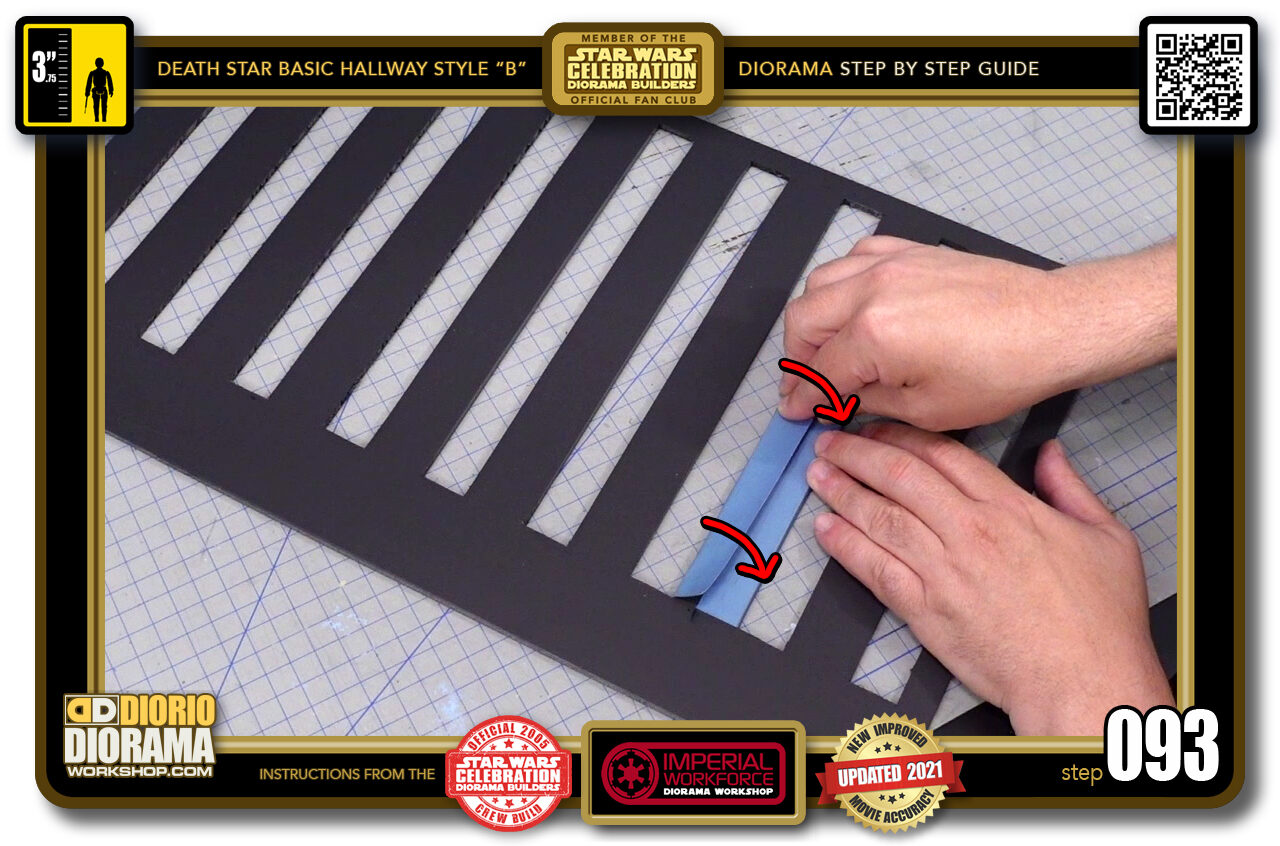
- STEP 093 > Now that you have one side completely connected, you can do the same for the other side. Pull up and over the corner edge until fold is tight and then connect the full skin to the surface overlapping the decals other end.
-
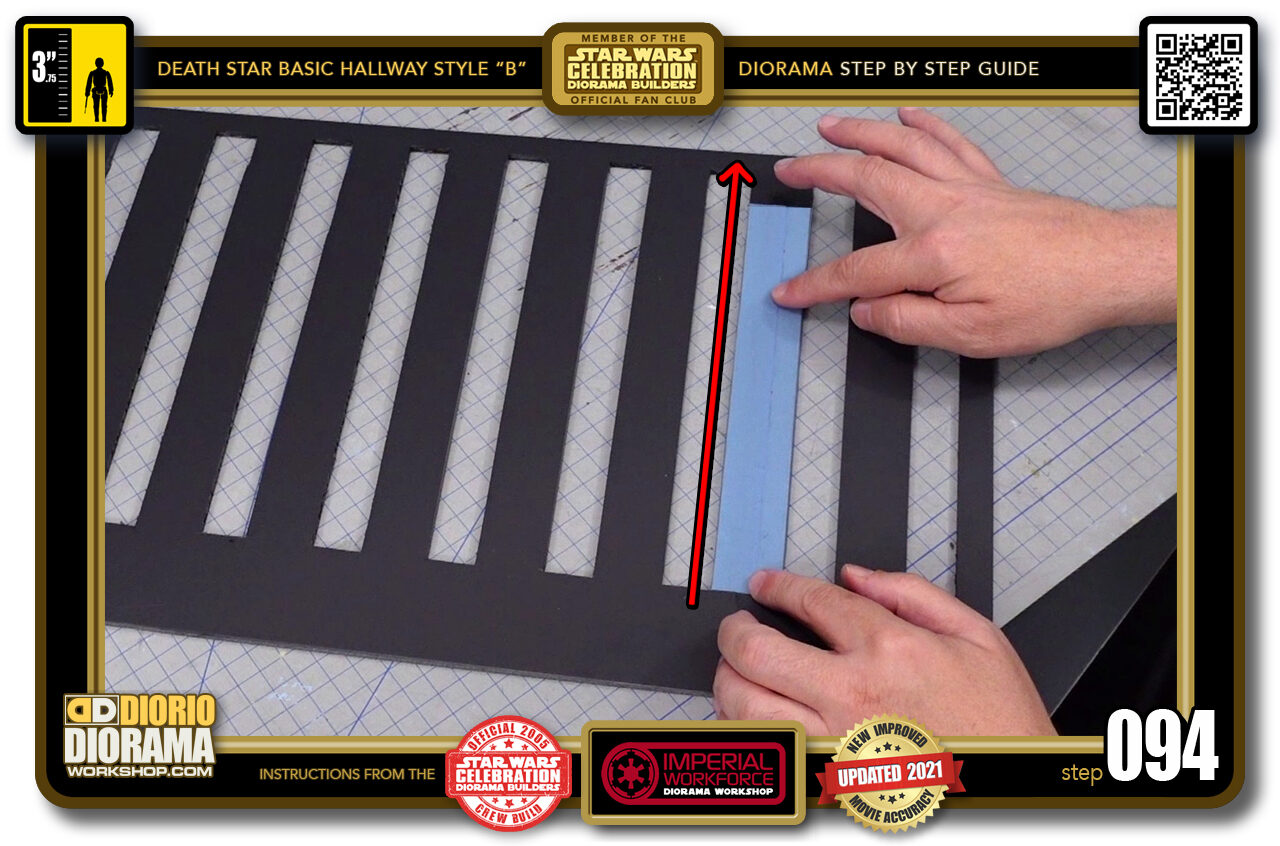
- STEP 094 > Glide your finger along the seam to make sure the connection is permanent.
-

- STEP 095 > If you want to be extra sure, you can add pieces of Scotch Tape along the seam at every 10-15 cm.
-
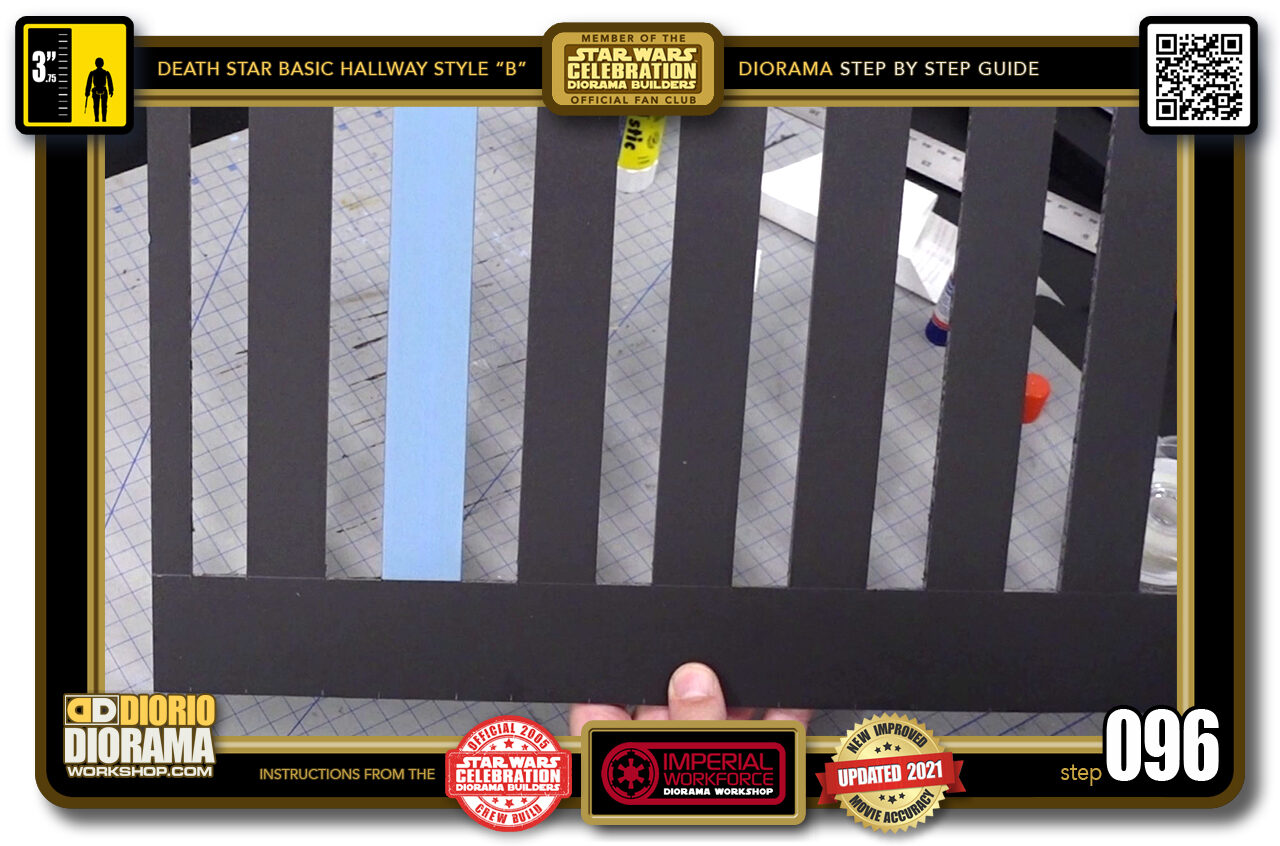
- STEP 096 > Congratulations, your first ceiling decal strip is in place. You just have 10 more to go 🙂 The good news is that it's not very hard, it's just time consuming.
-
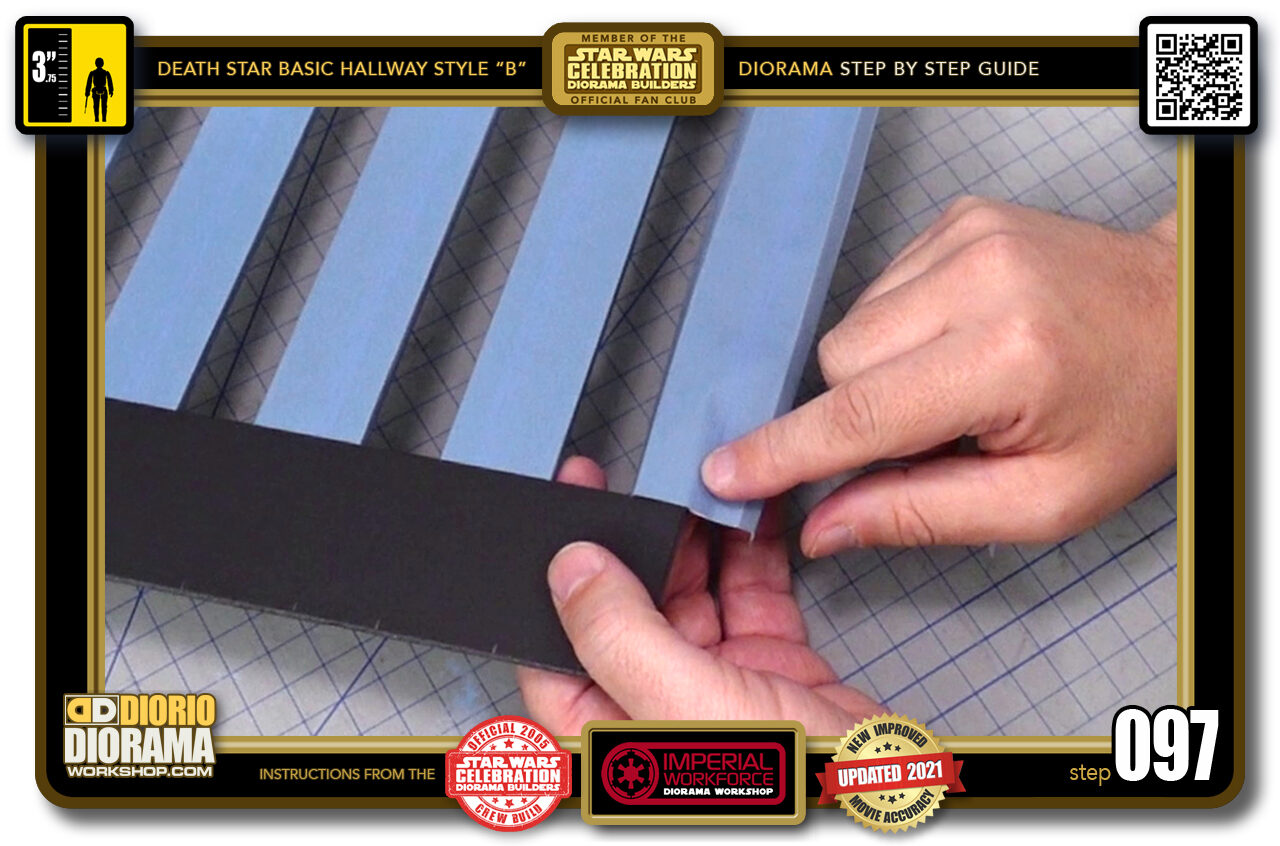
- STEP 097 > Once you applied all of the inner beams it is time to do the 2 outside half beams (1.75cm caps). Now if you were to wrap them as is, you would notice the skins are TOO WIDE. We need to do slight modification for both.
-
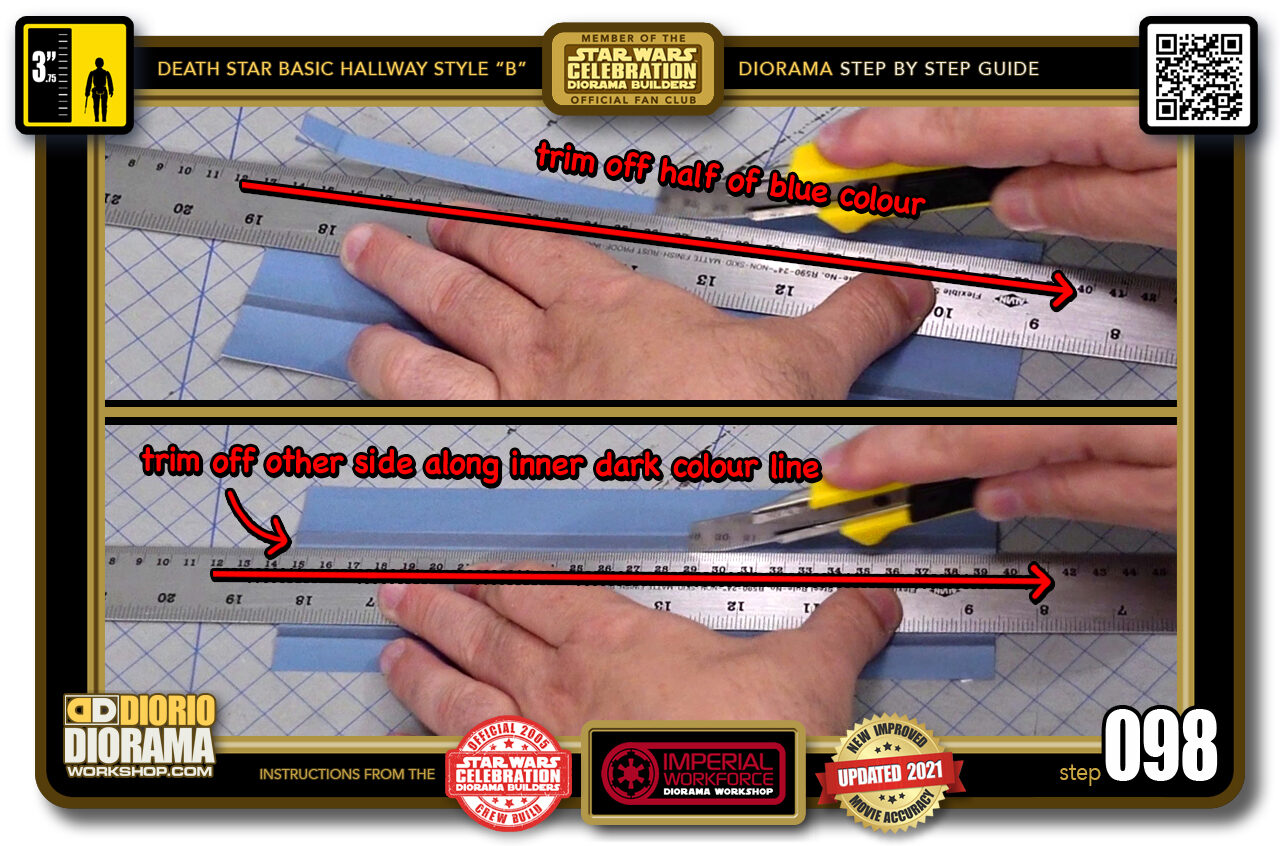
- STEP 098 > Pick a light blue zone on the outer edge of the DARK folding guide and place your cork ruler along the middle of the colour (top image) Take your X-Acto knife and trim that off. Now on the opposite side, align your cork ruler along the INNER edge of the DARK folding guide. Cut that off (bottom image).
-
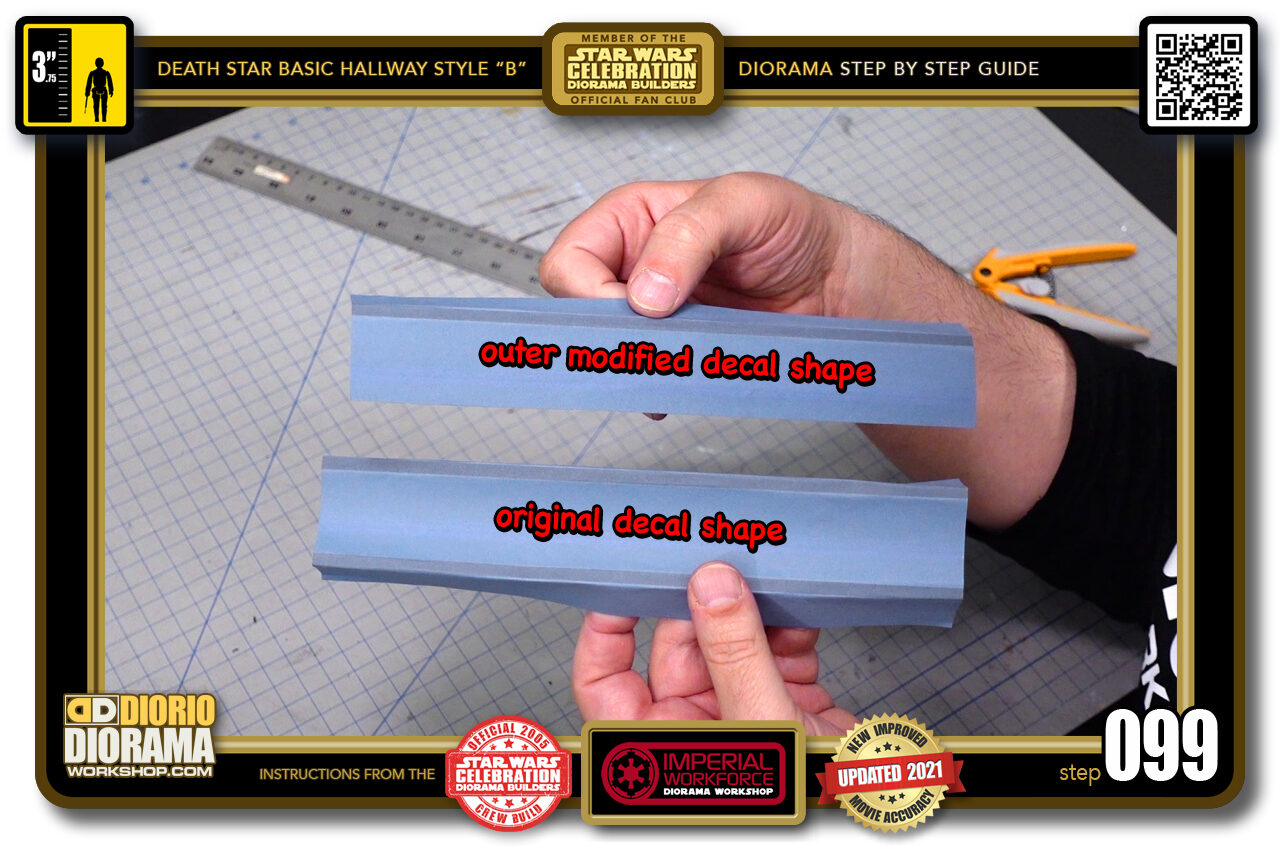
- STEP 099 > You will end up with a modified decal skin (top) do this again so that you have 2x modified strips.
-
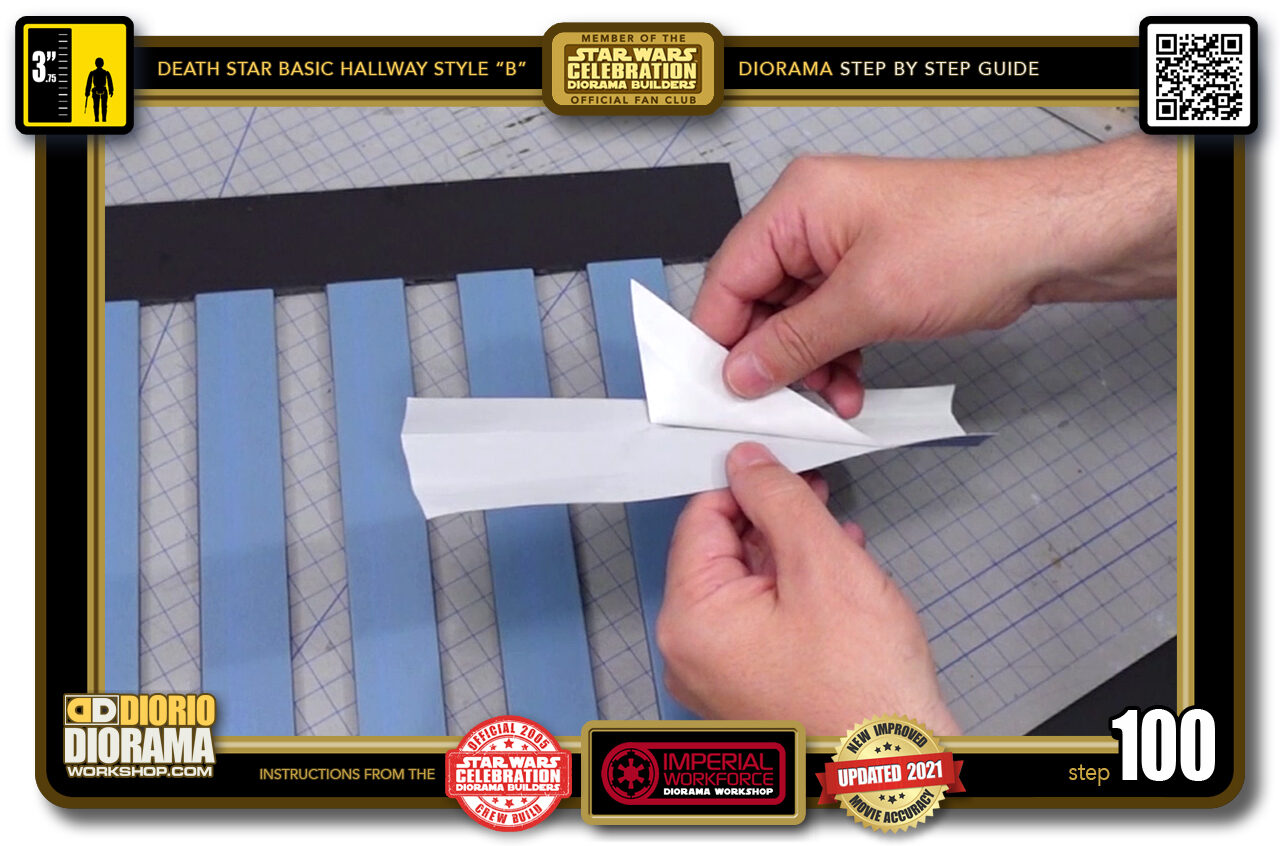
- STEP 100 > Peel your decal sheet. If you used regular paper, put some gluestick on the back and on the foamcore.
.
Did you already build this Diorama ? At home or at our Star Wars Celebration Diorama Builders workshop ? Would you like to show it in the site’s GALLERY VISITORS DIORAMAS section, YES ? That is Awesome !!! You can find out all the details on how to email me your photos on the VISITORS SUBMISSIONS INFO page … When I get your photos, I will create your very own page just like this one. You may not realize it but work does inspire others to join in the fun of making Action Figure Dioramas.
.
NOT FOR RESALE ALL Decals, tutorials and artwork are ©FrankDiorio (dioramaworkshop.com) and offered FOR FREE to the fans – that would be you ? so you can build and display my diorama designs in your very own home. I realize I cannot control what one does with my graphics once I place them on the web, I can only ask you as one fan to another, please respect the artist and do not be that jerk who uses my designs and tutorials to build a copy of my work only to sell it on EBAY or trade/sale groups and forums. Thank You. Frank.
.

.
.
If you have a facebook account, why not join the Official Diorama Builders Fan Club today, simply click the logo link below.
 .
.
Catch up with fellow visitors and exchange stories, read cool interviews with the crew, exchange photos, fun surprises and grab some FAN ONLY merchandise next year at actual future conventions ?
.
©2021 Frank Diorio DioramaWorkshop.Com
.
IF YOU LIKE WHAT YOU SEE, PLEASE SHARE WITH YOUR FRIENDS
USING THE SOCIAL MEDIA BUTTONS BELOW