


-
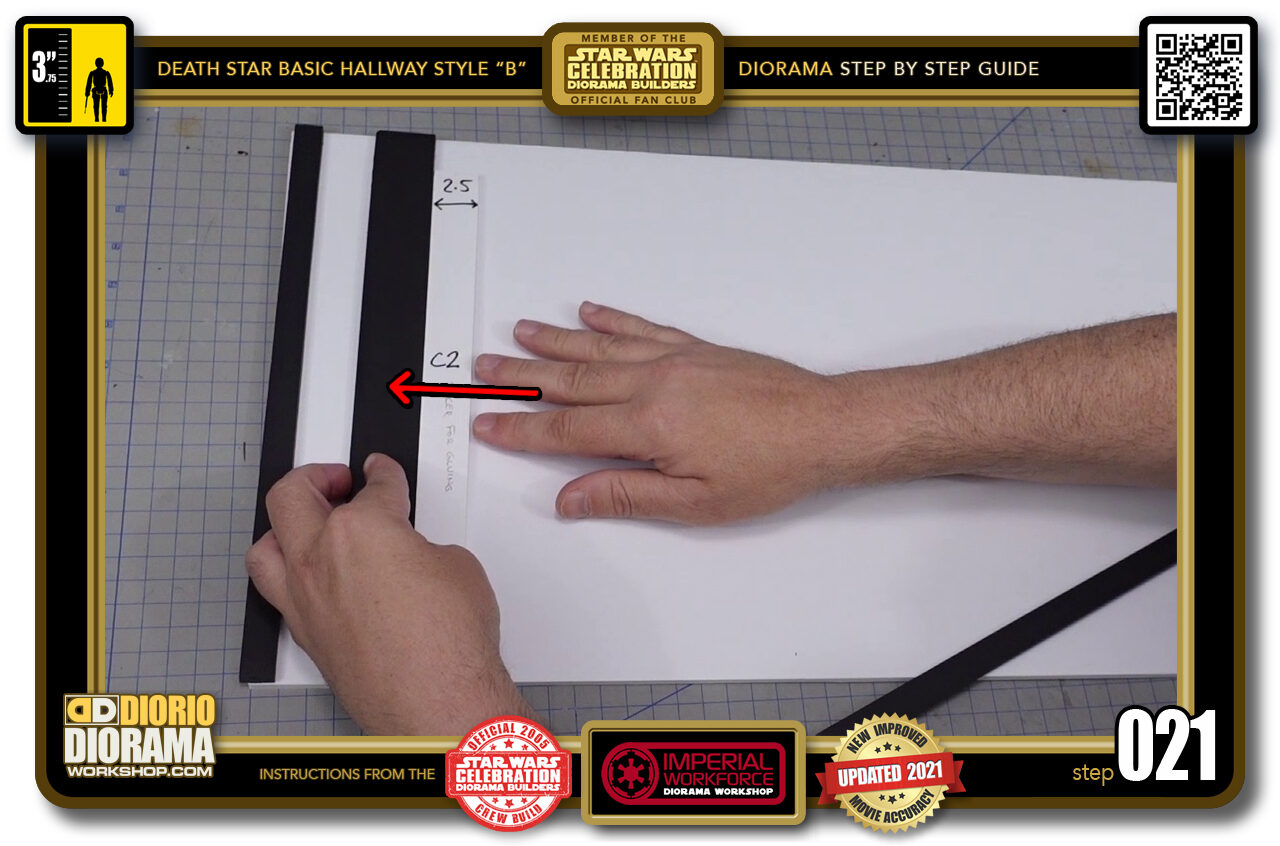
- STEP 021 > Now you can slide your spacer out from between the 2 hot glued black ceiling strips and place it against the opposite side of the outer strip (the one you just glued).
-
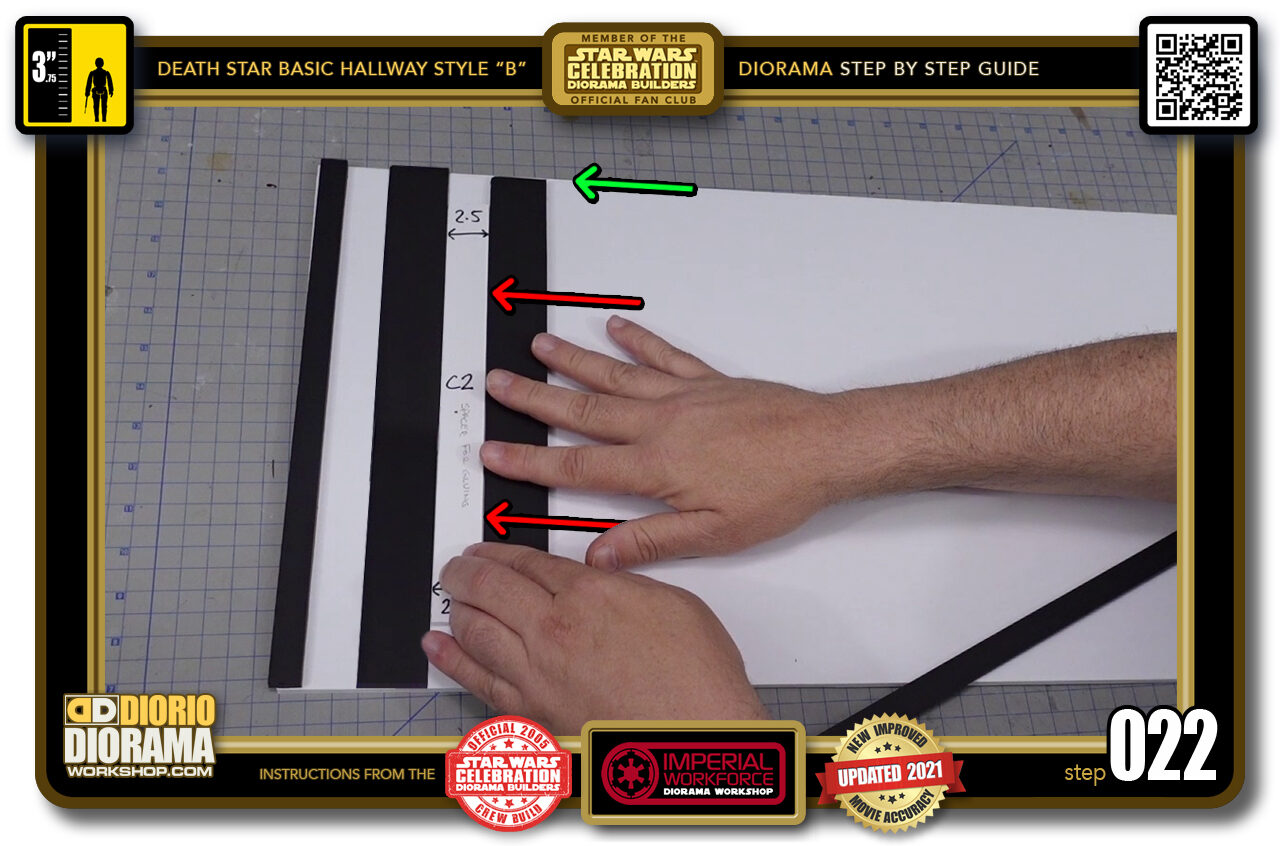
- STEP 022 > Here is where the copy paste begins. Grab another 3.5cm black strip, put line of hot glue like before and repeat the instructions of Step 020. Slide it against the support, press down onto the ceiling, let it cool off, and then slide out your support so you can reposition it against the other side.
-

- STEP 023 > Now you just have to repeat this until you go all across your white ceiling. When you reach the end, you will see that a regular 3.5cm black strip will stick past the end - this is where you put the 2nd 1.75cm cap strip.
-
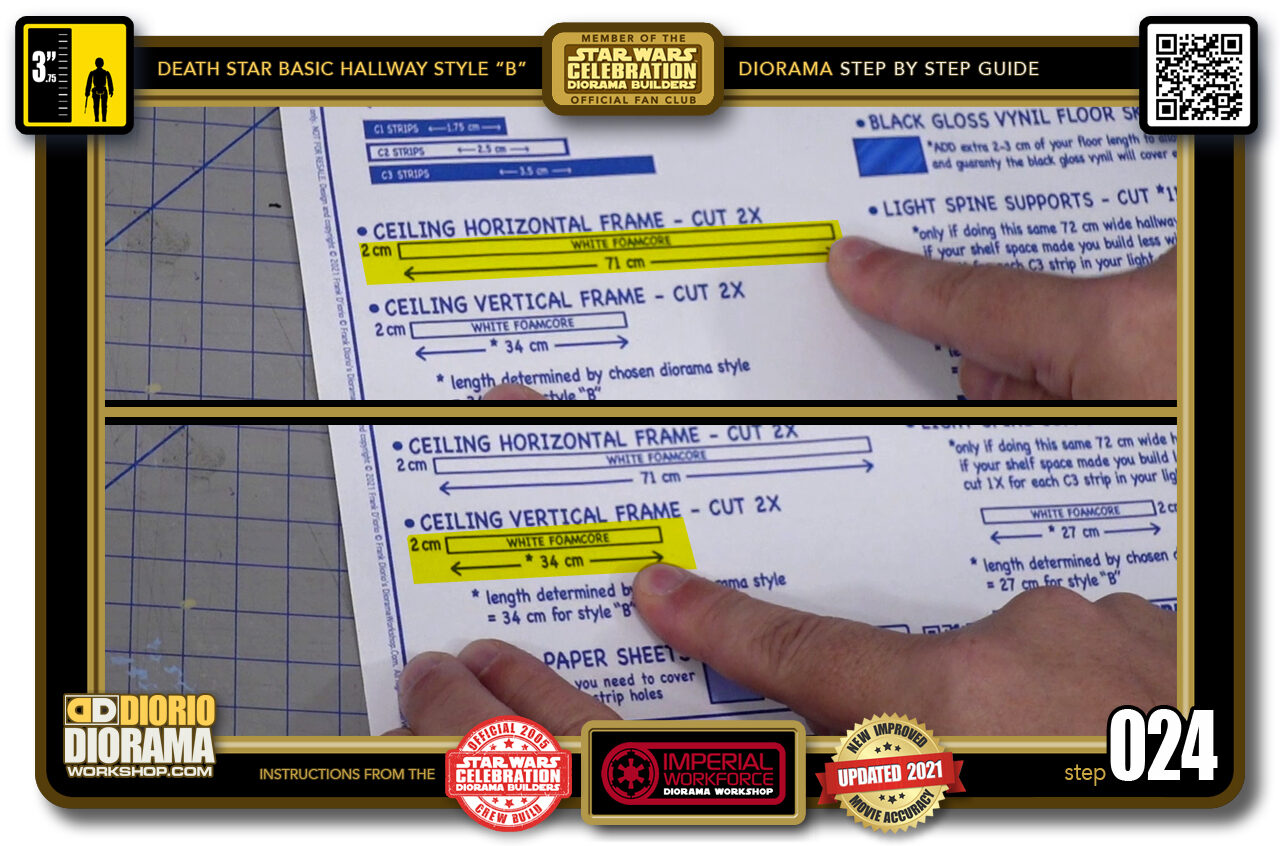
- STEP 024 > If you are doing a LED Light Up ceiling box, here is where the fun begins 🙂 Let's start with the end pieces that create the height of your ceiling box. We will need to cut 4 pieces from WHITE foamcore so that it will maximize reflectivity inside of the box itself.
-
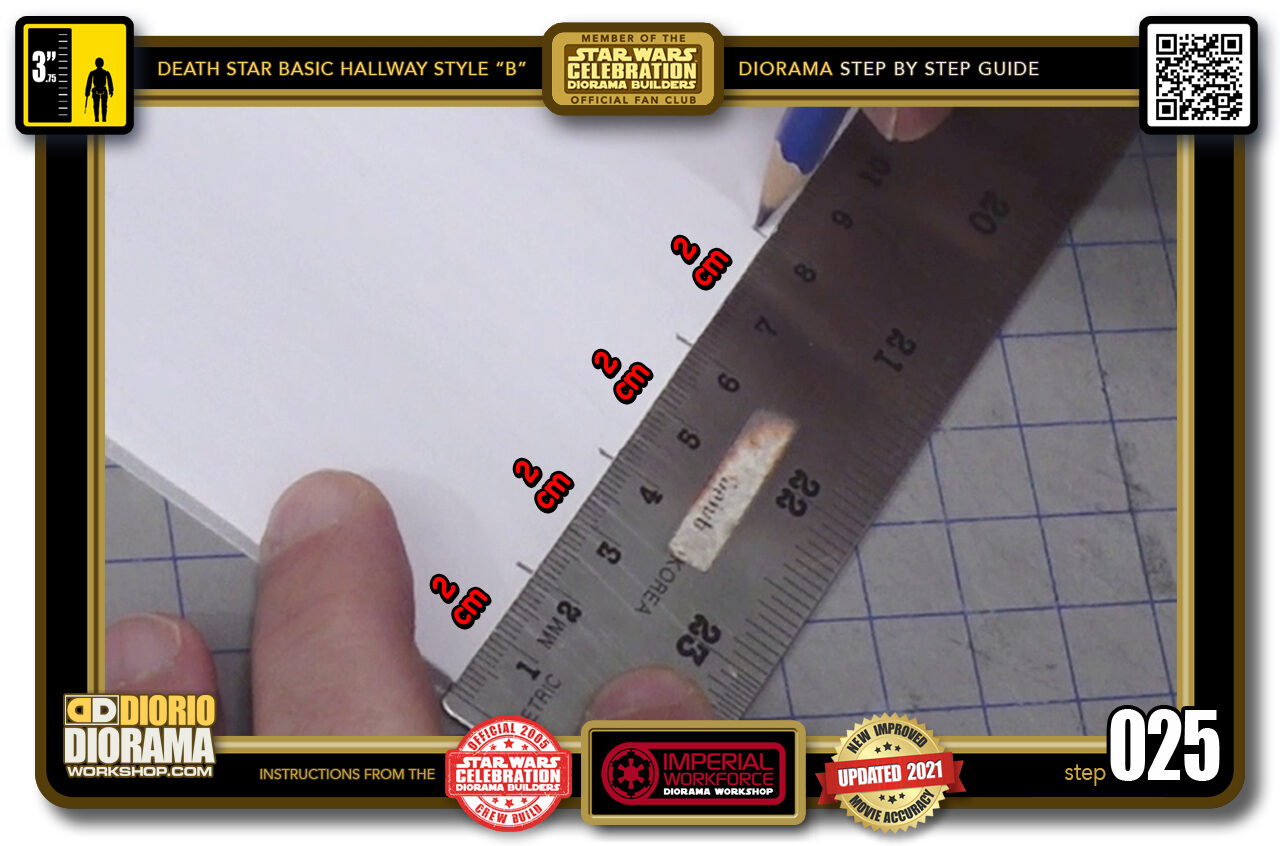
- STEP 025 > You need to have a piece of white foamcore that is at MINIMUM 71cm in length. The width less important as all 4 strips are all 2cm width so start by placing pencil marking at each end of your white foamcore.
-

- STEP 026 > Now after connecting all your markings with your ruler, you want to measure 71cm on 2 of the pieces.
-
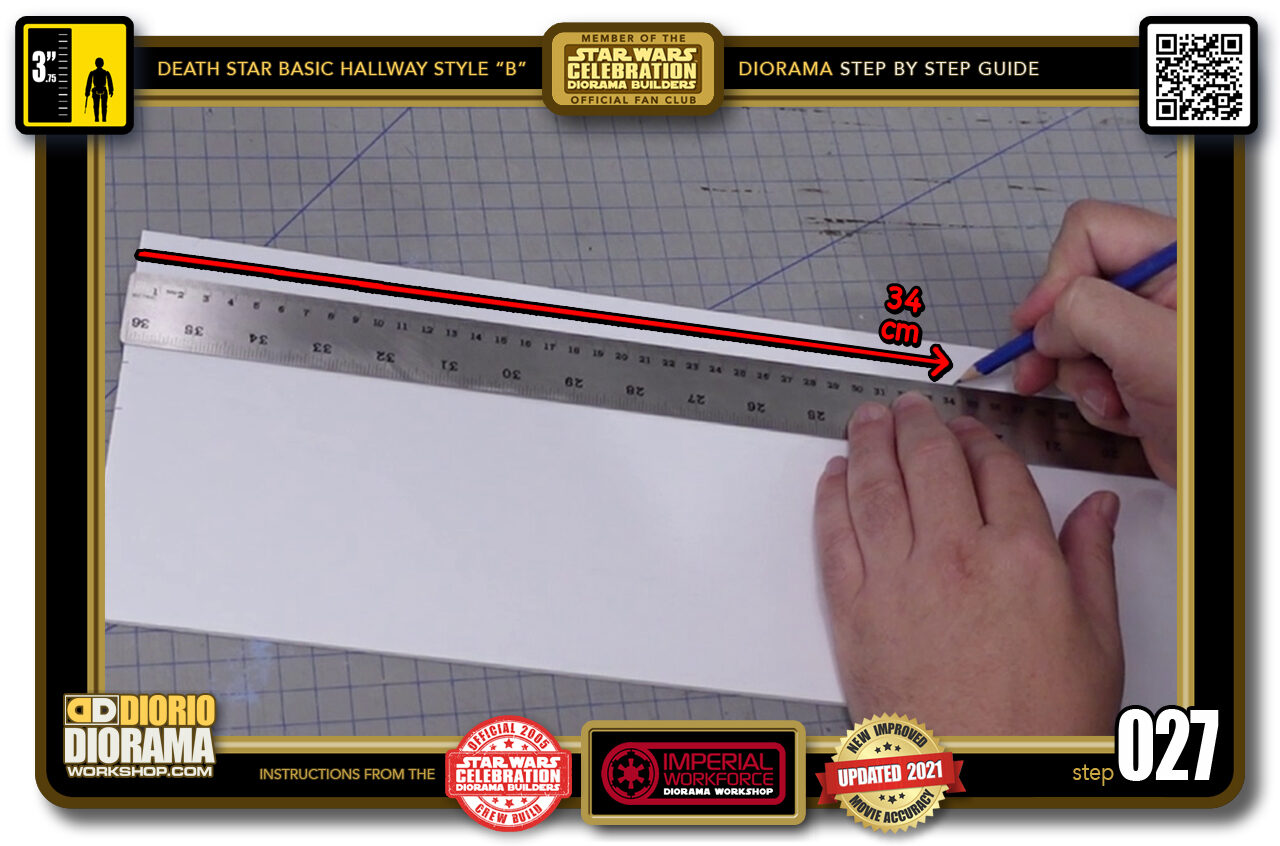
- STEP 027 > Then measure 34cm for the other 2 strips.
-
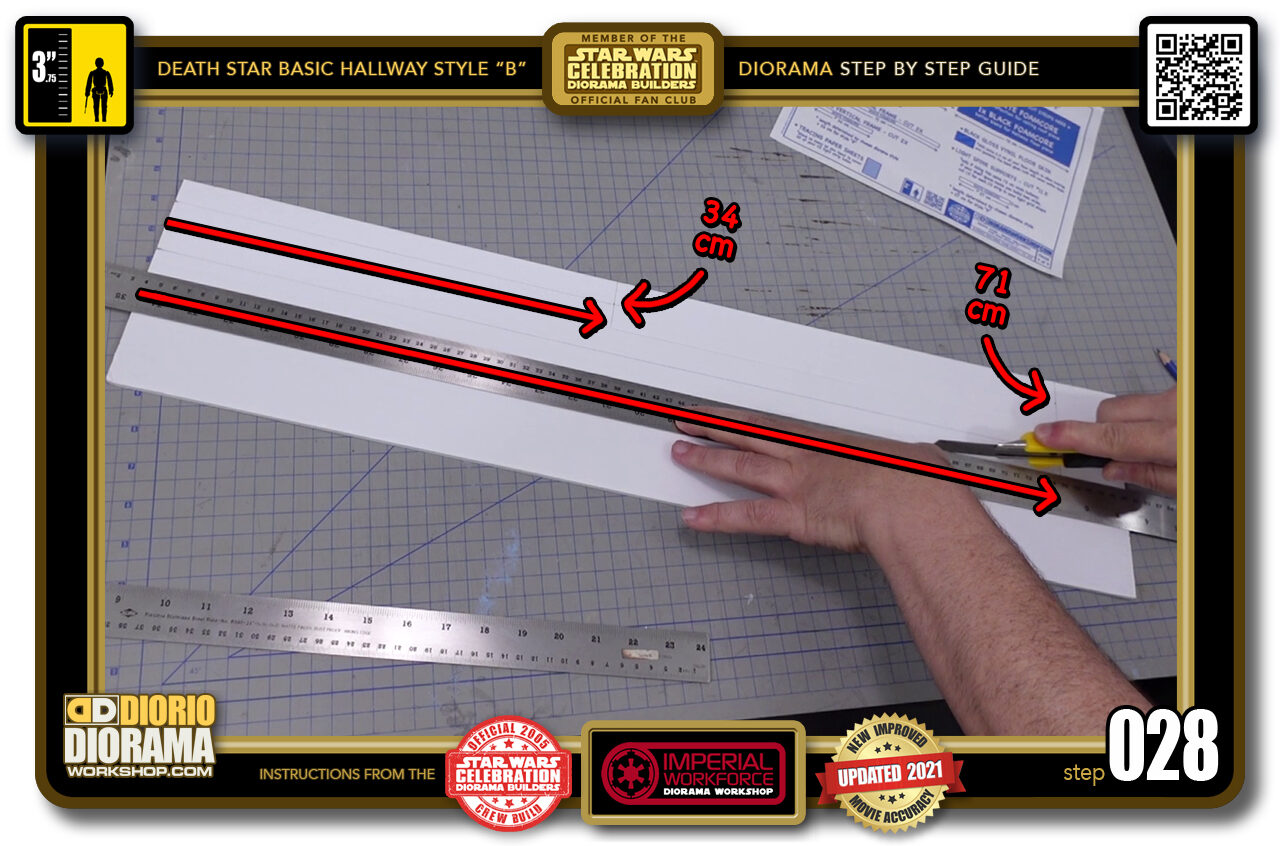
- STEP 028 > It's easier to cut along the full length of the 71cm first, then you can trim off the excess at your 34cm mark.
-
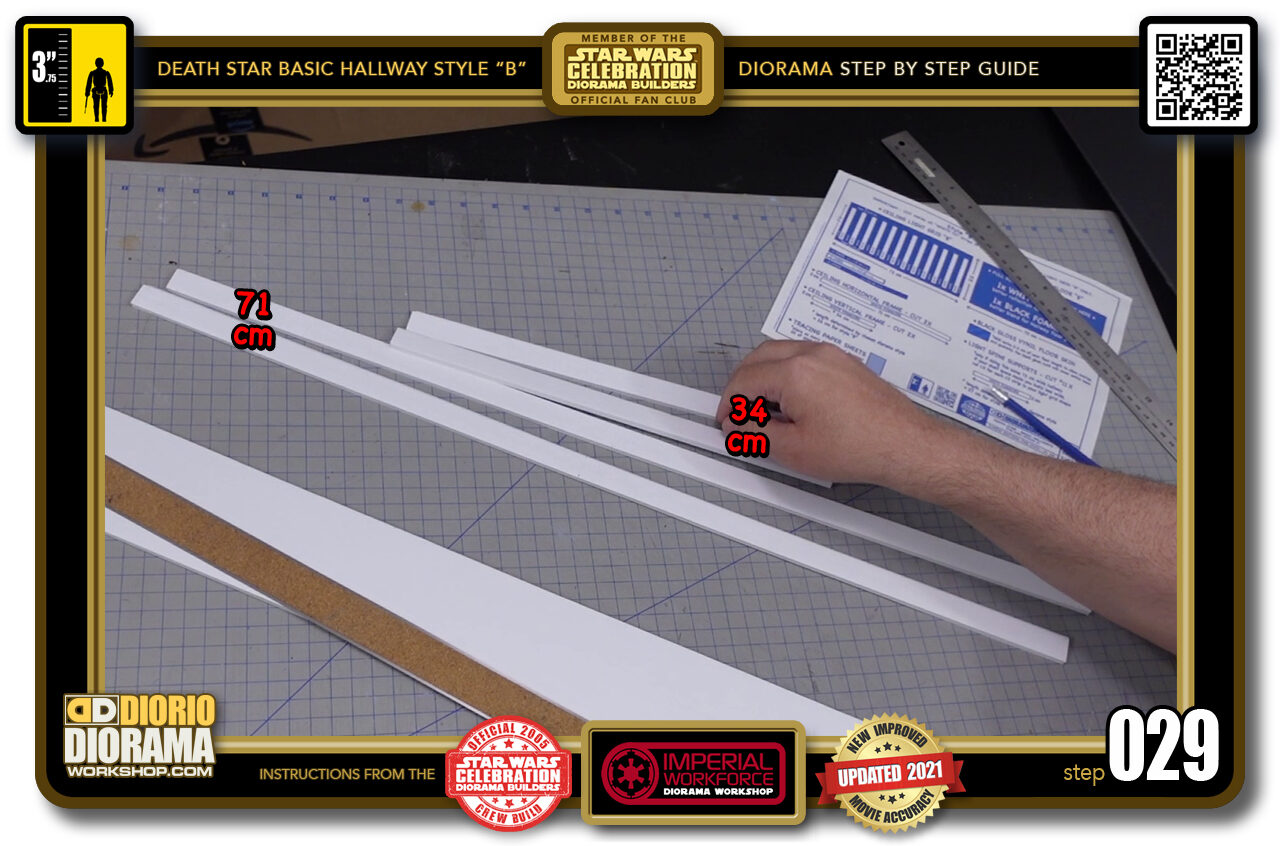
- STEP 029 > You should now have 2x 71cm x 2cm strips and 2x 34cm x 2cm strips. Put these aside for now is a secure area.
-
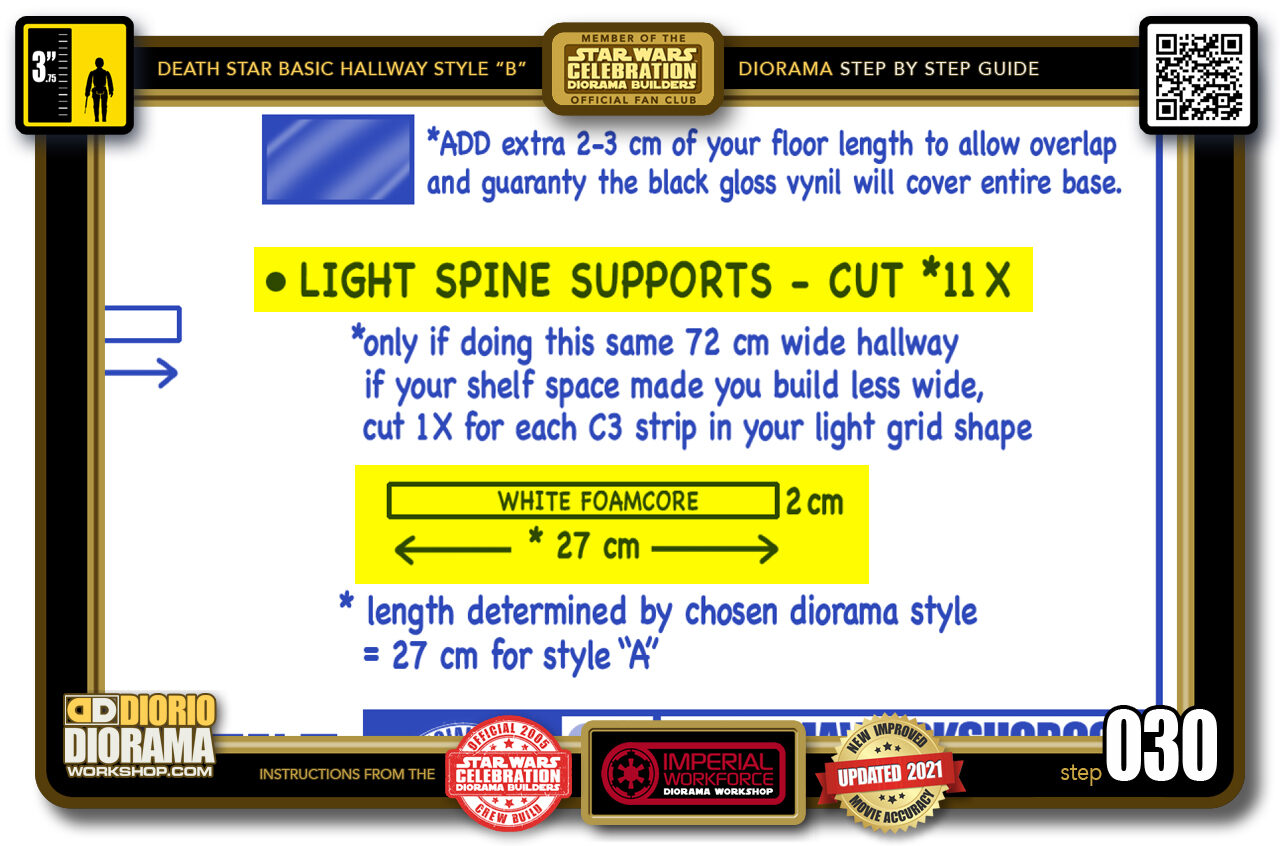
- STEP 030 > We now have to cut your light spine supports. 11 to be exact. Each must be 27cm long by 2cm wide.
-
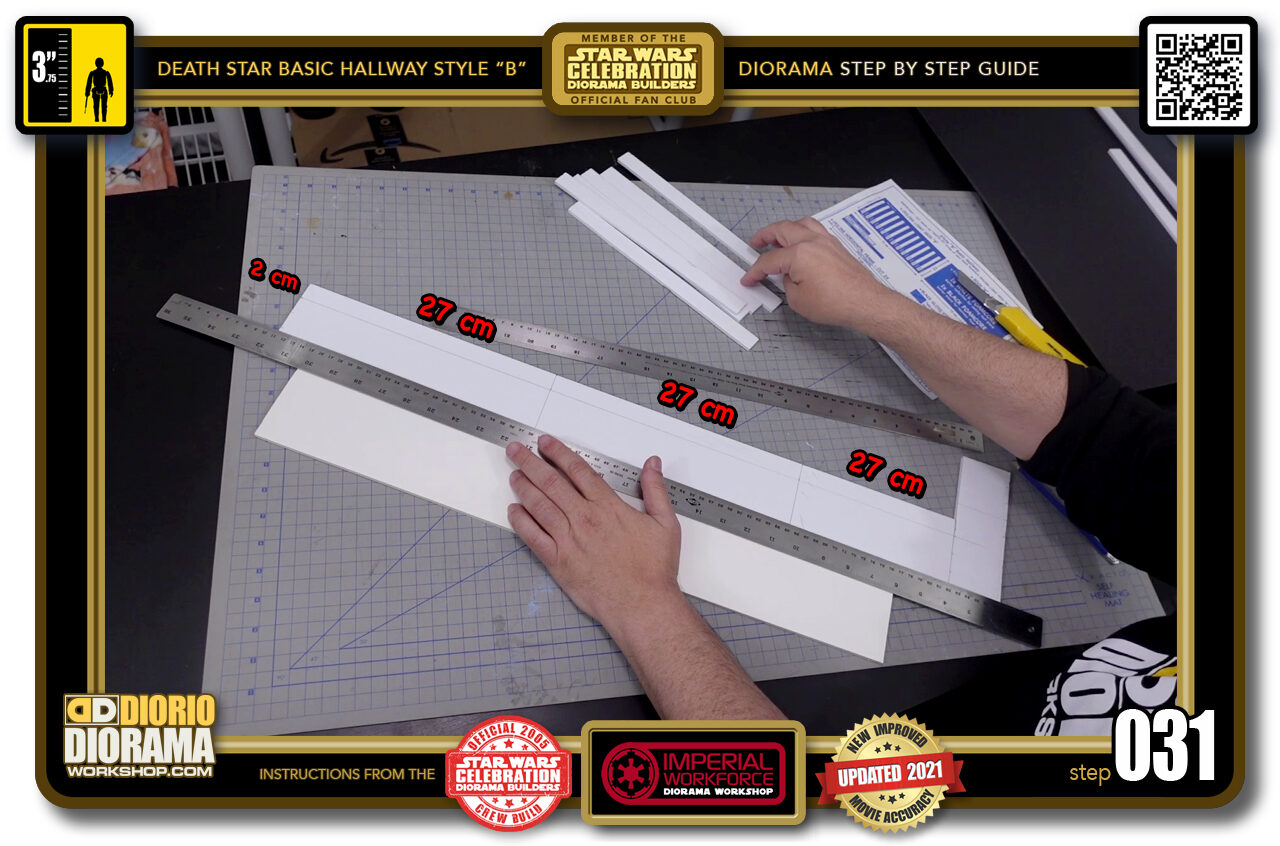
- STEP 031 > Measure as many 27cm strips that can fit on your piece of foamcore. The width of all of them is the same - 2cm. Once all of these are cut, put them aside next to your ceiling end strips.
-
-
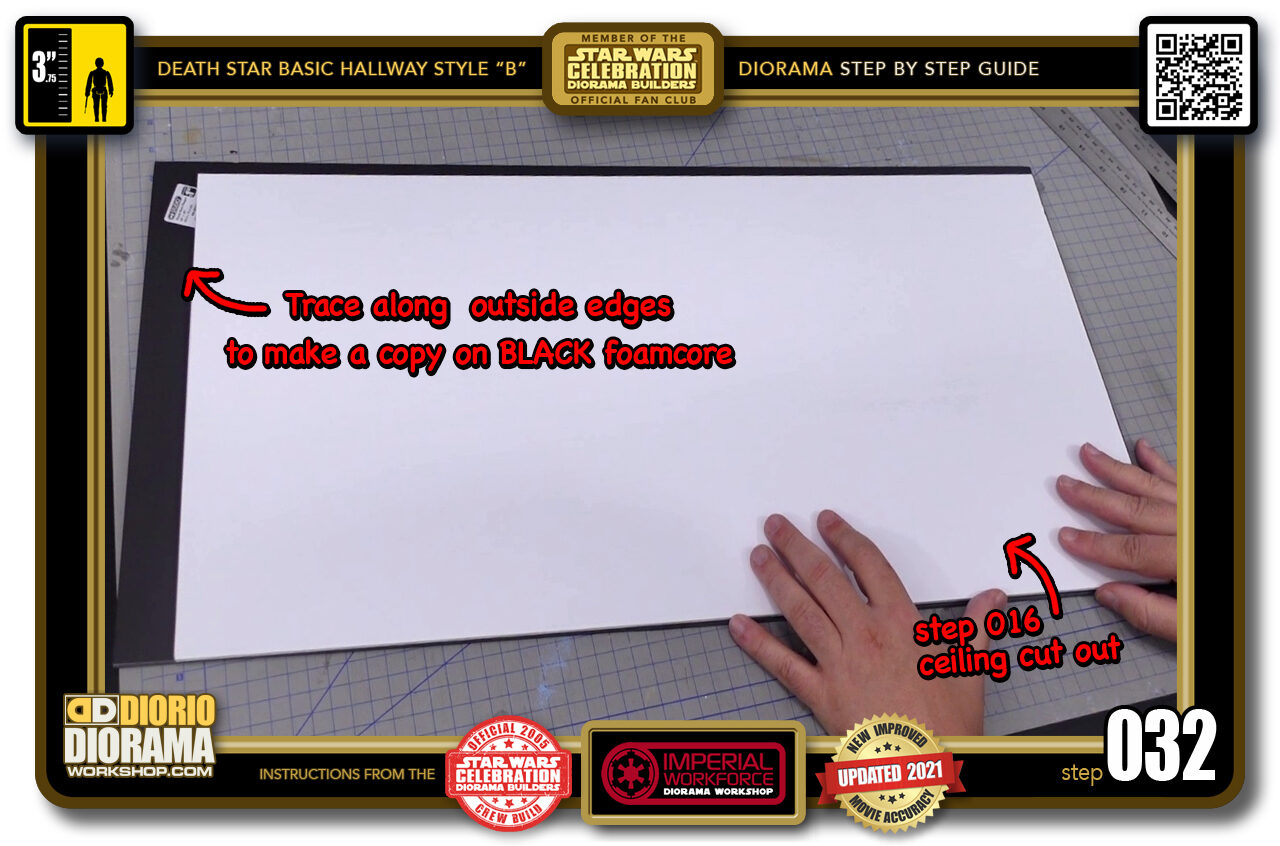
STEP 032 > You now need to make a identical version of this ceiling shape but on BLACK foamcore. It works best with the decals later on. The easiest way to do this is to just line up your ceiling flush on 2 outer sides of a fresh foamcore and trace along the other 2 sides.
If you cannot find black in your local store, you can still use white foamcore.
-
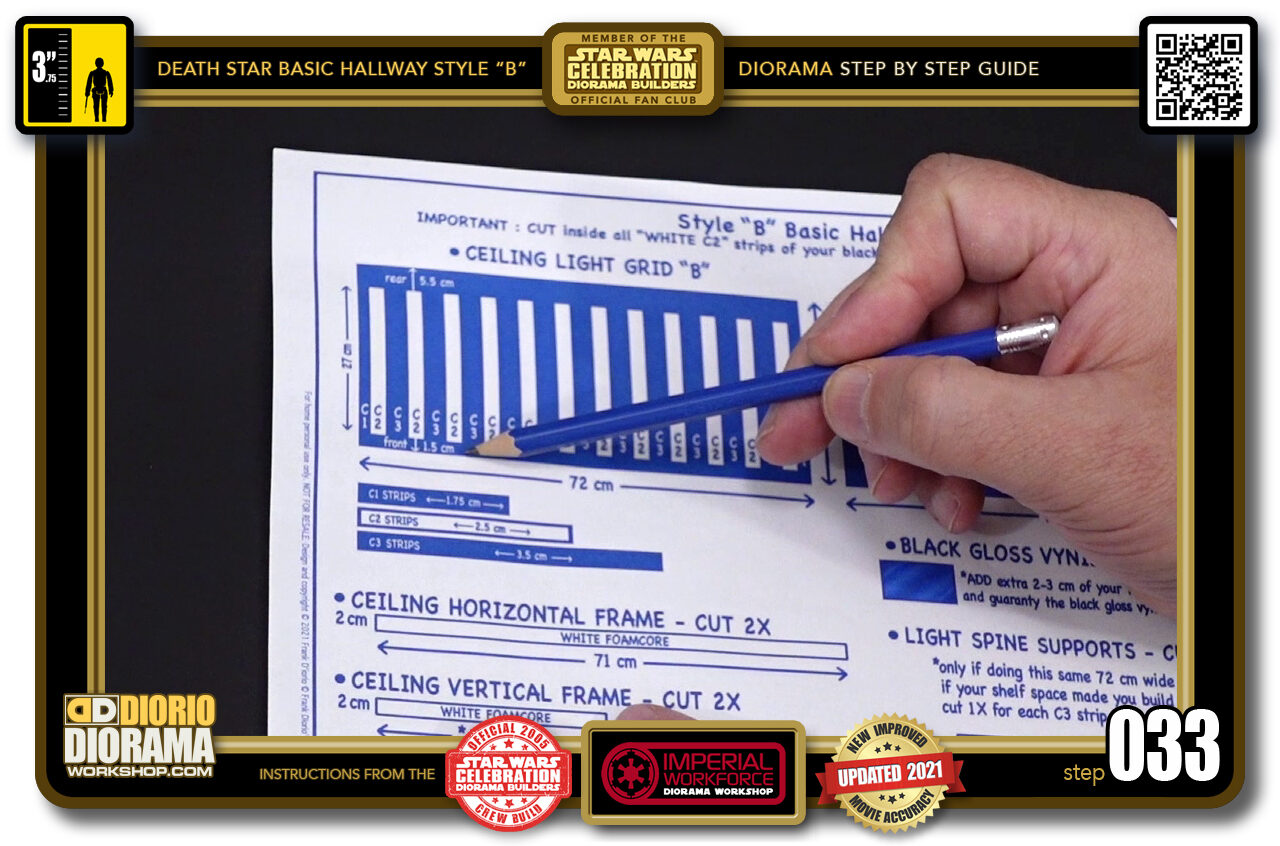
- STEP 033 > Now as opposed to placing black strips of the regular ceiling, the LED Light Up ceiling has the white spaces cut out to let the light shine through. If you look at the blueprint, The zones you will cut out will be 2.5cm wide and the spacers will be 3.5cm.
-
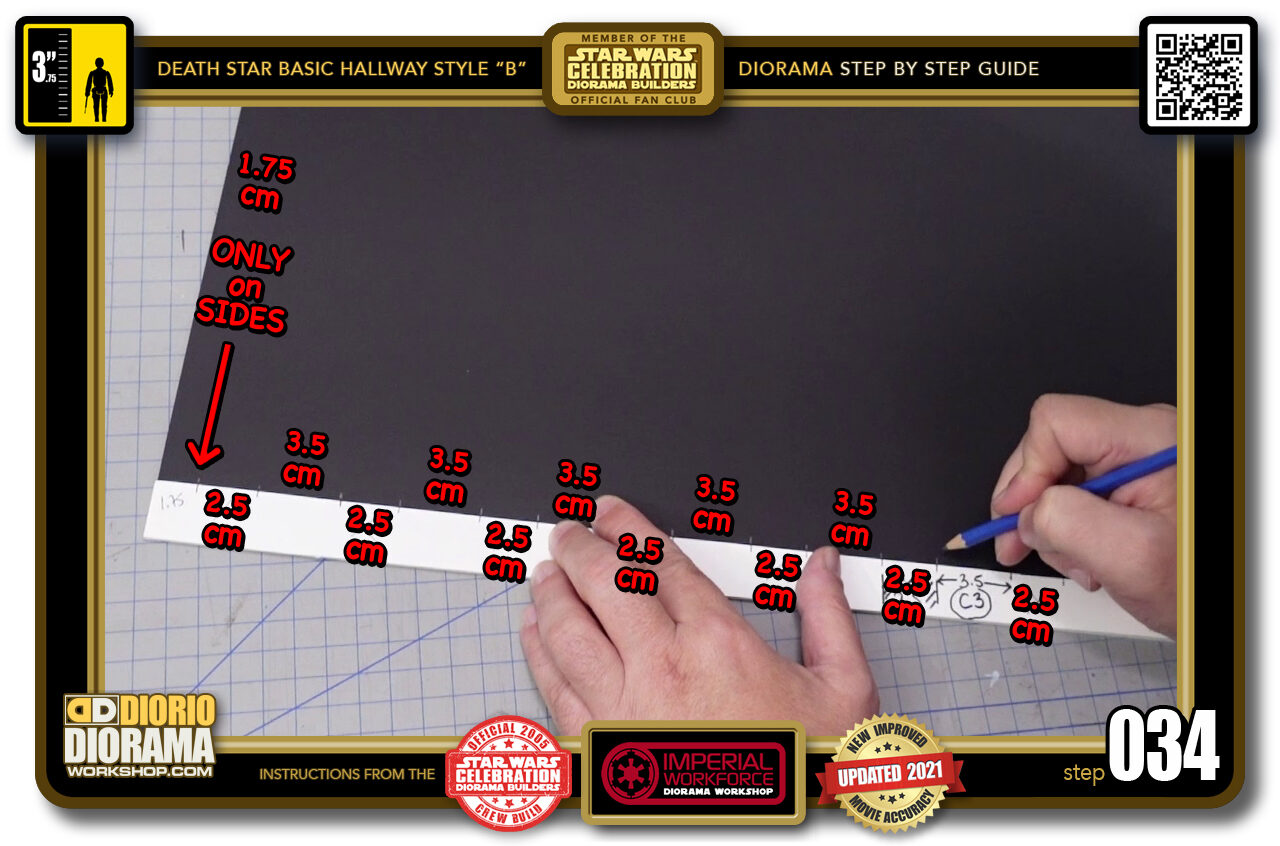
- STEP 034 > Let's start with the long side of your ceiling (your front and rear) From the outer corner (cap), you want to put a pencil line at 1.75cm FIRST then you measure 2.5cm, then 3.5cm, and repeat... 2.5cm, 3.5cm, 2.5cm, 3.5cm and so on until you reach the end where you should end up with the same 1.75cm cap gap you started with.
-
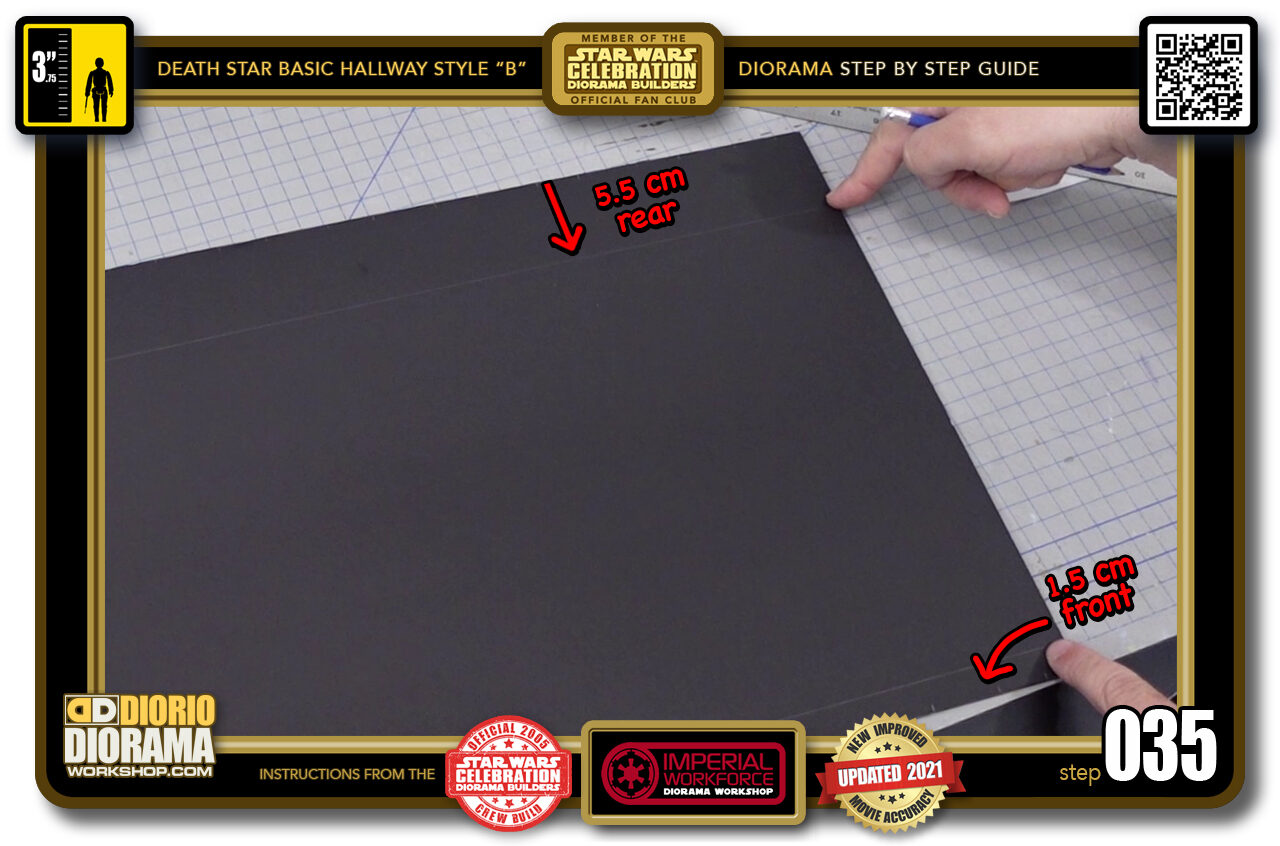
- STEP 035 > Now for the ends (left and right ceiling) you want to place on both sides, a pencil guide at 1.5cm and 5.5cm
-

- STEP 036 > Grab your cork ruler and start connecting your measurements. This should give you the same boxes as you see in the blueprint (step 017).
-
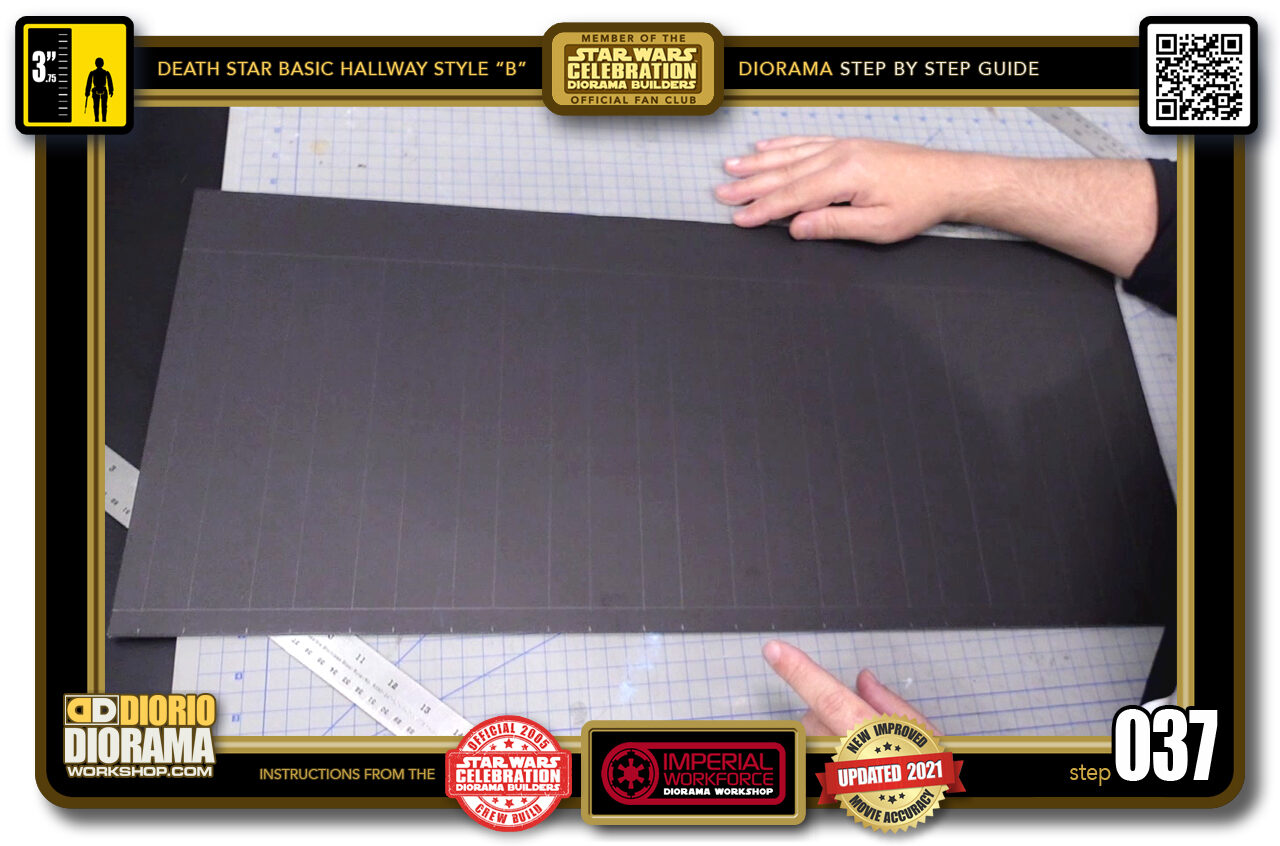
- STEP 037 > After a few minutes all of your pencil marks should be connected and ready to cut.
-

- STEP 038 > Before that, I found it helpfull to avoid confusion, to place squiggly lines or little "X"s inside the 2.5cm wide boxes. This will make sure you don't cut out a divider strip by mistake.
-
-
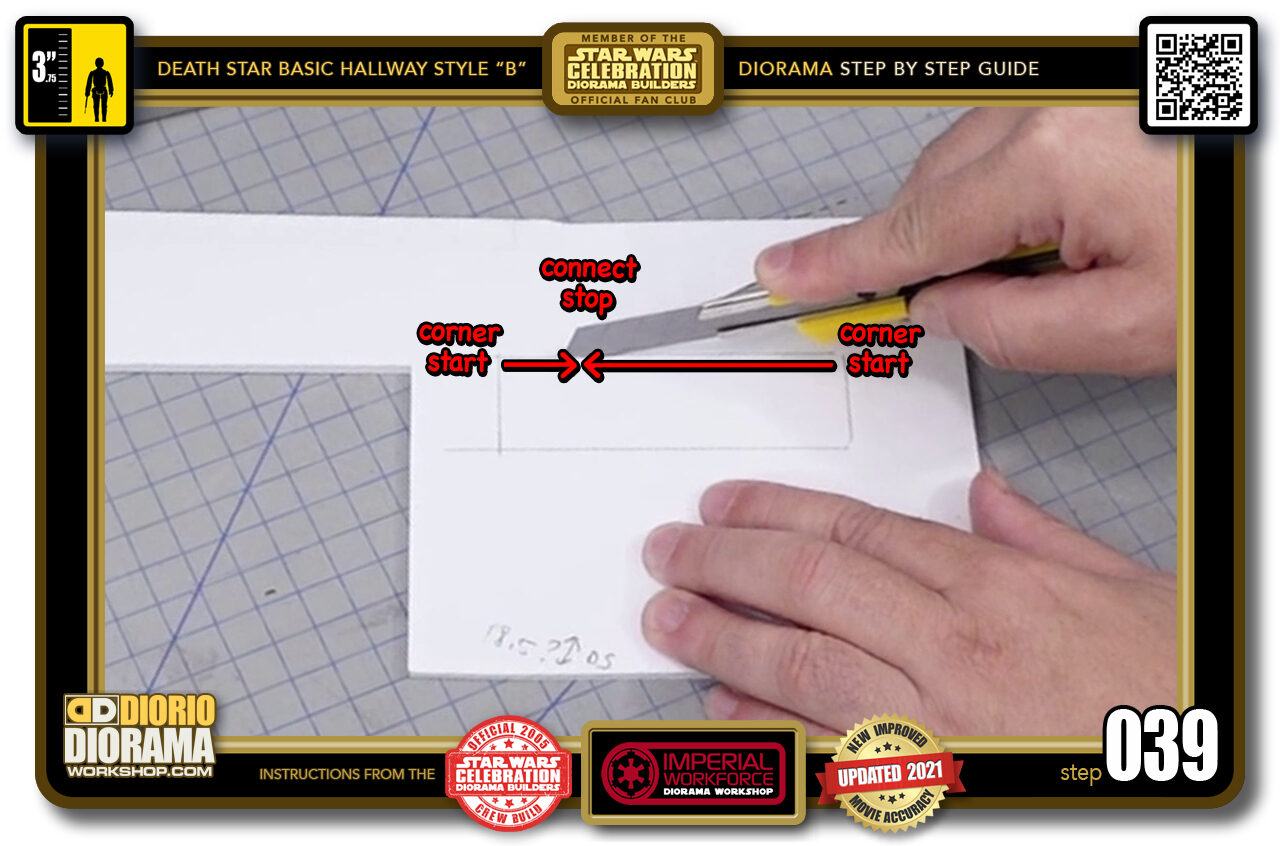
STEP 039 > I am switching to a white template to better help you see how your ceiling light strips will be cut.
To get the cleanest corners, you want to start in a corner and join up, connect with it's opposite corner cut. To do this place the tip of your blade against a corner, slowly press down, puncturing the foamcore and lower your hand so that the blade has maximum reach of the surface and start cutting towards the centre. IMPORTANT to STOP BEFORE you reach the opposite end. Then spin your foamcore 180 degrees, place X-Acto blade against the corner, press down to poke, start cutting until you reach the end of your first cut. You do this for every side of your rectangle.
-
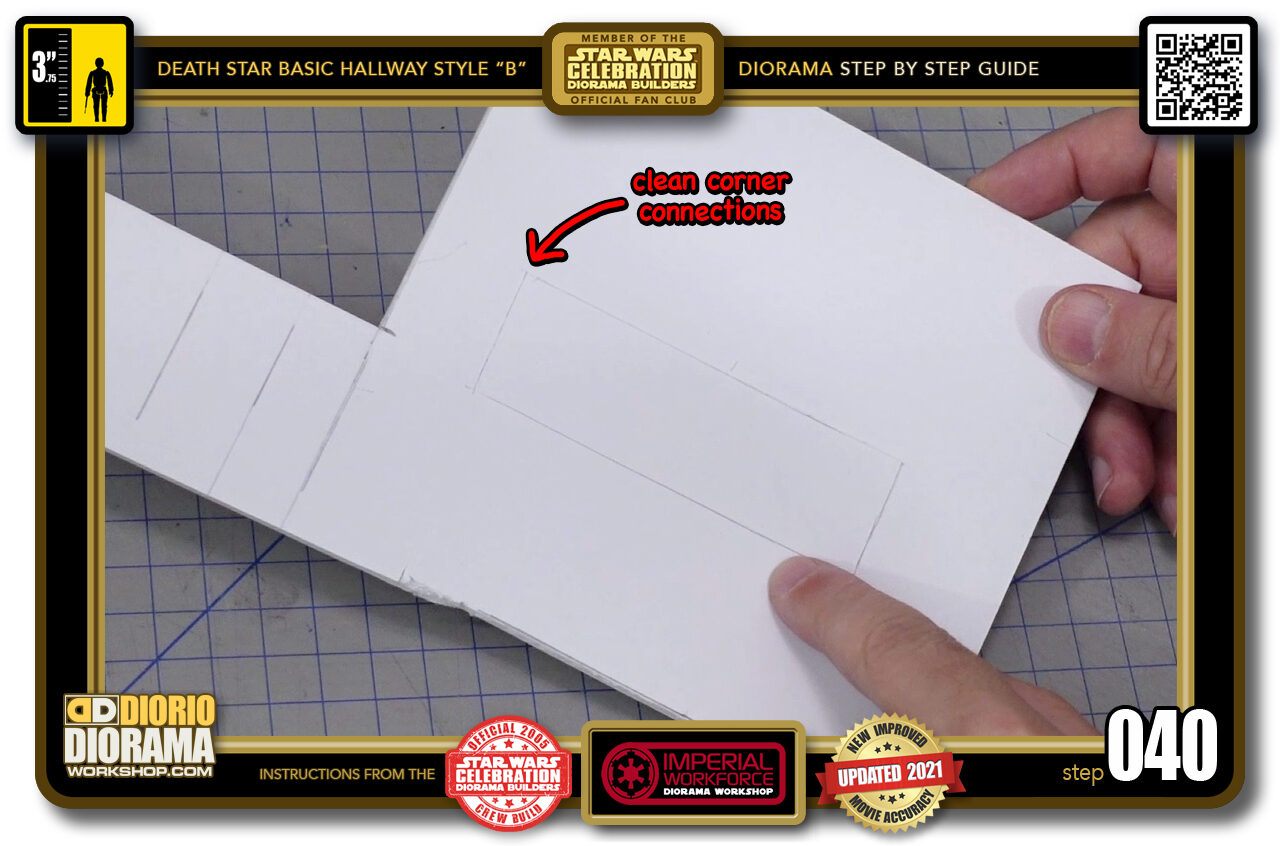
- STEP 040 > When you are done, flip the ceiling to the other side, and examine your corner connections. If you see some have not quite made it, simply use your X-Acto blade to help it along.
.
Did you already build this Diorama ? At home or at our Star Wars Celebration Diorama Builders workshop ? Would you like to show it in the site’s GALLERY VISITORS DIORAMAS section, YES ? That is Awesome !!! You can find out all the details on how to email me your photos on the VISITORS SUBMISSIONS INFO page … When I get your photos, I will create your very own page just like this one. You may not realize it but work does inspire others to join in the fun of making Action Figure Dioramas.
.
NOT FOR RESALE ALL Decals, tutorials and artwork are ©FrankDiorio (dioramaworkshop.com) and offered FOR FREE to the fans – that would be you ? so you can build and display my diorama designs in your very own home. I realize I cannot control what one does with my graphics once I place them on the web, I can only ask you as one fan to another, please respect the artist and do not be that jerk who uses my designs and tutorials to build a copy of my work only to sell it on EBAY or trade/sale groups and forums. Thank You. Frank.
.

.
.
If you have a facebook account, why not join the Official Diorama Builders Fan Club today, simply click the logo link below.
 .
.
Catch up with fellow visitors and exchange stories, read cool interviews with the crew, exchange photos, fun surprises and grab some FAN ONLY merchandise next year at actual future conventions ?
.
©2021 Frank Diorio DioramaWorkshop.Com
.
IF YOU LIKE WHAT YOU SEE, PLEASE SHARE WITH YOUR FRIENDS
USING THE SOCIAL MEDIA BUTTONS BELOW