


-
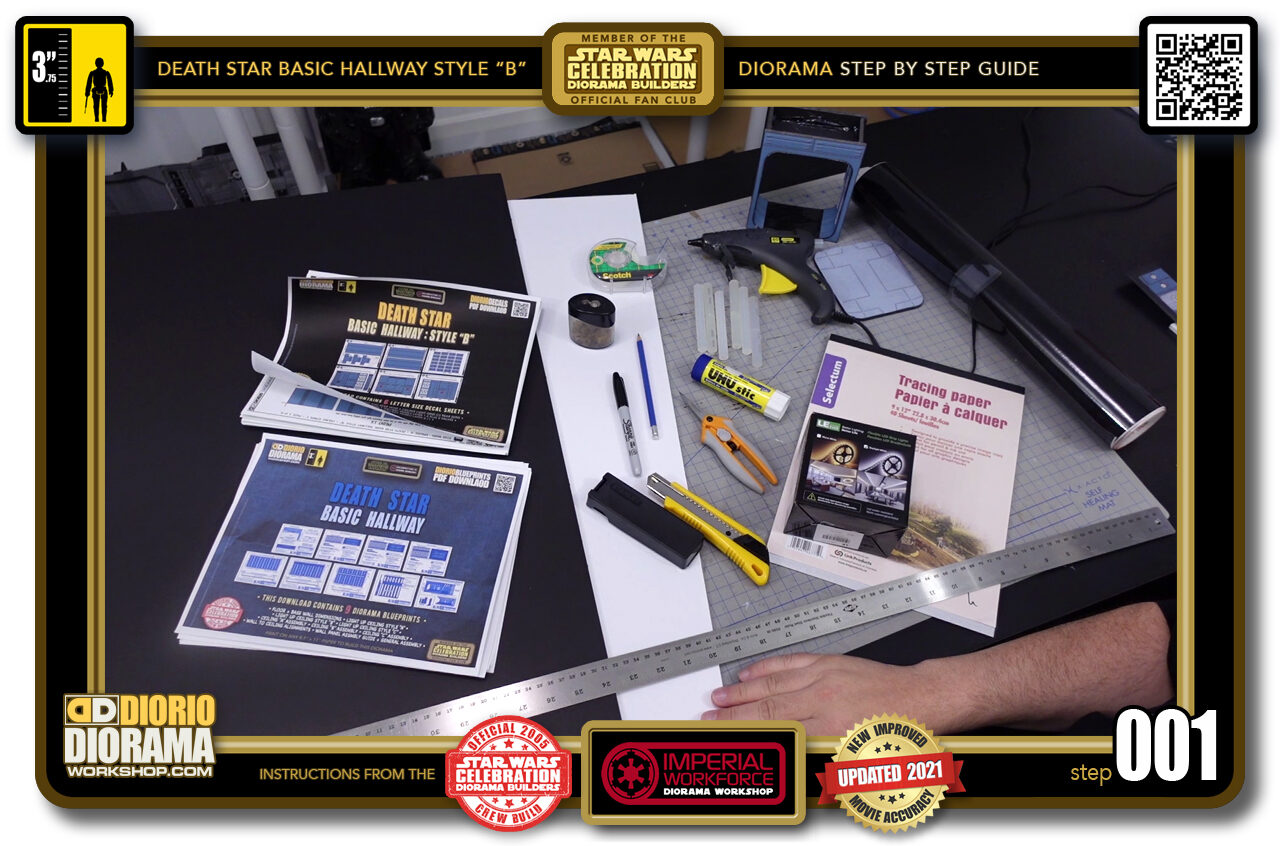
- STEP 001 > Here are the materials you will need to make your Basic Death Star Style "B" Hallway. You can view the print PDF list at this link ... https://dioramaworkshop.com/tutorial-materials-list-death-star-basic-hallway-style-b-diorama/
-
-
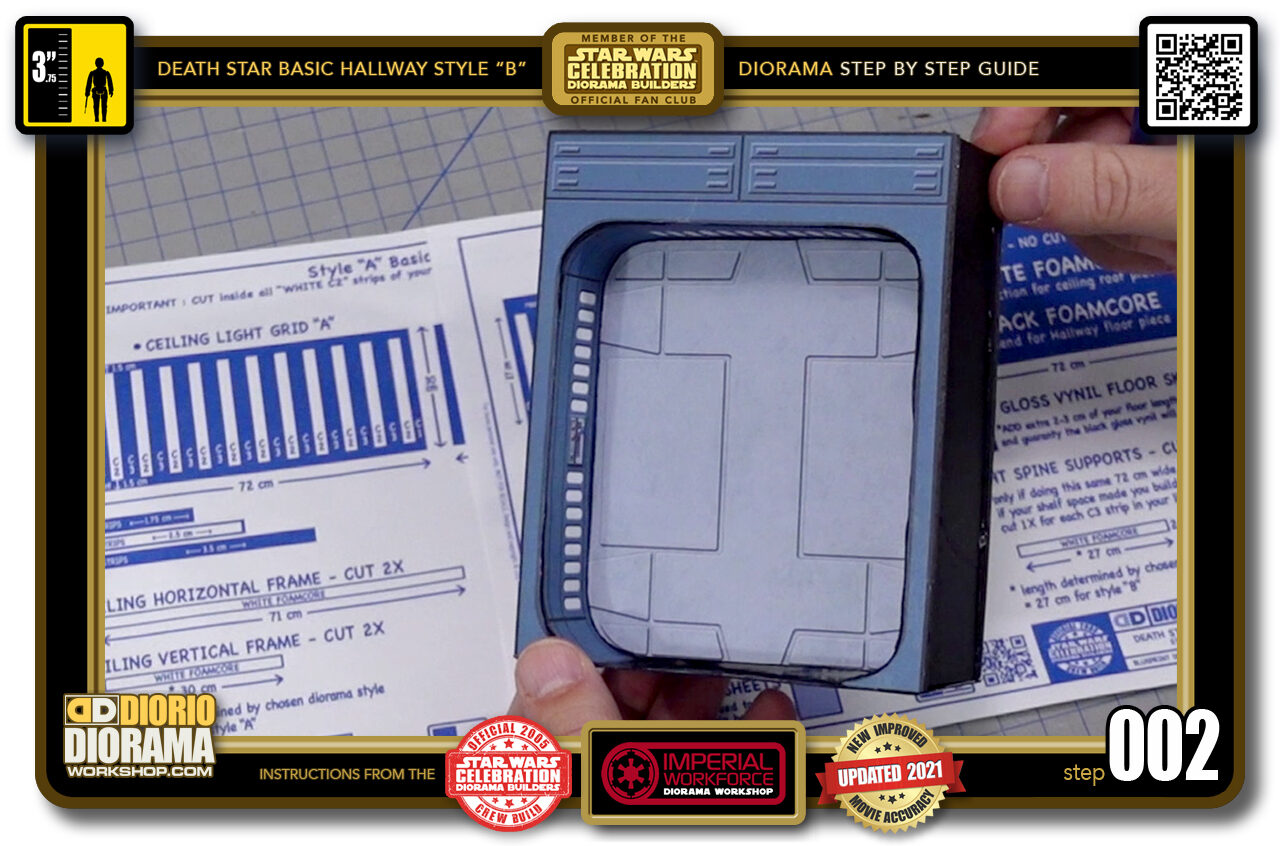
STEP 002 > The main difference with the Basic Death Star Style "A" hallway is that for this "B" style you will be using a true 3D doorway, not a flat decal.
You can find everything you need (decals, blueprints, tutorials at the Speed Index menu ... https://dioramaworkshop.com/speed-index/ simply scroll down to STAR WARS A NEW HOPE - DEATH STAR BASIC DOOR.
-
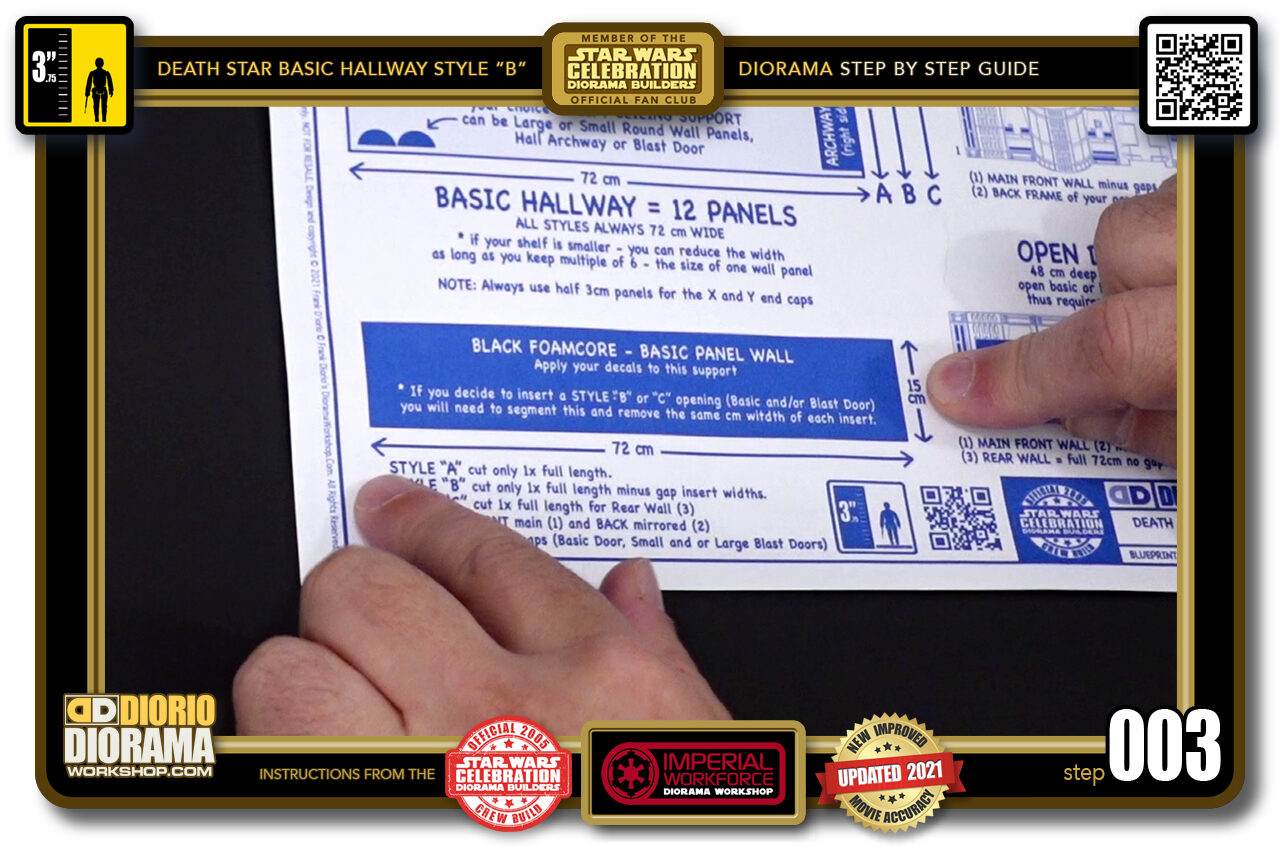
- STEP 003 > If you look at the blueprints, you will see that the basic decal wall dimensions remain the same (72cm x 15cm) as Style "A"
-
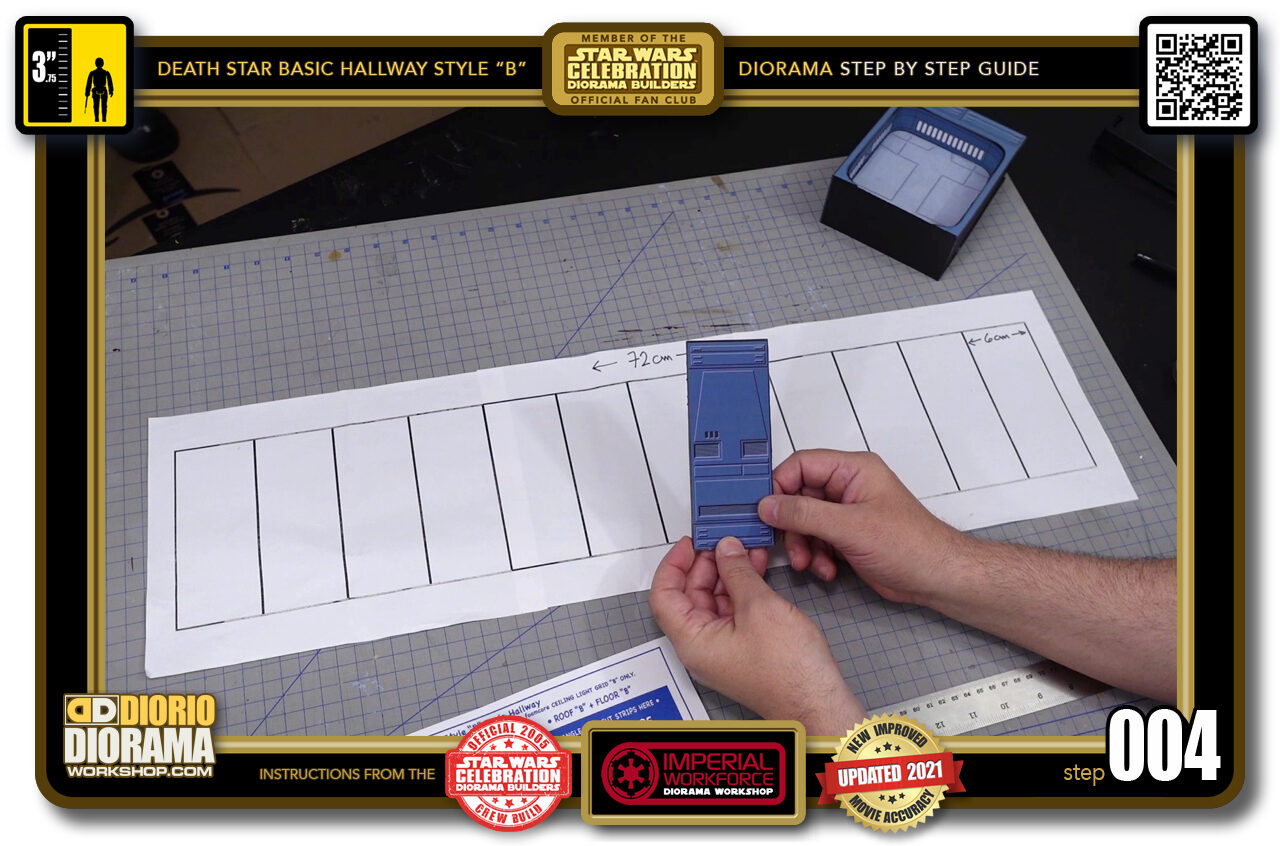
- STEP 004 > If you make a paper template using the dimensions of 1 wall panel - 6cm x 15cm - you will be able to play around with your door to see where you want to replace 2 decal spaces.
-
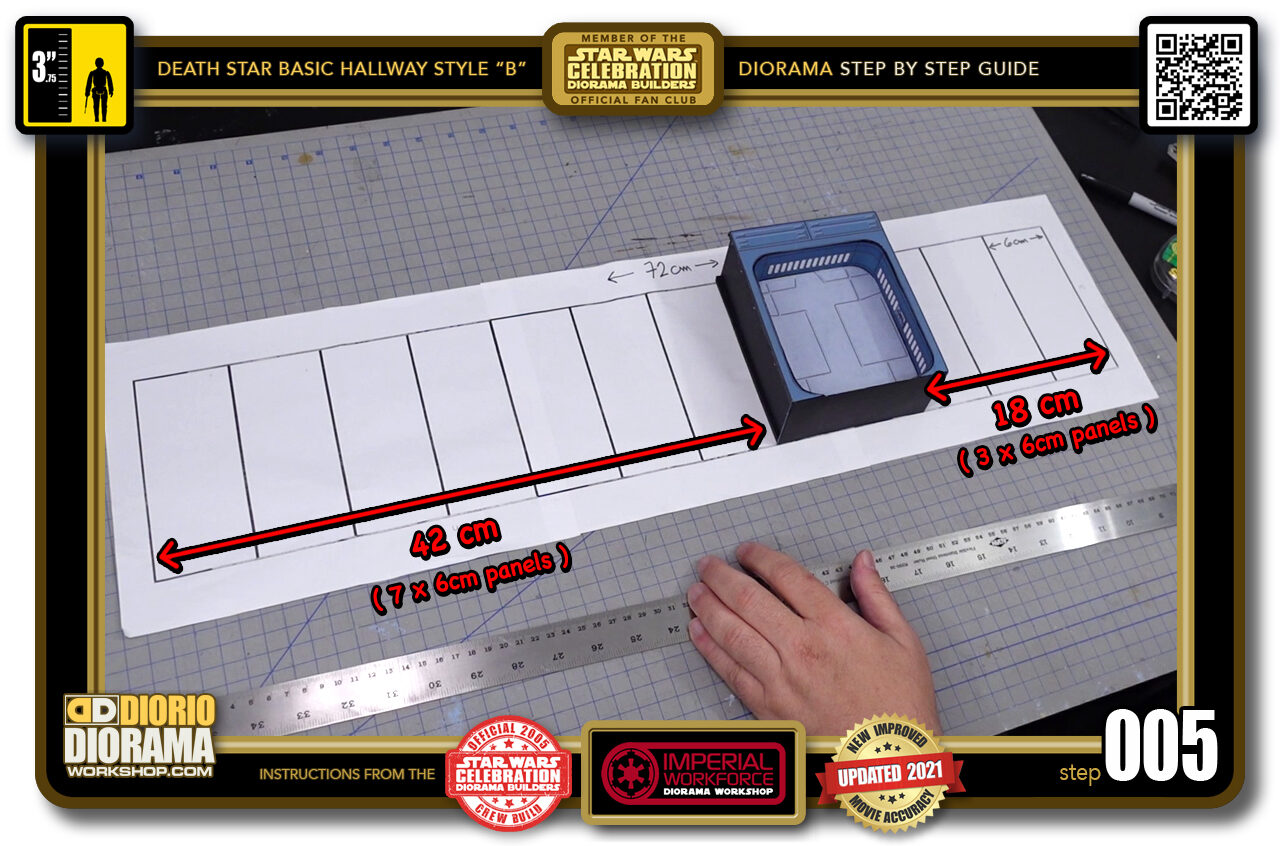
- STEP 005 > You will notice that the design of the Death Star Basic Door is the width of 2 basic wall panel decals (12cm) Sliding it back and forth along the template will help you visualize the sizes of your side wall panels. Here is where I decided to place mine which gives me a left side wall dimension of 42cm (7 panels) and on the right side 18cm (3 panels)
-
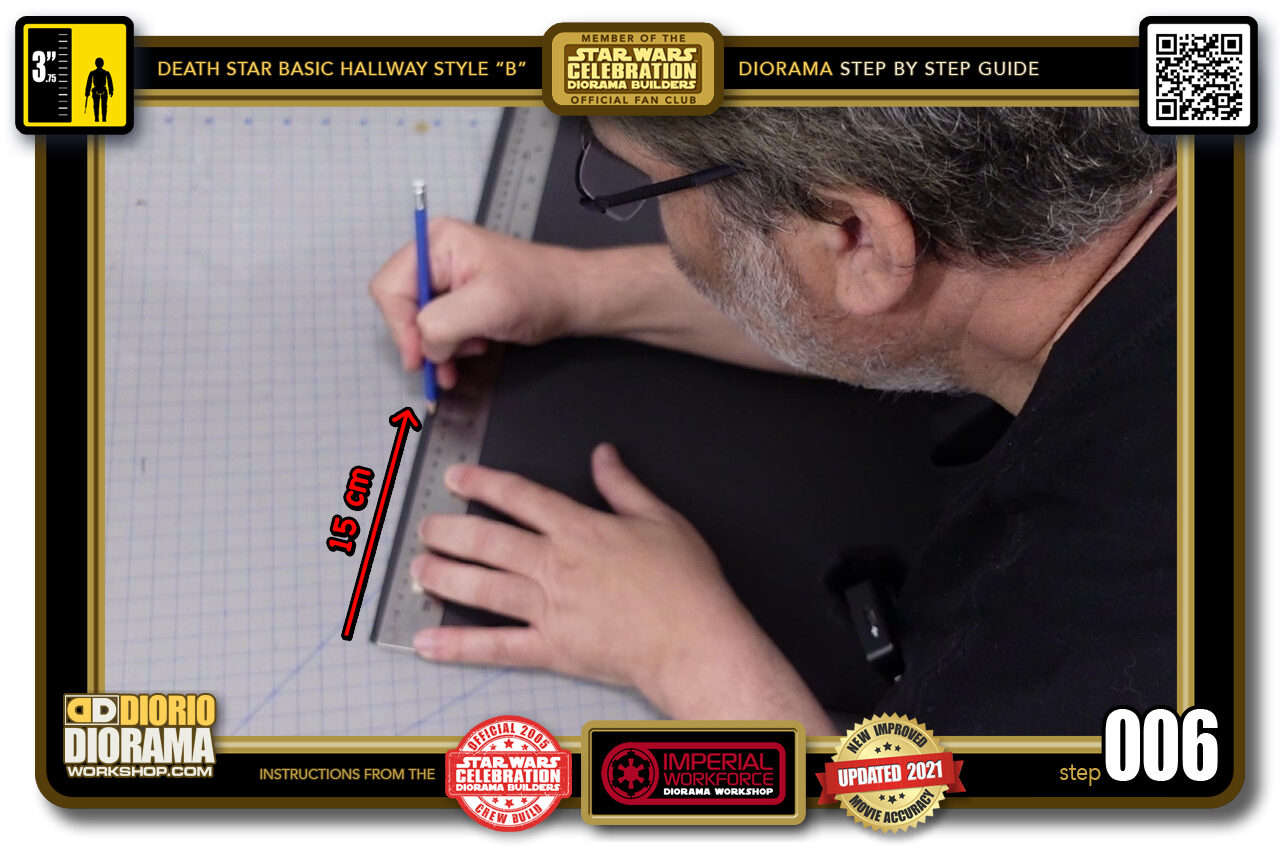
- STEP 006 > We can now cut out or rear wall from a black foamcore sheet (if you can only find white that is ok, but black works best to blend your decal seams together. So start by measuring 15cm on both ends of your foamcore sheet.
-
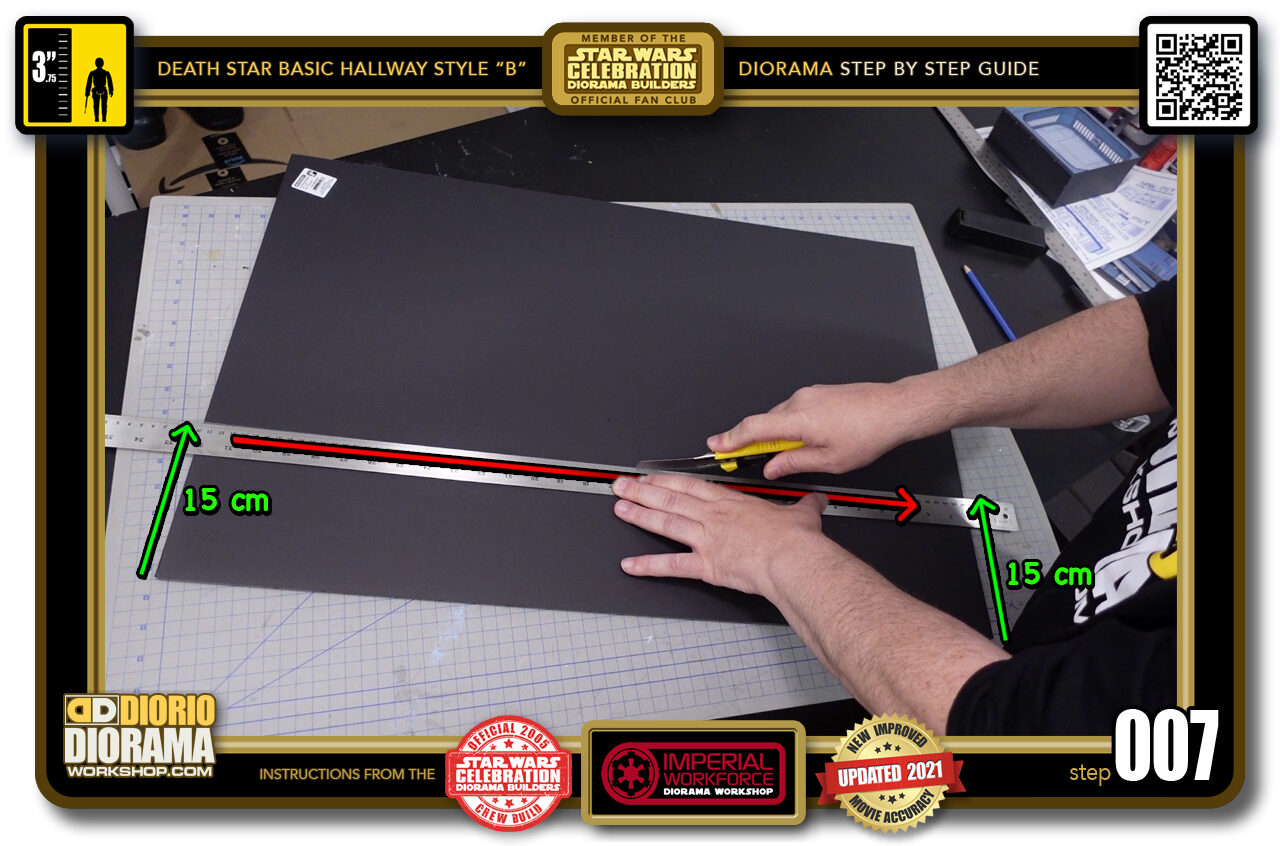
- STEP 007 > Align your ruler with the 2 15cm height markings and use your Xacto knife to cut the length your wall piece.
-
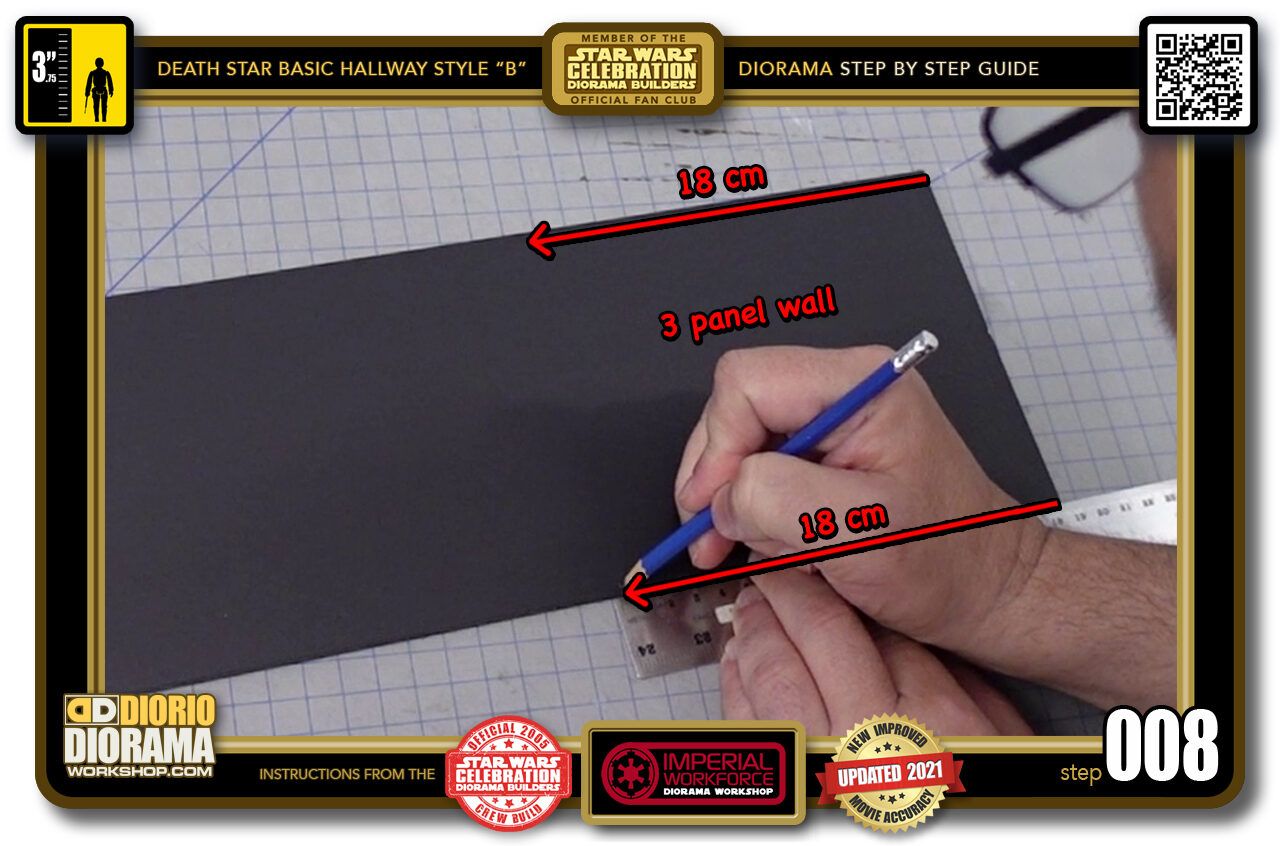
- STEP 008 > Now that we have the proper height it's time to measure the right wall. Use your pencil to put a indication of 18cm at the top and bottom. Then connect your marks with a ruler and slice with your Xacto knife.
-
-
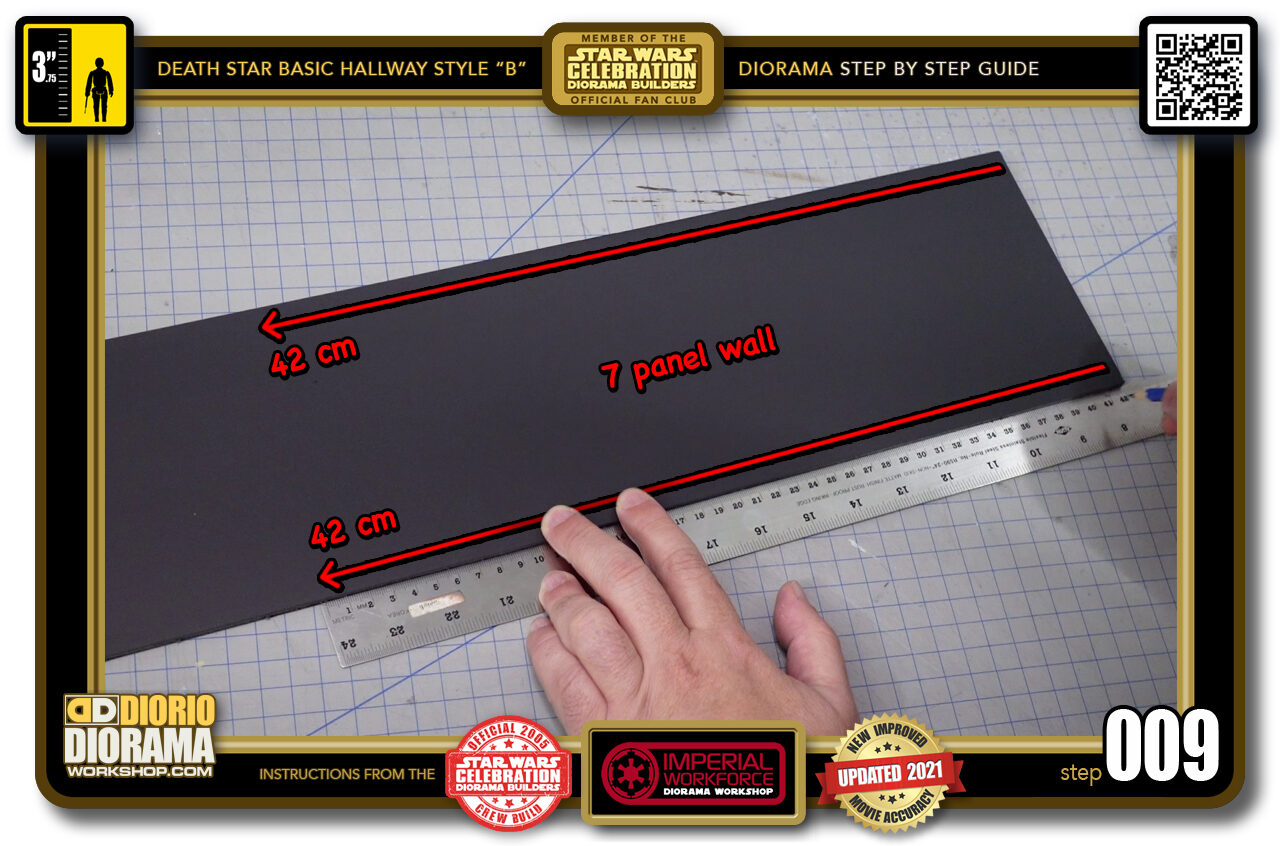
STEP 009 > Do the same for the left wall but this time measure 42cm top and bottom.
Remember that these measurements are for the position I selected for my door frame. If you placed it elsewhere on the template, use your own measurements for these 2 steps.
-
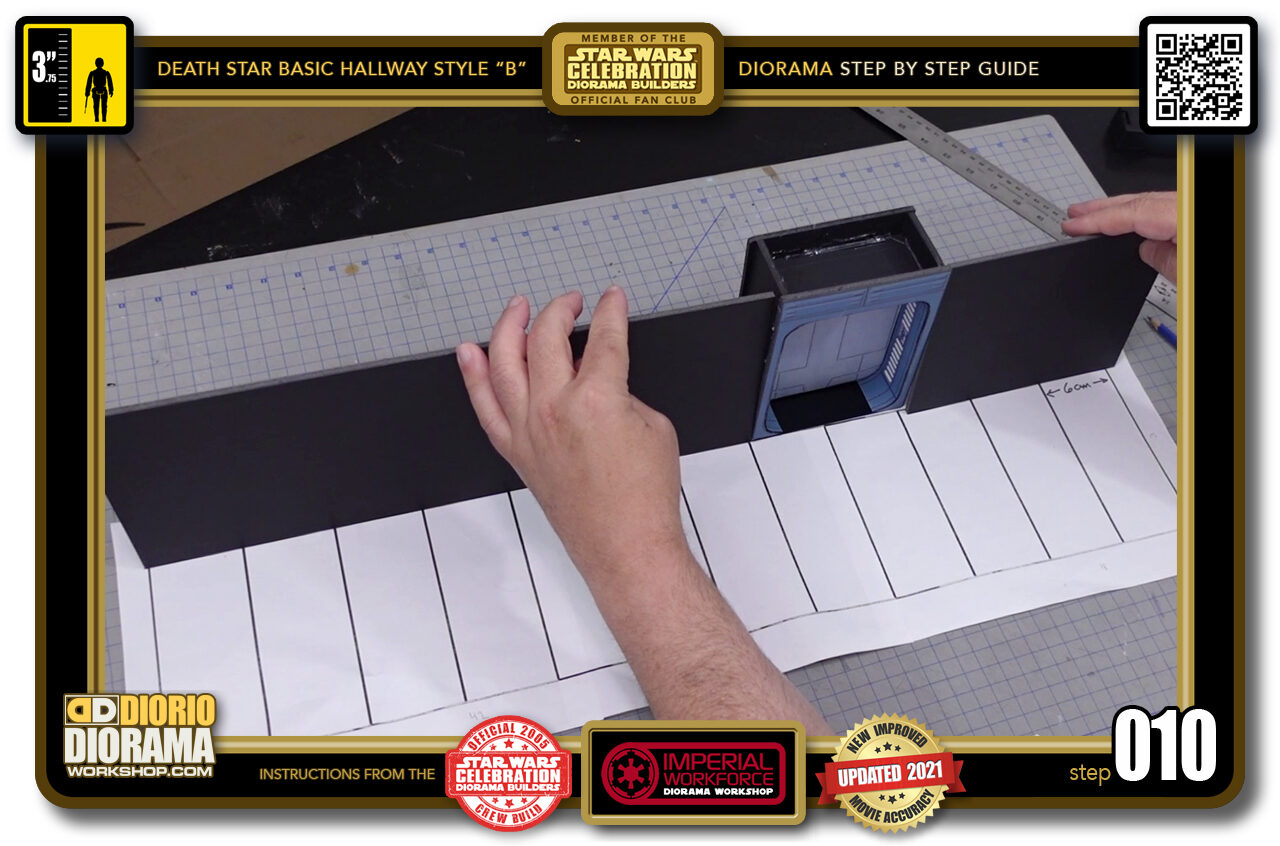
- STEP 010 > Both wall pieces now cut leave a 12cm gap for your actual 3D basic door to be inserted perfectly in between. We can put these away for now and move on to our floor.
-
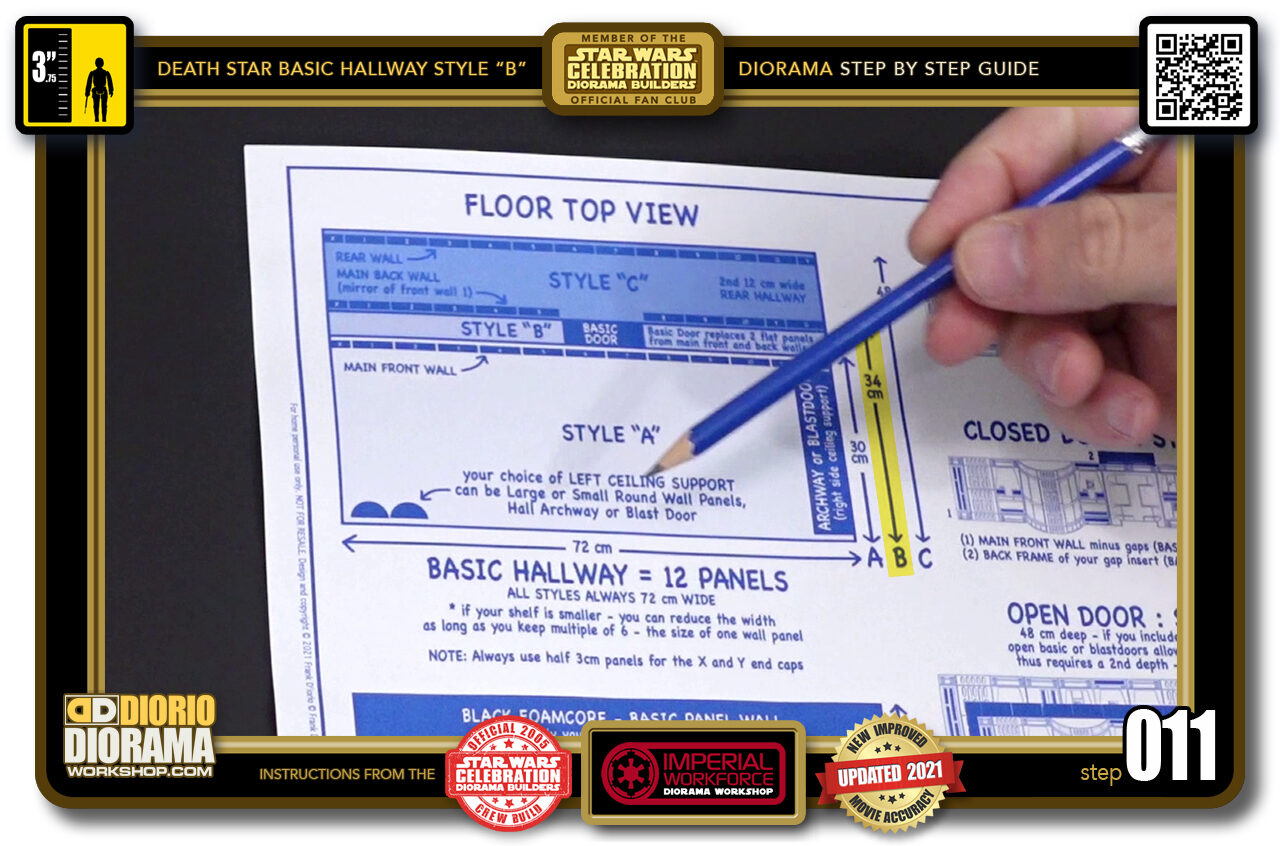
- STEP 011 > Now there are 2 ways to make your Death Star ceiling. If you don't want to take the time to build the LED Light Up version, you can create the same illusion using black foamcore strips.
-
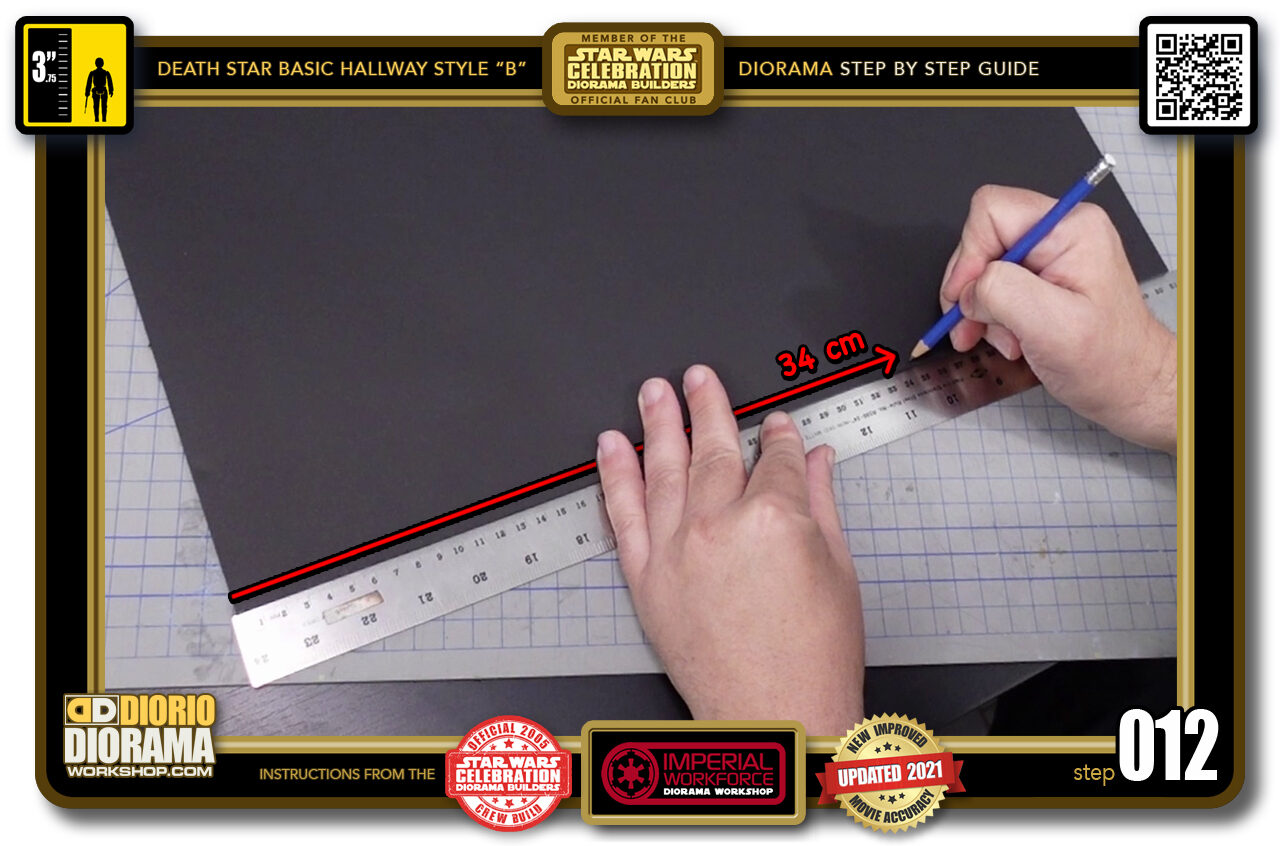
- STEP 012 > Let's make your ceiling shape. Measure 34cm on both side of your black foamcore.
-
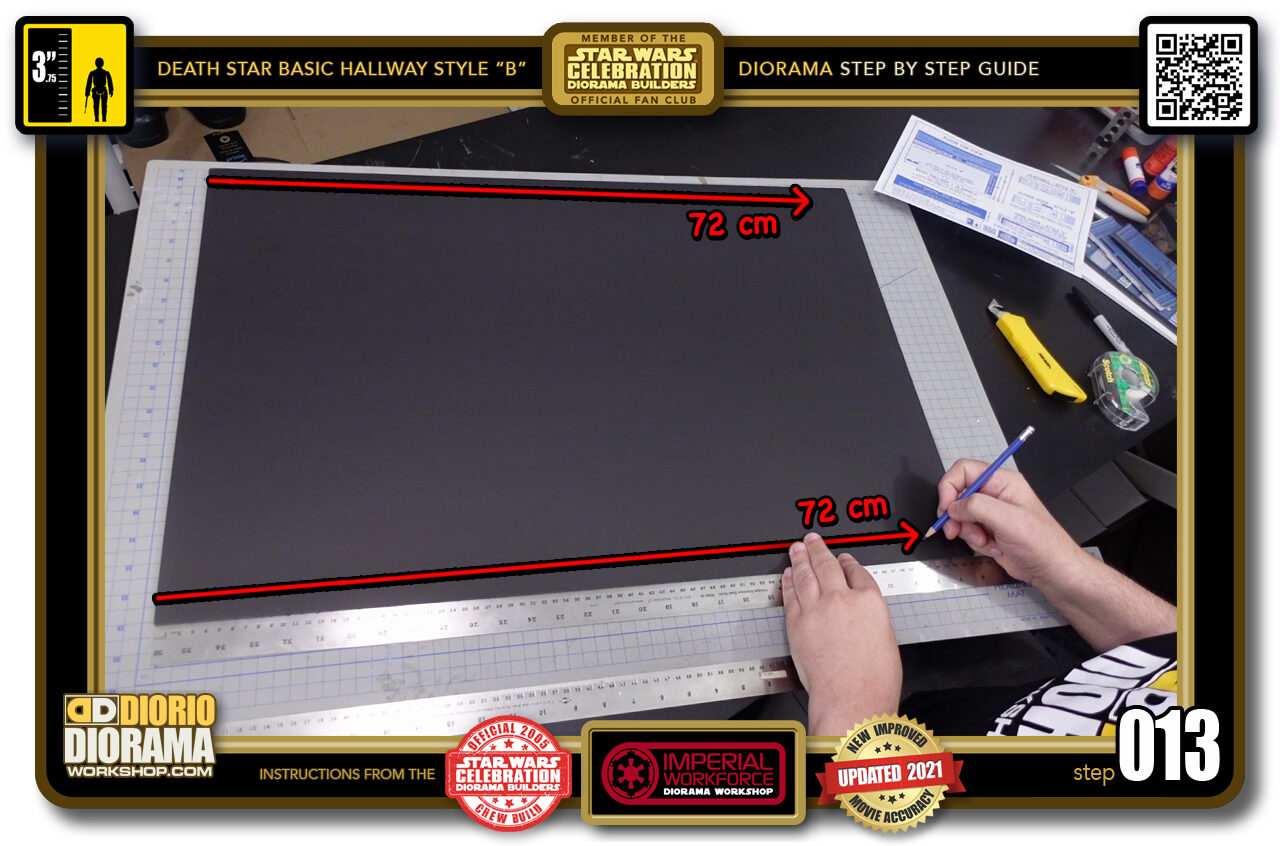
- STEP 013 > Now measure 72cm wide on both top and bottom.
-
-
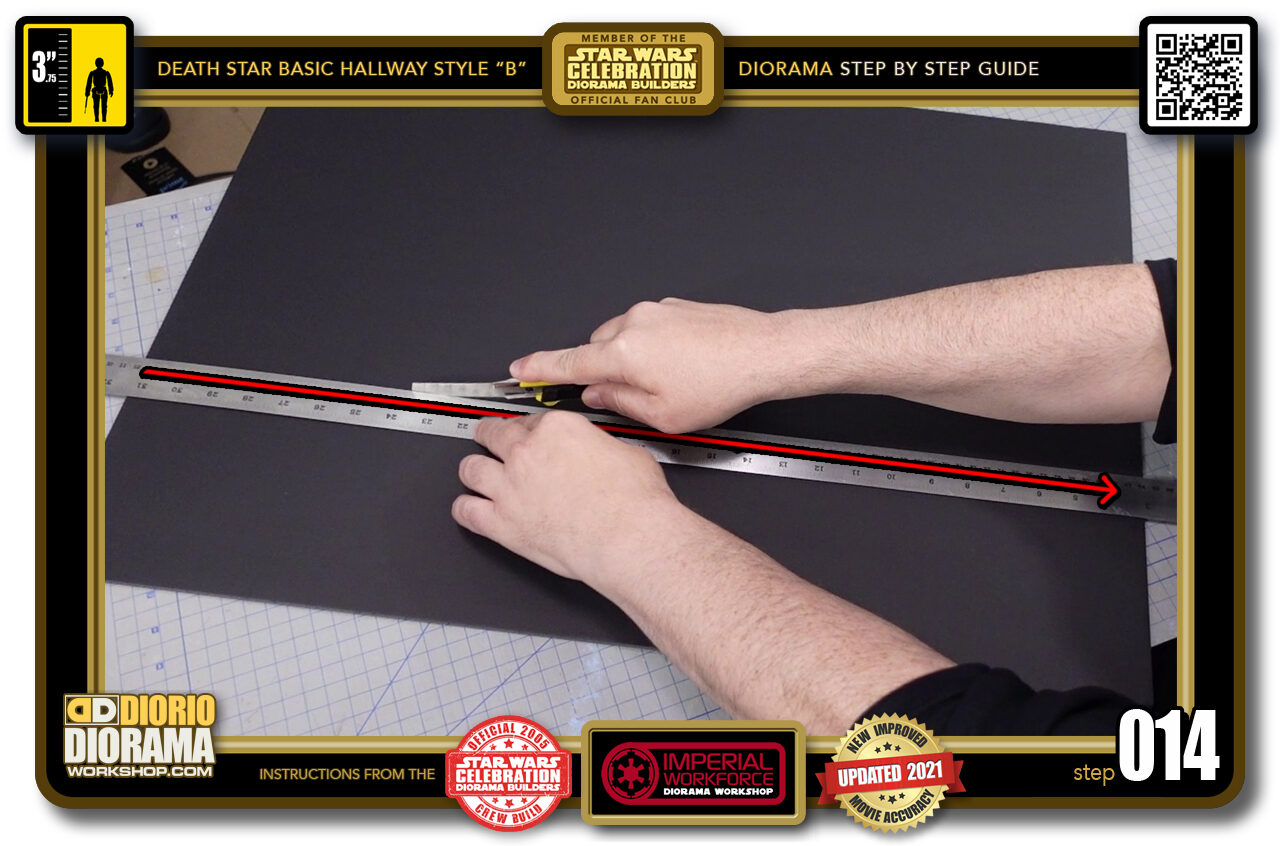
STEP 014 > Align your pencil marks with a cork ruler and slice using a X-Acto knife.
Remember to use a NEW blade when starting new projects or after 20 cuts or so. Foamcore is the KILLER of the blades. You always want clean smooth edges.
-
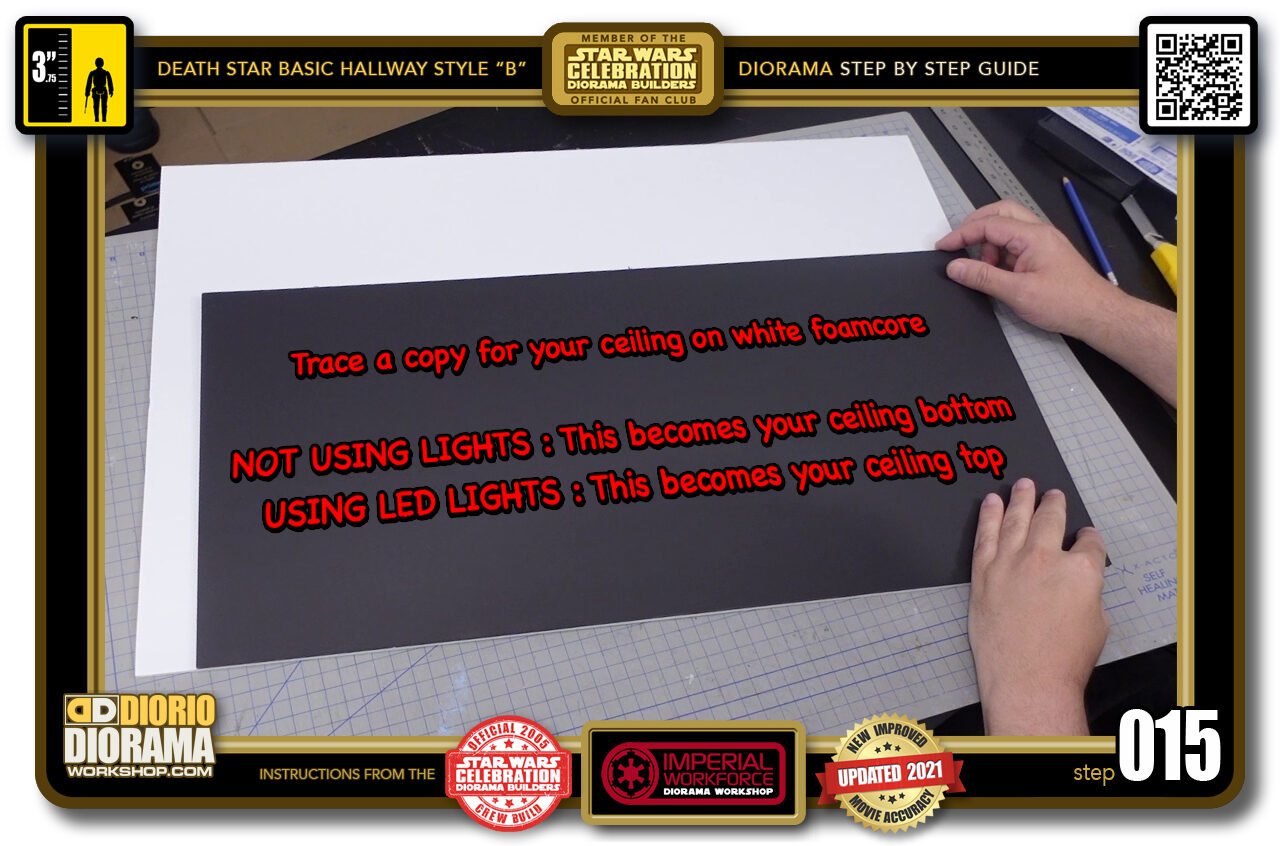
- STEP 015 > Take your black foamcore ceiling piece and trace it on a white foamcore.
-
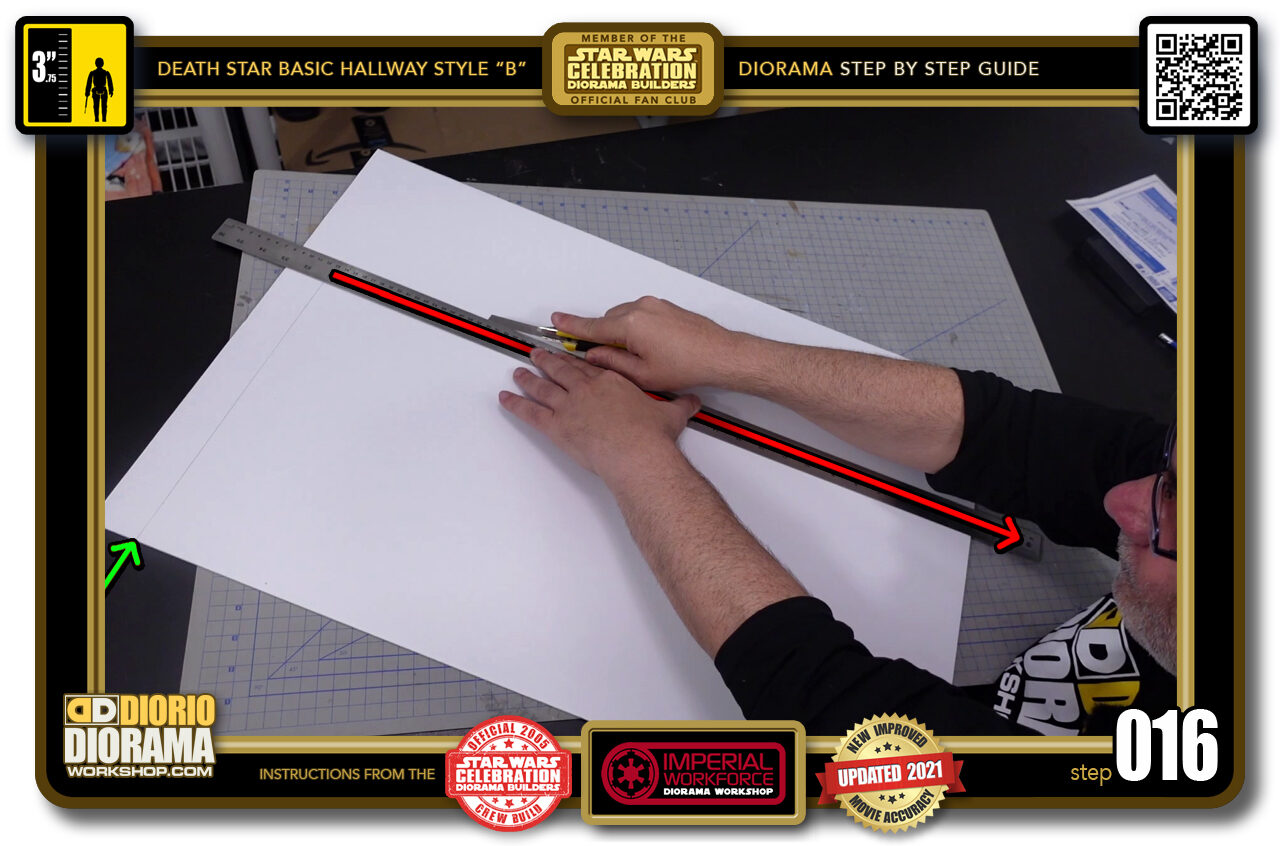
- STEP 016 > Cut along your traced lines to obtain the copy shape of your black piece.
-
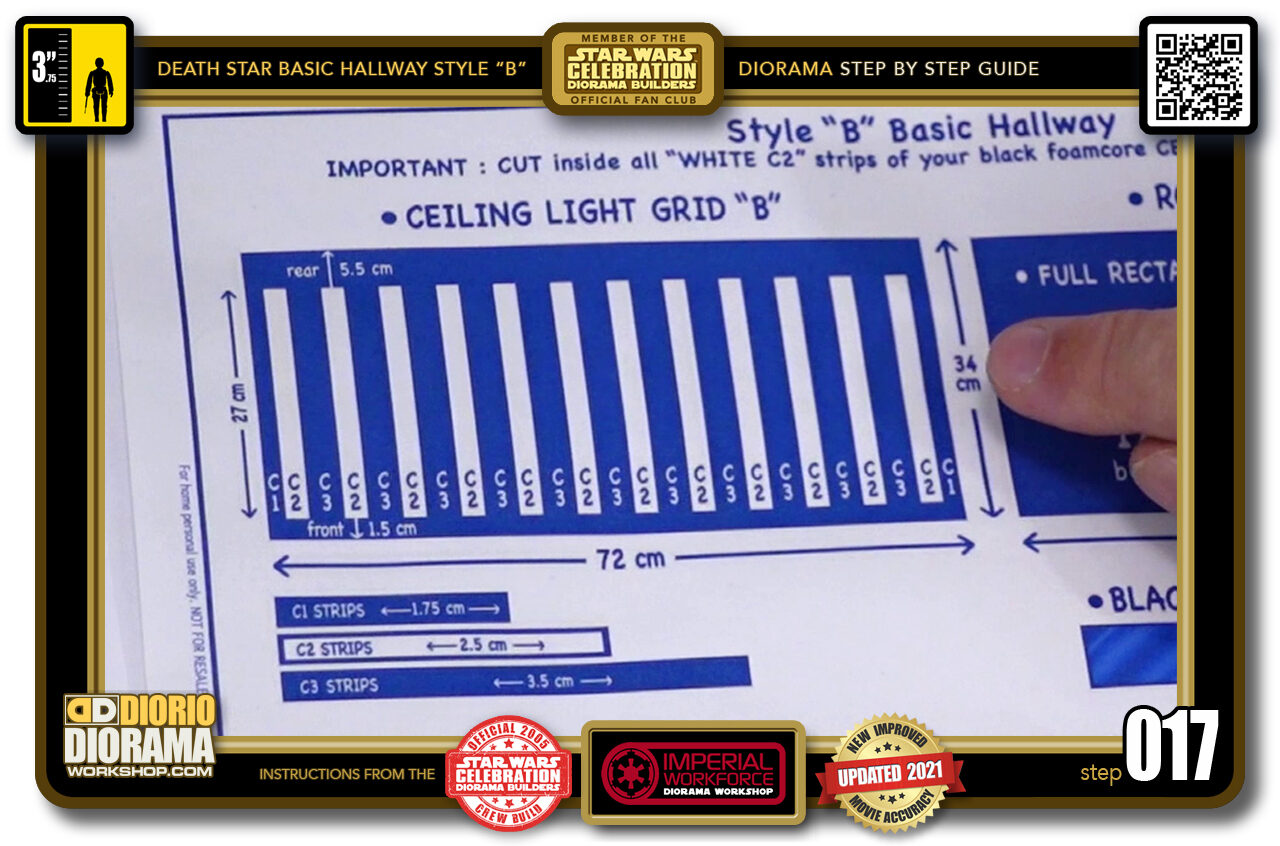
- STEP 017 > Now if we look at the blueprint, if you are NOT doing LED lights, then your WHITE rectangle will be your main ceiling and you will be adding 3.5cm strips to create the illusion of the movie set.
-
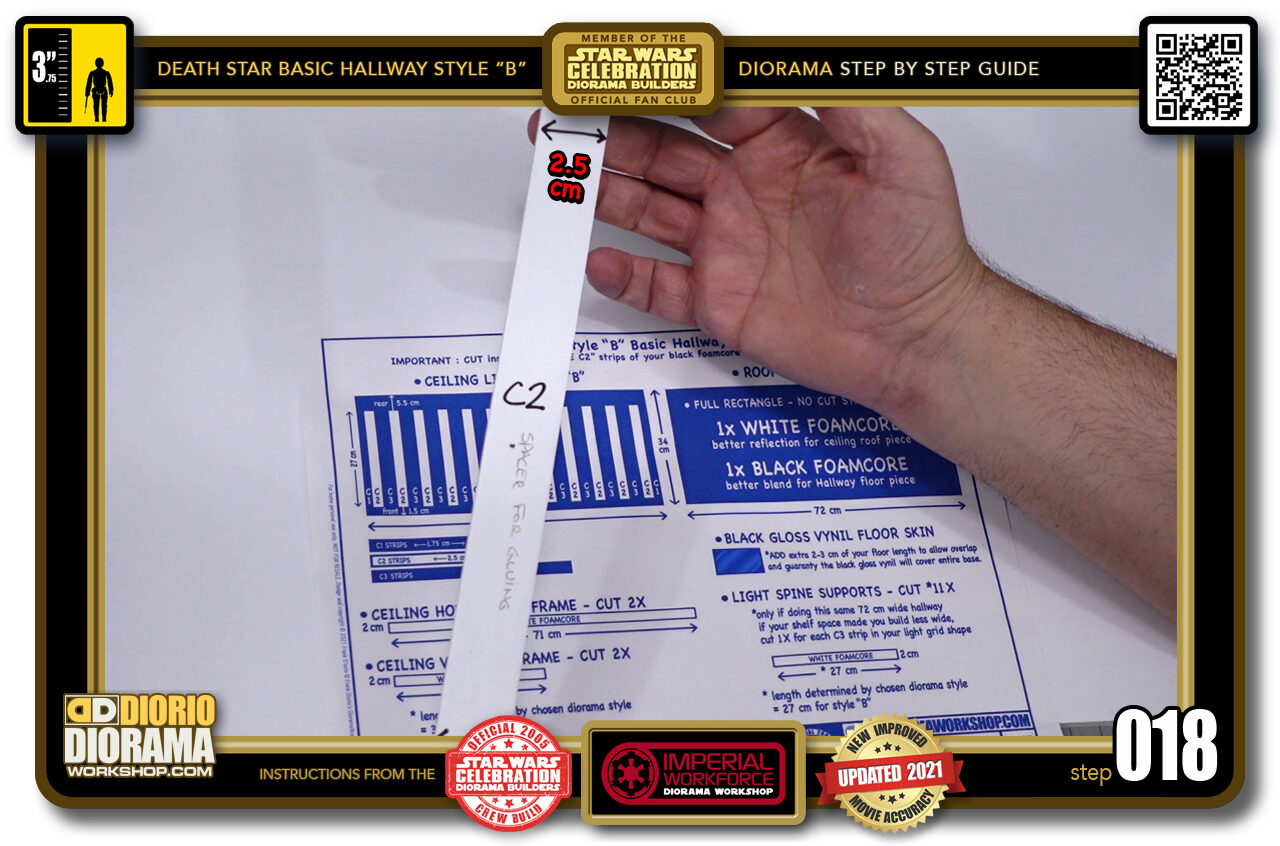
- STEP 018 > You will need to make yourself a 2.5cm wide strip that will be used as your spacing guide. You can use a scrap piece if you wish, it doesn't need to go the full depth of your ceiling surface.
-
-
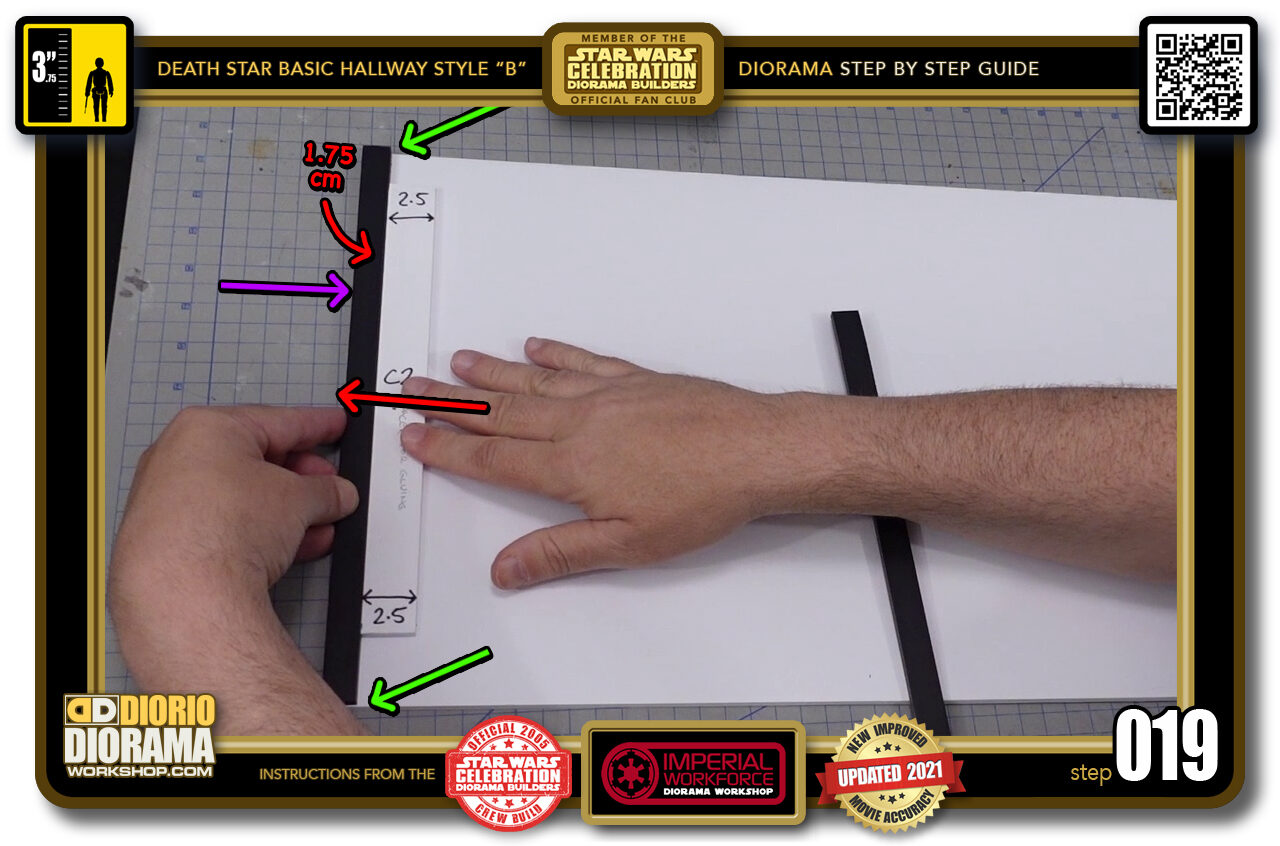
STEP 019 > Now your starter cap black strip - the one you will hot glue to the very edge of your white ceiling, is the only one (with the opposite end cap piece) to be 1.75cm wide. ALL strips must be 34cm long to reach and be flush from the front all the way to the rear of the diorama hallway Style "B"
once your end black strip is attached, place (NOT GLUE) your 2.5cm spacer right against it. This will guarantee you have the exact same correct spacing every time.
-
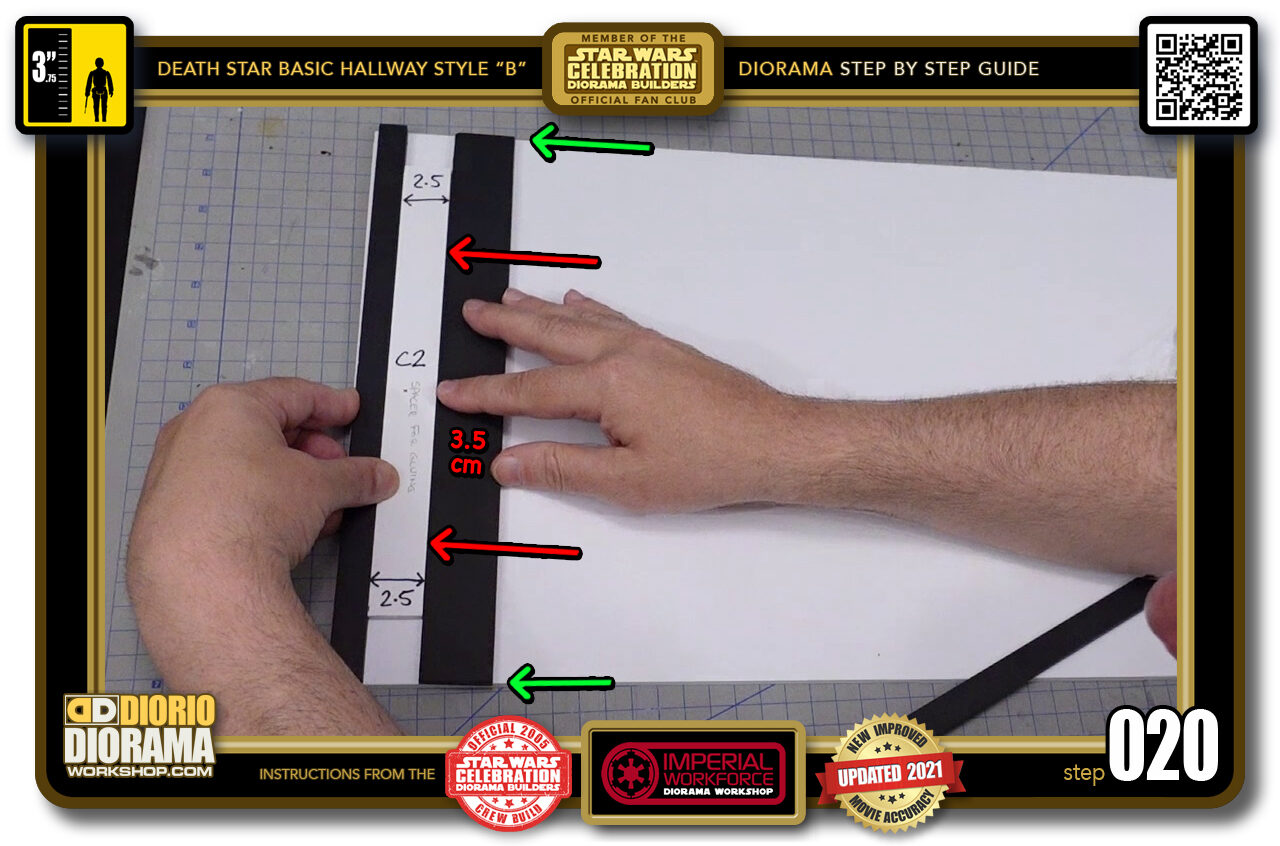
- STEP 020 > Grab one of your 34cm x 3.5 black strips, put some hot glue on the back and place it against the side of your spacer before pressing down t secure it flat onto the white ceiling. Let it cool down a few seconds before moving on.
.
Did you already build this Diorama ? At home or at our Star Wars Celebration Diorama Builders workshop ? Would you like to show it in the site’s GALLERY VISITORS DIORAMAS section, YES ? That is Awesome !!! You can find out all the details on how to email me your photos on the VISITORS SUBMISSIONS INFO page … When I get your photos, I will create your very own page just like this one. You may not realize it but work does inspire others to join in the fun of making Action Figure Dioramas.
.
NOT FOR RESALE ALL Decals, tutorials and artwork are ©FrankDiorio (dioramaworkshop.com) and offered FOR FREE to the fans – that would be you ? so you can build and display my diorama designs in your very own home. I realize I cannot control what one does with my graphics once I place them on the web, I can only ask you as one fan to another, please respect the artist and do not be that jerk who uses my designs and tutorials to build a copy of my work only to sell it on EBAY or trade/sale groups and forums. Thank You. Frank.
.

.
.
If you have a facebook account, why not join the Official Diorama Builders Fan Club today, simply click the logo link below.
 .
.
Catch up with fellow visitors and exchange stories, read cool interviews with the crew, exchange photos, fun surprises and grab some FAN ONLY merchandise next year at actual future conventions ?
.
©2021 Frank Diorio DioramaWorkshop.Com
.
IF YOU LIKE WHAT YOU SEE, PLEASE SHARE WITH YOUR FRIENDS
USING THE SOCIAL MEDIA BUTTONS BELOW