


-
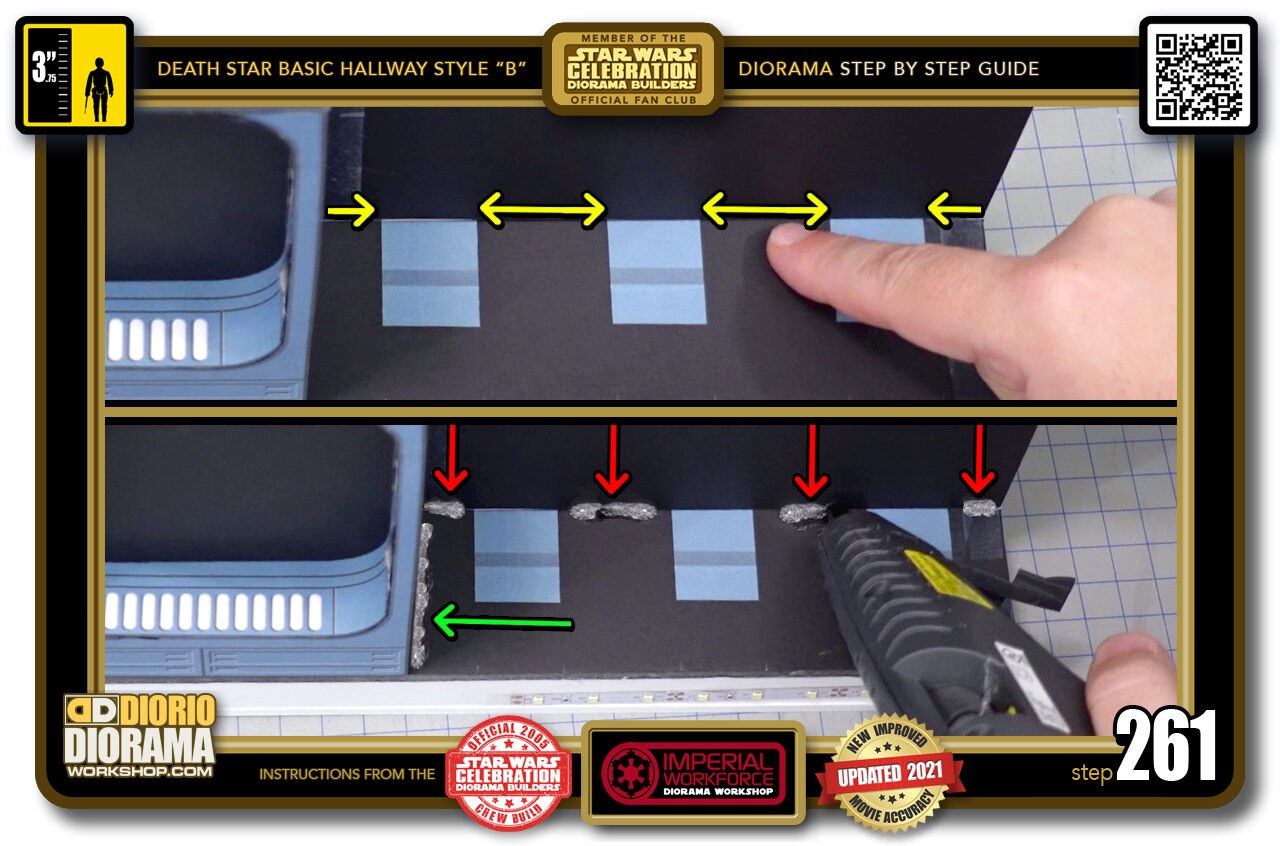
- STEP 261 > You want to put some hot glue drops along the wall base but ONLY in the BLACK areas between the skins (top image yellow arrows) Take your hot glue and put small drops (bottom image red arrows) and also along the base of the door connection (bottom image green arrow).
-
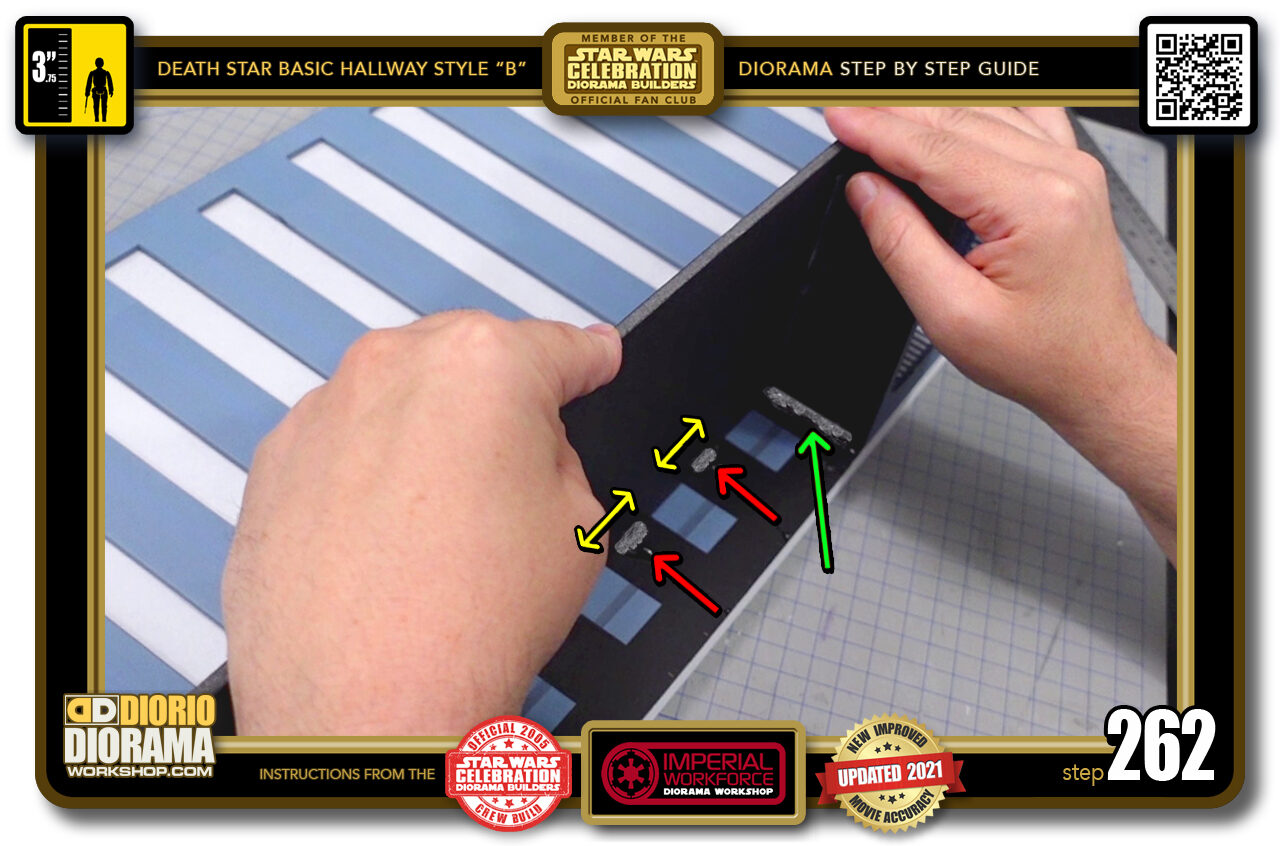
- STEP 262 > You want to do the same on the opposite side of the door. Only place hot glue on the BLACK foamcore (yellow arrows) just a small glob is enough (red arrows)
-
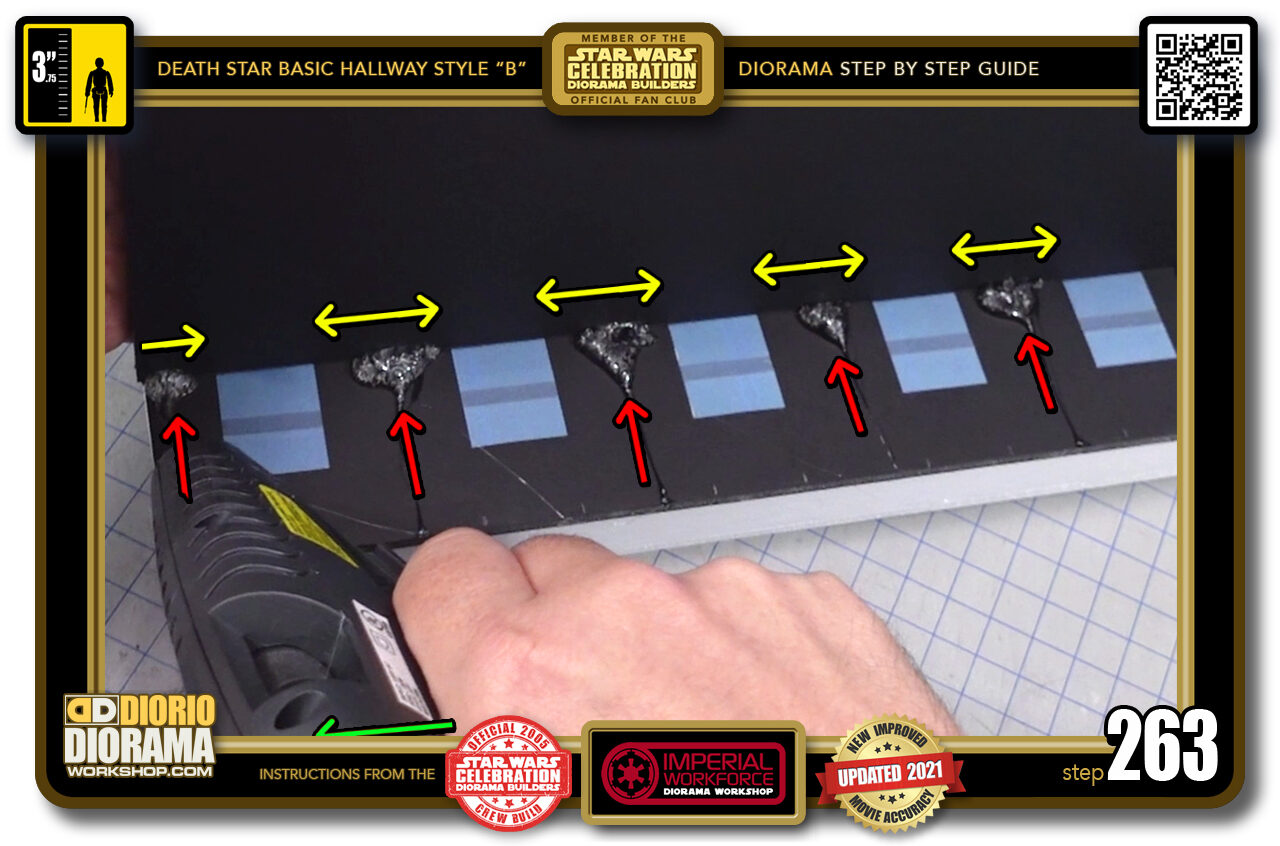
- STEP 263 > M
-
- STEP 264 > Let this cool down a little and we are ready to add the side accessory support of your choice.
-
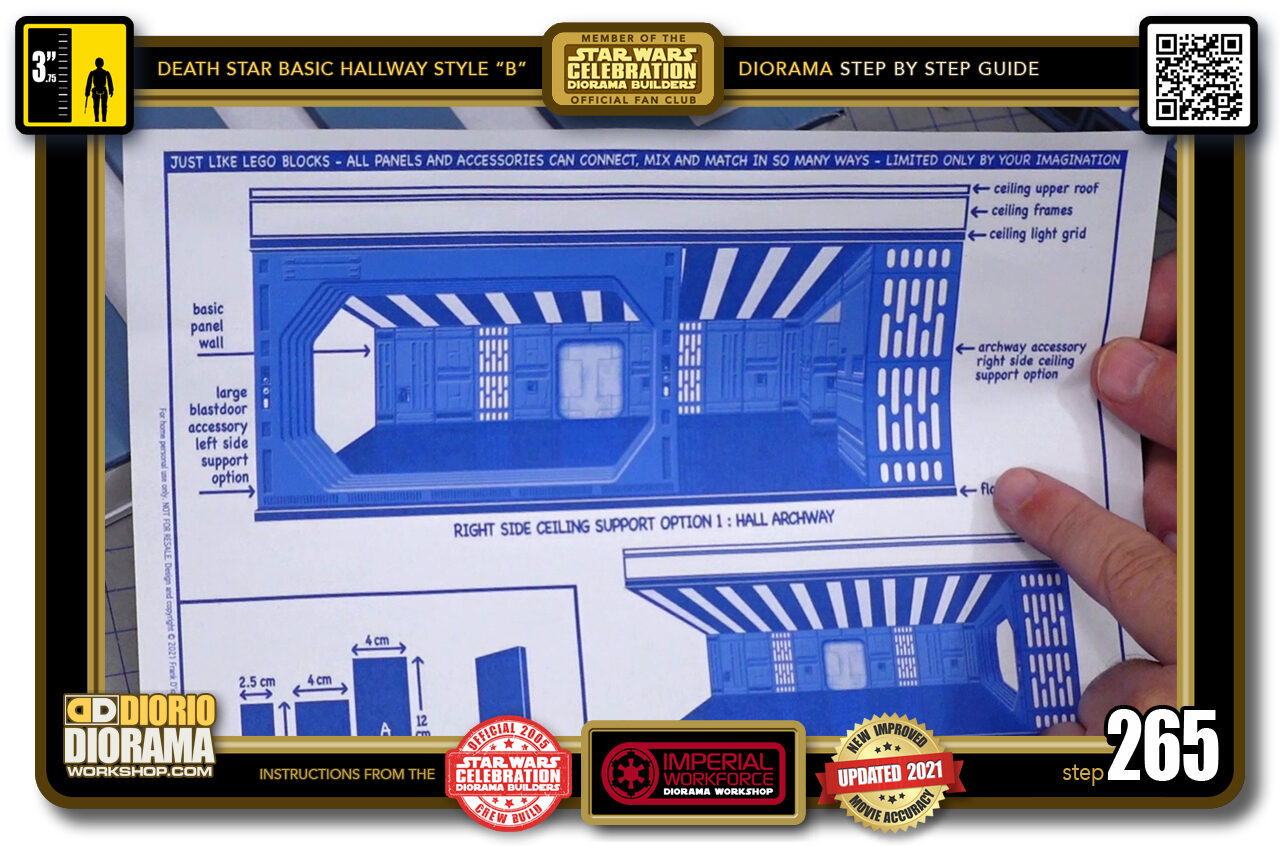
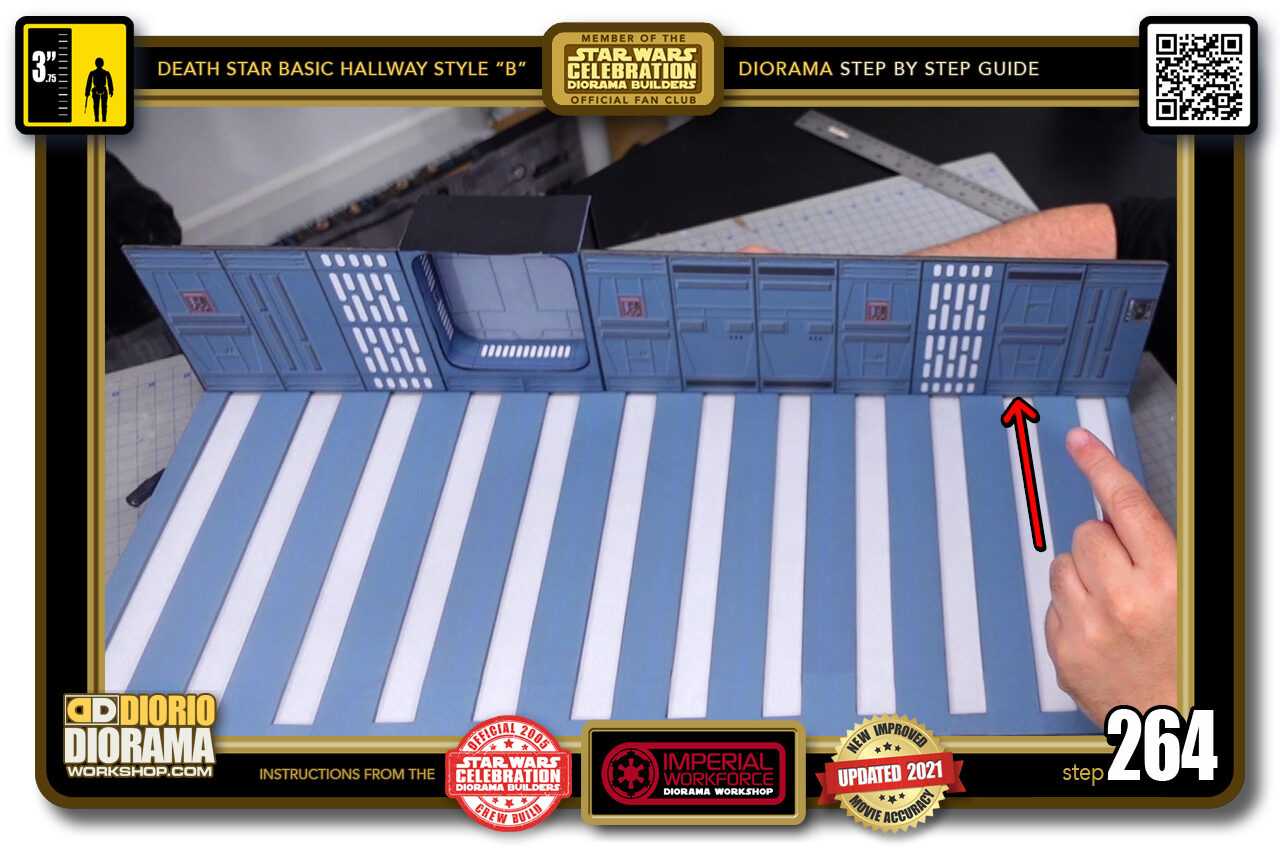
- STEP 265 > If you look at the blueprints you can see a variety of options for you. Since all the accessories are like Lego, you can pretty much select any that you want if you don't want to build exactly the version you are seeing here.
-
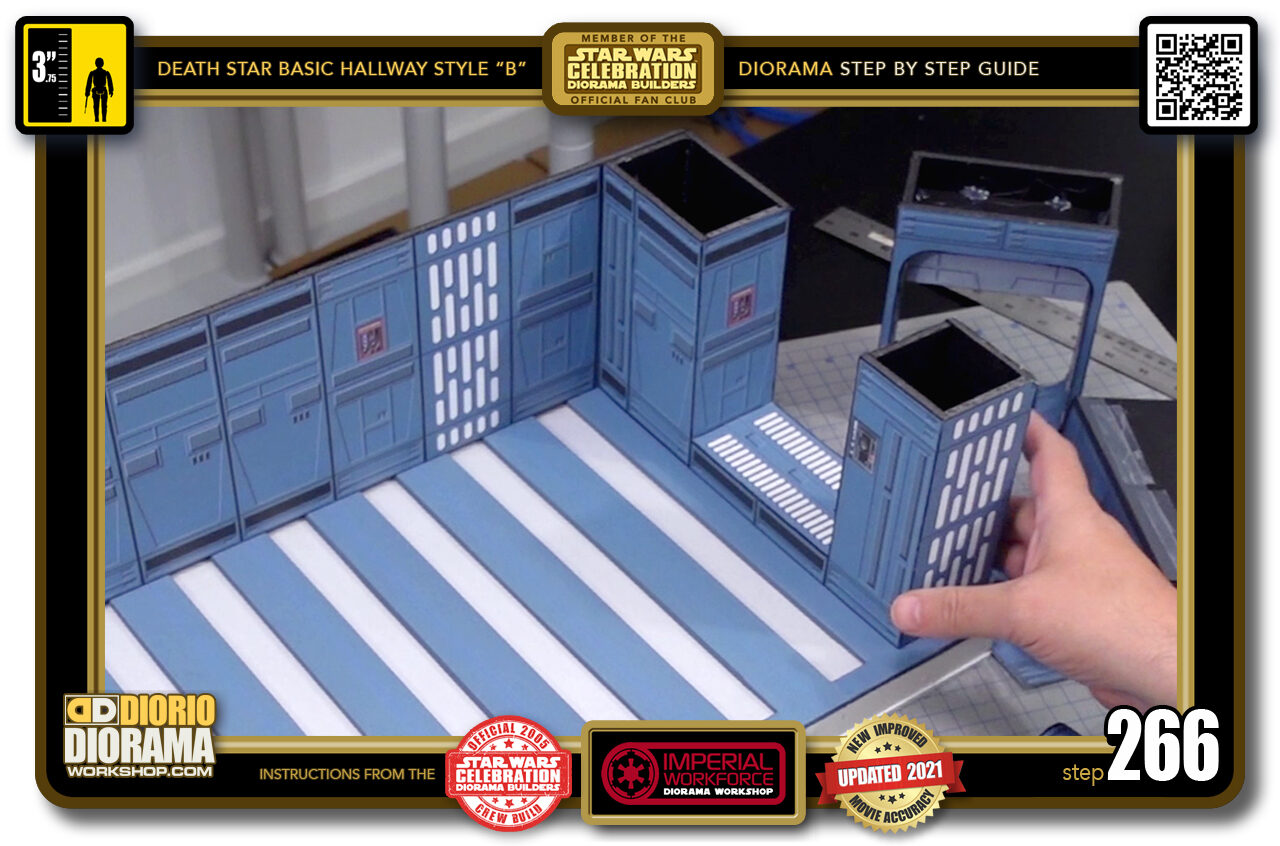
- STEP 266 > You could place a Archwall...
-
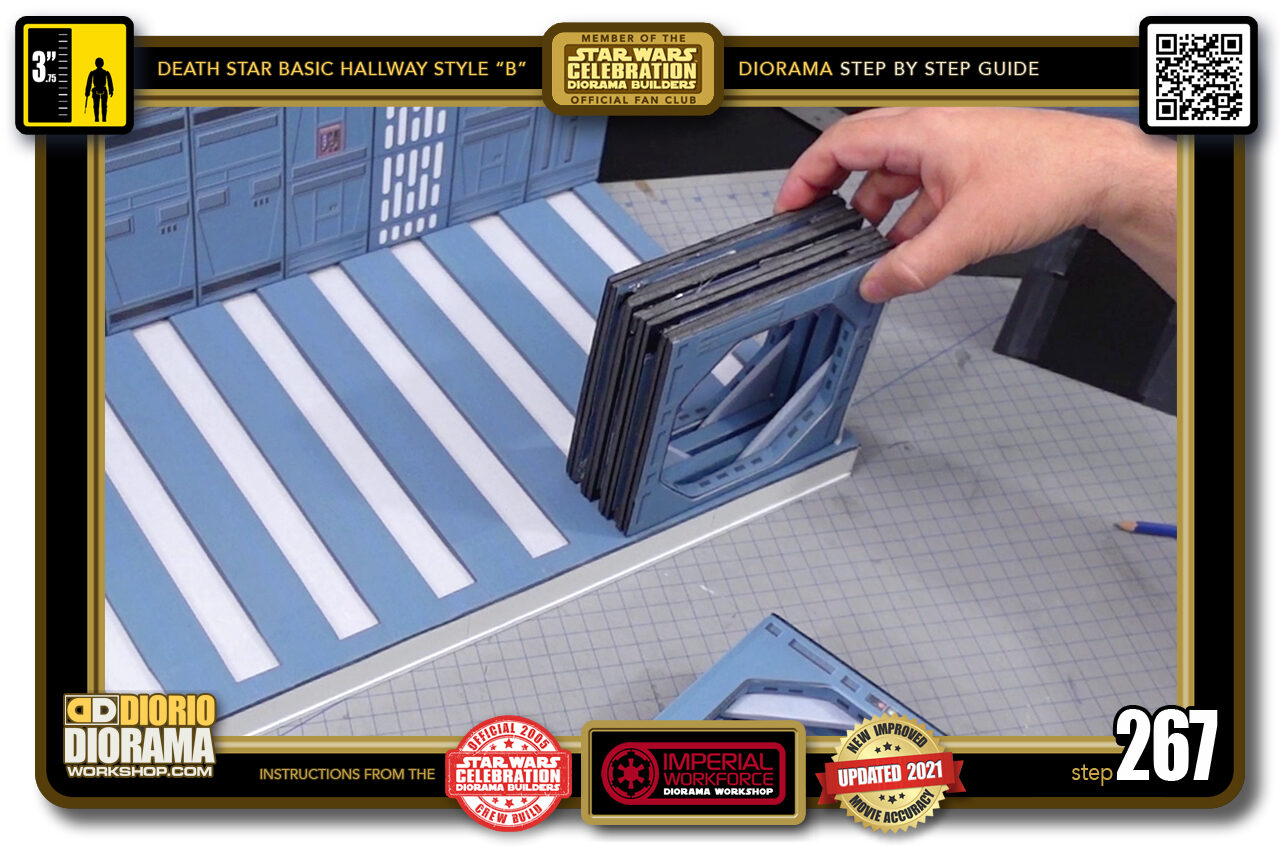
- STEP 267 > Or a small blastdoor...
-
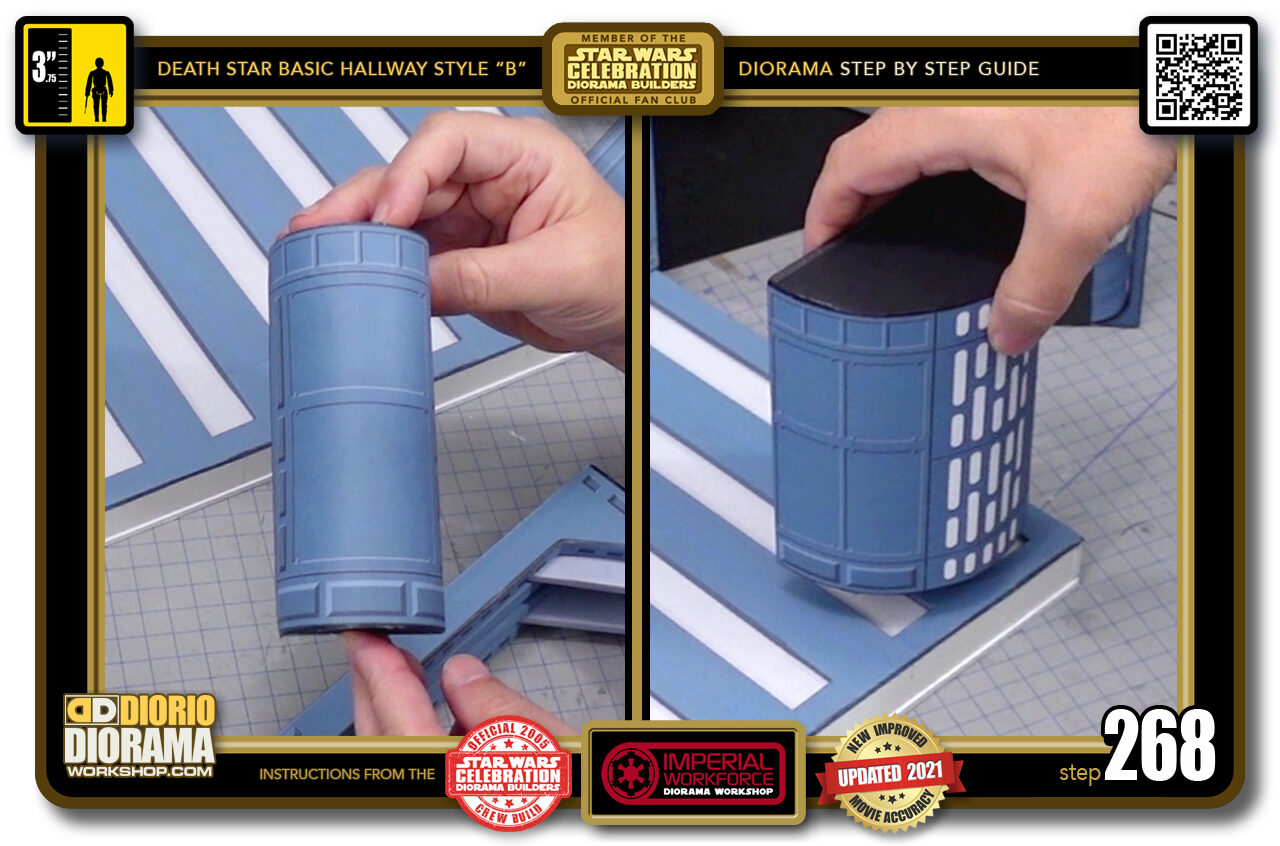
- STEP 268 > maybe a small round wall (left image) or a Large round wall (right image)...
-
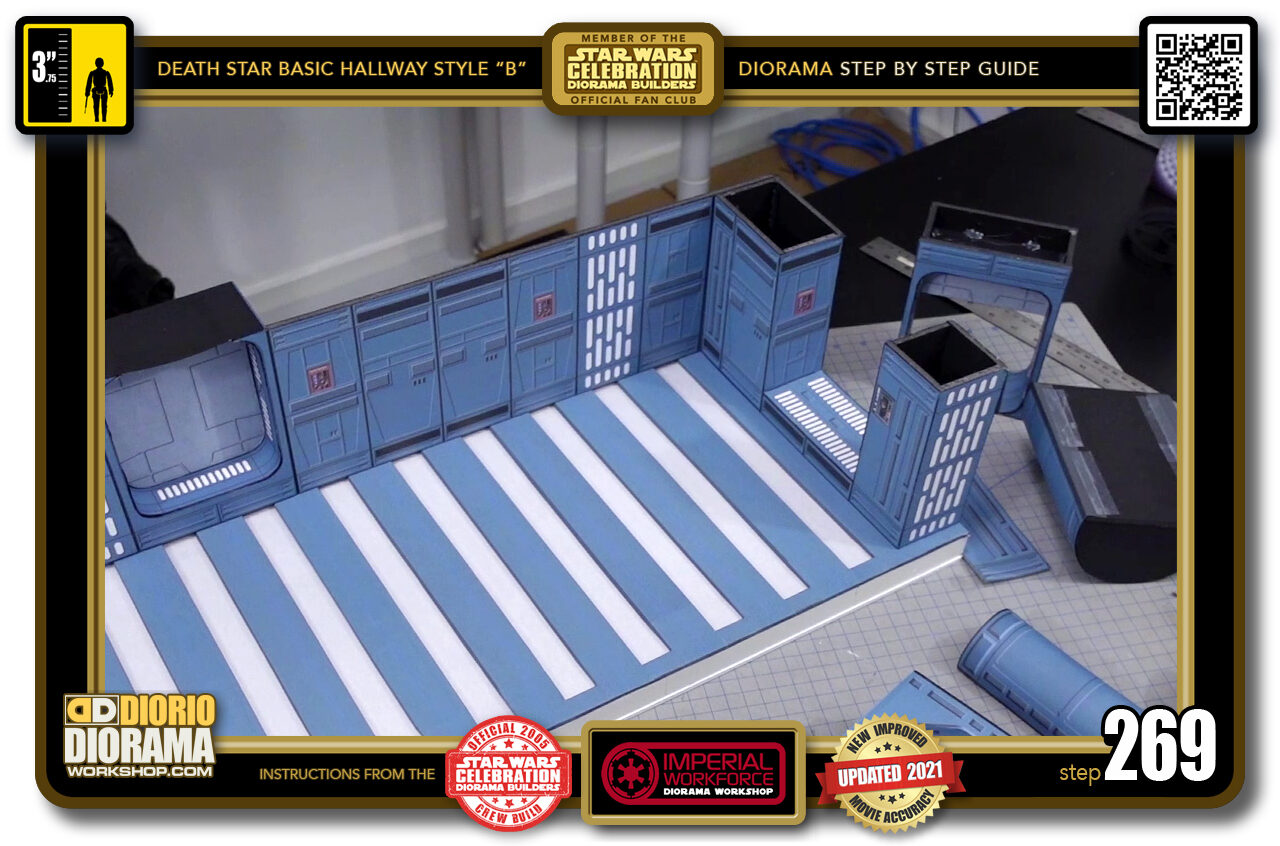
- STEP 269 > No matter what you select and makes you happy is what counts 🙂
-
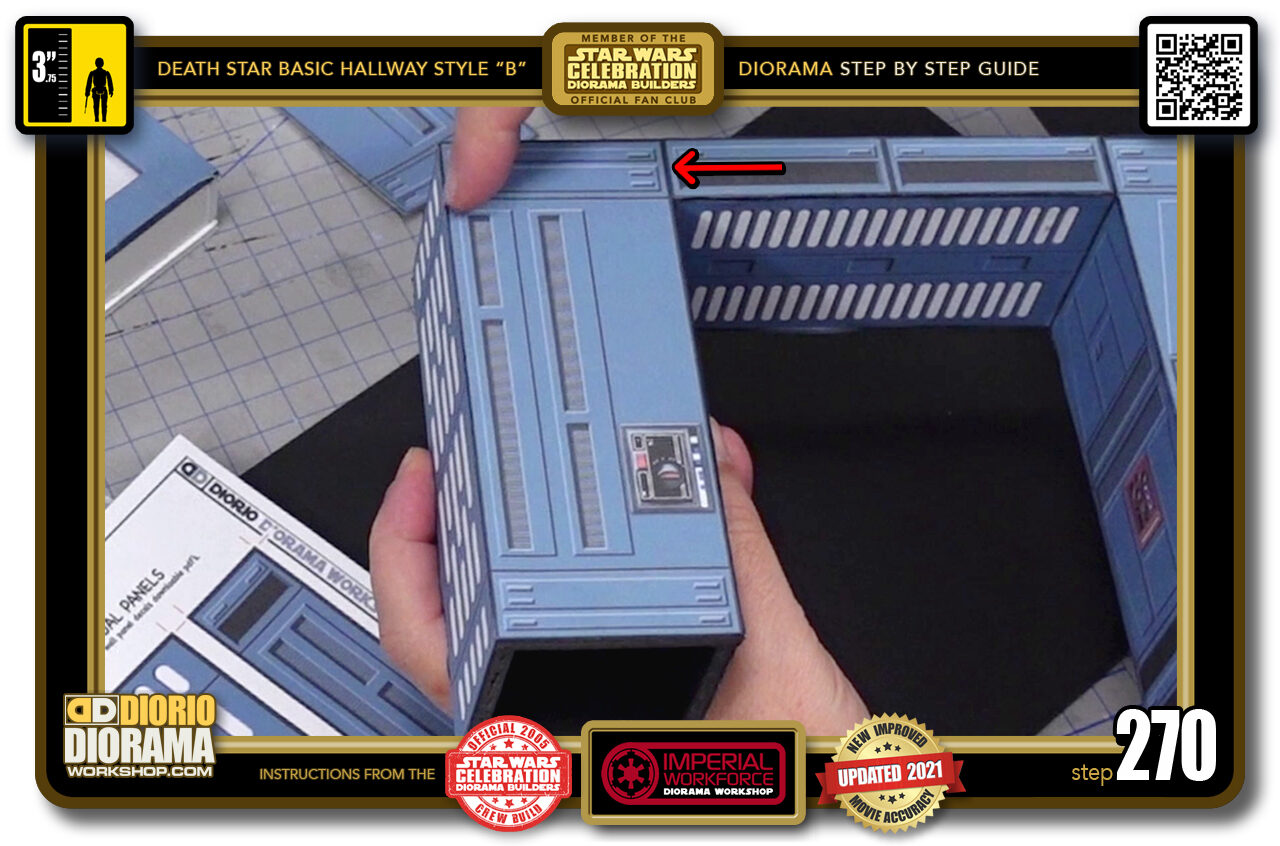
- STEP 270 > I think for me I will place a plain support column that you find at the end of your archways.
-
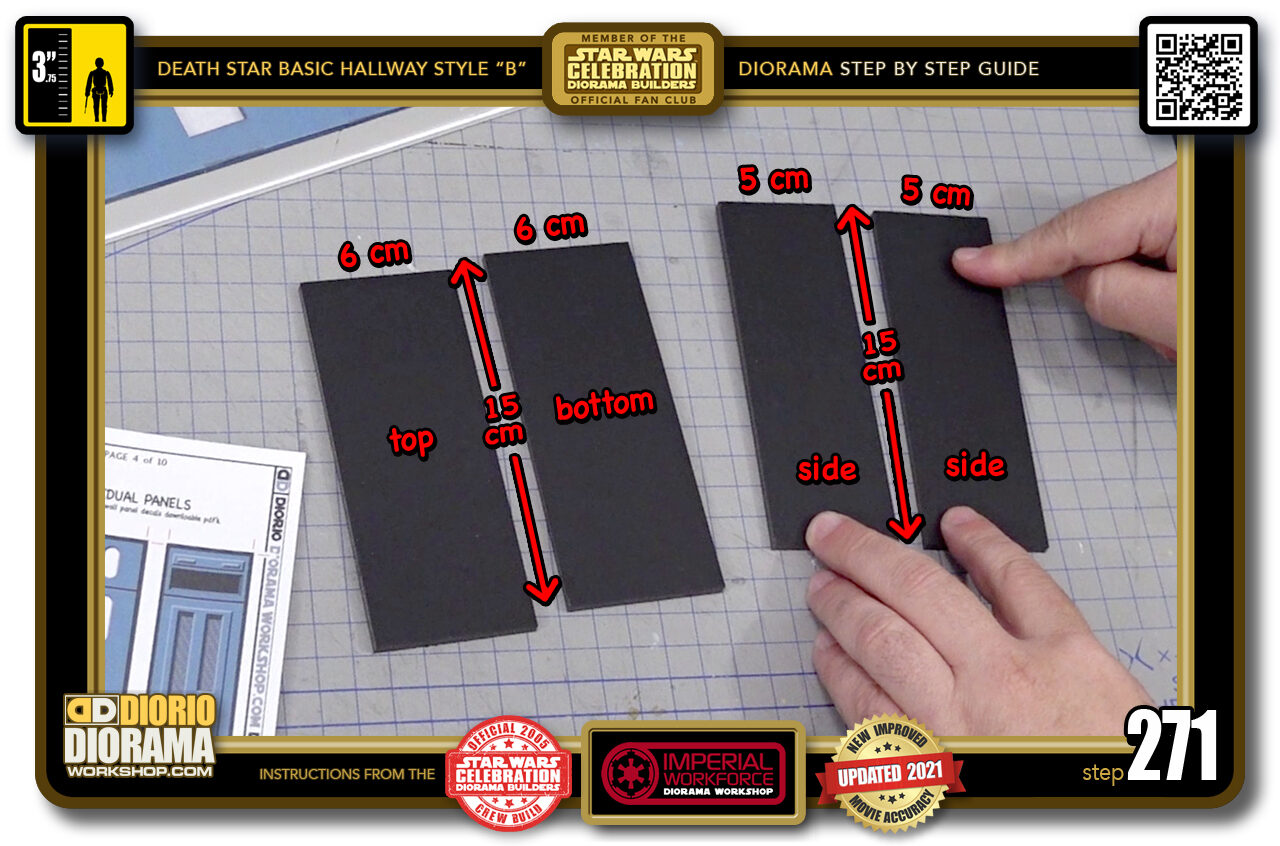
- STEP 271 > You need to just cut 4 pieces of foamcore to create your support column. 2x 15cm x 5cm and 2x 15cm x 6cm
-
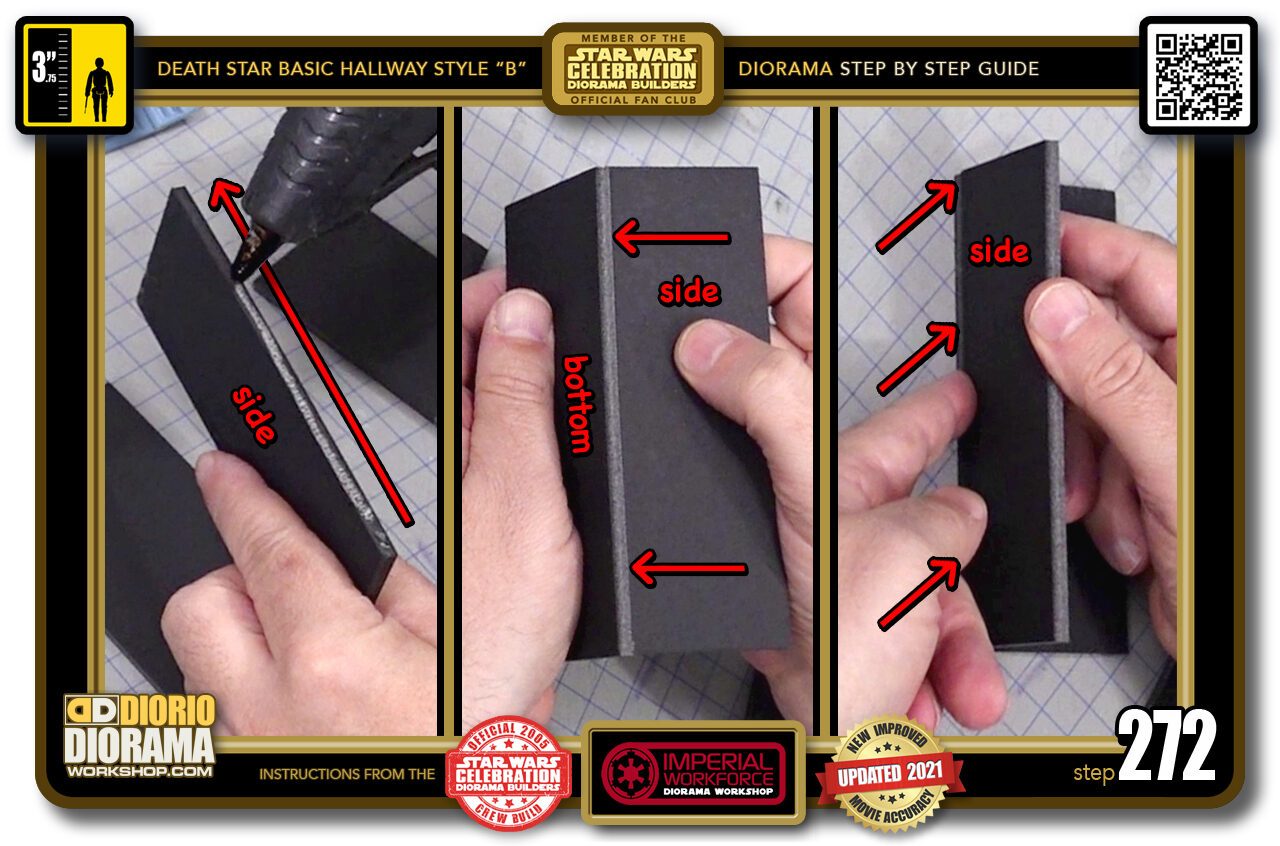
- STEP 272 > Start by putting a line of hot glue along the spine of your 5cm wide rectangle (left image red arrow) then press it under the bottom, align it with both ends of your 6cm foamcore (centre image) and press it flush along the spine (right image)
-
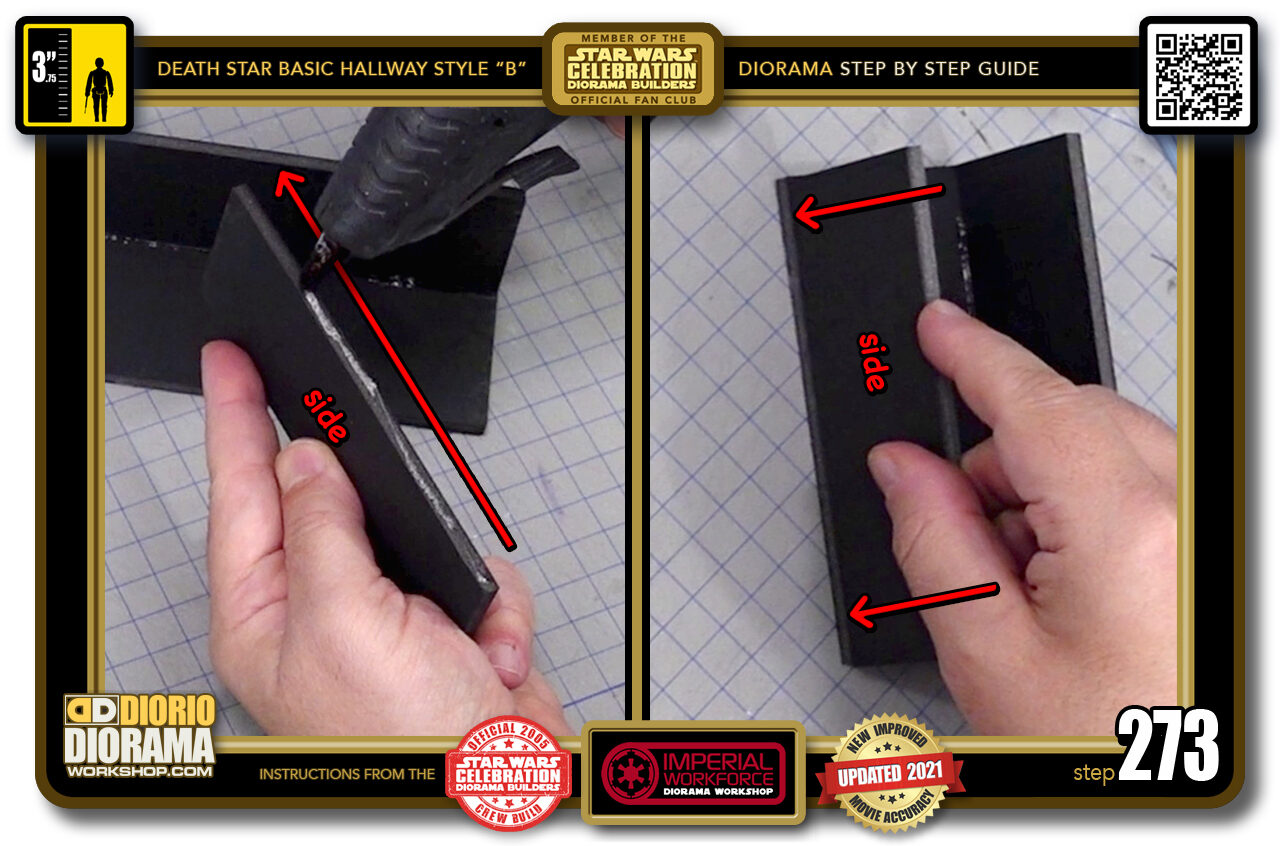
- STEP 273 > Next take the other 5cm side and put a line of hot glue along it's spine (left image red arrow) Like before, align it with both ends of your bottom and press it down flush against the edge (right image red arrows).
-
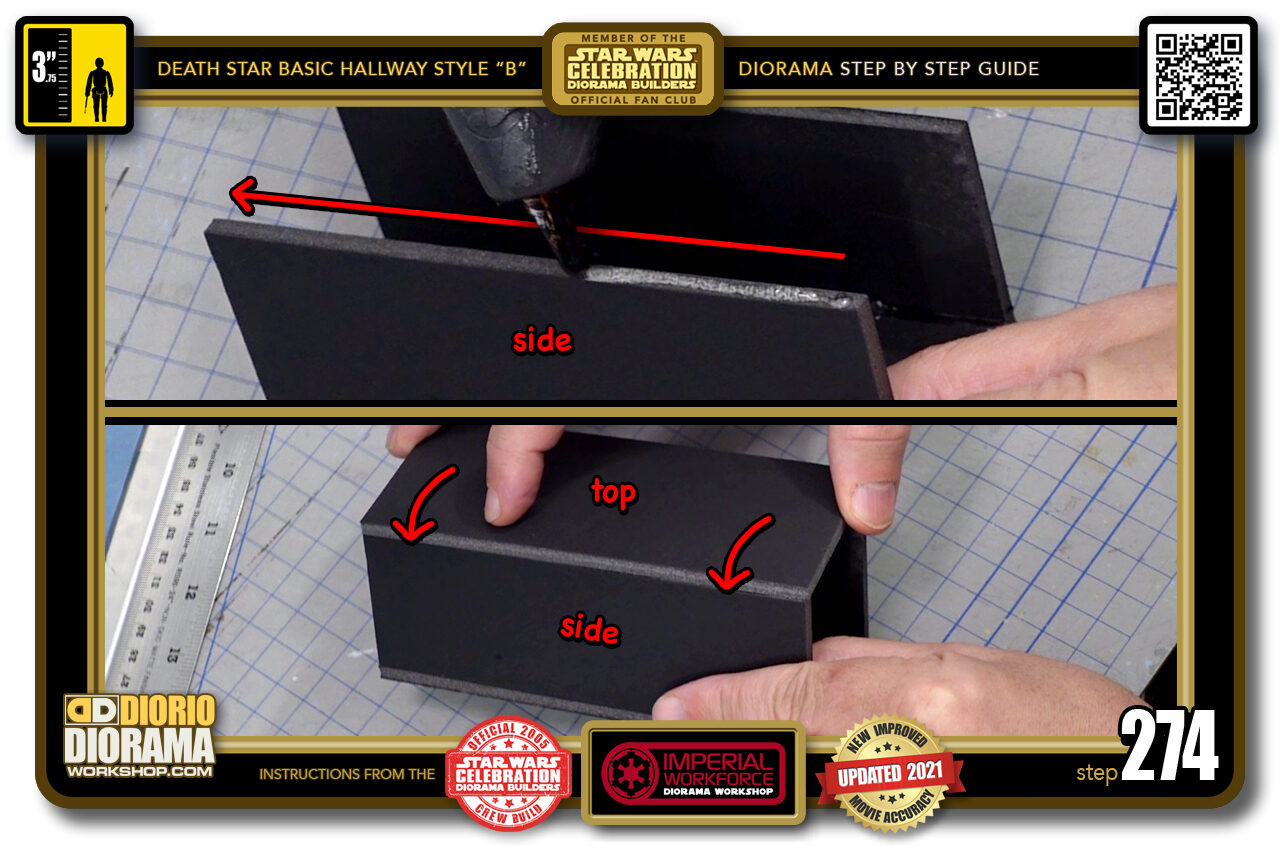
- STEP 274 > Now we have to cap it so put a line of hot glue along the left side's spine (top image red arrow) and then lower the top 6cm piece onto it (bottom image red arrows) Make sure it is centred and flush with the side.
-
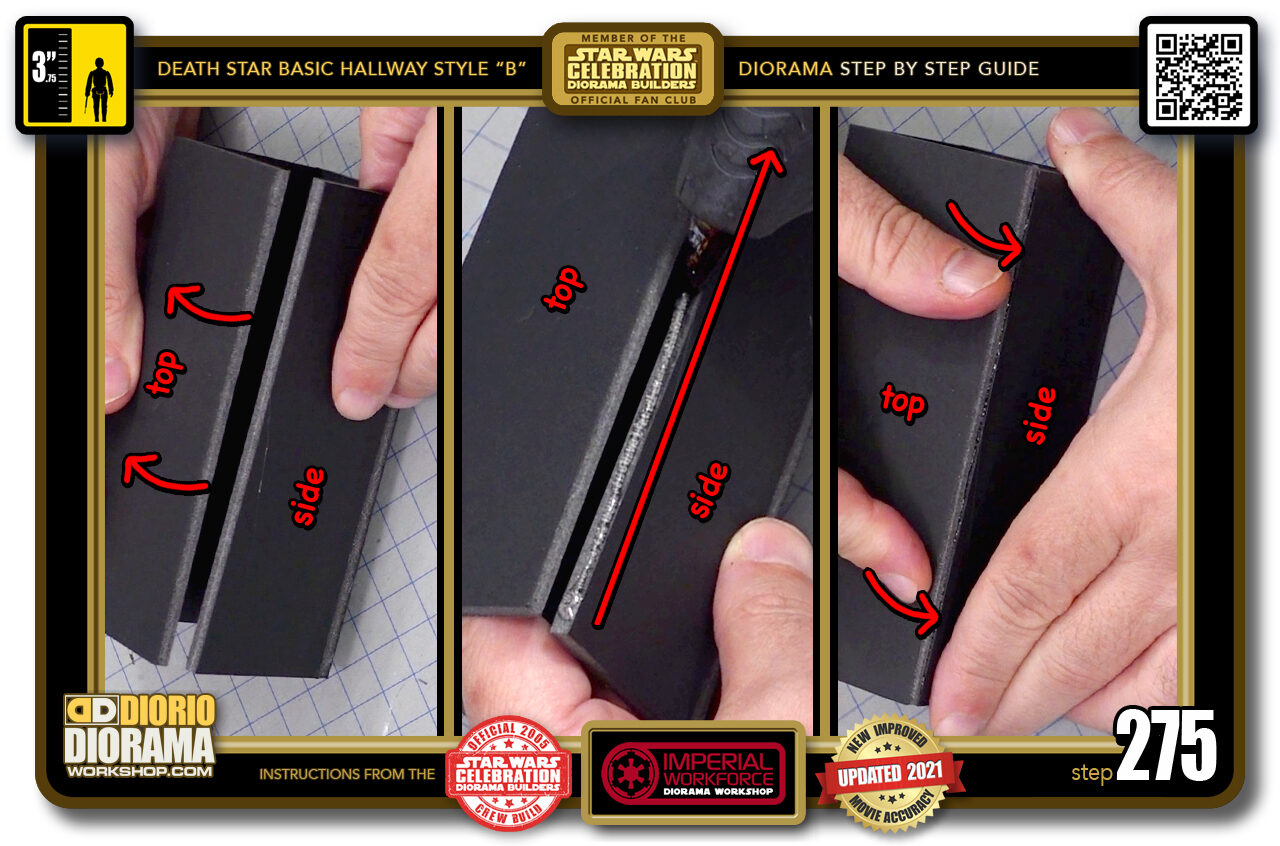
- STEP 275 > We now want to lift the top slightly - don't pull off the side you just glued (left image red arrow) Then put a line of hot glue along the top of the spine (centre image red arrow) last lower the top onto the glue making sure you are aligned at each end and flush with the side edge (right image red arrows).
-
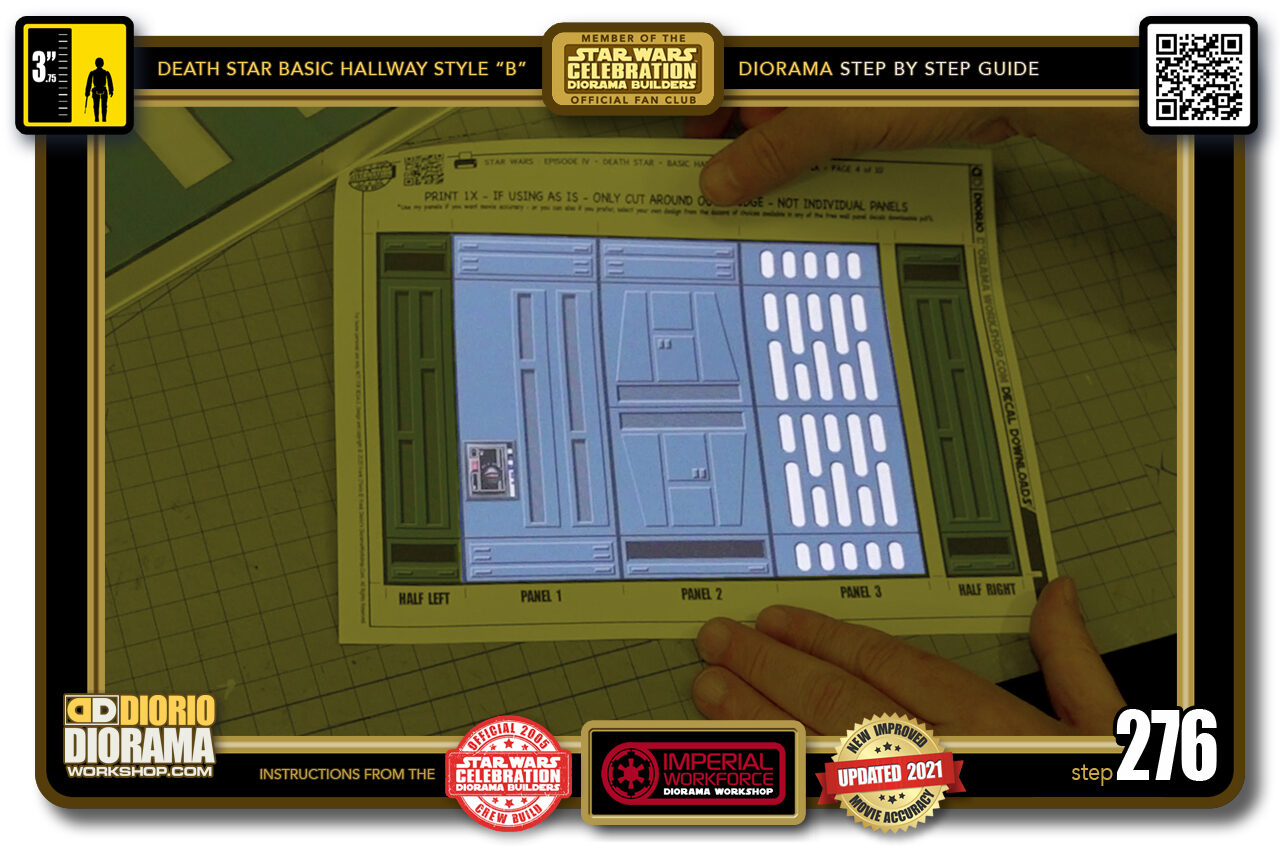
- STEP 276 > Again I only need 3 panels here, I cn keep the ones in the DARK ZONE for later use.
-
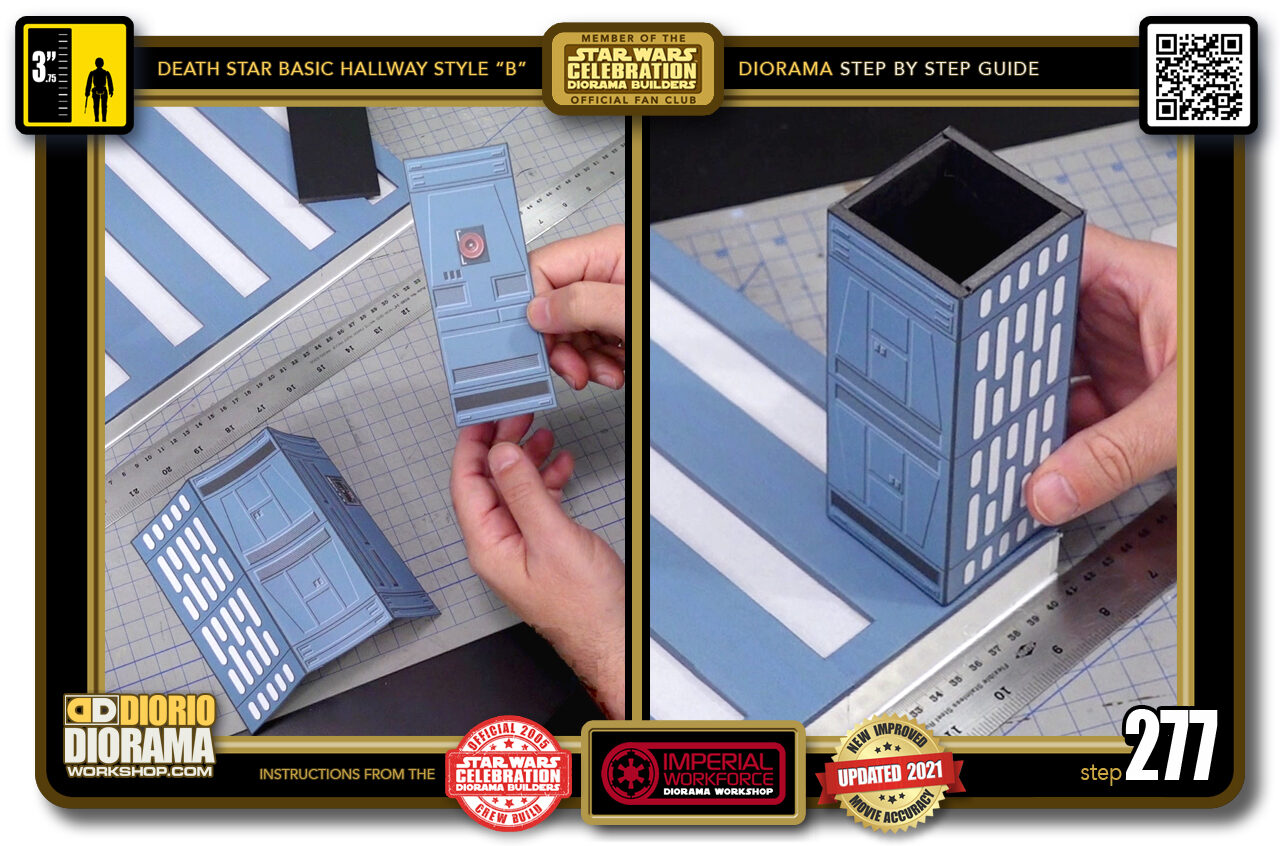
- STEP 277 > So the decal skin contains 3 sides but I need a 4th so I grabbed a random skin from my spare pile. (left image) Don't forget to use the BLACK SHARPIE all around your skins. Then I wrapped the decals in the same technique as I did for the walls (right image)
-
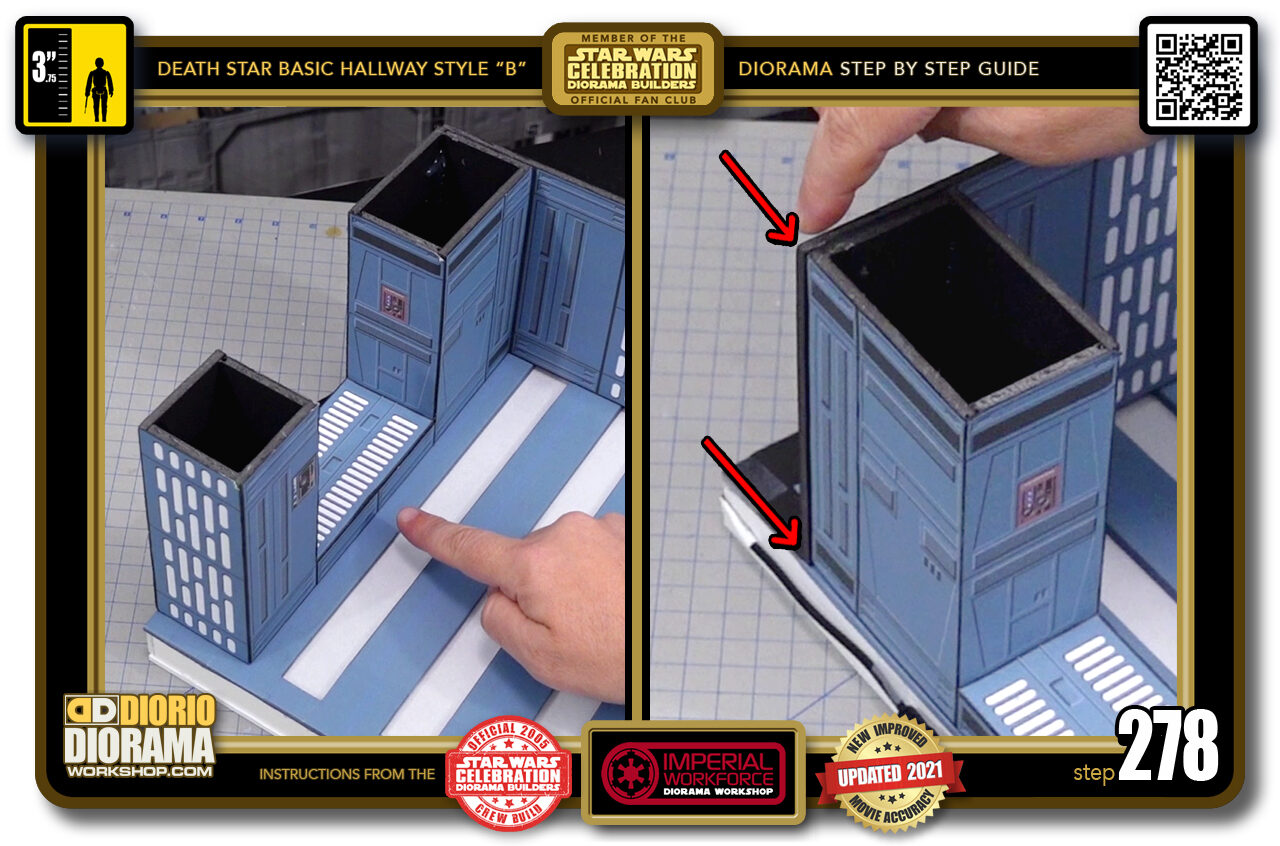
- STEP 278 > I decided to use and place an archway wall in this corner. Remember to place it upside down as the surface you are attaching this to is the ceiling (left image) You are going to want to make sure that it is flush and aligned, pressed against the wall's end panel (right image red arrows).
-
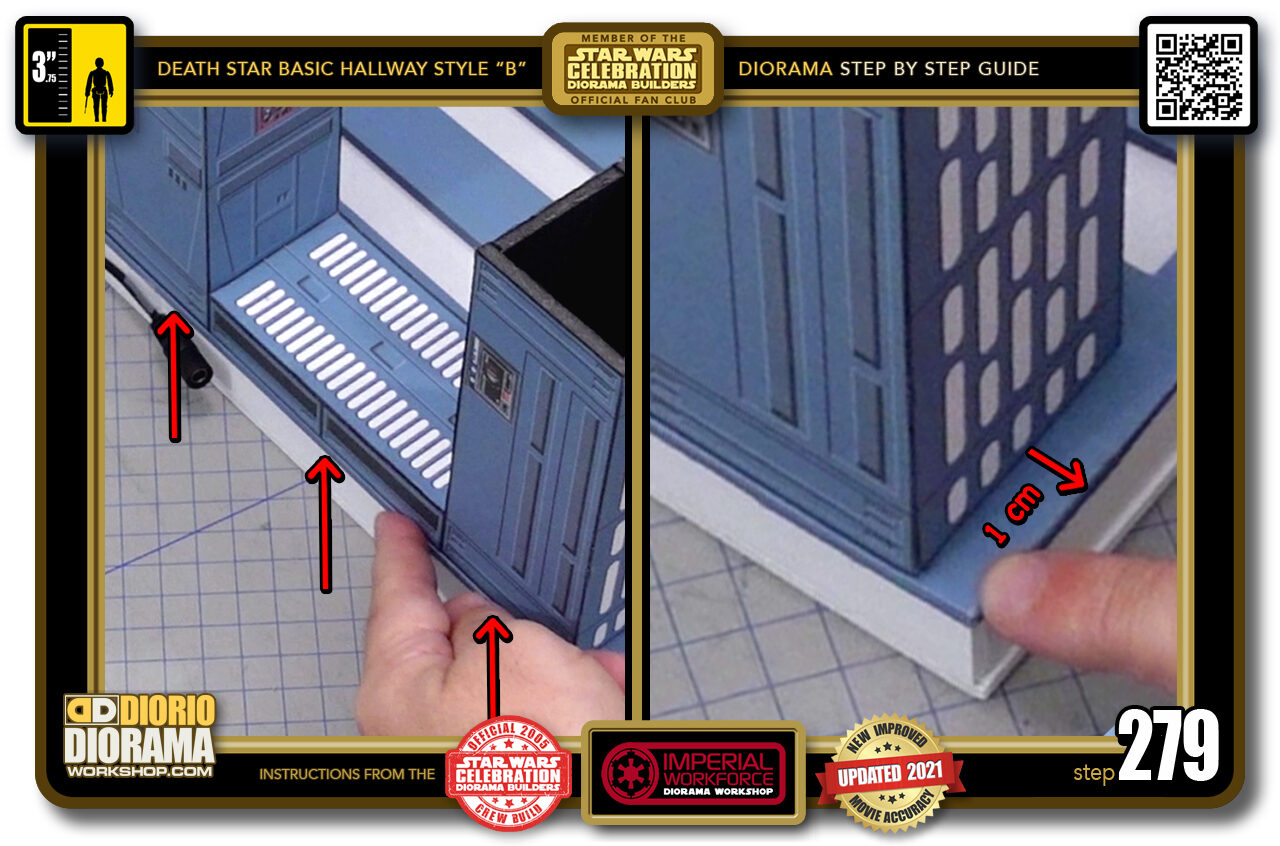
- STEP 279 > You will also want to make sure it is flush along the ceiling's edge (left image red arrows) as well as have in the front, a 1cm gap from the edge (right image red arrow)
-
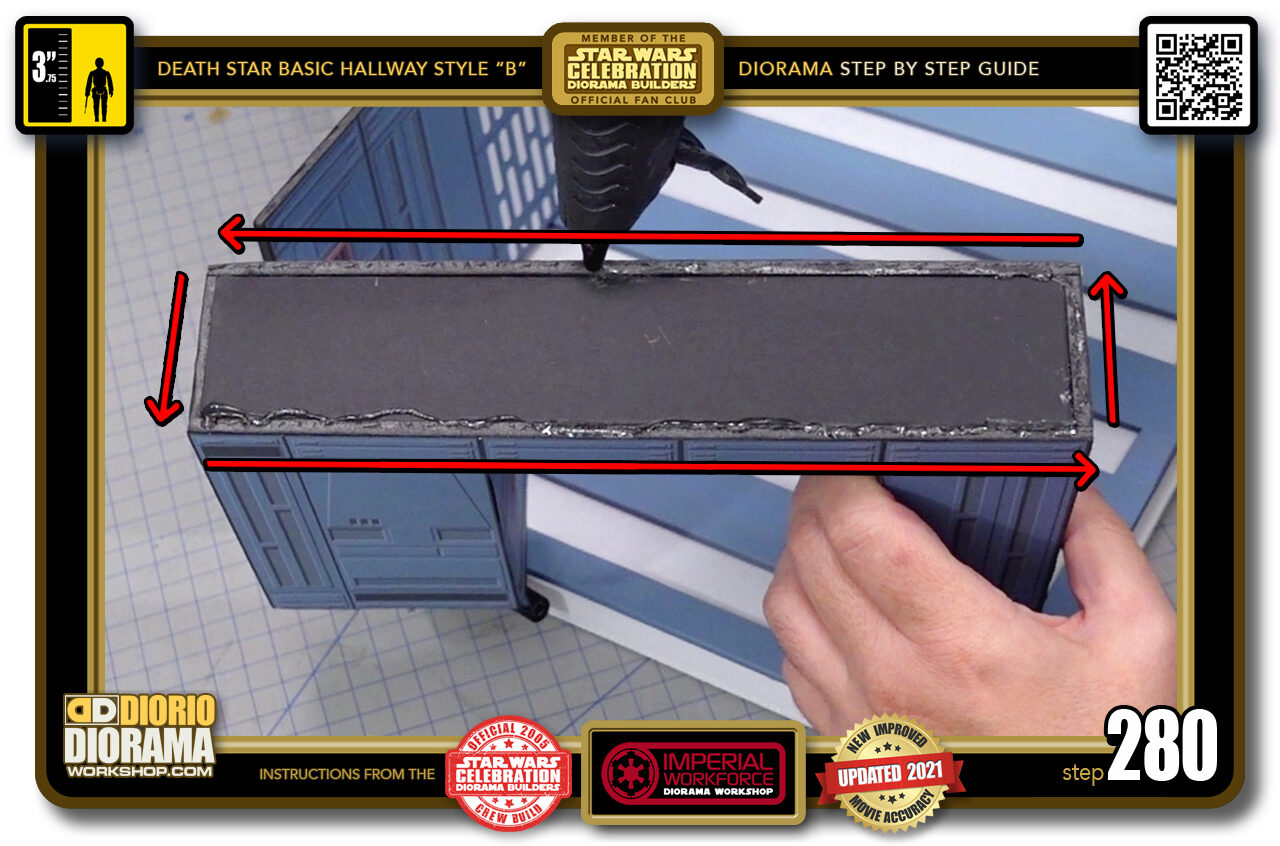
- STEP 280 > You want to place 2 lines of hot glue on the top spines of your archway (red arrows)
.
Did you already build this Diorama ? At home or at our Star Wars Celebration Diorama Builders workshop ? Would you like to show it in the site’s GALLERY VISITORS DIORAMAS section, YES ? That is Awesome !!! You can find out all the details on how to email me your photos on the VISITORS SUBMISSIONS INFO page … When I get your photos, I will create your very own page just like this one. You may not realize it but work does inspire others to join in the fun of making Action Figure Dioramas.
.
NOT FOR RESALE ALL Decals, tutorials and artwork are ©FrankDiorio (dioramaworkshop.com) and offered FOR FREE to the fans – that would be you ? so you can build and display my diorama designs in your very own home. I realize I cannot control what one does with my graphics once I place them on the web, I can only ask you as one fan to another, please respect the artist and do not be that jerk who uses my designs and tutorials to build a copy of my work only to sell it on EBAY or trade/sale groups and forums. Thank You. Frank.
.

.
.
If you have a facebook account, why not join the Official Diorama Builders Fan Club today, simply click the logo link below.
 .
.
Catch up with fellow visitors and exchange stories, read cool interviews with the crew, exchange photos, fun surprises and grab some FAN ONLY merchandise next year at actual future conventions ?
.
©2021 Frank Diorio DioramaWorkshop.Com
.
IF YOU LIKE WHAT YOU SEE, PLEASE SHARE WITH YOUR FRIENDS
USING THE SOCIAL MEDIA BUTTONS BELOW