


-
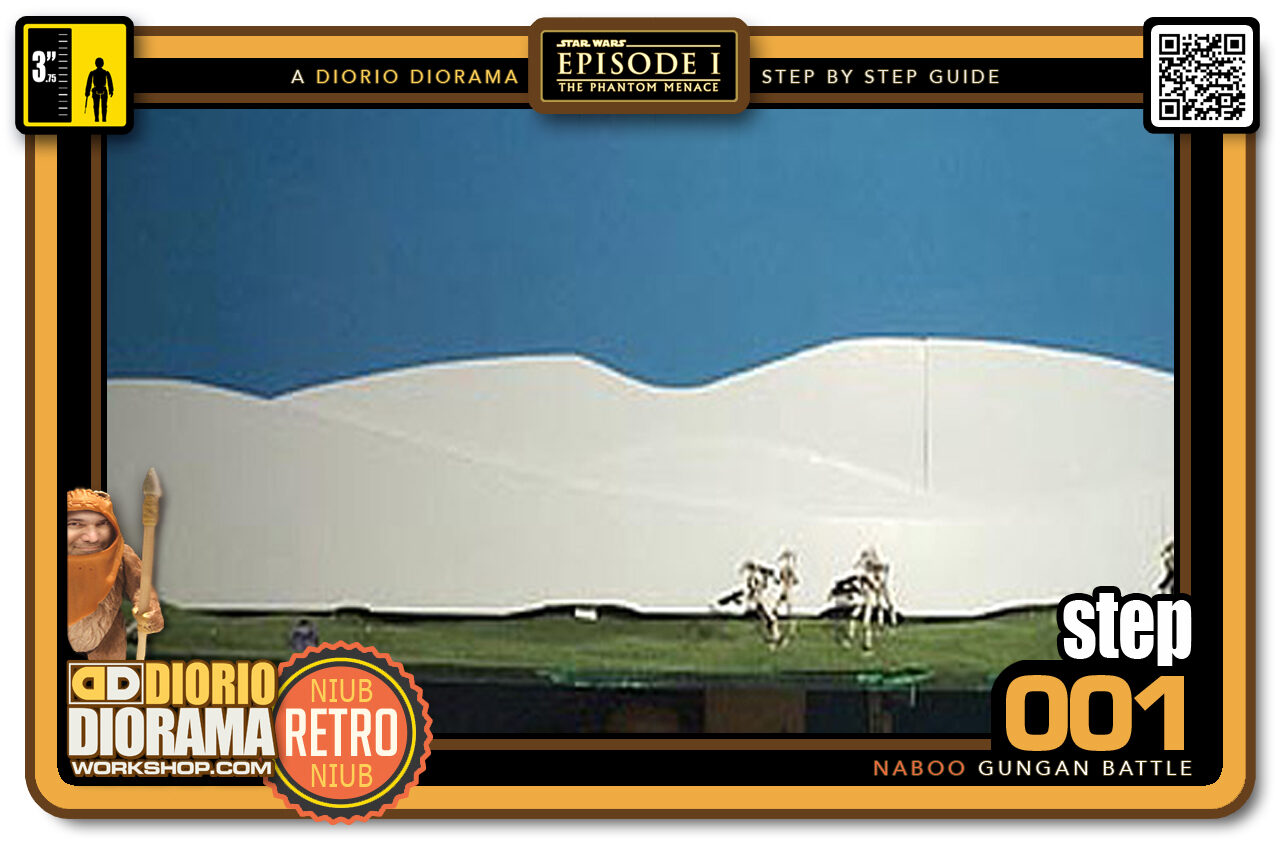
- STEP 001 > Here is a little preview of what will become the Final version of the Gungan Battle. I have cut out rough mountain like shapes for the background hills out of foamcore. I used pictures from the making of books to get the exact same looking slopes as the film and modified them a little to fit the width of my shelf. You can see the floor is already done, I forgot to take photos of that, but it is the SAME technique as the mountains, except I bunched up a little less newspaper but enough, spread out to create a hilly grassy terrain and not just a flat wood surface.
-
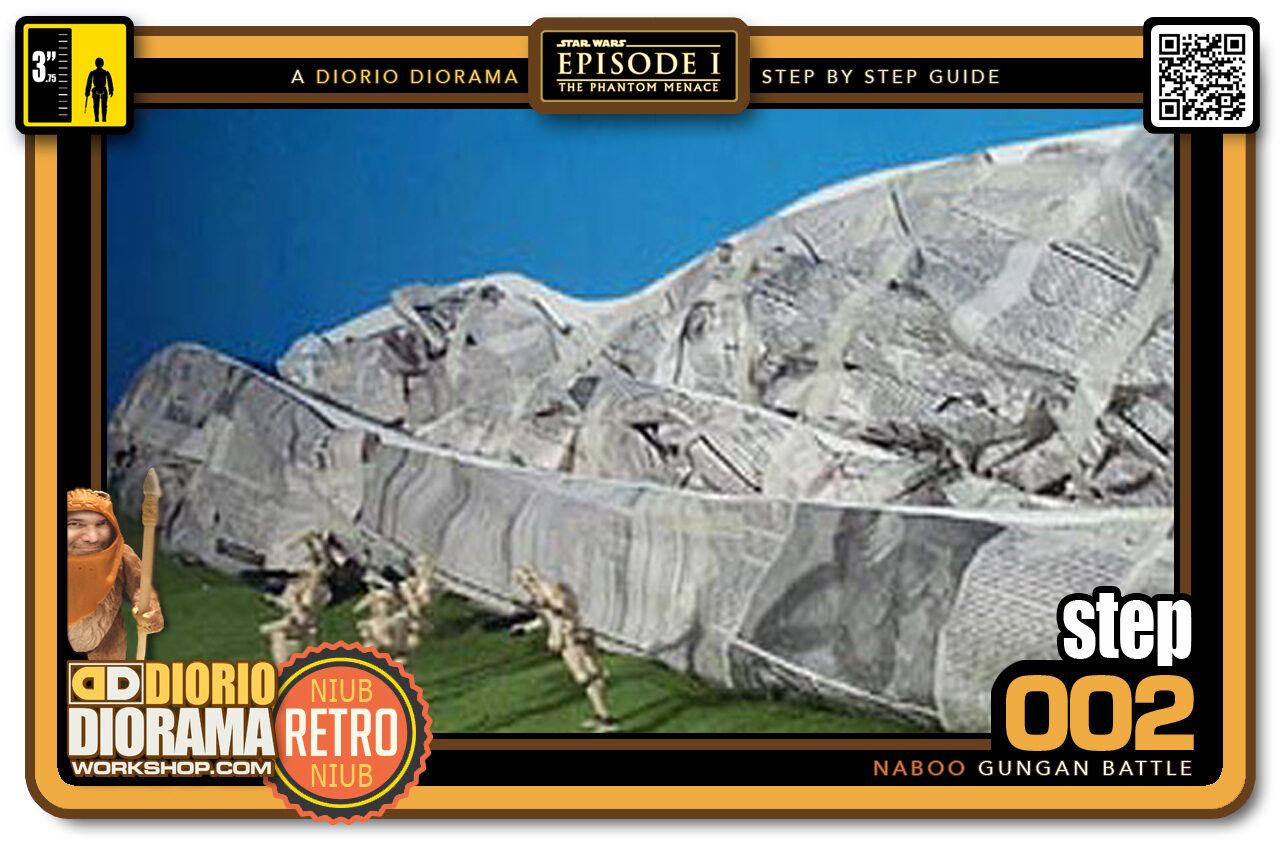
- STEP 002 > Here you can see how I crunched/balled up up newspaper and taped it to each separate foamcore piece. This will fatten the shape and add some curved volume to the flat surface. When I apply the plaster bandages strips, it should give the illusion of what we see in real nature.
-
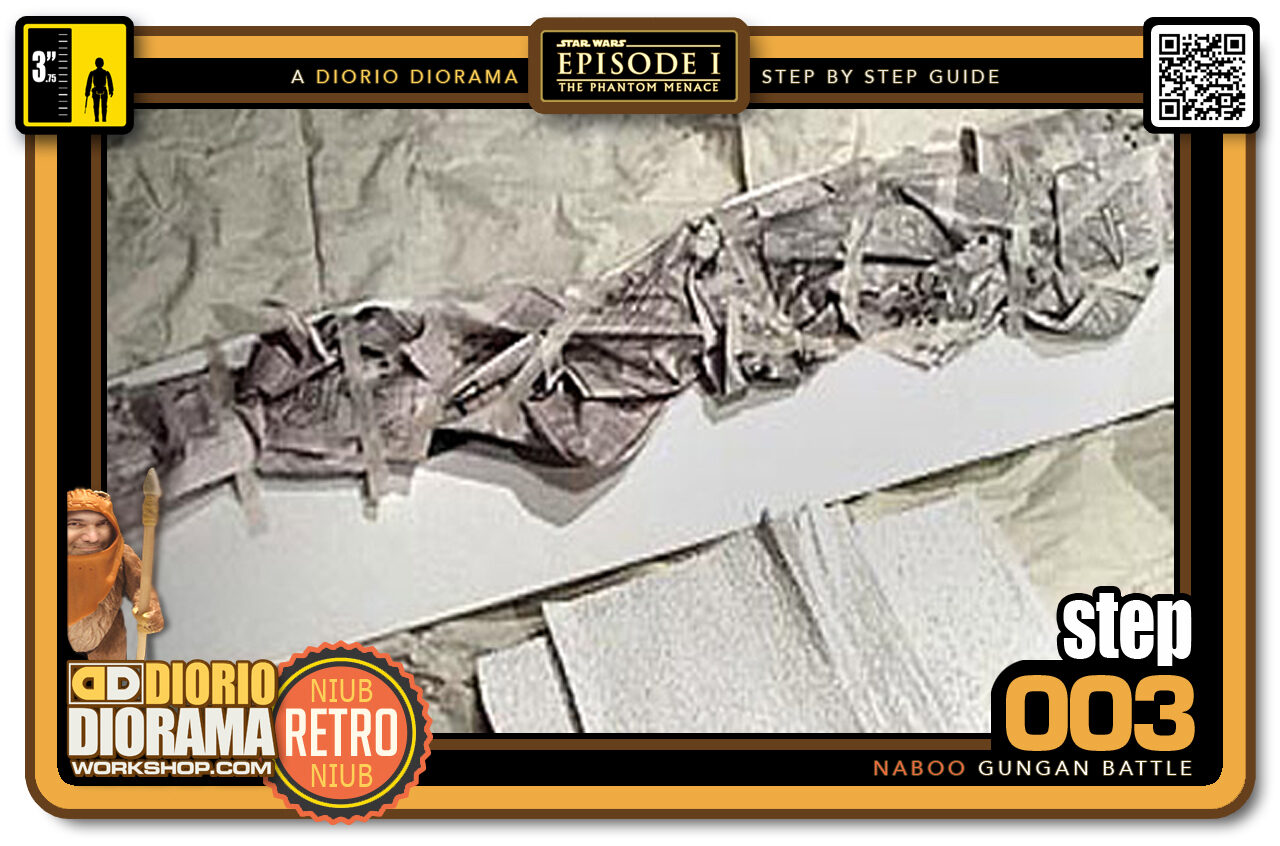
- STEP 003 > I cut my plaster bandages into large strips and placed them stacked below my first mountain shape. Place your rear layer of foamcore mountains on the floor. This is the one that will be closest, leaning against the wall. IMPORTANT: Make sure to place an old shower curtain or plastic drape on the floor, as this is about to become a lot of fun but very messy. You don't want plaster on the carpet ?
-
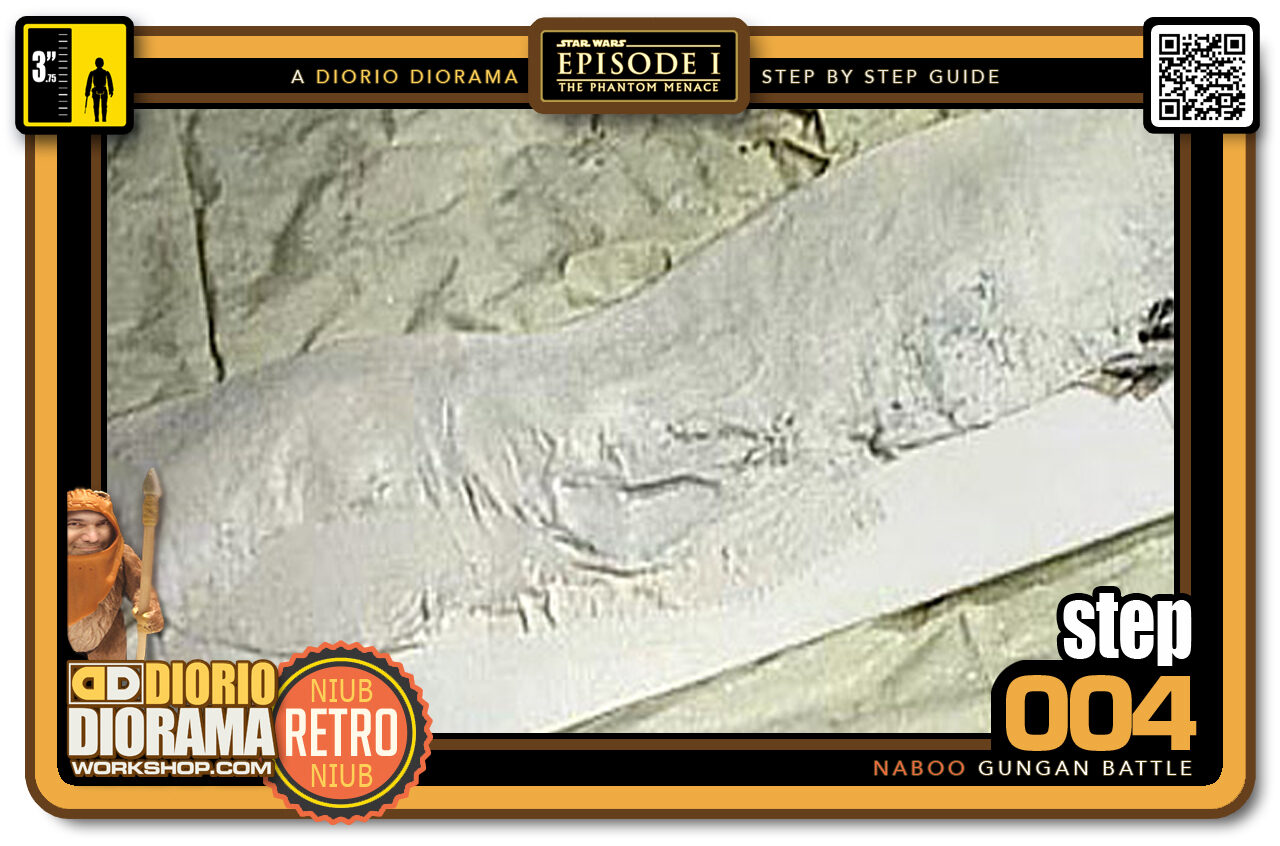
- STEP 004 > Grab a strip of plaster bandage and dip it in your water bowl or bucket. Let it drain a little and then apply it on top of your newspaper. DO NOT PUSH HARD, you don't want to smooth the newspaper and make it flat, you want to lay the plaster bandages on top and let the newspaper create the flow of your mountain. With your fingers, gently stroke the bandages, to smooth it out and hide all the little holes. Continue doing this until you cover the entire surface of your mountain shape.Here is what the newspapers look like covered with the plaster bandages when you are done.
-
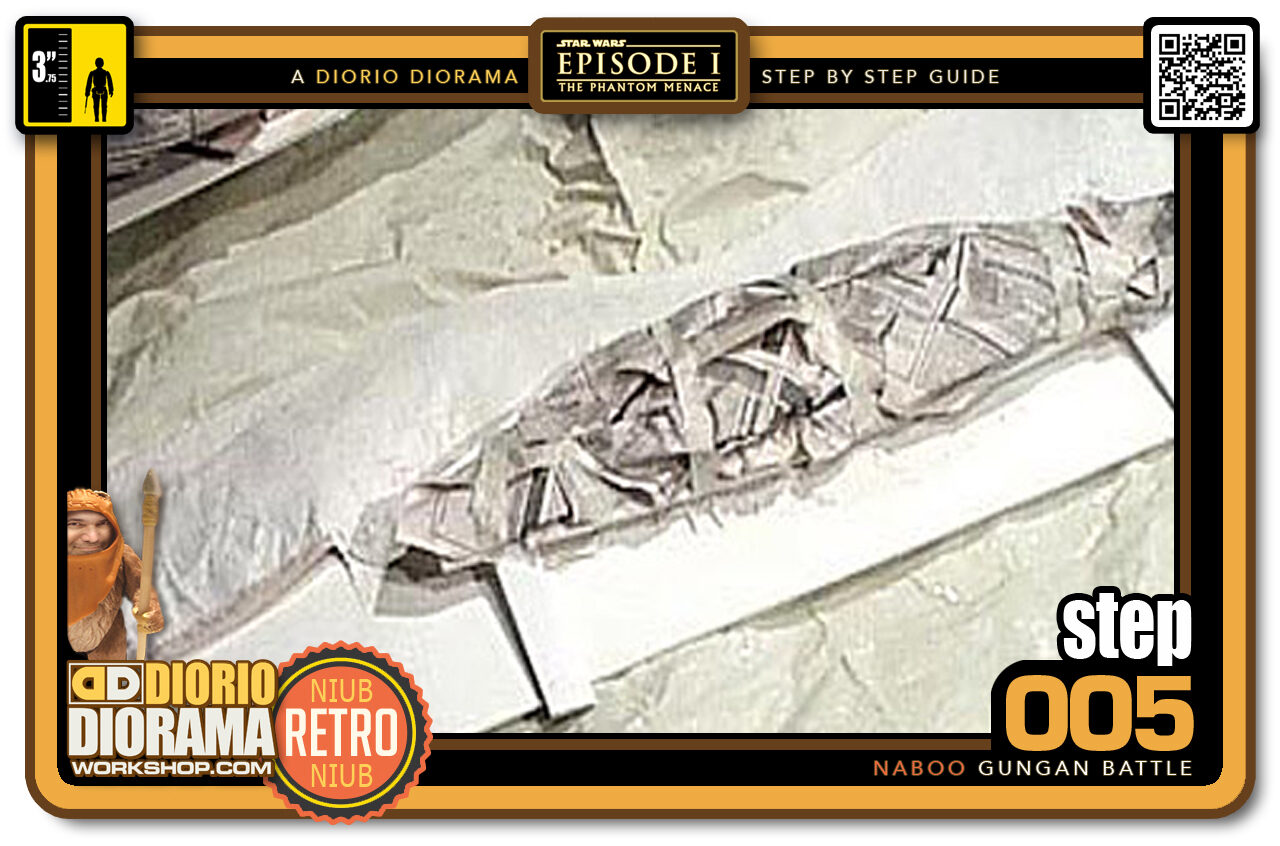
- STEP 005 > Place mountain number 2 shape over the background layer you just plastered. Move it around to see where it fits the best. When you are happy with the shape, remove it and repeat the plastering steps of the rear mountain. Dip, drip, place, stroke...
-
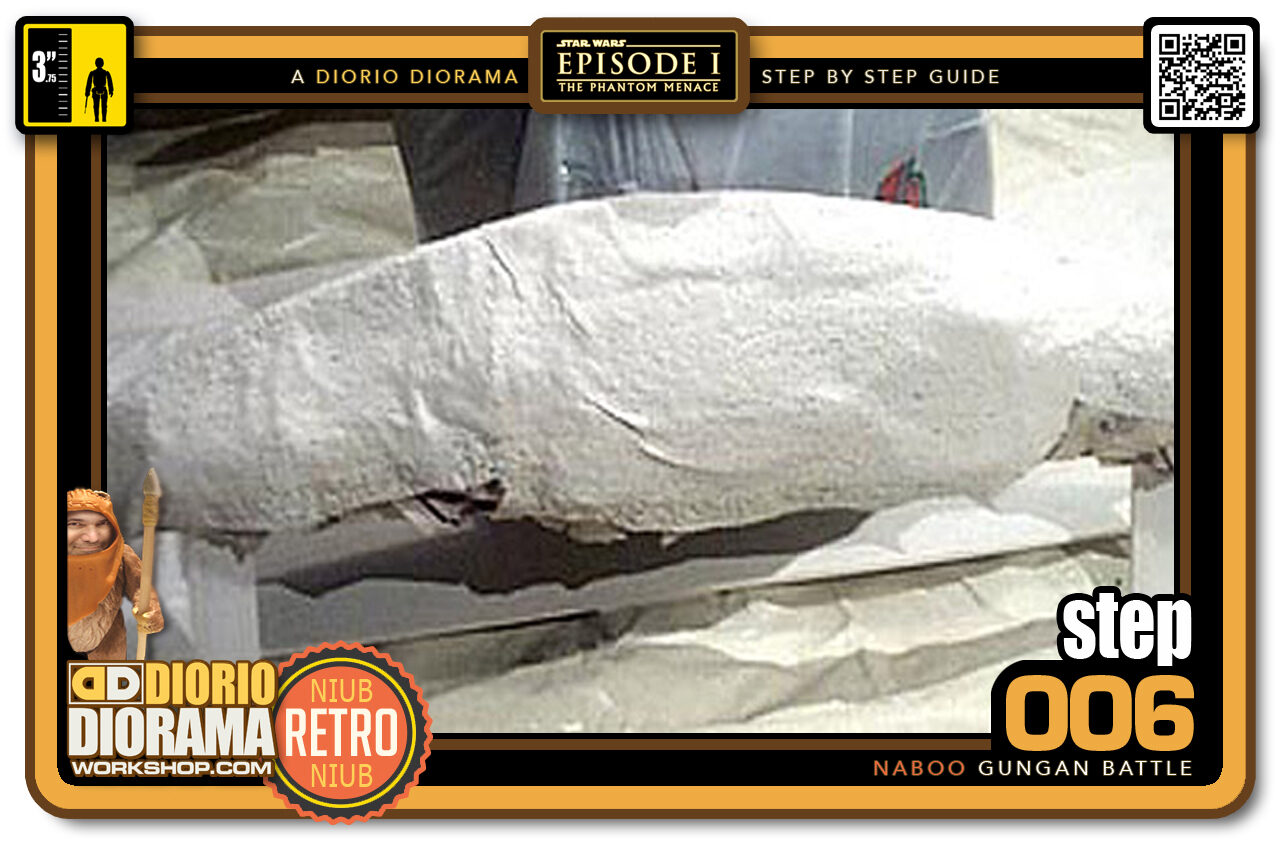
- STEP 006 > Repeat the same steps with the plaster bandages that you did for the rear mountain. Dip, drain, apply, stroke... After a few minutes mountain number 2 is completely covered with the plaster bandages.
-
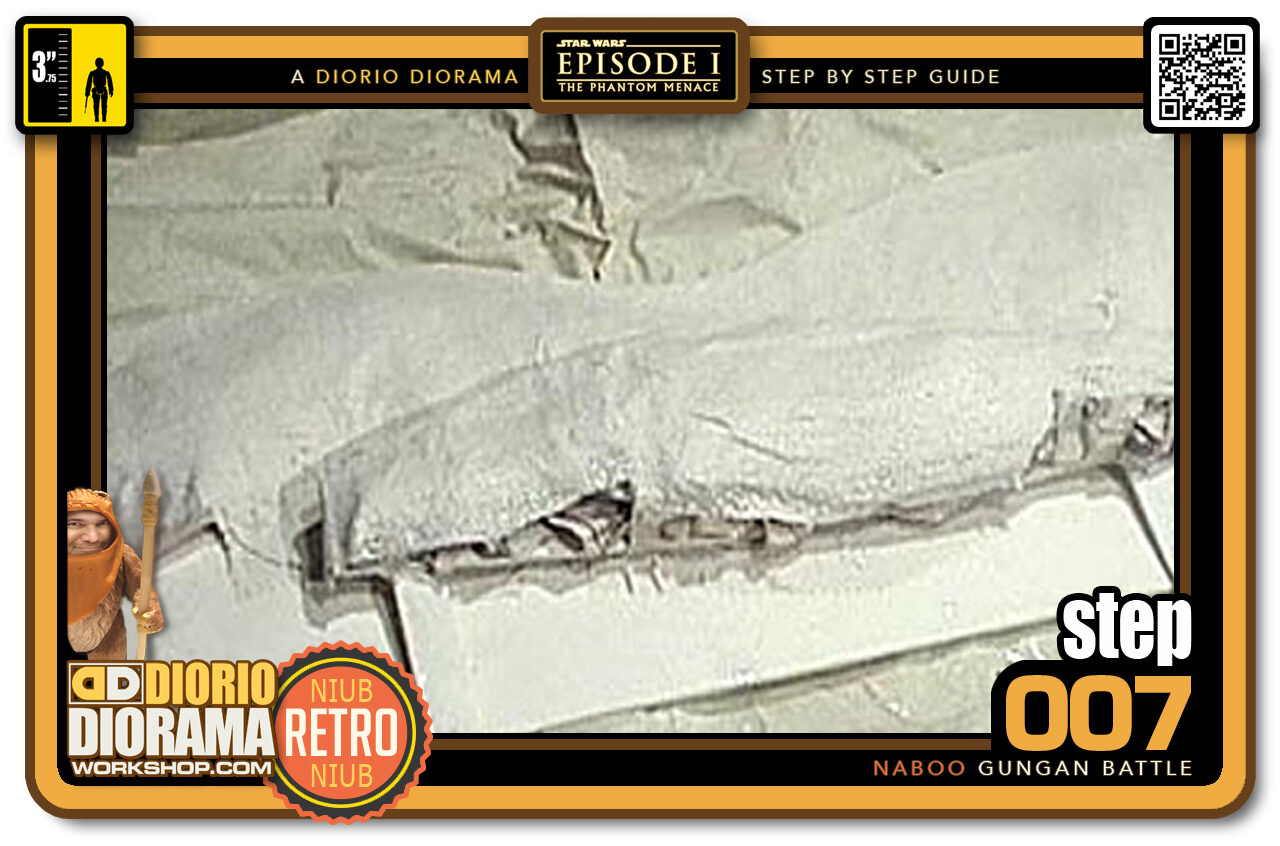
- STEP 007 > Now place mountain number 2 back on top of the first background mountain.
-
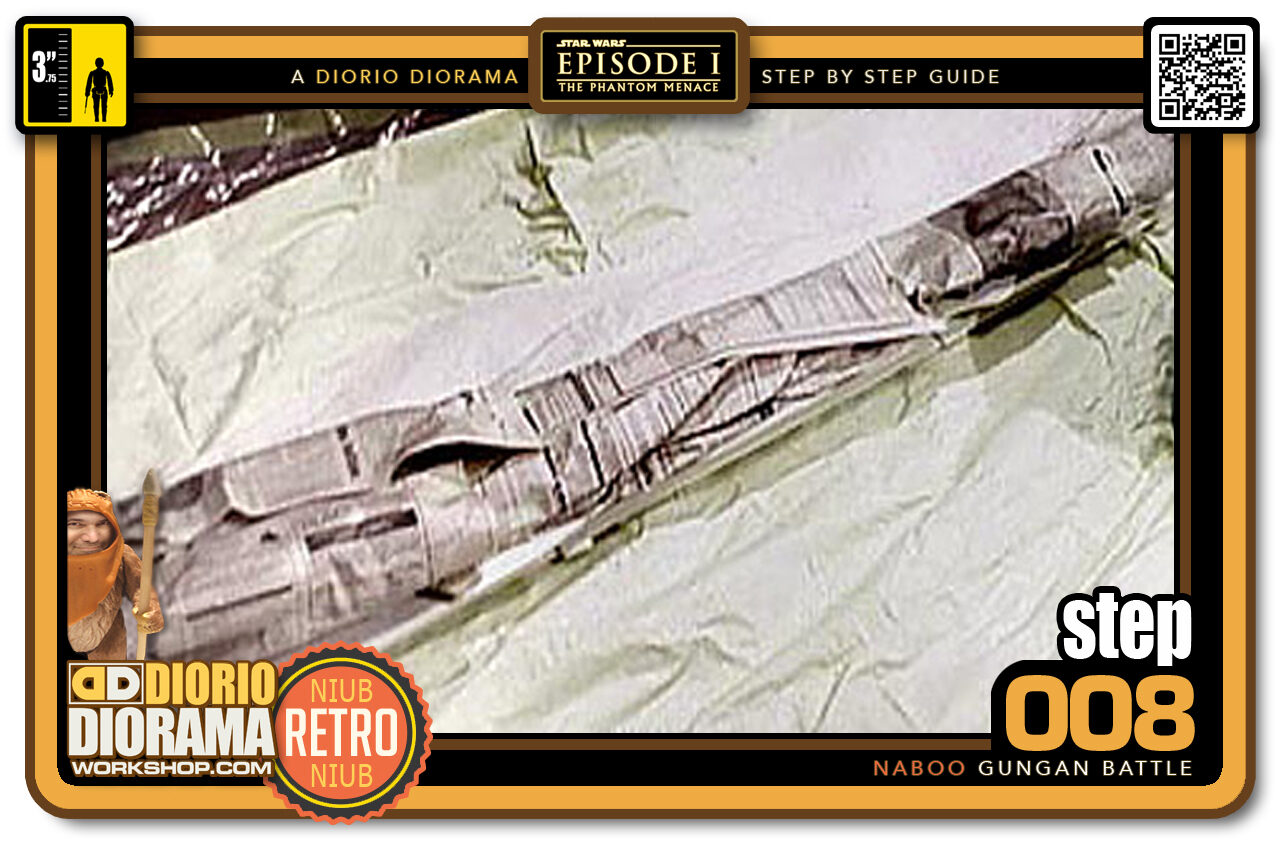
- STEP 008 > It's hard to see in this picture but the front mountain is now placed on top of the 2 other layers. Move it around until you like the spot. If you feel it needs to be fatter, you can add some more crunched up newspaper. Now we are ready for the final plaster bandage layer.
-
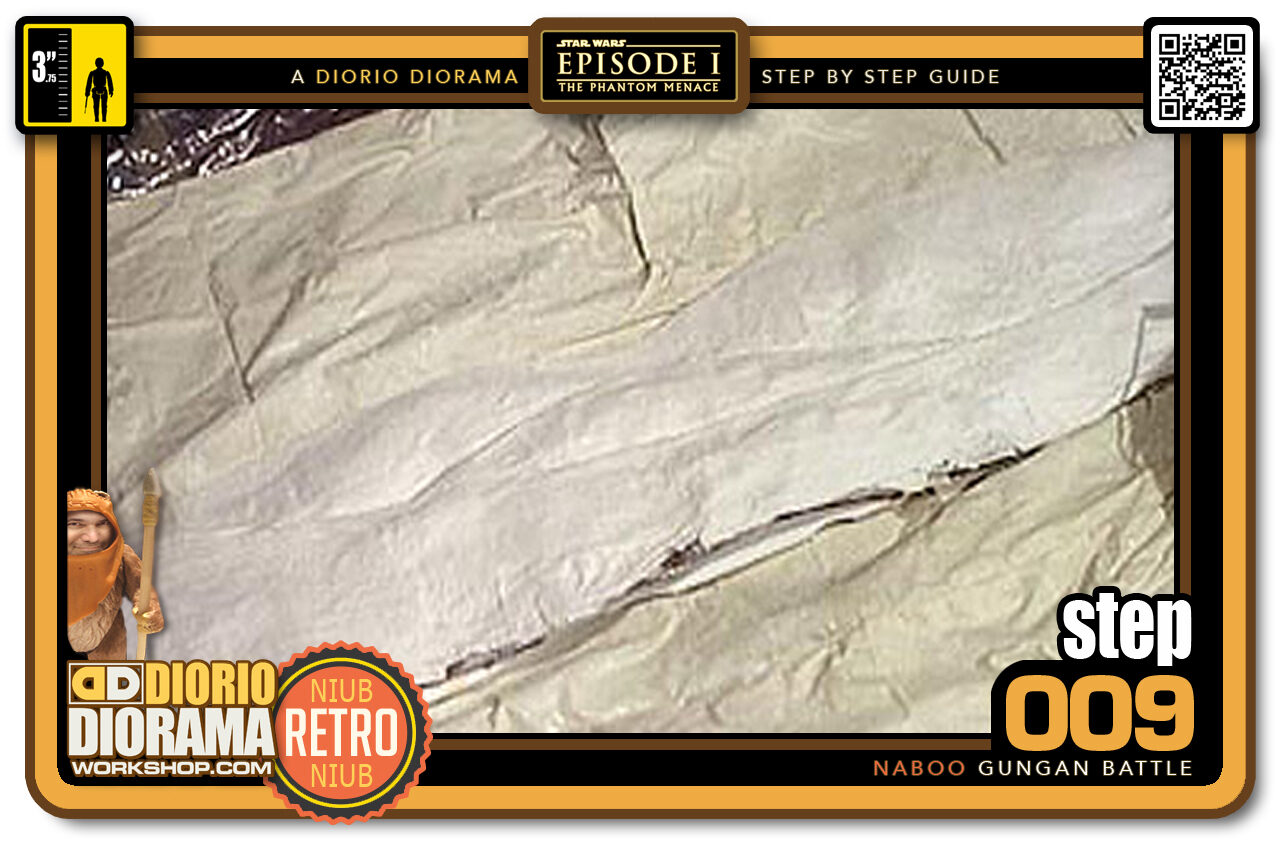
- STEP 009 > Now when you put the bandages on this layer, you do have an extra step. After you covered your front mountain, now it's time to blend them all together. Just take some long thin strips and place them along the cracks (seams) where the layers connect together and stroke the plaster gently until you can no longer see the gap between the mountain layers. This way, all 3 shapes bind together and form one big mountain background.
-
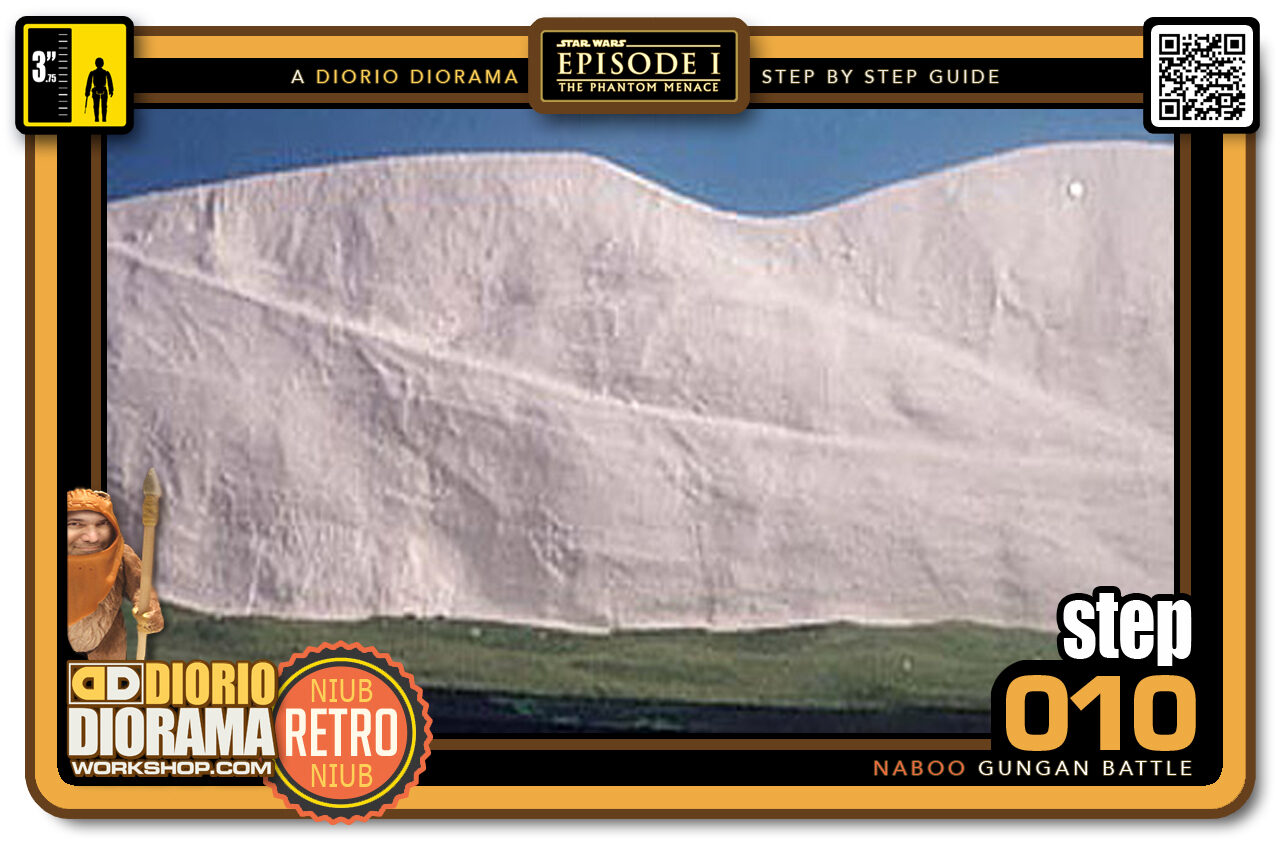
- STEP 010 > Carefully lift your mountain diorama background off the floor and place it on the shelf to dry. Notice the grass on the base is already done, I forgot to take photos at the time. What you will see with your build now is just a plain wood shelf. To do the ground, I used the same technique as the mountains but with less newspaper, just enough to make bumps and Of course if you want, you can add more layers, that's where your imagination comes into play. Higher, shorter, fatter, you are the chief designer for your own diorama ?
-
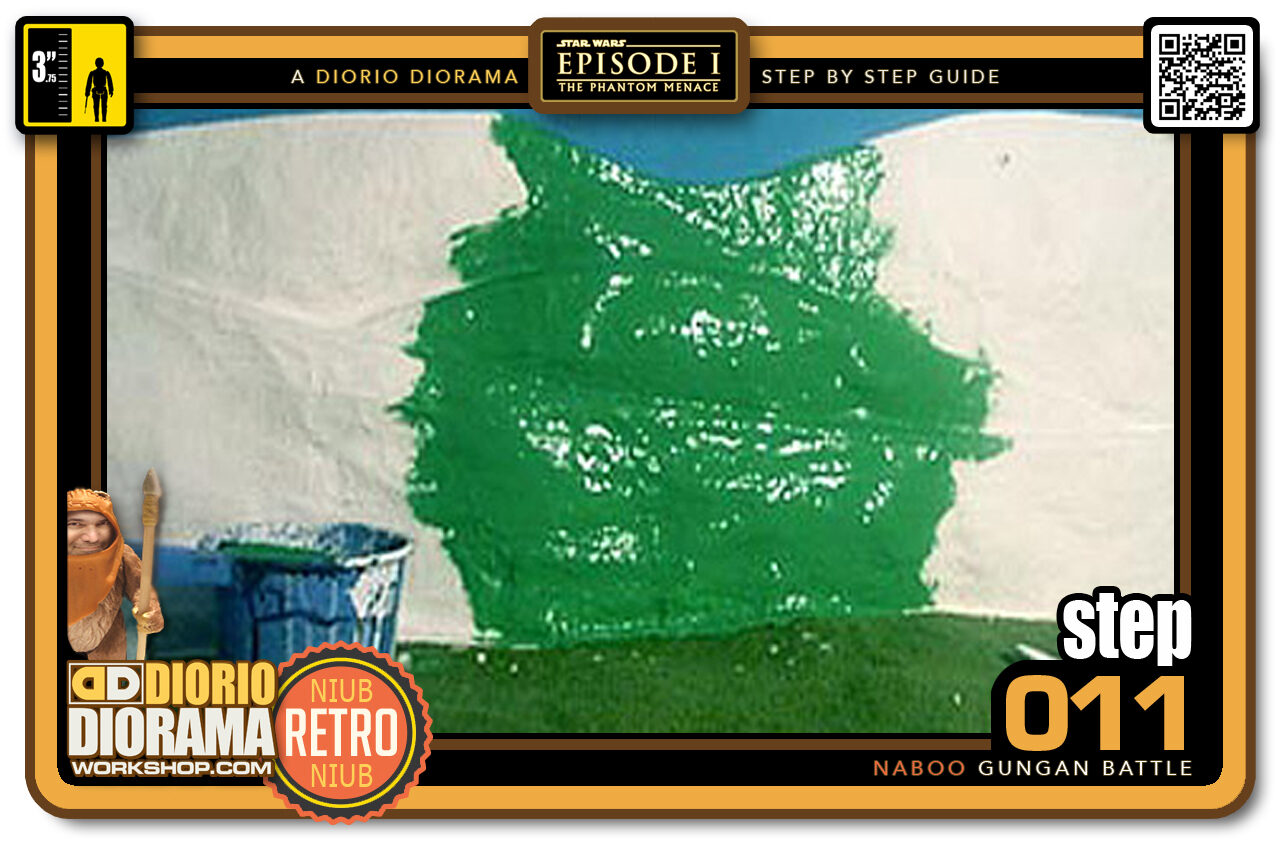
- STEP 011 > Ok, Now that the plaster is dry, I took a plastic bowl, mixed 1/2 portion of green paint and 1/2 portion of Elmer's white glue. This way you kill 2 steps with 1 application. Paint the mixture onto the plaster mountains. IMPORTANT: DO NOT COVER THE ENTIRE BACKDROP. Make sure to do small areas at at time (like you see in the photo) so that the glue doesn't dry too fast. You want it to remain tacky/sticky for the texture application. Using a table spoon, sprinkle hobby store miniature railroad "grass" and watch it stick to the mountains - it's that easy. Since your glue is now green, if you miss some spots in between it will not show as much. Continue sprinkling until the entire paint/glue patch has been covered. Repeat the process starting by painting a new little green paint patch.
-
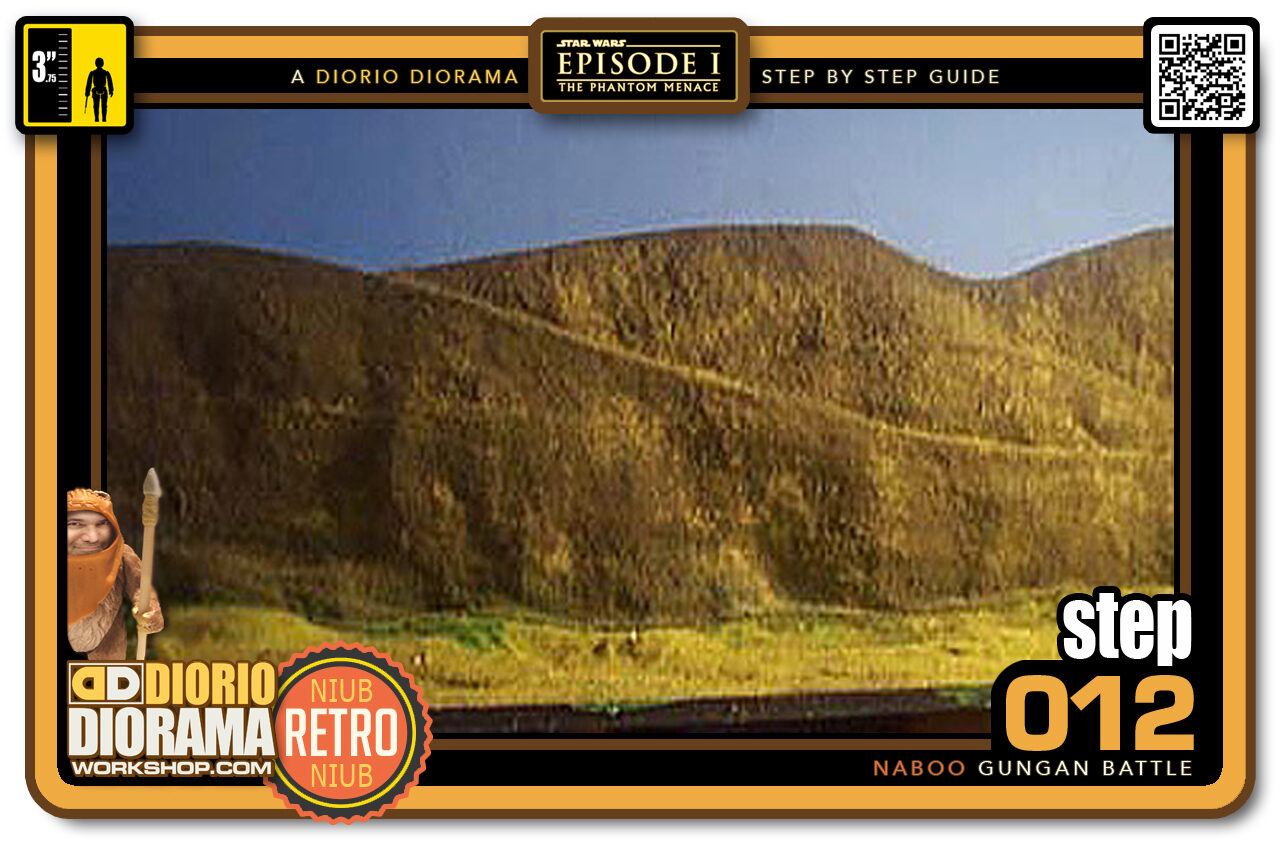
- STEP 012 > After a few hours, and patience ? your entire surface is covered with the fake miniature railroad model grass powder stuff. After your mountains are done, do the same technique for the grass base. Little paint, sprinkle, paint, sprinkle. You can tap down with your fingers in the end to make sure as many grass fluff is stuck to the paint/glue. Let this dry overnight and then you are ready to remove the excess. If you want to make it more realistic, you can mix 2-3 different colour grasses like I have. There is a variety available at your hobby store and amazon.
-
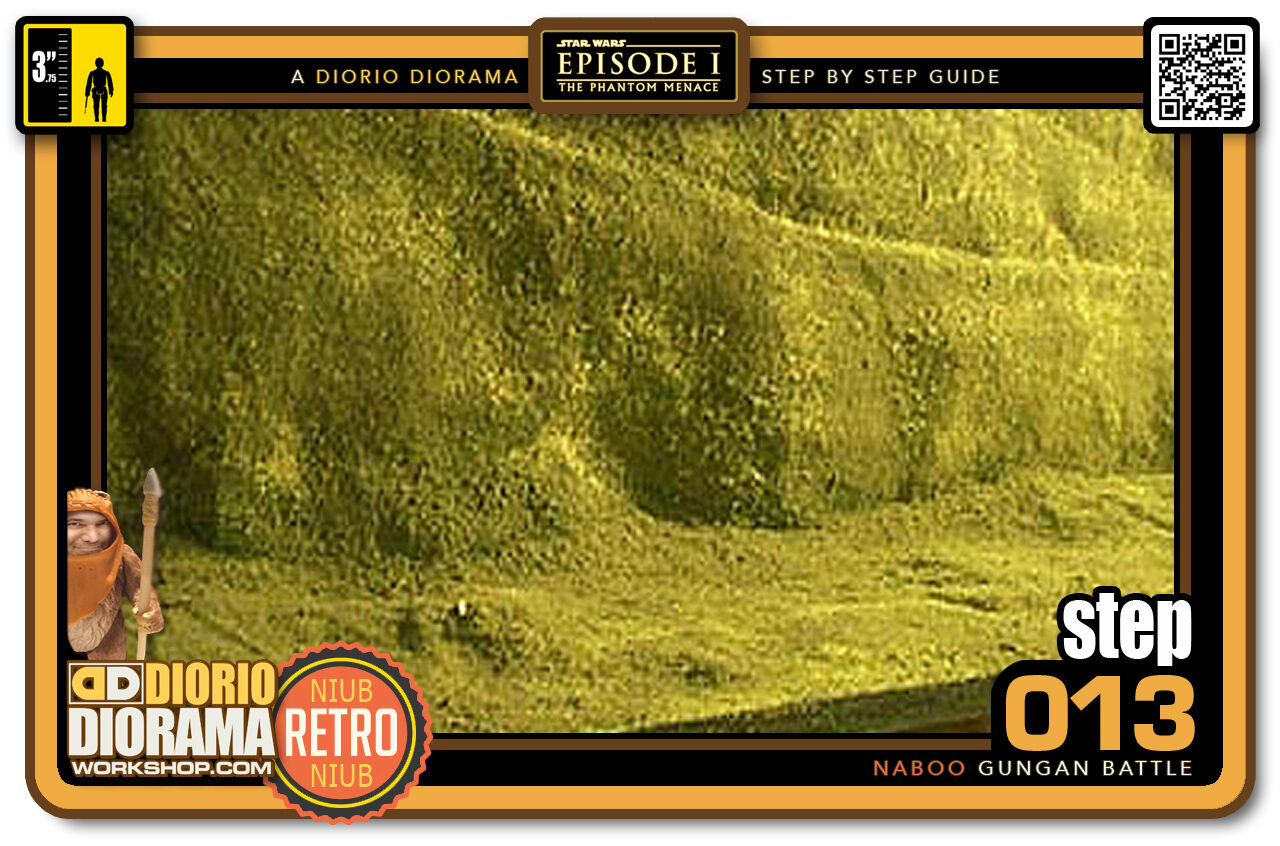
- STEP 013 > Here is a close up of what your grass base surface looks like when done. It sure doesn't look like your plywood shelf anymore ?
-

- STEP 014 > Here's a cool trick to keep all your battle droids from falling over like dominoes once in the diorama. Buy some plastic hair curlers that come with pins and cut those into 2 cm lengths, then dab some glue on the end and stick them into the plaster floor. The holes under the battle droids feet fit just snug and allow you to give cool poses that would normally make the figure fall, like bending backwards on one leg from a Gungan power ball. It's just like the old school Kenner figure action figure display stands ?
-
-
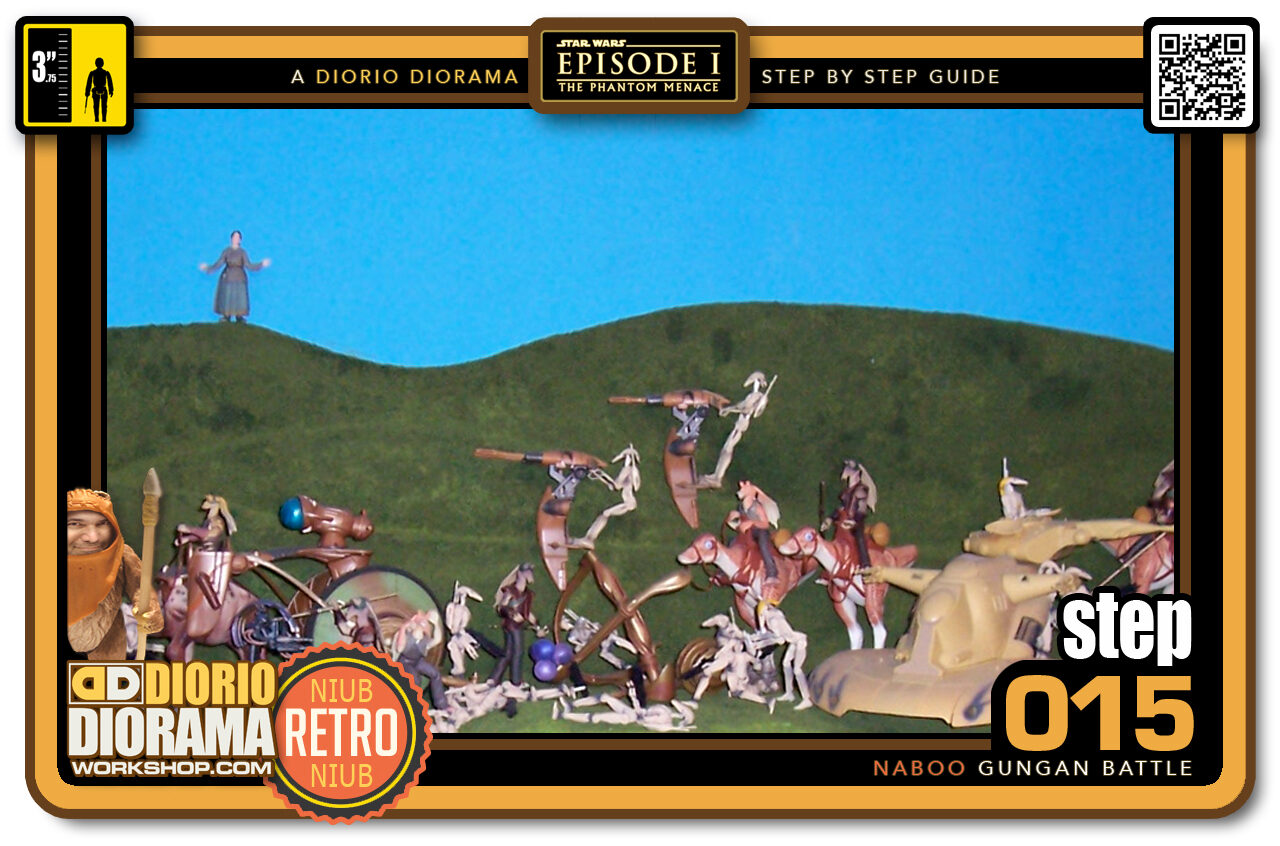
STEP 015 > Your diorama is now ready for you to place as many Battle Droid and Gungan warrior figures that your space allows. Don't forget Jar Jar ?
This higher resolution image from my old basement diorama wall gives you a better look at the possibilities of this scene. So many toys where made for this over the years, Staps, Battle Droids, Super Battle Droids, Droidika, Tanks, Fambas, Eeopies, if you own all these toys, your scene will look just like the movie ?
.
Did you already build this Diorama ? At home or at our Star Wars Celebration Diorama Builders workshop ? Would you like to show it in the site’s GALLERY VISITORS DIORAMAS section, YES ? That is Awesome !!! You can find out all the details on how to email me your photos on the VISITORS SUBMISSIONS INFO page … When I get your photos, I will create your very own page just like this one. You may not realize it but work does inspire others to join in the fun of making Action Figure Dioramas.
.
NOT FOR RESALE ALL Decals, tutorials and artwork are ©FrankDiorio (dioramaworkshop.com) and offered FOR FREE to the fans – that would be you ? so you can build and display my diorama designs in your very own home. I realize I cannot control what one does with my graphics once I place them on the web, I can only ask you as one fan to another, please respect the artist and do not be that jerk who uses my designs and tutorials to build a copy of my work only to sell it on EBAY or trade/sale groups and forums. Thank You. Frank.
.

.
.
If you have a facebook account, why not join the Official Diorama Builders Fan Club today, simply click the logo link below.
 .
.
Catch up with fellow visitors and exchange stories, read cool interviews with the crew, exchange photos, fun surprises and grab some FAN ONLY merchandise next year at actual future conventions ?
.
©2021 Frank Diorio DioramaWorkshop.Com
.
IF YOU LIKE WHAT YOU SEE, PLEASE SHARE WITH YOUR FRIENDS
USING THE SOCIAL MEDIA BUTTONS BELOW