


-
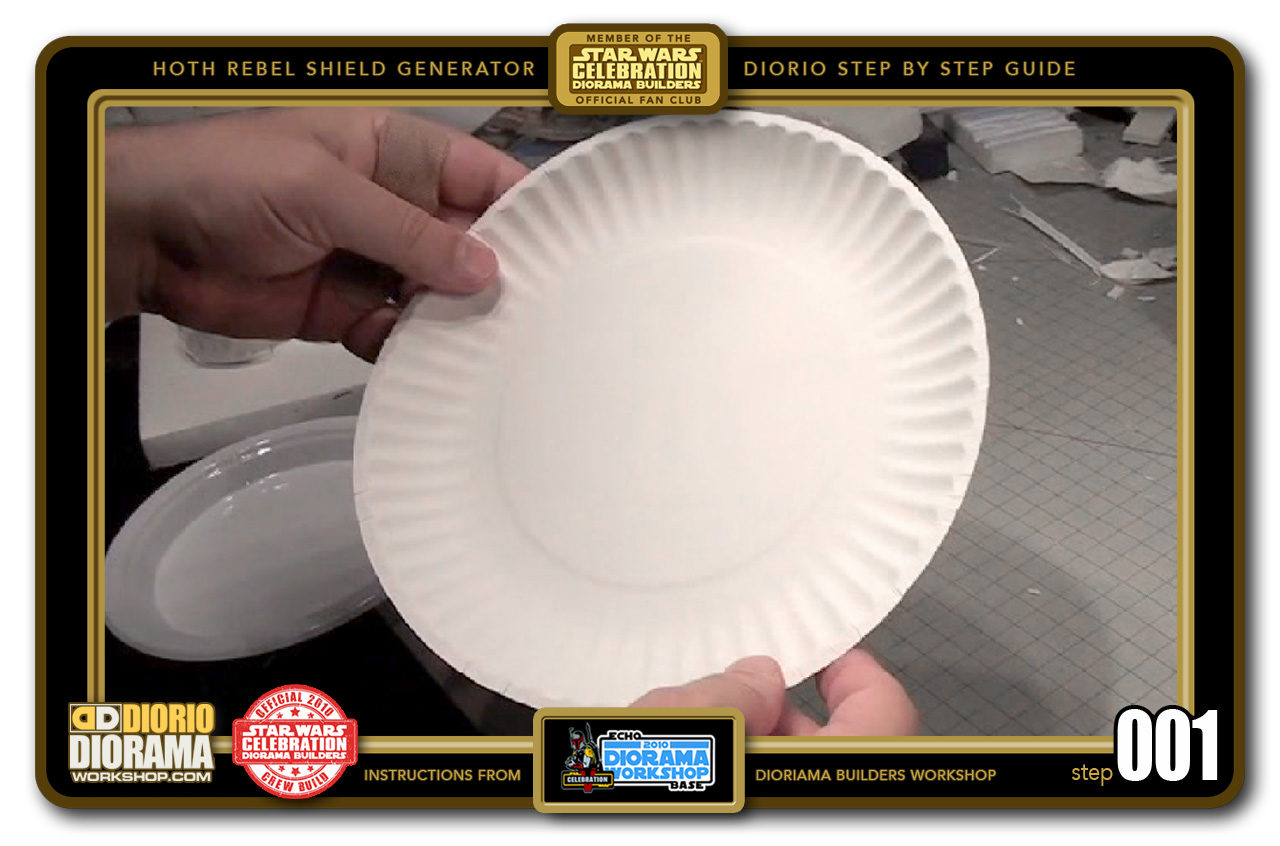
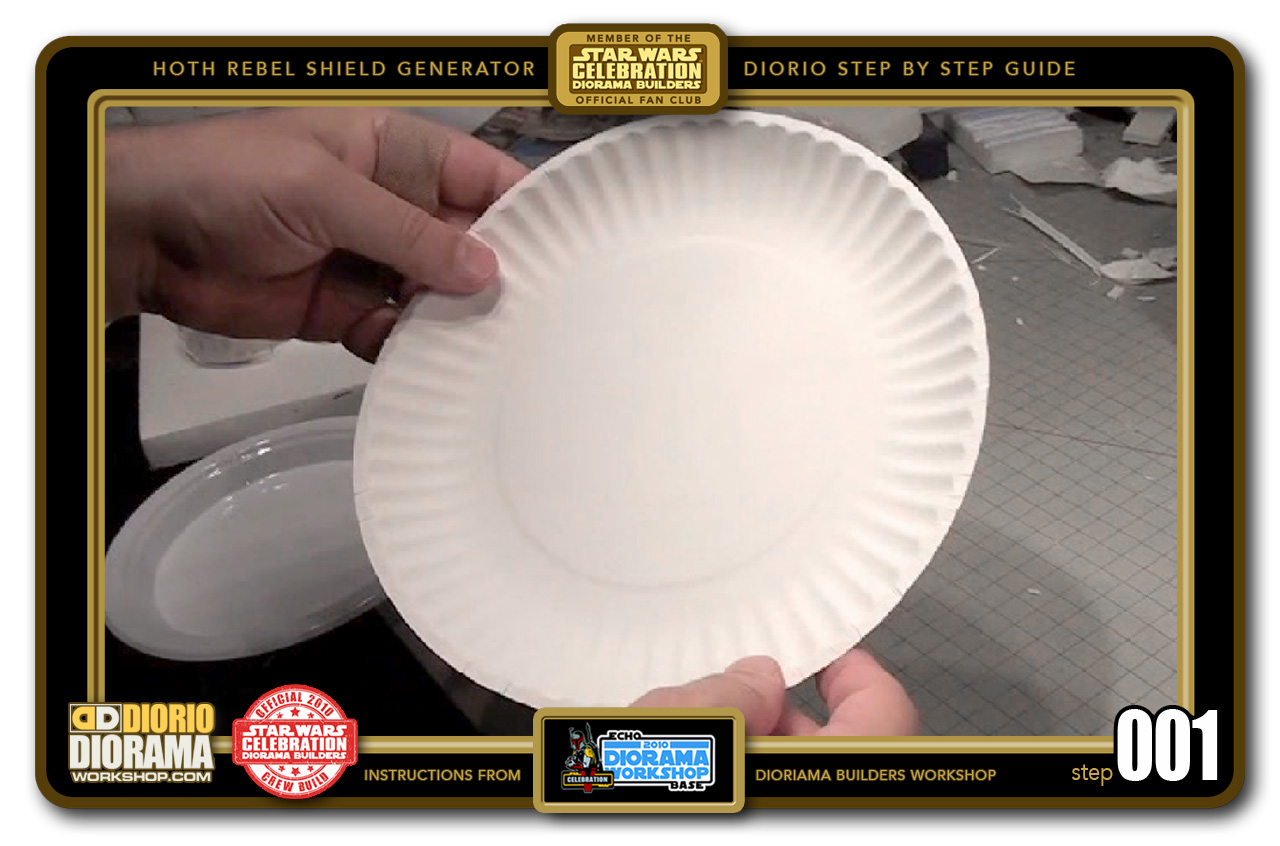
- STEP 001 > Grab a 12" paper plate found at most dollar store or party center stores. If you cannot find the exact size match, as long as you have a large and smaller plastic one, you are fine. What you want to try and find, is one that has these groove ridges all along the side to add cool texture when painted.
-

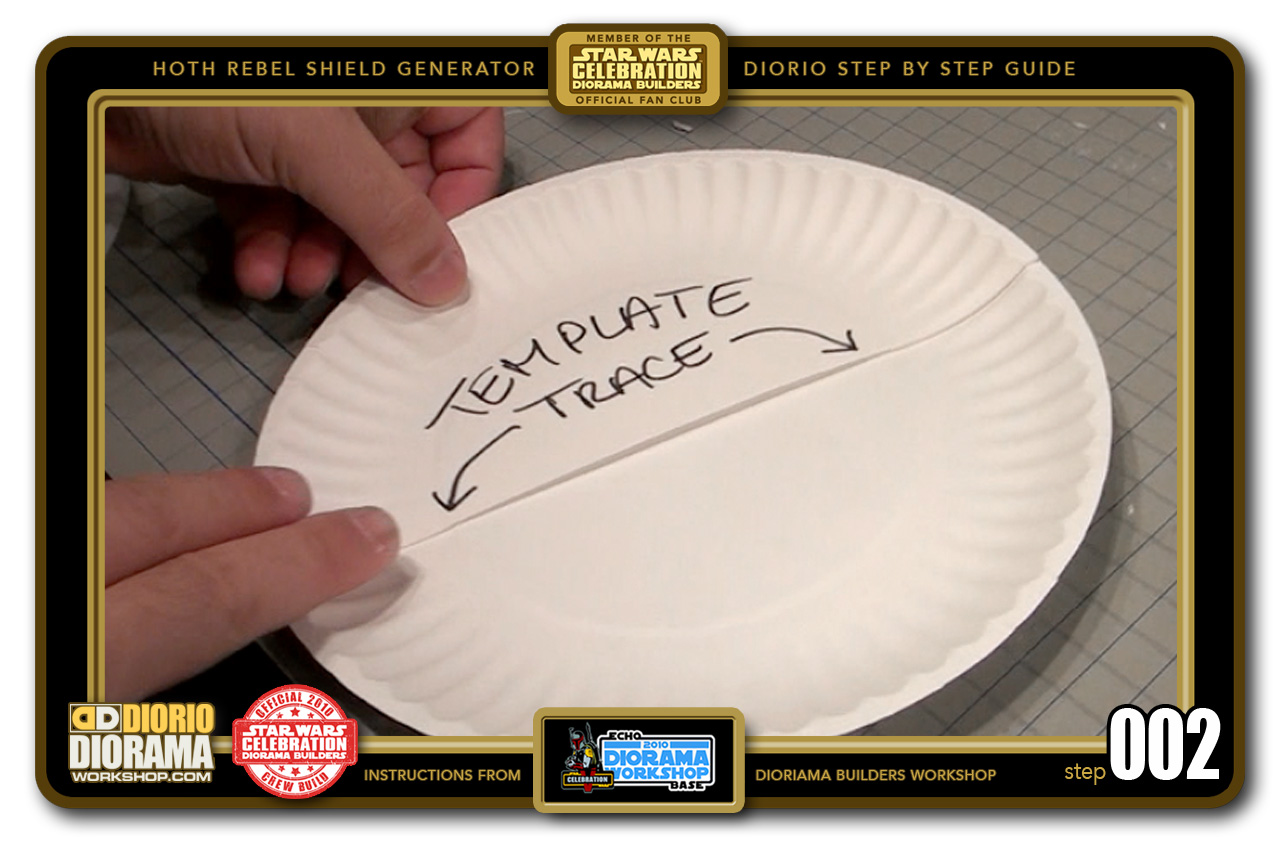
- STEP 002 > If you cut one of the plates in half, this will become your TEMPLATE. Use it to place on top of your first 12" paper plate.
-

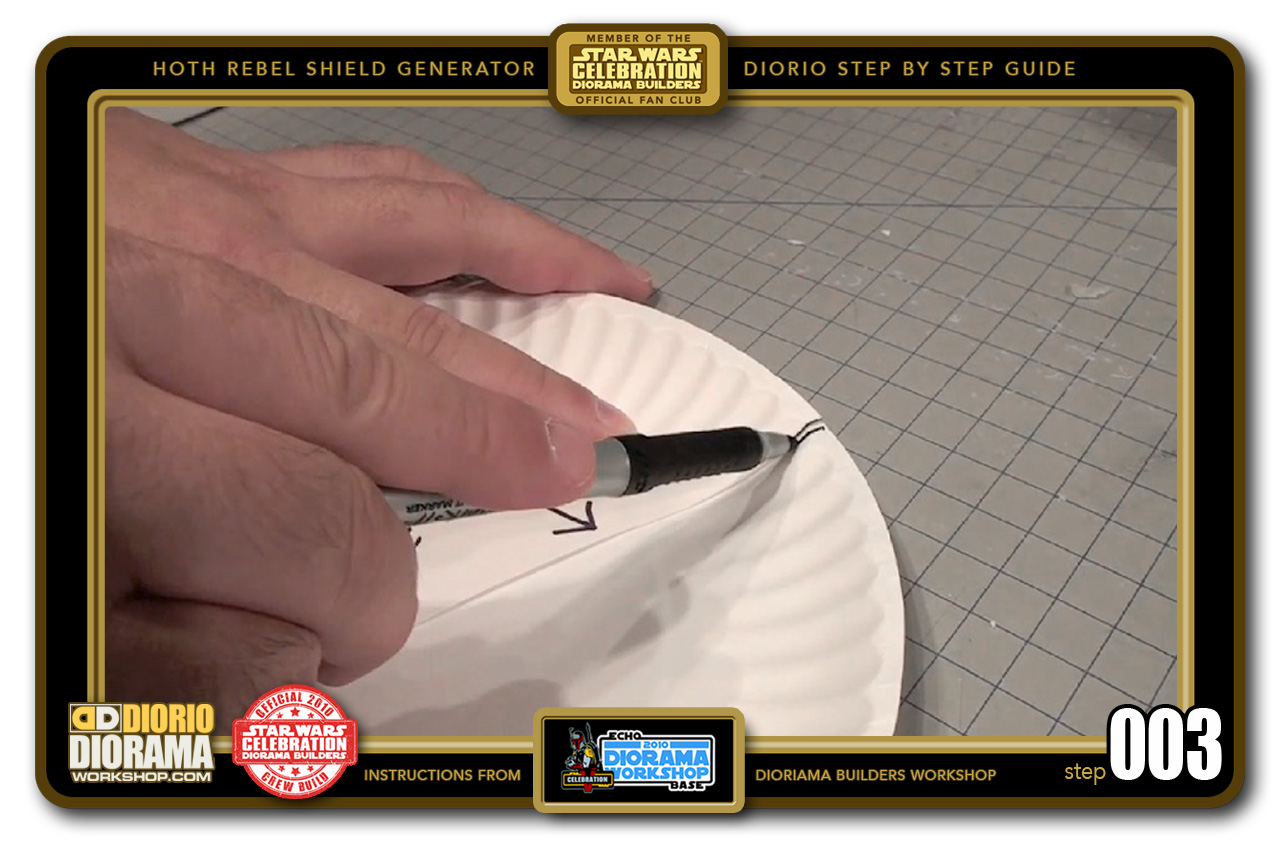
- STEP 003 > Use a pencil or Sharpie Pen to trace down the edge of the Template.
-
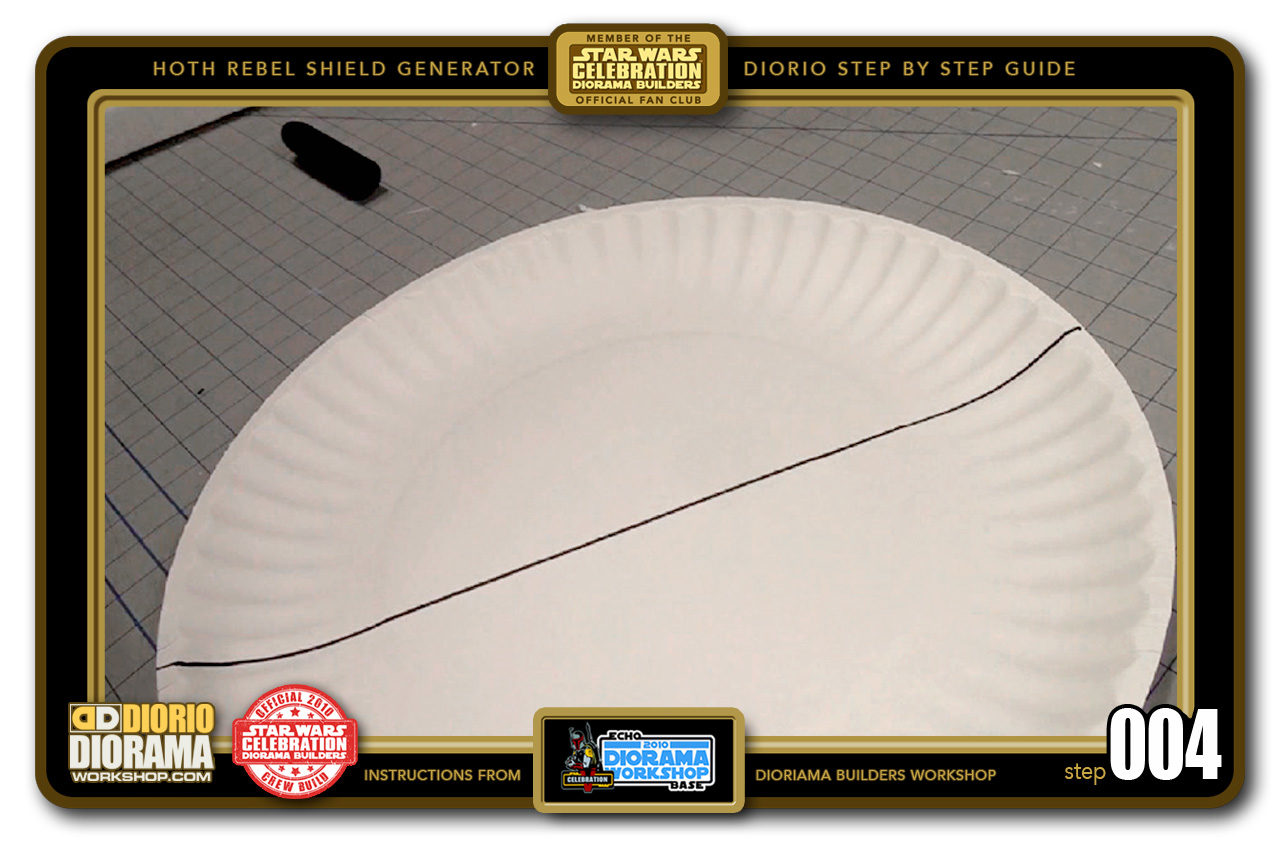
- STEP 004 > You will now have a line going down through the center of your plate.

-
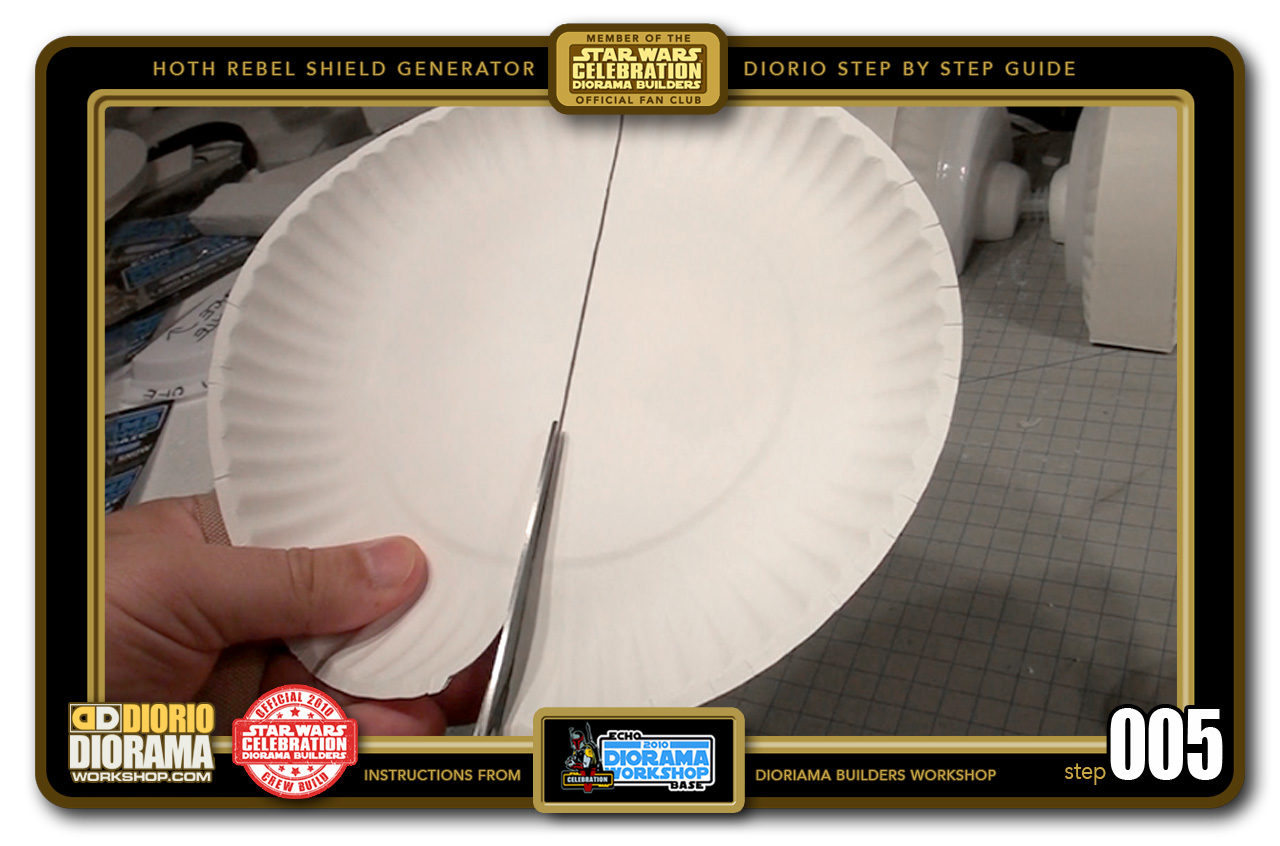
- STEP 005 > Grab some scissors and cut along the line.

-
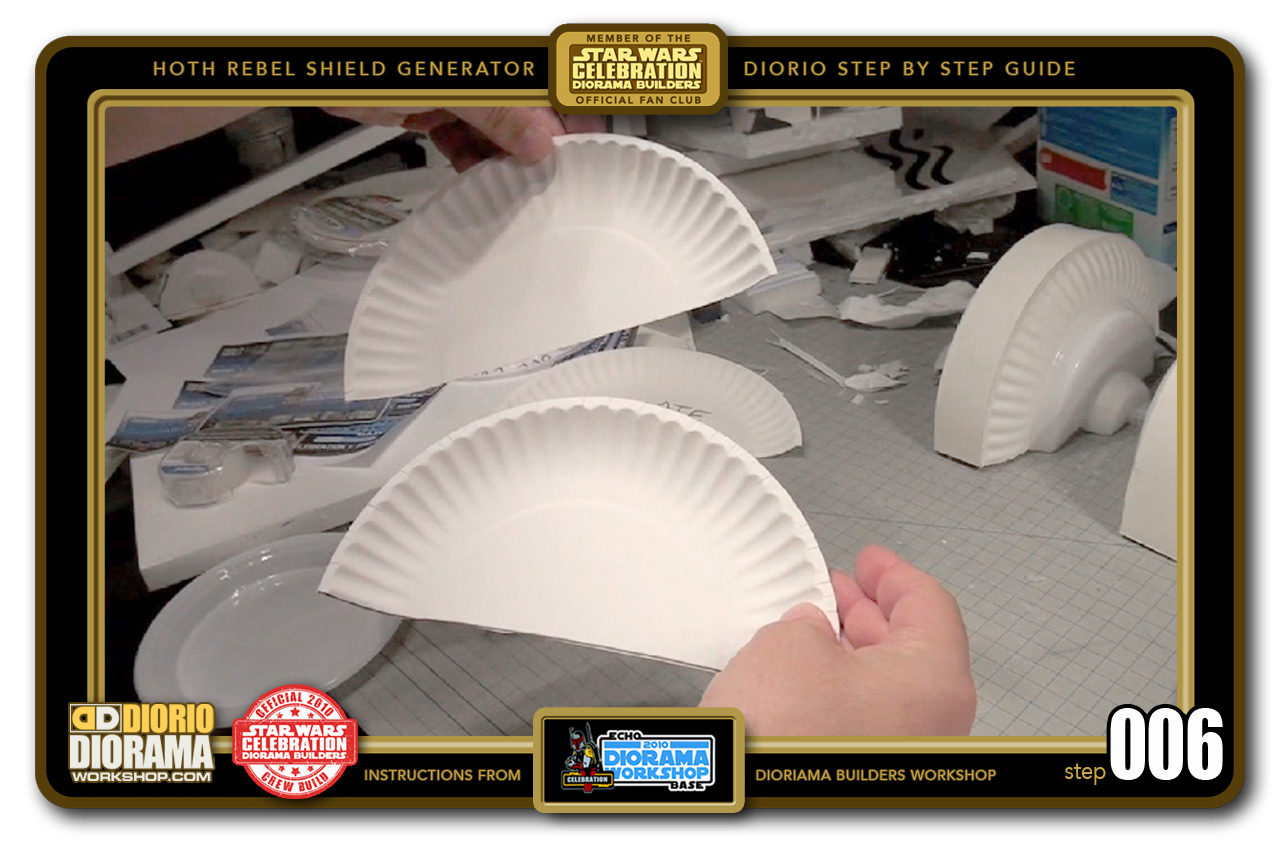
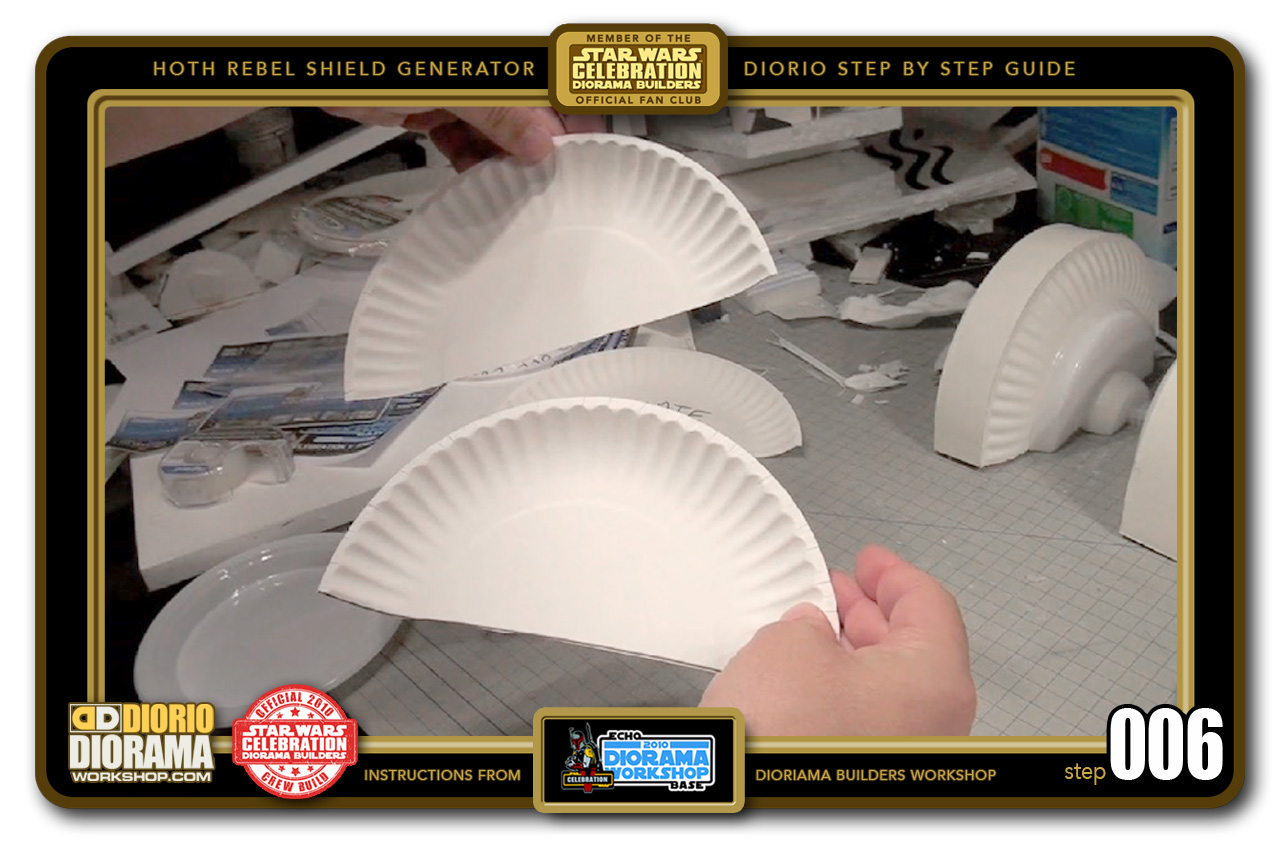
- STEP 006 > You will now have 2 perfect paper plate matching halves.
-

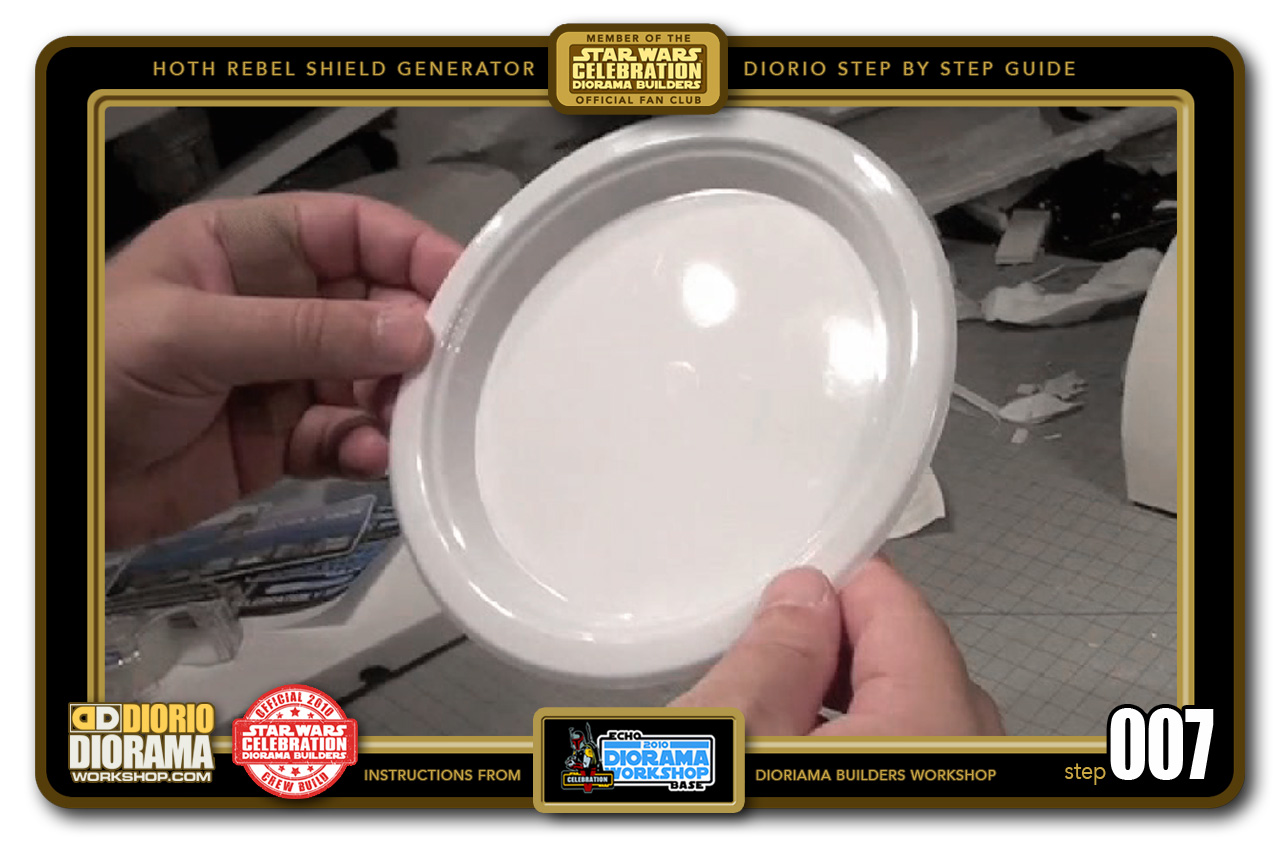
- STEP 007 > Now grab a 7" plastic plate. The reason I picked this one is because of the raised, deeper dish than the flatter larger paper plate.
-
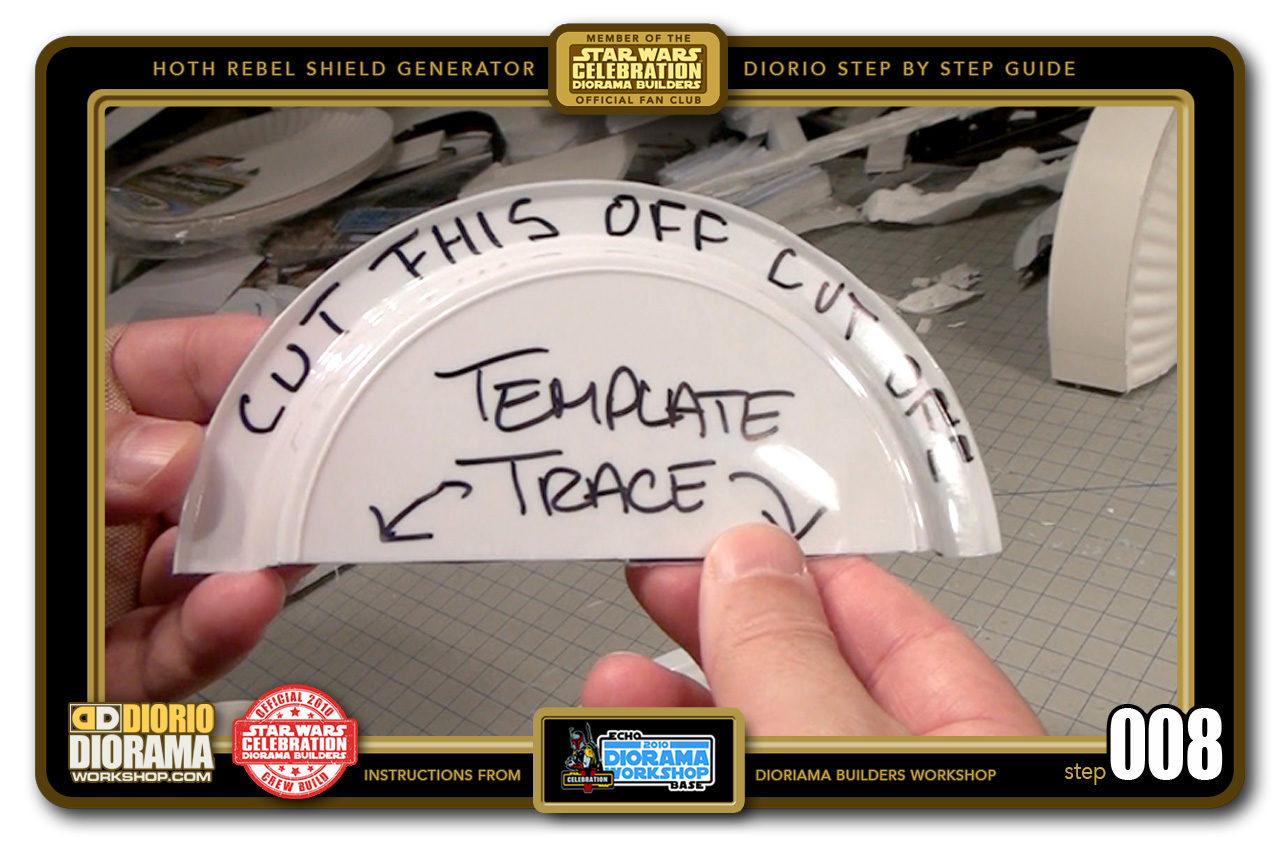
- STEP 008 > Cut your 7" plastic plate in half as you did for the papaer plate. This will become your 7" STENCIL.

-
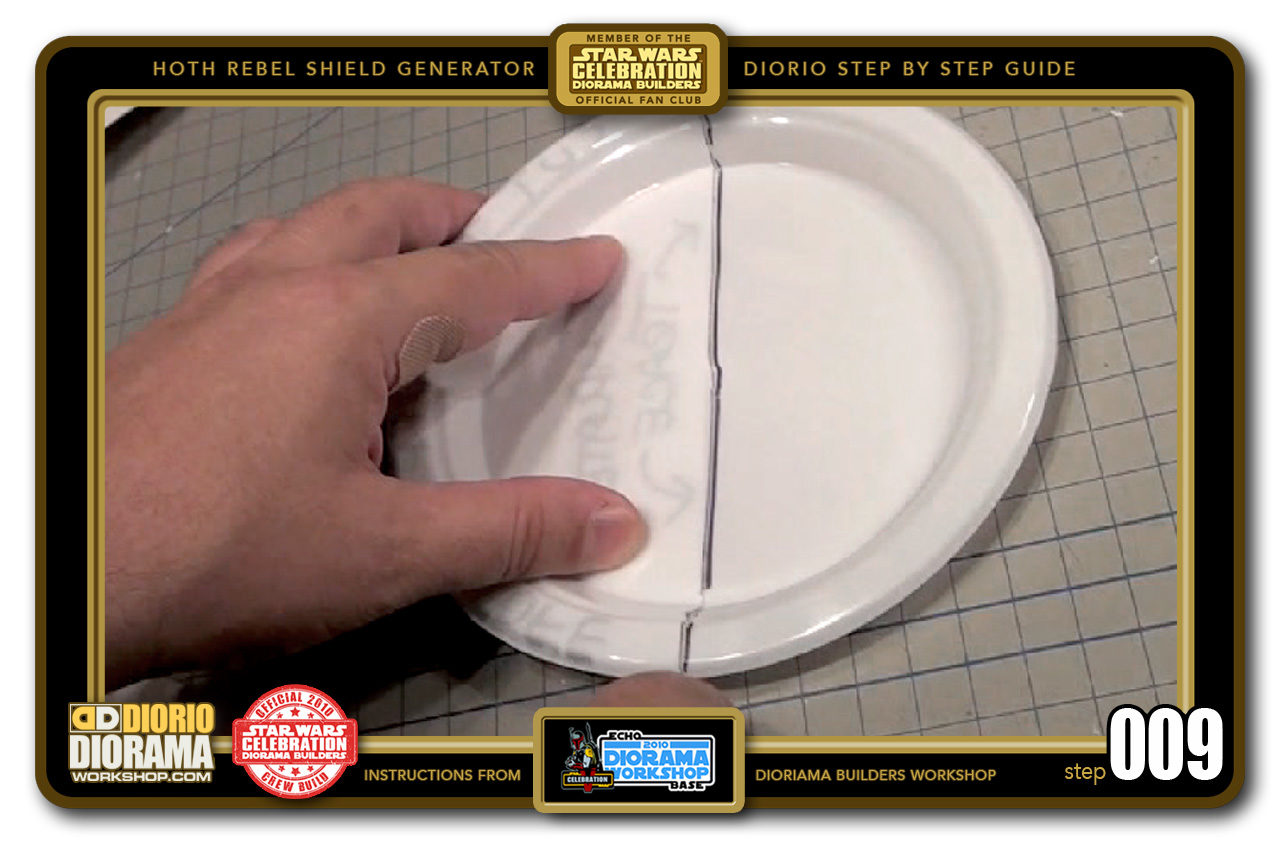
- STEP 009 > Place the 7" stencil on top of your first plastic plate and trace the side with your pencil or sharpie pen.

-

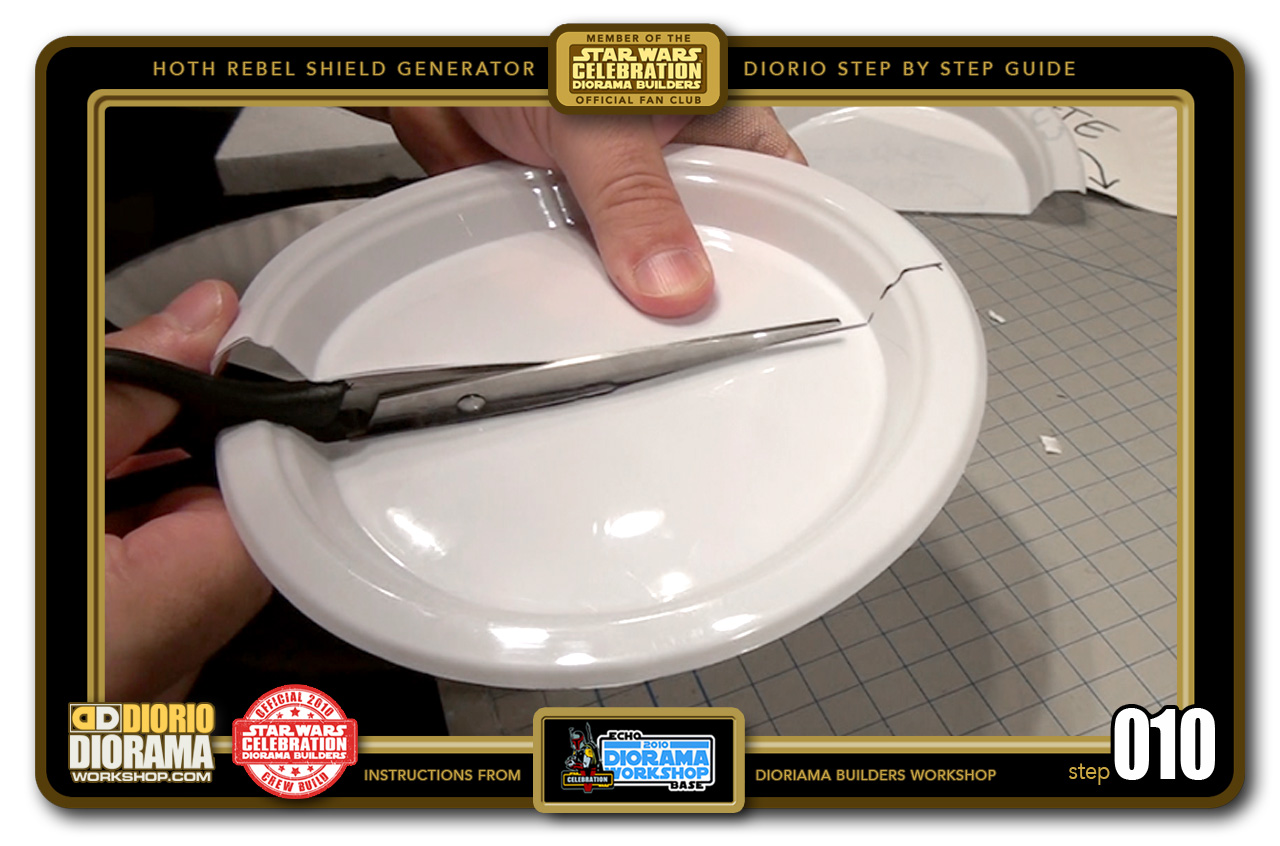
- STEP 010 > Grab your scissors and cut along your line to give you 2 equal matching halves.
-
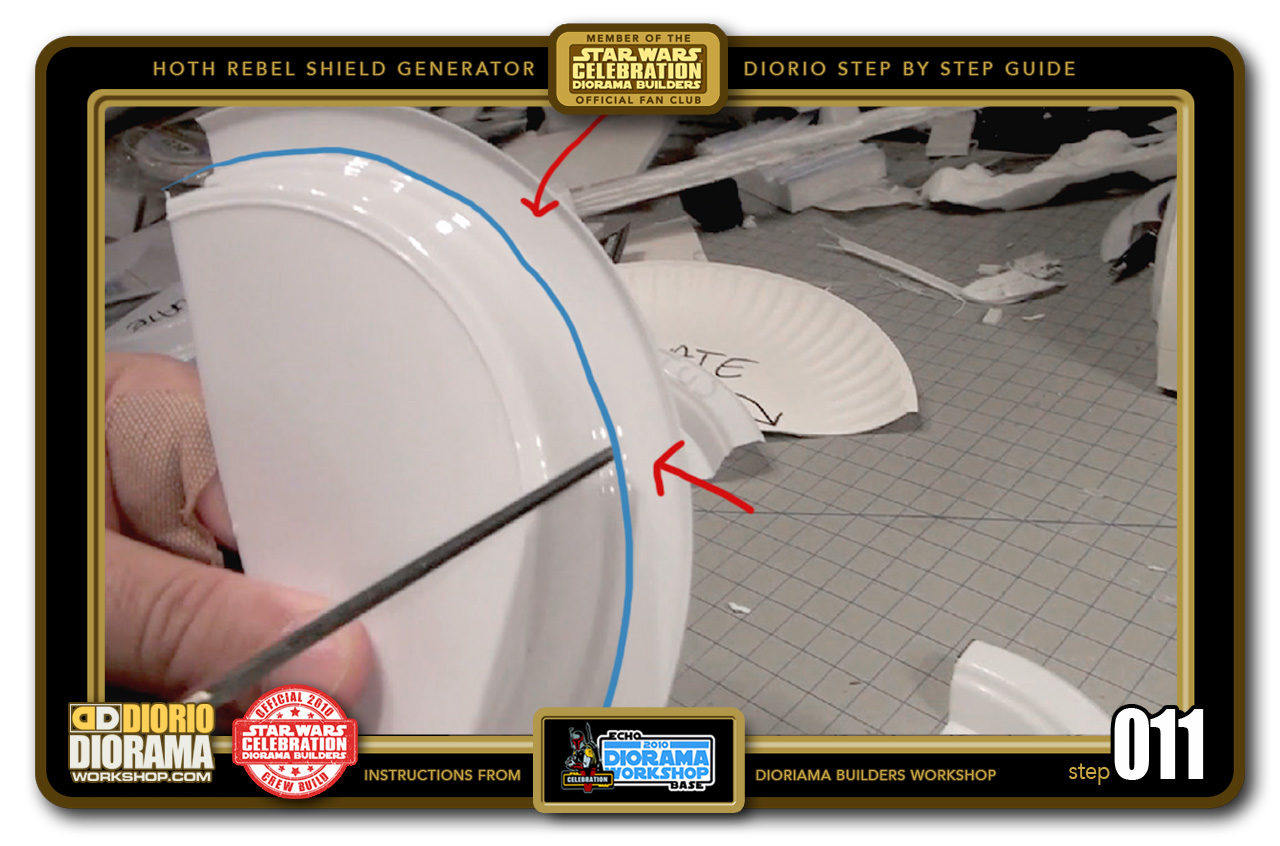
- STEP 011 > On this plastic plate, I did not want the flat rim part (red arrows) , I just wanted the plate to end where it starts bending (blue line)

-
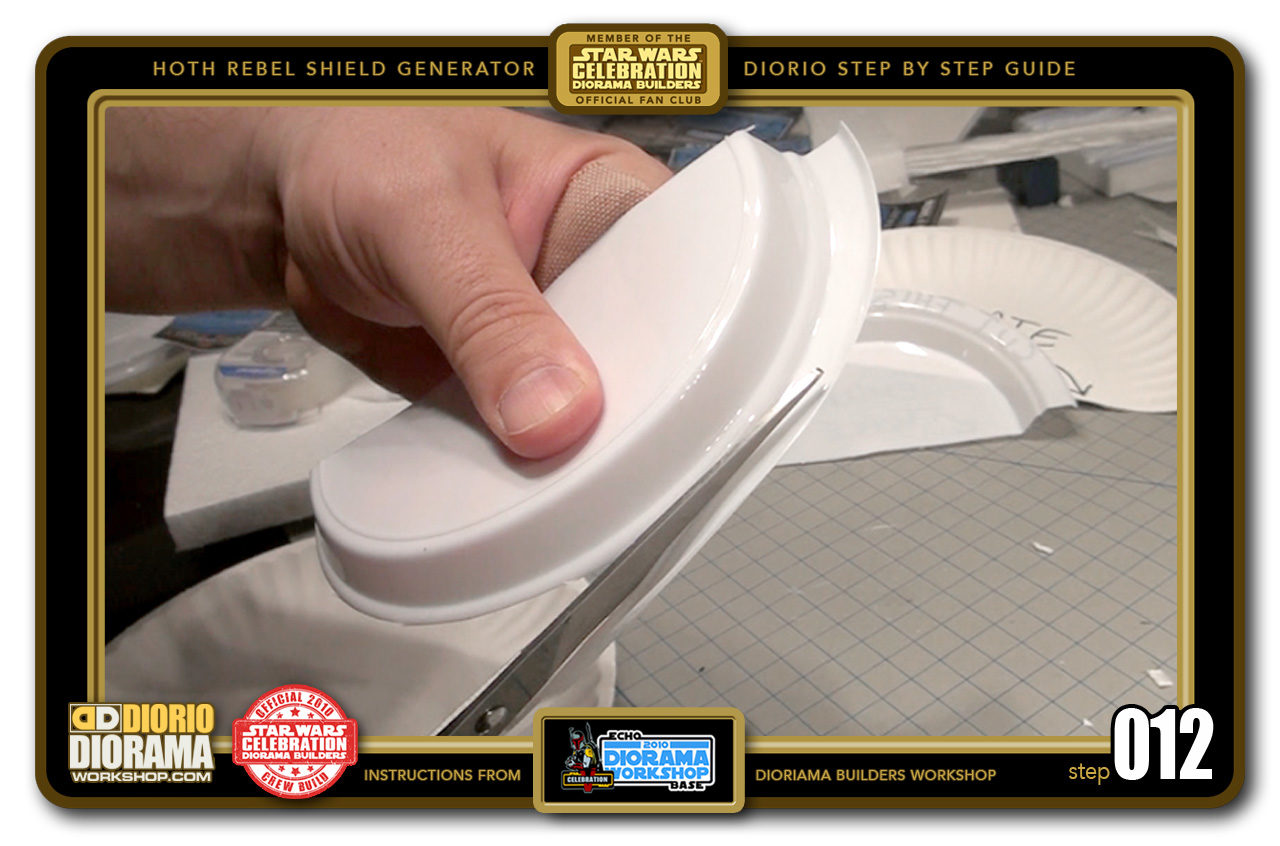
- STEP 012 > Carefully trim off this flat edge piece from your 2 halves.

-

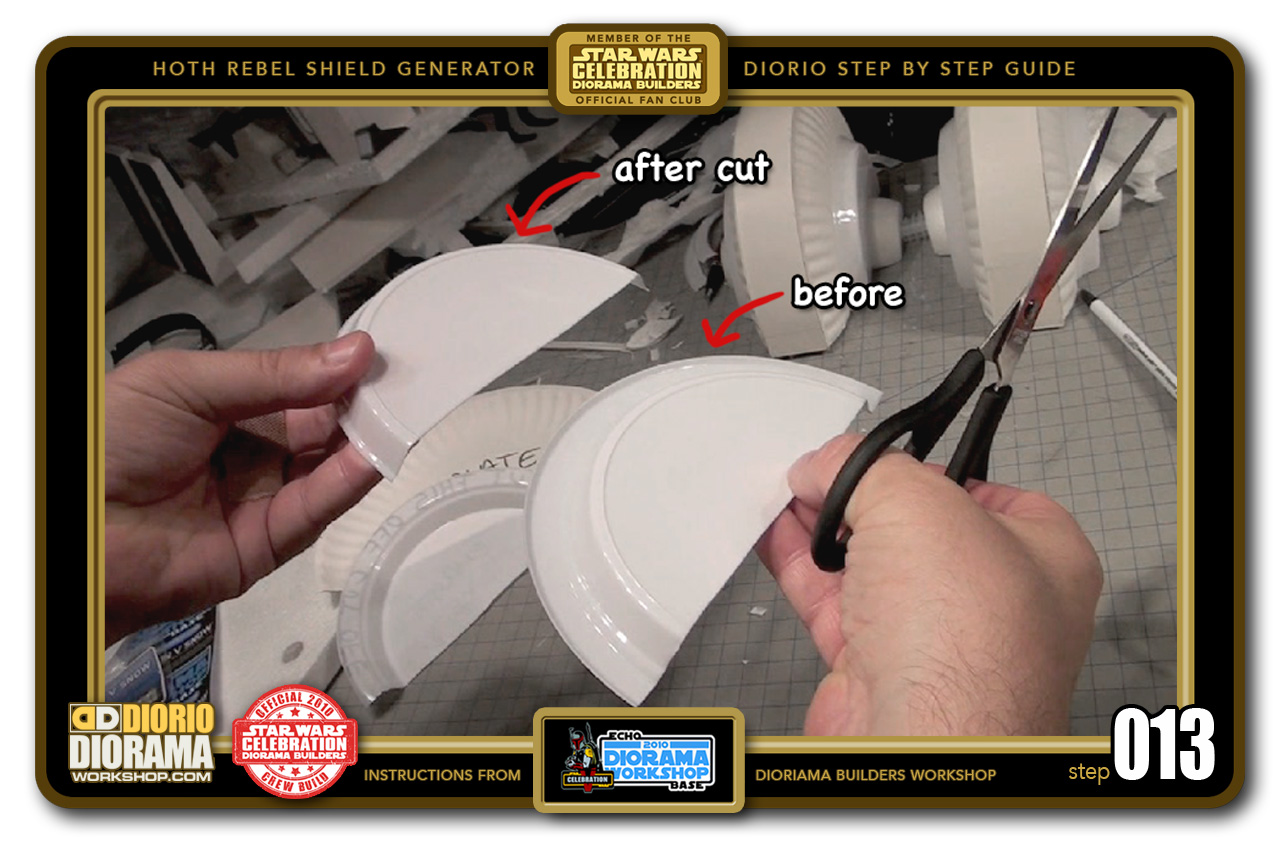
- STEP 013 > This shows you a better view of what the plate looked like before the trim was cut (the plate as you buy it) and the raised portion that we need for the build (on the left)
-
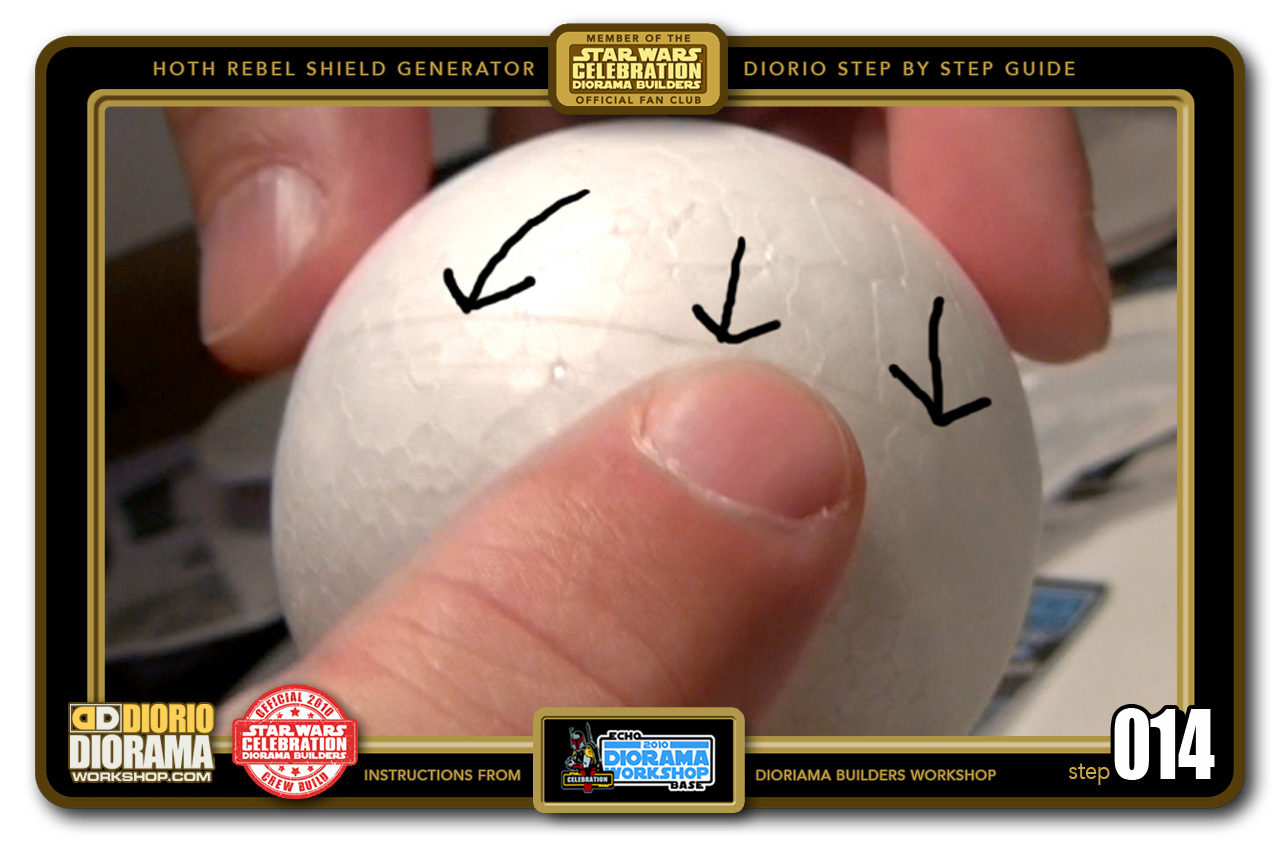
- STEP 014 > Grab a 2" styrofoam ball, found at your local dollar or craft store. Turn it around until you discover the seam that indicates the center of the ball.

-

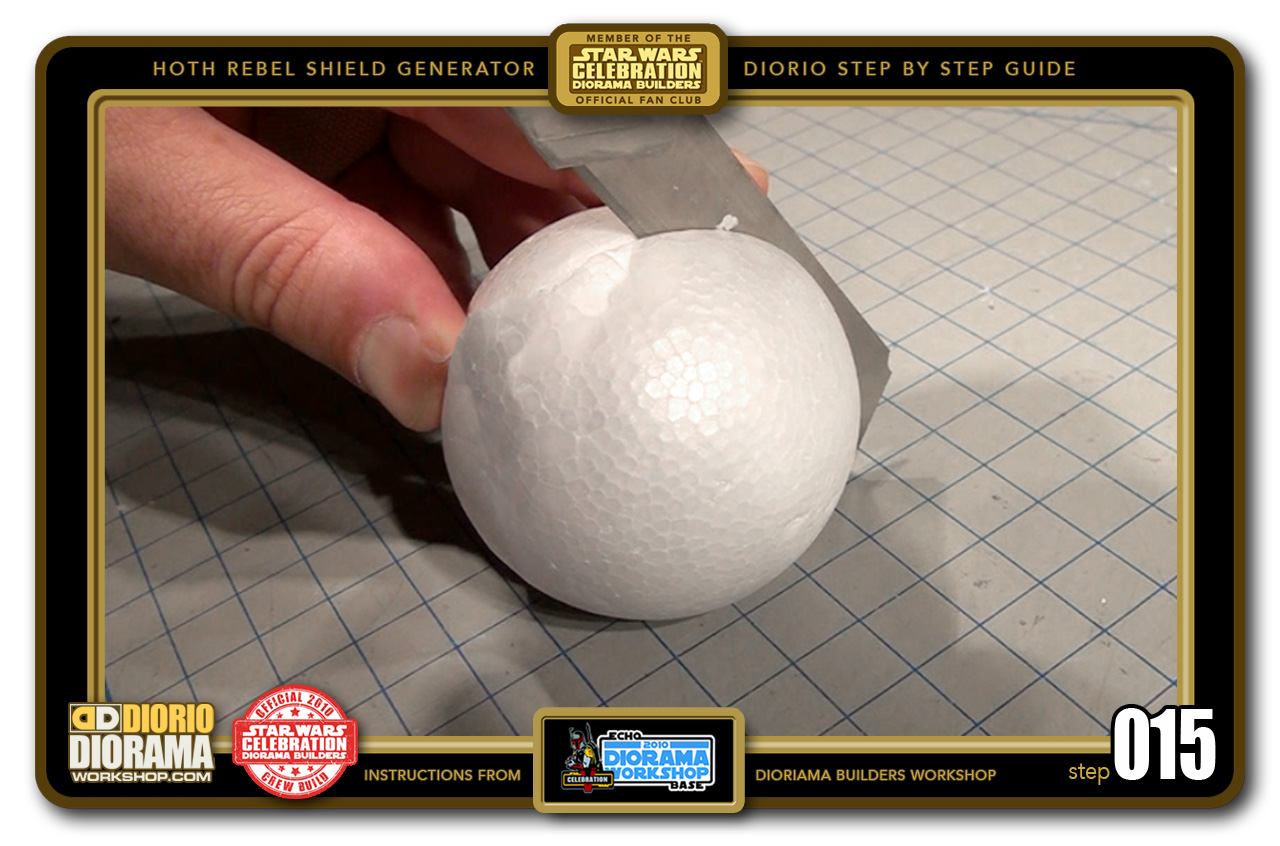
- STEP 015 > Grab your Xacto Knife (best with a NEW BLADE ... carefull not to cut your fingers) and extend it full way so that you can slice down the middle of the ball in one swoop. Place the blade, the end closest to the handle, onto the ball and carefully pull towards you as you press down. DO NOT MAKE front and back sawing motions as if it were a piece of wood. This would create a jaggy cut. You want the blade to slide down the ball in ONE direction from back to front. If it doesn't cut all the way through, lift the blade, slip it back into the grove and do another cutting motion as before.
-

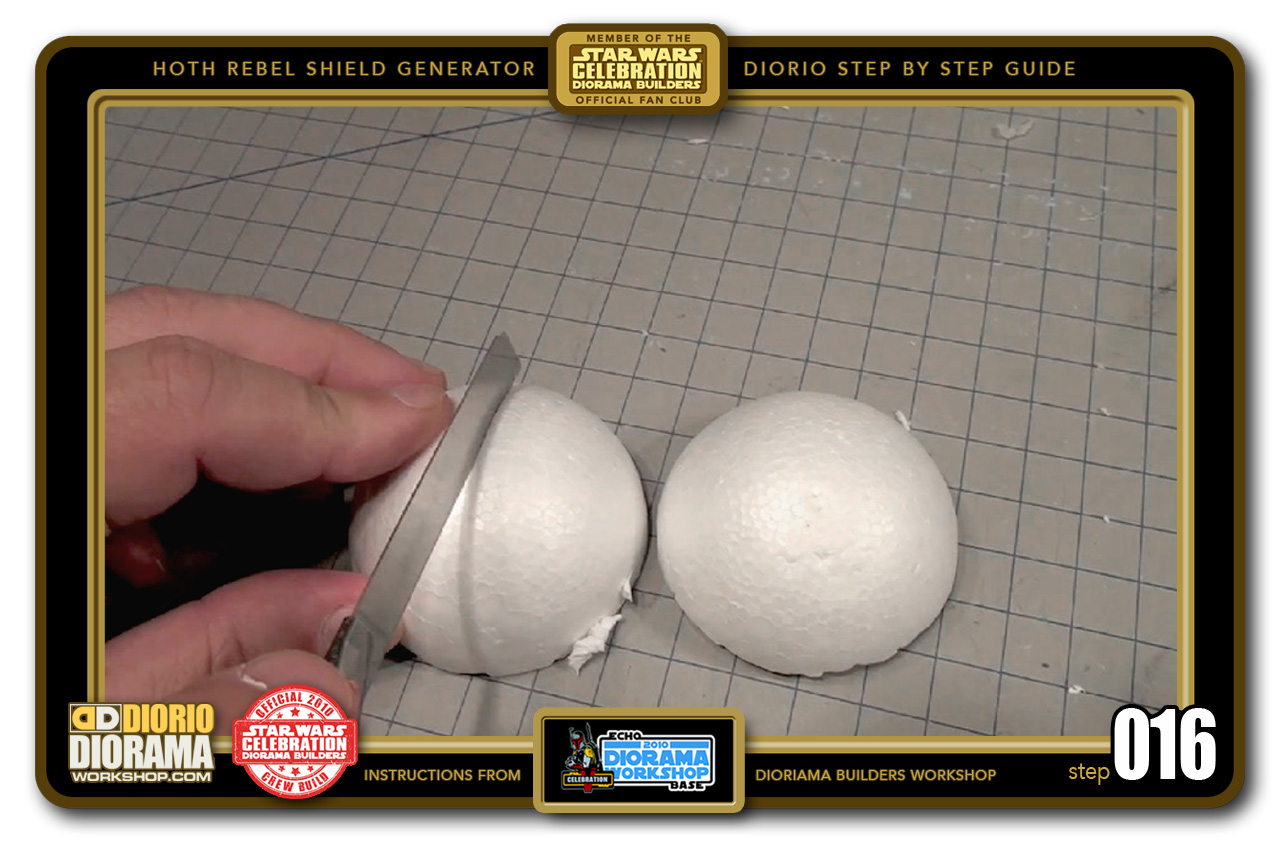
- STEP 016 > Now you want to cut each of your styrofoam ball halves into their own halves. There is no more seam guide for this part, you have to wing it and use your eyes to judge where the center would be.
-
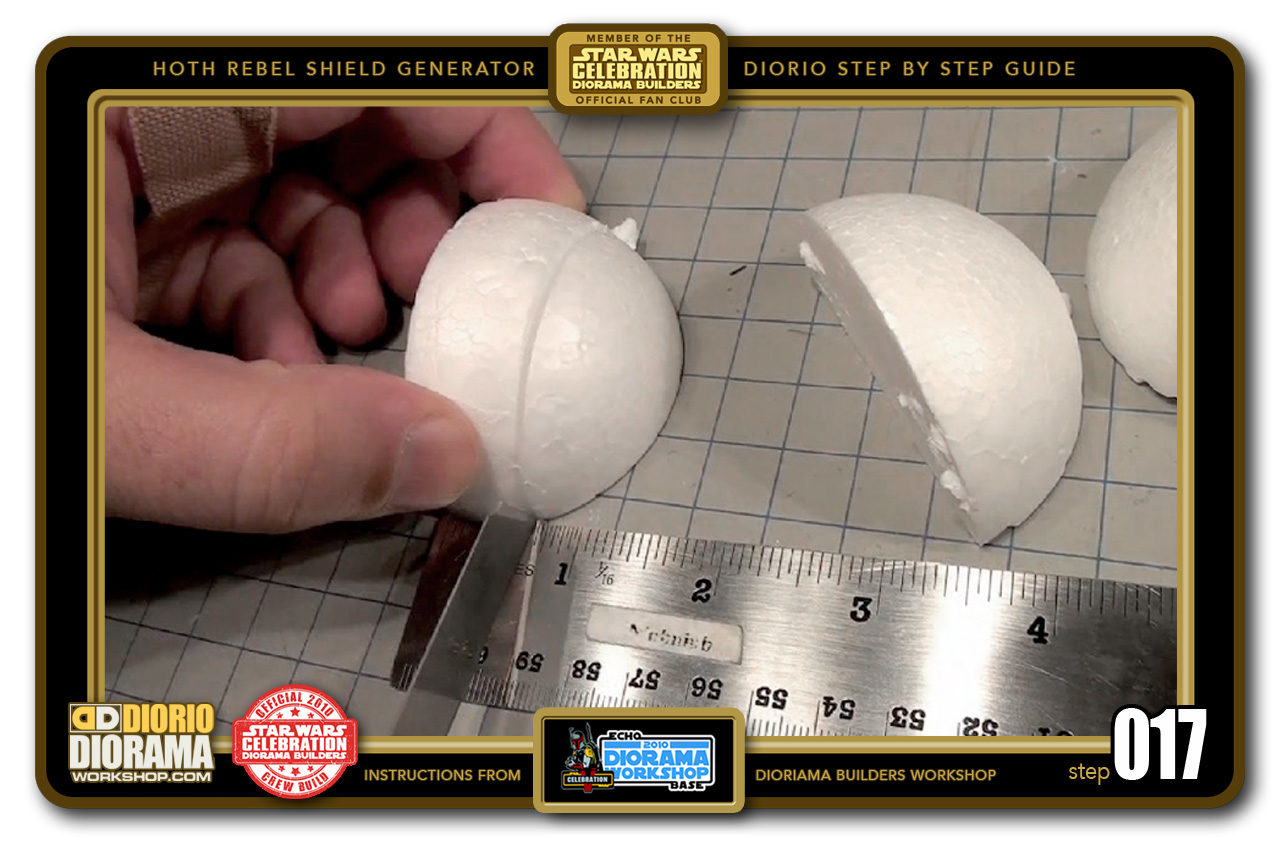
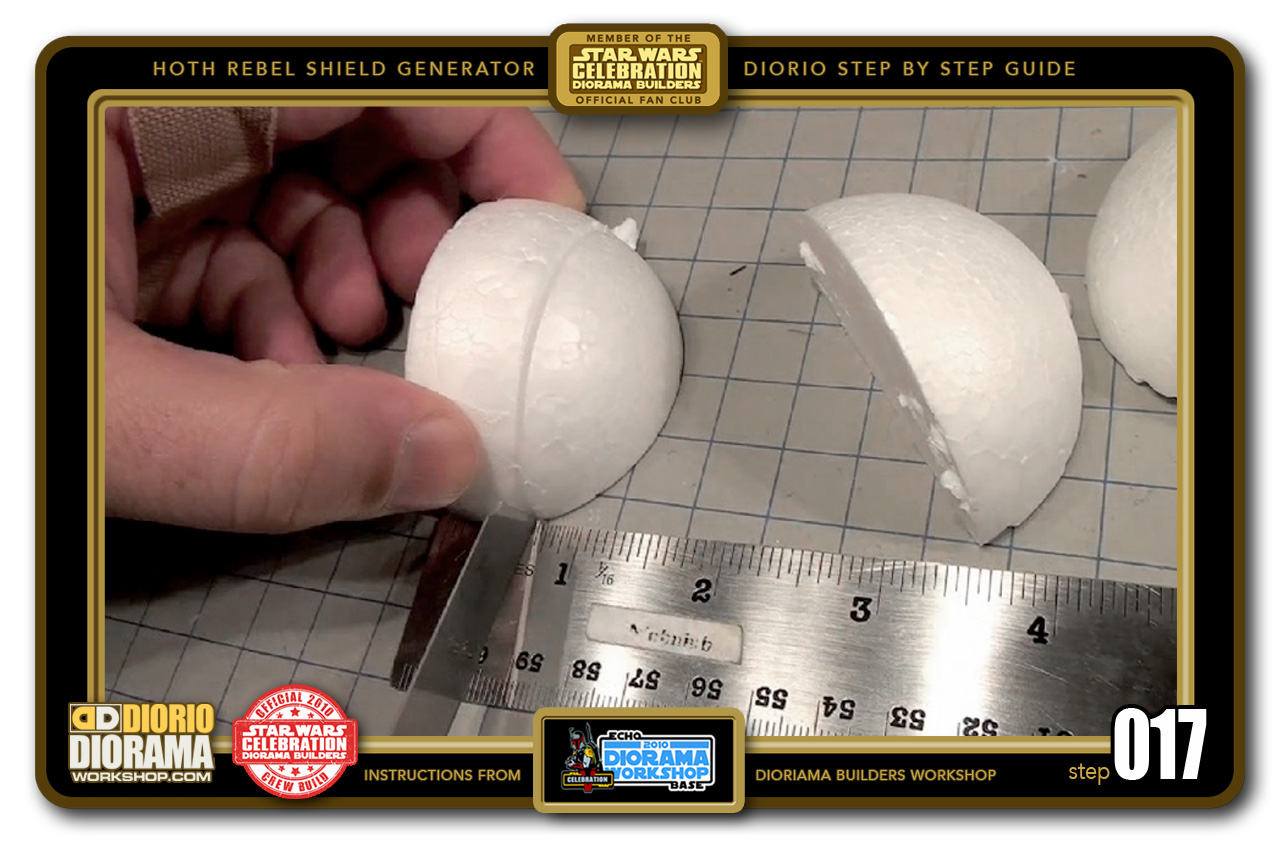
- STEP 017 > Now grab your styrofoam ball 1/4 piece, and place it along a ruler. Measure at 3/4" and make a clean cut. now put aside the rounded end, we do not need that side for this build. Do this same cut for all your styrofoam ball 1/4 pieces.
-

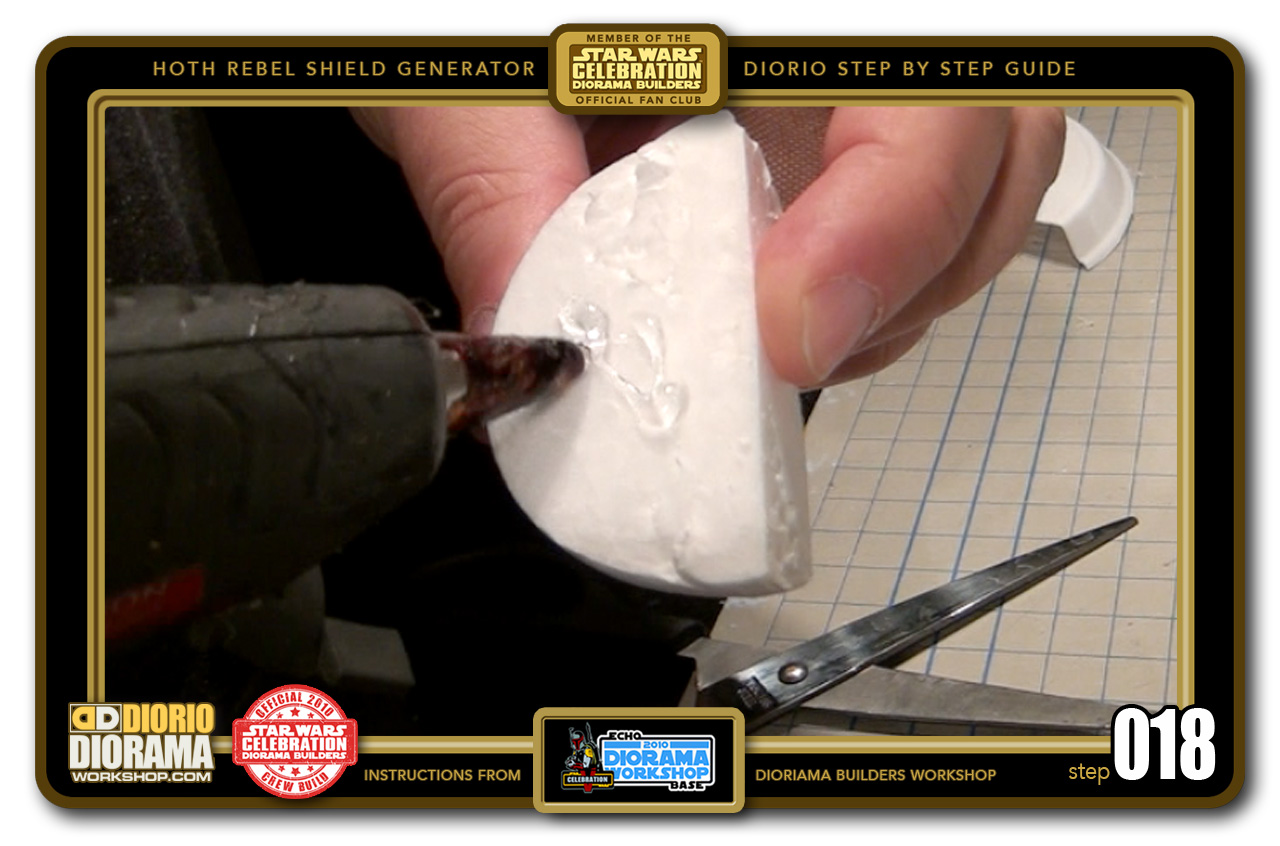
- STEP 018 > Grab your hot glue gun and carefully put a dab of the LARGER SIDE of the cut.
-
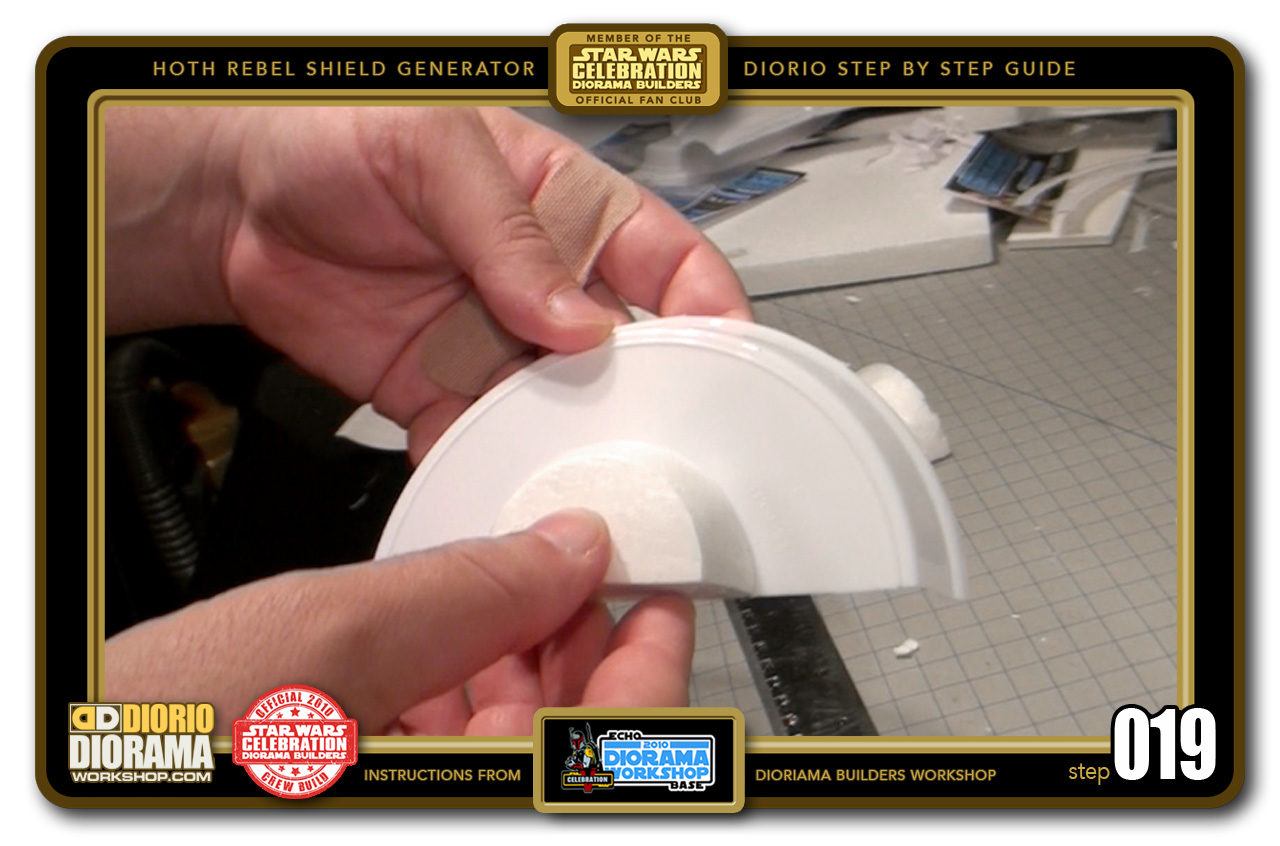
- STEP 019 > Now place the glued side onto the bottom center of the outer 7" plastic plate.

-
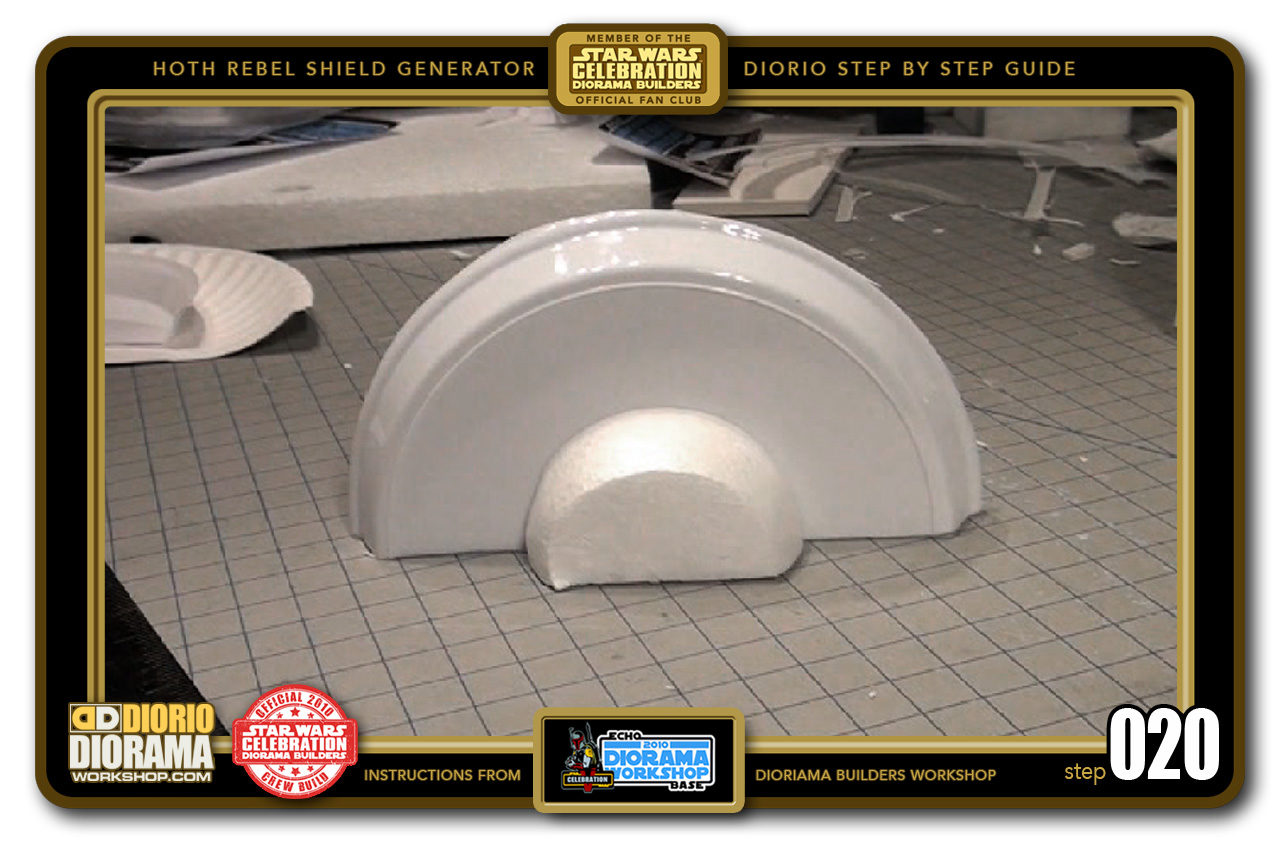
- STEP 020 > Put aside and let the glue cool down.


.
Did you already build this Diorama ? At home or at our Star Wars Celebration Diorama Builders workshop ? Would you like to show it in the site’s GALLERY VISITORS DIORAMAS section, YES ? That is Awesome !!! You can find out all the details on how to email me your photos on the VISITORS SUBMISSIONS INFO page … When I get your photos, I will create your very own page just like this one. You may not realize it but work does inspire others to join in the fun of making Action Figure Dioramas.
.
NOT FOR RESALE ALL Decals, tutorials and artwork are ©FrankDiorio (dioramaworkshop.com) and offered FOR FREE to the fans – that would be you ? so you can build and display my diorama designs in your very own home. I realize I cannot control what one does with my graphics once I place them on the web, I can only ask you as one fan to another, please respect the artist and do not be that jerk who uses my designs and tutorials to build a copy of my work only to sell it on EBAY or trade/sale groups and forums. Thank You. Frank.
.
.
If you have a facebook account, why not join the Official Diorama Builders Fan Club today, simply click the logo link below.
 .
.
Catch up with fellow visitors and exchange stories, read cool interviews with the crew, exchange photos, fun surprises and grab some FAN ONLY merchandise next year at actual future conventions ?
.
©2018 Frank Diorio DioramaWorkshop.Com
.
IF YOU LIKE WHAT YOU SEE, PLEASE SHARE WITH YOUR FRIENDS
USING THE SOCIAL MEDIA BUTTONS BELOW