


-
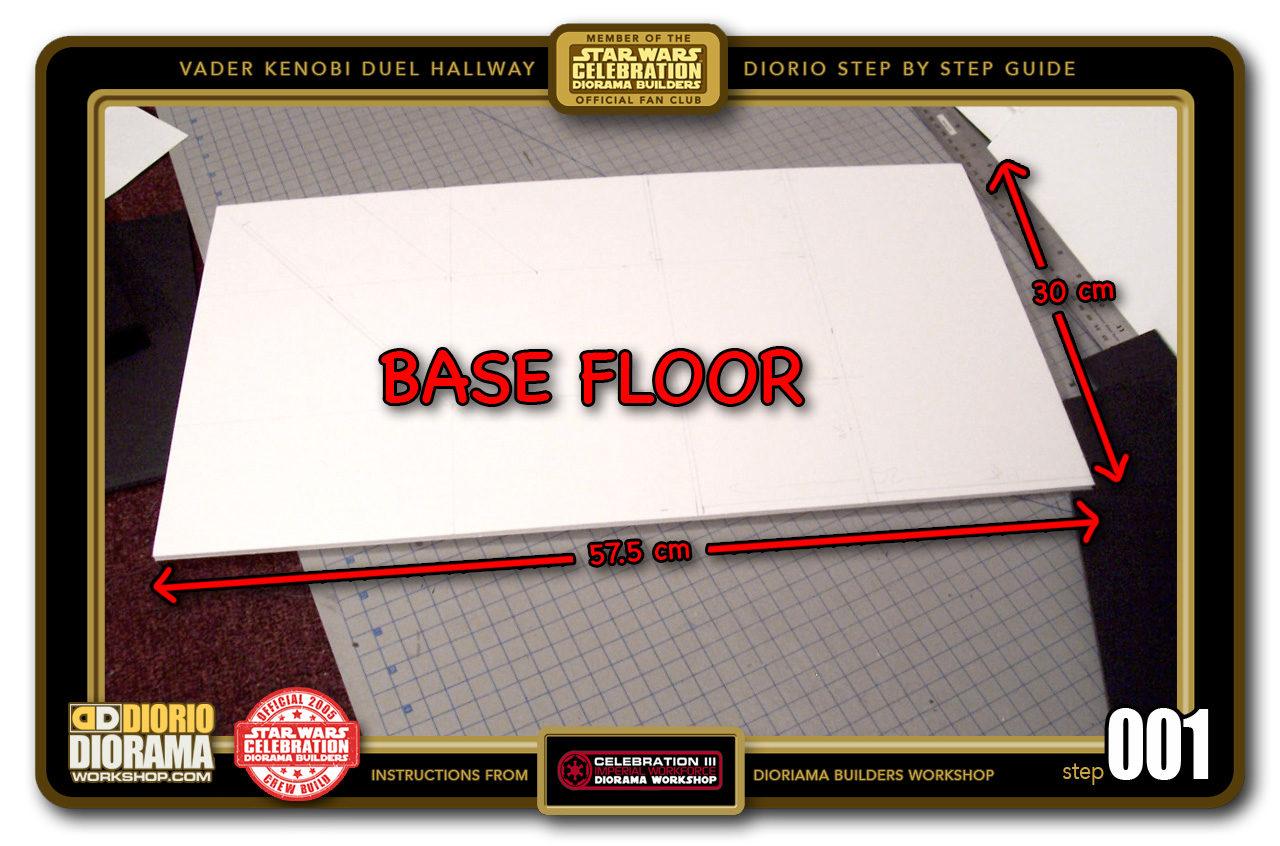
- STEP 001 > Let's get started with the floor base. Base Foamcore piece for this room is 30cm X 57.5cm.

-
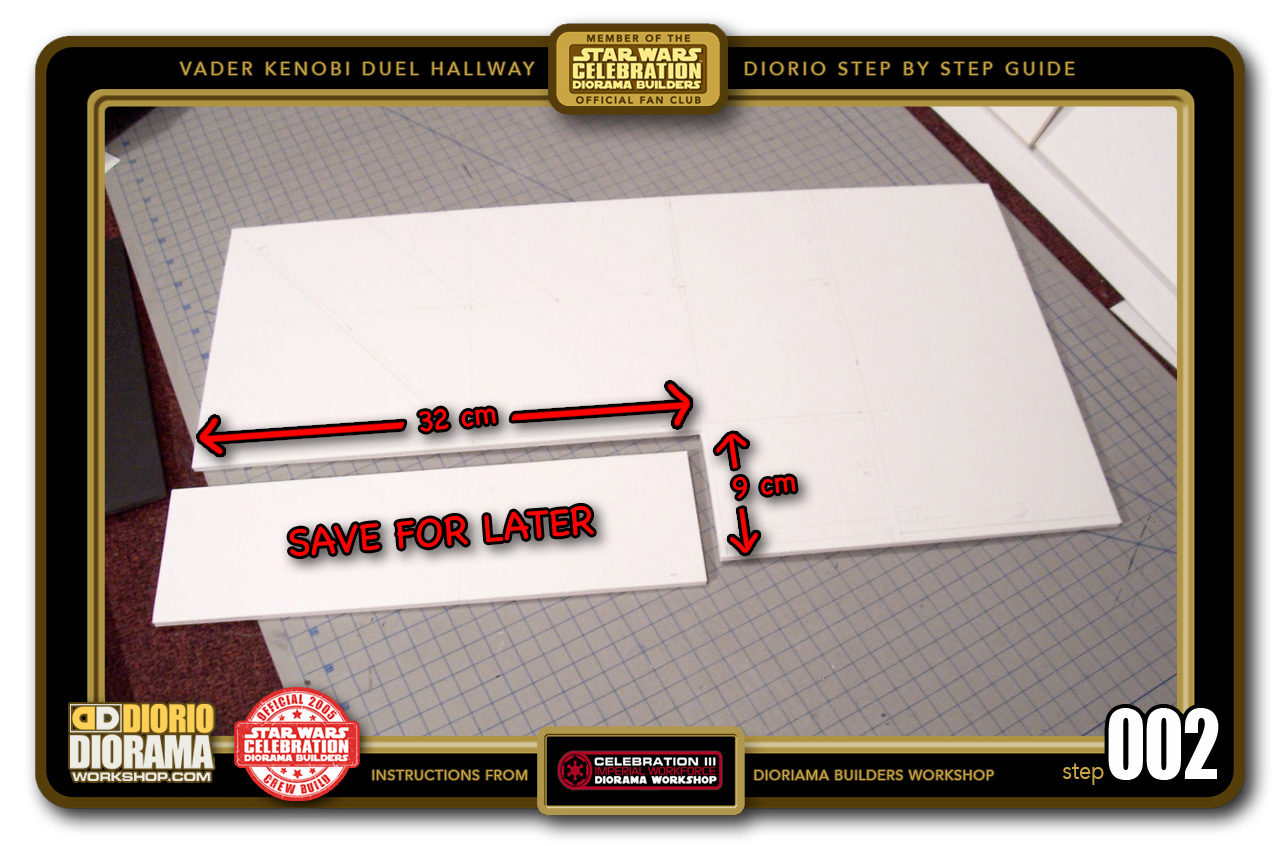
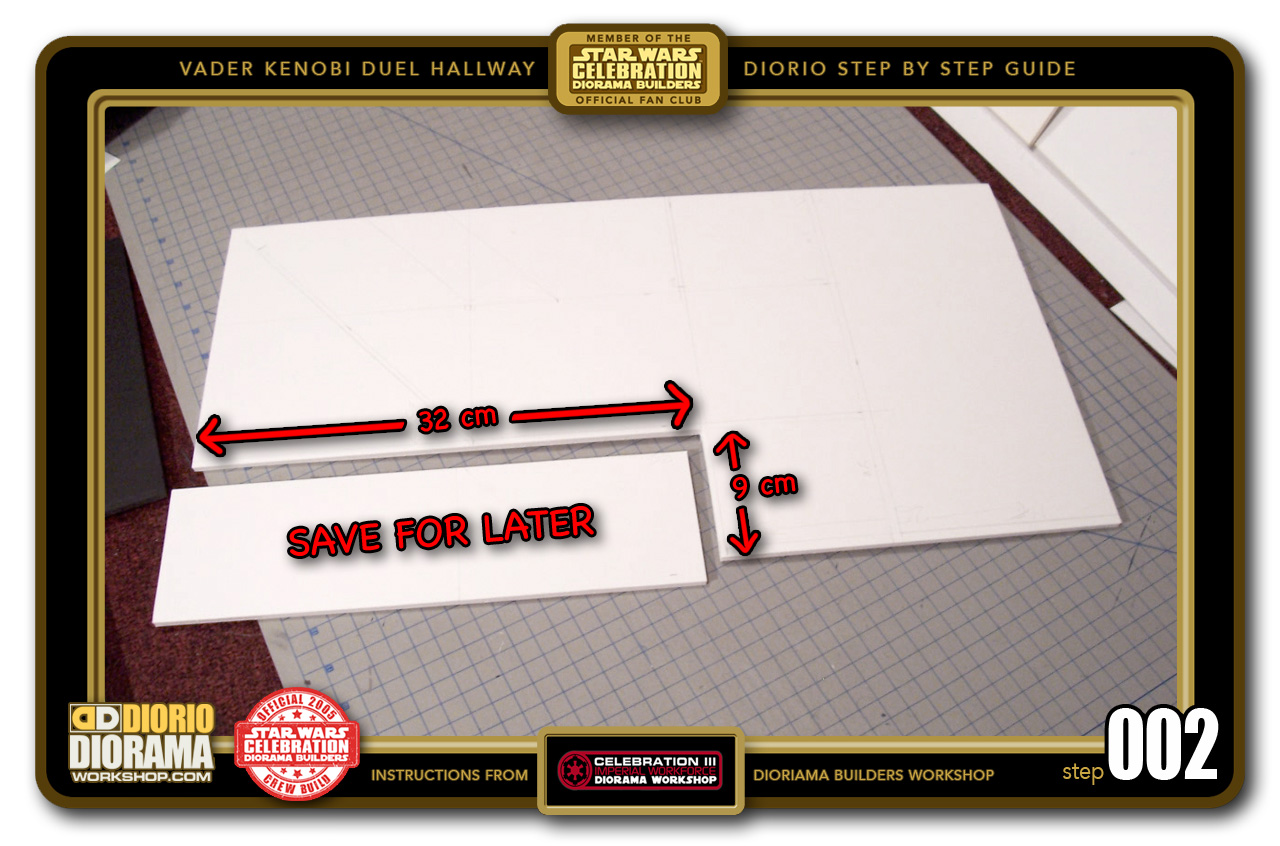
- STEP 002 > In one corner measure out 9cm at the Top and 32cm down. Cut out this piece, you can save it for other rooms.
-

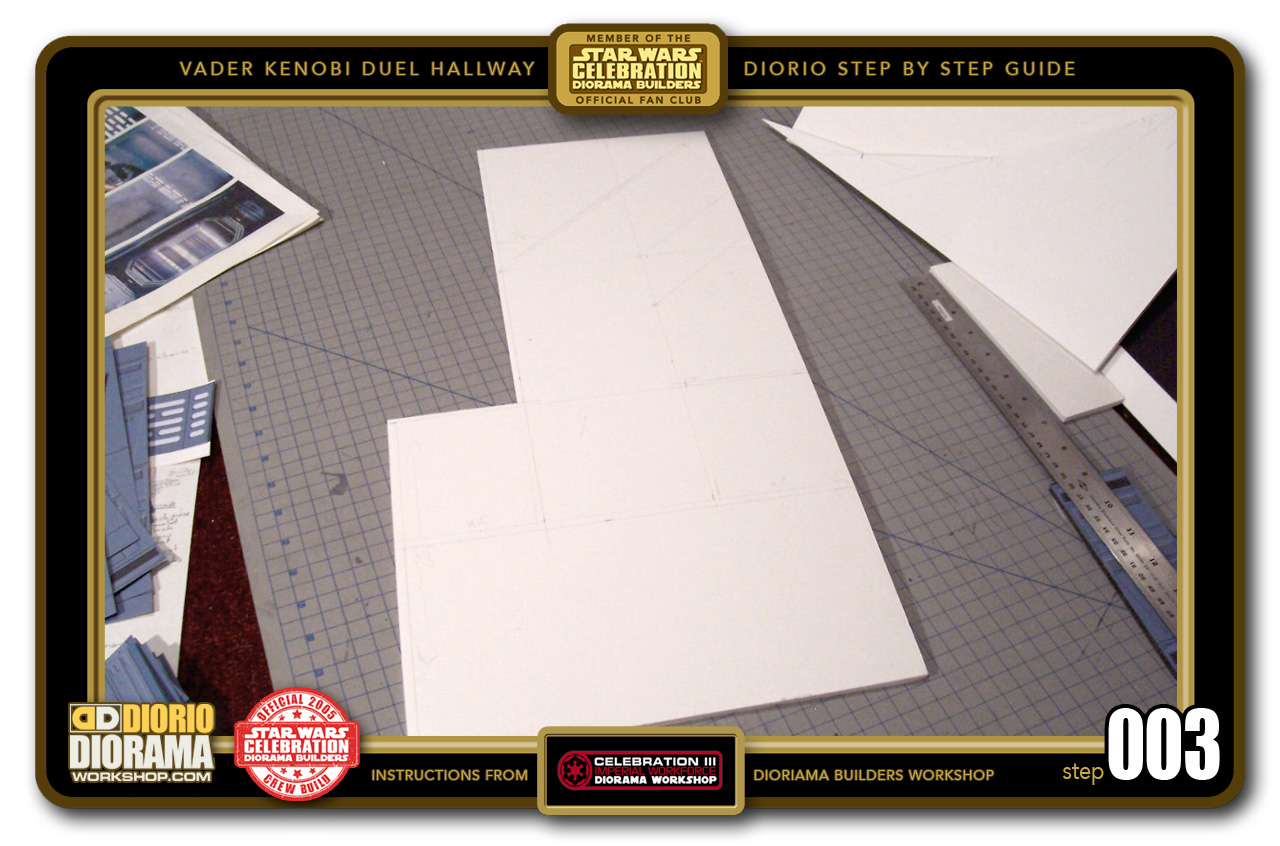
- STEP 003 > This is the shape of your hallway based on the movie set. The bottom, more wide side is the front of the diorama.
-
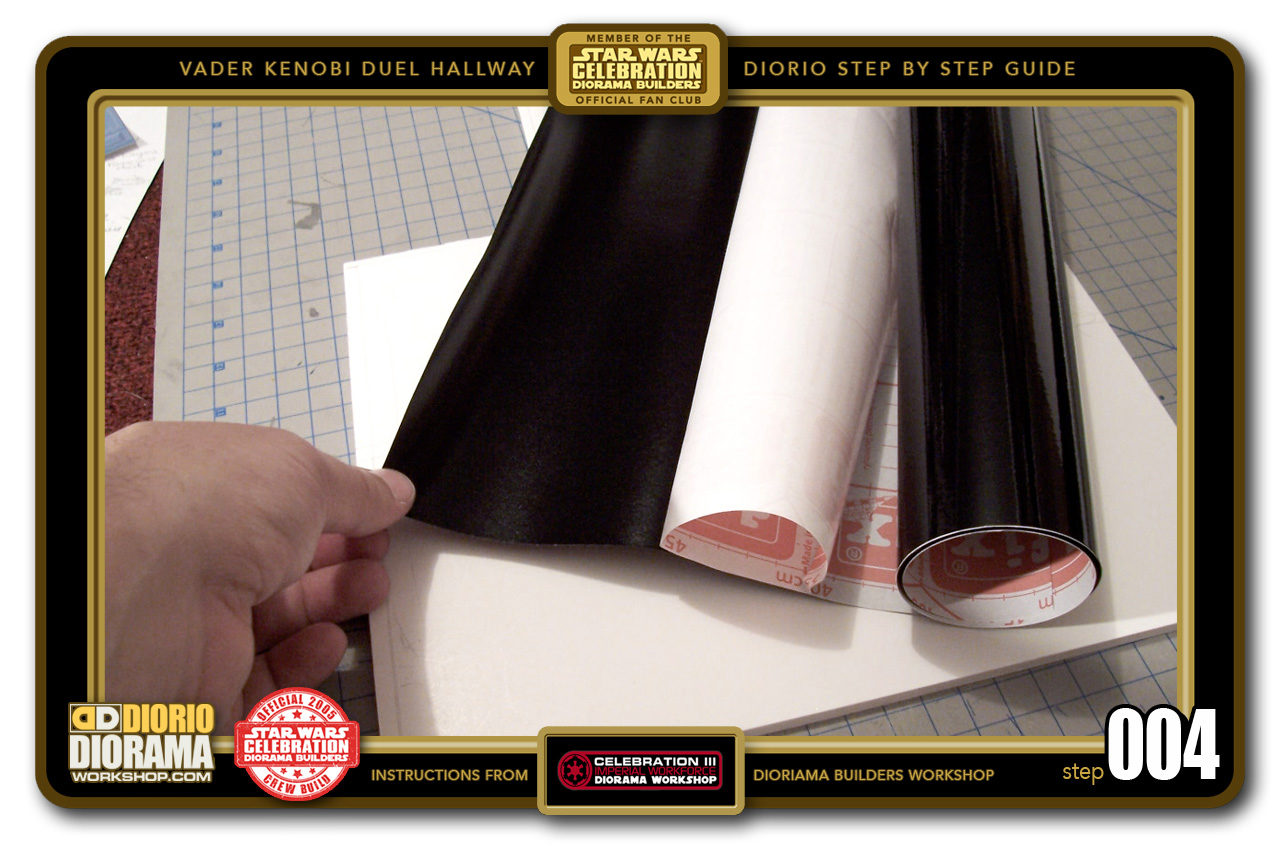
- STEP 004 > Time for the MacTac / DC FIX. On LARGE surfaces it is a little trickier to apply the vinyl without scrapping your Foamcore. So I will try to explain how to go about it properly... Start by peeling back about 3 inches all the way across the roll. Fold the Wax paper only underneath it, so it will not be in the way when you flip the MacTac DC FIX right side up for application.

-

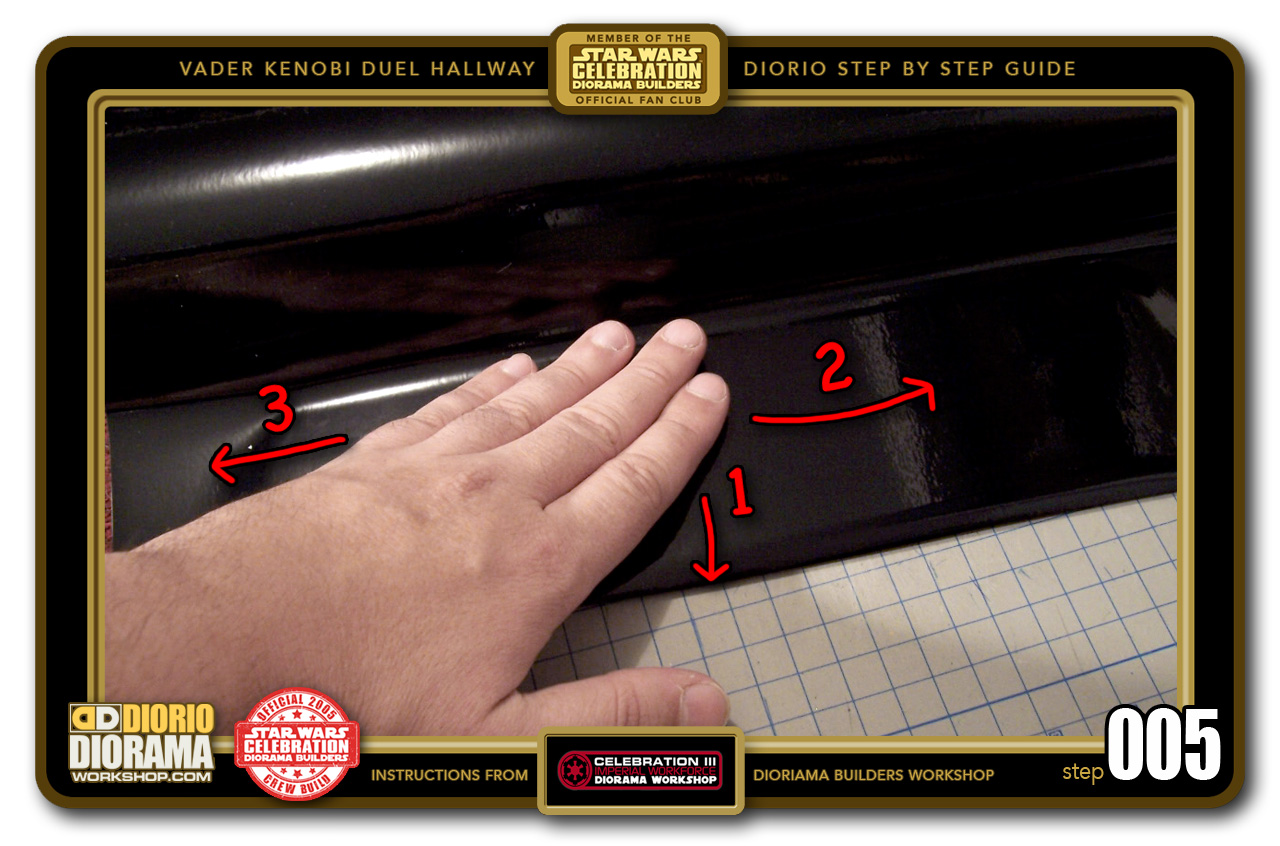
- STEP 005 > Align the MacTac DC FIX with the bottom of the floor piece, make sure it sticks out a little - we can trim later. Now 1) press down in the center and with your fingers, 2) wipe towards the right 3) return your fingers to the center and press towards the left. This removes 90% of the air bubbles and will get you off to a smooth start and more important, secure a big enough piece to allow you to continue, "peel and swipe" technique.
-
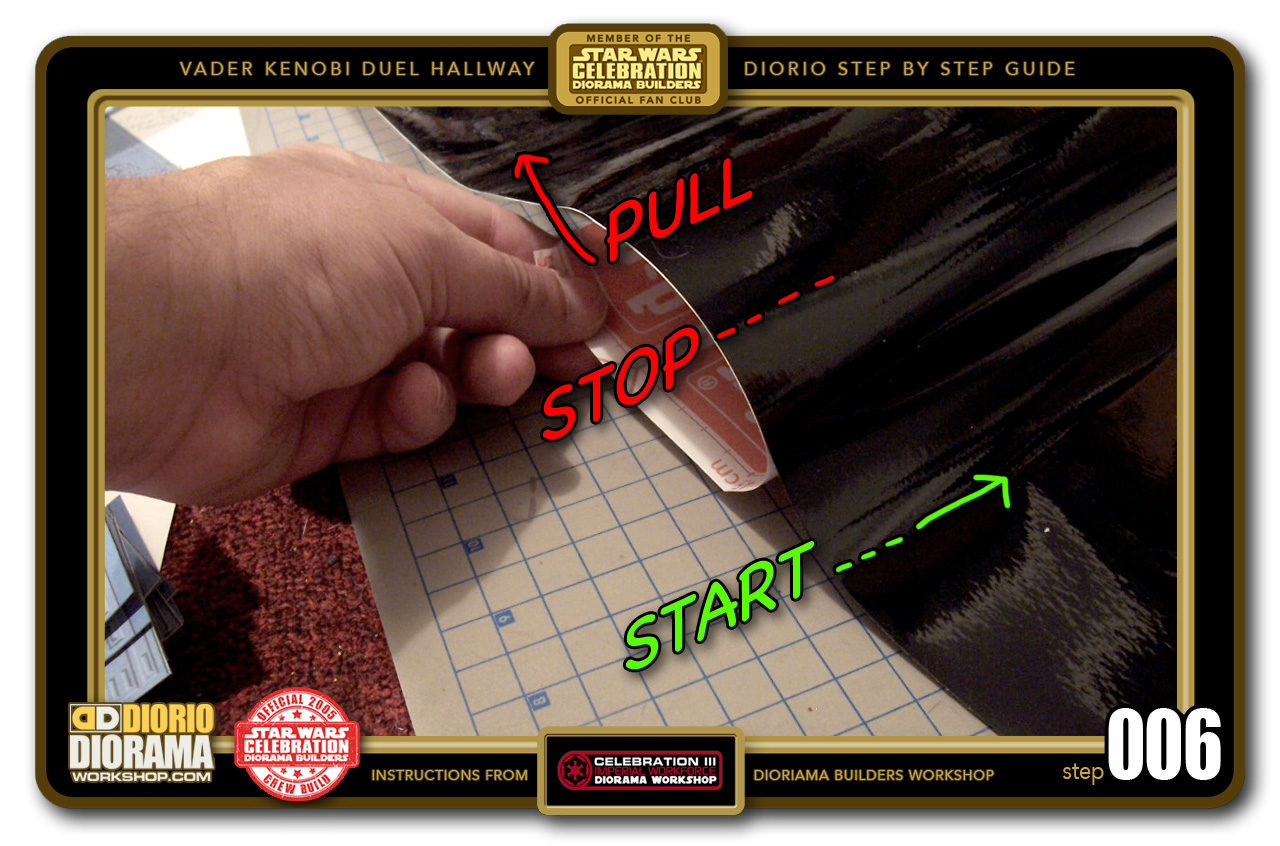
- STEP 006 > Now gently pull on the wax paper again to expose about 5 or 6 more inches. As you pull, LIFT so the sticky surface doesn't attach itself yet to the foamcore prematurely.

-

- STEP 007 > As you are pulling the wax paper with one hand, press along and down the center of the MacTac DC FIX using a scrap square piece of foamcore. This will assure that the vinyl fits smoothly onto the foamcore surface with minimal folds and bubbles.
-

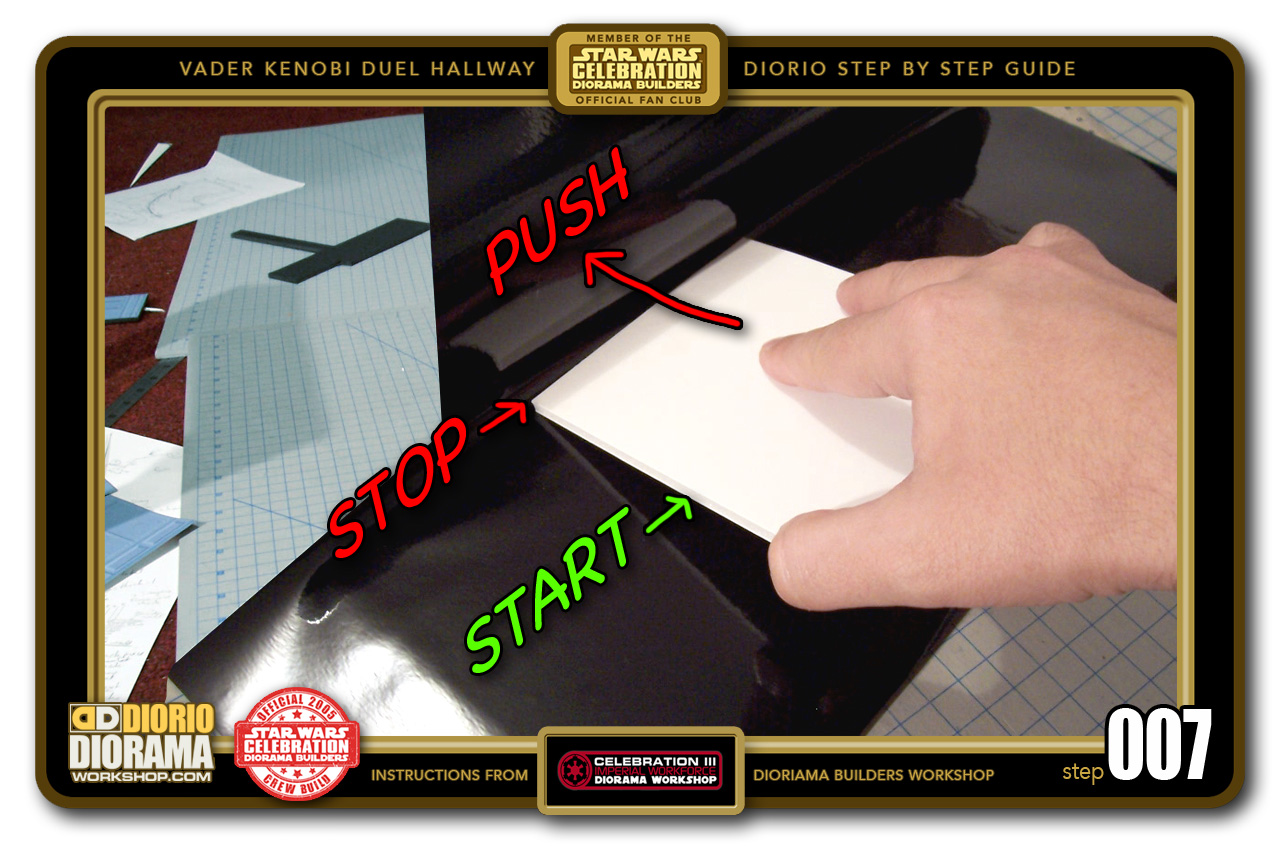
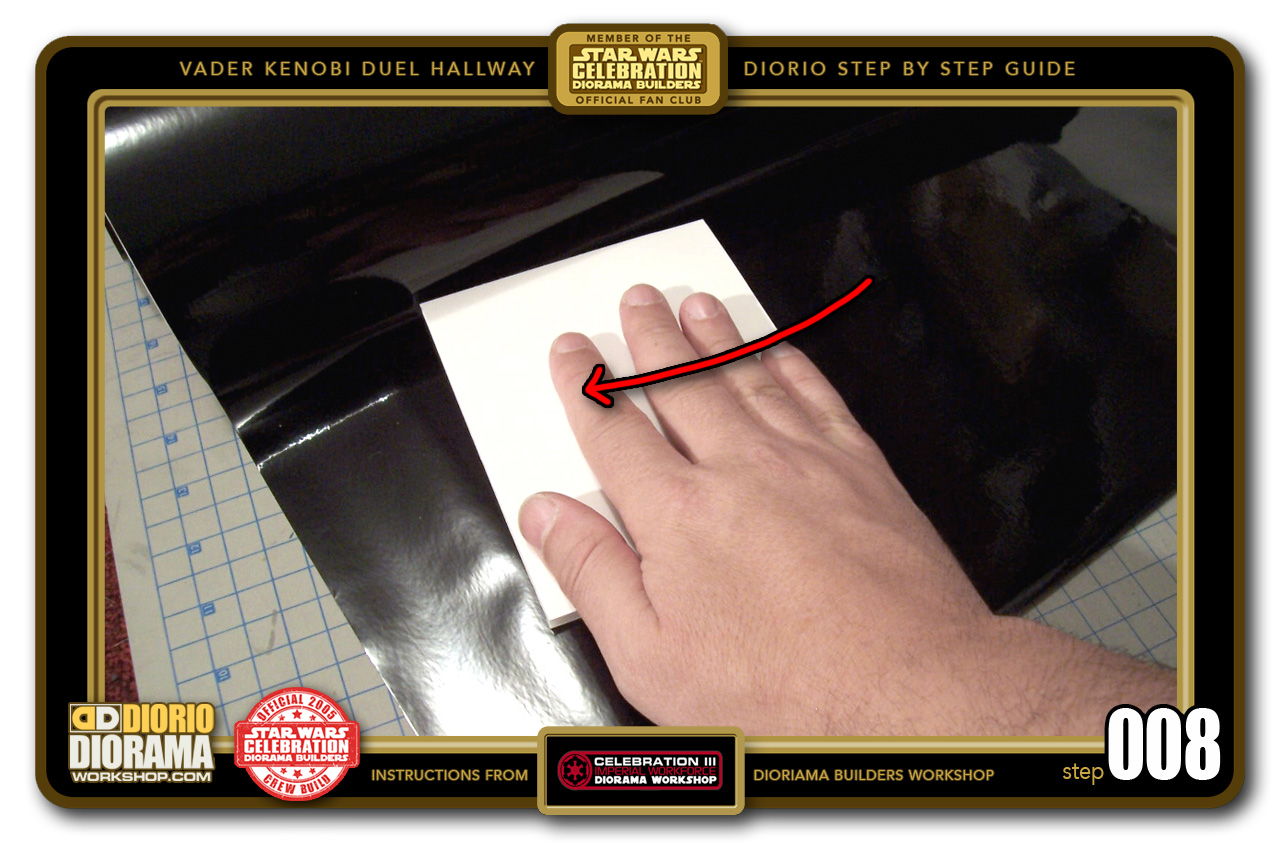
- STEP 008 > After pulling 5 or 6 inches, stop, and press outward with the scrap foamcore towards the left removing remaining bubbles and making a smooth flat contact with the floor in the process.
-

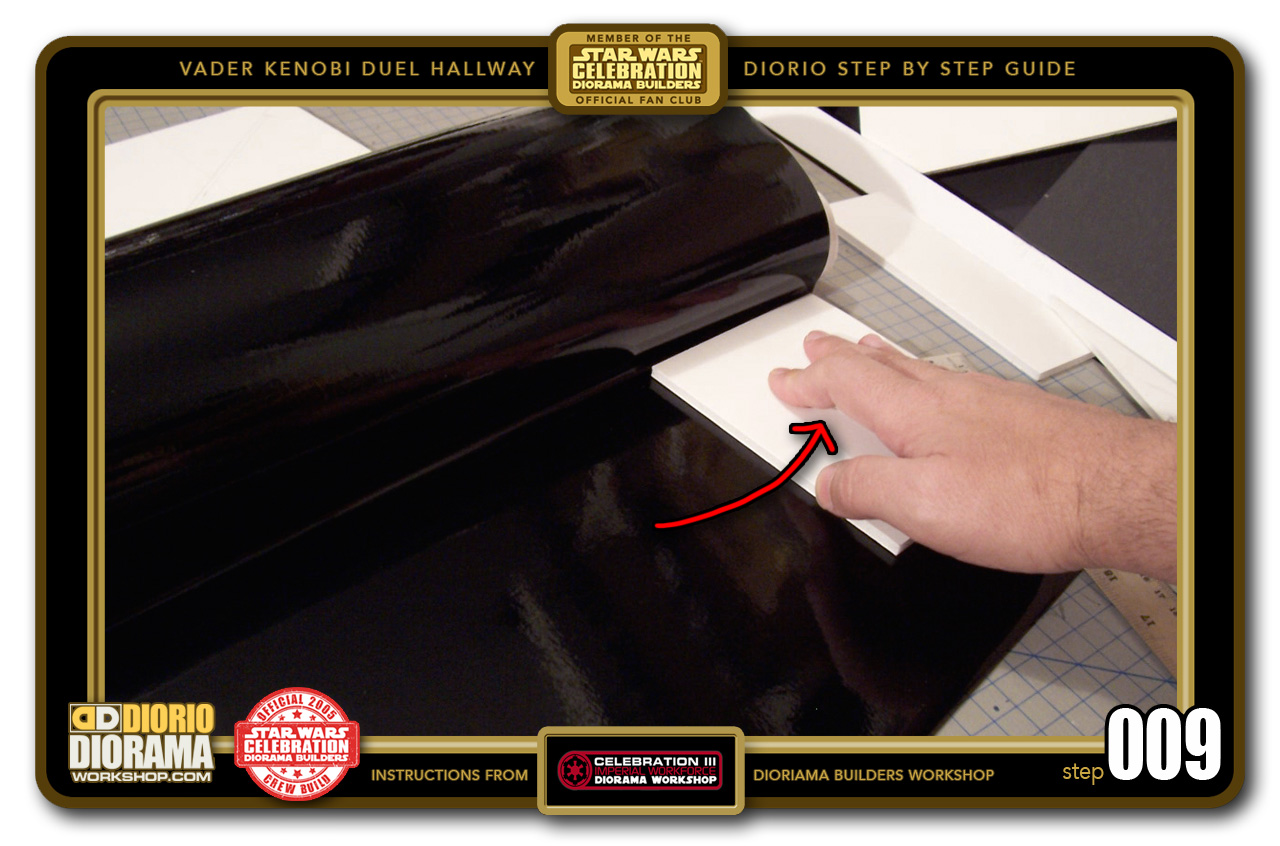
- STEP 009 > Repeat the same motion this time from the center towards the right until the entire surface is secured flat in place. Now pull another 5-6 inches of the wax paper and repeat steps 006, 007 and 008 until the entire foamcore floor has been covered.
-
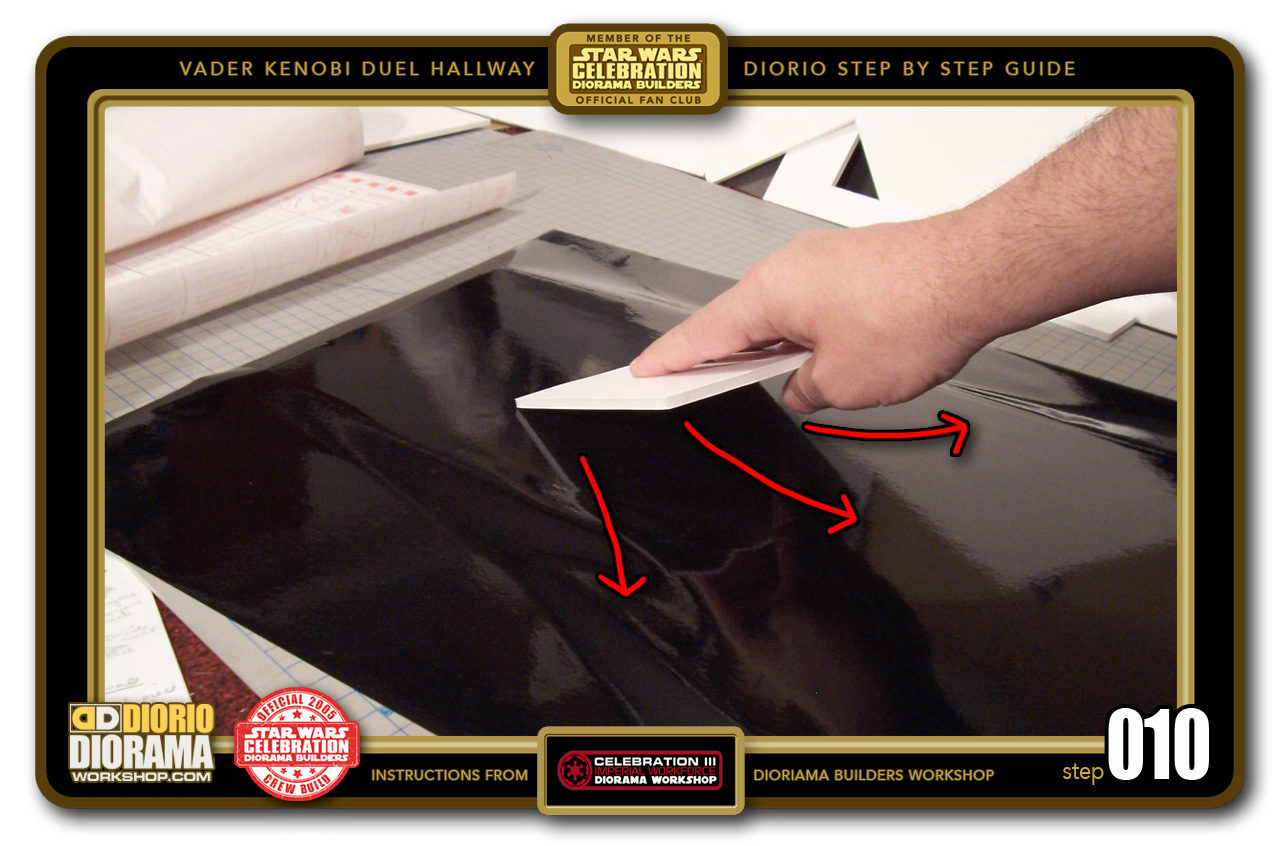
- STEP 010 > Now angle your scrap foamcore and wipe it downwards across the floor to remove any last folds and bubbles, that may have occurred during the MacTac DC FIX application.

-
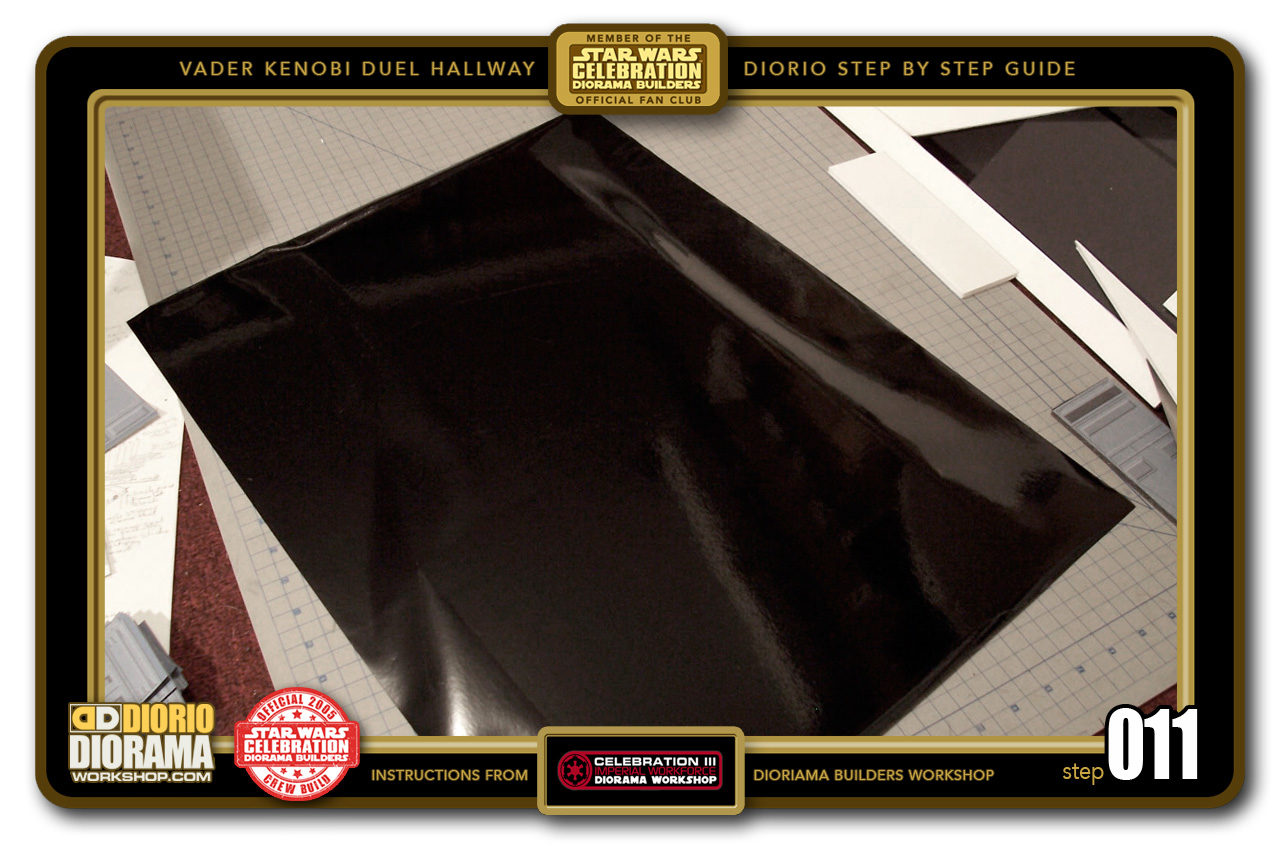
- STEP 011 > You now have a perfect glossy floor ready for some trimming 😀

-

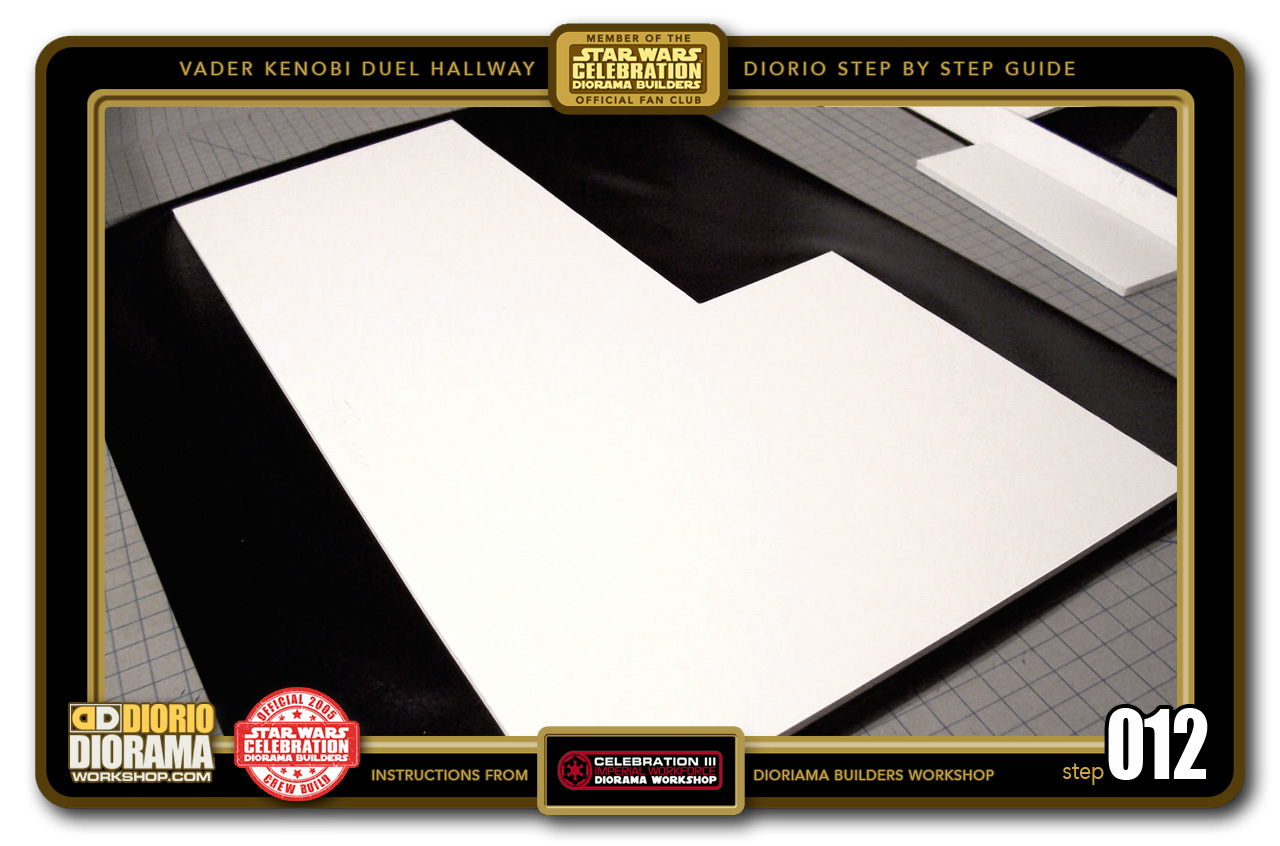
- STEP 012 > Flip over the floor base exposing the excess sticky side of the MacTac DC FIX vinyl.
-
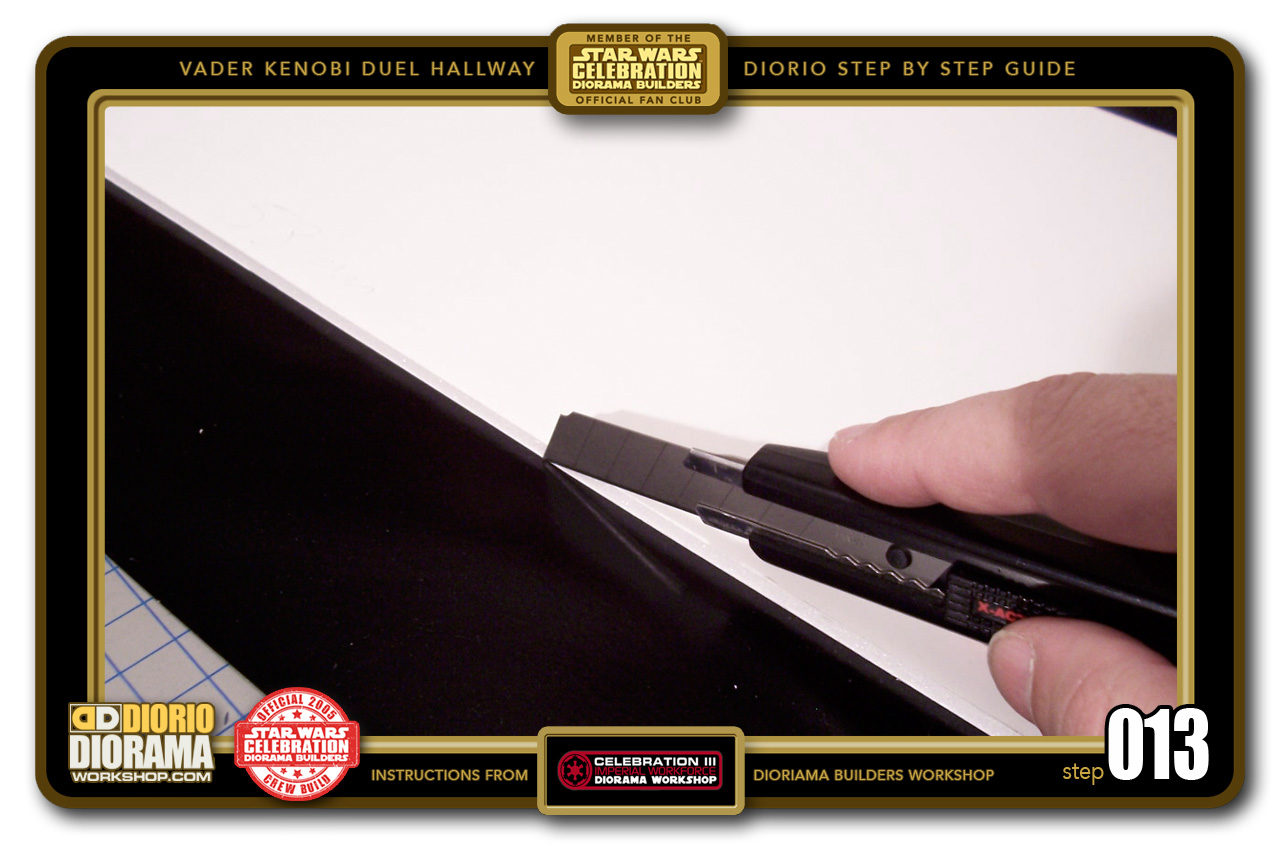
- STEP 013 > Using a NEW Xacto blade to prevent tearing, slowly go all the way around the floor cutting off all the excess MacTac DC FIX that you see sticking out past the foamcore shape.

-
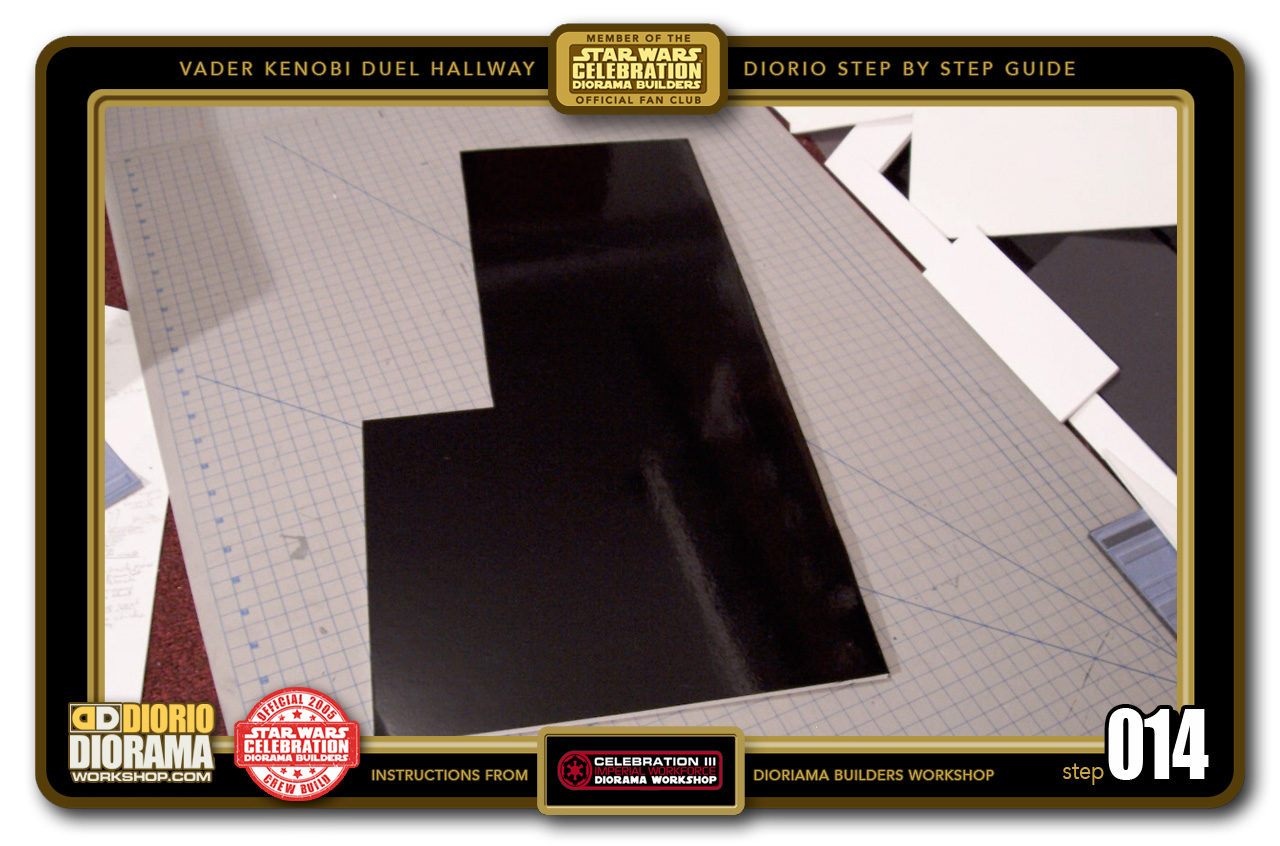
- STEP 014 > Once you pull off all excess and flip the floor back to it's proper side, there you have it. Darth Vader and Obi-Wan's Jedi Duel floor is all ready for the wall installations 🙂

-
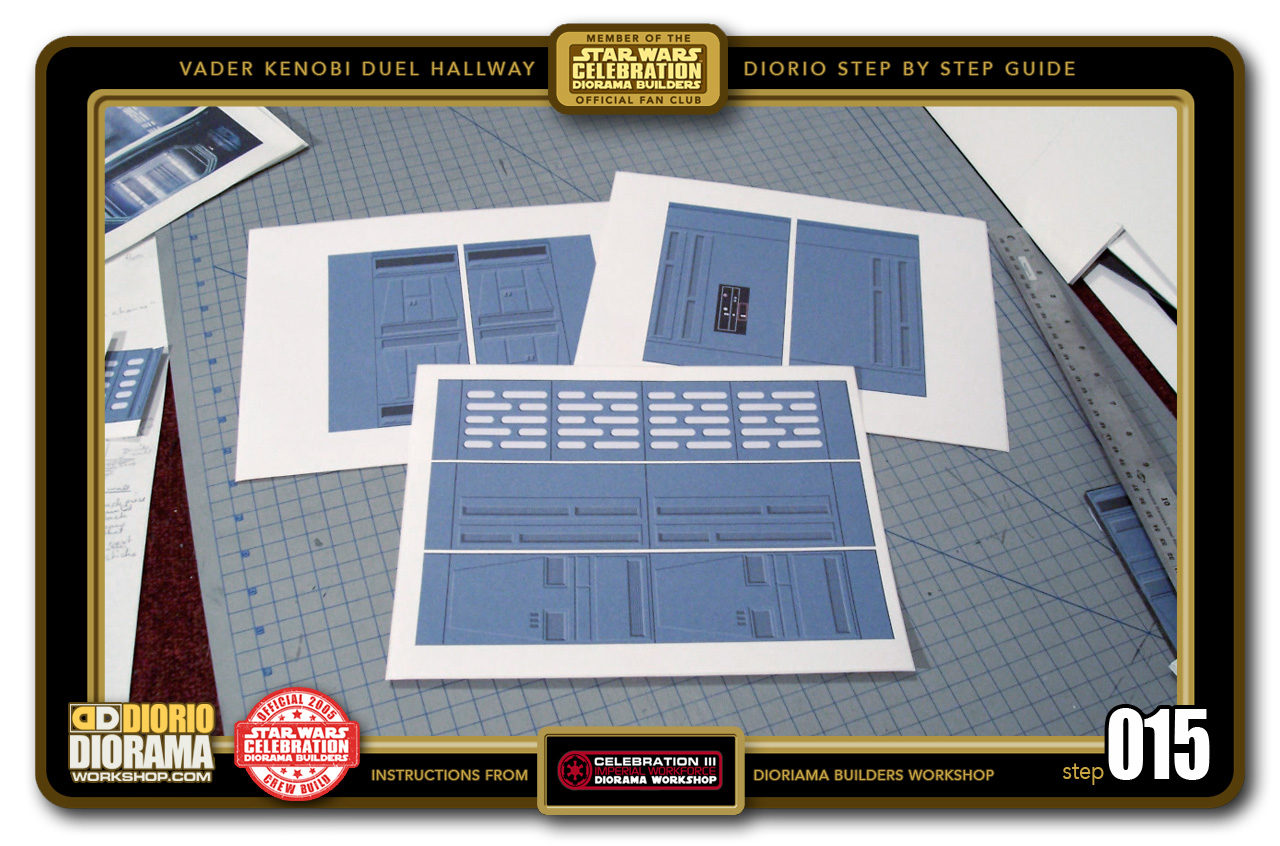
- STEP 015 > Print out your VADER KENOVI DUEL Decal PDF from the Tutorials Star Wars or Speed Index menu. In the photo were the Star Wars Celebration III prototype textures, yours will have the 2018 frame but the exact same images inside. I print mine on Avery Full Page Letter Size Label sheets. This prevents the need for glue. Just peel and apply 🙂 You can of course print on regular paper and use Glue Stick to apply your decals NEVER EVER USE HOT GLUE !!! It will harden too fast and create HUGE ugly bumps.

-
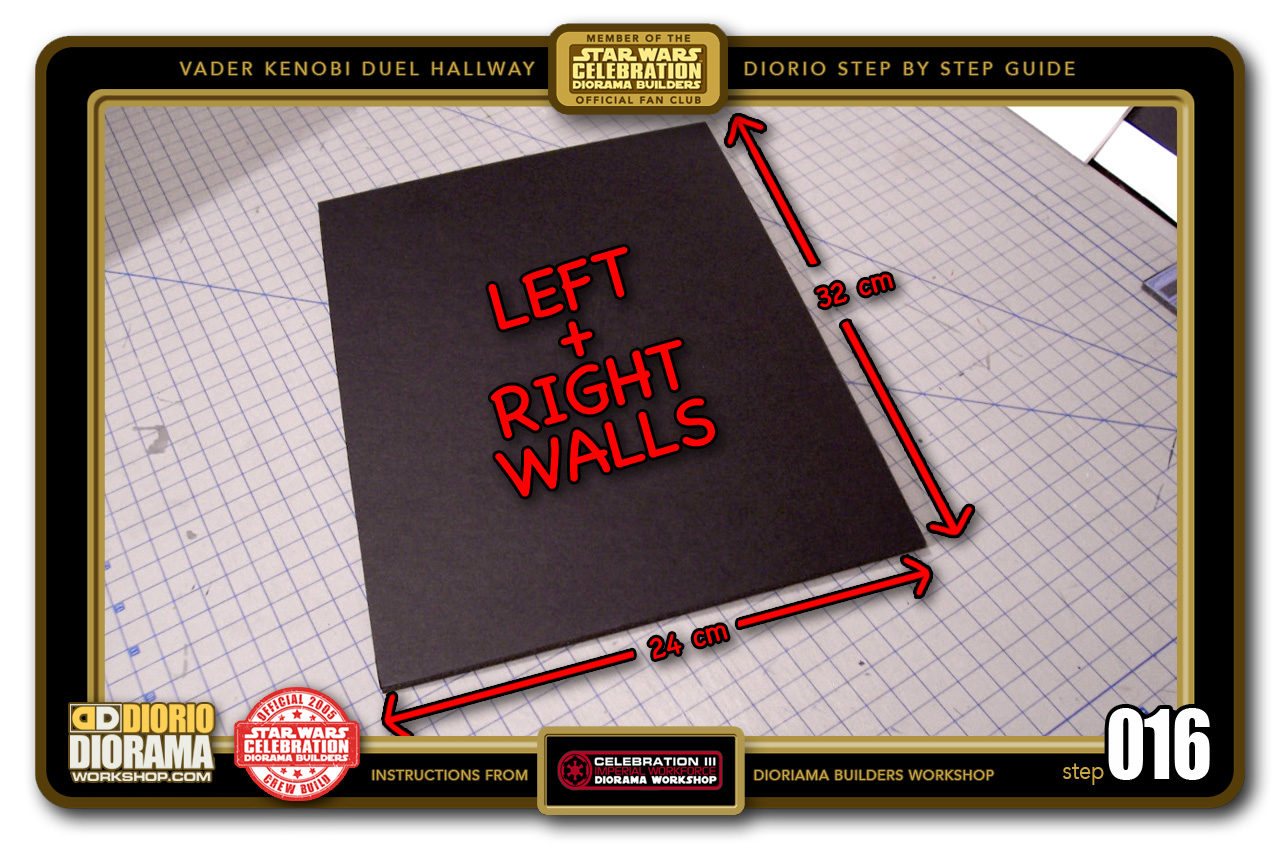
- STEP 016 > The LEFT WALL: Cut out 32cm X 24cm BLACK foamcore. Black lines between decals look much nicer for the Death Star than white lines. If you can't find black in your area, white is ok, you can paint it with latex blueish grey before applying the decals to prevent seeing bright white surface lines if your decals don't line up perfectly side by side.

-
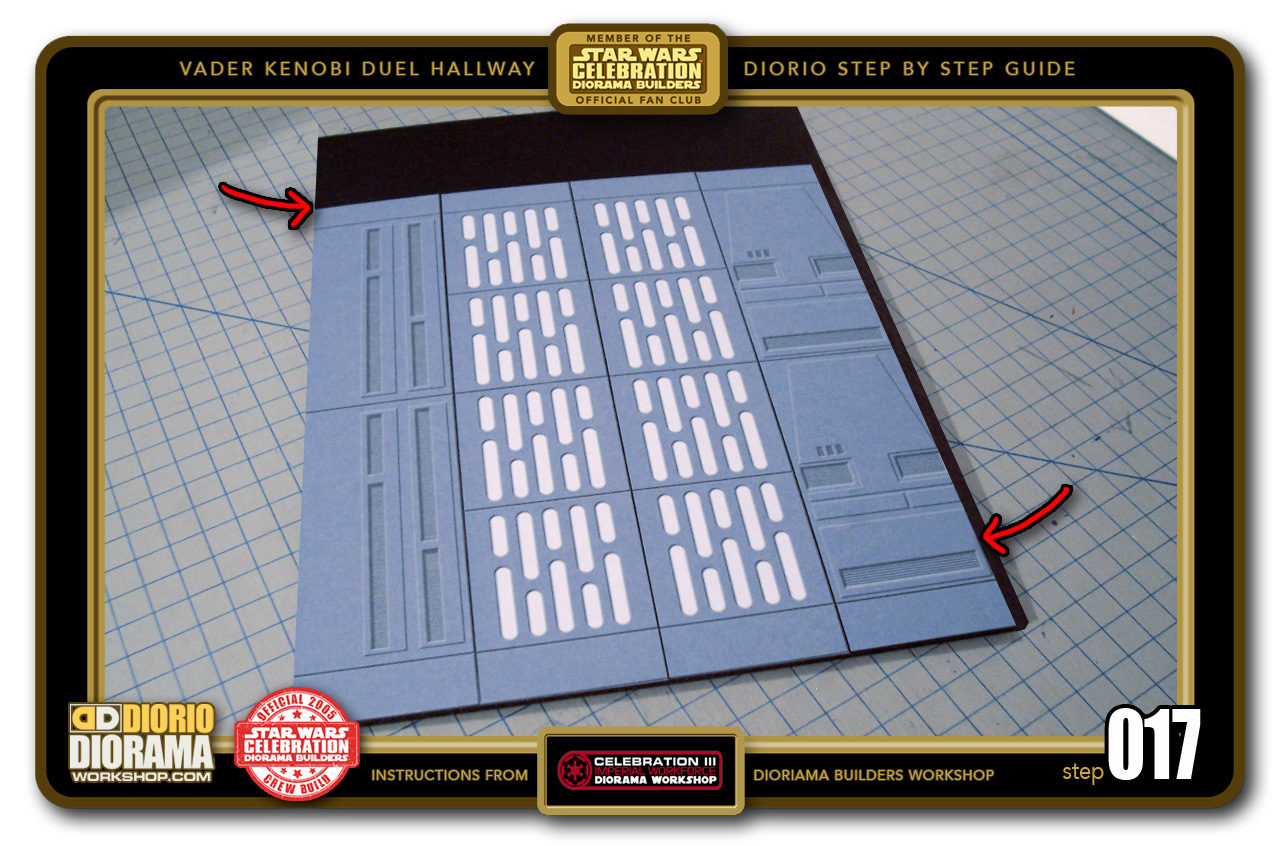
- STEP 017 > Apply one side at a time, peel the wax paper on the back of the label sheets and apply the LEFT WALL SIDE 1 first. Make sure it is lined up FLUSH with the left side of your wall (Top red arrow) Then align and apply the LEFT WALL SIDE 2 against the first decal. It is NORMAL to see a black gap all along the right side of the wall (bottom red arrow). This is the THICKNESS of a foamcore sheet, and will be covered when you attach your WALL A piece later on.

-
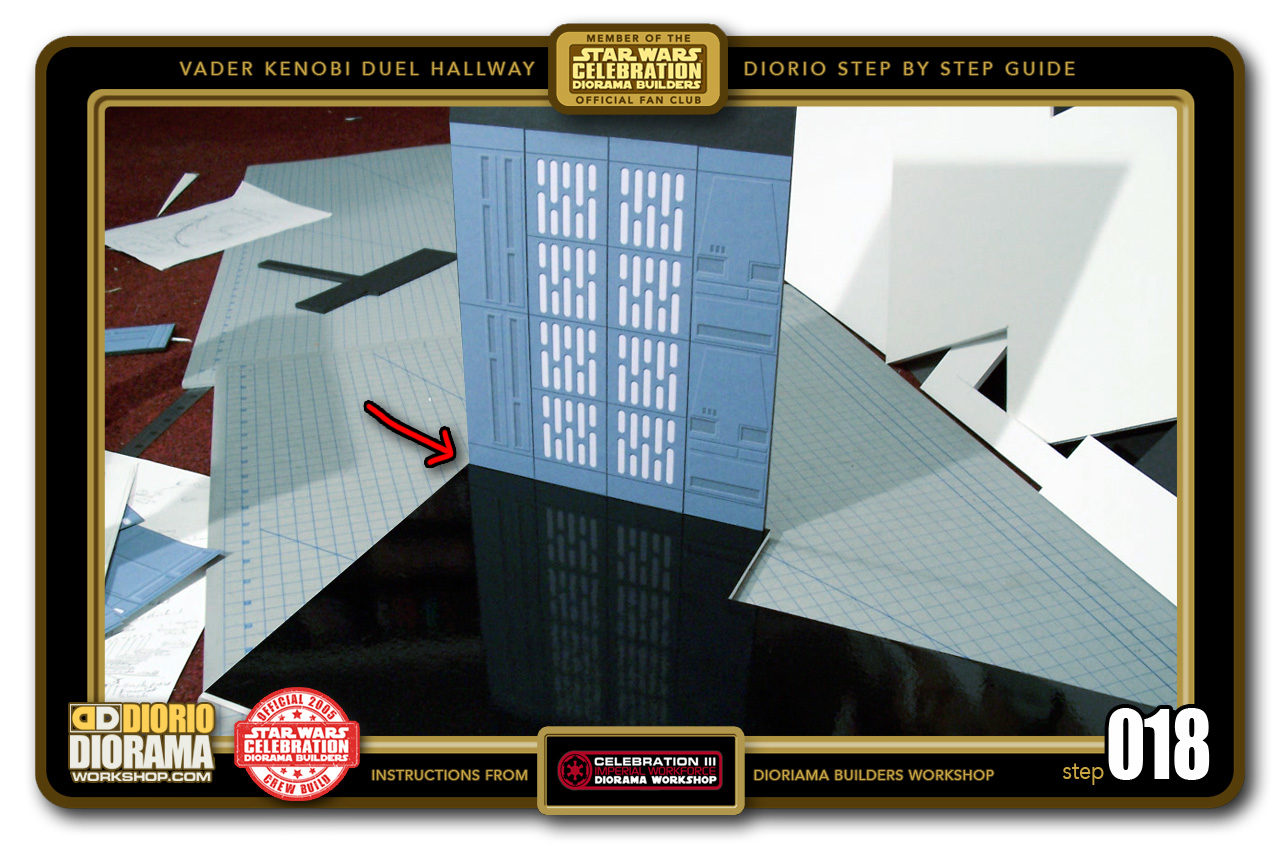
- STEP 018 > Take out your hot glue gun and attach the LEFT WALL to the floor base. Make sure to align the front FLUSH with the front left corner (red arrow)

-

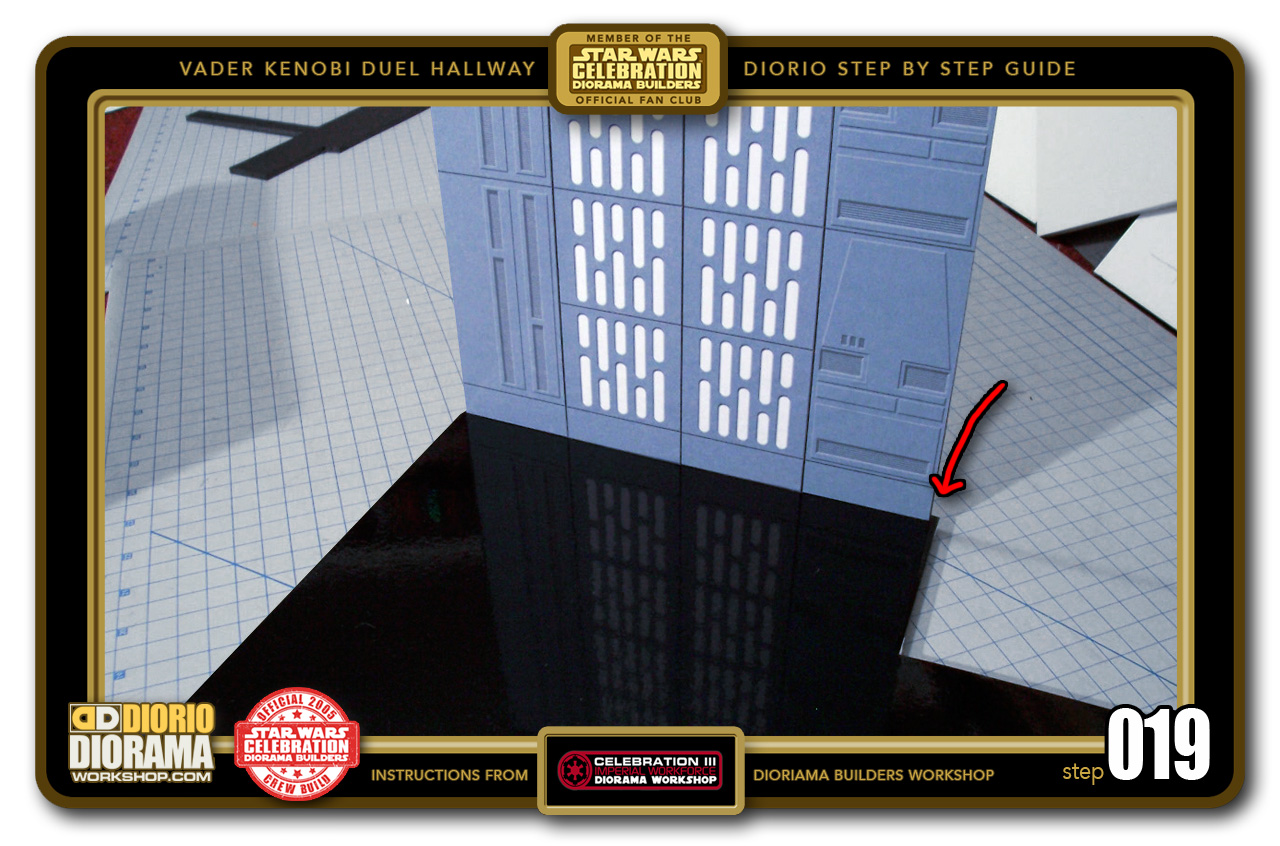
- STEP 019 > We want to keep a small gap on the right side of the wall (see the red arrow) to perfectly fit the next WALL A corner piece.
-
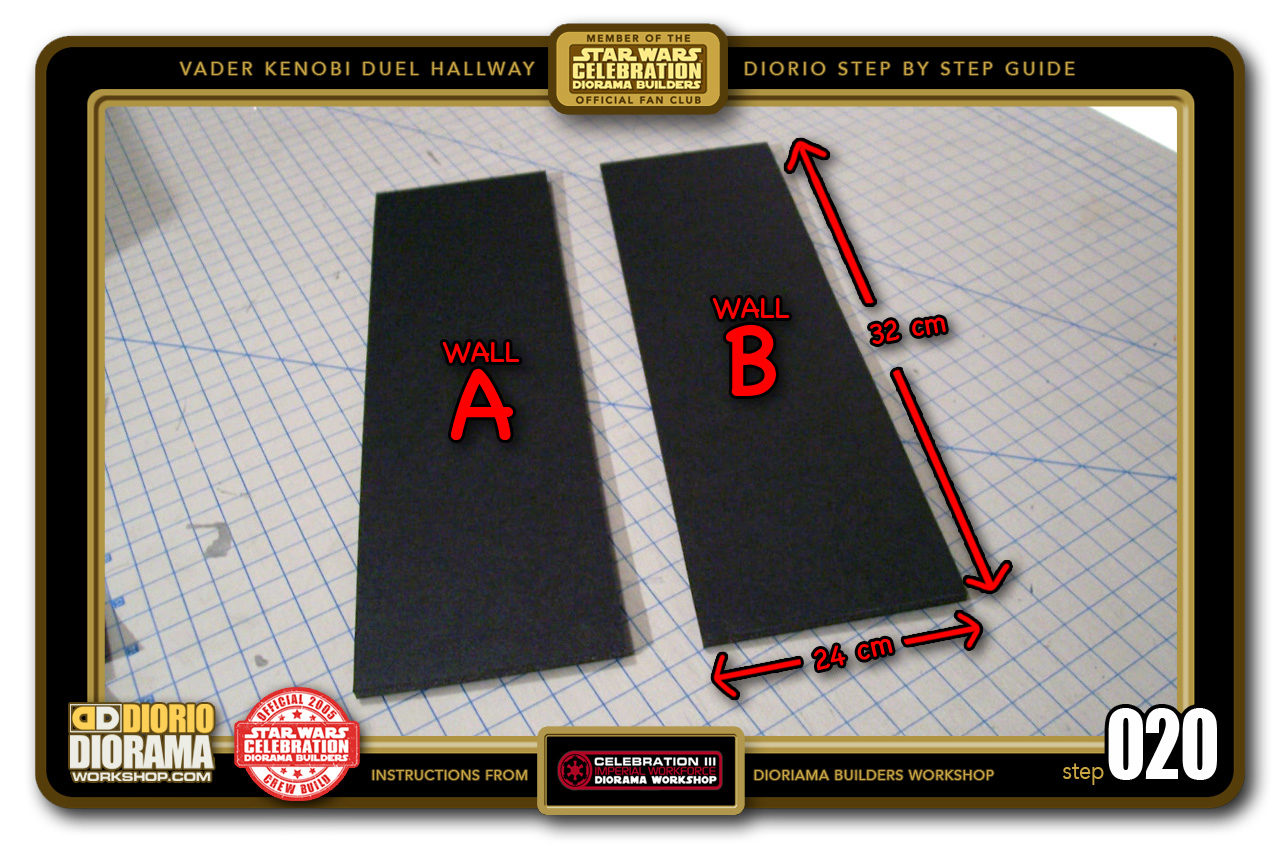
- STEP 020 > Next up, cut out 2 identical pieces of 9.5cm X 32cm rectangles. Best to use black foamcore if you have it to better hide the Decal connection seams.


.
Did you already build this Diorama ? At home or at our Star Wars Celebration Diorama Builders workshop ? Would you like to show it in the site’s GALLERY VISITORS DIORAMAS section, YES ? That is Awesome !!! You can find out all the details on how to email me your photos on the VISITORS SUBMISSIONS INFO page … When I get your photos, I will create your very own page just like this one. You may not realize it but work does inspire others to join in the fun of making Action Figure Dioramas.
.
NOT FOR RESALE ALL Decals, tutorials and artwork are ©FrankDiorio (dioramaworkshop.com) and offered FOR FREE to the fans – that would be you ? so you can build and display my diorama designs in your very own home. I realize I cannot control what one does with my graphics once I place them on the web, I can only ask you as one fan to another, please respect the artist and do not be that jerk who uses my designs and tutorials to build a copy of my work only to sell it on EBAY or trade/sale groups and forums. Thank You. Frank.
.
.
If you have a facebook account, why not join the Official Diorama Builders Fan Club today, simply click the logo link below.
 .
.
Catch up with fellow visitors and exchange stories, read cool interviews with the crew, exchange photos, fun surprises and grab some FAN ONLY merchandise next year at actual future conventions ?
.
©2018 Frank Diorio DioramaWorkshop.Com
.
IF YOU LIKE WHAT YOU SEE, PLEASE SHARE WITH YOUR FRIENDS
USING THE SOCIAL MEDIA BUTTONS BELOW