


-

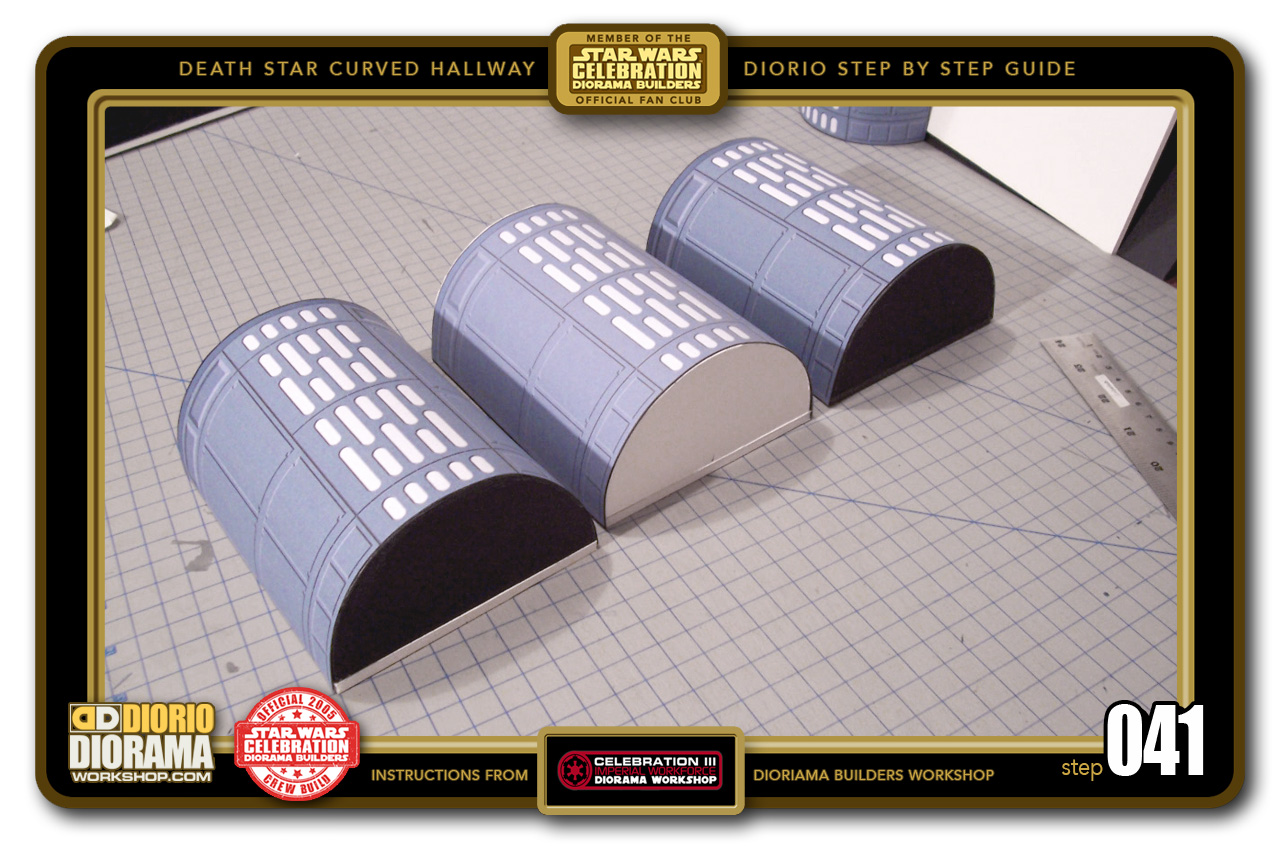
- STEP 041 > Print yourself THREE big round wall skins from the Tutorials Star Wars menu Basic hallway panels pdf decals and wrap them around the bases.
-

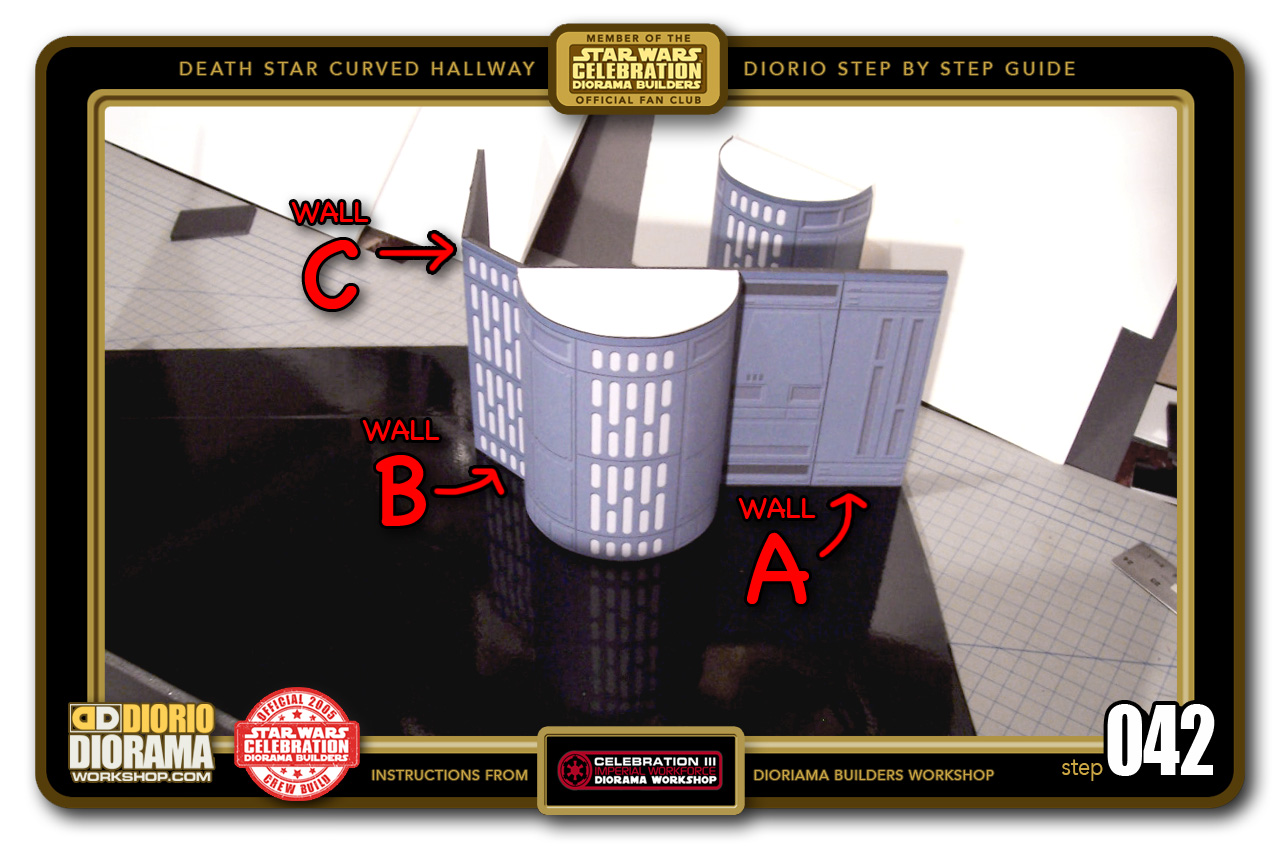
- STEP 042 > Place the FIRST big unit along the blank space on top of the left black space of the "WALL A" panel.
-

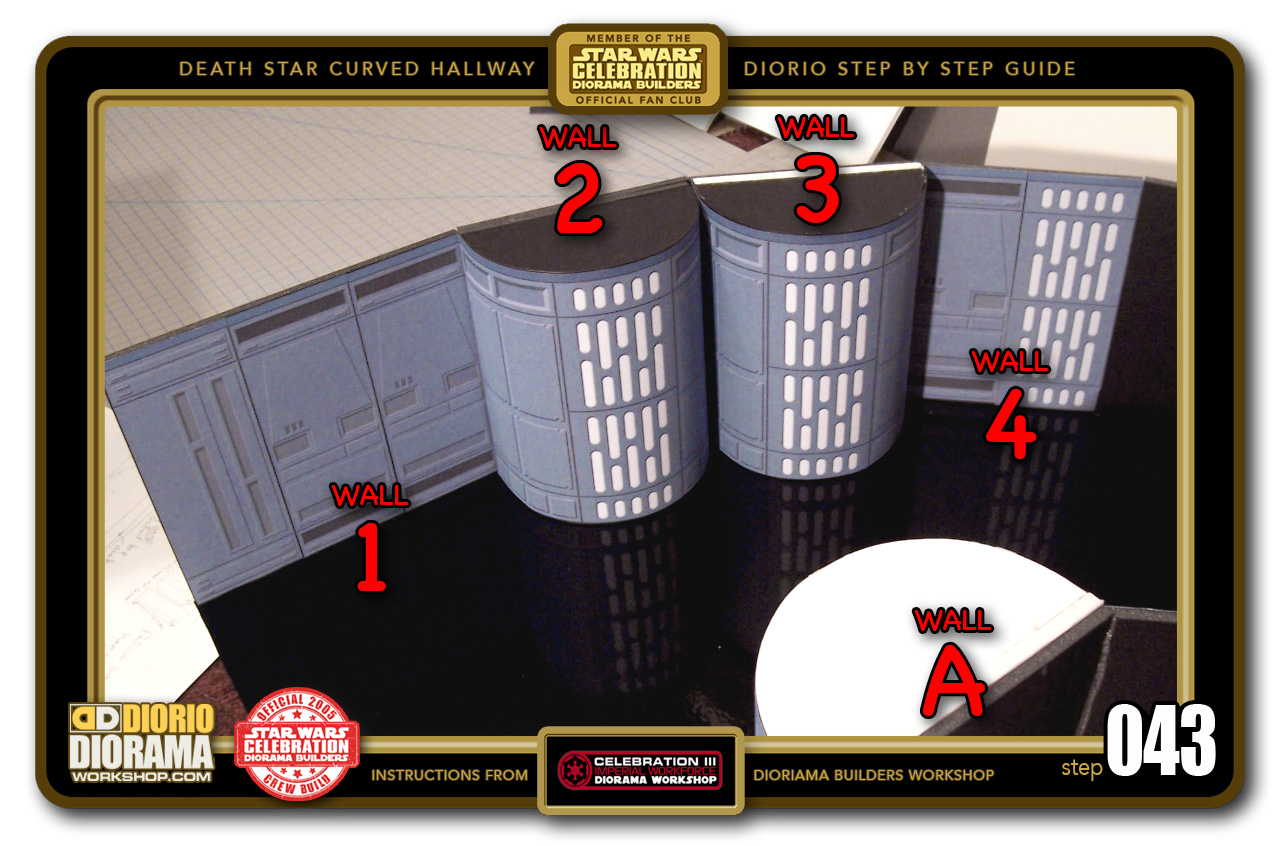
- STEP 043 > Take the TWO remaining big round wall units and place them side by side on top of "WALLS 2 and 3"
-

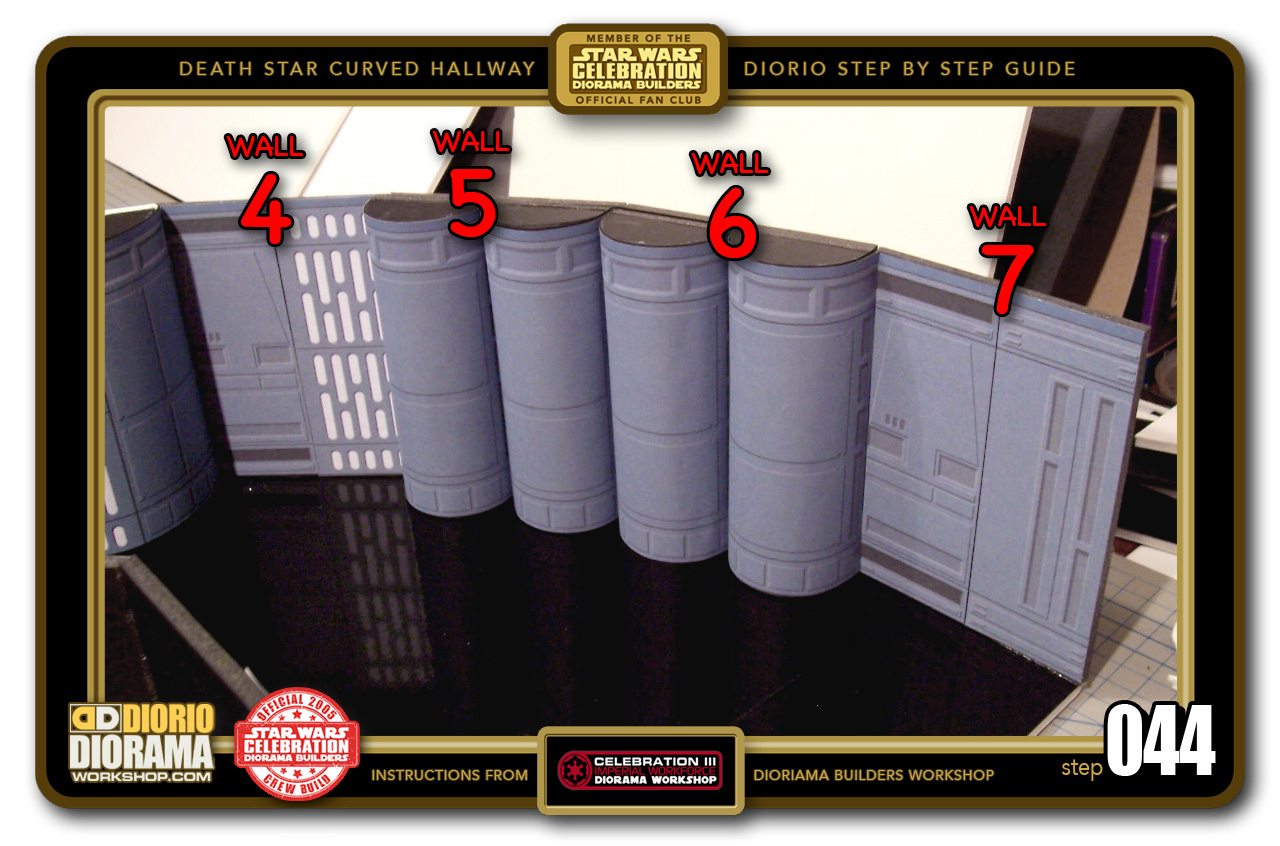
- STEP 044 > Place the FOUR small round wall units side by side (2 per panel) along the remaining blank spaces of "WALLS 5 and 6".
-

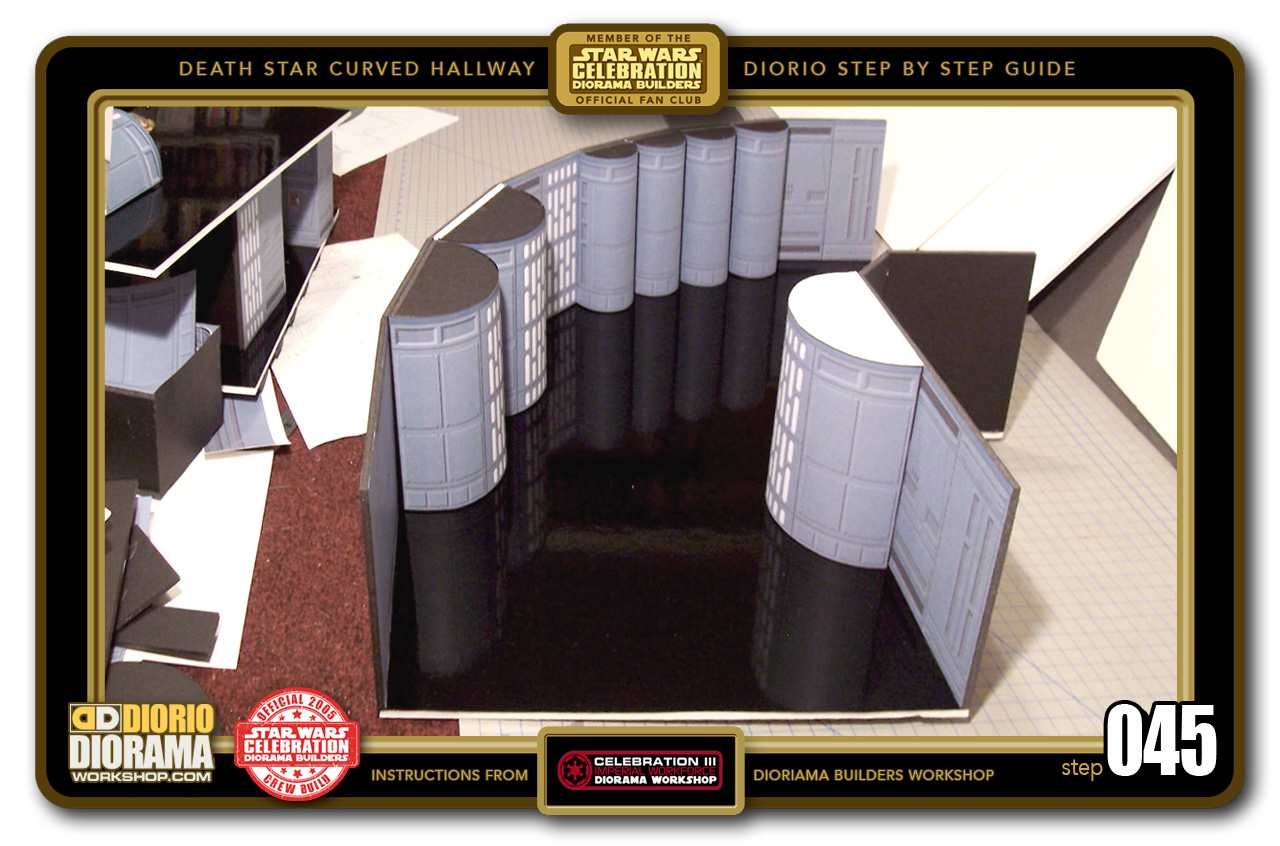
- STEP 045 > Once all your round walls are hot glued into place, you have yourself a movie accurate hallway from the set of Star Wars Episode 4 🙂 Now all we need is a ceiling...
-

- STEP 046 > Place the diorama on a piece of WHITE foamcore this time and trace along the edges of the floor shape. IMPORTANT: BEFORE CUTTING !!!! Make sure to add an extra 2cm on the outer edges so that the ceiling can rest on top of the walls.

-

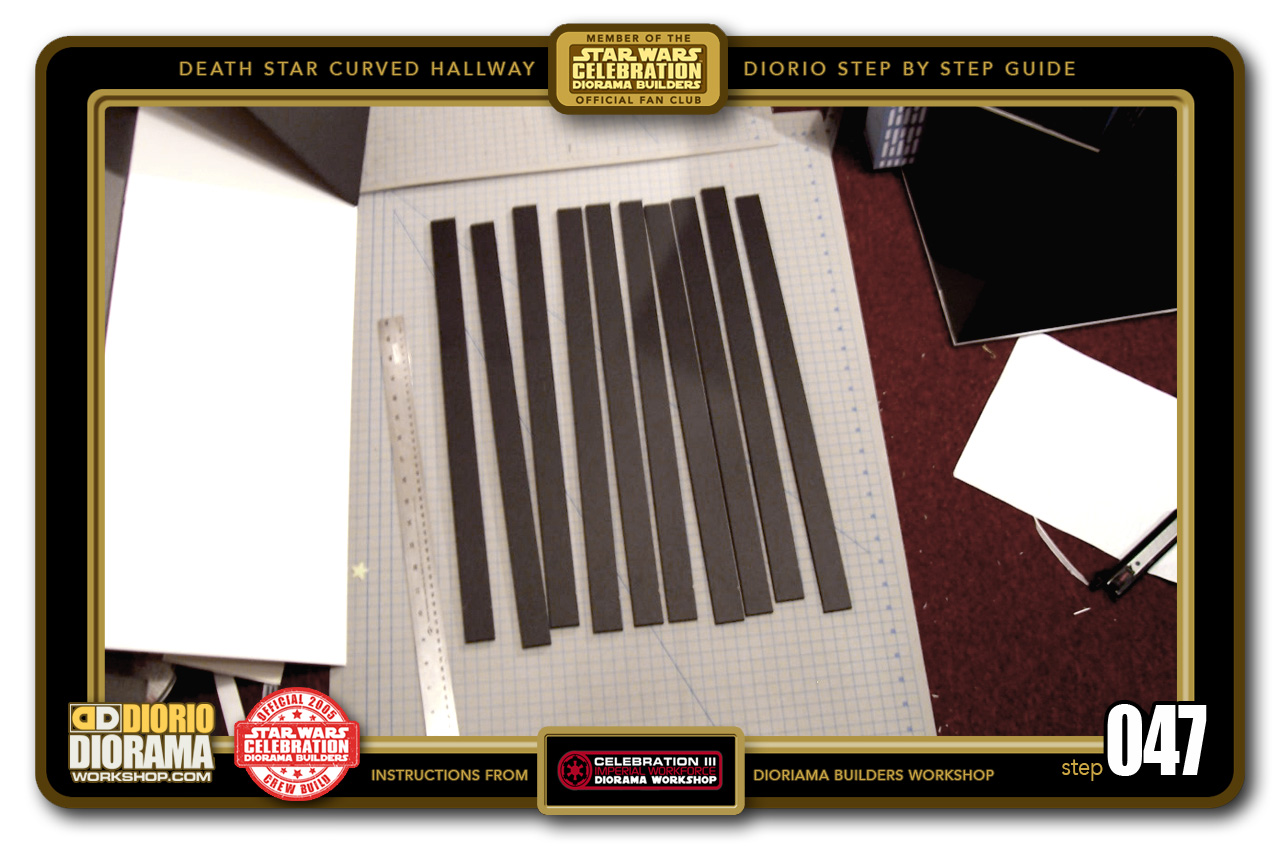
- STEP 047 > You must start to know by now that the Death Star ceilings are all about strips 🙂 Cut out TEN strips 52cm X 3cm wide.
-

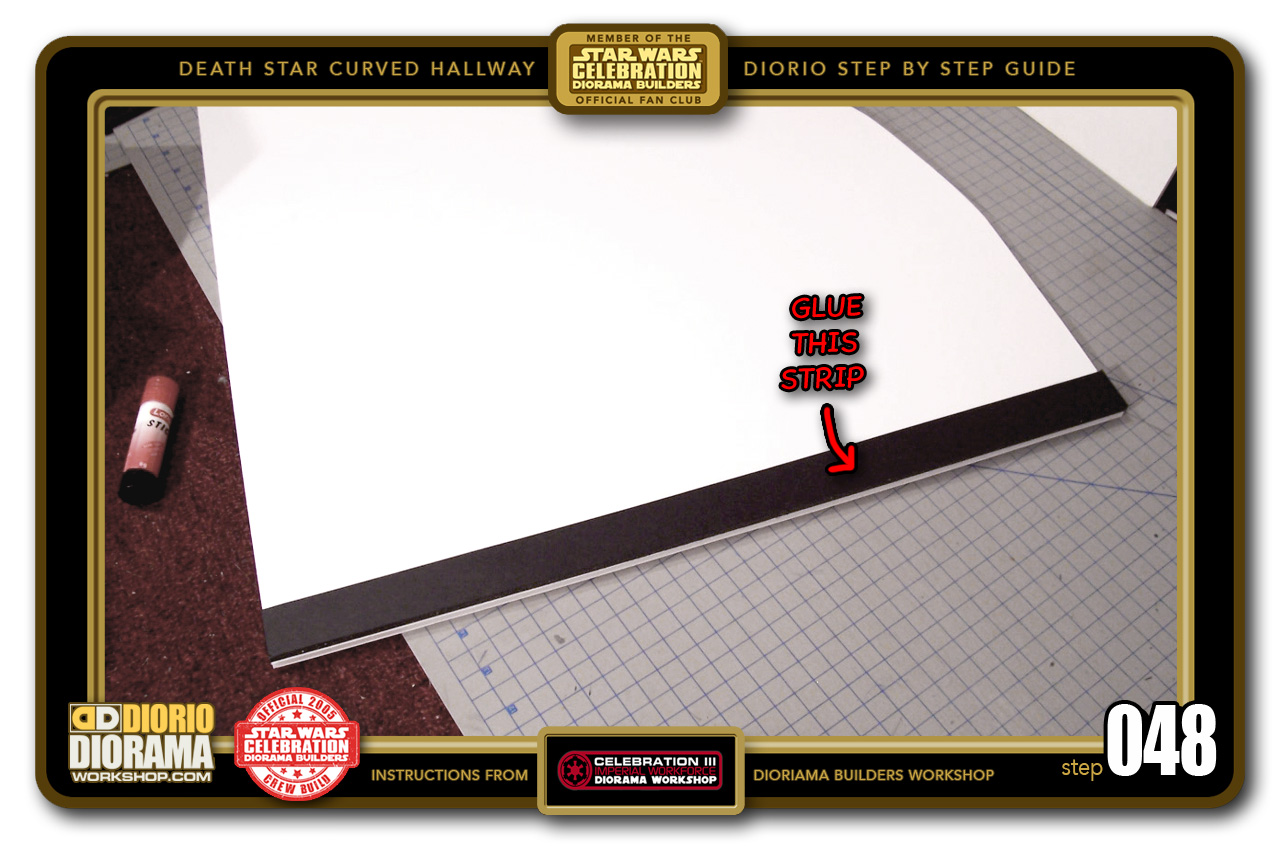
- STEP 048 > Use the hot glue gun to secure the first strip in place. Make sure to align it perfectly with the front of the ceiling.
-

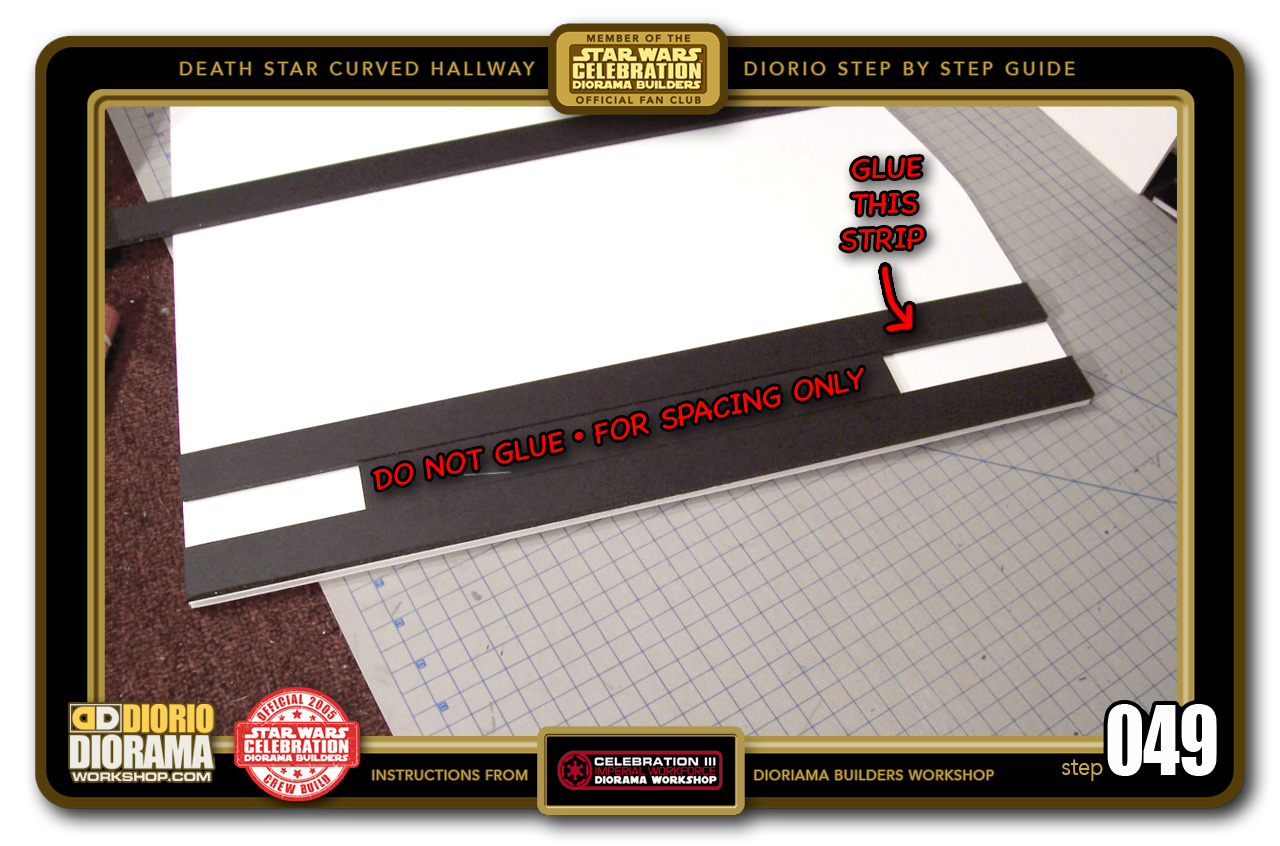
- STEP 049 > Place a spacing strip (can be a scrap as long as 3cm thick) IMPORTANT: DO NOT GLUE THE SEPARATOR STRIP. Place some hot glue on another strip and carefully place it onto the foamcore, making sure it touches and lines up with your UNGLUED SPACER strip.
-

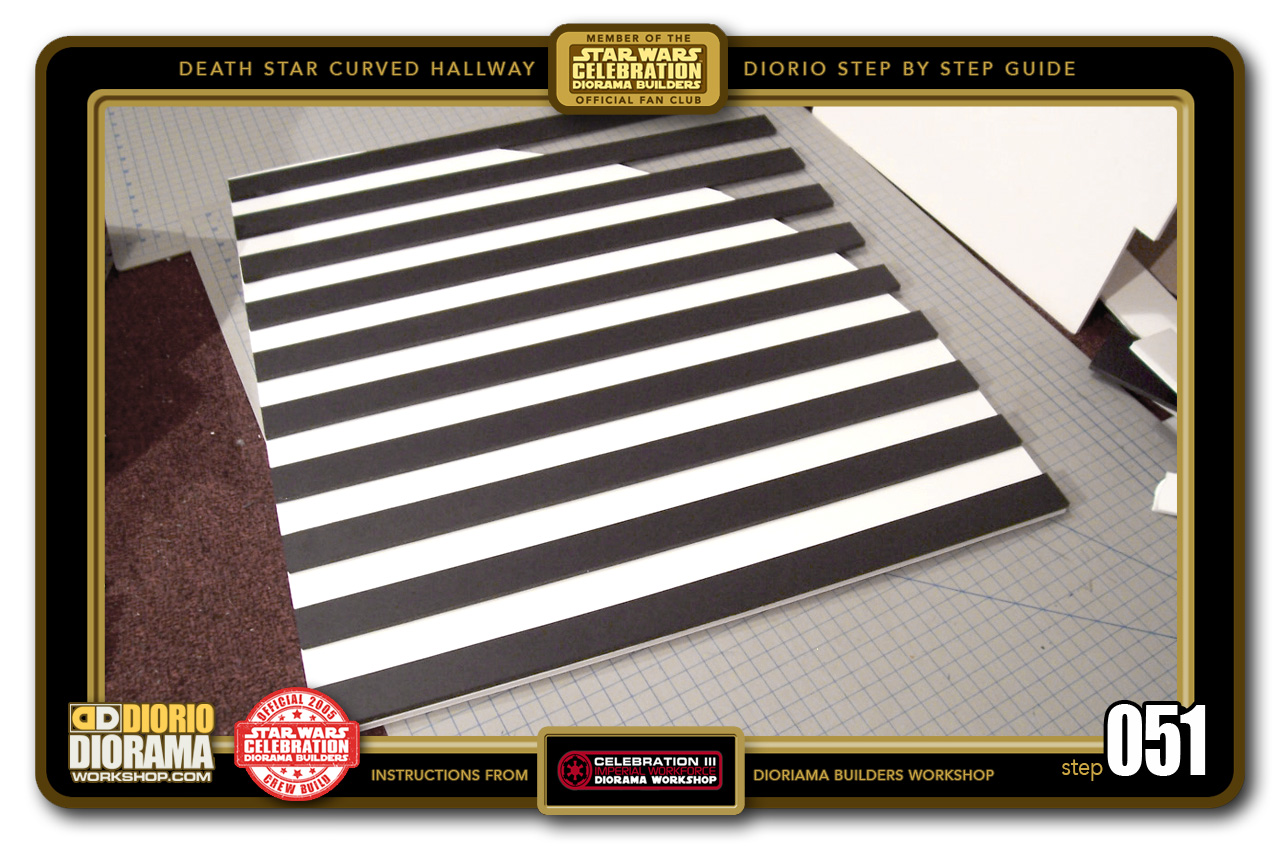
- STEP 050 > Now remove the spacer strip, and you start t understand what we are doing here. Once your hot glue cools down a little, your ceiling should now look like this. Simply continue with the spacing technique, glueing until all TEN strips are secured in place.

-

- STEP 051 > After a few minutes, your ceiling now looks like this. When all strips have cooled off, it's time to trim them.
-
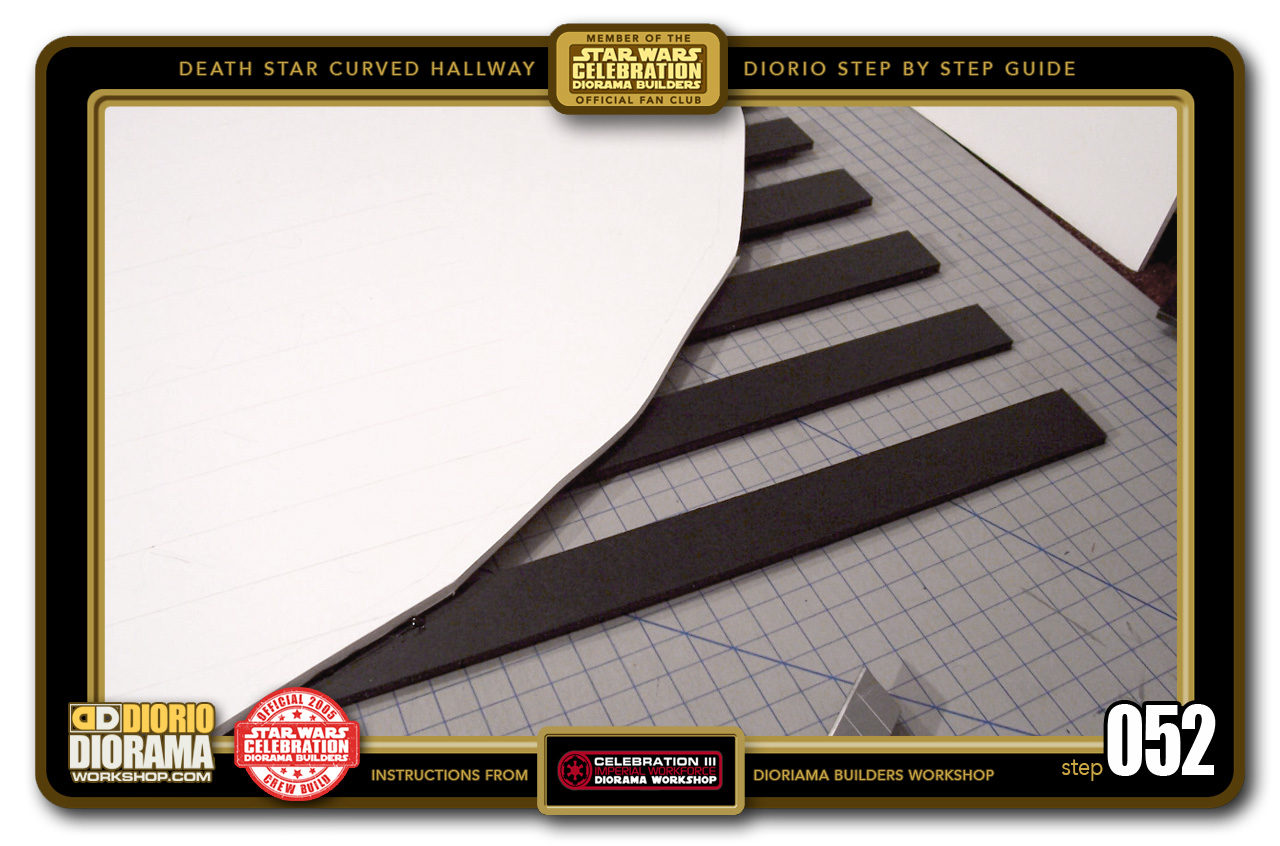
- STEP 052 > Flip the ceiling upside down...

-

- STEP 053 > ... and SLOWLY trim all excess strips with your Xacto knife. Watch your fingers when using new fresh blades !!!

-

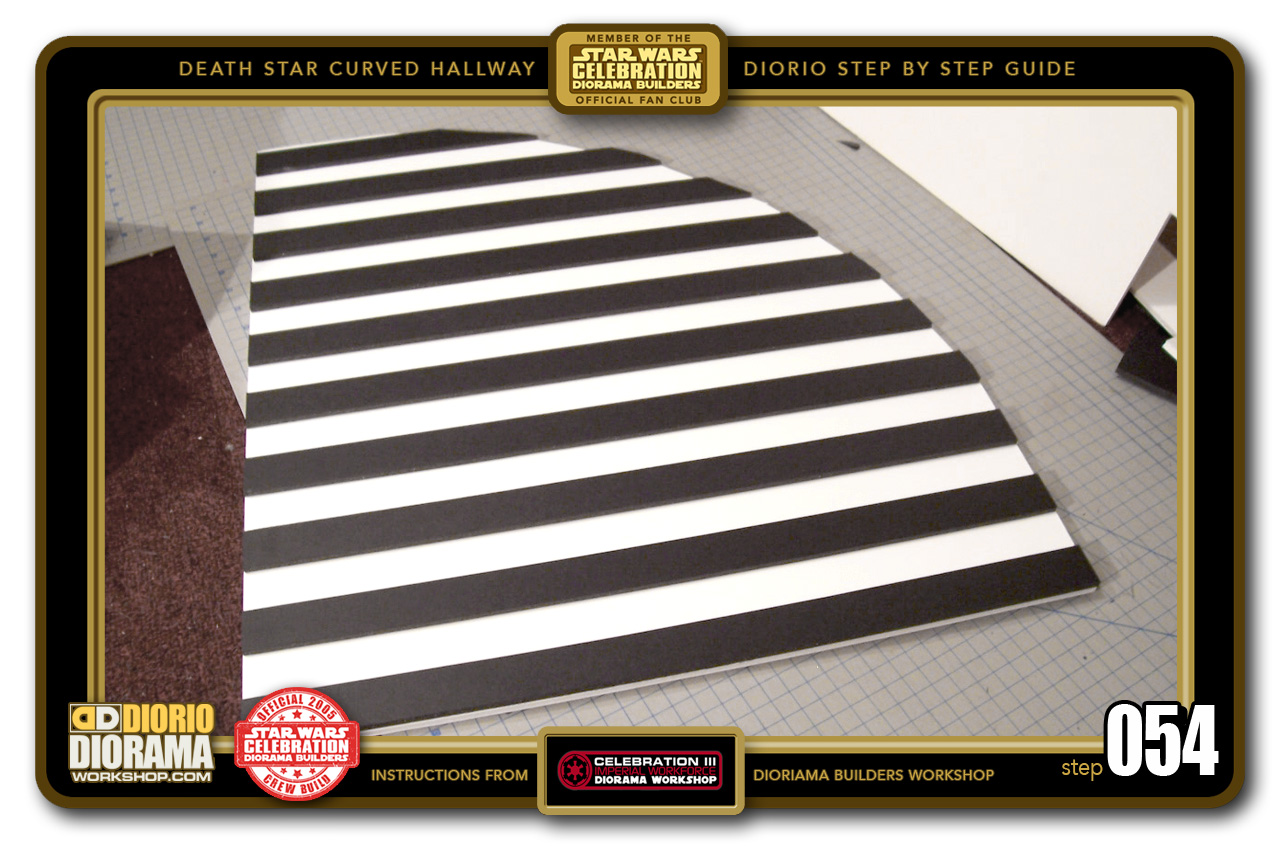
- STEP 054 > When all trims are completed, you will have a perfect Death Star ceiling waiting to be placed on top of the walls. There will be one last step to make it perfect, especially if you are stacking multiple levels on top of each other which I will explain in Step 058.
-

- STEP 055 > Flip your ceiling with the strips facing downwards and place on top of the walls. NO NEED to GLUE if you want to use as a playset and access the interiors to place your action figures.

-

- STEP 056 > Oh yeah, One last thing if you want movie accuracy... You will need a large blastdoor to place at the front entrance leading into your curved hallway 😛 Go to the Tutorials Star Wars menu for the blastdoors instructions and Step by Step pictures, Decals and Blueprints. Once built you can then come back here for the final ceiling trimming. Of course if you don't want to go through the trouble of making a blastdoor you can subsitute a hall archway (also available in the Tutorials Star Wars menu) or simply do neither and just continue to Step 058.

-

- STEP 057 > Once the large blastdoor is in place, you can see how it looks just like in the movie 🙂 You are almost done and ready for the next room to build for your Modular MEGA Death Star Playset 😛

-
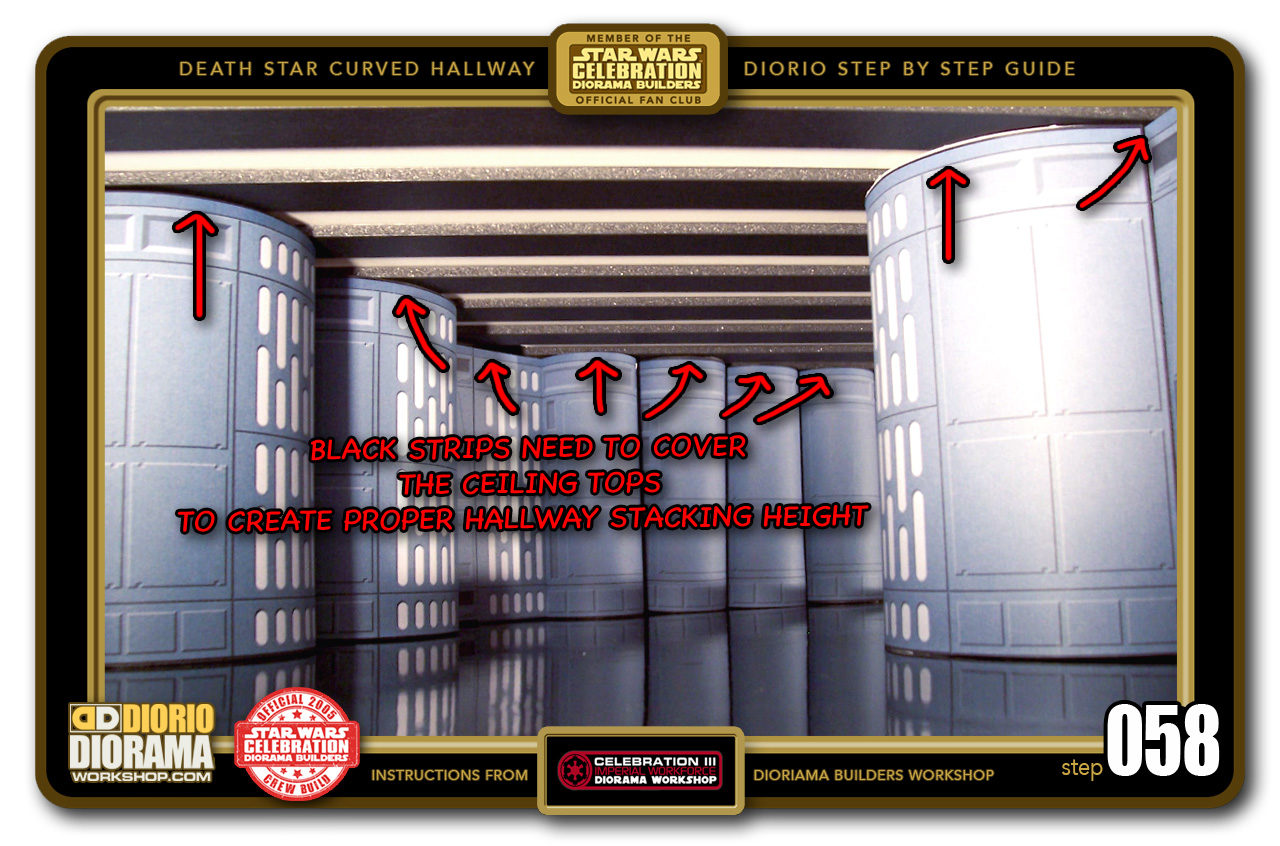
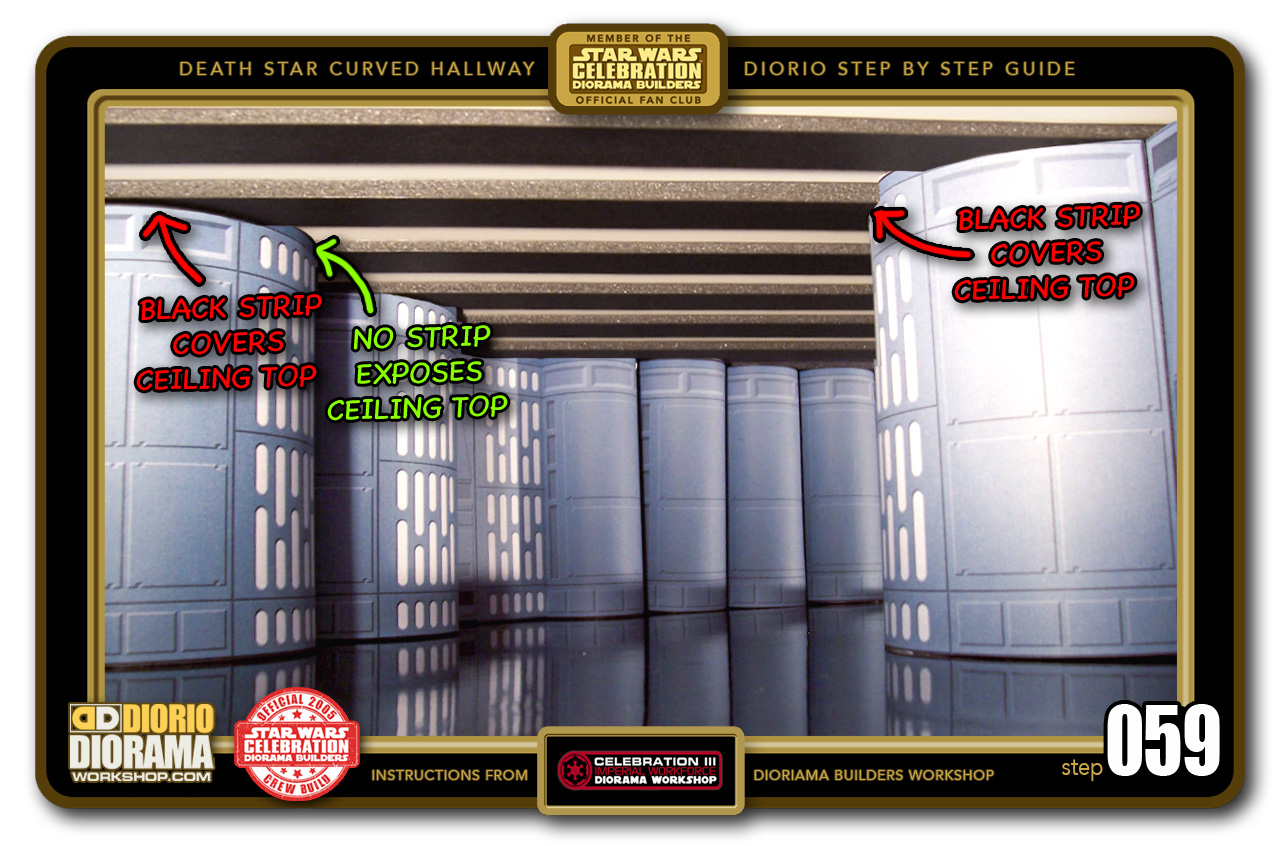
- STEP 058 > The last thing to do if you are stacking more than ONE level in your MEGA Death Star diorama is to lower the ceiling to the proper height. As you can see, the red arrows point to the ceiling tops, which are the thickness height of a sheet of foamcore. You need to flip your hallway upside down, and with a pencil, trace around your curved and straight walls. Then carefully cut along these guides to shorten your black strips to follow their contours.

-

- STEP 059 > Once the contours on all strips are all cut, your ceiling will now be able to lower the extra .5cm and allow the WHITE foamcore ceiling to physically rest on the top of your wall panels. The BLACK strips should now also be covering up those ceiling tops just like in the movie.
-

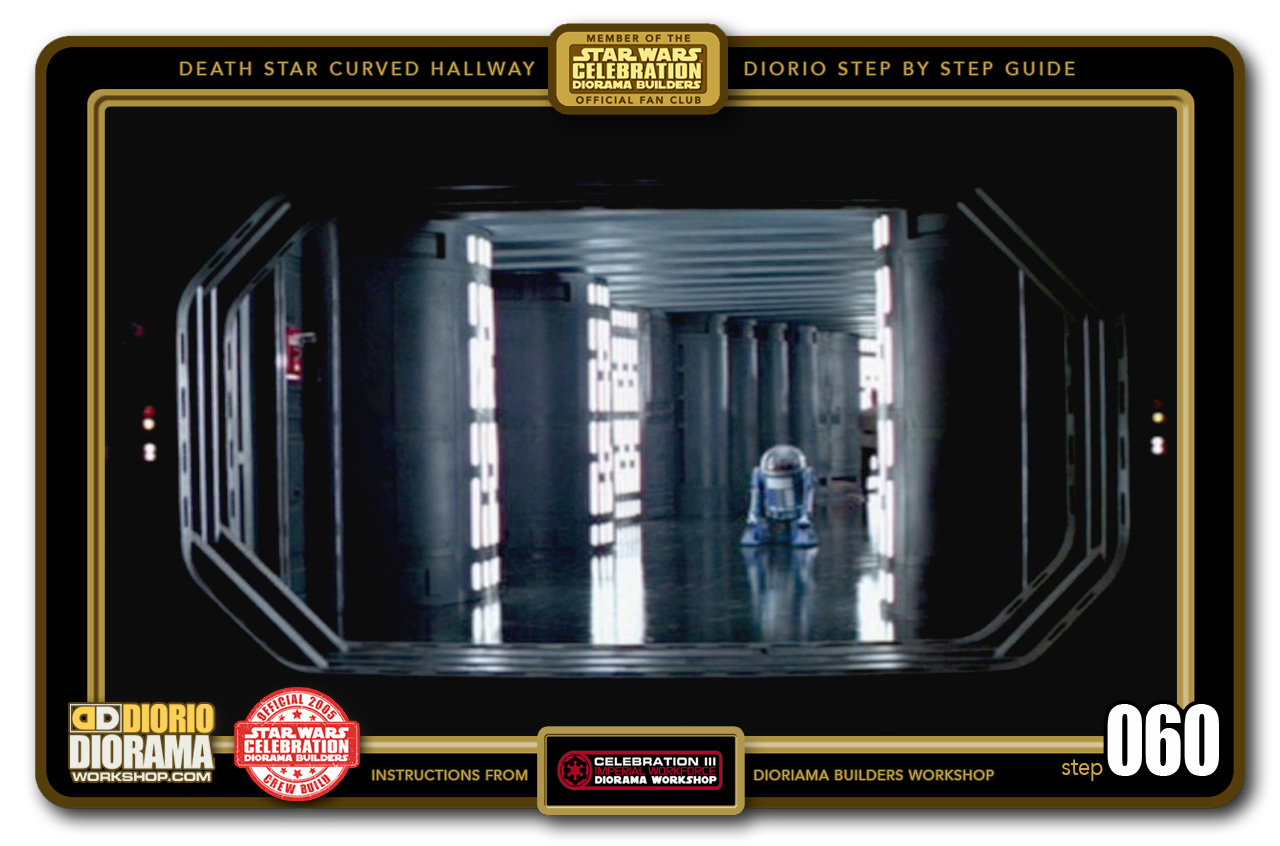
- STEP 060 > Here is the still from Star Wars Episode 4 that I used as reference for this curved hallway design and construction.
-

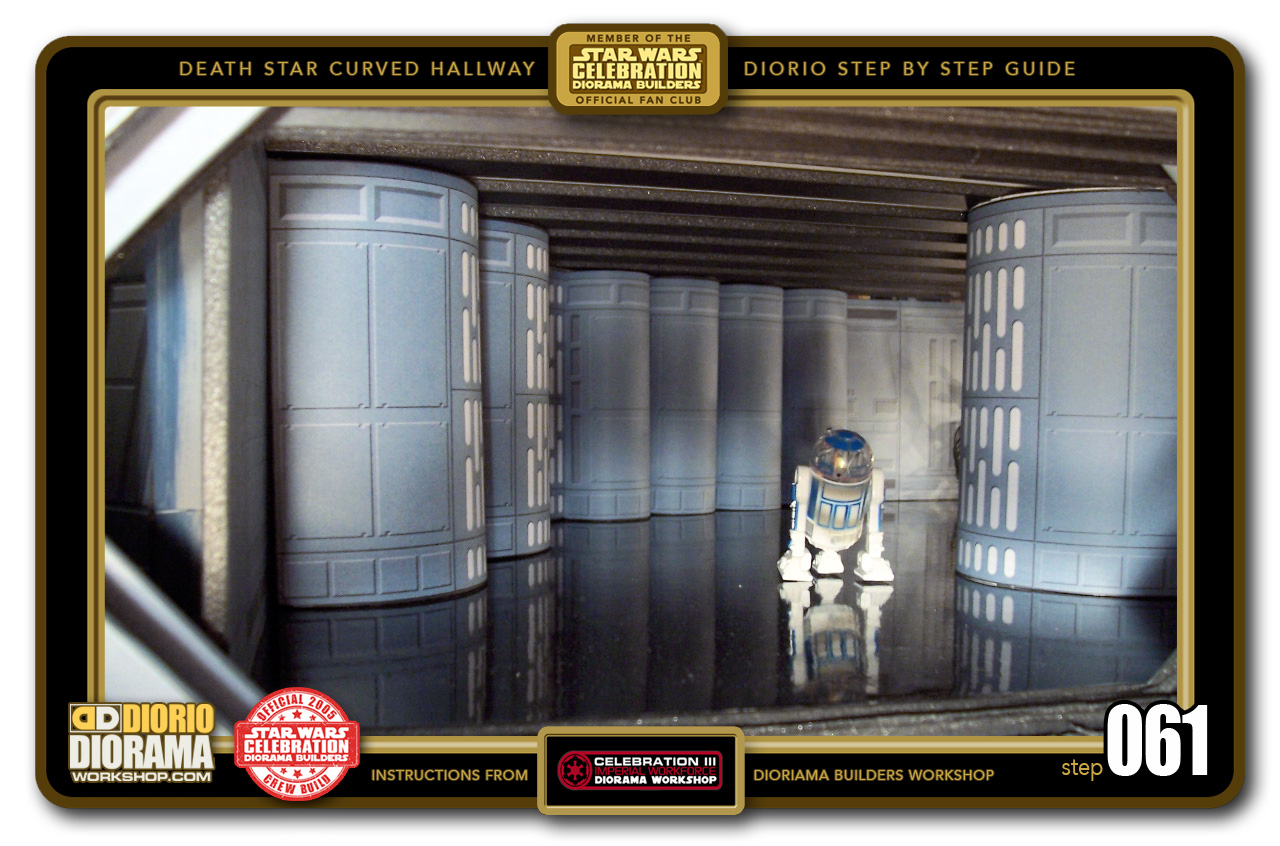
- STEP 061 > A closer view from inside. Do you see a resemblance to the movie set now ? 🙂

.
Did you already build this Diorama ? At home or at our Star Wars Celebration Diorama Builders workshop ? Would you like to show it in the site’s GALLERY VISITORS DIORAMAS section, YES ? That is Awesome !!! You can find out all the details on how to email me your photos on the VISITORS SUBMISSIONS INFO page … When I get your photos, I will create your very own page just like this one. You may not realize it but work does inspire others to join in the fun of making Action Figure Dioramas.
.
NOT FOR RESALE ALL Decals, tutorials and artwork are ©FrankDiorio (dioramaworkshop.com) and offered FOR FREE to the fans – that would be you ? so you can build and display my diorama designs in your very own home. I realize I cannot control what one does with my graphics once I place them on the web, I can only ask you as one fan to another, please respect the artist and do not be that jerk who uses my designs and tutorials to build a copy of my work only to sell it on EBAY or trade/sale groups and forums. Thank You. Frank.
.
.
If you have a facebook account, why not join the Official Diorama Builders Fan Club today, simply click the logo link below.
 .
.
Catch up with fellow visitors and exchange stories, read cool interviews with the crew, exchange photos, fun surprises and grab some FAN ONLY merchandise next year at actual future conventions ?
.
©2018 Frank Diorio DioramaWorkshop.Com
.
IF YOU LIKE WHAT YOU SEE, PLEASE SHARE WITH YOUR FRIENDS
USING THE SOCIAL MEDIA BUTTONS BELOW