


-
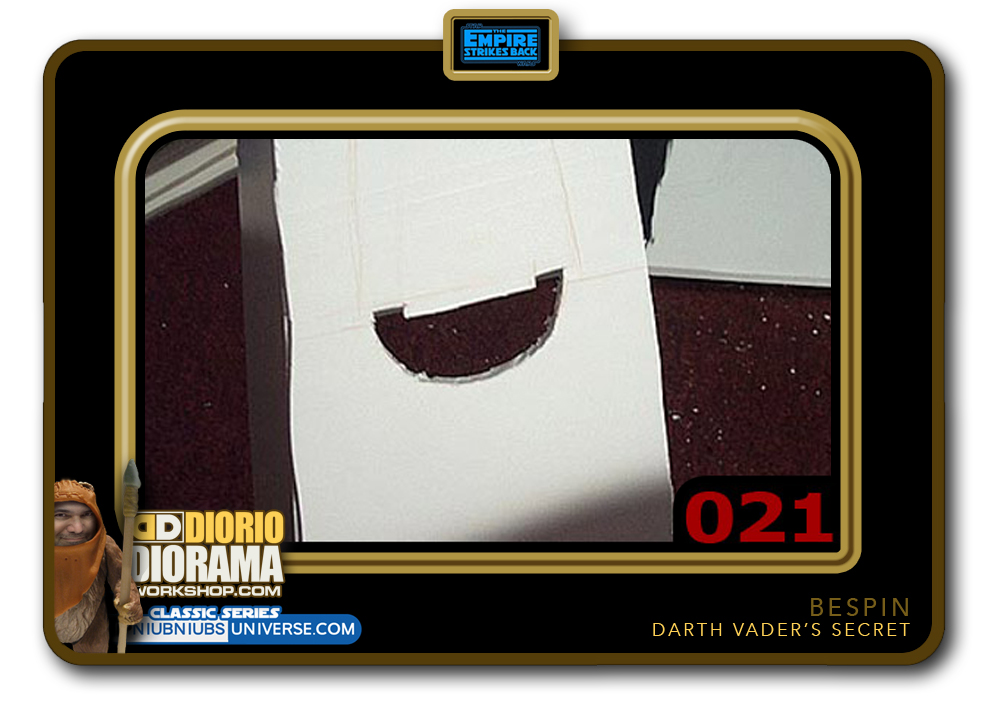
- STEP 021 > Next we need to make a hole in the structure to slide in the scaffolding support. Just use the other half of the poster tube to draw your cutting lines. Notice the ends are a little raised to accommodate the raised foot guard rails.
-
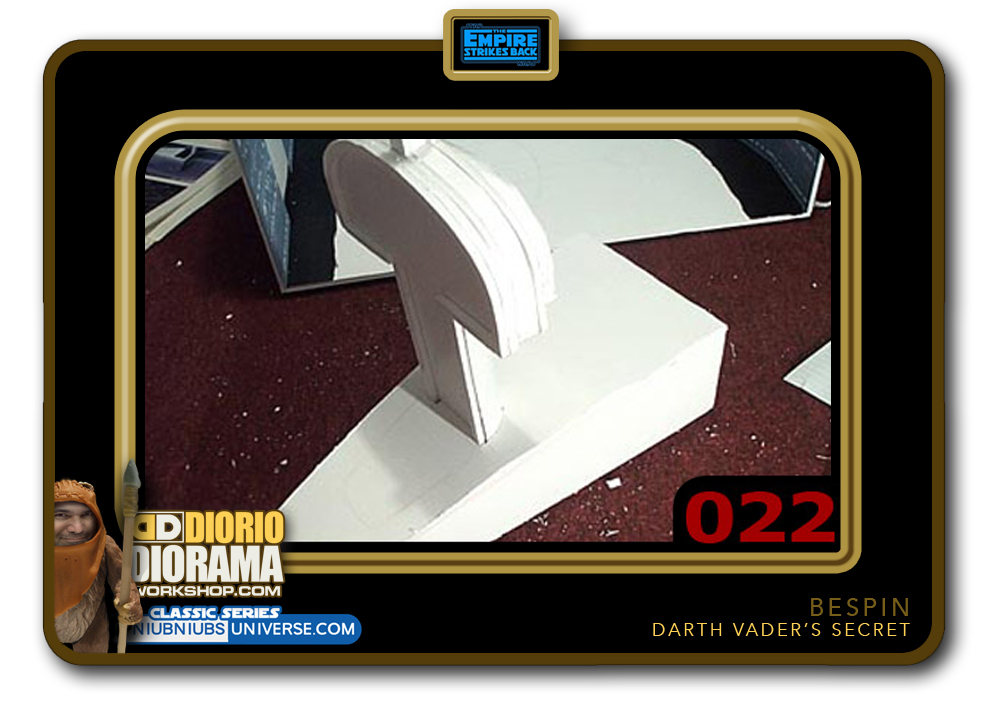
- STEP 022 > Now slide the scaffold into it's slot. Don't glue it just yet. We just want to see if it fits properly. It will be easier to add details later if we don't have one giant foamcore shape just yet.
-
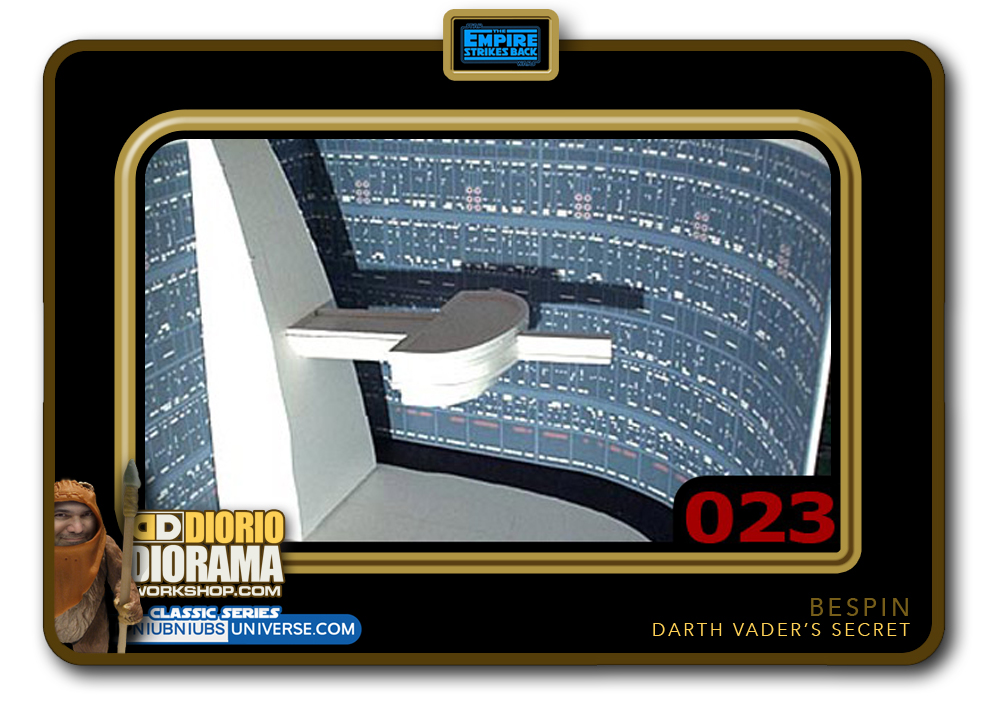
- STEP 023 > This is what it looks like so far placed inside the diorama box. If you want to be movie accurate, the walkway should be at least 4 or 5 times longer but then you would need a wider box as well 🙂
-
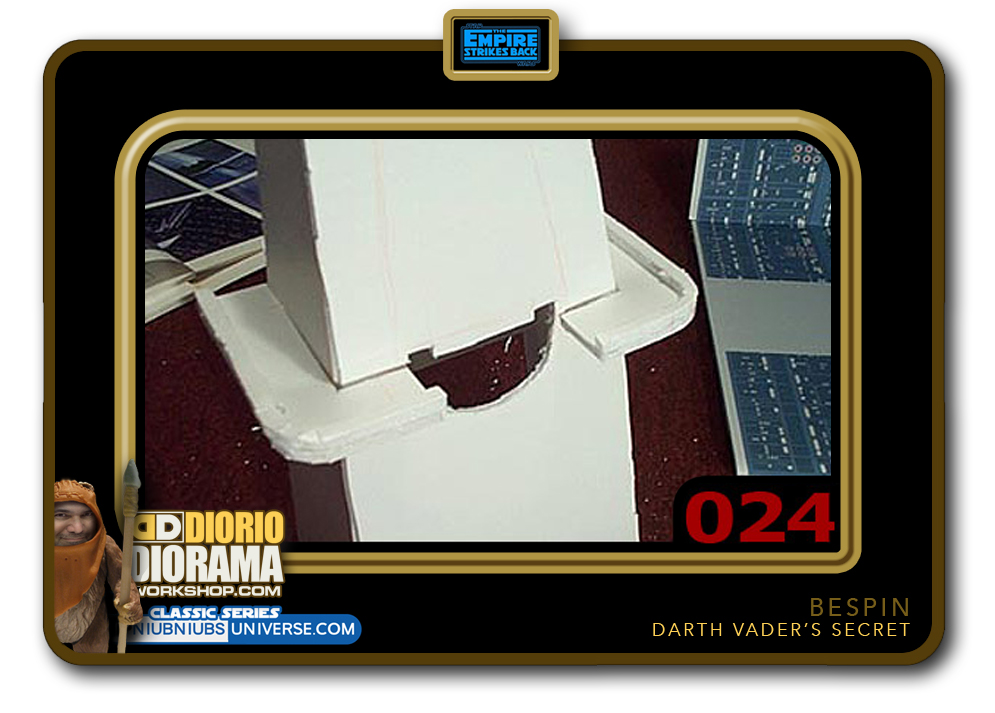
- STEP 024 > Looking closely at the reference pictures, I noticed there are platforms that circle around the shaft base. I just cut out 2 rounded "L" shape pieces of foamcore for each side and then glued the same 1/2 cm wide strip on the edges to match the look of what I did on the catwalk ( I removed the scaffold so you could better see what I did in this picture ).
-

- STEP 025 > I stuck the scaffold back in to show you what the build looks like so far. I just had to cut off the catwalks foot rail where they intersect with the "L" shape sides so that it doesn't look like a road speed bump, but a level passageway from the sides going to the front and then to the end where the weather vane will hang.
-
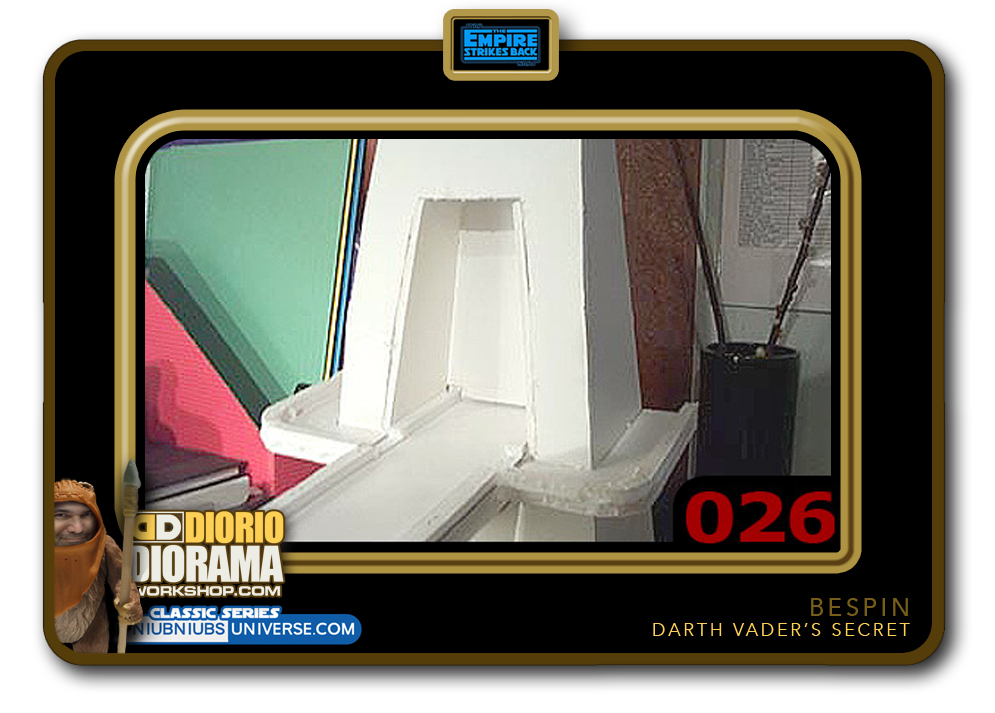
- STEP 026 > I cut out a hole in the shape of the movie set doorway high enough for a figure to fit through even though it won't open up to a room. ( that will be in the eventual seperate DELUXE Celebration 7 tutorial of this diorama scene )
-

- STEP 027 > Looking at the film and the matte paintings in the "Art of Empire Strikes Back", you can see the structures corners are rounded not square. So I used an Xacto knife ( be careful and don't cut off your fingers ) and chopped off the ends at a 45 degree angle. Not the easiest thing to do. Maybe next time, I should try using a hot wire cutter to slice through the foam like butter ( the technique we used in 2010 Celebration V )
-
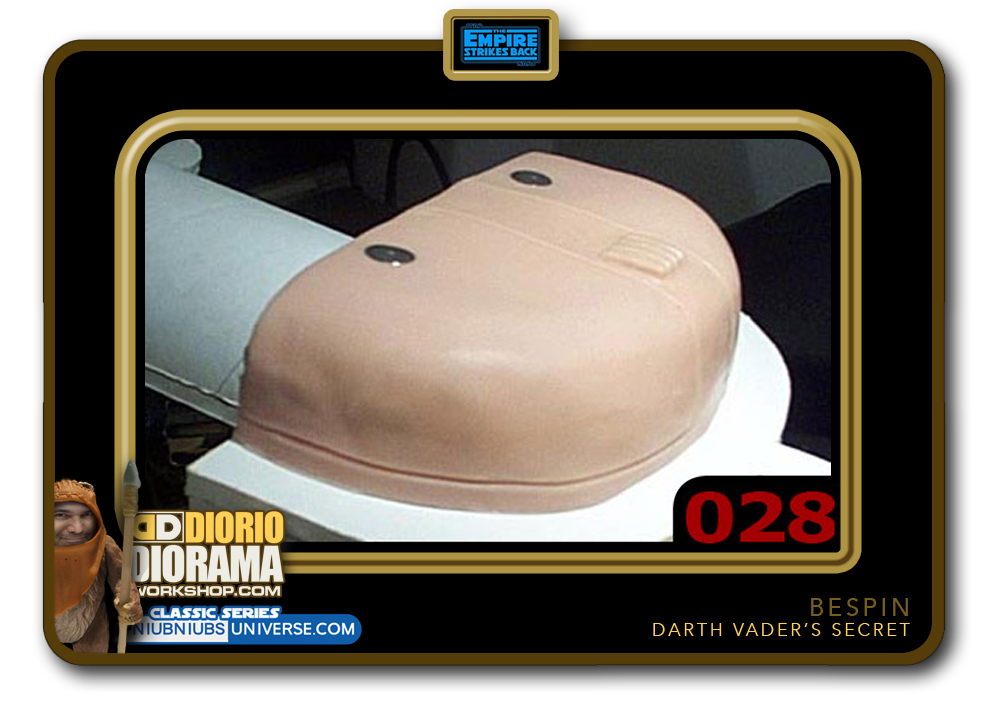
- STEP 028 > When I woke up this morning there was a HUGE crack in the Super Sculpey 🙁 I guess because it was too paper thin, So I ripped it off and decided to try something else. One thing that I knew I would have to keep in Super Sculpey though was the bottom of the balcony. So I used a thicker 1/4cm thick ( like a pie crust ) skin to make sure no cracks would occur this time after hardening.
-
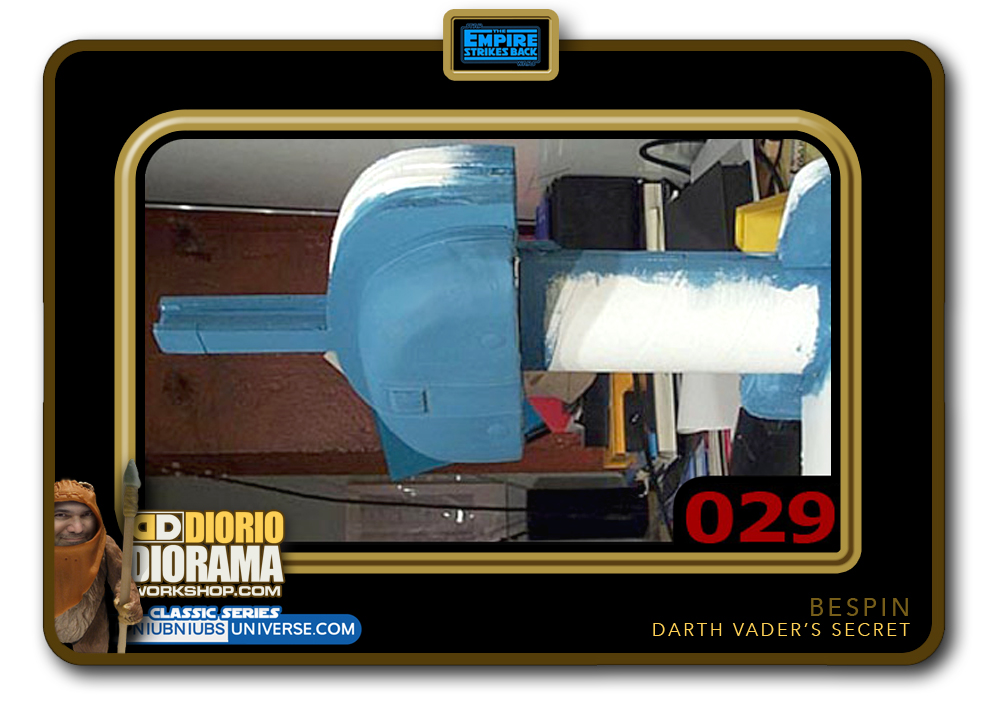
- STEP 029 > My new plan is to make sticker decals in Photoshop which will be easier for you to use as well to match the look of my diorama. So the next step is to paint in the joints where the stickers will meet. This way I will have blue ( Print your decals, bring one to the paint store and match the color ) instead of white gaps. Also i painted the Super Sculpey underbelly. This time without cracks 🙂
-
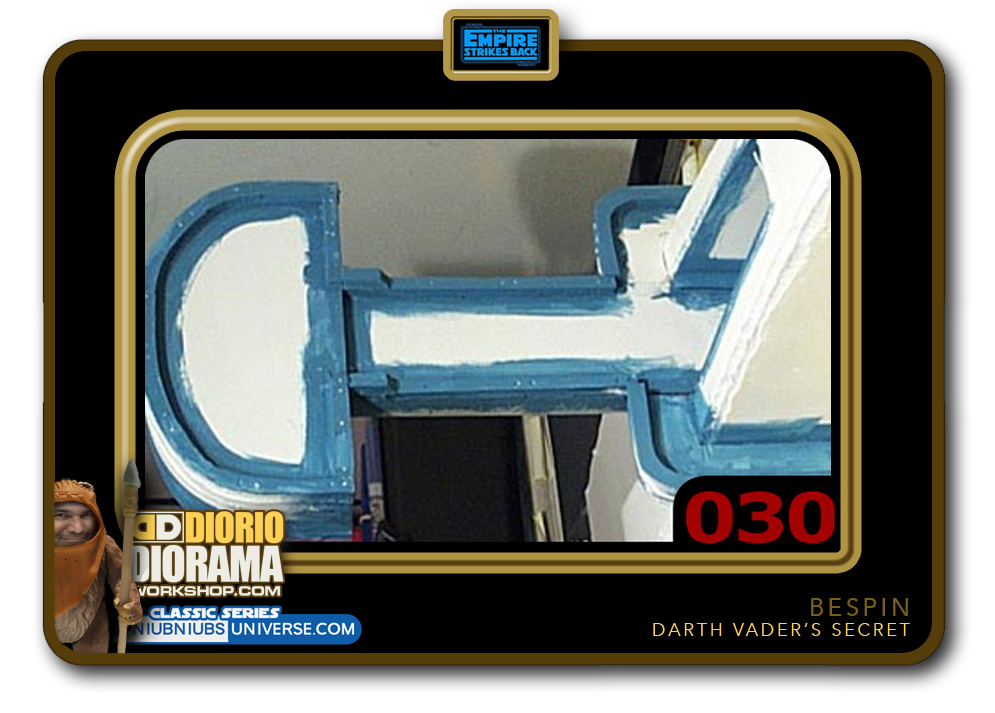
- STEP 030 > As I did for the bottom, here you can see where I painted the seam edges blue too. Think of it like when you paint your home, you use a brush and do all the moldings, corners, before doing the main roller application. You will understand more why I did this in Step 33.
-
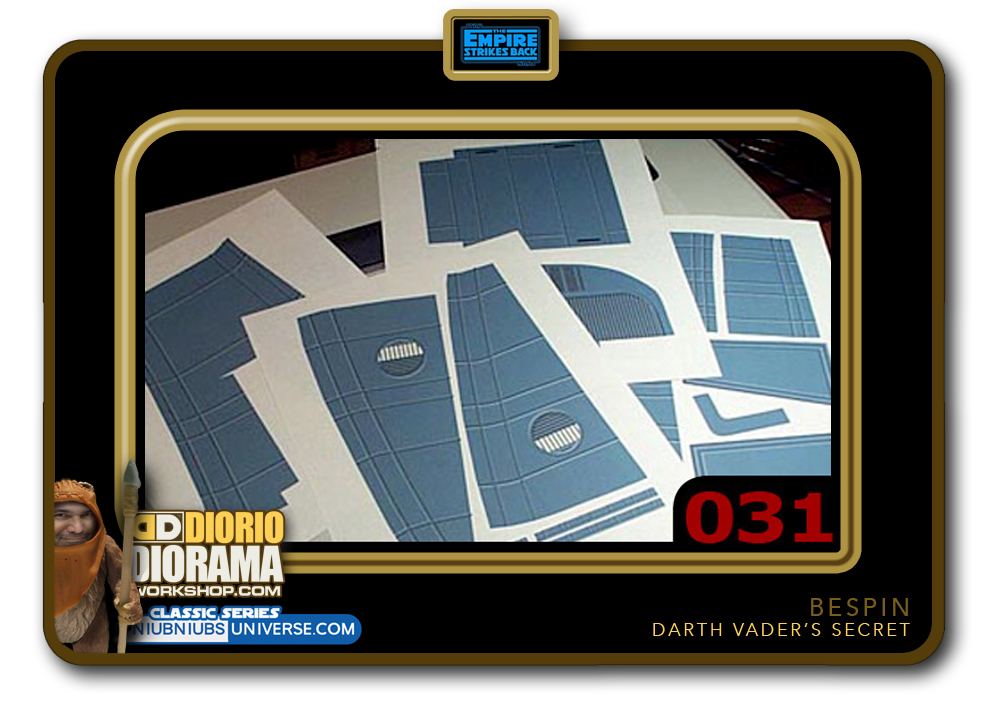
- STEP 031 > I spent all day making my stickers using Photoshop. To make sure my shapes would fit, I taped pieces of paper first on the foamcore pieces and with a pencil, traced the contours to make myself patterns much like when you sew a dress. So for you, just print out all the free decals from the tutorial Empire Strikes Back menu.
-
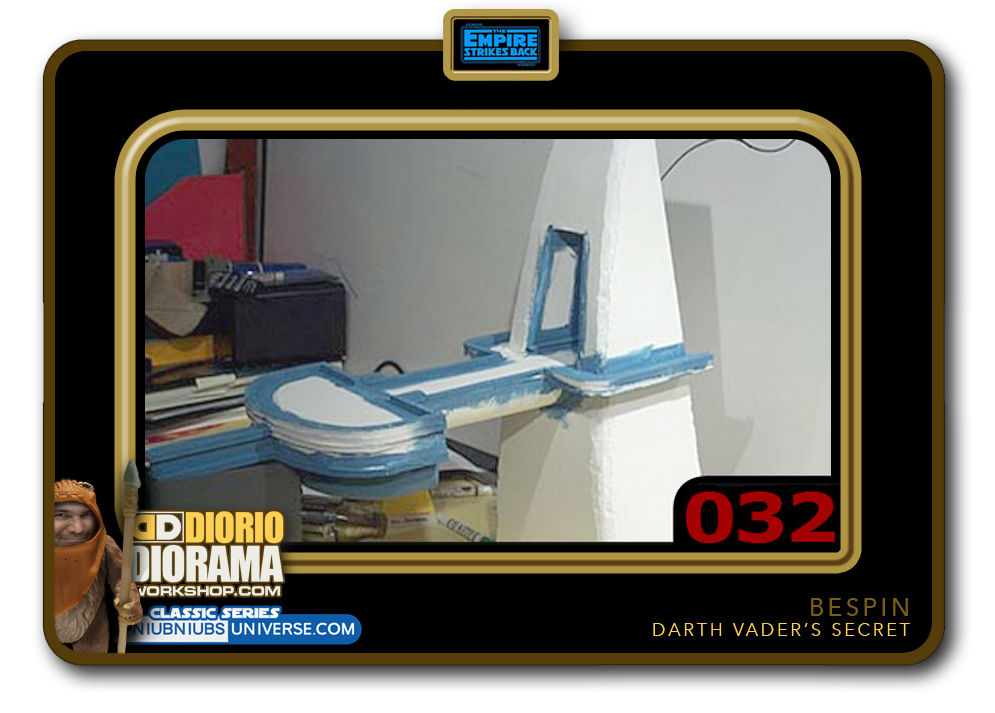
- STEP 032 > Another angle showing you where I painted the seems blue. We are now ready to apply the decal skin textures.
-

- STEP 033 > Obviously let the paint dry first 🙂 One at a time, peel and apply each decal stickers to the appropriate foamcore location. Pretty neat huh? and way better then Super Sculpey. Now looking at where the decal edges connect with the foamcore, you should understand why I painted the joints blue. No ugly white showing through 🙂 This pretty much completes the catwalk part of the diorama.
-

- STEP 034 > Now it's time to sculpt the "rockets" that Luke hangs from after he gets his hand cut off. ( oops Spoiler alert 🙂 The main cigar shape I did with Super Sculpey. I then added some pieces from greeblies, other toy pieces, doodads and objects that looked cool. You could kit bash using model kits if you want cleaner look, I wanted it to look like the movie so that's why I sculpted the piece. I started paining it blue just to see if the sculpt would look nice.
-
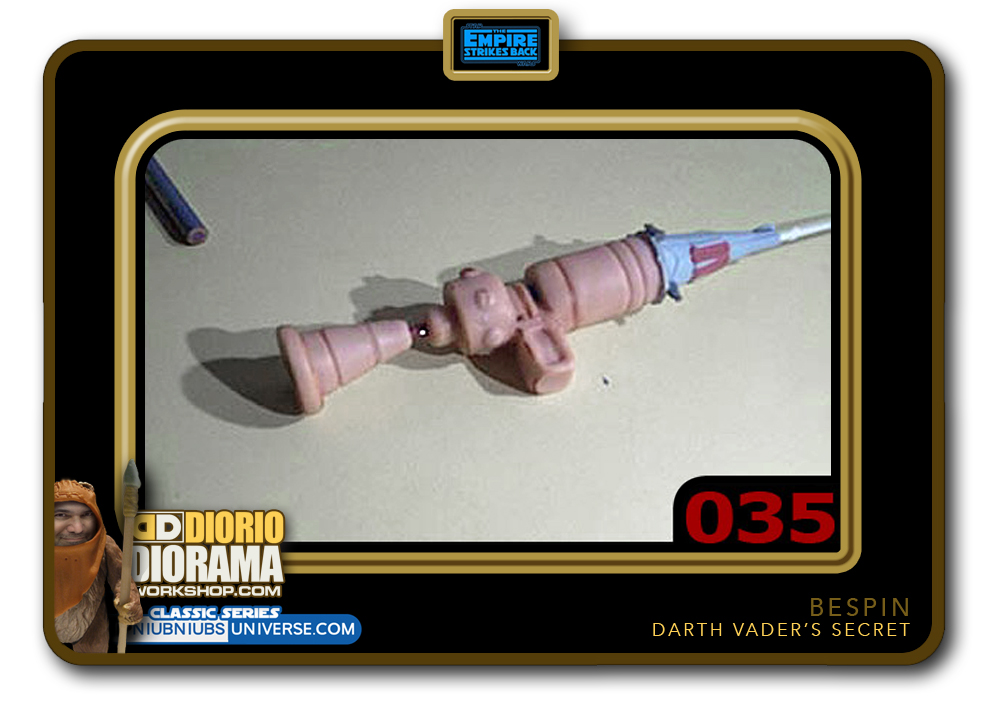
- STEP 035 > This is the second "rocket" shape that is attached to the first one if you base your build with the movie. Again i used Super Sculpey and for the top part a micro machines vehicle. Once painted the same colour, they will all blend together seamlessly. I hope 🙂
-
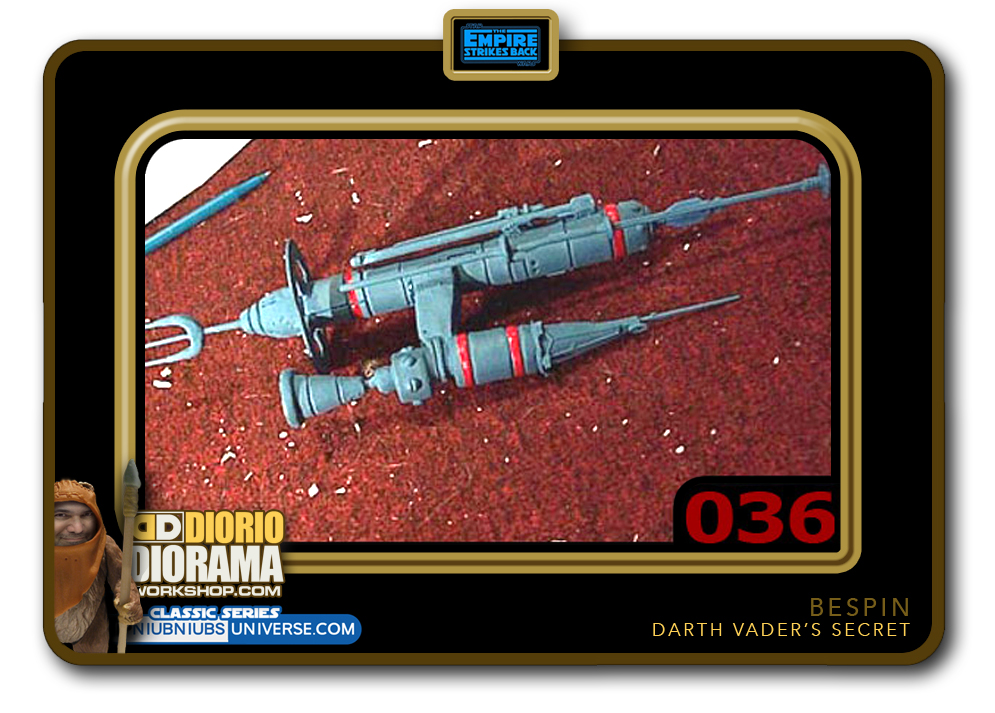
- STEP 036 > Using hot glue, I joined the 2 "rockets" shapes together using my reference pictures to make sure they were positioned properly. Yep, looks like the movie 🙂 the weather vane is complete. You can hot glue it to the end of your catwalk I-Beam that sticks out past the balcony. Just cut a little the end into a rounded shape vs flat which would not hug the rocket and strengthen the bond. Look at Step 043 to see where the connection of the 2 pieces fit together.
-
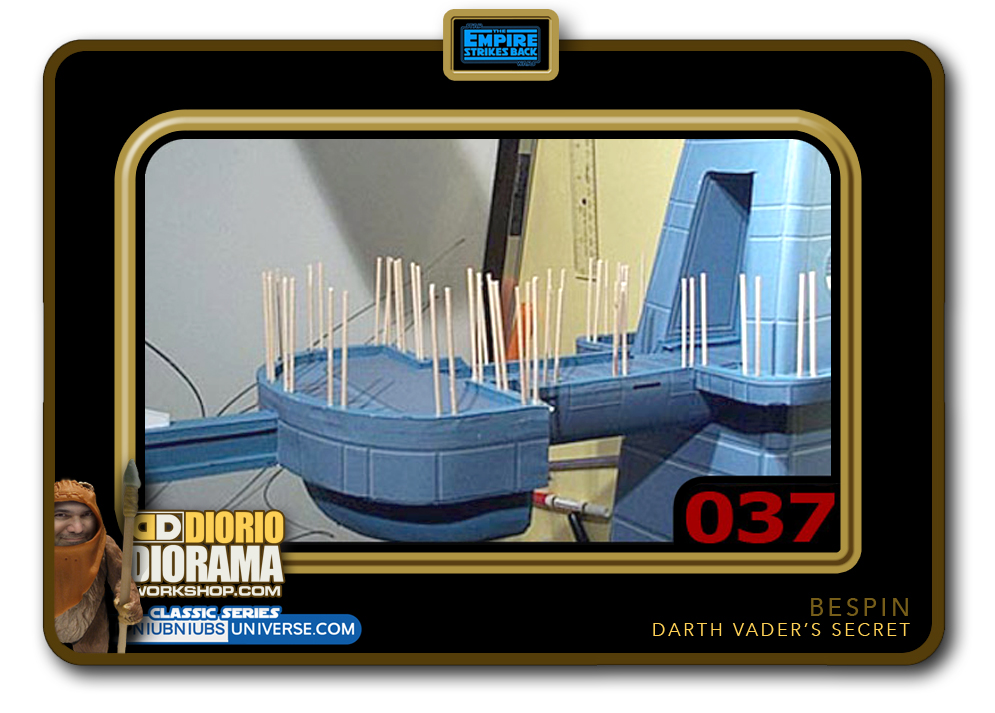
- STEP 037 > Now back to the main structure. I poked tooth picks into the foamcore foot rails. They will be used as support for the guard rails. If you look carefully, I added just the tiniest dab of hot glue to make sure they don't pop out and then painted over the glue. I also trimmed the point off the toothpics with nail clippers.
-
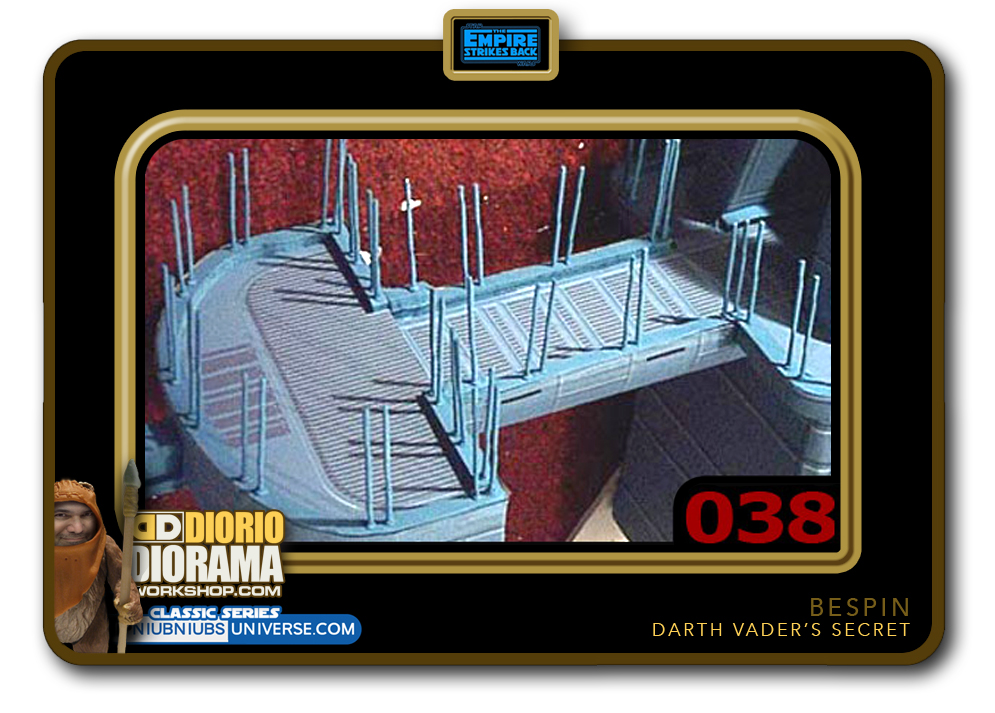
- STEP 038 > A closer view of what your toothpics and hot glue dabs look like once painted 🙂 getting closer to the end now.
-
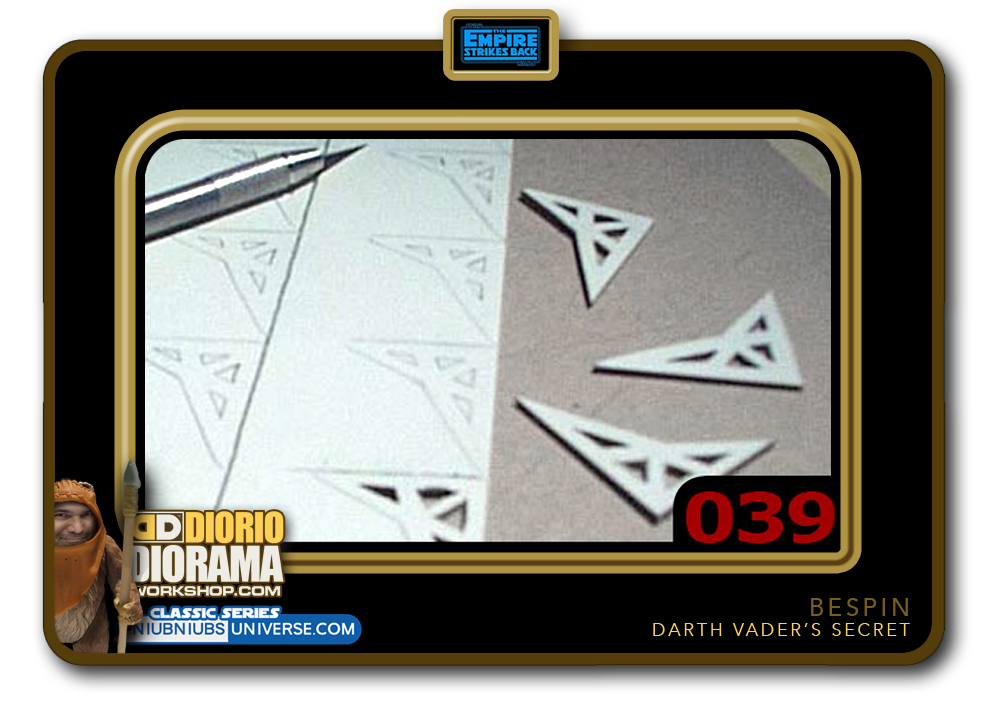
- STEP 039 > Well by now you know how picky I am about movie accuracy in my dioramas - LOL. Careful not to cut off your finger with this step. Use an Xacto Pen ( the ones with the pointy blades ) and cut 10 support beam shapes for the underneath of the "L" balconies. Cutting out the holes in the center make it look more like welded metal beams.
-

- STEP 040 > Painting these pieces is a lot faster and less boring then cutting them 🙂
-
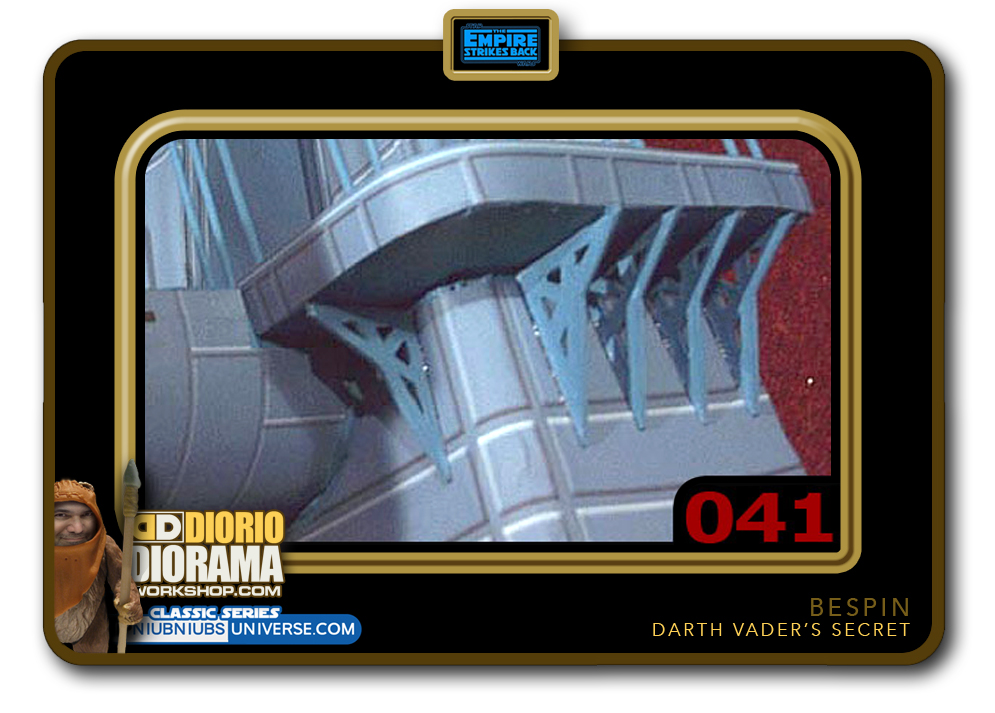
- STEP 041 > Ahhh that's where those things go. Not really necessary but adds to the structure's logi and of course, movie accuracy 🙂
-
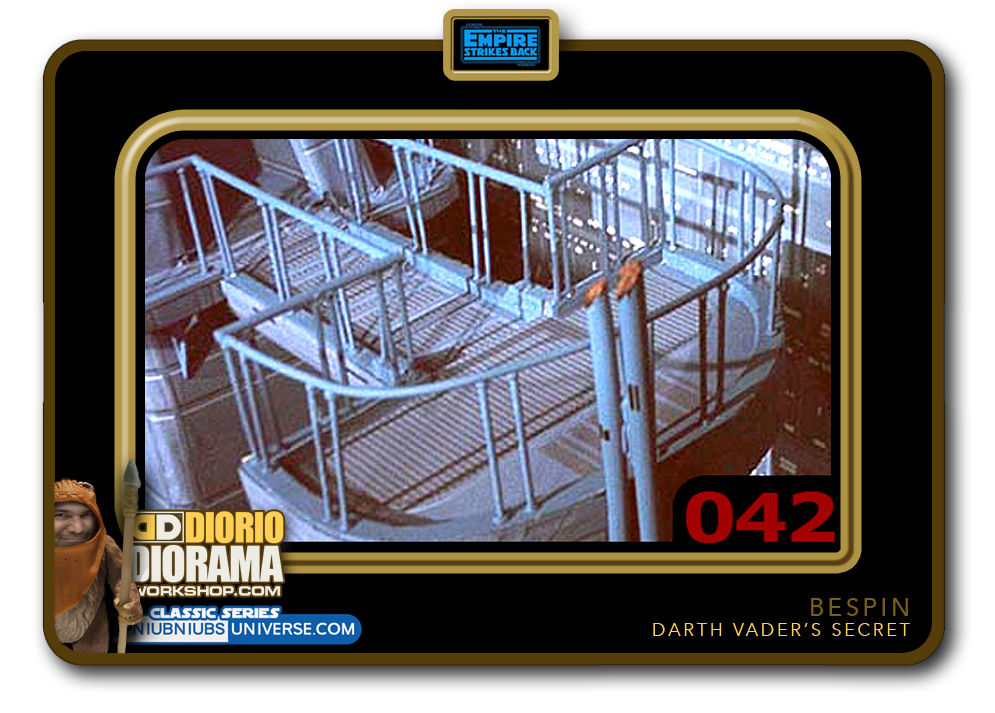
- STEP 042 > After the disaster of trying to get stereo wire to go in a straight line, I removed all and used kebob skewers sticks instead for a more sturdy and straight look. I did keep the stereo wire idea but only for curved areas above the balcony front. Now I think my diorama is complete 🙂 Oh yeah Add 2 straws and paint them, this is what Vader slices in half. I filled the inside tips with clay and painted orange and red to look like a Lightsaber slice glow effect.
-

- STEP 043 > And here is what the finished diorama looks like. You can see many many more photos in the Gallery section under Diorio Dioramas menu. If you make this, make sure to send your photos for the Visitor Gallery 🙂

.
Did you already build this Diorama ? At home or at our Star Wars Celebration Diorama Builders workshop ? Would you like to show it in the site’s GALLERY VISITORS DIORAMAS section, YES ? That is Awesome !!! You can find out all the details on how to email me your photos on the VISITORS SUBMISSIONS INFO page … When I get your photos, I will create your very own page just like this one. You may not realize it but work does inspire others to join in the fun of making Action Figure Dioramas.
.
NOT FOR RESALE ALL Decals, tutorials and artwork are ©FrankDiorio (dioramaworkshop.com) and offered FOR FREE to the fans – that would be you ? so you can build and display my diorama designs in your very own home. I realize I cannot control what one does with my graphics once I place them on the web, I can only ask you as one fan to another, please respect the artist and do not be that jerk who uses my designs and tutorials to build a copy of my work only to sell it on EBAY or trade/sale groups and forums. Thank You. Frank.
![]() Catch up with fellow visitors and exchange stories, read cool interviews with the crew, exchange photos, fun surprises and grab some FAN ONLY merchandise next year at actual future conventions ?
Catch up with fellow visitors and exchange stories, read cool interviews with the crew, exchange photos, fun surprises and grab some FAN ONLY merchandise next year at actual future conventions ?
.
©2018 Frank Diorio DioramaWorkshop.Com
.
IF YOU LIKE WHAT YOU SEE, PLEASE SHARE WITH YOUR FRIENDS
USING THE SOCIAL MEDIA BUTTONS BELOW