


-
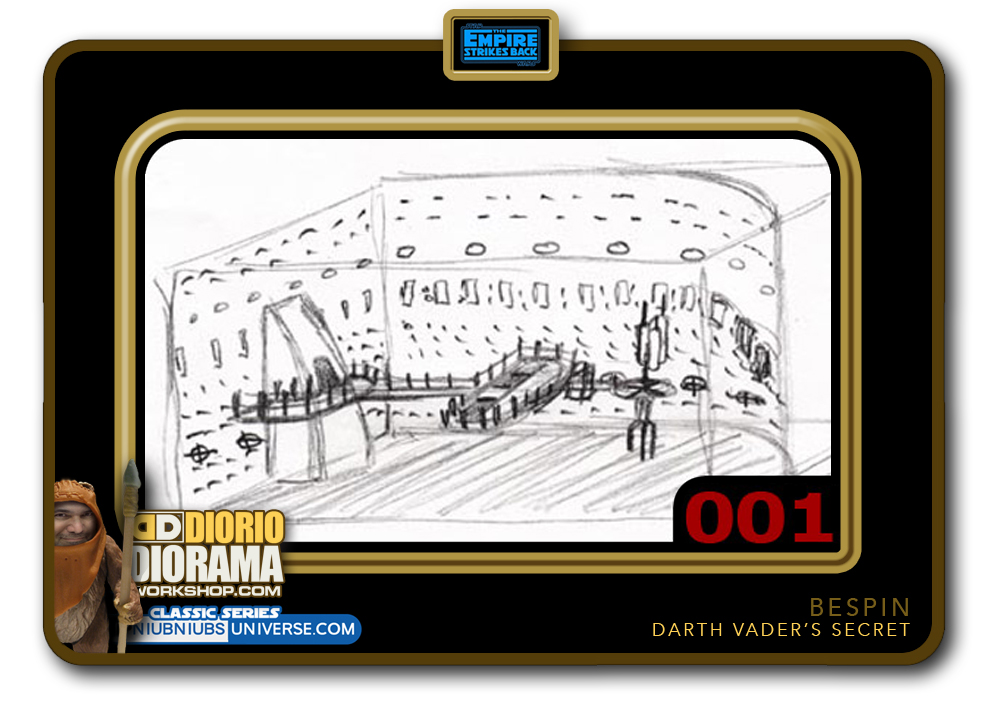
- STEP 001 > Here we go again 🙂 This is a quick sketch of what I hope the final diorama will look like. It's kinda hard to figure out so use your imagination a little - LOL
-

- STEP 002 > So we begin with a basic diorama display box. I created it using 4 sheets of foam core. They were bonded using a hot glue gun ( you must get one - best invention ever ) works miracles ! Vader's Secret Diorama Box measurements are 17" high X 24" wide X 14" deep.
-

- STEP 003 > Here is a close up of the curved support that we need so that the foamcore will have a nice solid curve to follow and be attached to. This will keep the rounded corner from caving in or warp out of shape if pushed by mistake.
-
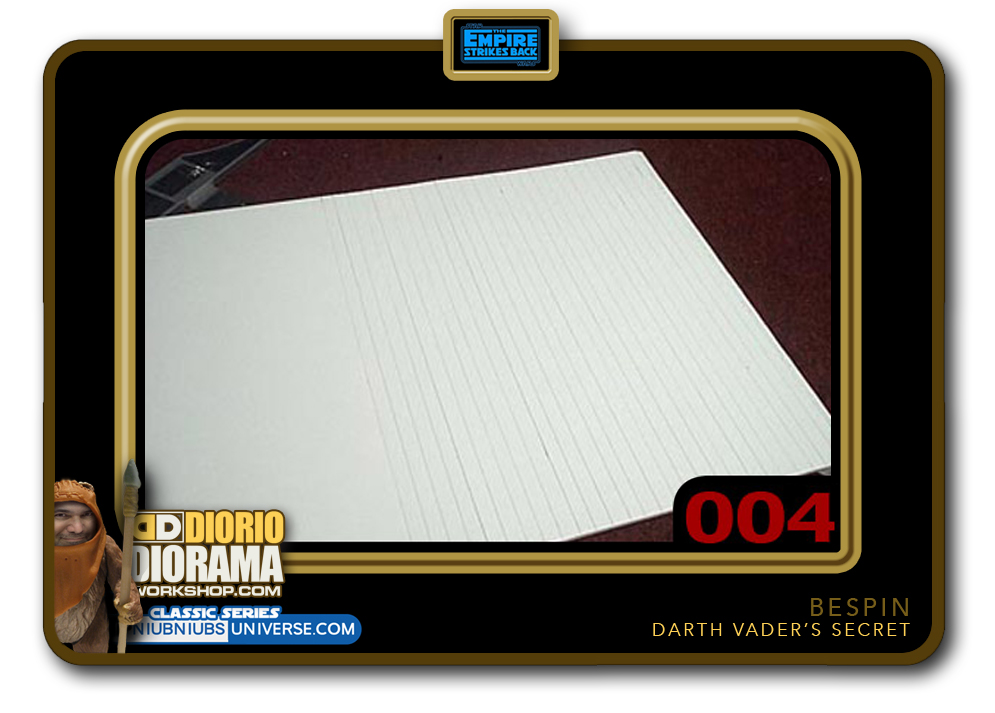
- STEP 004 > I cut a piece of foamcore 28" by 17" inches. At around 14", I start slicing 1 cm wide grooves on the backside. Make sure NOT to push too strong and go through the foam which would seperate your pieces in 2 parts. You want to use a NEW sharp Xacto knife and just slit 3/4 of the foam's thickness.
-

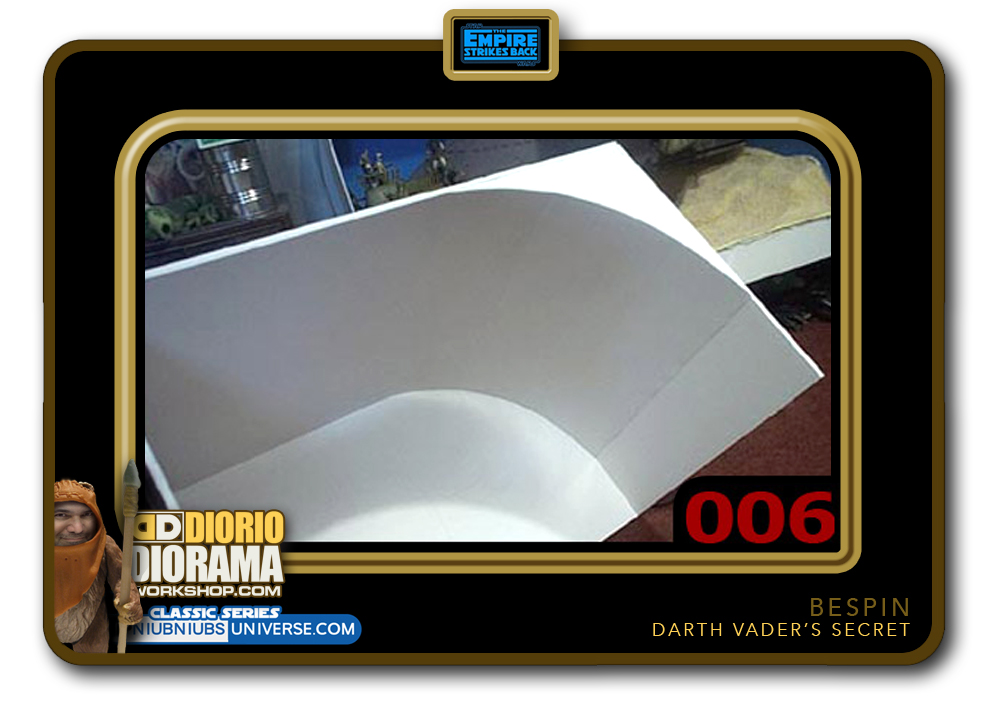
- STEP 005 > Now we can bend the foamcore into a circular shape without it snapping in half. Start bending it slightly from one end of your cuts towards where they end until you see the styrofoam seperating. Before you hot glue it, do a dry run by placing it along the curve base and seeing that it curves properly without snapping.
-
- STEP 006 > This is what the foamcore piece looks like once it's hot glued to the box frame. I added a top cover so that we don't see behind when looking down. Now we are ready to apply the background decals.
-
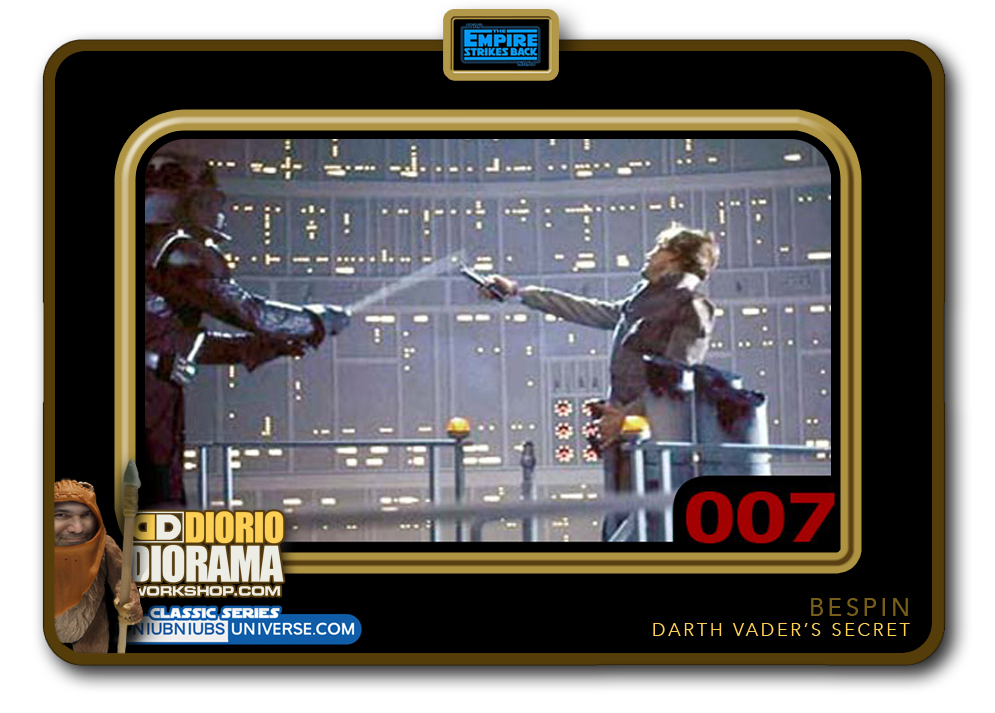
- STEP 007 > Next step was to find magazine and video still references from the film. This is just one that I used.
-
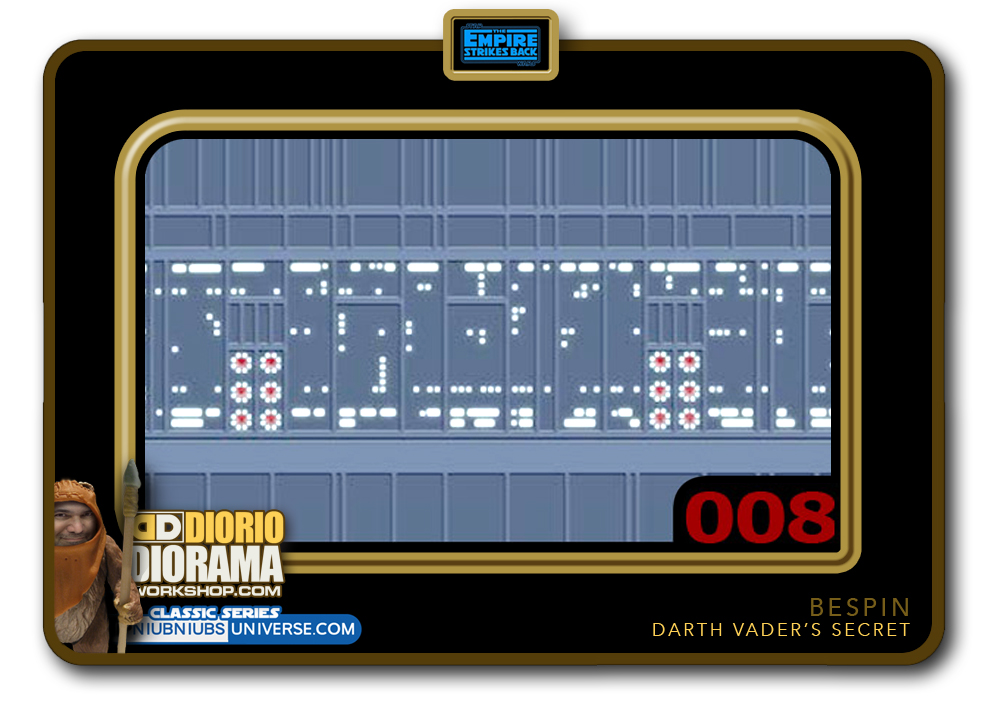
- STEP 008 > Using Photoshop, I follow the pattern from the movie. As you can see, I have only finished 1 row of lights. I wanted to make sure every light was exactly where they are located in the movie matte painting. Now that I completed 1 row, 3 more to go 🙂
-
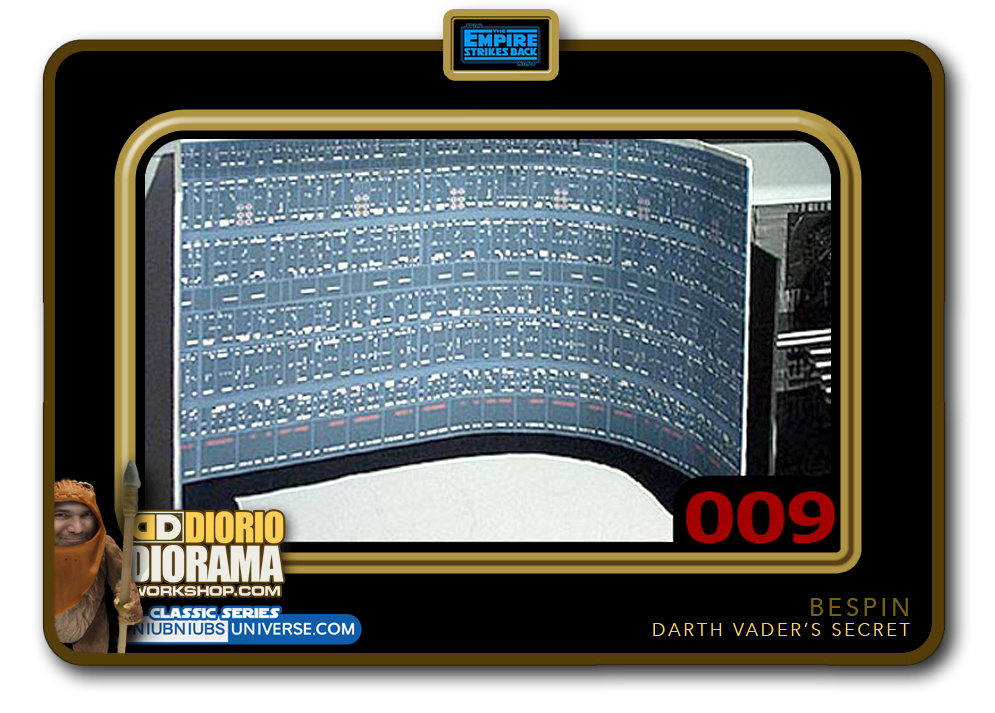
- STEP 009 > I printed all my photoshop patterns on full size label sheets. Compared to plain paper, I don't need to put gluestick on the back. All I have to do is peel off the backing and stick the paper to the foamcore. After an hour of carefully aligning all the 8.5" X 11" sheets this is what your background looks like 🙂 Looks great doesn't it?
-

- STEP 010 > Now it's time to start making the scaffolding platform. Using pictures from "the art of empire strikes back" book, I cut out a sheet of foam core that will act as the floor base. Because of the size of my box, the catwalk has to be pulled back vs the movie, I placed the 2 figures to get the size of the balcony. The width of the catwalk is the inside of your poster tube.
-
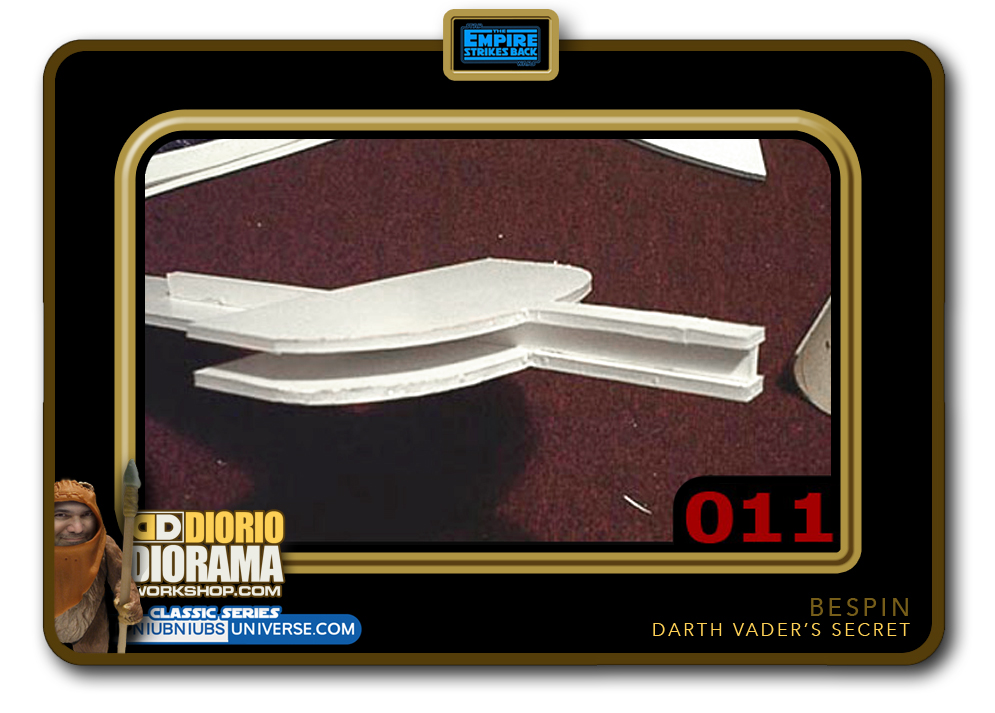
- STEP 011 > Now trace your shape on another piece of foamcore and then cut a duplicate shape. Using a 1cm thick strip as a beam, hot glue the 2 together. This will give the extruding end extra strength to support the balcony and weather vane as well as look like the shape of a construction I-Beam.
-

- STEP 011 > Cut 2 more 1 cm strips and slit them at 1 cm intervals in order to be able to bend and glue them to the base of the balcony. Make sure NOT to press too hard and cut through to the other side of your strips.
-

- STEP 013 > Now cut a poster tube right down the middle giving us a perfect half circle.
-
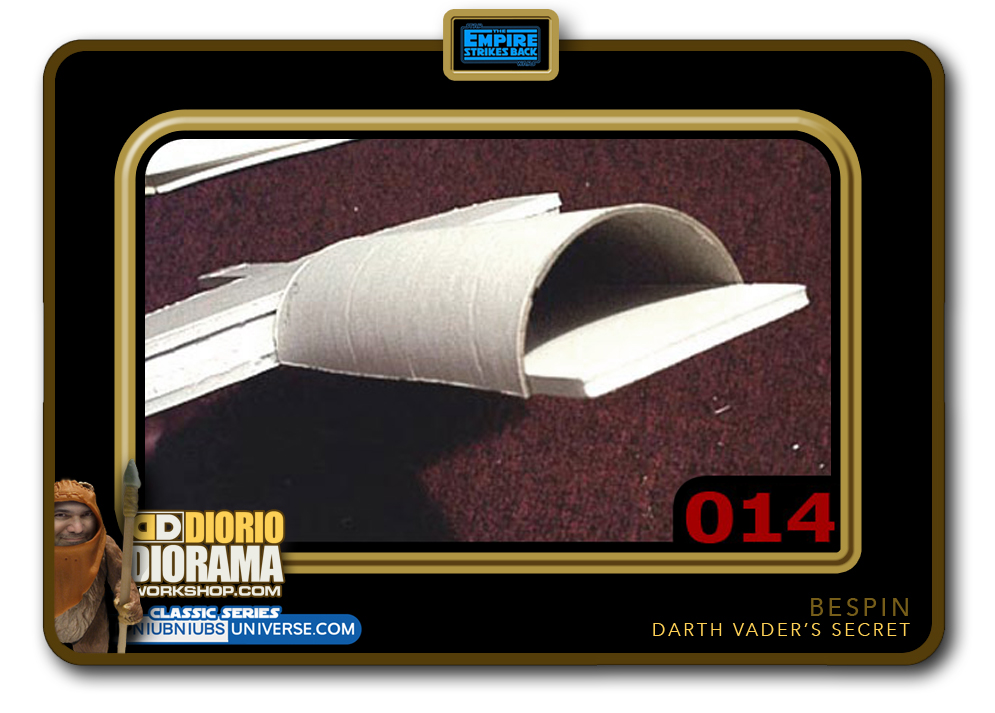
- STEP 014 > Glue the tube to the foamcore catwalk edges. This is the underbelly of your ramp.
-
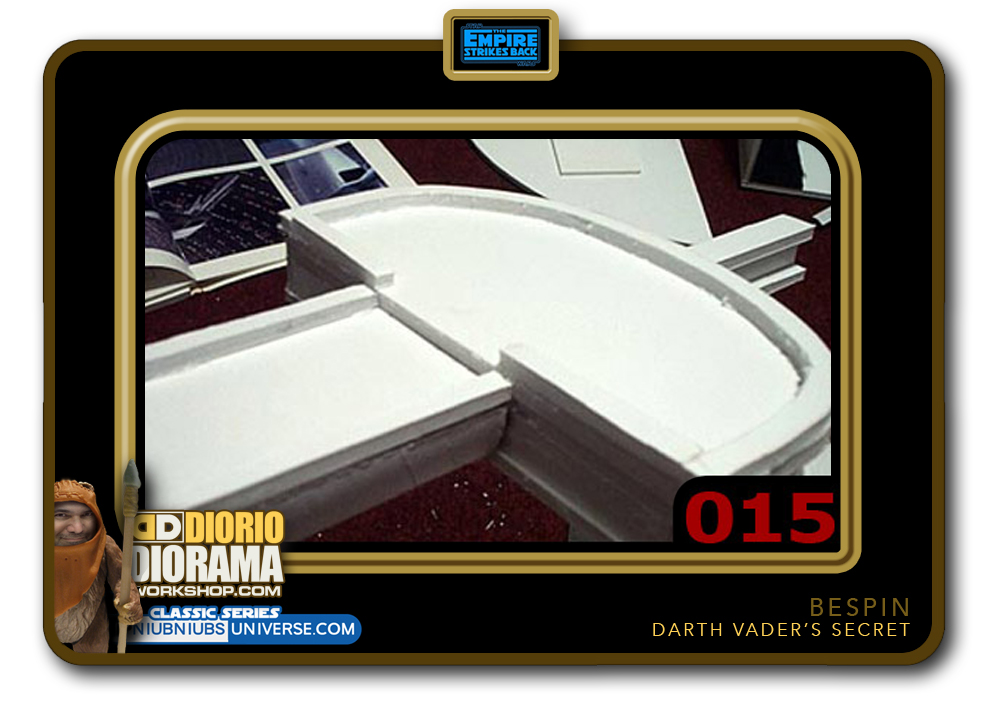
- STEP 015 > I then cut and glued 1/2 cm wide strips of foamcore to act as footer guard rails.
-

- STEP 016 > Next step, I added a foamcore box to the bottom of balcony shape and then used a sharp Xacto blade to shave off the corners to try to get a rounded edge. Not very easy. Be VERY careful using ANY Xacto knives, you don't want to cut off your finger! If your cutting isn't perfect like mine that's ok because we will cover it all with Super Sculpey later on.
-

- STEP 017 > Well the base skeleton is complete. Are you starting to be able to recognize the shape from the movie yet?
-

- STEP 018 > Now we must build the scaffolding's support doorway. The area that Vader and Luke walk out of to get to their confrontation. Simple enough, make a box using 4 pieces of foamcore and hot glue together. I used still frames from my Laserdisc to get the general curve shape of the sides.
-
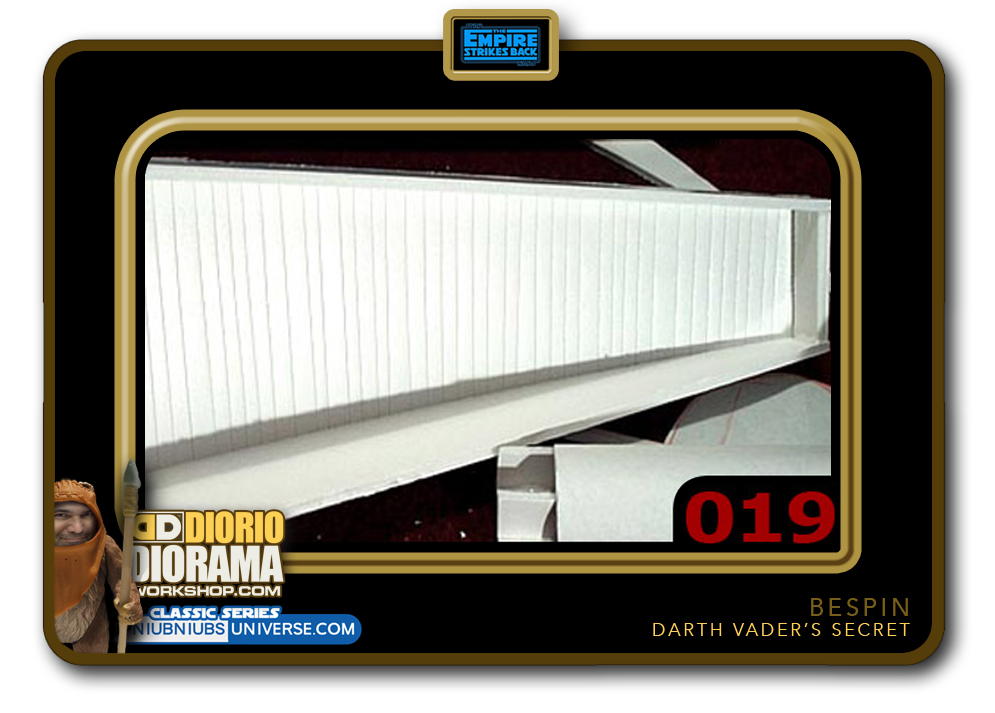
- STEP 019 > For the top lid, cut a piece and again, use the bending technique of making slits 1 cm appart and bending it over the curved side walls. Start by slicing and curving a basic rectangle, once bent and pressed in place, take a pencil and trace along the edges. Place it unbent on cutting mat and cut along the lines.
-
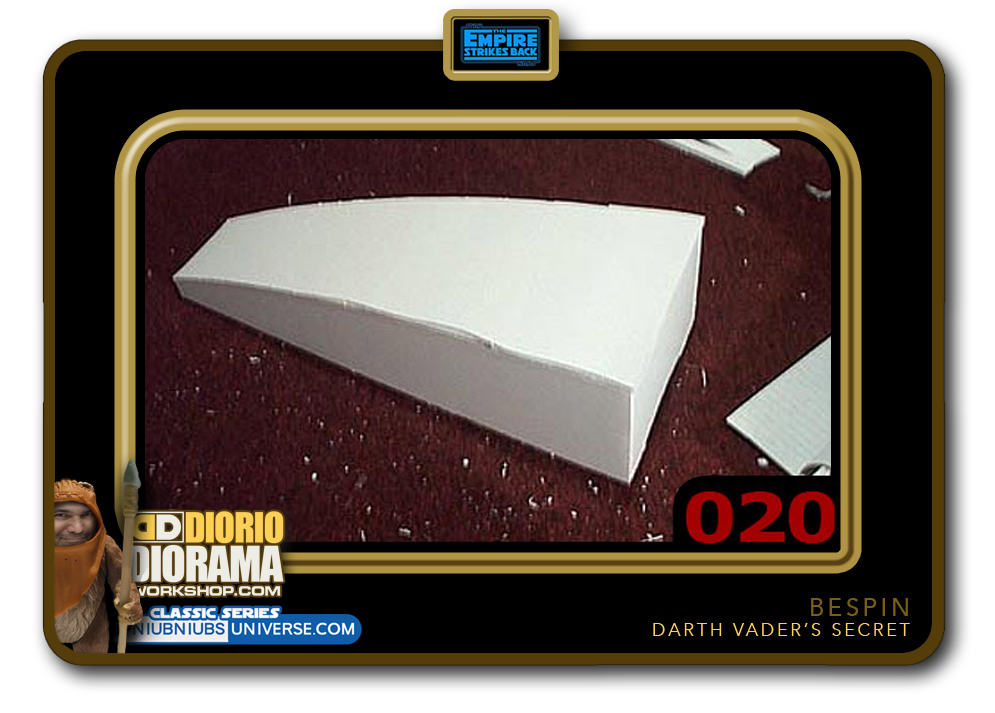
- STEP 020 > Once your piece is cut to size, put hot glue on the side top edges and carefully align and press the piece to the base. IMPORTANT: You want to glue with the bending slits on the INSIDE of the box. You want the outside to be smooth.

.
Did you already build this Diorama ? At home or at our Star Wars Celebration Diorama Builders workshop ? Would you like to show it in the site’s GALLERY VISITORS DIORAMAS section, YES ? That is Awesome !!! You can find out all the details on how to email me your photos on the VISITORS SUBMISSIONS INFO page … When I get your photos, I will create your very own page just like this one. You may not realize it but work does inspire others to join in the fun of making Action Figure Dioramas.
.
NOT FOR RESALE ALL Decals, tutorials and artwork are ©FrankDiorio (dioramaworkshop.com) and offered FOR FREE to the fans – that would be you ? so you can build and display my diorama designs in your very own home. I realize I cannot control what one does with my graphics once I place them on the web, I can only ask you as one fan to another, please respect the artist and do not be that jerk who uses my designs and tutorials to build a copy of my work only to sell it on EBAY or trade/sale groups and forums. Thank You. Frank.
![]() Catch up with fellow visitors and exchange stories, read cool interviews with the crew, exchange photos, fun surprises and grab some FAN ONLY merchandise next year at actual future conventions ?
Catch up with fellow visitors and exchange stories, read cool interviews with the crew, exchange photos, fun surprises and grab some FAN ONLY merchandise next year at actual future conventions ?
.
©2018 Frank Diorio DioramaWorkshop.Com
.
IF YOU LIKE WHAT YOU SEE, PLEASE SHARE WITH YOUR FRIENDS
USING THE SOCIAL MEDIA BUTTONS BELOW